Circular Yoke Summer Shirt
Right about now, many of us are tucking our hand knits into beds of cedar shavings for the summer, but don’t toss the knitting needles in there, too! Warm weather never stopped us from casting on, and our Circular Yoke Summer Shirt is one great reason why!
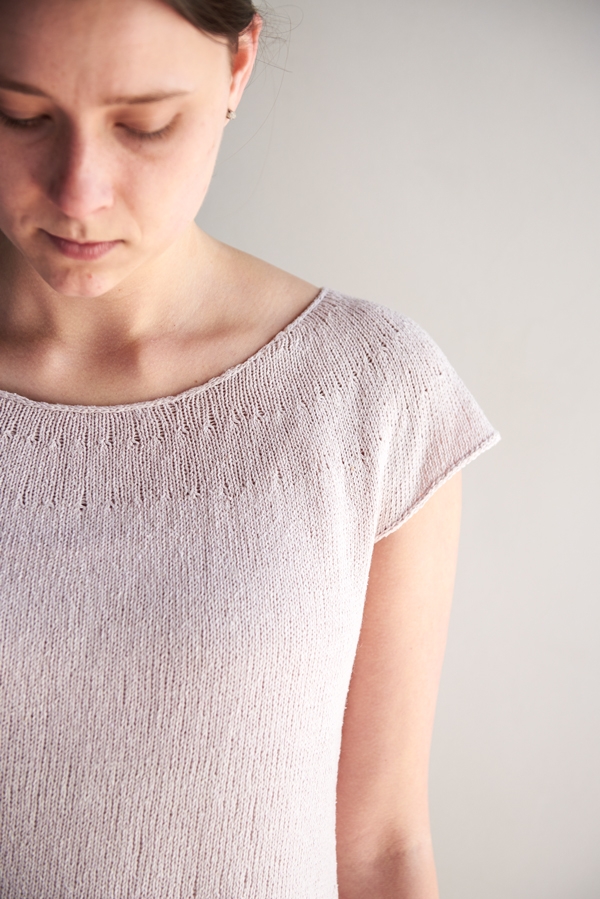
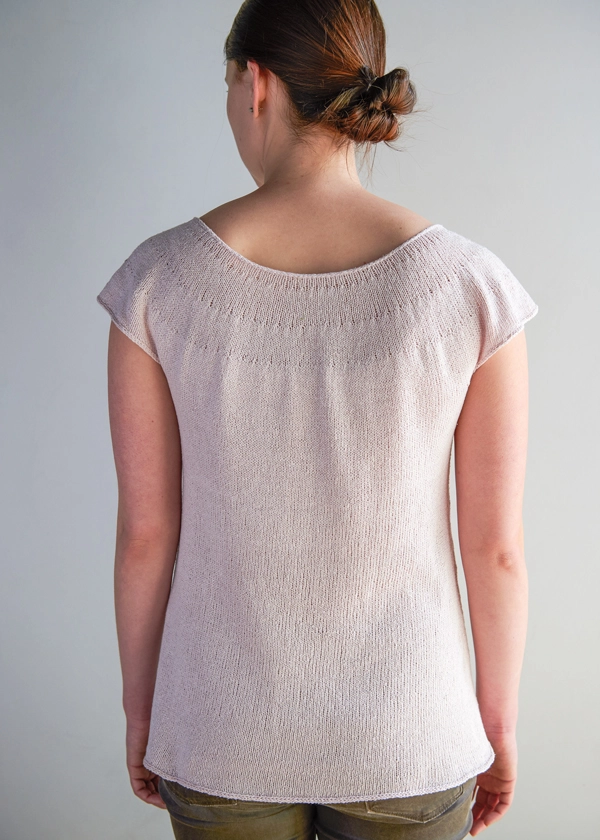
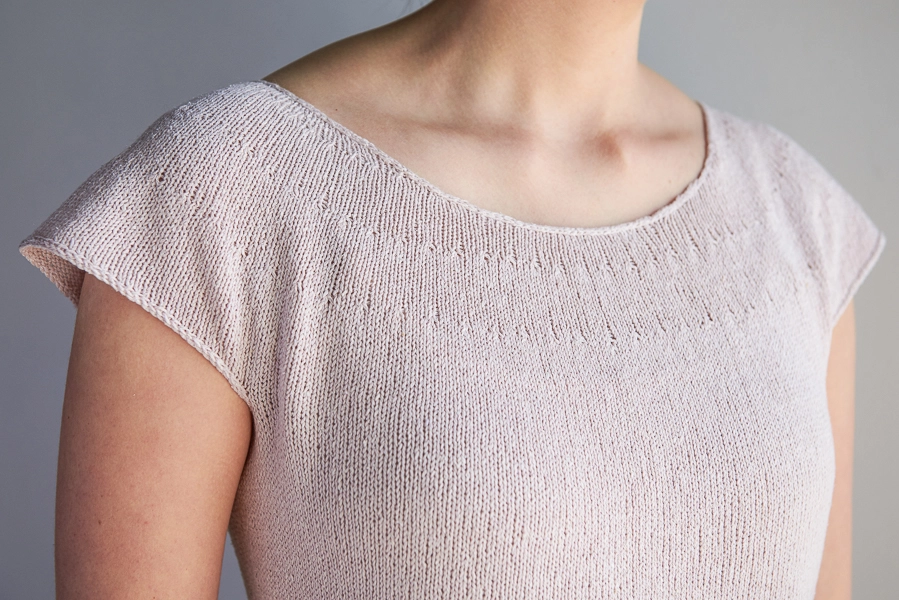
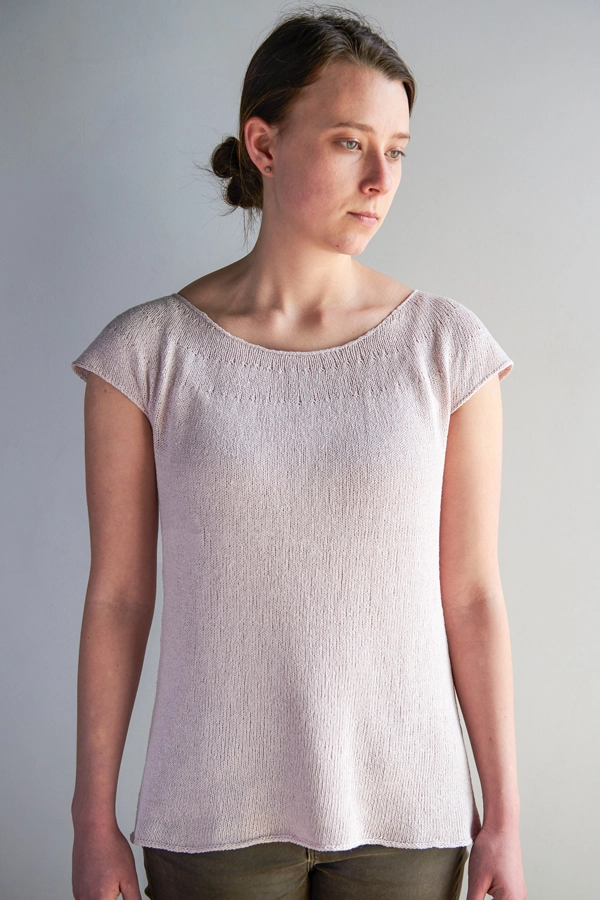
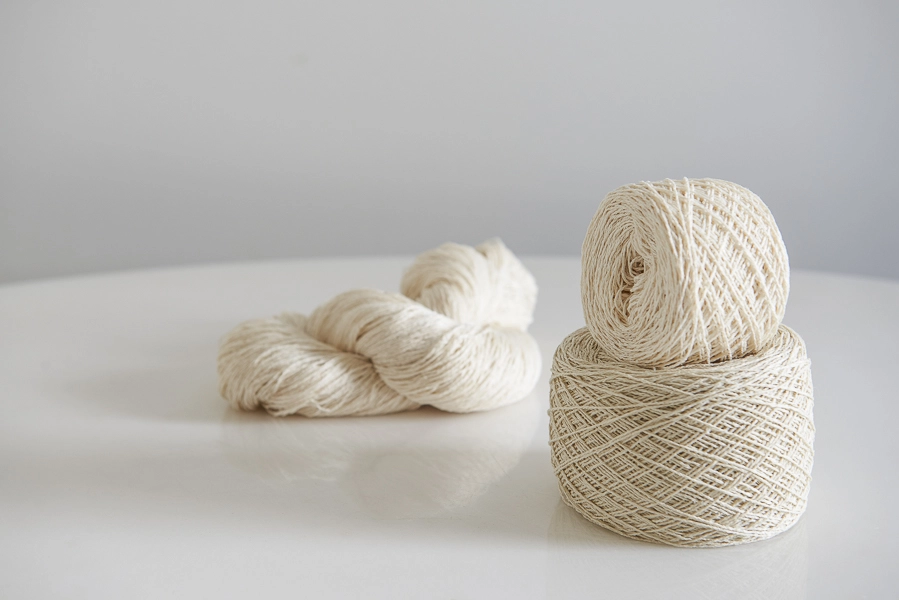
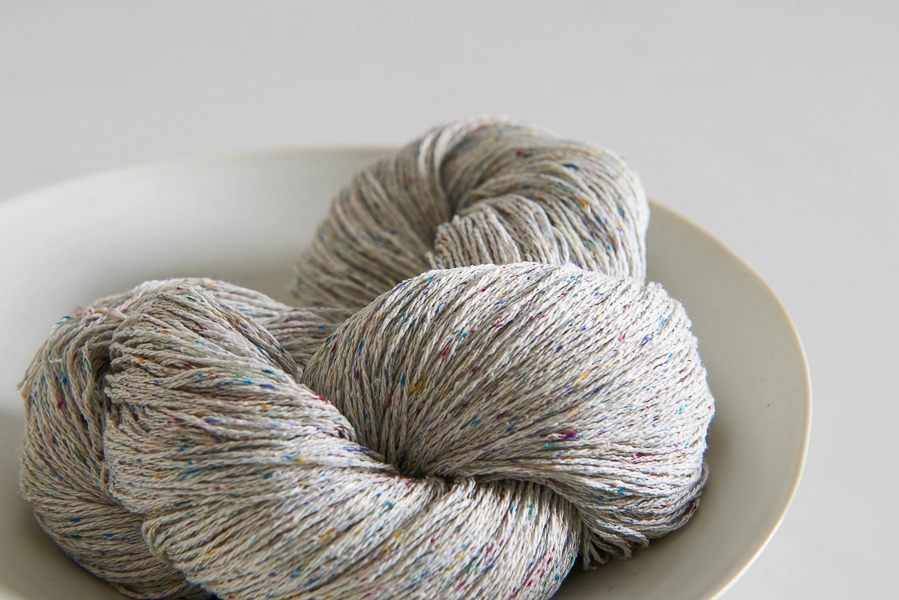
In our gorgeous new Cattail Silk, the Circular Yoke Summer Shirt is light and airy, fresh and ventilating, just what a summer knit should be. Knit in the round from the bottom up, its beauty come from simple details, like pretty yoke decreases, gentle waist shaping, and no-fuss finishing.
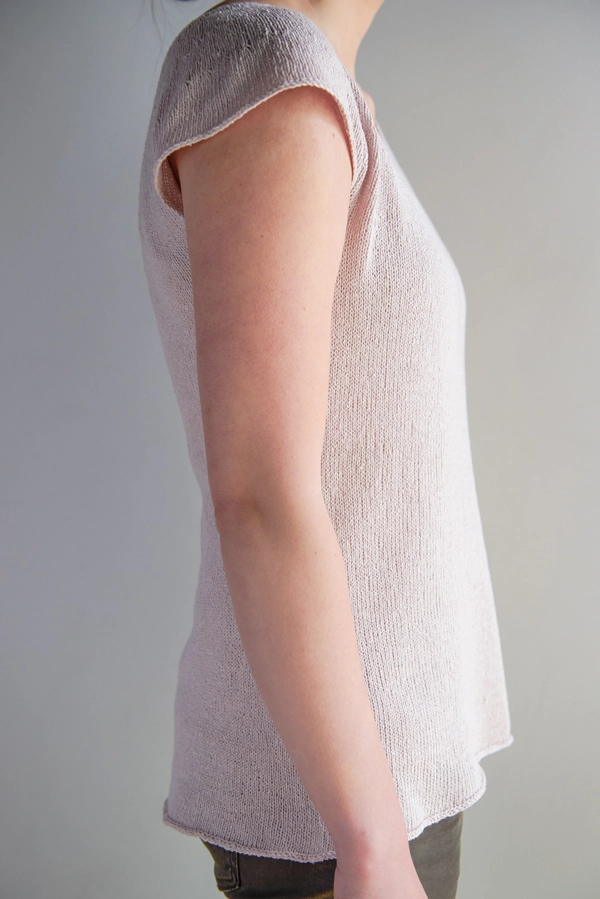
Nearly the same as our original Silken Straw Summer Sweater, this version has simpler finishing and lots more sizes. The Cattail Silk also has a lighter drape and, with less shine than the Silken Straw, a more versatile wear-anywhere look.
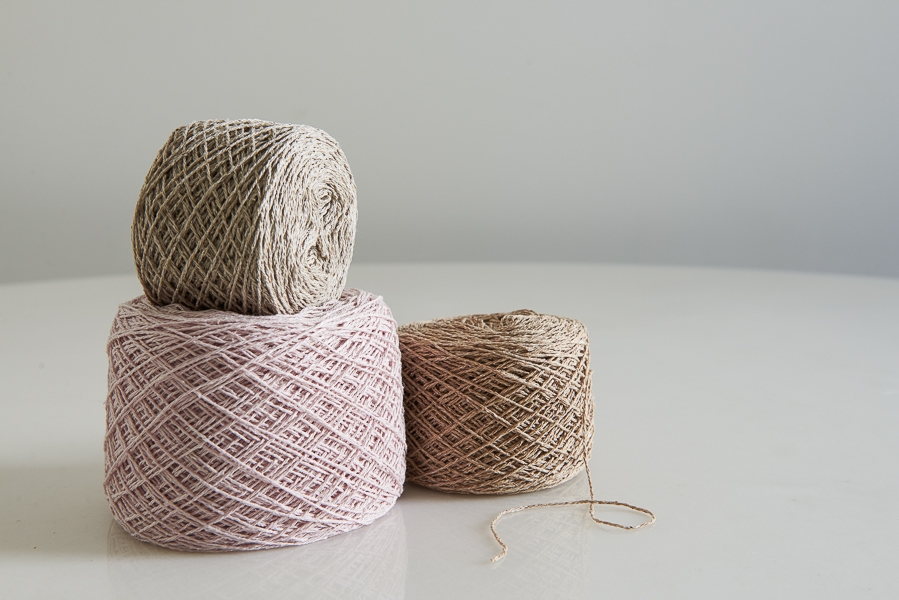
And best news for last, you only need two or three skeins of Cattail Silk! We used cool and collected Lavender Daybreak, but our palette of eighteen colors is full of lots of pretty choices. And with a whole summer of knitting ahead, no need to choose just one!

Designed by Purl Soho designer, Whitney Van Nes.
Share your progress and connect with the community by tagging your pics with #PurlSoho, #PurlSohoBusyHands, #PurlSohoCircularYokeSummerShirt, and #PurlSohoCattailSilk. We can’t wait to see what you make!
Materials
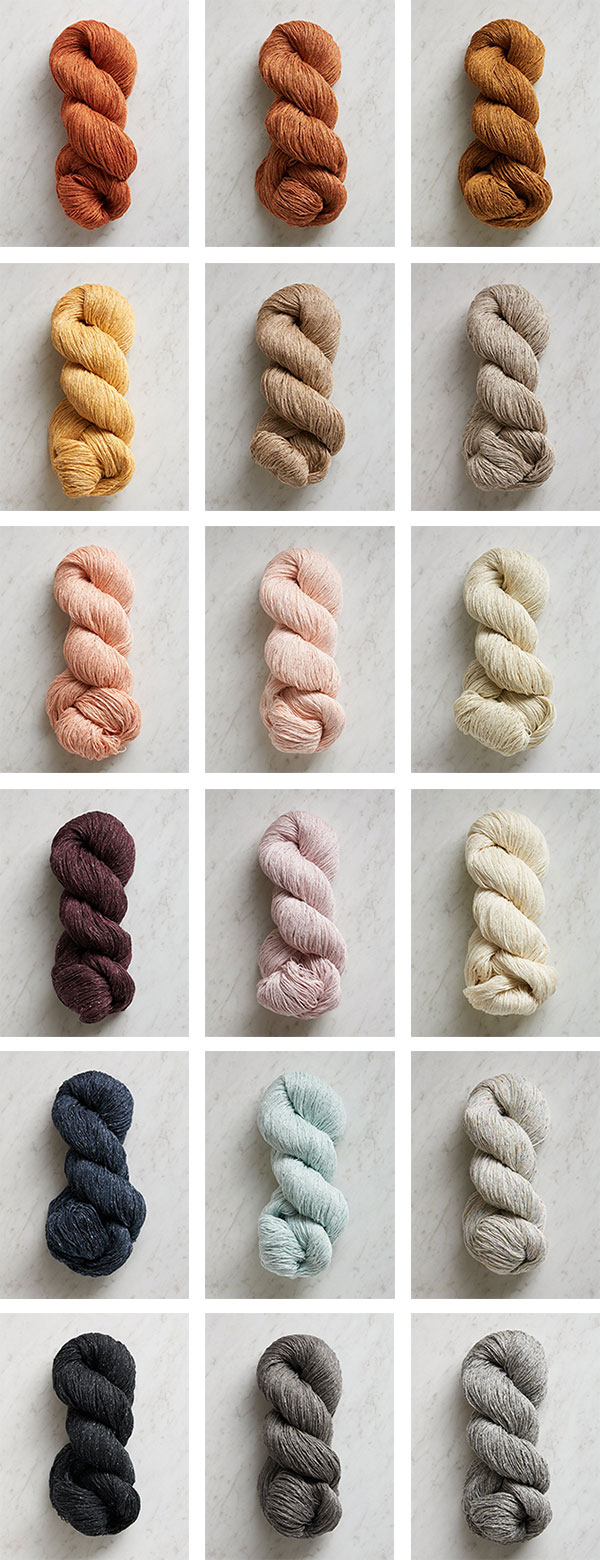
- 2 (2, 2, 3, 3) (3, 3, 3, 4) skeins of Purl Soho’s Cattail Silk, 100% silk. Each skein is 618 yards/ 100 grams; approximately 945 (1090, 1240, 1415, 1520) (1655, 1805, 1955, 2105) yards required. We used the color Lavender Daybreak.
- US 3 (3.25 mm), 24-inch circular needles
- Size 34¾ only: US 3, 16-inch circular needles
- Stitch markers, including one unique
GAUGE
28 stitches and 36 rounds = 4 inches in stockinette stitch, blocked
SIZES
NOTE: For help picking a size, please check out our Understanding Ease + Selecting Size Tutorial!
34¾ (38¾, 42¾, 46¾, 50¾) (54¾, 58¾, 62¾, 66¾)
To fit actual chest circumference of 31-33 (35-37, 39-41, 43-45, 47-49) (51-53, 55-57, 59-61, 63-65) inches, with approximately 1¾-3¾ inches of positive ease
- Finished Chest Circumference: 34¾ (38¾, 42¾, 46¾, 50¾) (54¾, 58¾, 62¾, 66¾) inches
- Finished Waist Circumference: 33¼ (37¼, 41¼, 44½, 48½) (52½, 56½, 60½, 64½) inches
- Finished Hip Circumference: 36½ (40½, 44½, 48, 52) (56, 60, 64, 68) inches
- Finished Length from Underarm to Bottom Edge: 18 inches
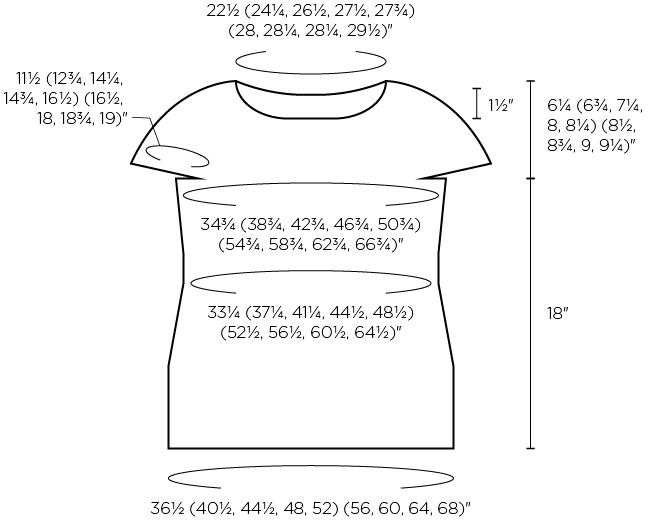
SAMPLE: The sweater shown here is size 38¾, worn with 3 inches of ease.
NOTE: We have updated this pattern to include more sizes. If, for some reason, you would like the original pattern, please contact customerservice@purlsoho.com, and we’ll send you the PDF!
PATTERN
BODY
BEGIN AT BOTTOM EDGE
Cast on 256 (284, 312, 336, 364) (392, 420, 448, 476) stitches. We used a basic Long Tail Cast On.
Place a unique marker for end of round and join for working in the round, being careful not to twist the stitches.
Knit every round until piece measures 5½ inches from cast-on edge (unrolled). (NOTE: You may begin shaping earlier if you prefer to shorten the length from Bottom Edge to Underarms.)
Next Round: K128 (142, 156, 168, 182) (196, 210, 224, 238), place marker (pm), knit to end of round.
SHAPE BODY
*Decrease Round 1: Knit to next marker, slip marker (sm), knit to last 3 stitches, slip slip knit (ssk), k1. [1 stitch decreased]
Decrease Round 2: K1, knit 2 together (k2tog), knit to 3 stitches before next marker, ssk, k1, sm, k1, k2tog, knit to end of round. [3 stitches decreased]
Knit 8 rounds even, or for just under 1 inch.
Repeat from * 5 more times. [232 (260, 288, 312, 340) (368, 396, 424, 452) stitches remain]
Knit 10 rounds even, or for just over 1 inch. (NOTE: You may adjust the number of these rounds if preferred.)
**Increase Round 1: Knit to next marker, sm, knit to last stitch, make 1 right (m1R), k1. [1 stitch increased]
Increase Round 2: K1, make 1 left (m1L), knit to 1 stitch before marker, m1R, k1, sm, k1, m1L, knit to end of round. [3 stitches increased]
Knit 9 rounds even, or for 1 inch.
Repeat from ** 2 (2, 2, 3, 3) (3, 3, 3, 3) more times. [244 (272, 300, 328, 356) (384, 412, 440, 468) stitches]
Knit every round until Body measures 18 inches from cast-on edge (rolled), or until desired length, ending last round 7 (9, 10, 12, 12) (12, 13, 13, 13) stitches before end-of-round marker.
BIND OFF FOR UNDERARMS
Bind off 14 (18, 20, 24, 24) (24, 26, 26, 26) stitches (removing end-of-round marker), knit to 7 (9, 10, 12, 12) (12, 13, 13, 13) stitches before next marker, bind off 14 (18, 20, 24, 24) (24, 26, 26, 26) stitches (removing marker), knit to first bind off. [216 (236, 260, 280, 308) (336, 360, 388, 416) stitches remain]
CAST ON FOR SLEEVES
Turn work so wrong side is facing you and cable cast on 67 (72, 80, 80, 91) (92, 100, 106, 107) stitches; turn so right side of work is facing you, and making sure cast on isn’t twisted, knit next 108 (118, 130, 140, 154) (168, 180, 194, 208) stitches (to next set of bound-off stitches); turn so wrong side is facing you and cable cast on 67 (72, 80, 80, 91) (92, 100, 106, 107) stitches; turn so right side is facing you, and again making sure cast on isn’t twisted, knit next 54 (59, 65, 70, 77) (84, 90, 97, 104) stitches, pm for new end of round. [350 (380, 420, 440, 490) (520, 560, 600, 630) stitches]
YOKE
NOTE: The end of round is now located at center back.
Knit every round until Sleeves measures 1¾ (2¼, 2¾, 3½, 3) (3¼, 3½, 3¾, 4) inches from cable-cast-on edge.
Decrease Round: *K3, k2tog, repeat from * to end of round. [280 (304, 336, 352, 392) (416, 448, 480, 504) stitches remain]
Knit 16 (16, 16, 16, 12) (12, 12, 12, 12) rounds, or for 1¾ (1¾, 1¾, 1¾, 1¼) (1¼, 1¼, 1¼, 1¼) inches.
Decrease Round: *K2, k2tog, repeat from * to end of round. [210 (228, 252, 264, 294) (312, 336, 360, 378) stitches remain]
Knit 9 rounds, or for one inch.
SIZES 50¾, 54¾, 58¾, 62¾, AND 66¾ ONLY
Decrease Round: *K– (–, –, –, 8) (5, 3, 2, 2), k2tog, repeat from * to last – (–, –, –, 4) (4, 1, 0, 2) stitch(es), knit to end of round. [– (–, –, –, 265) (268, 269, 270, 284) stitches remain]
Knit 9 rounds, or for one inch.
SHAPE NECKLINE
ALL SIZES
Set-Up Round: K95 (104, 116, 122, 122) (124, 124, 125, 132), bind off 20 (20, 20, 20, 21) (20, 21, 20, 20) stitches, knit to end-of-round marker, remove marker, knit to beginning of bind off. [190 (208, 232, 244, 244) (248, 248, 250, 264) stitches remain]
NOTE: From now on you will be working back and forth in rows, with each row ending at the Neckline edge. Also, for this section feel free to try a Sloped Bind Off for a neater finish!
Row 1 (wrong side): Bind off 4 stitches, purl to end of row. [186 (204, 228, 240, 240) (244, 244, 246, 260) stitches remain]
Row 2 (right side): Bind off 4 stitches, knit to end of row. [182 (200, 224, 236, 236) (240, 240, 242, 256) stitches remain]
Row 3: Bind off 3 stitches, purl to end of row. [179 (197, 221, 233, 233) (237, 237, 239, 253) stitches remain]
Row 4: Bind off 3 stitches, knit to end of row. [176 (194, 218, 230, 230) (234, 234, 236, 250) stitches remain]
Row 5: P1, purl 2 together (p2tog), purl to last 3 stitches, p2tog through the back loop (p2tog tbl), p1. [174 (192, 216, 228, 228) (232, 232, 234, 248) stitches remain]
Row 6: K1, ssk, knit to the last 3 stitches, k2tog, k1. [2 stitches decreased]
Row 7: *P1, p2tog, repeat from * to last 4 (4, 4, 4, 4) (5, 5, 4, 6) stitches, p1 (1, 1, 1, 1) (2, 2, 1, 3), p2tog tbl, p1. [115 (127, 143, 151, 151) (154, 154, 155, 165) stitches remain]
Row 8: Repeat Row 6. [2 stitches decreased]
Row 9: Purl to end of row.
Repeat Rows 8 and 9 two more times. [109 (121, 137, 145, 145) (148, 148, 149, 159) stitches remain]
Bind off loosely in knit stitch.
FINISHING
BOTTOM, ARMHOLE, + NECKLINE EDGES
NOTE: Use 16-inch circular needles if making size 34¾.
Pick up and bind off around the Bottom, Armhole, and Neckline edges. Here’s how…
Picking up 1 stitch for each cast-on or bound-off stitch, and along the Neckline, for each edge stitch, pick up two stitches, *pass first stitch over, pick up one stitch, repeat from * around entire edge, cut yarn and pull through remaining stitch.
WEAVE IN + BLOCK
Weave in the ends and wet block to finished dimensions.



Hello! I am making this pattern and was wondering would it be possible to turn it into a dress? If so how long would it have to create the body? The dress would be above the knees.
Thanks!!
Hello Melissa,
Thank you for reaching out! If you wanted to turn this pattern into a dress you will want to consider your height and the length between your hip and where you would like the dress to end. You will also want to consider adding shaping around the hips. It will require some experimenting, but I think it could be really beautiful!
Good luck and let us know how it goes!
-Marilla
Melissa, I realize this is two years later and you’ve probably figured things out but I just made this into a dress and I made the total length from the armpit to the hem 25.5”. I already had a dress that I used as my template but just finished it and I’m in love! Good luck!
This is a beautiful shirt; however, I’d just like to add that if you’re making one of the larger sizes (I’m trying to make the 40.5), the 24-inch cable wasn’t long enough for me. I’ve frogged twice because the stitches we’re twisted. Off to buy a longer cable…
Hi Meghan,
Thanks for the tip! It can be quite frustrating to get a twist in your stitches, especially with such a large cast on! Using a longer needle will definitely help, but you will probably need to switch back to the smaller needle as you work the yoke decreases.
Happy knitting!
Julianna
could this be knit in the new sweetgrass yarn?
Hello Susan,
Thank you for reaching out! Yes- Sweetgrass has a very similar gauge to Cattail silk so it should work beautifully. I would, as always, knit up a gauge swatch before jumping in.
Happy knitting!
-Marilla
I knitted this top in size 40 1/2 in Cattail Silk. The bust measurement came out exactly right but the bottom edge is 48″ around and the finished waist is 40″ – far too loose. I knit to gauge and all other measurements are correct, so I don’t know why or how this happened. Can this be a mistake on the pattern ? I am planning to knit the Sayer top and cannot figure out which size to make. What do you suggest?
Hi Sally,
Thanks for reaching out! That is an odd problem – the cast on stitch counts in the pattern are correct, so if your gauge is correct it should match the schematic. If the bust measurement is correct and the waist measurement is not too far off (our schematic lists 38 3/4″ for the waist, so 40″ is only a little more than an inch larger than ours), but the hem turned out almost 6″ too large, is it possible that you used a loose style of cast on, such as a knit-on or backwards loop cast on, or the hem was over stretched in blocking? We recommend washing Cattail Silk in the machine on a cold, gentle cycle, and tumble drying low, and in my experience the stitches tighten up a bit after a trip through the washer and dryer, so I would try that to see if it improves the fit of the top.
For Sayer, I would suggest measuring the width of the piece at the bottom after you have finished a few inches to make sure it matches the schematic before you get too far. If you find that your cast on stretches out more than you would like, I would recommend using a Long Tail Cast On if you don’t already and possibly working it on a smaller needle before switching to your main needle size for the rest of the top.
Best of luck and I hope that helps!
Julianna
I love this pattern
Just finished it
In cattail silk
But the bottom edge really curls up when I wear it
Perhaps I need to steam it again
Any suggestions
Thanks!
Hello Lorraine,
Thank you for reaching out! I would reccomend wet blocking it to help relax the fibers a bit more.
I hope this helps and let us know if it continues to be an issue!
Happy knitting,
Marilla
Garter stitch, or plain knit has a tendency to curl. If you knit the first row tbl this does not happen.
I’ve nearly completed this lovely shirt after a year of working on it off and on and between projects and it fits perfectly! The only thing remaining to do is the finishing edge on the neckline. I am struggling and wonder if you could advise me. The armholes and bottom are done and were relatively easy to do using a crochet hook to bind off the stitches. With such fine yarn, how does one bind off with two stitches for every stitch? I’m assuming that the needle enters each leg of the stitch from the center outward. Is this correct? If so, how is it done without making a mess of the neckline? I would love to wear this shirt before the cold weather sets in, so please respond. Thanks in advance!
Hello Linda,
Thank you for reaching out, I’m so happy to hear that your shirt has come out so well! This is a great questions, It sounds like you have the right idea. You have your working yarn which you will pick up by inserting your needle into your cast on stitch and picking up your working yarn to create a stitch. I am always going back to our tutorial when I need to pick up stitches in a pattern.
I hope this helps and let us know if you have any further questions or if this doesn’t answer your question.
Happy knitting!
-Marilla
Would I be able to knit this lovely top in something a wee bit heavier in weight… just a bit more substantial? What yarn would be best to use and what size knitting needles? The pattern is beautiful and the design is perfect for me. I’m a little ‘hippy’ but more slender going higher up. Your thoughts would be so welcome!
Thank you,
Ina
Hello Ina,
Thank you for reaching out! I would recommend sticking with the same weight, but going to a warmer yarn. I would check out our Linen Quill or Line Weight as alternatives. You might also be interested in looking into our Top-Down Circular Yoke Pullover which is knit up in our Flax Down, though it does have different proportions.
I hope this helps and happy knitting!
-Marilla
Hi. I really love this top and I am in the midst of making one. Afterthought cable cast on, when I tried to knit these stitches , they are all crowded at this limited space and pulling the stitches at the underarms. Am I doing a mistake or is there a trick to do this? Thanks
Hello Yin,
Thank you for reaching out! It sounds like your cast on might have been to tight. I would recommend being careful to both to cast off on the looser side for underarms and then also cable cast on with some looseness.
I hope this is helpful and let us know if you have any further questions!
-Marilla
Hello! I recently purchased one of the Mineral Silk mini-skein packs. I was thinking that I could cast on and maybe knit one row, and bind off at the end with Mineral Silk, to add a little sparkle to the top! Do you think that would work out? I was thinking of using the i-cord cast on so the cast-on edge would be a little decorative. Would that be okay, or would the cast-on be too tight?
Hi Vandana,
Thanks for reaching out, and what a lovely idea! Mineral Silk is a lighter weight yarn than Cattail Silk, so I would definitely recommend swatching with both yarns separately to make sure the gauge won’t be significantly affected by switching, even for just a few rows. You may find that Mineral Silk held double is a closer match to Cattail Silk! And yes, I think an i-cord cast on would be a beautiful unique touch!
I hope that helps, and please do let us know how it turns out!
Julianna
I want to make this summer sweater using my Sparrow linen yarn. I have 6 yarn skeins. What is the largest patterns size I could make?
Hi Kathryn,
Thanks for reaching out! You will need 875 (950, 1000, 1060, 1110, 1170, 1220, 1265) yards for each size of this shirt. With 6 skeins of your yarn, I believe the largest size you could make is a 36 1/2.
Happy knitting!
Julianna
I’ve knit to “Shape Neckline” and I’m confused about where in Round 1 the 20 stitch bind off should go. I don’t think my markers are where they should be, however, I do have the beginning round at the center back. Should the 20 stitch bind off be at the center front?
Thanks,
Judy
Hi Judy,
Great question! Yes, the 20 stitches should be at the center of the front, directly opposite the center back marker. If your center back marker is placed correctly, you can take your total number of stitches, subtract 20, and divide by two to determine how many stitches to knit before starting the bind off.
I hope that helps!
Julianna
This is my first attempt at a sweater/shirt so I’m a little nervous. I am not very good at finishing, so I’m hoping this is a good first sweater. I’d like to make this a short length, do you have any recommendations for doing so?
Hi Fay,
Thank you for writing in! I would be happy to help you with this question, as modifications can really make a project yours! My favorite way to determine what body length I want for garment projects is to measure a favorite top that I currently own; find a top that hits exactly where you’d like your Summer Shirt to and measure the length from underarm to hem. Once you have this measurement, take a pencil or pen and change the last paragraph of the Body section to the following:
Knit every round until Body measures (your measurement) from cast-on edge (rolled), ending last round 6 (7, 8, 9, 9, 10, 11, 12) stitches before end-of-round marker.
I hope this helps and please feel free to reach out if you have any further questions!
Gaby
I love your patterns and tutorials! While I’m currently using a stash yarn in acrylic, I’m hoping to buy ‘appropriate’ yarns soon! My issue is this: using my stash acrylic yarn, my edges are curling quite a bit. Do you have any suggestions, or is this an artifact of the acrylic that the suggested yarn wouldn’t create.
Thanks very much!
Amanda C
Hi Amanda
Thanks for writing in! After you finish knitting there is an edging that is picked up and knit around the hem, neckline, and armholes, and this should eliminate some of the curling you are experiencing. Most of the rolling you’re seeing now should be eliminated once you block (soak or steam) your shirt, but be sure to check the yarn label for the appropriate way to handle the acrylic because too hot of steam could possibly damage the yarn. I hope this helps!
Happy knitting
Jessica
Thank you very much! I’ve started the edging and I’m still seeing the curling, so I wanted to check that the blocking would help. I’ll keep going, thanks for the quick reply!
Amanda C
would it be ok to finish the neckline using the 1 stitch (rather than 2) method? I’m still finding the 2 stitch method a bit confusing.
thank you!
Hi Jodee,
Thanks for reaching out! Yes, you should be finishing the neckline and the armholes using the same method! The difference in terminology is to indicate that parts of the neckline ar formed by row edges, rather than just cast off stitches. You should be picking up one stitch per row or bound off stitch and casting them off immediately, just as you did around the armholes!
I hope that clears things up!
I have just started this top. I cast on for the 40.5 size (to accommodate my hips) but want to reduce to the 38.75 size for the chest and waist. How do you suggest I do the shaping? I am using Knitting for Olive pure silk.
Hi Karen,
Great question! I would suggest simply continuing to decrease every 10th row, or every inch, as already established until you reach the right number of stitches, which should take three additional decrease rows.
Happy knitting!
Julianna
Thank you – I will try that.
I LOVE this pattern. A little confused about the finishing. I’m picking up and binding off on a bound off edge? Binding off in the normal manner as you pick up? Is this to help with the curling. I find the armholes are too big and showing quite a bit of my bra. Will this help with that?
Hi Beth,
Thanks for writing in! Yes, you will be picking up and binding off on the edge you just bound off on. The most important step for flattening out any rolling edges will be blocking the finished top, but this edging should tighten up the openings slightly so the armhole will get a little smaller. If you find that the armholes are still too big, you could try picking up 4 stitches out of every 5 or 3 out of every 4 to tighten things up a tiny bit more!
Happy knitting!
Julianna
I just completed this sweater. it is so lovely but even though I steamed and blocked, the lower edge really rolls up. thanks so much Lorraine
This is my first attempt in knitting a sweater in the round. Being only 5 ft and pear shaped I have some adjustments that need to be made in this pattern. I need to decrease the underarm to bottom edge by ~ 5 inches AND I have to cast on more stitches to accommodate the hip size. So in order to obtain a smaller waist and bust size I know I need to decrease more stitches to obtain the waist and bust measurement I need. Not sure how to do this without adding more rounds but then it would lengthen the underarm to bottom edge. Do I just knit less rounds within each decrease repeat and/or less rows prior and after the rows that require decreases and increases. I need a finished hip of 40 inches but the waist is 32 and bust is 34. Then my row gauge does not match the stitch gauge which then confuses me more. (28 stitches/41 rows). Thanks so much for your help. Tina
Hi Tina,
Thanks for reaching out, I am happy to help! First off and most importantly you need to adjust your gauge so that it is consistent with the pattern before making any adjustments. Out tutorial All About Gauge is an excellent resource to use! It may take a bit of trial and error to get the right results, but I believe that the best solution would be to knit less rounds in every decrease row rather than knitting less before and after the decreases. Make sure to keep it consistent with each round so that the decreases stay even throughout!
I hope this helps and please feel free to reach out with any more questions you may have while working on this!
Happy knitting!
Gianna
Gorgeous pattern! New lockdown knitter here, this will be my first sweater/shirt. I’m not sure I understand how the sleeves are made. Why do we need to turn the work on the wrong side, then right side, and so on?
I’m translating the pattern in French (and cm), would you like a copy?
Hi Margaux,
Thanks for writing in! You are turning the work so the wrong side is facing you just to cable cast in the stitches so that the seam will be on the inside of the shirt and hidden more rather than on the outside!
I hope this helps and please let me know if you have any more questions!
Warmly,
Gianna
Hi Gianna,
Got it, thanks! Really appreciate your help 🙂
I’ve knit this sweater once and I love it. I’d like to do it again in a brighter white than is available the cattail silk line and was looking at the swan white in Burnish. I realize that I will need to pay attention to yardage but do you think this would make a good yarn substitution? I’ve never knit with bamboo.
Thanks, Heather
Hi Heather,
Thanks for reaching out! I think Burnish would be an excellent option for this pattern! Bamboo is great to work with, this yarn has a beautiful drape and slight sheen. I would just recommend working a gauge swatch prior to beginning to ensure you are consistent with the pattern!
I hope this helps, happy knitting!
Gianna
Thanks so much!
I am knitting size 46 3/4. My question relates to the number of stitches I should have –
The pattern states: Repeat from * 5 more times. [232 (260, 288, 312, 340) (368, 396, 424, 452) stitches remain]
This is fine (312) but the next count states: Repeat from ** 2 more times. [244 (272, 300, 328, 356) (384, 412, 440, 468) stitches]
So, I should have 328 stitches at this point however I will only have 324 made up as 312 + (increase 4 + increase 4 two more times) = 312 + 12 = 324 not 328.
Can you clarify please. Thank you.
Hi Anne,
Thank you for writing in with this question! We are so glad you brought this to our attention, and our design team is actively looking at this for editing, since there definitely seems to be an error here. While we work on publishing an official errata for this, we suggest working one more repeat of the increase section to reach the 328 stitches needed!
We will follow up once our edit has been published, and thank you again for helping to make our patterns better!
All the best,
Margaret
Thank you.
Hello! this is a beautiful pattern! I am looking forward to making it for my cousin. 🙂
I’m one of those “bad” knitters who have never done a gauge swatch. Whoops. I read the article “All About Gauge”, which I found very helpful! However, I am still confused by one little word: 28 stitches and 36 “rounds”.
Why “rounds” and not “rows”? Surely the gauge swatch should not be knit in the round?
I appreciate the guidance as I try to reform my ways- so I don’t have to re-form the shirt after weeks of knitting! 😉
Hi Anita,
Thanks for reaching out! Because this pattern is knit primarily in the round, we recommend swatching in the round as well, since that will provide the most accurate gauge measurement. You can learn more about the technique of swatching for circular gauge in this tutorial. Hope this helps!
All the best,
Lili
I have finished the project! However, though making a gauge swatch, the size of the knit is much, much larger than intended…hmm.
But my main issue is that the place where I changed skeins has pulled horribly, causing an ugly “line” across the row. (It’s the the yarn got pulled very tight and collapsed part of a row.) I have tried easing and teasing it, but to no avail. Any ideas?
Tips on joining skeins of silk yarn / a note in the pattern to look up the suggested methods would be helpful! Never having knit with silk before, I was unprepared for this issue…
Hi Anita,
Congrats on finishing your project! I’m sorry to hear that it came out larger than expected though. Are you using Cattail Silk for this? If so, then I’d recommend machine washing and drying the shirt! We’ve found that this yarn shrinks a bit in the dryer, so that might help bring it down to the intended size. This may also help even out the stitches in the problem row!
As for joining a new skein of yarn, we generally recommend leaving the ends of the yarn loose, and then weaving them in after you’ve finished the project. We have a great tutorial on this, right here, and it will work for any type of yarn–silk included!
All the best,
Lili