Julie Hoover for Purl Soho: Sayer
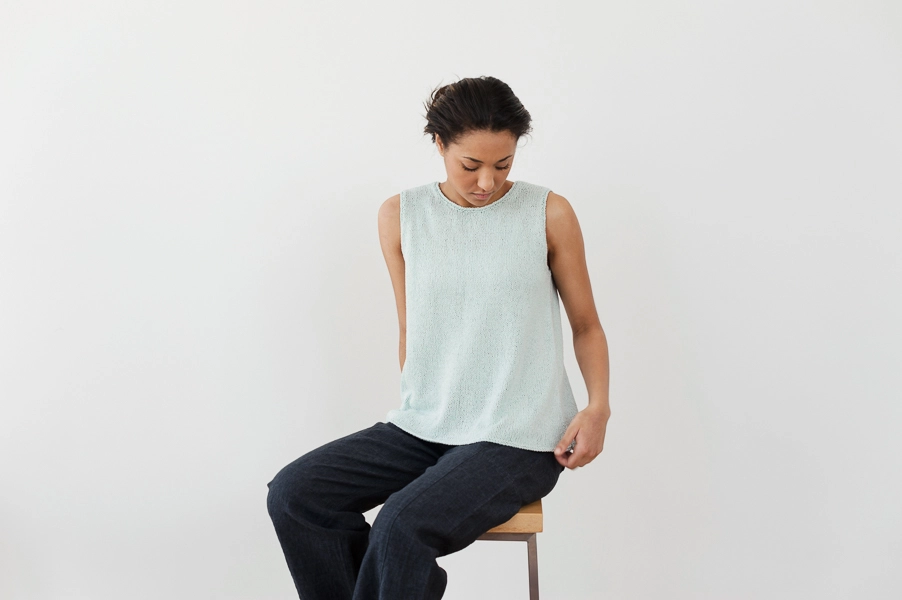
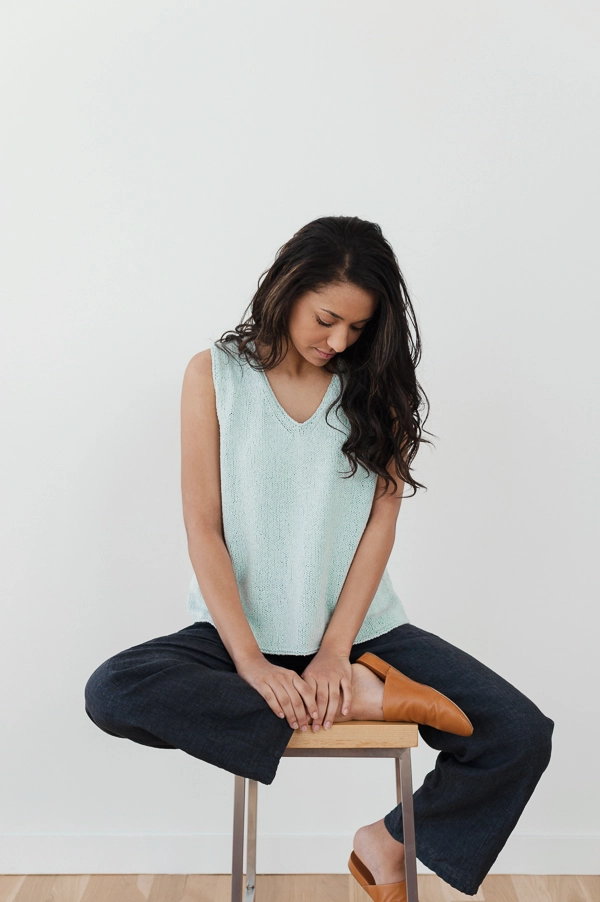
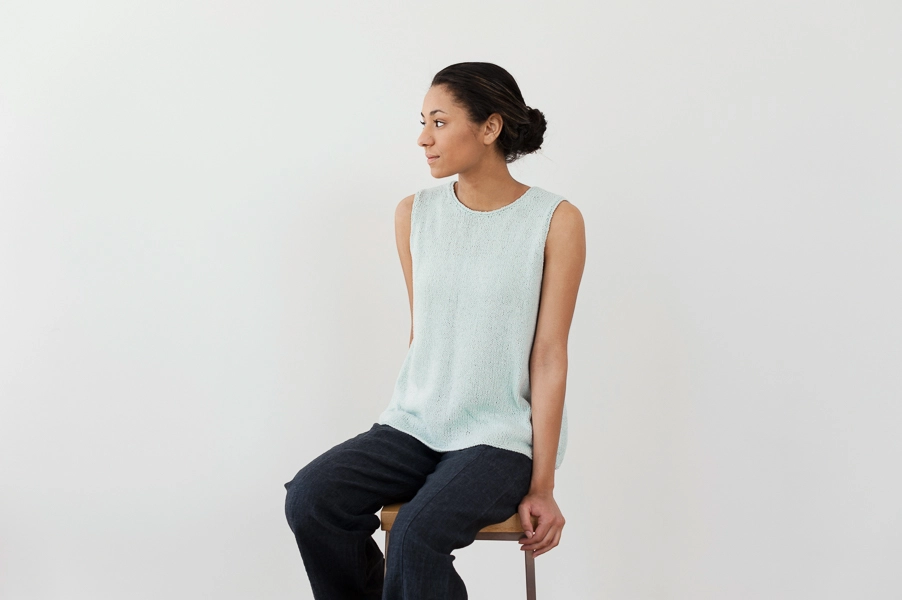
From designer Julie Hoover specially for Purl Soho, the Sayer tank is a no-fuss knit fit for summertime’s most fun activities: outdoor dinners, vacation ramblings, and hammock catnaps.
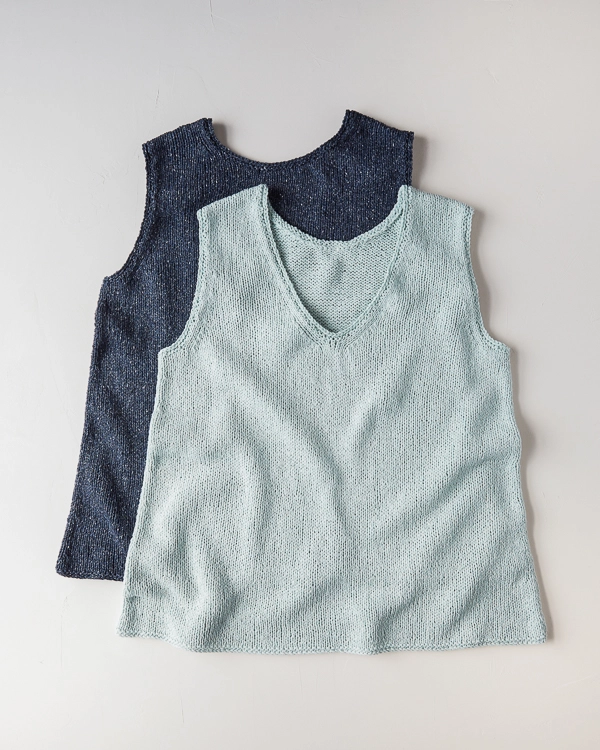
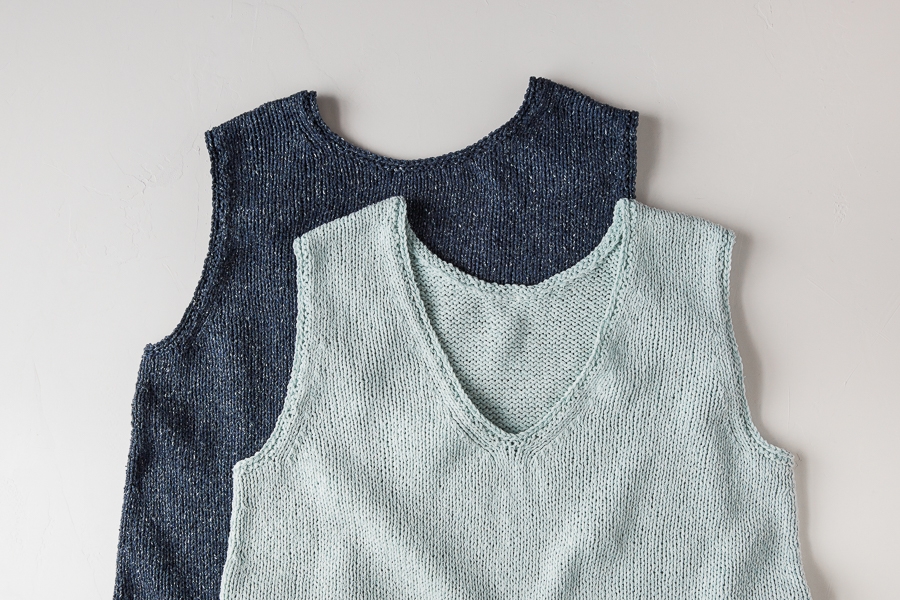
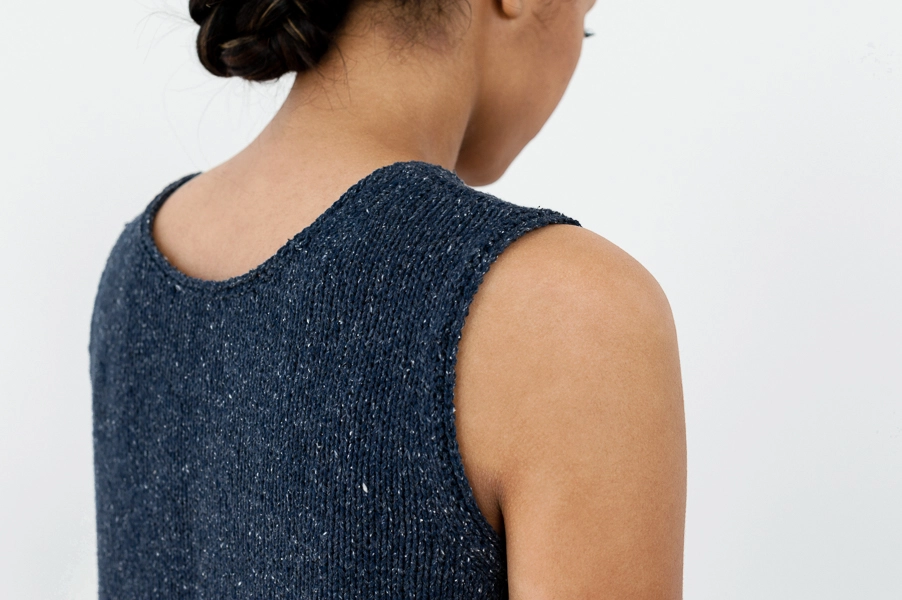
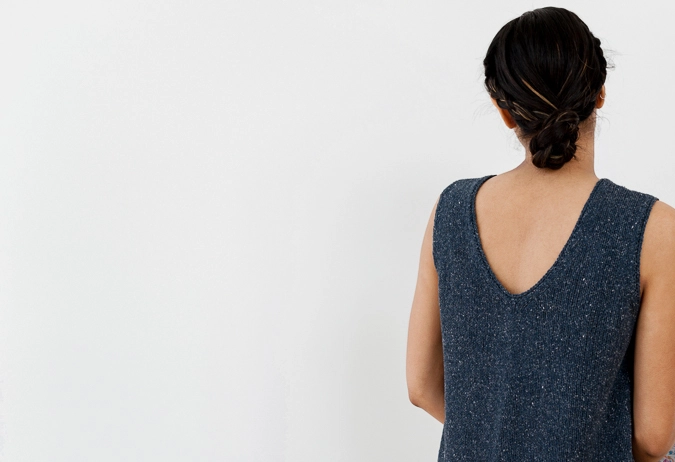
With a V-neck on one side and a crewneck on the other, the Sayer gives you free rein to decide which one to wear in front and which in back… And to change your mind! Knit in two pieces from the bottom up, Sayer’s simple stockinette body, with slight A-line shaping and garter edges, is truly a breeze!
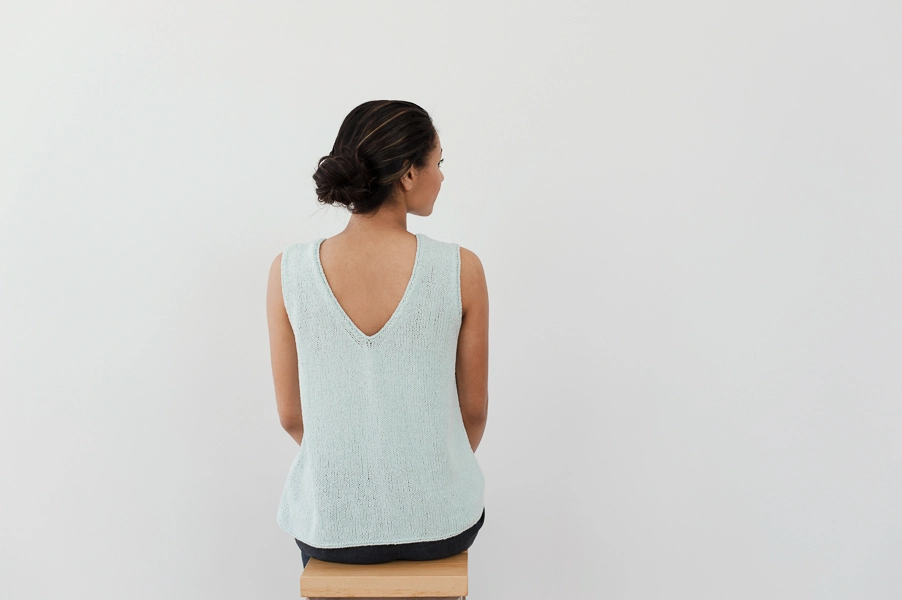
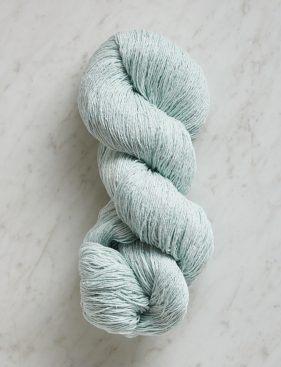
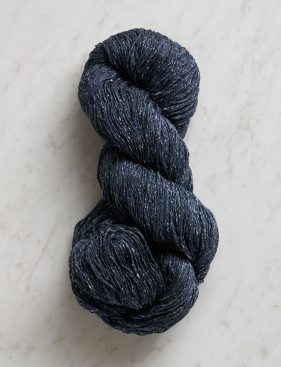
Julie knit her tank holding two strands of our fine Cattail Silk for a fabric that is lightweight and cool, natural and totally beautiful. We dipped into two summer-sky shades, Blue Bamboo and Deep Indigo, but the sky’s the limit with eighteen gorgeous colors of Cattail Silk to choose from. You’ll only need a few skeins to whip up your own, just in time for summer!
Yarn lovers, if you adore the yarn used in this project, you’ll love exploring all of our other yarn collections! Discover over 45 thoughtfully designed yarns in nearly every natural fiber and in every spectacular color you can imagine. Only available here at Purl Soho’s online yarn store, where every skein is created with care and your creativity in mind!
Designed for Purl Soho by Julie Hoover. Currently based in Ann Arbor, Michigan, Julie Hoover designs knitwear and makes yarn, for both her own personal label and others. Her work reflects a lifelong passion for clothing and textiles, and her view that knitting is a beautiful way of creating timeless fashion, a thoughtful mix of quality and creativity, intention and care.
Share your progress and connect with the community by tagging your pics with #PurlSoho, #PurlSohoBusyHands, #PurlSohoSayer, and #PurlSohoCattailSilk. We can’t wait to see what you make!
Materials
- 2 (3, 3, 3) (4, 4, 4, 4) skeins of Purl Soho’s Cattail Silk, 100% silk yarn. Each skein of this fingering weight yarn is 618 yards/ 100 grams; approximately 1235 (1375, 1580, 1715) (1935, 2095, 2290, 2445) yards required. These are the colors Blue Bamboo and Deep Indigo.
You’ll also need…
- US 7 (4.5 mm), 24-inch circular needles
- US 7, 16-inch circular needles
- US 6 (4 mm), 16-inch circular needles
- Stitch markers
- Scrap yarn or stitch holders
- T-pins and blocking wires (optional)
- Julie Hoover for Purl Soho’s Sayer Pattern
Gauge
18 stitches and 27 rows = 4 inches in stockinette stitch on larger needles with yarn held double, after blocking
Sizes
NOTE For help picking a size, please check out our Understanding Ease + Selecting Size Tutorial!
36½ (40, 43½, 47) (50½, 54, 58, 62)
To fit actual chest circumference of 30–33 (34–37, 38–41 41–44) (45–48, 48–51, 52-55, 56-59) inches, with approximately 3-6 inches of ease.
- Finished Chest Circumference: 36½ (40, 43½, 47) (50½, 54, 58, 62) inches
- Finished Length from Shoulder to Bottom Edge: 24 (24½, 26¼, 26½) (27¾, 28¼, 29¾, 30) inches
SAMPLE: The top pictured here is Size 40 inches modeled with 6½ inches of ease.
Pattern
Sayer is is available for purchase as a PDF download.
Update: More Sizes
January 2020
We’ve expanded the size range for Sayer! Since last spring, all of our new sweaters fit at least a 60-inch chest. If you downloaded this pattern in the past, please update your pattern for free, either in My Pattern PDFs on your My Account page at purlsoho.com or in your Ravelry library.
Looking for more inspiration? Explore all of our free knitting patterns and knitting tutorials, buy one of our many knitting kits and yarn bundles, and shop for beautiful yarn. We have over 35 gorgeous natural fiber yarns in 100’s of magnificent colors, designed to bring integrity, beauty, and joy to your next knitting project and only available at Purl Soho!
Gosh I would love to try this project but I’ve never attempted anything like this. I’ve knitted hats, booties, scarves, etc. So cute though!!
Hi Donna,
Thank you so much for the kind words! I think Sayer would be a wonderful introduction to the world of garment knitting! It is a fairly straightforward knit with decreases to shape the body, armholes, and necklines, and only four seams to sew at the end. The neck and arm openings are finished by picking up stitches and working in the round for just a few rows. If you have made hats and booties you probably already have experience with all these techniques! And of course, if you run into any problems, we are always here to help!
Best of luck and happy knitting!
Julianna
Would Linen Quill work for this as well? I have enough of that and could get started right away!
Hi Elizabeth,
Linen Quill would be a wonderful option for this top! I would still suggest knitting a gauge swatch, but Linen Quill and Cattail Silk do knit up to the same gauge!
Best of luck, and please let us know how it turns out!
Julianna
Does the yarn have any give to it with this pattern? I am in between the first 2 sizes. I don’t like things to be too baggy on me. Just want to order the correct amount of yarn for the project.
Thx.
Hi Ginny,
Thanks for writing in! Cattail Silk on its own does not have any stretch or elasticity, so while the knitted fabric does have some stretch due to the nature of knitting, it is still a relatively firm yet drapey fabric that will not stretch out with wear. If you have a similar top that you like the fit of, I would suggest measuring that top and choosing the finished measurement that is closest!
I hope that helps!
Julianna
Hi there,
What level of difficulty would you say this pattern is?
Thanks
Hi Nicole,
Thanks for writing in! I would consider Sayer to be an advanced (or adventurous!) beginner project. It is a fairly straightforward knit with decreases to shape the body, armholes, and necklines, and only four seams to sew at the end. The neck and arm openings are finished by picking up stitches and working in the round for just a few rows.
Happy knitting!
Julianna
Hi again,
So I measured my chest size and fall at 34. Would you recommend going with the 34-37 (would that be too big) or dropping down to the 30-33?
I’ve never knit much besides scarves or blankets so this is all very new to me!
Cheers 🙂
Hi Nicole,
I would probably stick with the 34-37, but if you have a similar top that you like the fit of, you could measure that top and choose the finished measurement that is closest! I hope you give Sayer a try, and if you run into any problems, we are always here to help!
Best,
Julianna
Thanks Julianna!!
I believe the pattern is telling me to use catskill silk doubled throughout. It also say to use 2 colors. WHAT ABOUT THE SIZES THAT SAY YOU NEED 3 skeins? thanks
Hi Joan,
Thanks for reaching out! For the third skein of Cattail Silk, you could either wind it into two balls by weight, or, if you are using a swift and ball winder, work from the inside and outside of the ball simultaneously.
Best,
Julianna
I am wondering if I need 3 or do I double that and get 6 skeins?
Hi,
You do not need to double the amounts listed in the pattern – unless you would like to make two tops! When you are knitting a size that calls for three skeins, you can either work from the inside and outside of each ball simultaneously, or work from the first two balls held together, and then work from the inside and outside of the third ball.
I hope that clears things up!
Julianna
If you are using two colours …. and you hold two strands of two different colours….. and the pattern says 3 balls needed….. would I need to buy 4 balls? 2 of each colour?
Hi Mary,
Thanks for reaching out! If you plan on using 2 different colors then I would suggest getting 4 skeins, 2 of each color!
Warmly,
Gianna
One last question……(for now)
When working with silk, which would be the best material to use for needles: wood, plastic, bamboo, or the Addi’s?
Thanks again!
Hi Nicole,
This is entirely up to your personal preference! Cattail Silk is not a particularly slippery silk so there is no need to use a grippy needle such as bamboo – however, if you prefer bamboo needles they will work just fine! I personally am fond of Addi Turbo Rocket needles, but feel free to use whatever type of needles you are most comfortable with.
Best,
Julianna
Could this sweater be knit in the round until the armholes and them worked separately – making only 2 seams to sew up?
Hi Linda,
Great question! This would be a very easy pattern to modify to working in the round! I would subtract two stitches from each the front and back cast on and from the armhole cast offs to account for the selvage stitches that will no longer be taken into the side seams, and be aware that the V-Neck shaping begins before the armhole cast off, but otherwise it should be smooth sailing!
Best of luck and happy knitting!
Julianna
Linda,
Did you knit this in the round? I am hoping to do it that way and wonder if you had any problems doing it.
I’ve knit two in the round. The adaptations were easy to do. I’m a messy seamer, so that was my motivation. Also, when I go from in-the-round to flat, I change needle size, because I knit looser in the round, so check your gauge on that or you get a ghosty shift there. For the second one I decided to lengthen, so I added rows in the shaping section. I love this top and will probably knit another.
Hi! The cattail silk top looks great with the whole outfit! Would you know where the model bought her linen trousers (and shoes)? Many thanks.
Hi Anna,
Thanks for reaching out! The clothes worn in the pictures above are a few years old but we are happy to help! The pants are form Eileen Fisher and the shoes are from Vince!
I hope that this helps!
Cassy
Would you suggest wood or metal needles for Cattail Silk?
Hi Judy,
This is entirely up to your personal preference! Cattail Silk is not a particularly slippery silk so there is no need to use a grippy needle such as bamboo – however, if you prefer bamboo needles they will work just fine! I personally am fond of Addi Turbo Rocket needles, but feel free to use whatever type of needles you are most comfortable with.
I hope that helps!
Julianna
Would you please confirm that the lighter coloured tank is blue bamboo and for size 40 I need 3 skiens. Also, I would like to purchase both the wool and pattern to be shipped together. Is that possible?
Hi Mona,
Thanks for writing in! You are correct, the lighter color is Blue Bamboo and you will need 3 skeins. Although we don’t sell them bundled, you can certainly purchase both the yarn and the pattern at the same time! You can add the pattern to your basket here, and the Cattail Silk here, and complete your checkout with all of the items you need.
Happy knitting!
Julianna
Julianna, thank you for the quick response!
If making a yarn substitution, what weight should I use if I want to use a single rather than doubled yarn? What I’ve been finding is lace weight doubled is equal to fingering weight, and fingering weight doubled is equal to dk. However, the gauge for this project, 18 st =4” is that of a worsted weight. Is this because of the larger needles and looseness of the fabric?
Hello Sally,
Thank you for reaching out! You are correct, two strands of Cattail Silk is most similar to a light worsted to worsted weight yarn. Once you make your yarn selection you will need to knit up a gauge swatch to find the right needle size to use to get gauge.
Happy knitting!
-Marilla
I’m wondering about how much will a half a stitch throw off the sizing. The yarn I would like to use is closer to 5 st/ inch (unlike the 4.5/inch as suggested in the pattern). As for my sizing, I am in between the 30-33 and the 34-37. Like several before me I fear that it will be too big if I go with the larger size particularly with my gauge being a little larger than suggested).
Thank you for your help.
Hello Jessica,
Thank you for reaching out! Half a stitch will have quite a big effect on the size, however if you are getting 5 stitches per inch rather than 4.5 stitches per inch your finished garment will come out smaller because you will lose half a stitch per inch. Because of this I would recommend knitting the size up rather than the size down.
I hope this helps and let us know if you have any further questions!
Happy knitting,
Marilla
I knew that I had that backward. Thank you!
I already ordered this pattern and the Cattail silk yarn, but I would like to make this in a 100% cotton or cotton/linen blend fabric. Can you recommend another yarn that would work with this pattern. Also, would a single strand of Dk or worsted weight work vs the two strands of fingerling? Thanks love this pattern, hoping to make it in several colors! 🙂
Hi Teresa,
Thank you so much for the kind words! Our Field Linen substitutes very nicely for Cattail Silk if you would like a linen version. Two strands of Cattail Silk is most similar to a light worsted to worsted weight yarn, so I think Sayer would work well in a single strand of Blue Sky Worsted Cotton!
Best of luck, and please let us know how all your tops turn out!
Julianna
Hello, love the top and plan to make it my first top project! If I use the Blue Sky Worsted Cotton for a 38-40, how many skeins do I need to order? I also still use the same size needles, correct? Thanks!
Hello Alison,
Thank you for reaching out! It looks like you should be able to stick with a size 7 needle and knit this top up with Blue Sky’s Worsted Cotton, though I would knit up a gauge swatch before jumping in! You will need 5 skeins to make the size 40.
Happy knitting!
-Marilla
I just want to make sure I understand how the colour choices of the Cattail silk are meant to work.
I need 2 skeins and am meant to knit holding one thread of each skein together, correct? So am I meant to blend 2 colours together to create a new colour? How do I know how it’s going to look? I see you have light and dark blue, but the tops are one of each colour. I’m interested in the porcelain white, but if blended would that go with woodmouse? Thanks.
Hi Lori,
Thanks for reaching out! For our samples, we used two strands of the same color for each top – in other words, we used two strands of Blue Bamboo for the lighter colored sample, and two strands of Deep Indigo for the darker colored sample. However, if you would like to use two different colored strands to create a new color, I think that is a really great idea that opens up many color possibilities! Using two similar colors such as Porcelain White and Wood Mouse held together would create a lovely, subtly marled fabric!
I hope that helps, and please let us know how your marled Sayer turns out!
Julianna
I truly enjoyed working this project! I used the Cattail Silk in Deep Indigo & Flower Field Gray held together throughout. Since I avoid sewing at all costs, I modified the pattern slightly. I worked in the round until the underarm, then worked each side. Instead of binding off at the shoulders, I used short rows to shape, then Kitchener Stitch to join. I later decided I wanted mine a touch longer so I added a crocheted edging. Thank you for the pattern & inspiration. This will be a staple in my wardrobe for years to come!
Hi Sunny,
Thanks for writing in, and your Sayer sounds wonderful! What clever modifications and I’m sure the marled effect of using two different colors is beautiful! Thank you for letting us know how your top turned out!
Best,
Julianna
* I made the assumption “right” and “left” refer to a picture of the piece and NOT as worn on the body.
* I am now working on the crew neck decreases.
* I believe there is an error under the LEFT SHOULDER instructions. I think the “Left Neckline Decrease Row” should read Slip 1, K1, ssk, knit to end of row.
* Also, because of my assumption, I can see all my decrease sts per the instructions slant the wrong way at the side seams and armholes. But in looking at the photograph, I guess that’s intentional. Right?
It’s a lovely piece and I will enjoy wearing it.
Hi Barbara,
Thanks so much for the kind words and for reaching out! Actually, when referring to the left or right side of the piece in a knitting pattern, it does mean your left or right side as if you were wearing the garment, and in this case, since the top can be worn with the crew neck in either the front or the back, as if you were wearing it with the crew neck in the front. This row is correct and you will be using the angled decrease that is the opposite of what you would normally expect for a decorative effect, but it sounds like you may have reversed the left and right sides of the neck. When starting the Left Shoulder, you should have joined the yarn on the wrong side at the neck edge, so each right side row starts at the shoulder edge of the garment. If you have already completed the Right Shoulder and reversed the shaping, you can go ahead and reverse the shaping for the Left Shoulder as you have written.
I hope that clears everything up!
Julianna
Hi,
For this project, is it necessary to have both the US 7, 16-inch circular needles and US 7, 24-inch circular needles? Can I use just the 24-inch?
Thanks!
Hi Winnie,
Thanks for writing in! While the vast majority of the top is knitted on the 24 inch needles, you do need a shorter needle to work the armhole edging in the round since the opening is far smaller than 24 inches around. If you do not have a 16 inch needle, you could also work the edging on double pointed needles or using magic loop with a 32 inch or longer circular needle.
I hope that helps!
Julianna
A few questions about blocking:
1. Do you suggest blocking before or after assembling the vest?
2. I’ve read elsewhere that silk yarn should not be completely soaked in water to block because it looses 20% of it’s elasticity when wet. But the pattern states to soak for a minimum of 45 minutes. Any comments?
3. Do you suggest using foam blocking boards or a towel to block the vest?
Thanks!
Hello Bobbi,
These are great questions! I would block before assembling so that your two pieces measure out the same. As far as silk loosing its elasticity when wet, I haven’t experienced this, but it does loose a bit of it’s strength when wet which shouldn’t effect the blocking process to much. You just would want to tug on it to much. Foam blocking boards or a towel will both work great!
I hope this helps and happy knitting!
-Marilla
Question about Side Decrease instructions:
I have the printed pattern and there is a line that looks like a typo:
Side Decrease every 14th (14th, 14th, 14th, 16th, 16th) row 3(3,7,7, 3, 3) more times, then EVERY 12TH (12TH, 0, 0, 14TH) ROW 4(4, 0, 0, 4, 4) TIMES
Lines in Caps are confusing. I am making size 40. So do I decrease every 12th row 4 times? If so, that results in only 16 stitches decreased, when there needs to be 24.
Thanks for your help.
Hi Dianne,
Thanks for reaching out! I am happy to help! For the size 40, you will continue in stockinette stitch, repeating the side decrease row every 14th row 3 more times (a total of 4 times) and then every 12th row 4 times for a total of 90 stitches remaining. This would be a total of 16 stitches reduced! You start this section with 106 stitches for the size 40 and with the reduction of 16 stitches, this gets you to 90 stitches!
I hope that this clears things up!
Cassy
Hello.
I’m would like to try this in linen quill (for color options). Would I order the same number of skeins and would I use 2 strands while knitting as in the original instructions. Also, how similar is the drape and stretch to Cattail Silk?
Thanks!
Susan
Hello Susan,
Thank you for reaching out! To knit this top up in our Linen Quill you will need 3(4,4,4,5,5) skeins of yarn. I think It would be beautiful, but will have a very different drape and will likely be a more structured knit.
I hope this helps and happy knitting!
-Marilla
Hi
Re SHAPE SIDES
If I have ended the cast on section on a WS row (designated Row 2), then the first row of the SHAPE SIDES section must be a Row 1, a knit row.
Then how can the side decrease rows be even numbered rows, if they are knit rows? The knit rows are odd numbered rows.
The 14th row after starting the SHAPE SIDES section is a purl row, as are subsequent even numbered rows.
I’m stuck.
Hi Ann,
Thanks for reaching out! When counting rows for decreases that are written in this way, you will not be counting your first decrease row – you can think of it as Row 0. Row 1 of the fourteen rows will then be a purl row, so the 14th row will be another knit row, and all your decreases will be worked on right side rows.
I hope that clears things up!
Julianna
Are there schematics with this Julie Hoover’s knitting patterns? I would like to purchase and attempt this pattern on a knitting machine.
Hi and thanks for reaching out! All of our patterns, including those designed for us by Julie Hoover, do include schematics with measurements. Working this on a knitting machine is such a clever idea, so please do let us know how it turns out!
Best,
Julianna
Could the Sayer pattern be worked using Cashmere Merino Bloom? What kind of adjustments would be necessary?
Thank you!
Hi Carol,
Thanks for reaching out! Cashmere Merino Bloom held single is just a bit thinner than the Cattail Silk held double used in Sayer. It is possible that you could obtain the correct gauge by adjusting your needle size, but you would have to knit and block your gauge swatch to find out. If not, you might be able to knit a larger size using the smaller gauge and have it turn out to the correct size, but you would have to multiply your stitches per inch by the finished chest measurement of the size you wish to knit and compare it to the cast on amounts for each size to determine which size to follow while knitting.
I hope that helps!
Julianna
Could I make this with both sides having the Vneck?
So just knit 2 of the V-Neck side and then follow the seaming instructions.
Thank you.
Hi Karen,
Thanks for reaching out! Yes, this is a fantastic idea and a very simple modification to the pattern! Since the top is knit in two pieces, you can certainly make both sides the V-Neck option.
Happy knitting!
Julianna
I do not understand your instructions for arm hole decreases. Do I decrease on right sides @ X times while I am also binding off for under arms? I
Thank you,
Carolyn
Hi Carolyn,
Thanks for reaching out! You will not be decreasing and casting off at the same time in this pattern. When beginning the armhole shaping, you will first cast off the indicated number of stitches at the beginning of the next two rows. After these two rows, you will then start the decreases on the following row.
I hope that clears things up!
Julianna
Hello, would it be possible to knit the entire body in the round?
Could the pattern be adjusted to accommodate a seamless knit?
Thank you kindly, monique
Hello Gina,
Thank you for reaching out! You can certainly knit this top in the round. I would subtract two stitches from each the front and back cast on and from the armhole cast offs to account for the selvage stitches that will no longer be taken into the side seams, and be aware that the V-Neck shaping begins before the armhole cast off, so you will need to begin knitting flat again at that point.
Happy knitting!
-Marilla
Would Lantern yarn work for this pattern?
Hello Carolyn,
Thank you for reaching out! Lantern’s gauge does work for this pattern! The texture will be very different, I would also check out our our Cap Sleeve Pullover!
I hope this helps and happy knitting!
-Marilla
Hi, I have 2 skeins of super wash merino wool (825 yards, 4 oz, 115 grams each) that states gauge is 7-8 stitches = 1″ on US #1-3. Do you think if i held it double, it might work with this pattern? Its beautiful and i’d love to be able to use it in this pattern. Thank you! All your items are so lovely! Joy
Hello Joy,
Thanks for reaching out! I think this is a great idea. It will certainly get you close. I would recommend knitting up a gauge swatch to see how many stitches per inch you are getting and go from there.
I hope this helps and let us know if you have any further questions!
Happy knitting,
Marilla
Hi, I have some Mirasol Nuna yarn that I would love to use with this pattern, but I’m worried about the gauge. Can you tell me the gauge of the pattern before blocking?
Thank you
Hi Suzanna,
Thanks for reaching out! Unfortunately the gauge before blocking isn’t very useful, since many yarns react differently to blocking. Some yarns bloom and grow, other yarns contract, while some yarns don’t change their gauge at all! For best results, especially when substituting a different yarn, I would definitely recommend blocking your gauge swatch to make sure your finished sweater will still fit after it is washed and blocked!
Best,
Julianna
I’m new to reading patterns: what does this mean for the amount of yarn needed for the Sayer top? it doesn’t look like the shirt has two colors.
thank you.
2 (3, 3, 3) (4, 4, 4, 4) skeins of Purl Soho’s Cattail Silk, 100% silk. These are the colors Blue Bamboo and Deep Indigo.
Hi Heather,
I am delighted to help! The number of skeins noted are for each size. For this lovely top we offer sizes 36½ (40, 43½, 47) (50½, 54, 58, 62) inches. With that in mind, if you selected the size 47, you would use 3 skeins!
We also made two samples of this lovely top that you can see in our photos! The lighter one is made using Blue Bamboo and the darker is made using Deep Indigo!
I hope that this clears things up!
Cassy
I have already knit this in Cattail Silk and love it! I would like to try it in Cotton Pure, but not sure how many skeins for size 43 1/2, since I am guessing I will need to knit on size 6 needles to get gauge?
Thank you!
Hi Diane,
Thank for reaching out! Unfortunately Cotton Pure is not the correct weight for this pattern. Cattail Silk is a light fingering weight, which held double is about equivalent to a worsted weight, while Cotton Pure is a sport weight which lands right in the middle of those two weights. Held single it would be too fine for this pattern, while held double it would be too thick. If you would like to try it in cotton, I would recommend our Sweetgrass!
I hope that helps!
Julianna
Thanks, Julianna. I do have some Sweetgrass for a sweater, but may do the shell instead. Would love to see a similar beautiful shell for all cotton though!
To everyone at Purl Soho. I hope you are all safe and healthy! — your fellow New Yorker.
Hi Cassy and all,
I finally started this project and have been reading all the helpful comments. I have a question about an instruction:
I am making the 43 1/2 size which corresponds to the second size inside the first set of parentheses.
In the instruction for “shape sides”: continue stockinette stitch, repeating Side Decrease Row every 14 the row 7 more times, then every 12th row “0” more times. 90 stitches remain.
I am confused about the “0” more times means. And, what do the two asterisks mean after the bracket?
Does it mean keep working without decrease once the garment is 90 stitches wide and is 16 1/2 inches long?
thank you so much! this is the first “shaped” project I’ve made in many years.
Hi Heather,
Thanks for reaching out! Whenever you see a O or a dash in place of a number for your size, that means you will omit or skip this set of instructions. In this case, after decreasing every 14th row 7 times, you will skip ahead to the next set of instructions to work 5 rows even or until the piece measures the correct length for your size. For now, you can ignore the double asterisks! After completing the crew-neck side of the top, the V-neck side has you work the same instructions up until the double asterisk, and then return to the instructions that are specific to the V-neck.
I hope that clears things up, and best of luck!
Julianna
Would Burnish yarn be appropriate for this pattern? (I have some left over from another project.) It is also fingering weight. Thanks.
Hi Andrea,
Thanks for reaching out! Yes, I think Burnish would be an excellent yarn to use for this top! As always, you should knit a gauge swatch, especially when substituting a different yarn, but I don’t think you will have any problems obtaining the correct gauge and the resulting fabric should have a wonderful drape!
I hope that helps, and please do let us know how it turns out!
Julianna
This is my first sweater and I’m confused about Work 5 rows even in the Shape Sides portion..am I decreasing here? I am knitting the 40. I have 90 stitches at the end of the initial decrease, but then I’m supposed to have 76 stitches after binding off 7 stitches in Shape Armholes…Thanks.
Hi Kristin,
Thanks for reaching out! Working even means that you will continue working in stockinette stitch without increasing or decreasing. Once you reach the correct length, you will cast off 7 stitches at the beginning of the next two rows, for a total of 14 stitches, so you will end up with 76 stitches!
Best,
Julianna
Hi Julianna,
I’m finishing up the Right Shape Shoulder Crew Neck side, and I have 5 stitches left on my needle to bind off. Am I supposed to cut the yarn and rejoin with the stitches on the stitch holder or have I horribly misread this pattern?? Again, this is my first attempt at a garment..thanks.
Hi Kristen,
Thank you for reaching out! You’re exactly right- at this point you’ll cut your yarn, transfer the Left Shoulder stitches from the scrap or stitch holder to your needles and rejoin your yarn to continue knitting on the wrong side. This process, although not explicitly stated, will be the same when knitting the V-Neck side so you should be able to finish your first garment with confidence. We would love to see the results when your Sayer is complete!
Happy knitting!
Gaby
Modèles ravissants, aux finitions soignées. Très jolis fils.
Les explications existent-elles en français ?
cordialement
Hi Danièle,
Thanks for writing in! At present, our patterns are only available in English. We certainly appreciate the request!
Best,
Julianna
I see this pattern calls for 2 strands of cat tail silk half double, if I have a silk DK yarn which knits up to the same gauge could I make a substitution or would that dramatically affect the drape of the finished garment?
Hi Dani,
Thanks for writing in! As long as your yarn knits up tot he correct gauge, you can use it for this pattern! There are many factors that go into how a yarn drapes, so while most 100% silk yarns should drape just as well as ours, the best way to find out is to wash and block your swatch to see how it turns out!
Happy knitting!
Julianna
I would like to use Rowan cotton cashmere for this top. Would that work?
Hi Ann,
Looking at the specifications for that yarn, it says that it knits up at 5 stitches per inch, and Sayer calls for a gauge of 4.5 stitches per inch with Cattail Silk held double. I think that this might be do-able, but you would want to swatch to see what the yarn looks like at different gauges. It’s possible that you could knit at 5 stitches per inch and just knit up a smaller size than you would normally choose for yourself. I hope this helps – Happy Knitting!
Best,
Cassandra
Hello – I have a question about the instructions. Working the right shoulder crew neck side, it states “At the beginning of the right side rows, bind off at neck edge 2 stitches 4 times. Work 1 wrong-side row even”. Does this simply mean to bind off 8 times in the same row? The instructions say right side “rows”, indicating that these are separate rows, so should the wrong side be worked back to the neck edge before the next bind off? Finding this a little confusing – thanks for any advice!
Hi Lucy,
Thanks for reaching out! These instructions should be worked over 8 rows total. In other words, on the first right side row, you will cast off two stitches and knit to the end, and then purl back for the second row. On the the third row, when you have the right side facing again, you will again cast off two stitches and knit to the end, and then purl back for the fourth row. Once you have cast off two stitches at the beginning of four right side rows, purling back after each one, you will be ready to move on to the next set of instructions.
I hope that clears things up!
Julianna
Hi,
I would like to knit this patten in the round. I have read the comments and see that some customers have successfully done this. I have never adapted a pattern and am not sure where to start. Are you able to give me some information please?
Thank you so much.
Jane
Hi Jane,
Thanks for writing in! I’m happy to give you some tips on how to adapt this pattern for knitting in the round! Both sides of the top start out exactly the same, so you will cast on for the front less two stitches (for the seams that you won’t be working), place a marker, and then cast on the same amount for the back and place another marker before joining for working in the round. For most of the body you will simply work each set of instructions twice, once on the front and once on the back, but when you get to the ** in the instructions for the crew neck side, you will have to start the V-Neck shaping which requires working back and forth in rows, and once you cast off for the armholes, you will work the front and back separately as written. Since you omitted two stitches from the cast on, you will need to cast off two fewer stitches in each underarm in order to have the correct number of stitches for the next step.
If you don’t mind making the v-neck a little higher, I think it would be easier to knit both sides exactly the same until casting off for the armholes. After that, you will simply knit the crew neck side as written, and then knit the V-Neck side by working the armhole decrease and V-Neck separation instructions at the same time. As long as you read through the pattern before you get started, it shouldn’t be too difficult to modify! I hope you enjoy your (nearly) seamless top!
Best of luck and happy knitting!
Julianna
Hi!.
I just finished this the Cattail silk and I love it. I have some other yarn that is DK weight
133g/4 oz. 5.5 sts/inch on US 5-6
I used to knit years ago and always used the yarn specified.
Would this work? Thank you and be safe.
Lori
Hi Lori
Thanks for writing in! The original pattern calls for holding the yarn double, to equal a DK weight, so as long as your gauge matches the 18 st = 4″ for this pattern it will work!
I hope this helps and happy knitting!
Jessica
Hello,
I am knitting Sayer with Cattail Silk and am at the neckline edging step and would appreciate some assistance. Is the pattern written to pick up the slipped stitches or one stitch “back” from the slipped stitches? When I counted the slipped stitches, I don’t have enough based on the pattern number to pick up – but when I picked up one stitch back it seems to leave a ridge that I do not see in the finished pictures.
Thank you,
Val
Hi Val
Thanks so much for reaching out! Most of the edge will be picking up will be along a vertical edge. We have a really great tutorial here if you need it. I would recommend segmenting your edge with removable stitch markers into 4 or 8 segments. This will make it easier to get the same amount of stitches picked up in each section and keep your total number on track. There should be an amount of slipped stitches fairly close to the number you need to pick up. If you are only off by a few, maybe try sneaking a few in by picking up one leg of the slip, and then another through both legs of the slipped stitch. Using the slipped stitches for the pick up, will keep the edge nice and smooth. I hope this helps!
Happy Knitting
Jessica
Hi-
I am a bit confused by the directions….the side decrease row states: slip 1, k2, knit 2 together(k2tog), knit to last 5 stitches, slip slip knit, k3(2 stitches decreased)…I only see 1 decrease (k2 together) at the beginning of the row, should the ssk be k2tog? That would be a decrease of 2 in the row? The armhole decrease row also says the same thing? Can you clarify? Thank you
Hi Niki,
Thanks for writing in! An SSK, or slip slip knit, is a special type of decrease that leans to the left, while a k2tog leans to the right. You can learn how to work this decrease in our Slip Slip Knit (SSK) tutorial!
Best,
Julianna
Hi! I’m trying to get gauge for this pattern. My first attemp – using strands from 2 skeins – I used a US 7. Instead of getting 18 sts/4 inches, I got 21 sts. I tried going a US 9 and got 20 sts. The sts at size 9 are so loose. There is no “snap back” to the swatch and I’m hesitant to go up in needle size to obtain 18sts because I’m thinking the finished product will stretch/sag to much.
Please HELP! TIA. Jill
Hi Jill,
Thanks for writing in, and I’m sorry you are having so much trouble getting gauge! Are you using Cattail Silk or substituting a different yarn? If you are using a different yarn, it sounds like it might be too thin, and you may want to try using it held triple to see if you can get the correct gauge in a fabric you are happy with. Another thing I would try if you haven’t already is blocking or washing your swatch. Cattail Silk can be machine washed and dried, and it responds beautifully! The yarn plumps and fluffs up slightly, so even if your fabric looks a little loose or empty at the correct gauge, it may bloom and be perfect after a trip through the washer and dryer. It’s also best to measure your gauge after washing and drying if this is how you plan to launder the finished top to avoid any unpleasant surprises!
I hope that helps!
Julianna
Juliana, I am using Cattail Silk (which is amazing, by the way!). I’ll try washing/drying swatch after going up in needle size.
thanks.
Hi Julianna,
I too would love to knit this in the round and the instructions you provided Jane are great but I just have a couple of questions. I’ve pasted your reply below with my questions in brackets.
Both sides of the top start out exactly the same, so you will cast on for the front less two stitches – for the seams that you won’t be working, place a marker, and then cast on the same amount for the back (I’m doing size 43.5 so cast on 112 for the front and 112 for the back?) and place another marker before joining for working in the round. For most of the body you will simply work each set of instructions twice, once on the front and once on the back, but when you get to the ** in the instructions for the crew neck side, you will have to start the V-Neck shaping which requires working back and forth in rows (but I’m still knitting in the round until the armholes, right?), and once you cast off for the armholes, you will work the front and back separately as written. Since you omitted two stitches (four stitches total?) from the cast on, you will need to cast off two fewer stitches in each underarm (I don’t understand where I’m supposed to cast off 2 fewer stitches. Before I get to the Shape Armholes in the Side Shaping for both Crew and V so I have 98 stitches to go into the armhole shaping? Or in the Bind Off?) in order to have the correct number of stitches for the next step.
I really want to try to maintain the deep V because it just looks so great, so hoping I can get this figured out. I’ve read through a few times and think I can manage it with your answers the the above. Thanks so much.
Hi Lianne,
Thanks for writing in, and I apologize if you saw my previous response – that was meant for another comment! It sounds like you’ve got the right plan for getting started! To keep the v-neck as low as the original, you will have to separate for the v-neck before casting off for the armholes, which gets a little tricky. I would definitely recommend reading all the way through the pattern for both the front and back so you’ve got a good idea of everything that’s going to happen! For your size, you will need to separate the right and left fronts when the top measures 15.75 inches and begin working back and forth in rows instead of in the round. To do so, when you get to the Separation Row, you will knit the indicated number of stitches, and instead of placing any stitches on hold, turn your work and purl all the way back until you get to the center of the front stitches, which is now your temporary beginning of the row. You might want to place a stitch marker here to remind yourself not to knit in the round!
For the next few inches, you will work each right side row by following the instructions for Shape Right Neckline and Armhole until you get to the side marker, knit across the back stitches, and work the instructions for Shape Left Neckline and Armhole after the second side marker. Once the piece measures 16.5 inches, measured along the area where the side seam would be, it’s time to separate for the armholes. On your next right side row, you will work the Right Neckline decrease, knit to 7 stitches before the side seam marker, bind off 14 stitches (you’re totally right that we’re casting off two fewer stitches here!), knit across the back until you are 7 stitches from the next marker, bind off 14 stitches for the second armhole, and work the Left Neckline decrease instructions to get to the end of the row.
Things will now get easier, as you can follow the pattern as written for each section of the top! Your yarn will be attached to the Left Front, so I would probably start with those instructions, which you have already done a few rows of at this point.
I hope that helps, and please let me know if you have any other questions!
Julianna
Wow Julianna, thanks so much for this. What a detailed response. I’m going to read through it all again, along with my pattern and make notes and if I have any questions I’ll check back in with you. Thanks again – can’t wait to really get into this. I just finished the Tulip Tank, so am eager to add this to my summer collection (while it is still summer).
Hi! I really like this pattern and I am curious if you may have a “vest” version for the winter in a longer and heavier weight?
Thank you!
Hi Maureen,
I’m so glad you are inspired by our Sayer pattern! Our Ribline Vest is a great winter vest. It is made with a worsted weight yarn. Also, with a little bit of tweaking, Sayer could be a great winter vest as well. It is knitted with two fingering weight yarns held together. This could easily be swapped out with a worsted weight wool yarn. I would also recommend making it a size smaller because it was originally designed with quite a bit of ease in it. I hope this helps! Let me know if you have any more questions about this.
Happy knitting,
Oscar.
Why is this pattern no longer available?
Hi Stephanie,
Thank you so much for reaching out! We are currently experiencing some technical difficulties so I’m afraid the Sayer pattern isn’t showing up at the moment, but we are working as hard as we can to get it back online! In the meantime, it is still available on Ravelry, or you can reach out to [email protected] so we can process your order manually!
All the best,
Julianna
Oh dear, I think I have messed up. In Shape Armholes I followed directions and decreased the required times of “right side rows”.
Well, I continued to do the following decreases counting “right side rows”, but now I see it says every 4th row (no mention of “right side”). Should I have done exactly what it said instead of assuming “right side” rows? FYI, this is my first garment, so bear with me.
Hi Linda,
Thanks for reaching out! You did the decreases correctly! For the decreases every 4th row and then every 6th row you are following the same instructions for the armhole decrease rows, so all decreases should be made on the right side as opposed to the wrong side!
Good luck with the rest of the pattern and feel free to reach out if you have any more questions!
Happy knitting!
Gianna
What great news!! I don’t have to unknit.
Many thanks.
Hi, Loving the pattern so far. I’m shaping the neckline an armhole on the v-neck side. We have 90 stitches at this point but the neck divisions are two 44 stitch pieces. Please help. What have I missed? Thanks
Hi Barbara,
Thanks for reaching out! It sounds like you are on the right track! You should have 90 stitches, going into the SEPARATE RIGHT + LEFT FRONT section. You will start with a slip 1, the k39, ssk, k3, you will then place these 44 stitches onto stitch holder or scrap yarn for Left Front. Then you will slip 1, k2, k2tog, knit to
end of row. 44 stitches remaining for Right Front!
I hope this clears things up!
Warmly,
Gianna
Thank you. I was wondering if the total stitches held is 44+44=88. Where are the other two stitches?
Hi Barbara,
No problem! You will be working a ssk and k2tog in that Separation Row, decreasing by two stitch, leaving you with 88 total!
Warmly,
Gianna
thanks Gianna
This feels like a dumb question but I’m on the Shape Sides Section and notice it no longer says anything about slipping the first stitch of every row like in the “Begin” section. Is it now assumed every row is begun with the slipped selvage method?
Hi Sarah,
Thanks for reaching out! That’s not a dumb question at all – you are correct, you will want to continue slipping that first stitch as you did in the BEGIN section. That will keep your edges nice and uniform and make it easier when it’s time to seam the ends together!
I hope this helps, and please let me know if you have any other questions!
Happy Knitting,
Kelsey
I have three skeins of Anzula Mermaid (60% Sea Cell, 40% Silk) yarn – lace weight – could I use it for this pattern? I would use two strands and have a total of 2,000 yards.
Hi Maribeth,
Thanks for reaching out! I think you could absolutely use the Mermaid yarn for this project, and depending on the size you’re making, that should be plenty of yarn to complete the Sayer! Since you’re substituting yarn, I would strongly recommend knitting up a gauge swatch before beginning your sweater, to ensure that you’re getting the correct gauge called for in the pattern.
Happy Knitting!
Warmly,
Kelsey
Perfect – thanks so much!
Hi, I’m about to shape the armholes on the crew neck side. When it says “bind off x stitches at beginning of next 2 rows,” does that mean to bind off knitwise on the right side row and purlwise on the wrong side row? If so, would that also be the rule for the rest of the pattern (unless specifically stated otherwise)?
Hi Anna,
Thanks for reaching out! Unless otherwise specified, you will want to always bind off on the right side of the fabric!
I hope this helps, happy knitting!
Gianna
Thank you, Gianna!
I haven’t knitted anything in quite a long time and was going to start with the Little Moons Lace Wrap but am concerned it might be too complicated, so might start with the Sayer. I’d like to make it using the Burnish yarn but since I have to buy the pattern, I see from the comments that it has to be soaked and washed before blocking if you use the Cattail silk. Is this the same case with the Burnish? And it would be great if you could show some samples of garments made with each type of yarn as well as care instructions before we have to buy the patterns.
Hi Katherine,
Thanks for reaching out! Burnish is an excellent option for this top! You don’t need to soak and wash the yarn prior to blocking since rayon is a much different fiber from silk and doesn’t require the extra steps, it is good to go to start knitting!
Also, this top was knit and designed in the Cattail Silk, so that is the only version of the samples we have knit up. Since we didn’t design this top in Burnish, and it is only a yarn that has come up as a recommended substitute for people who don’t want to knit with Cattail, we do not have a sample available.
We are always happy to provide yarn substitutions and care instructions for those yarns upon request, but unfortunately, we just don’t have the resources to create samples for every yarn. We only have the samples knit in the yarn the pattern was written for.
I hope this helps and clears things up, happy knitting!
Gianna
Hello,
I have two questions.
First, I’d rather do the blocking at the end of the project. Is there any reason why I can’t do the seams before blocking the finished project? If the front and back pieces are identical along the seams, there shouldn’t be any issue with the pieces not matching.
Second, should the seaming be done with a single yarn, or should it be doubled in the needle?
Thanks! I’m really enjoying this knit and the way the finished fabric drapes.
Hi Laura,
Thanks for reaching out! We recommend blocking the pieces before assembly because it makes the seaming process much easier and you can ensure that the pieces are blocked to the exact finished dimensions. It also helps to even out the stitches so you have an easy time sewing! I always recommend following the pattern and blocking the pieces prior to assembly but I also suggest blocking your finished garments again once you have sewn everything together for the best overall results. Also, when you sew the pieces together you will want to use a single strand, not a doubled strand.
I hope this clears things up and I am so glad to hear that you are enjoying this patter!
Gianna
What is meant by “work 1 wrong-side row even”. I know what a wrong side row is but what does “even” mean?
Hi Pam,
That’s a really good question! Here, “work 1 wrong-side row even” just means to work a normal wrong-side row, so in the case of this pattern: Slip 1, purl to end of row. Basically, the word “even” is there to indicate that you don’t need to work any decreases or bind off any stitches in this row, like you’ll do on other wrong-side rows in this portion of the pattern. Hope this helps!
All the best,
Lili
Hello,
I tried needle size US 7 (4.5mm) and am getting 20 stitches across, instead of 18 as indicated in the pattern for gauge. Should I go up a needle size to US 8 to get gauge? I only ask because the label for the Cattail Silk yarn says for US size 2 to 5 needles, and 4 inches = 24 to 30 stitches.
Hi Adriana,
Thanks for reaching out! Yes, that is correct, if you find you have more stitches than needed to obtain the gauge you will want to go up in needle size! The gauge of this pattern is a bit unique since you are using 2 strands of Cattail Silk as opposed to a single strand, so you can disregard the suggested needle size on the Cattail Silk label since those are what we recommend using if you are only knitting with a single strand!
I hope this clears things up, happy knitting!
Gianna
Hi- do you think I can make this using 2 stands of Santolina instead of Cattail Silk?
Thanks!
Danielle
Hi Danielle!
Thank you for your questions! Two strands of Santolina would be too thick for this pattern, however just one strand of Santolina would be perfect! We always recommend double checking gauge, especially when substituting yarns, however Santolina and Cattail Silk have a very close gauge so you shouldn’t need to make too many adjustments.
I hope this helps!
Happy knitting,
Margaret
oh thanks…..I guess I don’t understand gauge! they both say fingering and Cattail says 6.0 to 7.5 sts = 1 inch and Santolina says 6.5 to 7.0 sts = 1 inch….so if cattail is held double I’m confused why Santolina couldn’t be! What weight would Santolina knit up to held double?
Thanks and sorry for my ignorance!
Hi Danielle,
We’re so sorry for the incorrect information in our previous reply! Since this design uses a fingering weight yarn held double, two strands of Santolina would be perfect! Just be sure to do a gauge swatch to double check. You may need to size up or down your needles in order to get the correct gauge!
All the best,
Lili
Hello…I have two questions regarding the Sayer Pattern.
1. for the sloped bind off, my size requires binding off 9 stitches total…would I bind off 6 stitches normally on the first round then three sloped on the second round?
2. I’d like to do both sides crew neck. Can I just knit the crew neck pattern twice? Thank you,
Hi Alison,
Thanks for reaching out! Can you let me know where in the pattern you’re seeing a bind-off of 9 stitches total? Perhaps I’m missing this! If you let me know what size you’re making, that would be super helpful as well. In general though, you would work the normal number of bind-off stitches on the first row. Then, on the next right side row, you would slip the first two stitches and bind off one of them. After that, you would work one fewer bind-off stitch than the pattern states, since you already worked the first one with the slipped stitches!
And in answer to your second question, yes, it would definitely work to knit the crew neck side twice. Hope this helps, and I’ll keep an eye out for your reply to the first question!
All the best,
Lili
Hi Lili,
Thank you for getting back to me. I’m on page two, “Shape Armholes” section – Crew neck side. size is 47. …directions are to bind off 9 stitches at the beginning of the next two rows. I just don’t understand the sloped bind off. I’ve watched the video over and over, but I can’t wrap my mind around it. Thanks for your time and patience.
Ally
Hi Ally,
Thanks for letting me know! You actually will not need to use a sloped bind-off at this point in the pattern. That’s because you’re binding off 9 stitches on each side, not next to each other! You’ll begin by binding off 9 stitches on the first one of these two rows, which is a right side row. Once you finish knitting across that row, you’ll be on the other side of the knitting. Then, you’ll turn your work to begin the second row, which is a wrong side row, and you’ll bind off 9 stitches there. This creates the bottoms of the armholes–one on each side!
All the best,
Lili
Thank you Lili!
I so appreciate your help!
Ally
I’d like to begin this in the round and then I read in previous comments that I should “subtract two stitches from each the front and back cast on and from the armhole cast offs …but otherwise it should be smooth sailing!”
My question is about side decreases- how should I adapt them to shape the sides in the round?
Thanks!
Hi Chantal,
I would recommend placing a stitch marker halfway through your live stitches to mark the other side. Then, you can simply work the decreases as the pattern indicates before and after each marker (the end-of-round marker and the new marker) for the side shaping!
All the best,
Lili
Hi! I have a lot of skeins of Buttercup cotton leftover from something else. Would that yarn work for this pattern?
Hi Sophie,
Buttercup Cotton should work for this pattern. Since you already have it on hand though, I’d just recommend knitting up a gauge swatch to see if you can achieve the gauge and if you like the texture of the knit fabric!
All the best,
Lili
Hello! I am hoping to knit this tank and it looks like the smallest pattern size is too small for my measurements by about two inches both in bust and length. I was wondering if the designer had made any additional sizes post publication. If not, I was looking to see if there were any suggestions for how to calculate the percentage to decrease the pattern for a size 28 bust and proportional length.
Thank you!!
*I posted this question a few days ago and did not see it in the thread, if the question was already received feel free to delete this!*
Hi Rachael,
Thanks for writing in! I’m afraid that there aren’t any additional sizes, but you could modify the gauge to make a smaller version. I’d recommend aiming for about 19.5 stitches in 4 inches to make garment with a 33- to 34-inch finished chest circumference. That will fit you with 5-6 inches of positive ease!
All the best,
Lili