Twisted Rib Hat + Mittens In Cashmere Merino Bloom
A twisted rib offers structure and definition, but its tidy braid-like ridges also lend a thoughtful beauty, and when teamed with our Cashmere Merino Bloom, an elegance, too.
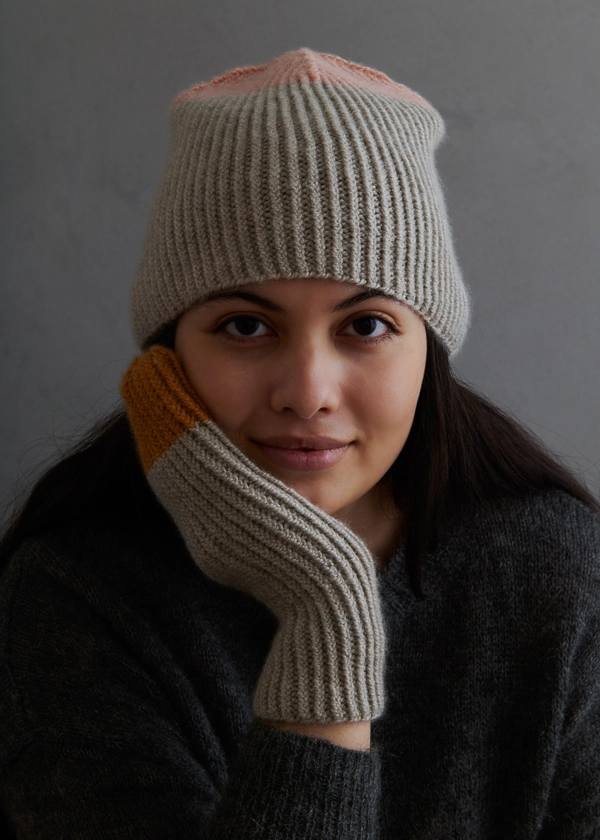
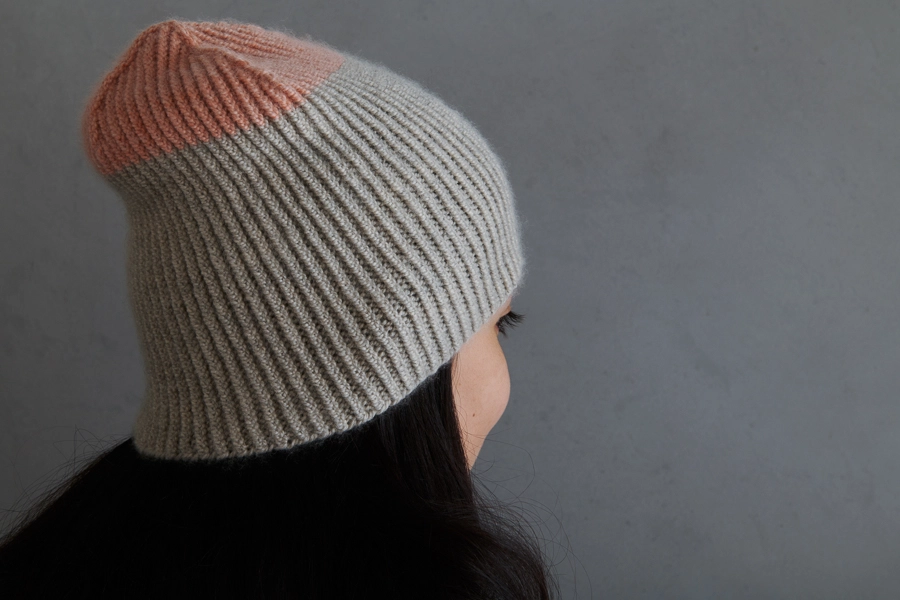
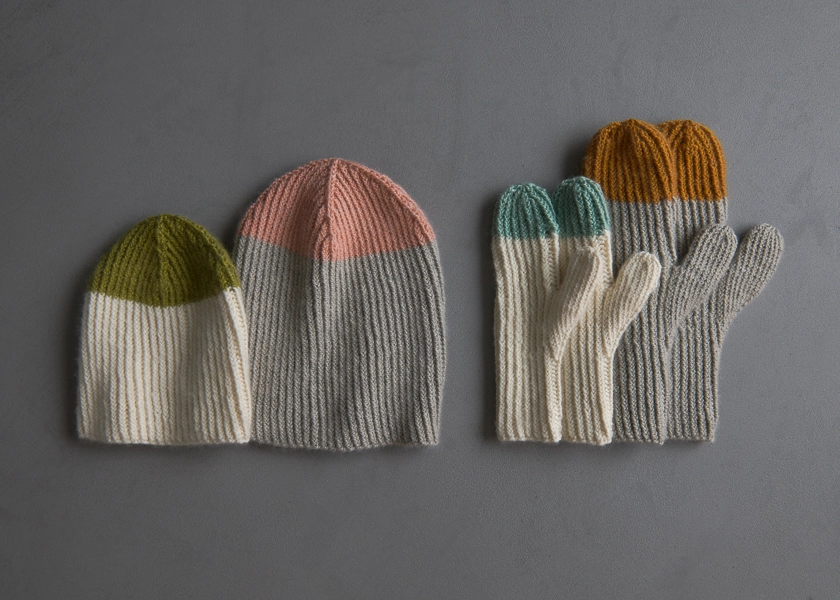
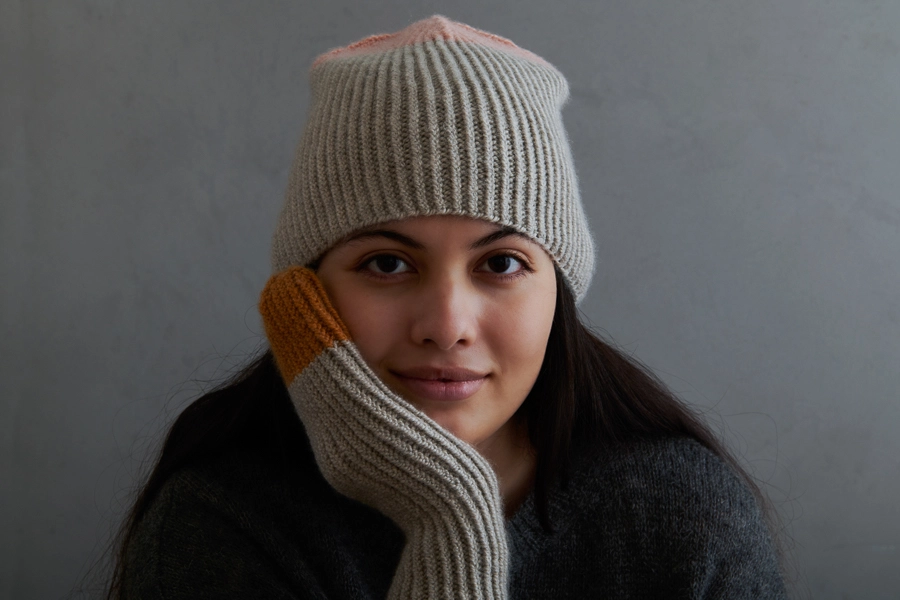
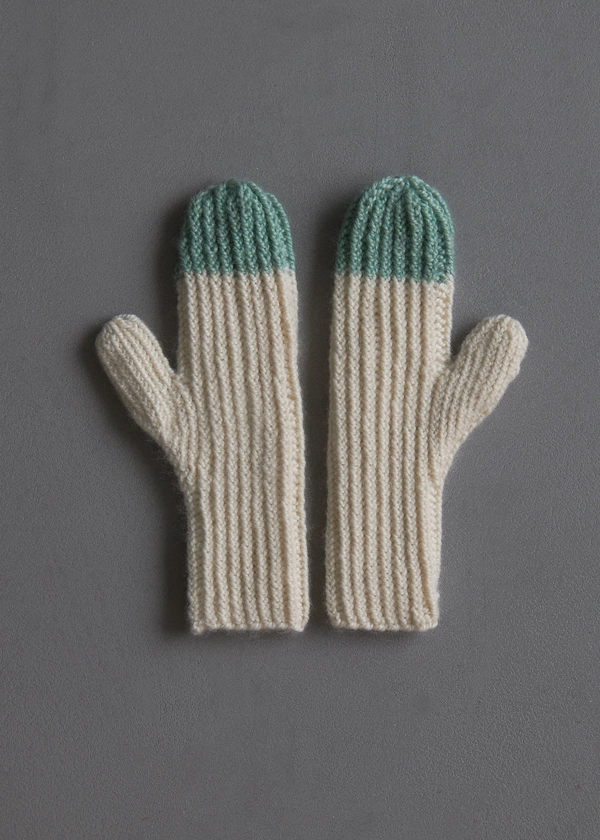
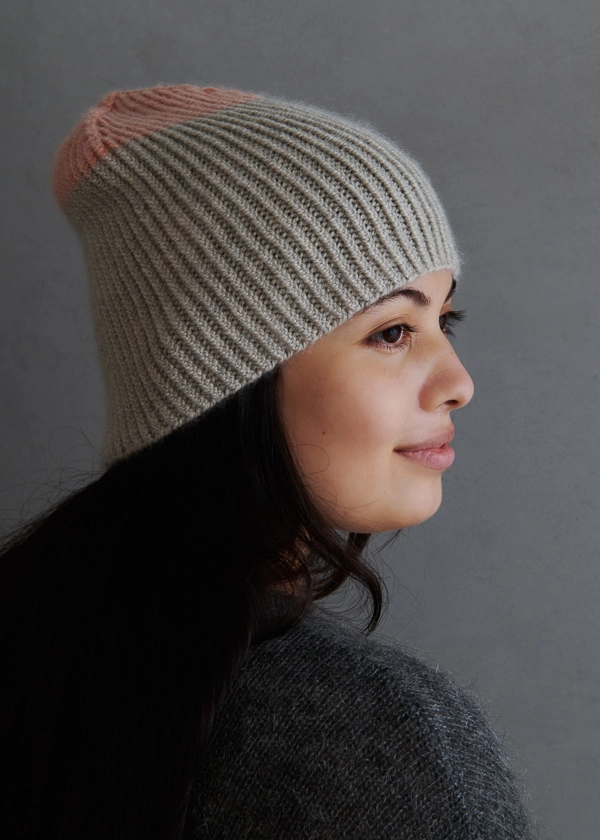
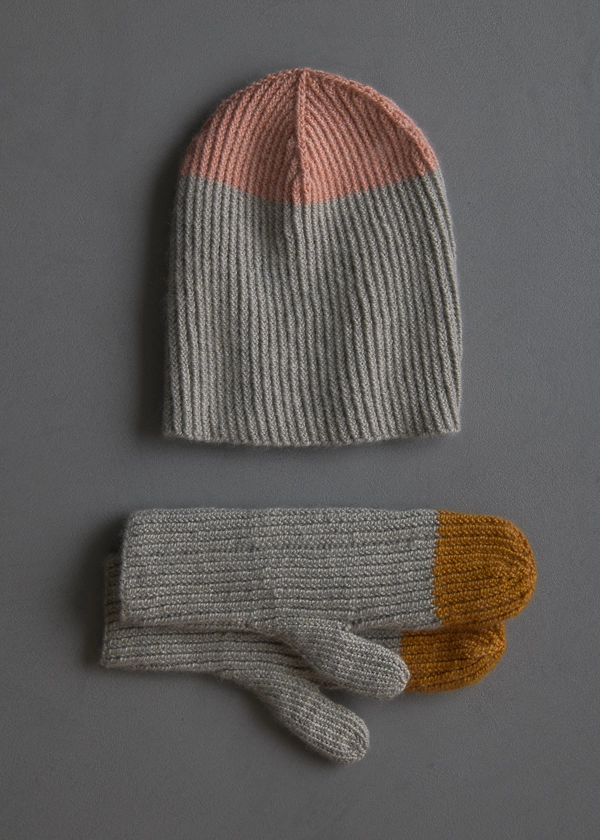
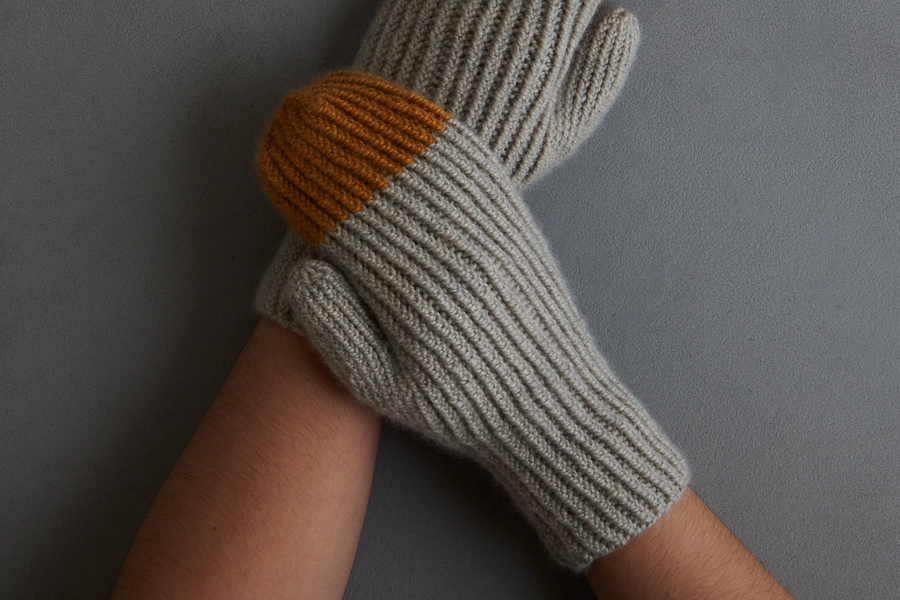
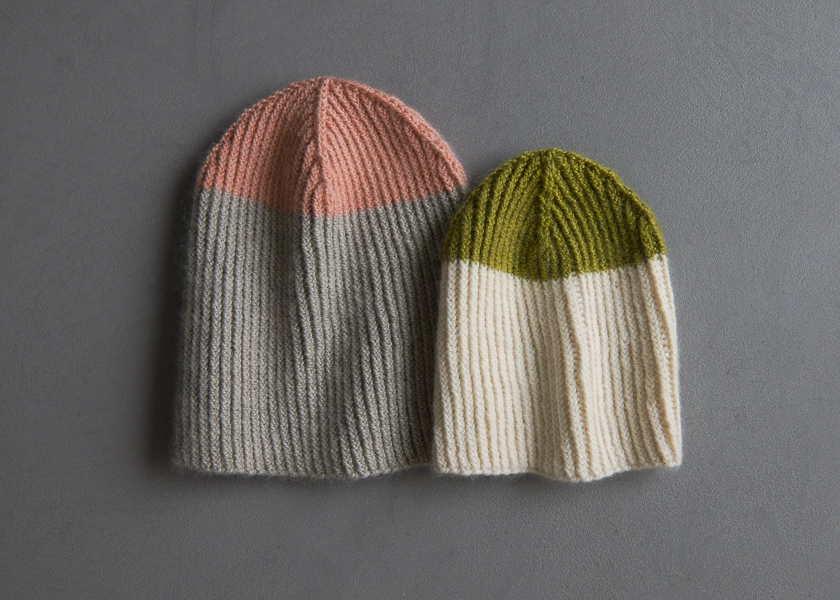
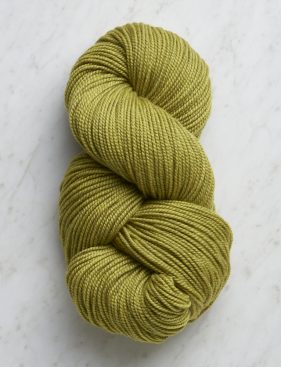
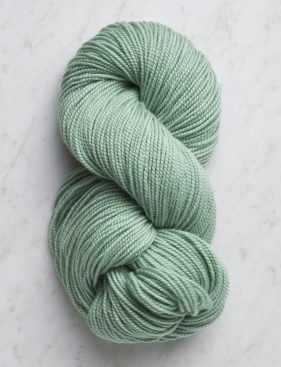
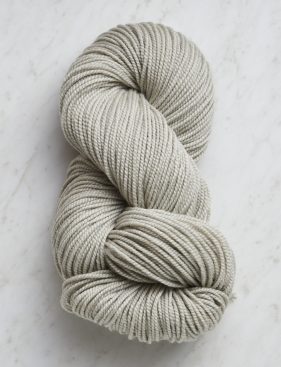
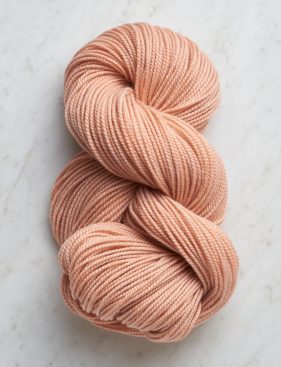
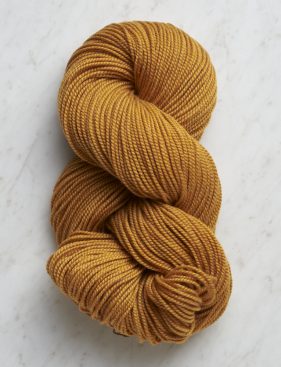
Twisted Rib Hat + Mittens are timeless knits, but the colors we used are brand new to the world! We have just added nine gorgeous colors to our Cashmere Merino Bloom palette, and four of them are represented right here on the tips and crowns of these knits: sweet Conch Shell, briny Golden Green, rich Warm Honey, and mint-condition Vintage Jade.
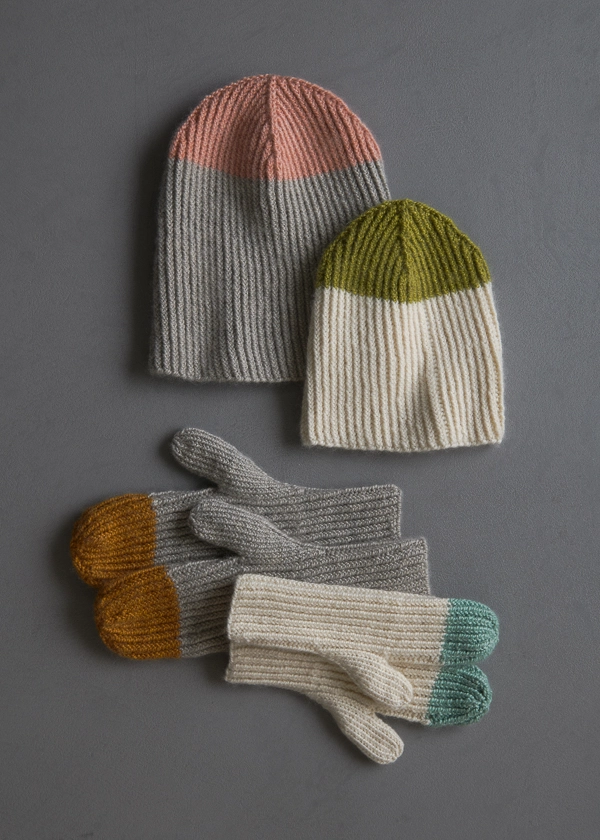
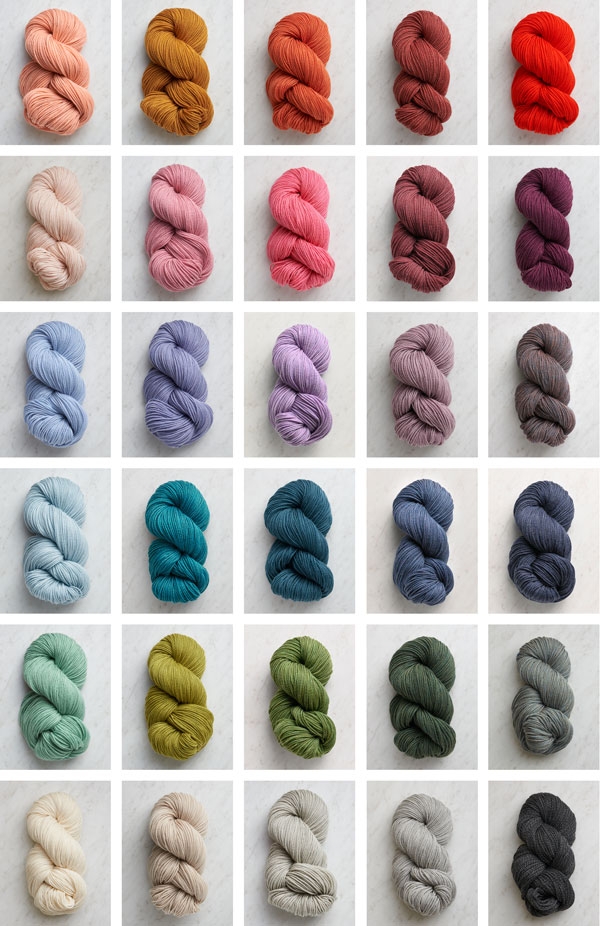
Explore all 31 colors of our supremely soft and cozy Cashmere Merino Bloom, and cast on for this free pattern, sized for pretty much everyone!
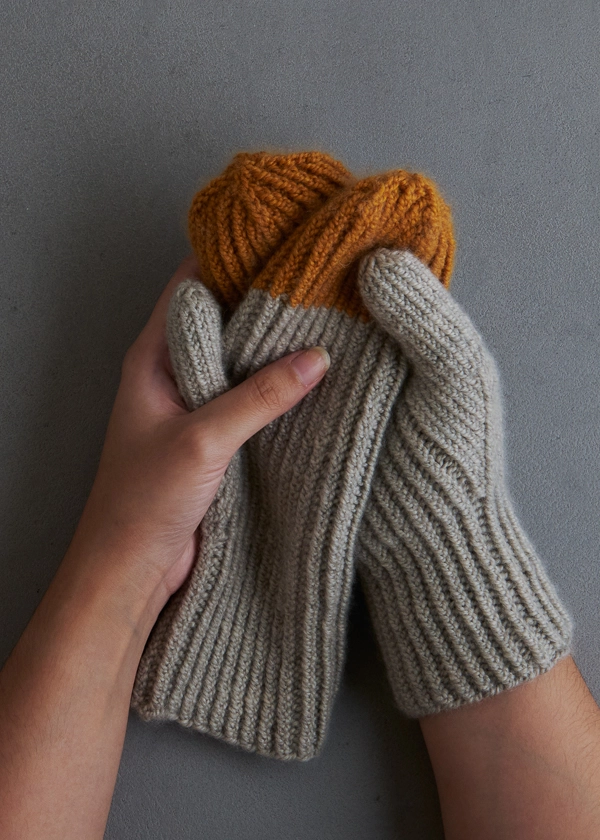
Designed by Purl Soho designer, Laura Ferguson.
Share your progress + connect with the community by tagging your pics with #PurlSoho, #PurlSohoBusyHands, #PurlSohoTwistedRibHatAndMittens, and #PurlSohoCashmereMerinoBloom. We can’t wait to see what you make!
Materials
Hat
- Main Color (MC): 1 skein of Purl Soho’s Cashmere Merino Bloom, 75% extra fine merino and 25% cashmere. Each skein is 218 yards/ 100 grams; approximately 89 (117, 144, 175) total yards required.
- Contrast Color (CC): 1 skein of Cashmere Merino Bloom; approximately 34 (45, 48, 58) total yards required
- US 6 (4 mm), 16-inch circular needles
- A set of US 6 double pointed needles
- Stitch markers, including four removable
Mittens
- Main Color (MC): 1 (1, 2) skein(s) of Purl Soho’s Cashmere Merino Bloom, 75% extra fine merino and 25% cashmere. Each skein is 218 yards/ 100 grams; approximately 93 (165, 250) total yards required.
- Contrast Color (CC): 1 skein of Cashmere Merino Bloom; approximately 10 (30, 44) total yards required
- A set of US 5 (3.75 mm) double pointed needles
- A set of US 6 (4 mm) double pointed needles
- Stitch markers, including one unique and four removable
NOTE: To make both the hat and mittens, you will need…
- MC: 1 (1, 2, 2) skein(s) of Cashmere Merino Bloom; approximately 183 (211, 310, 430) yards required
- CC: 1 (1, 1, 1) skein of Cashmere Merino Bloom; approximately 45 (55, 76, 102) yards required
GAUGE
29 stitches and 28 rounds = 4 inches in Twisted Rib, using larger needles
SIZES
Hat
Baby/Toddler (Kid, Adult Small, Adult Large)
- Finished Circumference: 13¼ (15½, 17¾, 20) inches unstretched, comfortably stretching to 15½ (18¼, 21, 23) inches
- Finished Height: 7¾ (8¾, 10, 11) inches, with instructions to modify
Mittens
Toddler/Kid (Adult Small, Adult Large)
- Finished Circumference at Palm: 4½ (6½, 8½) inches, comfortably stretching to 5½ (7¾, 9) inches
- Finished Length from Cuff to Tip: 8¾ (10½, 12¼) inches, with instructions to modify
We knit the sizes and colors below…
- Kid Size
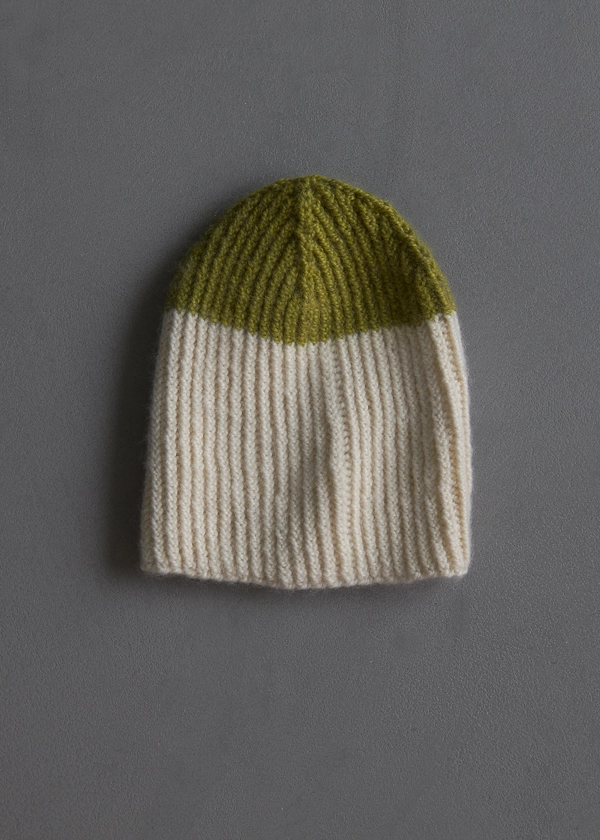
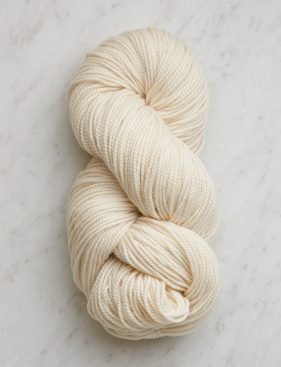
- Hat: MC is Heirloom White; CC is Golden Green
- Mittens: MC is Heirloom White; CC is Vintage Jade
- Adult Small Size
- Hat: MC is Reed Gray; CC is Conch Shell
- Mittens: MC is Reed Gray; CC is Warm Honey
NOTES
S2kp (slip 2, k1, psso): Slip 2 stitches together knitwise, k1, pass slipped stitches over knit stitch and off right needle. [2 stitches decreased]
Ssk (slip, slip knit): Slip two stitches together purlwise, insert left needle into front of both slipped stitches, k2tog. [1 stitch decreased] NOTE: Typically for an ssk we slip the first stitch knitwise and the second purlwise. For this pattern, however, we slip both stitches purlwise so that the top stitch is twisted, blending beautifully with the Twisted Rib fabric.
PATTERN
HAT
CAST ON + WORK IN TWISTED RIB
With MC, cast 96 (112, 128, 144) stitches onto circular needles. We used a basic Long Tail Cast On.
Place marker and join for working in the round, being careful not to twist the stitches.
Round 1: *K1 through the back loop (tbl), p1, repeat from * to end of round.
Repeat Round 1 until piece measures 4¾ (5½, 6½, 6¾) inches from cast-on edge.
Cut MC.
Join CC.
Repeat Round 1 for ½ inch or until piece measures 2½ (2¾, 3, 3¾) inches less than desired finished height.
SHAPE CROWN
Set-Up Round: [K1 tbl, p1] 6 (7, 8, 9) times, k1 tbl, place removable stitch marker on just-worked stitch, [(p1, k1 tbl) 12 (14, 16, 18) times, place marker on just-worked stitch] 3 times, p1, *k1 tbl, p1, repeat from * to end of round.
Round 1: [*K1 tbl, p1, repeat from * to two stitches before next marked stitch, k1 tbl, remove marker, s2kp (see Notes), place marker on just-worked stitch] 4 times, **k1 tbl, p1, repeat from ** to end of round. [8 stitches decreased]
Round 2: [*K1tbl, p1, repeat from * to 1 stitch before next marked stitch, k1 tbl, remove marker, k1 tbl, place marker on just-worked stitch] 4 times, **k1 tbl, p1, repeat from ** to end of round.
Round 3: *K1 tbl, p1, repeat from * to 1 stitch before next marked stitch, remove marker, s2kp, place marker on just-worked stitch, [**p1, k1 tbl, repeat from ** to 2 stitches before next marked stitch, p1, remove marker, s2kp, place marker on just-worked stitch] 3 times, p1, ***k1 tbl, p1, repeat from *** to end of round. [8 stitches decreased]
Round 4: *K1 tbl, p1, repeat from * to end of round, moving the markers up one round as you come to them.
Repeat Rounds 1-4 two (2, 2, 3) more times. [48 (64, 80, 80) stitches remain]
Repeat Rounds 1 and 3 (omitting Round 2) 2 (3, 4, 4) more times. [16 stitches remain]
Next Round: [K1 tbl, s2kp] 4 times, removing removable stitch markers as you come to them. [8 stitches remain]
Cut yarn and thread tail onto tapestry needle. Draw the needle through the remaining stitches, pull taut, and bring the tail to the inside of the hat.
FINISHING
Weave in the ends and gently wet block.
MITTENS
CAST ON + WORK IN TWISTED RIB
With smaller double pointed needles and MC, cast on 32 (48, 64) stitches and distribute them over 3 needles. We used a basic Long Tail Cast On.
Place unique marker for end of round and join for working in the round, being careful not to twist the stitches.
Round 1: *K1 through the back loop (tbl), p1, repeat from * to end of round.
Repeat Round 1 until piece measures 2 ½ (3, 3 ½) inches from cast-on edge or to desired length to bottom of Gusset.
SHAPE THUMB GUSSET
Change to larger double pointed needles.
Set-Up Round: K1 tbl, make 1 left (m1L), place marker (pm), p1, *k1 tbl, p1, repeat from * to end of round, pm, make 1 right (m1R). [34 (50, 66) stitches]
Round 1: Knit each stitch tbl to next marker, slip marker (sm), p1, *k1 tbl, p1, repeat from * to next marker, sm, knit each stitch tbl to end of round.
Increase Round: K1 tbl, m1L, knit each stitch tbl to next marker, sm, p1, *k1 tbl, p1, repeat from * to next marker, sm, knit each stitch tbl to end of round, m1R. [2 stitches increased]
Continuing in pattern as established, repeat Increase Round every other round 5 (6, 7) more times. [46 (64, 82) stitches]
Next Round: Repeat Round 1.
Next Round: Remove end-of-round marker, k7 (8, 9) tbl, place previous 13 (15, 17) stitches onto stitch holder or scrap yarn, k1 tbl, remove marker, p1, *k1 tbl, p1, repeat from * to next marker, remove marker and replace with end-of-round marker. NOTE: The 1 unworked stitch from this round becomes the first stitch of the next round. [33 (49, 65) stitches remain]
Next Round: Joining the two ends of the Gusset together, slip slip knit (ssk, see Notes), then p1, *k1 tbl, p1, repeat from * to end of round. [32 (48, 64) stitches remain]
WORK PALM
Round 1: *K1 tbl, p1, repeat from * to end of round.
Repeat Round 1 until piece measures 2 (2½, 3) inches from the end of the Gusset.
Cut MC.
Join CC and continue to repeat Round 1 until piece measures 3½ (4¼, 4¾) inches from the end of the Gusset or until approximately ½ (¾, 1¼) inches from desired finished length.
SHAPE TOP
Set-Up Round: [K1 tbl, p1] 2 (3, 4) times, k1 tbl, place removable stitch marker on just-worked stitch, [(p1, k1 tbl) 4 (6, 8) times, place marker on just-worked stitch] 3 times, p1, *k1 tbl, p1, repeat from * to end of round.
Decrease Round 1: [*K1 tbl, p1, repeat from * to 2 stitches before next marked stitch, k1 tbl, remove marker, s2kp, place marker on just-worked stitch] 4 times, **k1 tbl, p1, repeat from ** to end of round. [8 stitches decreased]
Decrease Round 2: *K1 tbl, p1, repeat from * to 1 stitch before next marked stitch, remove marker, s2kp, place marker on just-worked stitch, [**p1, k1 tbl, repeat from ** to 2 stitches before next marked stitch, p1, remove marker, s2kp, place marker on just-worked stitch] 3 times, p1, ***k1 tbl, p1, repeat from *** to end of round. [8 stitches decreased]
Repeat Decrease Rounds 1 and 2 zero (1, 2) more time(s). [16 stitches remain]
Next Round: [K1 tbl, s2kp] 4 times, removing removable stitch markers as you come to them. [8 stitches remain]
Cut yarn and thread tail onto tapestry needle. Draw the needle through the remaining stitches, pull taut, and bring the tail to the inside of mitten.
WORK THUMB
Slip the 13 (15, 17) on-hold Gusset stitches onto 3 larger double pointed needles.
Holding the Mitten so that the Thumb is on the left, join MC to the front needle.
Knit each of the 13 (15, 17) stitches tbl, and before joining in the round, pick up 1 stitch from the base of the Thumb. [14 (16, 18) stitches]
Place marker and join for working in the round.
Round 1: Knit each stitch tbl.
Repeat Round 1 until piece measures 1¾ (2, 2¼) inches from the base of the Thumb or until approximately the desired finished length.
Next Round: [Ssk] 7 (8, 9) times. [7 (8, 9) stitches remain]
Cut yarn and thread tail onto tapestry needle. Draw the needle through the remaining stitches, pull taut, and bring the tail to the inside of the Thumb.
FINISHING
Weave in the ends and make another identical Mitten. Gently wet block both Mittens.






How is the hand size determined, for yardage? A beautiful pattern!
Hi Ashley,
Thanks for reaching out! You can find our sizing measurements listed just below the GAUGE section on the project page, and the corresponding yardage requirements under MATERIALS; I’ve also included them below:
MATERIALS:
Main Color (MC): 1 (1, 2) skein(s) of Purl Soho’s Cashmere Merino Bloom, 75% extra fine merino and 25% cashmere. Each skein is 218 yards/ 100 grams; approximately 93 (165, 250) total yards required.
Contrast Color (CC): 1 skein of Cashmere Merino Bloom; approximately 10 (30, 44) total yards required
SIZES:
Toddler/Kid (Adult Small, Adult Large)
Finished Circumference at Palm: 4½ (6½, 8½) inches, comfortably stretching to 5½ (7¾, 9) inches
Finished Length from Cuff to Tip: 8¾ (10½, 12¼) inches, with instructions to modify
If you need additional assistance, you can reach out to us at customerservice@purlsoho.com!
Warmly,
Kelsey
I want to make these mittens for my two nieces, both under 5 years old. I was trying to find a comparable yarn to make that would withstand their rowdy nature a little longer. Would Morning be a good option? Or flax down?
Hi Jasmine,
Thanks for writing in! I think Morning would be a great substitution for this pattern! It is a bit more durable since it has cotton in it, and it is also machine washable making it very easy to care for! Even though Morning is a light worsted/dk weight like Cashmere Merino Bloom, I always suggest starting off by working a gauge swatch prior to beginning to ensure you are consistent with the pattern!
Happy knitting!
Gianna
I’m relatively new to knitting. I’d like to knit this hat but as I read through the pattern, I’m a little unclear on something that appears a few times. In the setup round, I understand that depending on the size of the hat you’re knitting the number of repeats of a stitch or series of stitches appears in parenthesis. But when I read place stitch marker on just worked stitch and p1, k1 tbl (18 times), place marker on stitch — ALL 18 stitches? and then does the 3 times, p1 = purl1-3 times? I’m asking because the 3 times is followed by a comma and comes before the p1 and doesn’t follow the format in the other steps that came before.
–[ I’m knitting the largest size hat]
Set-Up Round: [K1 tbl, p1] 6 (7, 8, 9) times, k1 tbl, place removable stitch marker on just-worked stitch, [(p1, k1 tbl) 12 (14, 16, 18) times, place marker on just-worked stitch] 3 times, p1, *k1 tbl, p1, repeat from * to end of round.
Thank you,
Lina
Hi Lina,
I’d be happy to help clarify the pattern directions for you! The instruction to “place removable stitch marker on just-worked stitch” means exactly that – you’re going to want to place a removable stitch marker (like a bulb pin or you could even use a small piece of scrap yarn!) through the stitch that you just worked (in this case, it will be the k1tbl) to mark it. This is different because often stitch markers are placed on the needle between stitches, whereas here you will be placing the marker through the actual stitch itself.
The “3 times” you’re noticing is referring to all the instruction that lies between the brackets preceeding the “3 times”. So, in the set-up round you listed, that will mean you will repeat the [(p1, k1 tbl) 12 (14, 16, 18) times, place marker on just-worked stitch] section three times before moving on to the “p1, *k1 tbl, p1, repeat from * to end of round”. Written out for the largest size, that will mean you will work (p1, k1 tbl) 18 times, place a marker on just worked stitch, (p1, k1 tbl) 18 times, place a marker on just worked stitch, (p1, k1 tbl) 18 times, place a marker on just worked stitch, then continue on through the rest of the round’s instructions.
I hope this helps, but please feel free to reach out to us at customerservice@purlsoho.com if you need additional assistance!
Warmly,
Kelsey
HI Kelsey,
Thanks for the clarification it was very helpful.
One further question, is the setup round correct, i.e., the number of stitches 9 vs. 18? It seems there are 4 quadrants as it begins to decrease, are they not equal in size?
Thanks for your help.
Hi Lina,
The reason that you’re seeing to repeat both 9 and 18 times here is because you’re actually beginning the round in the center of a quadrant! They will all be equal in size (36 stitches each) when you finish this set-up row, and your end-of-round marker will fall exactly in the center of one. Hope this helps clarify things!
All the best,
Lili
About 3 years ago I knitted a pair of mittens using your pattern with a “lifeline “ along the palm of the hand. I thought this was the same pattern but the fit is entirely different.
I cannot recall the name of the pattern but I think it was shown in yellow. I must start knitting a new pair for myself soon . Winter is arriving in SD Soon!
Hi Margaret,
Thanks for reaching out! I’m almost certain that you’re looking for the Arched Gusset Mittens. I love this design–I actually just knit a pair for myself!
All the best,
Lili
Hello,
A question about the hat – to begin it says knit 1 tbl and purl 1. Is the purl also tbl? I am confused because in the title it says “work in twisted rib and I thought a twisted rib is both K and P tbl. I am knitting two pairs of hats and mittens for my kids. Thanks!
Hi Ana,
Thanks for reaching out. The purl is actually not tbl in this case! The reason that these designs don’t twist the purl stitches is to give the fabric a bit more stretch. And because they’re knit in the round, the stitch pattern will still look exactly like twisted rib, since all the knit stitches on the right side are twisted! Hope this clears things up.
All the best,
Lili
Hello again. I am working on the mittens and am not sure what to do here under shape thumb gusset:
“ Continuing in pattern as established, repeat Increase Round every other round 5 (6, 7) more times. [46 (64, 82) stitches] ”
So every other round should be the increase round, I get that. But what is the other round? Is it Round 1 or just knit/purl? Thank you!
Hi Ana,
Thanks for reaching out. The other round is knitting “in pattern,” which just means to knit the knit stitches and purl the purl stitches as you come to them! And in this particular pattern, the knit stitches are all knit through the back loop. Hope this helps!
All the best,
Lili
Hello, currently working on the twisted rib mittens and am confused when it came to the thumb gusset. I did the set up round but got confused since it says to end of round then place marker. So I am M1r after the end of round marker?
Then at the end of round one it says to slip 2nd marker and tbl to end of round, but wasn’t that 2nd marker the end of round marker?
Please help.
Thank you.
Hi Jocelyn,
Thanks for reaching out! You should actually have 3 stitch markers now, the unique marker, and then at the Set-Up Round of the SHAPE THUMB GUSSET section, you will be placing 2 more stitch markers. So after the unique marker, you will K1 tbl, make 1 left (m1L), then place 1st marker (pm), p1, *k1 tbl, p1, repeat from * to end of round, place 2nd marker (pm), make 1 right (m1R). 3 markers total.
I hope this helps clear things up!
Gianna
I am having troubles here too. When you get to the end of the round, there is the unique marker but then you say pm. So you want two markers right next to each other? So I have not been placing another marker after the one already at the end of the round.
Something keeps going wrong, and I have wasted so much time unraveling and trying over and over. This doesn’t usually happen to me. I am stuck.
Maybe it has to do with when to slip the marker at the end of the round? Pattern doesn’t say, so I do what is the normal action, and I slip the marker as soon as I get to it so that is why I wrote that it doesn’t make sense to have two markers next to each other.
Do you pm and m1R and then slip the unique marker that is at the end of the round?
Hi Lori,
Thanks for your response! When you work the set-up round of the SHAPE THUMB GUSSET, you will start the row right after the unique marker, after you slip that from your left to your right needle, you will K1 tbl, make 1 left (m1L), place marker (pm), so you should have 2 stitches in between your unique marker and then the marker you place. From there you will work the round till you reach the end of round (the unique marker) then you will place another marker (pm), and make 1 right (m1R), then you will slip the unique stitch marker, leaving one stitch between the new marker and the unique round. So you should have 3 markers total, and none of them should be directly next to each other.
I hope this helps clear things up!
Gianna
Thanks Gianna! I am sure that this is what has been missing. Just that small detail of pm BEFORE you slip the unique marker at the end of the round.
Another question on the gusset. Should I have the same number of stitches on either side of the unique marker? I have a few more stitches after the unique marker right now, and I have almost completed this portion of the pattern. I thought this might not make sense because there are no instructions for a left vs right mitten. Thank you for the help.
I answered my own question about number of stitches on each side of unique marker, I know they should be even, so I unravelled some.
I am having difficulty with the gusset . I knit the set up row, and the next row without issue, but the increase row seems backwards to me, because knitting the stitches between the markers goes beyond the end of the row? Please advise.
Hi Lori,
Thanks for reaching out! I am happy to help figure this out, I just need a little bit more information! What size are you making?
Looking forward to your response!
Gianna
Hi Purl!
What would be the change in DPN size if I am using SANTOLINA for my yarn?
Thanks!
Tali
Hi Tali,
Thanks for reaching out! That is an excellent question! Since Santolina is a fingering weight yarn and Cashmere Merino Bloom is a light worsted/dk weight yarn, you will want to go down in needle size quite a bit, I would recommend using a US 3 needle. However, I would suggest working a gauge swatch prior to beginning to ensure you like how the stitch pattern looks, or if you will want to adjust the needle size further!
I hope this helps, happy knitting!
Gianna
Thanks! Thats so great.
Would you also able able to tell me what the cast on number would be for that skein?
Hi Tali,
Thanks for your response! The best way to determine your cast on amount is to work up a swatch and count your stitches per inch, from there you can calculate your cast on amount! For more information about gauge, I would suggest checking out our tutorial All About Guage, it is an excellent resource to use!
Warmly,
Gianna
Do you know what size of the hat is featured in the photos associated with this pattern? Is it an Adult Small or Adult Large
Hi Grace,
Thanks for writing in! The hat that the model is wearing (Reed Gray and Conch Shell) is the Adult Small size, and the other hat that is just in the flat shots (Heirloom White and Golden Green) is the Kids size, you can find this information in the SIZES section of the pattern!
I hope this helps!
Gianna
Hello – I am hoping to use the Magic Loop method for the hat. Can you confirm this will work?
Thanks so much – Love your patterns 🙂
Amy
Hi Amy,
Thank you for writing in! You can definitely use the Magic Loop method for this hat if you prefer, though you should be just fine knitting this hat in the round on 16″ circular needles, too!
All the best,
Margaret
In the mitten pattern, should the s2kp knit stitch be knit through the back loop like the rest of the pattern or is it just a standard knit stitch? Thank you for your assistance!
Hi Stacey,
Thanks for reaching out! The knit stitch in the s2kp is a normal knit stitch, not a twisted knit stitch. It’ll actually be completely hidden once you pass the slipped stitches over it, so it won’t disrupt the pattern at all!
All the best,
Lili
Okay, perfect. Thank you!
Hello! I am curious as to why this pattern requires a marginally larger set of DPNs for the gusset and palm. Do you think it would be fine if I knit the whole mitten with 3.75mm DPNs?
Hi Olivia,
Thanks for writing in! The reason we designed these mittens to use a smaller size needle for the cuff is so that the cuff fits more snug around your wrist. That way, the mittens stay more secure, since the circumference around your wrist is generally smaller than the circumference of your palm. You can certainly knit the mittens all with one size needle, but keep in mind that the wrist won’t fit as tightly as intended. Hope this helps clarify things!
All the best,
Lili
Hello! I am planning to make the twisted rib hat. I have a question about yarn substitution. I was planning to use the Cashmere Merino Bloom, but just noticed the Anzula Cricket. I am making for a friend who is a bit sensitive to wool and the itch factor. Can you recommend one over the other here in terms of one being slightly better in this regard? And can you also tell me about the stretch factor of this hat. Many thanks!
Hi Linda,
Thanks for reaching out! Both Cashmere Merino Bloom and Cricket are blends of merino wool and cashmere, so they’re just about the same in terms of softness. Both cashmere and merino fibers are so fine that they bend to the touch, rather than sticking up and scratching. Most people who are sensitive to normal wool do not have the same reaction to merino wool or cashmere. I hope this background information is useful!
In answer to your question about the stretch of the hat, it comfortably stretches about 3 or 4 inches past the finished circumference. We used normal purl stitches (instead of twisted purl stitches) in the pattern, which increases the stretch considerably!
All the best,
Lili
Hi! I was wondering if I could knit the body of the hat longer so that it has a rolled brim (basically, does the inside of the hat look like the outside so that it can be flipped)? Thanks!
Hi Hilary,
That’s a great idea, and it’s totally possible! However, the inside of the hat does look slightly different than the outside. That’s because the stitch we use is essentially “half-twisted rib,” meaning that the knit stitches on each round are twisted, but the purl stitches are not. So when you flip the brim up, the opposite will be true–the knit stitches on the inside are not twisted, while the purl stitches are. But overall, this difference isn’t very noticeable, so I think your idea will look amazing!
All the best,
Lili
I just finished this beautiful hat in Cashmere Merino Bloom. I made the Adult Small, and my circumference unstretched was closer to 20″ (instead of 17 ¾ as the pattern suggests). So my question is how can I adjust the pattern to make something in between the Kid size and Adult Small? Would it be multiples of 2? The decrease section would be the main issue to deal with.
Hi Linda,
Thanks for reaching out, although I’m sorry to hear that your hat came out larger than expected! This likely happened because your gauge was a bit large, so I’d recommend knitting up a gauge swatch before your next project to make sure that’s accurate. You’ll probably need to size down your needles in order to get the correct gauge! If you would like to learn more about this, we have a handy tutorial called All About Gauge. Hope this helps!
All the best,
Lili
Hi,
I am helping a friend knit the hat and I am confused with the “shape crown” section. I saw an answer which explained it well, but now I can’t find it. Can you please help for size med.? Thank You!
Hi Polly,
Thank you for writing in! Could you please let us know the issue you are running into and also if you are making the Baby/Toddler (Kid, Adult Small, or Adult Large)?
All the best,
Gavriella
Hi,
I don’t understand the directions on the first row on the shape row. I am working adult SM.
Thank You!
Hi Polly,
Thank you for following up! For Round 1 you will want to first work *K1 tbl, p1,* repeating to two stitches before the next marked stitch, you will then k1 tbl, remove that marker, work a s2kp. Then you will replace the marker on the just-worked stitch. You will want to repeat this entire instruction for a total of four times. After that, you will work *k1 tbl, p1,* to the end of the round. For a total of 8 stitches decreased.
I hope this helps but you can also check out our Reading a Knitting Pattern tutorial that has a more in-depth look on how to work these symbols under the ASTERISKS, BRACKETS + PARENTHESES section. We’d also be more than happy to review these instructions over one of our free 1-on-1 sessions!
Happy knitting,
Gavriella