
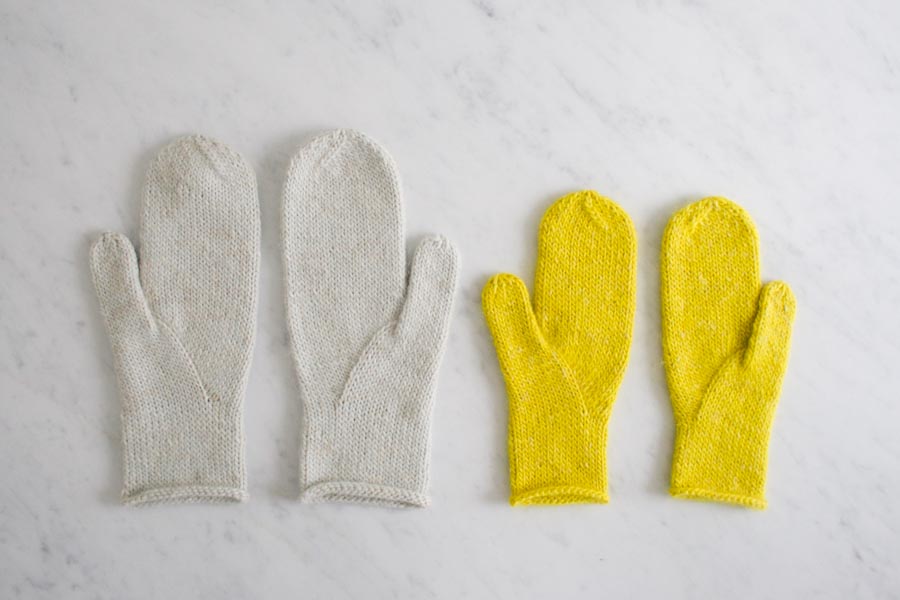
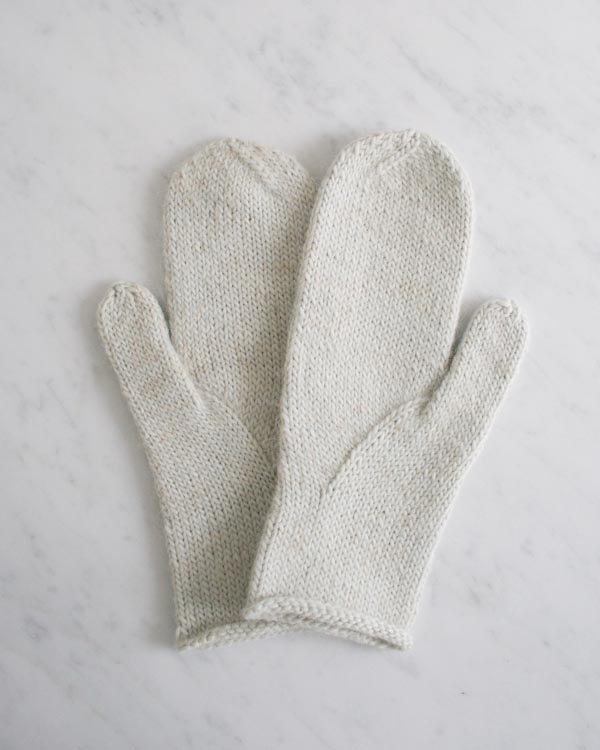
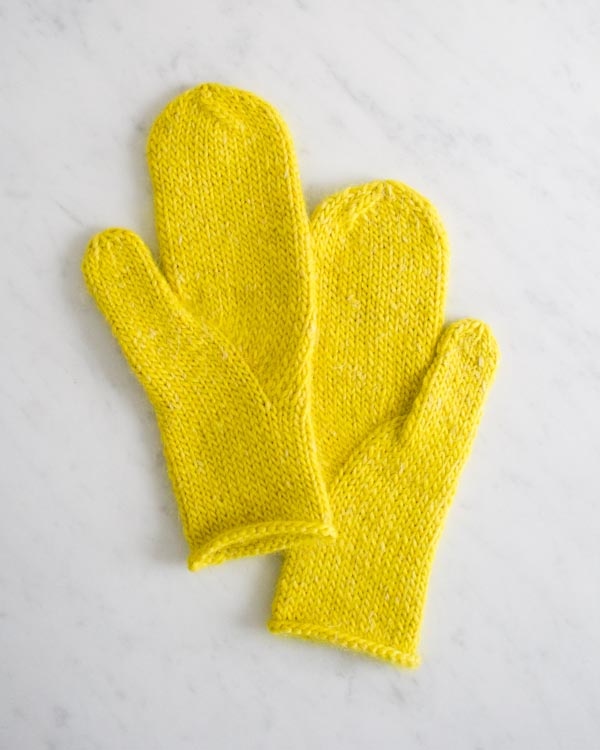
Arched Gusset Mittens
It’s called the “Life Line,” the crease that arcs from the bottom center of the palm, up and around that fleshy mound, to the point between the index finger and thumb. It’s said that this line represents the strength and vitality of one’s life. I’m no palm reader, but there’s one thing I know for certain when it comes to the hands…
You gotta keep those palms, fingers and thumbs comfy and cozy during these interminable winter months, or all those lines, life, vitality and otherwise, will be woefully worse for wear.
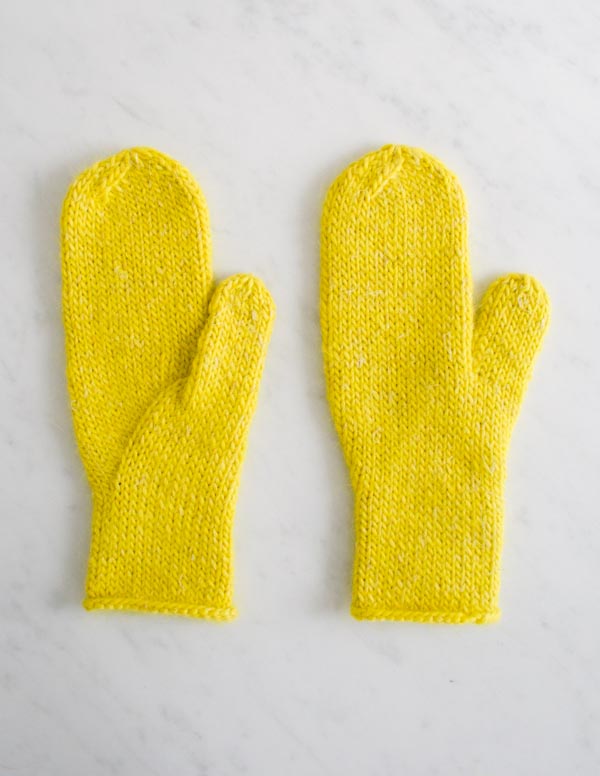
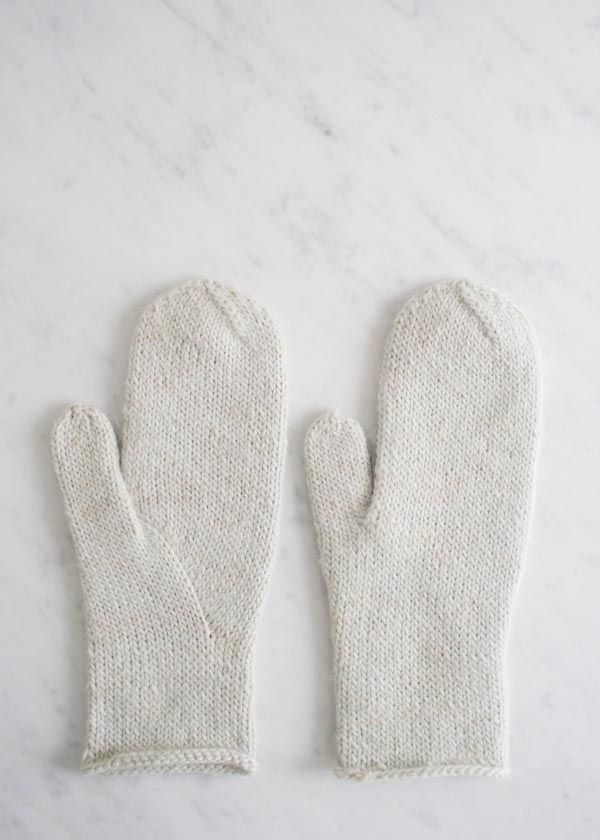
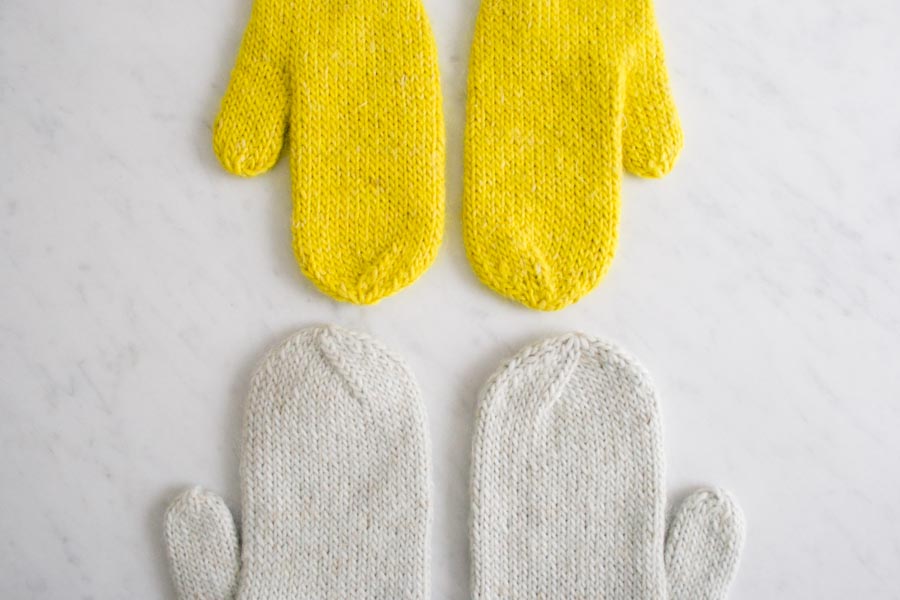
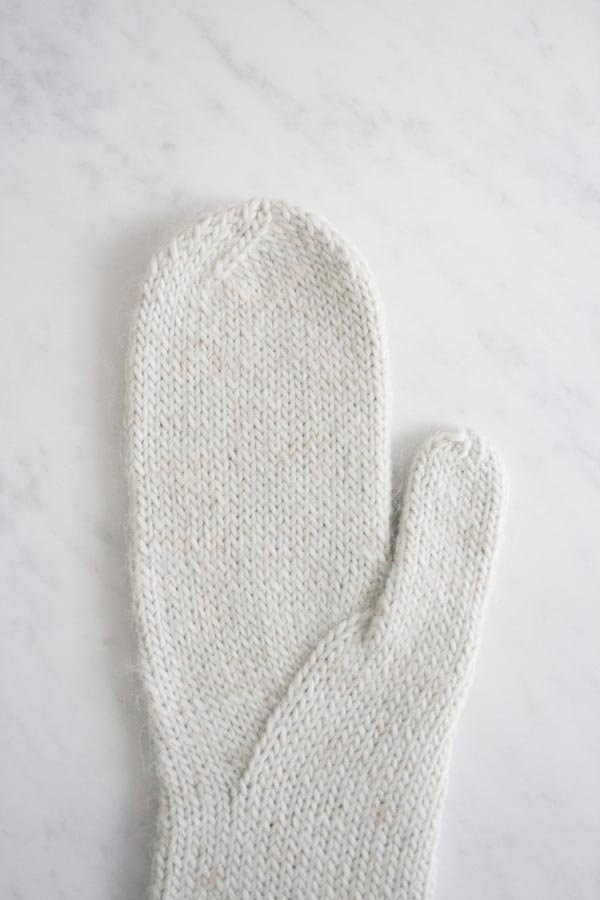
Echoing the natural curves of our hands these Arched Gusset Mittens fit, well… like a glove. They have extra tapering at the pinky-side top and a gusset that literally traces the lines on your hands. Plus, the pattern comes in three widths and includes instructions for modifying lengths. Knit in Purl Soho’s Flax Down, an alpaca, merino and linen blend, these mittens are speckled with nature and incredibly soft to the touch.
Finish out this winter with strength and vitality. Warm-up with a fresh pair of mittens! -Laura
UPDATE: NOW IN KNITTING YARN
SEPTEMBER 2022
Now in Knitting Yarn, it only takes one ball to knit up a pair of Arched Gusset Mittens in any size! Made of 100% merino wool from New Zealand, Knitting Yarn has a pleasant toothiness, squishy feel, and wonderfully even hand. It is also sturdy and affordable and comes in a big, cushy ball so you can cast on ASAP… Mittens for everyone!
Designed by Purl Soho designer, Laura Ferguson.
Share your progress + connect with the community by tagging your pics with #PurlSoho, #PurlSohoBusyHands, #PurlSohoArchedGussetMittens, and #PurlSohoFlaxDown. We can’t wait to see what you make!
Materials
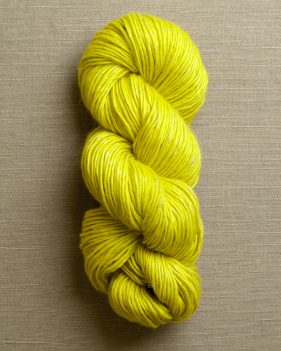
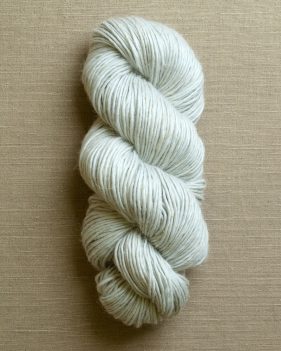
- 1 skein of Purl Soho’s Flax Down, 43% baby alpaca, 20% extra fine merino and 15% linen. Each skein is 219 yards; approximately 85 (180) yards required. For the size Small (Medium) samples, we used the colors Yellow Zest (Artemisia Green). (NOTE: We no longer offer Flax Down, but choose from one of our other light worsted/dk weight yarns.)
- A set of US 4 (3.5 mm) double pointed needles
- Stitch markers, including one of a different color or type
- A stitch holder or scrap yarn
Gauge
22 stitches and 28 rows = 4 inches in stockinette stitch
Sizes
Small (Medium, Large) to fit most Toddlers + Small Kids (Adult Smalls, Adult Larges)
- Finished circumference at palm: 5 ¾ (7 ¼, 8 ¾) inches
- Finished length from cuff to top of mitten: 8 (10, 12) inches, with instructions to modify
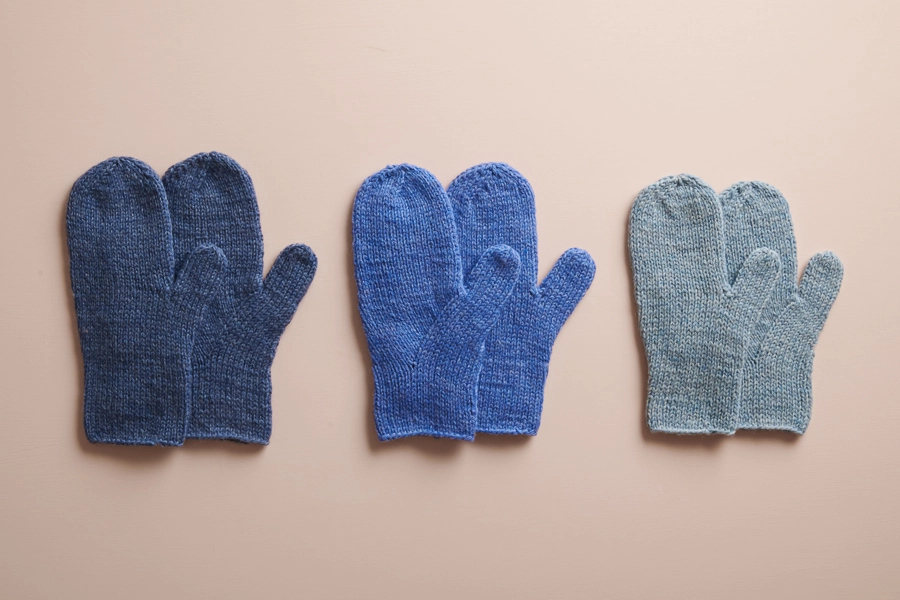
Samples: Size Small and Medium are pictured here.
Pattern
Knit Cuff
Cast on 31 (39, 47) stitches, distributing them onto three double pointed needles. We used a basic Long Tail Cast On.
Place different color marker and join for working in the round, being careful to not twist the stitches.
Work in stockinette stitch, knitting each round, until piece measures 2 (2 ½, 3) inches from cast on edge.
Shape Thumb Gusset
Right Mitten Only
Set-up Round: K15 (17, 19), place marker (pm), knit to end of round.
Round 1: Knit to marker, slip marker, make 1 left (m1L), knit to end of round. [1 stitch increased]
Repeat Round 1 fourteen (16, 18) more times. [46 (56, 66) stitches]
Next Round: K14 (16, 18), place previous 13 (15, 17) stitches on a stitch holder or scrap yarn, k1, remove marker, knit to end of round. [33 (41, 49) stitches]
Next Round: Ssk (joining the first stitch of the Gusset to the last stitch of the Gusset), knit to end of round. [32 (40, 48) stitches]
Left Mitten Only
UPDATE December 6, 2022: We’ve changed the wording of the Set-Up Round to be a bit clearer, right below. Don’t worry, the outcome is still the same!
Set-Up Round: K17 (23, 29), pm, knit to end of round.
Round 1: Knit to marker, make 1 right (m1R), slip marker, knit to end of round. [1 stitch increased]
Repeat Round 1 fourteen (16, 18) more times. [46 (56, 66) stitches]
Next Round: Slip previous 13 (15, 17) stitches onto stitch holder or scrap yarn, knit to marker, slip marker, slip next stitch purlwise onto right needle, remove end-of-round marker, replace slipped stitch back onto left needle, replace remaining marker with end-of-round marker.
Next Round: K2tog (joining the first stitch of the Gusset to the first stitch after the Gusset), knit to end of round. [32 (40, 48) stitches]
Continue Working Palm
Work in stockinette stitch, knitting each round, until piece measures 3 (3 ¾, 4 ½ ) inches from the end of the Thumb Gusset, or until 7/8 (1 1/8, 1 3/8) inches from desired finished length.
Shape Top of Mitten
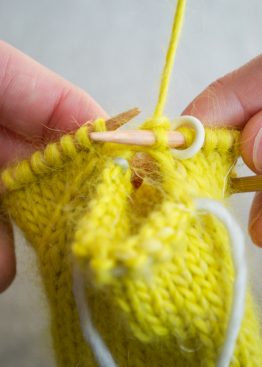
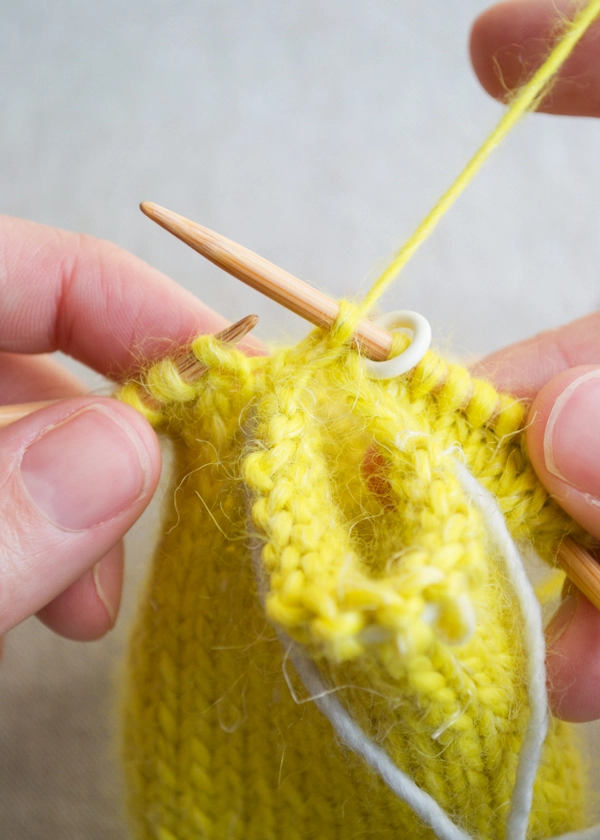
Set-up Round: K12 (15, 18), place marker, k4 (5, 6), place marker, k5 (6, 7), place marker, knit to end of round.

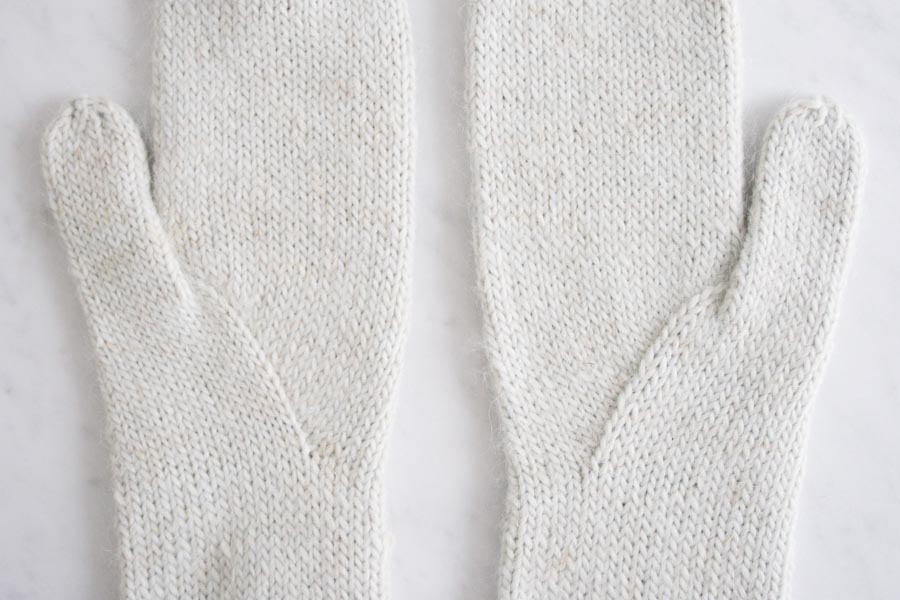
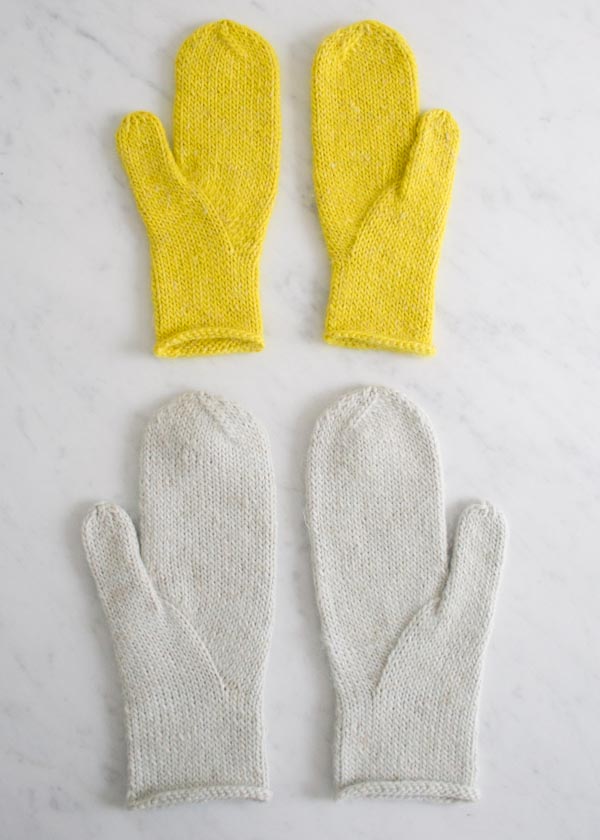
PICTURED: Left Mitten, palm side facing up (left), Right Mitten, palm side facing up (right)
NOTE: Below, I refer to the “1st”, “2nd” and “3rd” stitch marker. These do not include the end-of-round marker.
Round 1: Knit to 2 stitches before the 1st marker, k2tog, slip marker, knit to 3rd marker, slip marker, ssk, knit to end of round. [2 stitches decreased]
Round 2: K1, k2tog, knit to 2 stitches before the next (1st) marker, k2tog, slip marker, knit to 2 stitches before next (2nd) marker, ssk, slip marker, k1, k2tog, knit to next (3rd) marker, slip marker, ssk, knit to 2 stitches before the end of round, ssk. [6 stitches decreased]
Repeat Rounds 1 and 2 two (3, 4) more times. [8 stitches]
Cut yarn and thread it through the remaining stitches.
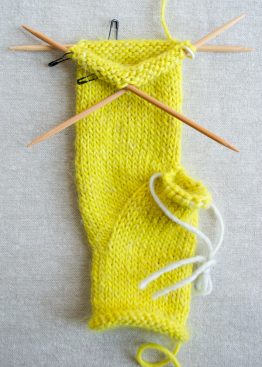
Finish Thumb
Slip the 13 (15, 17) stitches that are on hold onto three double pointed needles.
Hold the Mitten so that the thumb is on the left. Join yarn to the front needle.
Knit all 13 (15, 17) stitches, and before joining in the round, pick up 1 stitch from the base of the thumb. [14 (16, 18) stitches]
Place marker and join for working in the round.
Work in stockinette stitch until piece measures 1 3/4 (2, 2 1/4) inches from the base of the thumb or until just shy of desired finished length.
Next Round: *K2tog, repeat from * to end of round. [7 (8, 9) stitches]
Cut yarn and thread it through the remaining stitches.
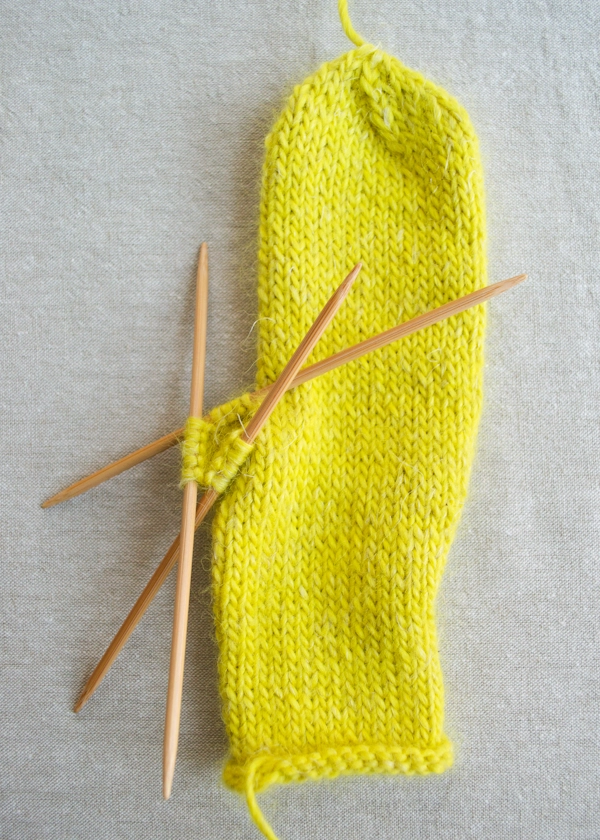
Finish the Mitten
Weave in the ends and block as desired.


Hello! I keep running into similar issues when shaping the top of the mitten- it doesn’t line up when I get to the last row. It will call for me to k2tog before the marker but there is only 1 stitch remaining. Any ideas what I might be doing wrong?
Hi Miriam,
Thanks for your question! I would suggest taking a look at your decrease rounds and checking that your stitch count is consistent with what’s in the pattern. Before starting the decrease rounds, you should have [32 (40, 48) stitches] depending on what size you’re making. Each set of decrease rounds (Round 1 and Round 2) result in a decrease of 8 stitches (2 stitches per every Round 1 and 6 stitches per every Round 2). You knit these decrease rounds 3 times for the smallest size, 4 times for the medium size, and 5 times for the large size. Each size should end with 8 stitches on the needles before threading through the remaining stitches and closing the top of the mitten.
More specifically, for each of the Round 1 decrease rows that result in a decrease of 2 stitches, 1 stitch is decreased between the BOR marker and the 1st marker and 1 stitch is decreased between the 3rd marker before getting back to the BOR. And for each Round 2, 2 stitches are decreased between the BOR and the 1st marker, 1 stitch is decreased between the 1st marker and 2nd marker, 1 stitch is decreased between the 2nd marker and 3rd marker, and lastly 2 stitches are decreased between the 3rd marker and the BOR. If you’re decreasing in this fashion for Round 1 and Round 2, you should be all set!
I hope this was helpful! Have a wonderful rest of your day!
All the best,
Cat
That worked! Thank you!!!!
Hi! I have some sport weight alpaca yarn that I want to use but don’t know how to convert the pattern and what size needles to use. How does one go about figuring that out? Thank you! Can’t wait to dive in (but resisting the urge to just dive in recklessly).
Hi Helena,
Thanks for reaching out. You’re in luck, because I’ve recently modified this pattern for a lighter yarn myself, and it worked out wonderfully! Here’s what I recommend:
First, you can use any needle size you’d like, since you’re going to need to change up the gauge anyway. So pick whatever needles work for your yarn, and start out by knitting a gauge swatch! Once you know how many stitches per inch you’re getting, multiply this number by your hand circumference, and that will be your cast-on number. Then, find 40% of this number, add 2, and that will be how many stitches you need to increase by in the gusset section (and the number of stitches for your thumb is this number without the added 2 stitches)!
There will likely be a few other little things you’ll need to adjust, but I hope this gives you a sense of how to begin!
All the best,
Lili
Hi Purl Soho! I just purchased some of your cashmere merino wool, with these mittens in mind. Any advice on how (if) to modify this pattern? I will be making the adult small.
Hi Alexandra,
Thanks for writing in! Flax Down (the original yarn) and Cashmere Merino Bloom actually have a pretty similar gauge so you should be able to follow. the pattern as written! However, I do recommend working a gauge swatch to ensure you are consistent with the pattern or if you will need to make any adjustments to the needle size to match the gauge,
I hope this helps, happy knitting!
Gianna
I just finished the first mitten of a pair using this pattern. I love it. I love the construction of the thumb gusset and the clarity of the pattern.
I am knitting them in a worsted weight baby alpaca/extra fine merino blend held together with lace weight mohair on US 4 needles. What a squishy, perfect mitten! I have a new go-to here.
Can you please explain “ previous stitches”??
Hi Sydnie!
Thank you for your question! When it comes time to divide stitches for the thumb gusset, you will be placing some but not all of the stitches you just knit on scrap yarn to save for later. By placing stitches you previously knit on a holder for later, your working yarn will be at the end of those stitches to continue using throughout the rest of the current row, and your stitches on hold will be ready to pick up when it is time to work the thumb.
I hope this helps!
All the best,
Margaret
This helped so much! Thank you! You always respond so quickly I appreciate you!
You are very welcome, Sydnie! We are happy to help.
Happy knitting,
Margaret
I’m confused with this statement. Small (Medium, Large) to fit most Toddlers + Small Kids (Adult Smalls, Adult Larges). I want to make these for my grandkids (4 & 6) for Christmas. Do I follow the number to the left of the first bracket? 31 (39, 47) for a kids mitten I would cast on 31 stitches?
Hi Amy!
Thanks for checking in. We’re happy to help clarify these sizes! We recently released these mittens in Knitting Yarn, and with our updated sizing to confirm, you will still cast on 31 stitches for a kid size mitten! If you are interested, you can see our updated pattern here.
I hope this helps, and happy (Christmas) knitting!
All the best,
Margaret
I have knit up the right mitten in this pattern & really live it. But I’m running into problems with the left gusset. In for attempts no matter how hard I try to reinterpret instructions f I place the “previous 15 stitches” on a holder my left thumb gussett ends up on the pinky side of the palm. And the lifeline feature ends up on the back of my hand if I turn it on my wrist so the gusset is by my thumb. It seems like I should place 15 stitches After the M1R marker to get the thumb gussett on the correct side. Hopefully I’m explaining this clearly enough. Can you help?
Hi Elizabeth,
Thanks for reaching out. It is admittedly difficult for me to visualize what you’re describing, but I still want to help out! Would you be able to send a photo of your work to customerservice@purlsoho.com? That way, we can see exactly what’s going on and offer more specific advice!
All the best,
Lili
I am having the same issue!! Did you get an answer?!
Hi Karen,
Thanks for writing in! It looks like Elizabeth hasn’t yet emailed us a photo yet, so we haven’t been able to take a closer look. If you’re experiencing the same problem though, I’d recommend emailing a photo to us as well! Then we’d be happy to troubleshoot.
All the best,
Lili
I have been looking at this pattern and wonder if I can use Magic Loop technique which is easier for my arthritic hands.
Hi Pat,
Thanks for reaching out. You can absolutely use magic loop to make these mittens!
All the best,
Lili
Hi,
I noticed the 12/6/2022 update above on the left mitten. I’m glad for the clarification, because I just struck out trying to make the twisted rib mittens (and part of my trouble was the setup round). This clarification is helpful; I’m wonder why the other mitten doesn’t match? The Update has a different stitch count for the setup round than the right mitten. Won’t that make them come out differently? Thanks for your help,
Jennifer
Hi Jennifer,
Thanks for reaching out! I’d be happy to explain how these mittens are constructed in a bit more detail. You’re absolutely correct–the right and left mittens do not match because they’re designed to be mirror images of each other. That allows the right mitten to perfectly fit the right hand and the left mitten to perfectly fit the left hand! You will end up with mittens that are different from each other, but that’s intentional! Otherwise, you would just have two left (or two right!) mittens.
All the best,
Lili
Well, this is what I get from knitting a free pattern. Between the time I printed the pattern and the arrival of the 6 skeins of yarn I bought from you for the pattern, you corrected a mistake.
Is there any way you can have this pattern tested to make sure it works before you publish? Please let me know when the pattern is ready. #frustrated
OH, and by the way there’s still a formatting error.
Repeat Round 1 “fourteen” (16, 18) times.
Sorry in advance, just really frustrated.
Hi Sean,
Thank you for reaching out about this! I want to assure you that this pattern was thoroughly test knit (as are all of our free and paid patterns) and we’re always eager to fix a mistake as quickly as possible, should human error occur!
These corrections are listed as a note to the pattern (or on our errata page), and we want to assure you that there haven’t been any errors that were found in this pattern yet. We think you may have instead noticed an update we made to clarify the wording of a round, and we apologize for causing any concern! Can you please let us know if this was the note that made you think there was an error?
Regarding the formatting of “Repeat Round 1 fourteen (16, 18) times” and other instances of this, I want to let you know that this was an intentional style choice. We always spell out the first number in order to differentiate it from the number 1 in “Round 1.” If we had written “14” instead, then “Round 1 14” has the potential to be misread as “Round 114.”
I truly hope that helps, but please don’t hesitate to reach out again if anything else is still frustrating you about this pattern!
All the best,
Lili
Hi,
I’m not sure I understand the instructions for the left mitten thumb gusset… do I finish the last increase round and then place the previous 15 stitches on the stitch holder? (In other words, the 15 stitches just before the end of round marker?) Or do I put the 15 stitches prior to the second marker on the stitch holder? I’m having trouble understanding how this will line up with the arch…it would be helpful if you posted a video of the left thumb gusset on you tube..
thanks, Ellen
Hi Ellen,
I’m sorry to hear that this part of the mitten is giving you trouble. Your first instinct is correct though! You finish the last repeat of the increase round, and then immediately put the last 15 stitches just before the end-of-round marker on hold. These on-hold stitches will eventually become the thumb!
I think you may find the photos in the SHAPE TOP OF MITTEN section to be very helpful. These photos show both the left and right mitten next to each other, making it easy to compare where the thumb stitches are placed in relation to the gusset increases. Let me know if they help you visualize how this works!
All the best,
Lili
How do I make these on magic loop?
Thank you
Jean
Hi Jean,
Happy to hear you are looking to make the Arched Gusset Mittens! You can make these using the magic loop method by dividing your working stitches in half instead of working across all the DPNs. I always love to refer to our Magic Loop video tutorial to brush up on the technique when I am knitting mittens or socks. I hope you find this helpful but please let me know if you have any other questions!
Happy knitting,
Gavriella
Thank you! The problem I’m having is when I try to do them on magic loop I can’t get the stitches to slope in the right direction according to the instructions.
Thank you for your time
Jean
Oh thank you for letting me know more of the issue you are running into!It sounds like the section of your magic loop split might be causing your work to pull ever so slightly. To work this pattern in magic loop, you will want to make sure that your stitches are oriented similarly to the pattern by having your marker on either the front or back needle. So although you are only working across the two needles, you will want to make sure you are still able to place your marker in between stitches that are on the same needle. For example, on my swatch of the smallest size, I placed 14 stitches on my front needle and 17 sts on my back needle to be able to have a stitch before and after the increase marker when I began my gusset increases. I hope this helps clear things up but if you need further assistance please feel free to reach out to us at customerservice@purlsoho.com and we can have a closer look.
All the best,
Gavriella