Classic Cuffed Hat
For as long as I can remember, every Sunday my grandmother makes fresh pasta from scratch, and every Sunday she uses the same metal pasta maker she got as a wedding anniversary gift from my grandfather in 1961. When we press her to upgrade to a new machine, she always responds, “It’s hard to improve on a classic!”
I revisited the truth in my grandmother’s words when I set out to make this winter’s hat. How could I improve on a classic winter hat? Very little, and so my pondering ended with these Classic Cuffed Hats, as reliable and perfectly timeless as a 1961 pasta maker!
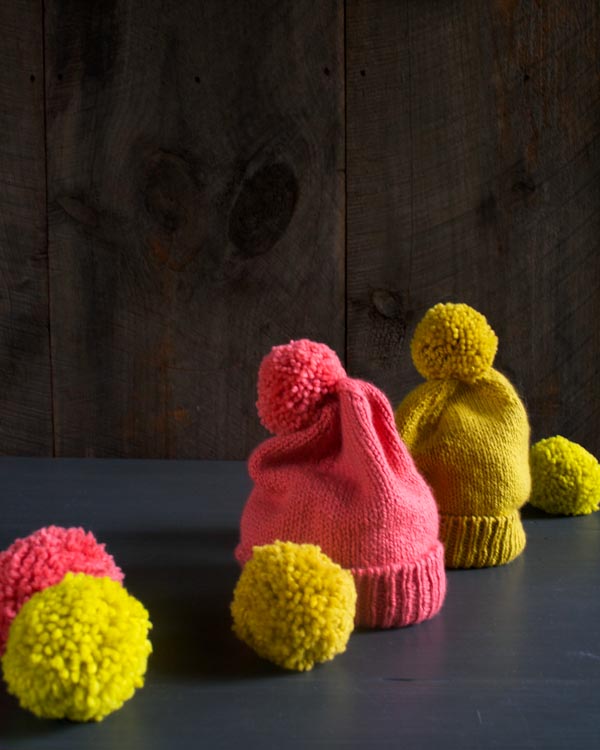
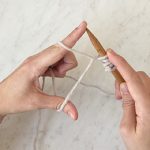
To ensure a design that would last a half a century, I made a couple of important decisions. First, I used a Long Tail Tubular Cast On, a simple technique that makes a magically clean and elastic foundation for the ribbed cuff. My new Long Tail Tubular Cast On Tutorial walks you through this method, step by step.
If you love the yarn used in this project, you’ll love all of our other yarn, too! Explore our 35+ lovingly created yarn collections, in nearly every natural fiber and spectacular color you can imagine… Only available here at Purl Soho’s online yarn shop!
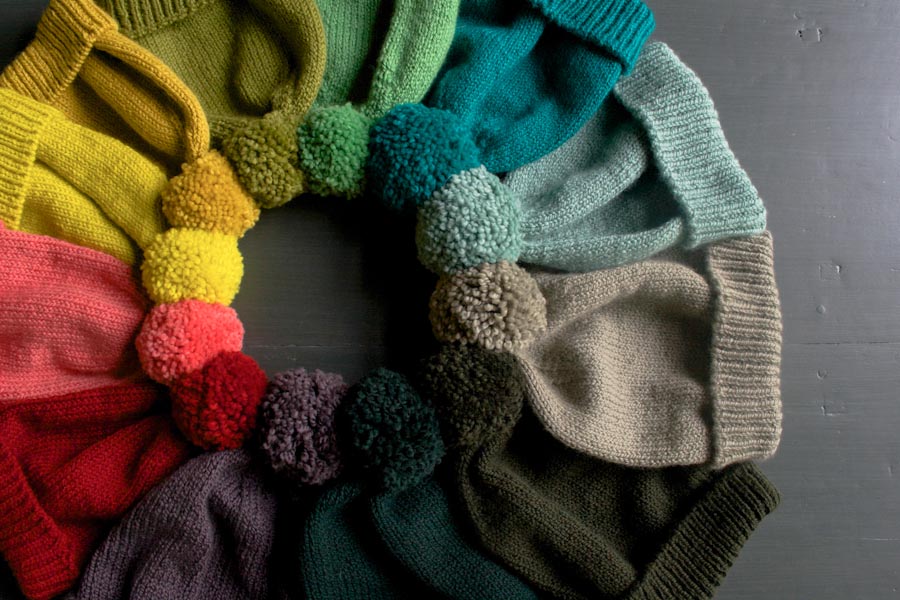
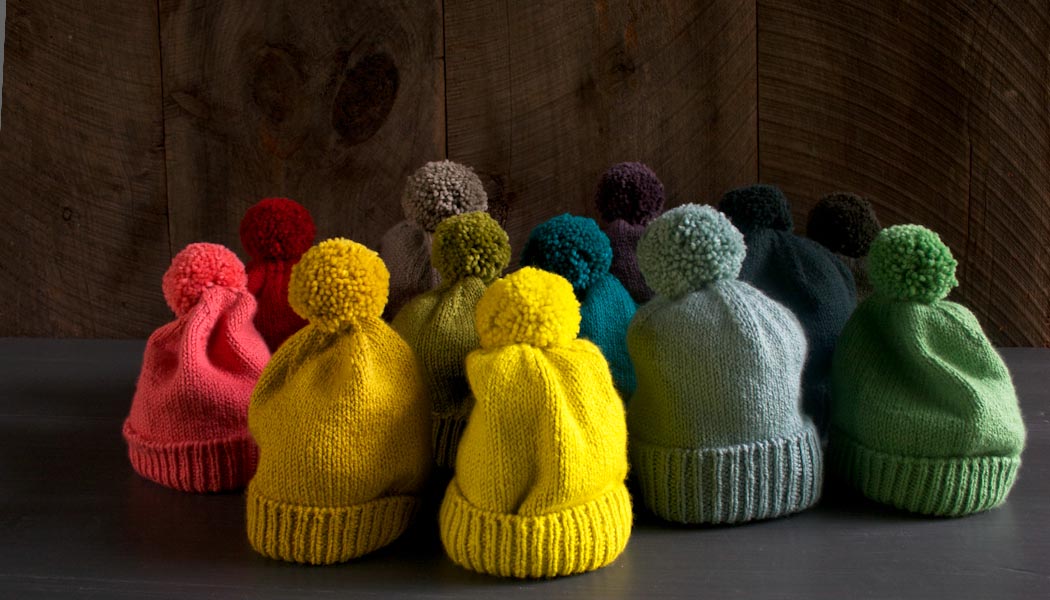
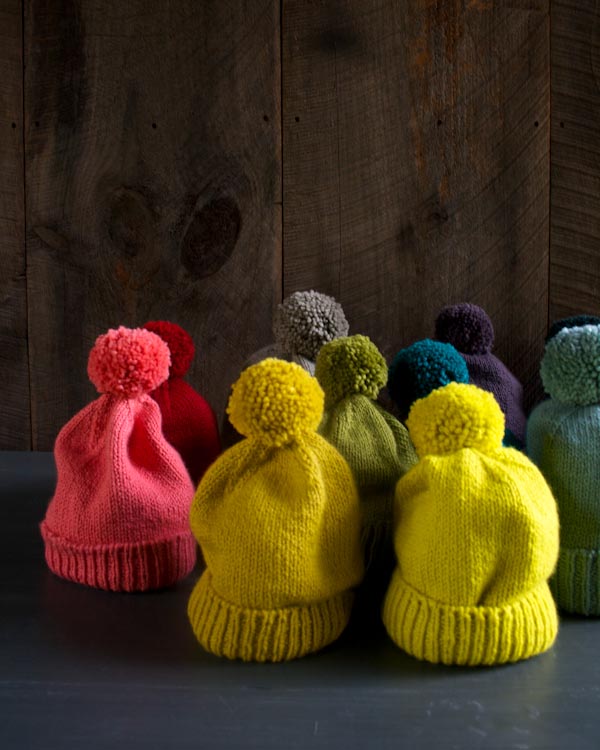
Second, I chose a yarn that I think of as an instant classic, Purl Soho’s 100% merino Worsted Twist. With 12 gorgeous new colors joining our palette, we couldn’t pick just one, so we made a hat in every new color! What color will you choose for your Classic Cuffed Hat? – Gina
Update: October 2014
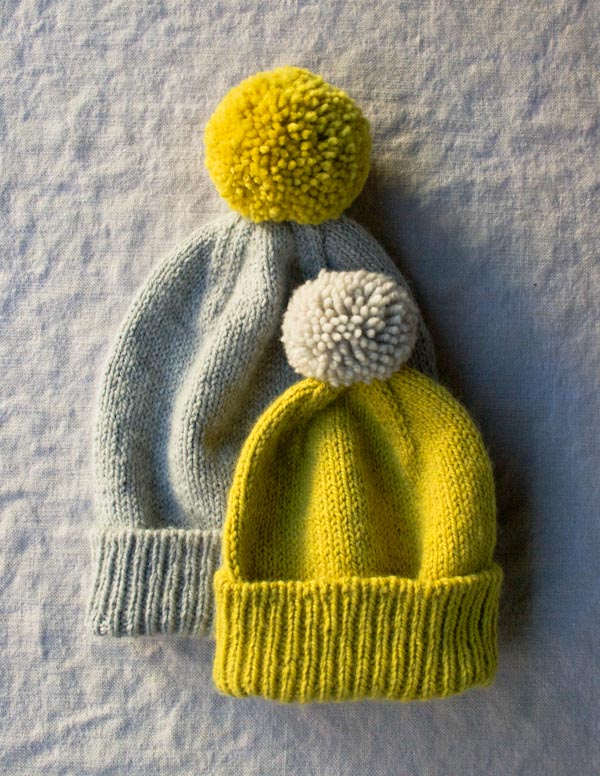
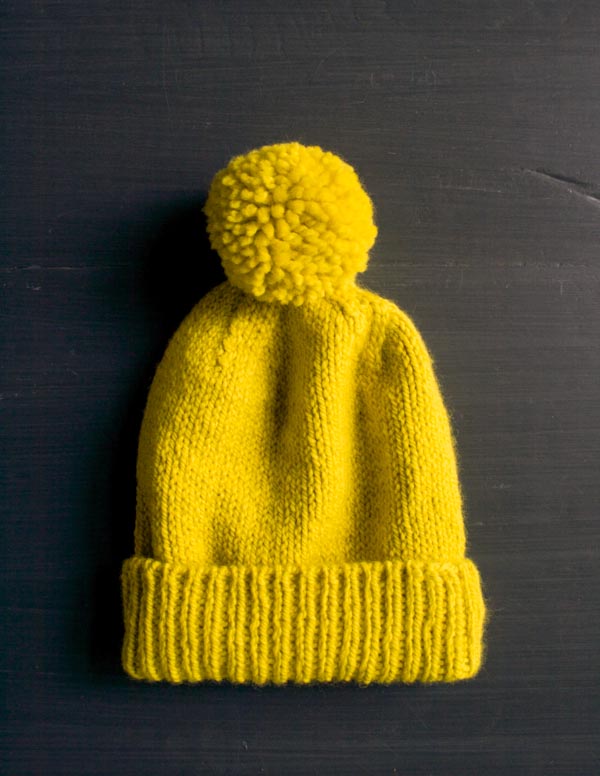
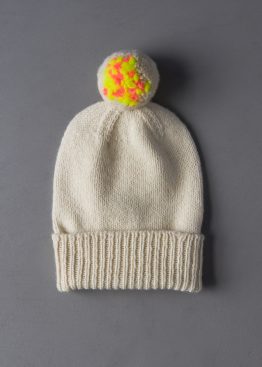
The colors, above, for the adult size are Ash Gray with a Dijon Yellow pom pom; and for the baby size are Dijon Yellow with an Oyster Gray pom pom.
Update: New Pom Poms
November 2019
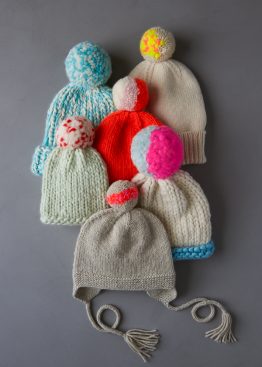
We’re having a party and you’re invited! We’ve topped a few of our favorite hat patterns with festive pom poms including our Classic Cuffed Hat! Using our Pom Pom Maker Set in the Small + Large and Extra Large + Jumbo sizes, adorn your Classic Cuffed Hat and join in on the party here!
UPDATE: NOW IN DAILY WOOL
DECEMBER 2024
We’ve updated this super popular free pattern so you can knit it in superwash Daily Wool, our incredibly soft and machine washable worsted-weight yarn! We also added twice as many sizes, so absolutely everyone can get in on the fun. This classic hat’s simple details have never looked better, thanks to Daily Wool’s smooth stitch definition and beautiful bounce. You have two dozen gorgeous heathered colors to pick from… Soft neutrals, happy brights, and everything else you could want!
Designed by Purl Soho designer, Gina Rockenwagner.
Share your progress and connect with the community by tagging your pics with #PurlSoho, #PurlSohoBusyHands, #PurlSohoClassicCuffedHat, and #PurlSohoWorstedTwist. We can’t wait to see what you make!
Materials
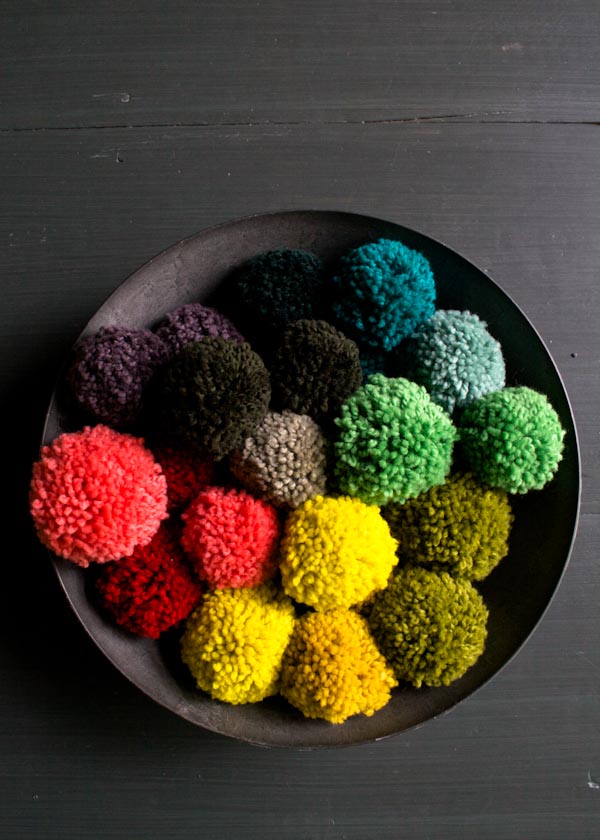
- Hat with Pom Pom: 1 (2, 2) skeins of Purl Soho’s Worsted Twist, 100% merino wool. Each skein is 164 yards/ 100 grams; approximately 164 (246, 328) yards required. We used all of our new colors! Look below for a list of colors.
- Hat without Pom Pom: 1 (1, 1) skeins of Worsted Twist, 100% merino wool.
- US 5 (3.75 mm), 16-inch circular needles
- US 7 (4.5 mm), 16-inch circular needles
- A set of US 7 double pointed needles
- Stitch markers, including 1 unique
- Optional: Purl Soho’s Pom Pom Maker in size Small + Large
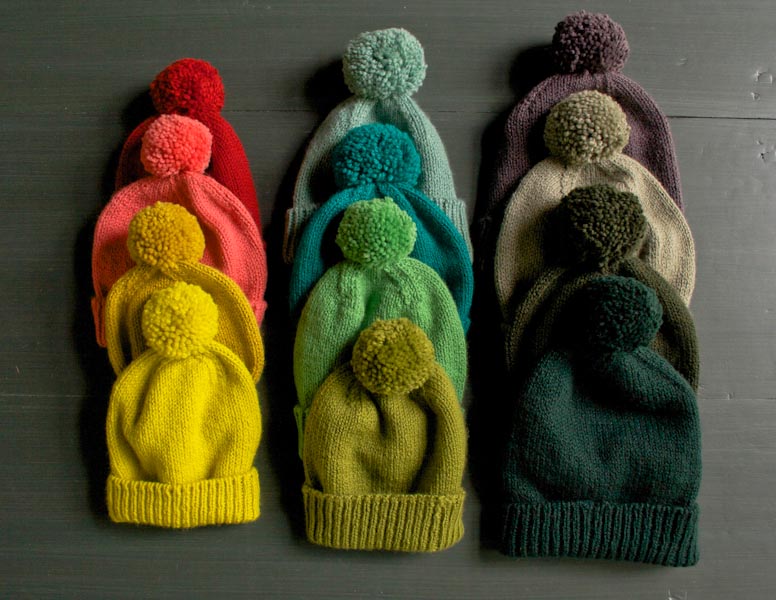
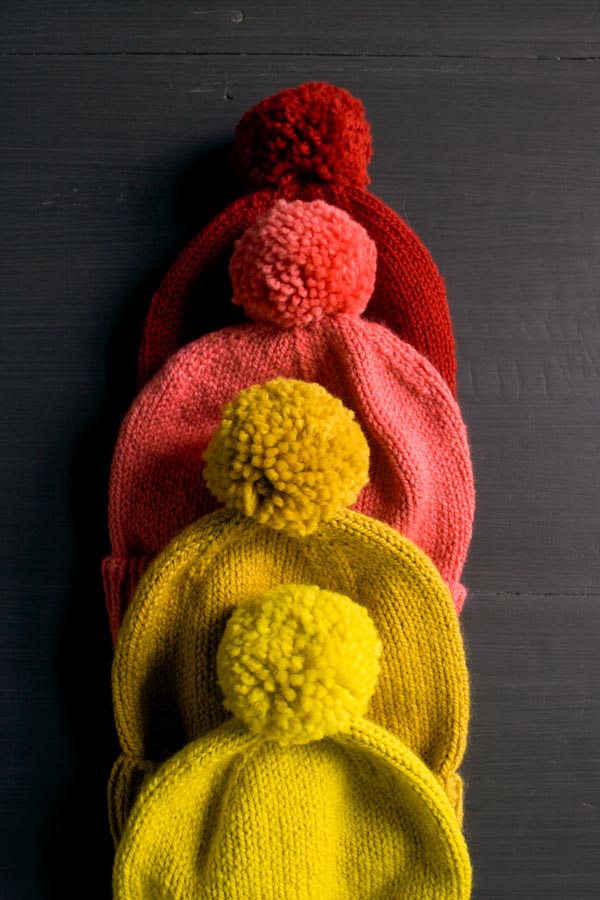
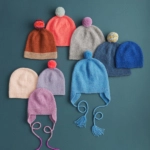
Baby Size, left, from top to bottom: Paprika Red, Pink Grapefruit, Ochre Yellow and Yellow Zest
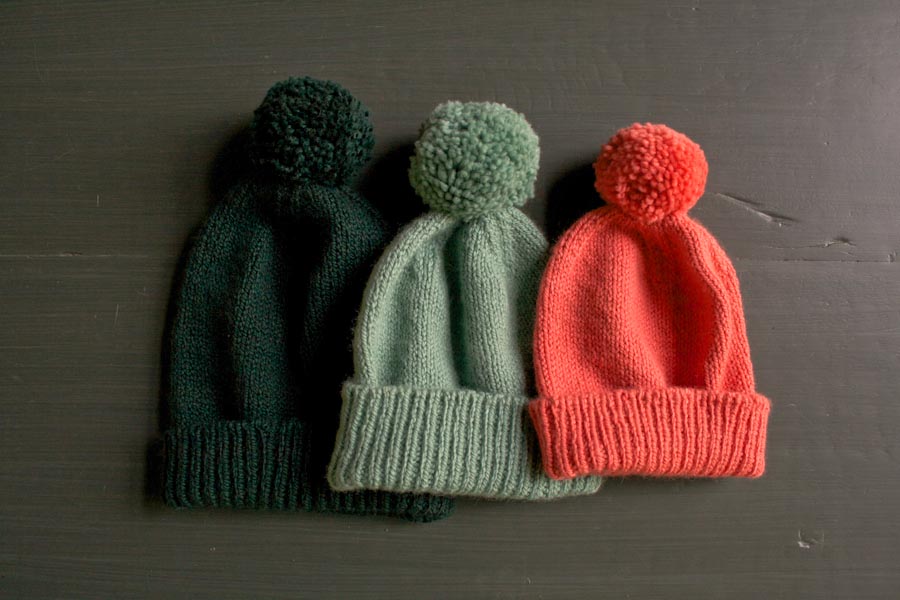
Kid Size, center, from top to bottom: Lichen Green, Green Turquoise, Pistachio Green, and Cardamom Green
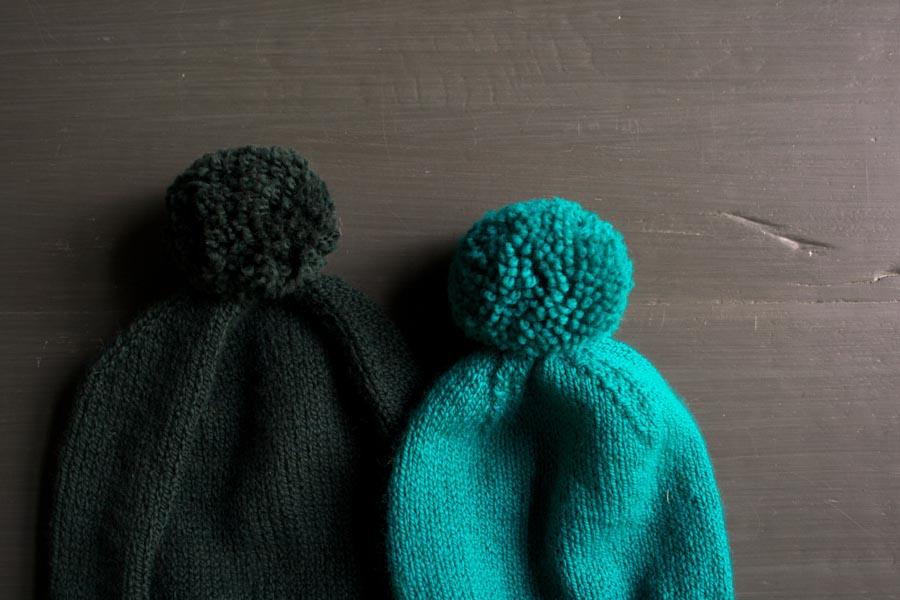
Adult Size, right, from top to bottom: Gray Fig, Green Gray, Moody Green, and Black Green
GAUGE
20 stitches and 28 rounds = 4 inches in stockinette stitch on larger needles
24 stitches and 32 rounds = 4 inches in 1×1 rib, unstretched, on smaller needles
SIZES
Baby (Kid, Adult)
- Finished Body Circumference: 15 (17, 18½) inches
- Finished Ribbing Circumference: 12 (13, 14) inches, unstretched
- Finished Height: 9½ (11, 12¼) inches, excluding pom pom
NOTE
SLIPPED STITCHES
Slip all stitches purlwise.
PATTERN
CAST ON
With smaller circular needles, cast on 72 (80, 88) stitches. We used a Long Tail Tubular Cast On (beginning with a purl cast-on stitch after the slip knot), but a basic Long Tail Cast On would also be beautiful (and less complicated!).
IF YOU USED A LONG TAIL TUBULAR CAST ON…
Foundation Row 1 (wrong side): *K1 through the back loop (tbl), slip 1 (see Note) with yarn in front (wyif), repeat from * to end of row.
Foundation Row 2 (right side): *K1, slip 1 wyif, repeat from * to end of row.
Place unique marker and join for working in the round, being careful not to twist the stitches.
Continue to Cuff.
IF YOU USED A BASIC LONG TAIL CAST ON
Place unique marker and join for working in the round, being careful not to twist the stitches.
Continue to Cuff.
CUFF
Round 1: *K1, p1, repeat from * to end of round.
Repeat Round 1 until piece measures 3 (3½, 4) inches from cast-on edge.
BODY
Switch to larger circular needles.
Work in stockinette stitch, knitting every round, until piece measures 8 (8¾, 9¾) from cast-on edge.
CROWN
NOTE: Change to double pointed needles when necessary.
Round 1: [K1, slip slip knit (ssk), k13 (15, 17), knit two together (k2tog), place marker] 3 times, k1, ssk, k13 (15, 17), k2tog. [64 (72, 80) stitches]
Round 2: Knit to end of round.
Round 3: [K1, ssk, knit to 2 stitches before marker, k2tog, slip marker] 4 times. [8 stitches decreased]
Repeat Rounds 2 and 3 five (6, 7) more times. [16 stitches remain]
Next Round: [K2tog] 8 times. [8 stitches]
FINISHING
Cut the tail and thread it through the remaining stitches. Bring the tail to the inside of the hat. Weave in ends.
POM POM
If you’re using Purl Soho’s Pom Pom Maker Set, use the Medium (Large, Large) Pom Pom Maker and the 2 (2½, 3)-inch Trim Guide to make a pom pom. Follow the instructions for a worsted weight yarn in our Pom Pom Tutorial.
ATTACH POM POM
Thread each pom pom tail separately through the top of the crown to the inside of the hat. Tie the tails into a knot, then thread the tails up through the pom pom itself and trim them flush with the pom pom.
Now enjoy your Classic Cuffed Hat!
Looking for more inspiration? Explore all of our free knitting patterns and knitting tutorials, buy one of our many knitting kits and yarn bundles, and shop for beautiful yarn. We have over 35 gorgeous natural fiber yarns in 100’s of magnificent colors, designed to bring integrity, beauty, and joy to your next knitting project and only available at Purl Soho!
Oh, wow I love this, and the new colors too!
Is there a PDF link for this pattern?
Hi Cindy-
There isn’t a PDF for this pattern. To print it or save it as a PDF we recommend that you use printfriendly.com.
Thanks so much for getting in touch!
Molly
help, I’m not computer knowledgeable. I went to the site and what do I do to get to the pattern. Thnaks
Hi Barbara-
We have just put up a free PDF of this pattern. It’s listed under the “Pattern” headline. Just click on the link and you’ll be taken to a printer-friendly PDF of the pattern.
Thanks!
Molly
Hi Cindy-
Just wanted to update you that we now have a free PDF of this pattern linked under the “Pattern” headline! Thanks again!
Molly
Thanks-see you have the PDF link. I will be ordering today if I can only decide on colors!
Molly I dont see the “pattern” headline, help!
Hi Carolann,
I’d recommend clicking ctrl + F on your keyboard and searching the word “pattern” to locate the beginning of the pattern section!
All the best,
Lili
Instead of having us go to printfriendly.com to make a printed or PDF version, why not have it available as an option here on the blog?
Hi Lizabeth-
We are working on an easy way to print all of our patterns here on the Purl Bee and hope to have a better solution up soon! It’s not as easy as just putting up a quick PDF here because we need to format it so that it’s up to our standards (even if it’s free) which takes a lot of time and effort. I totally understand that it’s annoying to have to go to a third party site and we are working on trying to make printing (and saving as a PDF) easier for all of our readers!
Thanks for getting in touch with this concern and for your understanding.
Best-
Molly
Hi Again Lizabeth-
Just wanted to let you know that we now have a free PDF of this pattern linked under the “Pattern” headline!
Best-
Molly
Thank you for this great pattern! I have a question about knitting this using a long tail cast on instead of the tubular cast on. Do you mean “proceed directly FROM the ribbing section” or “TO the ribbing section”?
Thanks! Cathy
Hi Cathy,
Thank you for writing in with your question!
Yes, after completing the long tail cast on, you’ll skip the “Begin” section, and resume at the beginning of the Ribbing section.
If you have any other questions, please don’t hesitate to ask! – Gina
Is there a way to figure out how to adjust the number of stitches initially cast on when using a bulkier yarn? Would this change the decrease pattern as well?
Hi Jess-
We don’t recommend re-writing patterns in a different gauge unless you have a lot of experience doing that. But you might want to check out our Super Soft Merino Hats for everyone, which uses a bulkier yarn. You could easily knit a longer ribbed cuff and make the head portion a bit taller as well to achieve a similar look.
Thanks!
Molly
I have a Mac and I just right click on my mouse and print the pages that I want
Love the pattern and the colors! These hats will make great Christmas gifts! Thanks for sharing.
What a lovely classic pattern and I am loving the colors! No worries about there not being a PDF version — people shouldn’t complain about a free pattern! 🙂
You can also save it to Pocket and forward it to yourself using your preferred method.
Thank you for another awesome pattern, I love your site and all the magic you share.
hi, nice pattern! (i apologize if this sends more than once, i hit submit and it just took me back to this page, not notifying me if it submitted or not) i am a bit confused for the first round on “shaping the crown” you mention right after “to place a marker…” and then after that you have “three times” i am a bit confused as to what that means. do i k2tog three times? also, at the end it says [64 (72,80) stitches], does that mean i would have 80 stitches to work with if i was working on an adult sized hat?
oh boy i hope my questions make sense, thank you sooo much in advance
Hi Dia,
Thank you so much for your kind words! Yes, your questions make perfect sense!
You are referring to the first round of the crown shaping, which reads:
Round 1: [k1, ssk, k13 (15, 17), k2tog, place a marker that is a different color than the end-of-round marker] three times, k1, ssk, k13 (15, 17), k2tog. [64 (72, 80) stitches]
“Three times” means repeat the instructions between the [] brackets three times.
Don’t just repeat the k2tog three times, repeat the entire contents of the brackets three times.
“[64 (72, 80) stitches]” is the stitch count for the baby, kids, adult hat (respectively) after the first crown shaping round. If you are making the adult size, you will have 80 stitches remaining at the end of this round.
I hope that helps to clarify! Thanks for writing in and please don’t hesitate to ask if you have more questions! – Gina
I’m currently working on the baby size and I’m newly switched from crochet, but is k13 right? Because I’ve not been getting enough stitches for the 4th section. I’m trying to figure out the right number because the math seems right… Or am I missing something
Hi Johanna,
Thanks for writing in with your question! K13 is correct. Before you knit the first decrease round, try placing markers to divide the stitches into 4 quarters. You should have 18 stitches between each marker, 18 x 4 = 72. This might help you to visualize where the decreases will be. I sincerely hope that helps, if not I can help you troubleshoot further. Please let me know if you have any more questions! All my best – Gina
Is there this could be done flat? I’m not a fan of dpns and not sure about only using the circular to finish the hat. I love the pattern and would love to use it to do a set (with a scarf) for my dil.
Hi Lisa-
This pattern is written just for knitting in the round and you will need to transfer to double pointed needles at the top. Maybe our double pointed needle tutorial will inspire you to give DPNs another chance? https://www.purlsoho.com/create/2008/07/25/double-pointed-needles/
If you’d rather avoid DPNs all together we do have one (very cute) hat that is knit flat: https://www.purlsoho.com/create/2013/10/06/new-kit-hat-and-hand-warmers-for-beginners/
Thanks for writing in!
Molly
Would this work in moss stitch instead of stockinette? Desperately looking for a simple pattern like this but with moss stitch. Any suggestions would be so helpful! Thank you!
Hi Zoe-
I don’t think this would work the same way in moss stitch and we don’t actually have any moss stitch hat patterns. Maybe you would have some luck searching Ravelry. Be sure to also search for “seed stitch” hat patterns since that’s another term for the same stitch.
Thank you and sorry we couldn’t be of more help!
Molly
Thank you for the PDF pattern! Just another reason to LOVE Purl Soho and the Purl Bee. XO!
is this a very stretchy hat? adult size seems like what I would normally do for a child.
Hi Judis,
Thank you for your question! Yes, the hat is extremely stretchy and will easily fit a head up to 23 inches (or more) in circumference.
– Gina
Is there another yarn you can recommend for this hat – I want to make it for my 11 mo old grandson but want it to be machine washable – just can’t see them hand washing things for him!
Love the pattern & colors in that yarn. I may do one in the yarn you show also.
Thanks!
Hi Esther-
Sure! This would work great with Anzula’s For Better or Worsted, which is fully machine washable and dryable!
https://www.purlsoho.com/purl/products/item/7913-Anzula-For-Better-or-Worsted
Thanks for your question!
Molly
I just made one for our 8-month-old granddaughter. I am counting on the fact that hats aren’t washed often! (I’ll do the first wash for her.)
This is a very basic question as I’m fairly new to knitting in the round, but how after finishing your second foundation row on the straight needle, how do you transfer your work to the circular needles? The tutorials I’ve found online have you knit your stitches from the straight needles into the circular needles, but that seems like it would screw up the ribbing pattern. Could you please help me? Thank you!
Hi Melissa-
Yes, you knit the from the straight to the circular needles. It won’t mess up the ribbing patten because you should knit it in pattern. Basically, start the “Rib the Cuff” section with the circular needles. Does this make sense?
Please let us know if you have any more questions!
Best-
Molly
That makes perfect sense, thank you so much for responding!
Is this supposed to be a fairly snug fitting hat. I ask because 88 stitches cast on at that gauge seems small for adult size hat? I think I Iwould use that size for a child. Can you comment on the sizing?
Thanks
Hi JMS – Thank you for your question! This hat knit in Worsted Twist is extremely stretchy. The adult size fits up to a 23 and 1/2 inch head size, when measured around the largest part of the head. I hope that answers your question. If you have any more, don’t hesitate to write in! – Gina
thanks so much. with this info in mind would your kids size 17 fit up to a 22 inch head? i’ve just purchase a lot of this wonderful yarn and am planning quite a few gifts with it. I just want to make sure I have my sizing right. thanks again
Hi JMS – For a child with up to a 21 inch head measurement, the kids size would be great. Anything bigger than 21, I would recommend making the adult size. I hope that’s helpful. Thank your for writing in and please do not hesitate to ask anymore questions! – Gina
Hallo Purl-Bee,
i didn’t find the general comment-place…
I just wanted to say: I love all your patterns, the super explanations, the colors, your ideas!
What a pitty I don’t live nearby!
With love, Sabina, Berlin
Thanks Sabina!
Hello Gina,
This may be an extreme request, ( sorry!)I’m pretty new to knitting and I really want to figure out how to make this adorable hat for my new niece and nephew. Would it be possible for you to make a video tutorial for this pattern??
I’m coming to NYC later this month and I plan on stopping in for some beautiful yarn! I will probably have more questions when I come in as well.
Thank you,
Simone
Hi Simone-
Unfortunately we don’t have the time right now to make a video tutorial of this but we are happy to answer any questions as they come up while you’re knitting! And of course we will also be happy to answer them in person if you stop by the store later this month.
Best-
Molly
I love this hat!
I was wondering if it could also be made using the same patter with the MANOS DEL URUGUAY Maxima yarn, and maybe using only one skein?
Thank you!
Becca
Hi Becca, Thanks for your question! Yes, you could absolutely use Manos Del Uruguay Maxima for this hat. I think it would be lovely! And you are right, you will only need one skein. Happy knitting! – Gina
I’m knitting this hat now in the adult size – it’s looking REALLY small (the ribbing part). Does it look very small at first?
Hi Marissa-
The ribbing will look very small but if you are getting the correct gauge your hat will be the correct size. The finished measurements are listed under the “Sizes” headline.
Thank you so much for getting in touch!
Molly
If I understand this correctly we are not joining in the round until the “rib the cuff” section. So I am left with a small section on the edge where the stitches are not joined. Do I just use what’s left of the tail from casting on to stitch that part together or have I done something wrong? Thank you!
Hi Liz – Thank you for your question! Yes, you are exactly correct, when you finish knitting the hat, you will use the tail remaining from the cast on to sew the small unjoined section together. It should only take 2 stitches to sew this together, pretty easy considering you already have to thread that tail into the tapestry needle to weave the end in. Let me know if I can help with any other questions! – Gina
I love this hat, but as I made my first one, I realized that the adult size is a little taller than I’d like it to be for my head. I think the next one I make, I’ll go about 8 or 8.5 inches before I start shaping the crown, instead of the 9 3/4ths suggested for the adult size. Just a thought for others- if you like a tall hat it’s great, but the crown-shaping section added about 3.5 inches for me. Other than that, so cute, warm and cozy!
I love this hat pattern! If I wanted to divide it into 3 even colour blocks (rather than just one solid colour), what would be the best way to do this?
This would make a great hat for football games!
Hi Rachel,
Thanks for writing in! I was thinking the same thing when I was making this hat!
I would divide it up like this:
Use the first color for the entire ribbing and the first round of the body (this avoids a color jog on the purl sections of the rib).
Find the body height by taking the finished height measurement of whatever size you are making and subtracting the ribbing length. Divide this number by two. The number you get will be the length of the second section.
Knit the remainder of the body in the third color.
And here’s another tip: If you make the pom pom with all 3 colors held together, it makes a really cool topper for a hat in team colors.
I hope whatever teams you root for have a great season! All my best, Gina
Love this sweet simple hat. Making one for myself and one for sweetheart. Thank you for the print friendly website. Didn’t know such an option…super easy to add link, delete pics, etc. and print. Thank you. Keep up the great work Purl Bee…you are always an inspiration for myself and friends. Love the things you all create and for free. I’ve never been back East but if I do I will stop in your shop!
I love this adorable hat and can’t wait to make it for my son! The issue I’m having is with the joining to work in the round…i have tried various methods of joining but always end with a large gap. Is there a particular way you suggest to join with this tubular cast on? I would really like to not have to keep starting over!! Thanks!
Hi Sarah! So sorry to hear you’ve been having trouble with joining. The answer is, you are supposed to have a gap when you join, then when you finish the hat, you neatly sew up the gap with 1 or 2 tiny stitches, using your tapestry needle. This cast on just does not take well to being worked in the round, the stitches are bound to end up twisted. So the solution is to work the cast on and the foundation rows flat, then join to work in the round, and stitch up the tiny gap later. I’m really happy you reached out! I hope my feedback prevents further struggling on your part. Please don’t hesitate to write in any time! Enjoy your week. – Gina
Thank you!! Glad to know i wasn’t just messing up over and over. 🙂
quick questions to clarify, when working the body it says 9 and 3/4 inches from the edge, so this would mean from the very bottom of the hat where the ribbing starts?
thanks for the pattern, i’m excited to finish the hat!
Hi Staceyh-
Yes this is correct, you measure from the cast on edge as you describe.
Let us know if you have any more questions!
Best-
Molly
I’m thinking about making an adult sized hat with the suggested yarn, but in two colors (one for the hat, the other for the pompom). Can you please tell me how many skeins I would need? 1 for each part, or 2 in one color for the hat and a third skein for the pompom? Thanks so much!
Hi Nico-
You will need one for the hat and one for the pom pom.
Thank you!
Molly
Thanks so much for this pattern. I cast on 96 stitches and am having trouble figuring the first round of decrease (since I can follow your rounds once I get to 88). Can you help me with the math?
Hi Brecken! Thanks for your question and kind words. If you cast on 96 stitches, your first decrease round will be as follows:
Round 1: [k1, ssk, k19, k2tog, place a marker that is a different color than the end-of-round marker] three times, k1, ssk, k19, k2tog. [(88) stitches]
Please let me know if I can help with any other questions. Enjoy! – Gina
Hi,
Could you give me a rough estimate on ages for the baby and kid? I’d love to make these for a 3 year old and a 5 1/2 year old (both boys).
Thanks!
Eleanor
Hi Eleanor, Thanks for writing in!
Head sizes can vary a lot, even among children the same age. That being said, I would estimate the sizes to be:
Baby – up to 2 years (up to 18 inch head circumference)
Kids – up to 10 years (up to 20 inch head circumference)
The best thing to do would be to measure their heads and decide based on their head size, not age. If you can’t measure their heads, I’d go with the Kids size for both. The hat is very stretchy so it can fit a pretty big range of head sizes. Please let me know if I can help with any other questions! – Gina
Thanks, Gina. That’s really helpful.
Eleanor
How long did it take to make this? Would a beginner be able to do it?
Hi Micaela,
The adult size took me about four hours to knit, although I am a pretty fast knitter. A beginner can definitely do this project, as long as they can knit in the round! Thank you for writing in with your question! – Gina
I would love to make this hat, but prefer a top down as I tend to twist stitches when there are a lot of them. I can’t figure out how to change the pattern. Can you help me?
Hi Patricia,
Thanks for writing in! I would not recommend knitting this hat from the top down. Knitting the hat in this way will dramatically change the look of the decreases (which when knit top down would be increases) at the crown of the hat. It is essential for the cuff of this hat to have a lot of stretch, unfortunately it’s not possible, even for a very experienced knitter, to get a neat bind off edge that is also stretchy enough to not squeeze the head of the person wearing it. If twisting the stitches is a problem for you, I think a better way would be to make the hat flat (i.e. turn your work after every round), and have a seam on the back side of the hat. To change the pattern to make the hat flat is a simple fix – just add 2 stitches to the total number cast on. These two stitches are for seam allowance. Let me know if that’s helpful! -Gina
hello! thank you very much for such a lovely pattern. i was wondering if it would be possible to knit this in all rib? i was hoping to make a k2p2 rib hat with a long cuff for cozyness. what do you think? thank you!
Hi Lori! Thank you so much for your kind compliments.
You can definitely make this in all rib! Just a rule of thumb, for k2 p2 rib, the total number of stitches cast on must be divisible by 4. Luckily, all the hat sizes (in this pattern) have stitch counts divisible by 4! When you get to the decreases, just follow along with the rib pattern you’ve already established, working the decreases, and the purl ribs will miter with the knit ribs (this might be hard to visualize, I think you will understand once you get to that point in the pattern)! I think this is a great idea! Go for it! Let me know how it turns out. All my best! -Gina
Hi, I was wondering if the adult size would fit a head that is 23 inches around, or if I would need to add more stitches to the 88 and how would I make the adjustments to the rest of the pattern. Help a large-headed person out. 🙂
Thanks,
Lauren
Hi Lauren! Thanks for writing in! I think the hat would fit a 23 inch head, it is very stretchy. But fit, as always, is a matter of preference. If you prefer a looser hat, I would cast on 96 stitches. The only part of the pattern that will change is the first decrease round. I have written out that line of the pattern for the commenter named Brecken above – check it out if you decide to go with 96 stitches! Happy knitting! – Gina
Hi, I’m trying to make this hat and I was just wondering how important the needle size was? I have size 6 and size 4. Can I just knit loosely?
Hi Lyra-
Needle size is always just a suggestion. The important thing is that you are getting the correct gauge. So if you can comfortably get the gauges listed under the “Gauge” headline with a 4 and a 6 go for it!
Thank you for your question and please let us know if you have any more!
Best-
Molly
Hi!
In the “Shape the crown” section it sais at Round 3 to ” slip the marker”
What do I do here? Do I slip the stitch?
Thanks in advance!
Jula
Hi Jula-
Just slip the stitch marker (usually a round little piece of plastic) from one needle to another.
I hope this helps. Please let us know if you have any more questions!
Best-
Molly
Hello!
I am making the adult size version of this lovely looking hat, and I decided to cast on 96 stitches (thank you for the recommendation from the comments above). I wondered if there were any other adjustments (other than the first decrease row, which you detailed above) that I should be making to make this hat a little bigger.
I realize I may be too late in asking this question, as I made the brim 4 inches (just like the pattern says) before moving onto the body, but I wanted to ask anyway.
Thank you!
Hi Claire, Thanks for writing in! If you want to make the hat a little bigger, you could also add length to the body. Just knit the section after the ribbing but before the decreases a little longer. Adding about 1/2 inch length should be sufficient. If you don’t have enough yarn to make this modification, I’m sure it will be big enough without the extra length. Please let me know if I can help with any other questions! All my best, Gina
Hello,
I feel pretty dense asking this, but why do I need 5 markers if I have 1 for the row marker and 3 for the decrease rounds? What am I missing? Thanks.
Hi! Thank you for writing in with your question! You are right, you only need 4 markers, one in a different color. Enjoy! -Gina
Is it an equal substitution to use two strands of your PURL SOHO LINE WEIGHT yarn for this pattern?
Thanks!
Hi Suz, You would need to knit with 3 strands of Line Weight to equal the weight of Worsted Twist. Thanks for writing in with your question and please let me know if I can help with any others! – Gina
I am working in this hat now, with a fantastically colorful self-striping yarn I found in the clearance pile at my local yarn shop. Just one question though… I don’t have a pom pom maker and have never made one before. It’s there a way to make a pom pom without investing in a pom pom maker? I don’t see a reason to spend the money on something I will rarely use. Thanks!
Hi Lindsey,
Thank you so much for writing in. I’m glad your enjoying knitting the hat. There are many ways to make a pom pom without the pom pom maker! For example, you can wrap yarn around your hand, as if you are starting to wind a ball of yarn. When you have a good amount of yarn wrapped around your hand, you cut the end and slip off the wrapped yarn. Tightly tie a double knot around the center of the wrapped yarn, then cut the loops. Fluff the ends with your hand and use sharp scissors to trim the pom into a perfect sphere. If my instructions don’t make sense, there are countless tutorials on youtube that are great. Try searching “How to make a pom pom”. You can also wrap yarn around cardboard scraps. Please let me know if I can help with any other questions! – Gina
Can I use double pointed needles instead of circulars?
Hi Beth-
Sure, you can use double pointed needles instead, just make sure to keep the tension even between the needles!
Thanks for getting in touch!
Molly
I just want to say that I for one am sooo pleased that this is NOT PDF. My printer isn’t working and I’ve not figured out a way to copy/paste a PDF. Thank you sooo much. I miss out on a lot of patterns.
Hi
This question may have been asked and answered but please, just to clarify. If I am confused with the LT tubular cast on can I use “regular” long tail cast on with same results?? What would be the problem with this method?
Thank you so much. Had great fun visiting the store in person this past weekend from Boston!
Hi Lisa-
The regular long tail cast on isn’t stretchy but it will work, the edge will just look and feel slightly different. So the results won’t be the same but you’ll still get a beautiful and wearable hat. The intro to the tubular cast on tutorial explains the benefits of this particular cast on a little more:
https://www.purlsoho.com/create/2014/10/21/long-tail-tubular-cast-on-tutorial/
Please let us know if you have any more questions!
Molly
Thank you so much for taking the time and effort to provide a free pattern. It is so kind of you and very much appreciated.
Hello! This pattern is wonderful and is just what I have been looking for. I love the classic look! I am currently making a kid size, but for an adult. The last 3 projects I have knit have come out WAY too big, even with the needle size being correct… so I got paranoid with this one and started to knit the kid size. It’s looking extremely small, though! I measured one of my hats that fits a little loose on me, and it was about 19 inches, so I thought the kid size that would would probably be okay. Now I’m wondering if I made a huge mistake. Am I just scarred from my recent attempts at hats being too big in the end? I didn’t take any chances on this pattern, and am knitting with the exact correct yarn weight and needle sizes. Can you please advise? Looking forward to hearing from yoU!
Hi Heather-
It sounds like you are knitting at a looser gauge than the pattern calls for and you should probably adjust your needles size to get the correct gauge. The gauge for this pattern is as follows (this info is listed under the “Gauge” headline:
Body: 20 stitches x 28 rounds = 4 x 4 inches in stockinette stitch on larger needle
Ribbing: 24 stitches x 32 rounds = 4 x 4 inches in 1 x 1 rib (unstretched) on smaller needle
The needle sizes listed in any pattern are always just a suggestion. In order for the hat to fit correctly the important thing is that you get the same gauge. You can use any size needle that you need in order to do that. If you are getting too few stitches per inch you should switch to a smaller needle size and if you are getting too many you should switch to a larger needle size. I myself am a loose knitter and I often move down two needles sizes to achieve the correct gauge!
Thanks for getting in touch and please let us know if you have any more questions!
Best-
Molly
Thanks so much for sharing this adorable hat pattern – perfect for charity knitting projects!
Just about finished my first hat in this pattern. Thanks for the easy to follow pattern. Love this hat
Hello. Love this hat! Any tips on fixing the gap from where the 2 foundation rows join the rest to knit in the round. There’s a bit of a dip there.
Hi Andrea, Thanks for sending your question! I’m happy to hear you like the hat. When you weave in your ends, I suggest using the tail remaining from the cast on to stitch up the little gap. 1 or 2 stitches should do the trick. Let me know if that helps! All my best, Gina
Hi Purl Bee! Thank you for all of the helpful replies you post! I am planning to order some skeins to start on a couple of these hats. Could you give an estimate of about how many yards of yarn are used to make a pom-pom?
Thank you!
Pam
Hi Pam! Thank you so much for your question and kind words. For these pom poms, I used approximately 15-25 yards of worsted twist, depending on the size of the pom pom. Know that if you choose to use a different weight of yarn, you will not use an equal number of yards to make the same size pom pom. In my experience (and, not to toot my own horn, but I’ve made a lot of pom poms), the smaller poms use around 10 grams of yarn when all is said and done, and the larger ones use 15-20 grams of yarn, regardless of the weight of the yarn. If you’re using the Clover pom pom maker, my best tip is to wrap the yarn loosely at first. If you wrap too tight to begin, the pom comes out too dense and looks like carpet. I bet you didn’t think you’d get a dissertation on pom poms, but there you go! Thanks for reading and happy knitting! -Gina
hi, I’d love to knit this for a newborn but I suspect the baby size will be too big? Do you have any suggestions to downsize to newborn (I think newborn is usually 12-14″)? thanks Kristy
Hi Kristy! The smallest size in this pattern is 15 inches around (finished hat measurement). The pattern can easily be adapted for a smaller size. For a hat 13 inches around, cast on 64 stitches to begin. Follow the pattern until you reach the “Shape the Crown” section. Your first round of decreases will be:
Round 1: [k1, ssk, k11, k2tog, place a marker that is a different color than the end-of-round marker] three times, k1, ssk, k11, k2tog. [56 stitches]
from here, follow the pattern until the end.
Let me know if that makes sense! Thanks so much for writing in and please let me know if I can help with any other questions. -Gina
Thanks for showing me a new way to cast on. Tubular is the only way to go for hats. It’s neat (figuratively and literally) and squishy!
Hi Lori! Thanks for writing us. I’m glad you enjoyed learning this new technique! I couldn’t agree more – this cast on is made for hats! All my best, Gina
Hello, I’m new to knitting, and I’ve never seen the annotation 1 (2,2) skein. What does the (2,2) indicate? Thanks!
Hi Heather,
Thanks for writing us with your question!
The annotation corresponds to the amount of yarn needed for each size. For this pattern, you need 1 skein for the smallest size, 2 skeins for the medium size, and 2 skeins for the large size.
This annotation is also used within the pattern to give stitch counts and other information relating to each size. Our standard is to use the parentheses like this: smallest size(medium size, largest size). A great example is the cast on for this pattern: Cast on 72 (80, 88) stitches. If you are making the medium size, you would cast on 80 stitches, the first number in the parentheses.
Please let me know if this makes sense!
All my best,
Gina
I love this pattern- thank you!!
I have a quick silly question though! I’ve done the ribbing, now I’m knitting every row but the knobbly side of the knitting is on the outside. When I finish the hat, do I turn the whole thing inside out so the neat side is showing instead??! Is there something obvious I’m missing?! Thanks.
Hi Alice,
Thanks so much for your kind words!
It sounds like you might have placed your knitting down and resumed knitting on the wrong side when you came back to it. This happens sometimes when your piece turns inside out somehow, which is easy to do on circular needles. Is that the case? Let me know if that doesn’t solve your problem. You’re correct, the smooth side of the work should be facing you as you knit. I don’t think you’re missing anything! -Gina
But if you’re knitting every row, how can the smooth side be on the outside while you’re knitting? The smooth side would have to be on the inside of the hat while you’re knitting all the way through. Am I wrong? The purl side is facing out on my hat while I’m knitting it as well.
Hi Kathy,
Thanks for writing in and for your question! When knitting in the round, if you knit every row, the knit stitches will appear on the outside and the purl bumps will appear on the inside. If you purl every row, the purl bumps will appear on the outside and the knit stitches will be on the inside. I am not sure how yours has reversed. Please feel free to send in pictures to [email protected] and we can try to help figure out what the issue might be!
Best,
Cassy
I hope that this helps!
Cassy
Hi there! I love the simple style and fit of this hat. I’m thinking about making it with smaller needles for a tighter knit (size 4, can tweak number of stitches according to gauge), but think I’ll want to do a 2×2 rib for that. For the beginning rows, do you think can I simply knit through the back loop twice and slip 2, then K2 slip 2 for the second round?
Thanks!
Hi Katrina,
Thank you for the comment! You can absolutely do a tubular cast on for a 2×2 rib. It is done a little differently, you will want to reorder the stitches as you go. Here’s a youtube tutorial that demonstrates how to go about that technique; https://www.youtube.com/watch?v=yE3b4Vq3sJ8
I hope this helps and feel free to respond if you have anymore questions!
Happy Knitting!
Jake
I really like this pattern and hat but i just finished it and it’s way too tight. I made the largest size and my gauge is spot on. idk if its because I’m using an acrylic yarn and maybe it doesnt have enogh stretch to it?
I want to make more but I dont know what to do. Should I just add more stitches? My head is average sized and my hair is shaved which is why I’m so confused!
Hi Emma,
Thanks for writing and very sorry that your hat is too tight! Certain acrylics can indeed have a lot less give than wool and chances are likely that this is what’s causing the tightness and lack of stretch in your finished hat. We don’t usually resize patterns, but the hat is quite straight forward and if you wanted to stick with the acrylic, you could try casting on 96 stitches (which would follow the established sizing increment of 8 sts, i.e. 72, 80, 88) and then follow the established increments from there. For example, you could work the ribbing until the piece measures 4 1/2 (to follow the 1/2″ increment), work the Body until it measures approximately 10 1/4, and when you then Shape the Crown, you can Knit 19 (to follow the sequence of 13, 15, 17). Without knowing the yarn you’re working with, it’s bit of a guessing game and may require some experimenting, but this should give you a good start. Please let us know if you have any additional questions and good luck!
I tried this and followed the sequence on round 1 knitting 19 and after I followed it I have 10 random stitches left!!
Hello Lindsay!
I’m sorry its taken a while to get back to you! If you have been knitting 19 stitches in the middle of the decreasing sequences, then you should be fine in order to include all the stitches in the row.
If you did perhaps cast on 106 on accident, that number isn’t a multiple of 8 unfortunately, so the decrease row will be a little different. I wouldn’t start all over! I would just start the decreases again so that you distribute the shaping evenly for a balanced crown of the hat.
I would do the first decrease round as follows: Round 1: [k1, ssk, k21, k2tog, place a marker that is a different color than the end-of-round marker] three times, k1, ssk, k23, k2tog. [98 stitches left].
I hope this helps you out! Thanks for your patience and please feel free to write again should you need anything else! -Alyson
Hi there!
I was just wondering if you mean 7mm or just number 7 for the needle size.
Thank you!
Hi Silvia-
It’s a US #7 needle. If you click on the link for the needles the mm and UK sizes are listed as well.
Thanks for getting in touch!
Molly
This pattern is lovely! I am making it for some cute little hipster twins who will be born this winter in Alaska, perfect! My question is, do you think the baby size is small enough for a newborn? Thank you!
Hi Leah-
It might be a tad big for a newborn but they’ll grown into it quickly and probably have lots of use for it in Alaska!
But if you want a hat truly designed for a newborn here is another good option (I make these for all of the newborns in my life!) https://www.purlsoho.com/create/2013/10/22/whits-knits-line-weight-hats-for-newborns/
Thanks for getting in touch and please let us know if you have any more questions!
Molly
Hi, could i make this hat with your super soft merino yarn? what changes would i need to make?
Cheers,
Carla
Hello Carla,
Here is another pattern that has a very similar construction, but that has already been written for Super Soft Merino! If you want the “classic cuff” just make sure to do the ribbing as long as you’d like in order to have room for the fold-over.
Enjoy! Pattern here: http://bit.ly/1MnR93I
-Alyson
I love this hat! And your beautiful colors (and combinations) make it even better. Truly a classic.
I am knitting hats for a ministry that gives hats to the needy. One group for whom we make hats is homeless people. Some of them need a slightly larger hat. Can you tell me how to increase your pattern one more size for people who have a lot of hair (it helps them keep warm in freezing temperatures)?
I find your hat pattern easy to follow, but I am new to knitting and have not learned how to make a pattern larger, including how to change the number of stitches between decreases when you have more stitches to work with.
I really appreciate your sharing this pattern and would like for you to know that it is bringing warmth and joy to a lot of folks.
Thank you.
Hello Anne!
Thanks so much for the kind words and its wonderful to hear that you’re using your skill to give back!
This hat’s decreases happen in 4 places around the crown, and the cast on edge is a multiple of 4. Once you figure out how many more inches you want your larger hat to be, multiply that number by 4 stitches and then add that amount to your cast on number.
Please don’t hesitate to write if you still have more questions! Enjoy! -Alyson
Hi! i am IN LOVE with this! & i really want one but i see that they are not available to purchase…i do not know how to knit so i feel like this would be very difficult for me to make….just wondering if they were going to be available for purchase later on
Hello Sydney!
We don’t sell the pre-made version of this item. We have started a line of Purl Soho Goods where our Boyfriend Hat is available! Check it out here: https://www.purlsoho.com/purl/products/item/9662-Purl-Soho-Purl-Soho-Goods-Boyfriend-Hat
We’re so glad you liked our pattern and hope you give knitting a try one day! Thanks for writing in! -Alyson
What size would you make for an 18 month old?
Hi Mindy-
I would make the “kid” size.
Thanks for getting in touch!
Molly
Hi I’m working on the hat now and I am starting to realize I might have mad a mistake in shaping the crown. I only have one really long line of decreases happening and it looks like there are two in the pictures. Should I have k2tog from the both markers?
Hello Cara!
You should actually have 4 lines of visible decreases. The first round of the section titled “Shaping the Crown” reads:
Round 1: [k1, ssk, k13 (15, 17), k2tog, place a marker that is a different color than the end-of-round marker] three times, k1, ssk, k13 (15, 17), k2tog. [64 (72, 80) stitches]
The “three times” phrase means you should repeat everything in that first set of brackets for a total of 3 times, which would give you a total of 4 stitch markers in your work. One would be marking the beginning of the round and the other 3 would be spaced out evenly so that you can mark where to create the decreases.
Hope this helps! Happy knitting! -Alyson
On round 1, where you repeat everything in the brackets three times, do we repeat it another time since it starts k1, ssk, etc. after it states “…three times”
I am pretty new to knitting but want to attempt this hat! So is this right for knitting the first round:
K1, ssk, k13, k2tog, marker
K1, ssk, k13, k2tog
Then I should have 64 stitches (going by the baby size)?
Thanks so much!
Hello!
It should read like this when written out:
K1, ssk, k13, k2tog, marker
K1, ssk, k13, k2tog. You’re correct, for the baby size you should have 64 stitches at this point.
If the instructions had said “three MORE times” then what you suggested earlier would have been correct. Hope this clarifies it! Welcome to the knitting world! -Alyson
If I use a size 8 knitting needle will it affect the pattern terribly?
Hello Lindsay!
How many stitches per inch are you getting with that size needle? If the stitches come out too big, then the hat will come out larger than expected in the pattern. If you are already a very tight knitter, than maybe using a size 8 wouldn’t skew the pattern too much!
I would recommend trying a gauge swatch and then you can estimate just how large the hat will come out by dividing the # of cast on stitches with the amount of stitches per inch you get. I hope this helps! Happy knitting! -Alyson
Thank you for this pattern. I’m excited to start, and would love to use Blue Sky Worsted Cotton. Would this work for this pattern? I’m wondering if it would be too stretchy.
Hello Christina!
That yarn is just about the same gauge as Worsted Twist, so you should be good! The cotton yarn will not be more stretchy than the wool, since its a plant fiber usually the wool will be slightly stretchier if anything! We’re so glad you like this pattern. Best of luck! -Alyson
I’d like to knit this hat but I’m thinking about making it in a Cashmere. Do you think the Jade Sapphire 6 ply or 8 ply would work well for this hat? If so, do you know how many yards I’d need to make the hat for a 16-month old? Would a 16-month old typically need a baby or kid size?
Hello Tamar!
I would use the 8 ply yarn so that the gauge doesn’t need to change and you can follow the pattern exactly as written! Since cashmere tends to stretch quite a bit, I would recommend making the slightly snugger size so that it will stretch into place!
Thanks so much for writing in and best of luck! -Alyson
Hi,
I have a question about hat sizing. Is there a rule of thumb for determining which hat circumference will fit a head circumference (given that hats stretch)? I want to knit this hat in 6 ply Cashmere for my 16-month old who has a 19″ head (95th percentile!) and I’m not sure if I should make it baby size or kid size or something in between.
Thanks,
Tamar
Hello Tamar!
Great Question! Different people prefer different ease on their hats! Would you like the hat to be snug? Then I would recommend about 3-4″ of negative ease (that means making the circumference of the hat 3″ smaller than that of the head’s). I would therefore recommend making the baby size of this pattern, even though your baby’s head is a little bigger! Best of luck! -Alyson
Hi there!
I’m relatively new to knitting, but a friend shared this pattern with me and I love the hat she made. I was able to get so far as the foundation rows with the tubular cast on, but I’m confused as to why it says not to turn after this. How do you join onto circular needles with the work in your right hand?
Thank you!!
Hello Lee!
The the working yarn remaining in your right hand, bring the left hand needle up to the right so that you can begin to close the gap and create a circle with the needles and their cord. Once you make sure that all the stitches are oriented along the needles in the same direction and aren’t twisted around the cord anywhere, you will use the working yarn on the right hand side to knit the first stitch on the left hand side, which previously would have looked like the last stitch of the row.
I hope this is clear for you, please write in again if you have any other concerns! Thanks! -Alyson
I’m making kid size and want to put stripes slightly above the ribbing. Is the total 3.5″ of ribbing turned up on top of 3.5″ of stockinette or is only half of the ribbing turned up onto itself?
I’m making this for Christmas and would appreciate a quick answer. Thanks.
How much of the ribbing gets turned up for wearing?
All of it, onto the stockinette?
Or half of it onto itself?
(I need to know because I want to put stripes slightly above where the ribbing will end)
Thanks
Hello, Winnie!
Thank you for writing in! The total cuff is 3.5-inches, so if you want to add striping I recommend starting the stripes at the “Work the Body” section. In other words, the 3.5-inch cuff is turned up onto itself.
Again, thank you for your question!
Best,
Kumeko
hi! I was wondering: when shaping the crown and repeating row one, do I have to take the stitch markers out before starting and then put them back in right after every 13/15/17 stitches I knit? This is my first hat so I am not sure what to do.
Thanks,
Ellen
Hello, Ellen!
Thank you so much for writing in! This is such a great beginners hat and we’re so glad that you are giving it a go! To answer your question I think it might be best to take a closer look at the directions for the crown shaping section:
Round 1: [k1, ssk, k13 (15, 17), k2tog, place a marker that is a different color than the end-of-round marker] three times, k1, ssk, k13 (15, 17), k2tog. [64 (72, 80) stitches]
So, here you’ll k1, ssk, k13 (or if you’re making the medium size k15 and if you’re making the large you’ll k17), k2tog, and place a stitch marker. You do this three times.
Next, k1, ssk, k13 (k15 or k17).
At the end of this round you’ll have a total of 4 stitch makers on your needles. 1 which marks the start of your round and the 3 marking three pattern repeats.
Round 2: Knit.
Here you’ll knit as usual. When you arrive at the stitch markers just move the marker from the left needle to the right.
Does this answer your question?
Best,
Kumeko
Hello,
I have some knitting experience. I took a sock knitting class and learned how to make socks and I have made a scarf. I have not knitted a hat before but I want to make s hat so bad! I have started watching the tubular cast one and am having a difficult time. I don’t want to give up! I recently found Purl Soho and I love this site. The color’s just make you want to knit something. Thank you for your beautiful site and patterns. I am open to any advice on the tubular cast on. I just keep ripping it out and trying again. I know the first few rows have to be the most important ones? Thank you again… Tricia
Hello, Tricia!
Thank you so much for writing in! We are delighted that we’ve inspired you to keep on knitting! Have you checked out our tutorial on the tubular cast on? It can be found here: https://www.purlsoho.com/create/2014/10/21/long-tail-tubular-cast-on-tutorial/ if you haven’t. If you’re still having trouble, please let us know!
Happy knitting,
Kumeko
Hello, Thank you so much for your reply. I have checked out the Long Tail Tubular Cast On and practiced a little; I wanted to ask you if you could use the Provisional Cast on method to start the long tail tubular cast on? It seems like a foundation row like that would help me with the stitches, but then I could be wrong. Thank you again for your site and inspiration.
Tricia
Hi, Tricia!
Since the Provisional Cast On is more for keeping stitches live for future knitting, I wouldn’t recommend using it in conjunction with the Long Tail Tubular Cast On. Based on your newest comment, I think you may be already past this part. Did you use the Provisional Cast On?
Again, thank you for writing in!
Best,
Kumeko
Hello! I am at the part “work the body” I am doing an adult head, when it says 9 3/4 inches that the piece is supposed to measure, does this mean the entire piece, or just the “work the body” section.
Thanks!
Hi Ashlee,
The 9 3/4 inches measurement will be from the cast-on edge, that is to say the entire hat that you have knit thus far.
I hope that this clears things up!
Happy knitting!
-Cassy
Hi. I love this hat and in a fit of over-confidence, promised to make hats for my uncle and cousins. I’m still relatively new to knitting, having only knitted scarves previously. I’m using the suggested yarn and needle size but the rim (adult size) seems a little of the small side. I even tried casting on more stitches. Any idea what I’m doing wrong?
Hello, Su!
Thank you for writing in and sorry about the delayed response! Did you make a gauge swatch? I recommend making a gauge swatch if you haven’t. You might be a loose knitter in which case you’d want to try a smaller needle size. If you have further questions please let us know! Again, thank you for commenting.
Best wishes,
Kumeko
Hi Kumeko,
I gave up and started again and finally seem to have fixed the issue of the tightness of the rim. The ribbing is a little uneven in places. Do you think a smaller needle would help tighten it up?
Thanks!
Hello, Su!
I am sorry to hear that you had to start over, but I am delighted that the tension is better this time around! If you’re getting the correct gauge I don’t recommend switching to a smaller needle, doing this would make the brim tight (again). It’s normal to have some uneven stitches, you can adjust this when you block the hat.
It sounds like you’re doing great! If you have further questions please let us know!
Best,
Kumeko
Hello!
I just discovered this pattern and I’ve already started making it, except I’ve hit a bit of snag.
In shaping the crown, I’m stuck at the instruction for Round 3. [k1, ssk, knit to 2 stitches before marker, k2tog, slip marker] four times. [8 stitches decreased]. Can you please explain what that means? Thank you!
Hi Stephanie,
I am happy to help. The expanded version of this row would read:
K1, ssk, knit to 2 stitches before marker, k2tog, slip marker, K1, ssk, knit to 2 stitches before marker, k2tog, slip marker, K1, ssk, knit to 2 stitches before marker, k2tog, slip marker, K1, ssk, knit to 2 stitches before marker, k2tog, slip marker
In essence, you will be repeating the directions inside of the brackets a total of 4 times. Overall, this will result in 8 stitches being decreased over the row.
I hope that this helps!
Cassy
Hi Purl Bee!
I am going to knit this for my 5 year old….but he has a pretty big head (21-22 inch circumference) – would you recommend the adult size? Thanks!
Hello, Claire!
Thank you for writing in! Sorry for the delayed response! I would make the adult size since the body circumference for the adult hat is 18 1/2-inches.
Best wishes,
Kumeko
Hi!! I love the hat. I wondering how many rows you did for the cuff. I know you said to make it 4 inches long, but u just wondered how many rows per inch. Thanks!
Hi Coletta,
Thanks for writing in! The gauge for unstretched 1×1 rib in this hat is 24 stitches and 32 rounds = 4 x 4 inches. After the 2 foundation rows, this would equal 22, 26, and 32 rows. However, please do note that for many knitters, getting both row and stitch gauge can sometimes be challenging. For that reason, I would be sure that if you do knit the number of rows I have listed here, do be sure that you are still getting the 4″ of ribbed cuff.
Happy knitting!
Cassy
Hello,
I am so excited to start this beautiful hat. I have learned how to work the long tail tubular cast, it’a actually a lot of fun. I have Addi circular needles, which are 40″long; I almost feel that the cable is too long. Would it be better to work on the 16″ cable as stated in the pattern or is it workable to use the 40″ and split the stitches into 3 sections. Thank you so much for your time and helping me to learn a very nice cast on edge.
Hello, Tricia!
Thanks for writing in! The 40″ cable is too long, especially once you start decreasing. I recommend switching to a 16″ cable.
Best,
Kumeko
Thank you so much, Cassy. That was really helpful!! How many rows would you say for tha body until you start the crown?
Hi Coletta,
I am so glad that I was able to help! The gauge for the body of this hat is 20 stitches x 28 rounds = 4 x 4 inches in stockinette stitch on larger needle. Given this measurement, the number of rows for the largest hat before the crown decreases would be roughly 41 rounds. As before, please do note that for many knitters, getting both row and stitch gauge can sometimes be challenging so be sure that your length is correct before starting the decreases!
Happy knitting!
Cassy
P.S. Sorry for my terrible spelling 🙂
No worries Coletta! It happens to the best of us!
Cassy
The hat looks beautiful but my cast on edge is too tight to get over an adult head comfortably. What could I have done wrong? I used Long tail tubular cast on.
Hello, Amy!
Thank you for writing in! It sounds like you may have a tight knitting tension. If that is the case that would cause your edge to be too tight. We recommend trying this cast on using a needle 1 or 2 sizes larger than the needle you will use for the ribbing if you are a tight knitter.
Best,
Kumeko
Hi, I have made this hat and loved the results. My question is this: could I use this same decrease method for the top of a hat that has a pattern in it? I have a pattern that is k1o1, p1,k2,p2 round 1 and k2, p2 repeat round 2 for body of hat. I love how your decrease for crown looks but I can’t figure out if it could be used for this kind of pattern. Thanks for any guidance!
Lisa
Hi, Lisa!
Thank you for writing in! The decrease that we used for this hat may affect the pattern that you are creating. I recommend sticking with the decrease that is provided in your pattern. If you have further questions, please let us know!
Best,
Kumeko
Hi there! Looking forward to making this hat in the adult size but having a little trouble with the ribbing gauge (this is my first project where a gauge is necessary). Somehow, my gauge keeps coming out to 3.5 inches wide instead of the required 4 inches, regardless of whether I’m using size 5, 6, or 7 needles. So I thought I’d add more stitches to achieve the same measurements at 7 stitches per inch.
Here’s where I get tripped up. The ribbing gauge given basically assumes 6 stitches per inch. If you divide 88 stitches by 6, you get about 15 inches for the ribbing circumference. But the pattern says the final circumference for ribbing in the adult size is 18 1/2 inches. Is there something I’m missing? What should I go by? Thanks for any help with my math!
Hi Melanie,
Thank you for your question. Gauge is important, but since yours is close to the prescribed gauge, I think you should be fine. Rib is difficult to gauge because it stretches and relaxes. I’m sure that when you steam or wet block your hat that your gauge should relax and stretch out a bit. Also, for future reference, you could swatch in the round. We have a tutorial for that! See the link below:
https://www.purlsoho.com/create/2012/03/16/swatching-for-circular-gauge/
Best,
Adam
Hi! I’m learning how to knit and I’m super confused by the crown; row 3 directions. I’ve done the instructions the four times, as stated, but that’s nowhere near the entirety of the row. Do I just start row 2 again, even though only 1/4 of row 3 is complete?
Thanks,
Essie
Hi Essie,
Thanks for writing in! When you decrease for the crown of a hat you should have your stitches divided into equal parts — in this case 4 quadrants. Be sure you have evenly placed your markers. The directions for round 3 have you knit one, decrease and then knit all the way until you are 2 stitches away from the next marker. In total, this round has 8 decreases, so make sure you are only decreasing that amount. I hope this sheds some light!
Best,
Adam
Hi Purl Bee,
I used a video to learn the long tail tubular cast on for you hat, because I was not successful with the tutorial. The You Tube video was called “While They Play”.
Yesterday when I successfully cast on 88 stitches, in addition to the initial stitch (total 89), I followed round 1, which was the same as your round 1 in your instructions. However, round 2 on the video contradicted your instructions (if I remember correctly, she advised slipping the knit stitch, and purling the purl stitch). I prayed as I choose to follow the video instructions. This is the first time I have used this cast on so I cannot tell if it worked out OK, and would really appreciate your advice and opinion, as I know I will use this cast on again and make your hat again! Thank you,
Caroline
Hi Caroline,
Thanks for writing in. Tubular cast on is difficult to learn, but well worth the hassle. First you will start with a slip knot and then the next stitch you cast on will be a “purlwise” cast on. Repeat until you have 88 stitches, ending with a purlwise cast on. Turn your work and continue with the foundation row. This foundation row is K1 through the back loop, S1 with yarn in front. Your second foundation row will be K1, S1 with yarn in front again. You knit your knits and slip your purls with the yarn in front. If you skip your knits and purl your purls on any of the foundation rows, you will essentially be slipping the stitch that was slipped in the previous foundation row twice. Though I could be wrong, I do not believe this would make a tubular cast on.
Best,
Adam
Hi Purl Bee,
Can you recommend a video that teaches your way of doing the long tail tubular cast on?
Thank you thank you!
Caroline
Hi Caroline,
Please take a look at this video by Ysolda Teague posted below:
http://ysolda.com/tutorial/tubular-cast-on/
Hope this helps,
Adam
Hi Adam,
Thank you so very much for both of your responses. So the total number of stitches of 88 includes the slipknot?
Also thank you for the video – it is very good!
Thank you thank you,
Caroline
Hi Caroline,
No problem at all! Glad you liked the video. 88 stitches includes the slip knot as a stitch. Good luck!
Best,
Adam
Hi, I’m im Australia and am unfamiliar with “ssk” can you please enlighten me. Thanks
Hi Julie,
Thanks for writing in! SSK stands for “slip slip knit.” We have a great little tutorial on how to execute a ssk and it can be found here: https://www.purlsoho.com/create/2013/08/13/slip-slip-knit-ssk/
I hope that this helps and happy knitting!
Cassy
Very neat. Thank you.
Is there any way I could knit this hat flat? If so, could you leave instructions? I am not good at knitting with circular needles, but I really love to knit. Thanks!!
Hi Coletta,
Thanks for writing us! Unfortunately we do not have a way of knitting this pattern flat, but we will keep your suggestion in mind for the future! Our Hat and Hand Warmers Kit includes a pattern for knitting a hat flat. Maybe that would be a good substitute?
Best,
-Adam
Are the size 5 circs used on the adult hat ribbing also or are they only for the baby/child size?
Hi there!
The US 5 needles are used for all the hats. This makes for a tight, stretchy rib fabric at the brim. Best of luck and happy knitting!
-Adam
This hat looks adorable, I can’t wait to make it. What age range is the baby size roughly at? I’d like to make it as a gift for the 3-6 month range and don’t know if it would fit or be too big. Thanks in advance!!
Hi Sarah,
Thanks for writing in! I think that the baby size would fit 3-6 months. This size will probably fit the baby up to a year!
Best of luck and happy knitting!
-Adam
Is there anyway to download this as a PDF? I really like the pattern and I want to make sure that i can save it for later.
Hi, Willow!
Thank you for writing in! If you’re on a desktop version of the site, you will find a “print” icon in the right column just below the date and tags. If you’re on a mobile version of the site, you will find a “print” icon below the pattern and above the comments.
Follow the easy on-screen instructions to delete whichever parts of the pattern you don’t want to print or save. For example, you may decide to shorten the pattern by omitting certain images or the list of materials. Then you can click the “PDF” button and it will download as a PDF.
Please let us know if you have further questions.
Best,
Kumeko
Hello, I am putting in a big order to make some family sets- the worsted twist doesn’t have a lot of bold colors available, any other yarns you would recommend? Thanks!
Hi Lishanna,
Thanks for writing in! If you are looking for brighter colors for these fun hats, I would recommend either Manos Maxima or Madelinetosh Worsted.
I hope that this helps and happy knitting!
Cassy
Your pom poms are perfect! How much yarn, approximately, do you use on the large clover maker?
Thanks!
Hi Karin,
Thanks for writing in! I don’t have a direct idea of how much yarn we use for each pom pom. Our general method at estimating yardage, weighting the piece and dividing by the yards per gram, would not work here as pom poms are trimmed quite a bit to make them round and even. We used the large Clover Pom Pom Maker here and wrapped each side until it was quite full! The best that I can tell you is that it is less than half a skein of Worsted Twist but I am not sure of a more precise amount.
I hope that this helps!
Cassy
Hello! So I’m like on level -1 of knitting! Haha! I just bought 2 needles 4mm and a ball of thread just because and I’m really eager to learn! What do you think it should be my first project? Maybe this hat is hard for me as a real beginner? Thanks!!
Hi Maria,
So glad you are into knitting! I think this project is a little difficult for a first-timer, but it’s certainly something you can build to. The best thing to start with is a scarf or our Hat and Hand Warmers pattern. Best of luck!
-Adam
I just finished this hat for a baby. It is absolutely ADORABLE! It was the first time I’ve knitted a hat. Your instructions and videos were extremely helpful and guided me through with techniques that were new for me. It turned out perfect! I can’t wait to give it to the new parents!! THANK YOU!!
Could I do this whole project with DPN? I am having some trouble with the circulars not fitting even at the start. Thanks
Hi Julia,
Thanks for writing in! You absolutely can use DPN’s for the whole project!
Happy knitting!
Cassy
I loveee this hat, I think this is the first hat I’ve made that I would personally wear every day I love the tubular cast on ( although it took me like 20 minutes to learn !) and I only ended up needing one skein for the biggest hat. ( until I messed up the puff ball) I am in love , and purlsoho yarns are my absolute favorite ( especially the painted ones ) I can find them everywhere from joans to walmart, so the first one I made was camo and I will be making many more in the future thank you !! Best hat pattern ever!!
Could I use the cashmere merino bloom for this pattern? Since the cashmere merino is a light worsted instead of worsted weight, should I use smaller needles and cast on more stitches?
Hi Madeleine,
Thank you for your interest in this pattern! You can certainly use the Cashmere Merino Bloom for this pattern! I would use the cast on from the Fluffy Brioche Hat as a guide and use a smaller needle size. I think you’ll get a good gauge on a US 5 or 6, depending on how tight or loose of a knitter you are. Best of luck and let us know how it goes!
-Adam
Hi! I would like to make this hat using Lanecardate’s Camel yarn. I’m sure what the weight of the yarn is. Do you think it would work?
Hi Lauren,
Great question! The Lanecardate Camel comes in at a DK/Light Worsted. The gauge on this yarn is similar but a touch smaller than the Worsted Twist that we used for this hat. You may well be able to use it in place of the Worsted Twist but only a gauge swatch will really tell. If you can get gauge on the suggested needles for this pattern and you like the fabric that it creates, you will be good to go!
Best,
Cassy
Thanks for the advice! I’m a very tight knitter and my gauge isn’t exactly right. Do you have any recommendations on a good hat pattern for the yarn?
Thanks!
Hi Lauren,
This hat pattern is great and very simple. I suggest you go up a needle size if you knit tightly. Thanks!
-Adam
I’m wanting to make this for my husband who has a 22″ head circumference so how many stitches would I need to cast on to make that size?
Hi Lee Anne,
Thanks for the question. The adult size will fit a 22″ head with no problem. You want to knit hats with negative ease so they stretch around the head and stay put. If you knit a 22″ hat for a 22″ head, the hat would fall over the person’s eyes. Best of luck and happy knitting!
-Adam
Hi there! Thank you for this wonderful pattern on a truly classic hat!
I am making this hat for a man and started knitting it as directed for an adult although it still seems a bit small for his head around the ribbing- using the cast on method you provided (which is awesome by the way), the hat does stretch quite a bit but it ends up pulling apart so far it doesn’t look good. What are your suggestions for increasing the number of cast on stitches? I worry about it as I don’t want to mess up the decreasing later on…
Second- it is my hope to add some fleece to the inside of this hat, for extra warmth. I have never done this before, do you have any tutorials or tips on the best way to do this? Additionally, should I make the hat even larger to account for the added fleece at the end?
Thanks so much!
Hi Shannon,
Thanks for the lovely compliment! I suggest increasing this hat in increments of four stitches because the gauge is roughly four stitches per inch and there are four sections for the decreases (adding just one stitch to your decrease rounds per each section). If you want to line the hat in fleece, you’ll need to keep the ribbing snug but expand the stockinette portion to accommodate the fabric. I’d increase at least four or six stitches after the ribbing evenly around the first stockinette round. If you increase six stitches during this section, just make sure your stitch count is divisible by four for the decreases.
All the best,
Adam
Hi — This is the perfect hat. New to knitting last year – My wool supply that I have stockpiled is exclusively super chunky/bulky size 6! I’m so desperate to get cracking on this hat with this wool I have (about 20 skeins at least)..could you get me going please with how I convert the pattern so I can use my wool! That would be awesome if you could help me and much appreciated!
Hi Tori,
Thanks for writing in and welcome to the knitting world! While we are unable to convert this pattern at present, we do have a number of hat patterns that would work well with the yarn that you have stock piled! Depending on the gauge of the yarn you have you can knit any of our Super Soft Merino hats (https://www.purlsoho.com/create/category/knit-accessories/knit-accessories-type-hats+knit-accessories-yarn-weight-super-bulky/) or any of our Gentle Giant hats (https://www.purlsoho.com/create/category/knit-accessories/knit-accessories-type-hats+knit-accessories-yarn-weight-jumbo/).
I hope that this helps and happy knitting!
Cassy
Hi! How important is it that I use both the size 5 and 7 needles? Could I do the ribbing and the body in a 6? Also, I have some left over light fingering yarn – 16 WPI – could I use this and just double up?
Hi Jasmine,
Thanks for the question. You can knit the rib and body on a US 6 but the rib will end up looking loftier than the stockinette portion. Also, the stockinette portion might be a bit snug on your head. If you have a US 7, I really do suggest knitting the rib on a 6 and the body on a 7.
All the best,
Adam
Hi, beginner knitter here! I have the same question as Jasmine but I was wondering if both the ribbing and body could be done on a US 7. I already started the ribbing on a 7 and it is the only needle size I have. Should I increase size for the body or can I get away with a 7 all around? I also plan on finishing off the hat without DPN using the Homestretch Hat method if that changes anything…thanks in advance!
Hi Sophie,
Thanks for writing in! Although you can knit the ribbing on the same size as the body of the hat, the brim of the hat will not fit as snugly and may flare out a bit when folded up. If you have the correct gauge on US 7 needles, I wouldn’t add stitches after that ribbing since the overall hat will then come out too big. If you plan on gathering all the stitches without decreasing, you will have to knit one to two inches longer in the body of the hat to make up for the missing length from the decreases. Also, with the number of stitches in this hat, it will probably be difficult to gather them all together without leaving a hole or gap in the middle, so working even just one row of K2Tog will make it much easier to gather it shut tightly!
I hope that helps!
Julianna
Hi! I was wondering if you could give me suggestions about adding two stripes of color to this hat? I would like to knit a grey base, with one navy stripe and one green stripe, and hopefully have a bit of room at the top to monogram our school initials…so maybe two skinnier stripes toward the bottom? Thanks in advance for any suggestions!!
Hi Lori,
Thanks for writing us! You can add a stripe anywhere in the hat but if you are planning on monogramming the top of the hat, you should definitely consider putting the stripe closer to the ribbing. Good luck and happy knitting!
-Adam
Hello and thank you for this beautiful, classic and what looks to be a very warm hat pattern! I have a skein and 1/3 of worsted twist leftover and would like to make a hat for my daughter. Will that be enough to make the kids size? Or will I need the full two skeins?
Thanks!
Hello Pastille,
Thank you for writing! This will be plenty of yarn for the hat, but you might not have quite enough for the pom pom. The good news is, because you don’t need to get gauge for a pom pom you could use any yarn from your stash for this part.
I hope this helps!
Warmly,
Marilla
I love your patterns and want to give this one a try. Wondering if you approve knitters to sell the work they make off your patterns. Thanks!
Hi Jennifer,
Thank you for writing in and for your kind words! Unfortunately, items made from our patterns cannot be sold or auctioned. All of our patterns are copyrighted and are intended for personal home use only.
Best,
Cassy
Hello! After casting on with the tubular cast on and completing the foundation rows, the next step is to begin rubbing the cuff. The first step there says to use the larger needles, place a marker and join the stitches. Should you slip all of the stitches onto the larger needles first, then join in the round and begin ribbing? Or do you start ribbing with the larger needles and after the first row join and continue? Thanks for the help!
Hi Julie,
Great question! No need to slip all of the stitches onto the larger needle. I would knit off of the old needle and onto the larger needle.
I hope that this helps!
Cassy
Hi,
What technique do you recommend using to join working in the round? Typically I’d cast on an extra stitch, but don’t know if that’s implied here.
Thanks,
Grace
Hello Grace,
Thank you for writing in. You don’t need to do anything special for the join on this hat- you can just start knitting!
Warmly,
Marilla
What size hat do you recommend for a 4 year old with a 21″ head?
Hi Maggie,
Thanks for writing in! With a head circumference of 21″, the largest size should work. You may want to follow the height measurements for the child size but the cast on and crown for the largest. I would also recommend measuring a hat that fits the little one and seeing what the circumference is. This may lead you to picking a smaller size if the hat fits well!
I hope that this helps!
Cassy
I have a question about joining in the round after the foundational rows… does it not leave a bit of a gap because you have two foundation rows that are not joined in the round? I feel like there would be a gap because you’re joining in the round on row 3.
I’m excited to try a different cast on! I haven’t been loving the traditional way when doing hats. Not enough give.
Hi Stephanie,
Thanks for writing in! You are correct, this will leave a gap. However, once you are finished knitting this lovely hat, you will weave in your ends and use the tail from your cast on to close up this gap. This will result in a nice stretchy and beautiful cast on edge!
Happy knitting!
Cassy
Knitting this hat for an adult. Casted on 88 stitches and used size 6 circular needle. I am almost 2 inches past the ribbing part and just remembered I didn’t change to larger size 8 for the body. Should I continue with the 6 or try changing now to the 8
Hi Mary,
Depending on your gauge it might be noticeable if you change in the middle of your work. I would recommend ripping it back a bit and changing to the size 8 needle.
Best,
Carly
I love this basic hat pattern and will begin knitting it today.
Thanks for the stretchy long tail cast on video.
I like to have a paper copy of items I’m knitting. I would like to make a suggestion on printing this pattern. It would be great if the pattern could be printed without all the pictures, and in a way so that the text for the pattern is on its own pages.
Thx for pattern 🙂
Hi Kathy,
Thanks for reaching out! We do have a print option! If you’re on a desktop version of the site, you will find a “print” icon in the right column just below the date and tags. If you’re on a mobile version of the site, you will find a “print” icon below the pattern and above the comments.
Follow the easy on-screen instructions to delete whichever parts of the pattern you don’t want to print or save. For example, you may decide to shorten the pattern by omitting certain images or the list of materials. To remove images, click the drop down next to the image icon and change from 100% to 0%.
I hope that this helps!
Cassy
I have a question about sizing. I have two toddlers with rather large heads. One is 19.5 inch circumference. The mother said they bought a hat that was 5 inches from the top to the ear and it wouldn’t go down over his ears. I want to make sure it’s long enough and wide enough. What size should I make for them?? Thanks!
Hi Caitlin,
Thanks for writing in! These lovely hats have a fair amount of stretch due to the wide ribbed brim. With that in mind, I think that the kid size should work for your little ones. The nice thing about the wide brim as well is that it gives you a fair amount of play for the height of the hat and allows for growing heads!
I hope that this helps!
Cassy
Hi there,
I changed the pattern up a bit to accommodate the wool size I had. I am at the point of shaping the crown. I have 46 stitches in total. Do you know how many I should knit in round 1 for shaping the crown? Or any suggestions to alter it a bit so that I can finish my hat?
Thanks!
Hello Sophie,
Thank you for reaching out! When shaping the crown you are essentially dividing your hat into four sections. Because 46 divided by four is 11.5 you will have to improvise a bit as you get to the top. I would start the decreases as follows; [k1, ssk, k7, k2tog, place a marker, k1, ssk, k6, k2tog, place a marker, k1, ssk, k7, k2tog, place marker,k1, ssk, k7, k2tog. This will give you 38 stitches.
I hope this helps and good luck!
Happy knitting,
Marilla
Hello!
I would love to knit this hat but I was wondering if by any chance the pattern would be available in french ?
Thank you so much
Nicky
Hi Nicky,
Thanks for reaching out! At present our patterns are only available in English! We appreciate your request and will keep it in mind!
Best,
Cassy
I just finished knitting this adult sized hat, but the crown decreases cause sharp ridges at the crown. Should I wash and block or shape the hat so it is more rounded?
Hello Diane,
Thank you for reaching out! I would recommend blocking this hat- this should smooth out your ridges right out!
I hope this helps and if you continue to have issues let us know.
Happy knitting!
-Marilla
I LOVE this hat pattern and have worked a few in “Baby” size! I find it is a bit large for newborns–more sized for an older infant–but would like to gift one to a friend who is expecting her 1st child later in fall. I’m thinking of trying to size down 8 stitches to keep in pattern (as well as a little length), and am wondering if anyone has noticed something similar or has tried this. Thanks!
Hello Becky,
I’m thrilled to hear how much you have enjoyed this pattern- thank you for letting us know! Going down 8 stitches will give you a circumference of approximately 13.3 inches which should work for a small, adorable, newborn hat.
I say go for it!
Happy knitting,
Marilla
This is a beautiful hat. I would love to knit it but don’t like knitting with circular needles. Can it be done with straight needles?
Thank you so much for your help.
Hi Bonnie,
Thanks for writing in and for the kind words! This should be a fairly easy pattern to convert to straight needles! The only necessary modification would be to work the main body of the hat in flat stockinette stitch by purling every other row. You may wish to also add two selvage stitches to the cast on since you will use up two stitches when seaming the hat, but otherwise you should be able to follow the pattern as written.
Best of luck and happy knitting!
Julianna
Since there are fewer colors available in the worsted twist, I’m wondering if Alpaca Pure is a good substitute? More color options…
How does this hat look without the pom-pom? I’m thinking that it would work well for a man too. Any chance you have a picture of the top without the pom-pom?
Hi Mary,
Great questions! I have actually seen a Classic Cuffed Hat knit in Alpaca Pure without the pom pom and it turned out fantastic! Although it is always a good idea to knit a gauge swatch when substituting yarns, Alpaca Pure does knit up at the same gauge as Worsted Twist so it is an excellent yarn to substitute in this pattern. Alpaca creates a knitted fabric with much more drape than merino wool, so the result is a somewhat slouchier hat, but it is incredibly soft and warm. Although we don’t have a picture of the Classic Cuffed Hat without a pom pom, the top of the hat will look quite similar to our Learn To Knit A Hat In The Round samples.
Best of luck and happy knitting!
Julianna
I’m looking to make this for the adult males in my life; my boyfriend, father, grandfather etc. The comments that I’ve read suggest I increase by four stitches but how many should I add; 4,8,12,16…?
Hello Courtney,
Thank you for reaching out! This really depends on how big of a hat you would like to make. With a gauge for your Ribbing getting 24 stitches x 32 rounds = 4 x 4 inches in 1 x 1 rib (unstretched) on smaller needle you will be adding an in for every six stitches. or 2/3 and inch for every 4 stitches added.
I hope this helps and happy knitting!
-Marilla
I have a 6 month old granddaughter with an 18 inch head. Will the baby size fit her or should I go up to the child size? I have used this pattern before for adult hats and love it!
Hello Jacqulyne,
Thank you for reaching out and for your kind words! I think the child size will work best, plus if its slightly two big there will be room to grow!
I hope this helps and happy knitting!
-Marilla
Hi there! Wondering if there’s a way to purchase a couple of these hats from you?
Hello Myra,
Thank you for your interest in our hats! We sell all the materials to make these lovely hats, but we do not sell them ready made.
If you are interested in learning to knit we have some great beginner kits like our Learn to knit kit and our Simple Hat and Hand Warmers .
Warmly,
Marilla
Lovely pattern. I love the opportunityy to learn a new cast-on technique. Regarding the tubular cast on… in video the instructions the demo uses an odd number of stitches so the knits and the slips line up. With this hat, there is an even number of stitches so the knits and the slips don’t line up. I’ve just finished the foundation rows and it doesn’t look tubular. I’d love your advice. Thanks very much.
Hello Rhonda,
Thank you for reaching out! For a Long Tail Tubular cast on you will be working with an even number of stitches, because it is often used for a rib stitch. The tutorial actually uses a 12 stitch cast on so you should be able to use it as a guide.
I hope this clears things up and happy knitting!
-Marilla
Love this hat pattern. It is possible to knit solely on circular needles and not decrease? Would I just knit the same number of rows without the decreases to shape?
Not ready to tackle dpn just yet and need a quick knit for next week!
Hello Jill,
Thanks for reaching out! You can certainly knit this hat without decreases and seam it up at the end. It will just come out as a square, with a point at each side. I would also reccomend checking out our Homestretch Hat for a quick knit without any decreases.
I hope this helps and happy knitting!
-Marilla
Hi … I love the colors that you show these hats in, but I can t fine them on you website… wondering if you could help.
Thank you
Hello Rose,
Thank you for reaching out! Unfortunately many of the colors picture in this pattern are no discontinued. We have lots of new beautiful colors in our Worsted Twist. I would also reccomend checking out Manos Maxima which knits up beautifully in this pattern.
I hope this helps and happy knitting!
-Marilla
hello! I love this pattern and the type of fabric this creates. do you think I could continue the rubbing on the body if I stayed in size 6 needles instead of going to the 7s? I am looking to do a full-rib hat but like this the best!
Hello Raphaela,
Thanks for writing! I don’t see why not, the only thing to be aware of is that the decreases at the top of the hat are not written to incorporate the ribbing, but It still might work out fine.
Let us know how it goes!
-Marilla
Hi! I think I need some help! I’ve been working on this hat for a while and I just did the first decrease round, but I’ve somehow ended up with 5 stitches left in the round. I’m not sure what I did, I followed the pattern exactly (for the 17 stitches version).
Thank you! I love this hat and desperately want to finish it!
Hi Kylie,
Thanks for reaching out! Although it’s hard to say what exactly went wrong without seeing your work, is it possible that you had five too many stitches before beginning the decreases? If that is the case, I would take out the first decrease row and work one extra row, decreasing five stitches evenly spaced around the hat so that you have the correct number of stitches, and then begin the crown shaping again.
I hope that helps!
Julianna
Hi! I’m knitting the adult size of this beanie right now and am about 11 rows into the ribbed cuff. The circumference (unstretched) looks really small compared to other adult size beanies I have. I’ve checked the guage and it is on track with what the pattern suggests, so I’m just curious if it’s deceptively small while on the needles? It seems like it stretches quite a bit but wondering if others have found it to be too small when all is said and done. I don’t want to keep going if it winds up being way too small!
Hello Becky,
Thank you for reaching out! When starting a hat, particularly a ribbed one, it will appear much smaller than it is. If you are on gauge I would worry about it. If you are on gauge the hat circumference will be 14″ unstretched and stretching to 18 1/2″.
Happy knitting!
-Marilla
Hi, I’m making this hat and I’m wondering how much of the cuff is the ribbing folded over on itself versus ribbing folded over stockinette. It seems like a 4″ cuff must be partially folded over on itself but I just wanted to check. Thanks!
Hello Rachel,
Thanks for this question! I like to wear this hat with a folded brim, but you can wear it either way!
Happy knitting,
Marilla
Gotcha, but do you basically fold the ribbing cuff in half? Or is the crease of the fold the point where the ribbing switches to stockinette? Thanks!
Hi Rachel,
I understand now, yes I fold the brim in half, though again you could wear the hat either way.
Happy knitting!
-Marilla
Congratulations for yr instructions, for yr tutorials for yr projects for everything. Quality in all these! I trust you so much! Concerning the above beautiful hat, could you pls tell me(as I am not very much familiar yet with circular needles ) if I could make it with straight needles? Yr reply would be very much appreciated. Thank you very much indeed and regards from Greece!
Hello Kassiopi,
Thank you for your question and your kind words! We only have a pattern for this hat to be knit in the round, but it would be a great first in the round project. If you are looking for a hat to knit flat I would reccomend checking out our Four Spokes Hat pattern or our Simple Hat and Handwarmers pattern.
Happy knitting!
-Marilla
I love this pattern! For the body, the pattern says “stockinette stitch (knit every stitch)”, but I thought stockinette means to alternate a knit row and pearl row. Should I be knitting every row in the body or alternating a pearl stitch? Thanks!!
Hi Genna,
Thanks for writing in! Although stockinettte stitch is created by alternating knit and purl rows when you are knitting back and forth in rows, when you are working in the round, it is created by knitting every row.
I hope that clears things up!
Julianna
Hello,
I’m curious how it would affect the finished hat if I used size US 6 needles when it was time to switch to DPNS. (Let’s say it was all I had available.)
Hello Natalie,
Thank you for reaching out! This will give you a smaller gauge and a tighter knit. This means that it will likely change the shape of the hat. I would reccomend trying it out to see how dramatic of a change it is.
I hope this helps and happy knitting!
-Marilla
Hi!
Is there meant to be negative ease in the top stockinette portion as well as the ribbed cuff portion?
Obviously the cuff will stretch a lot more than the body, but I’m wondering if the top portion will stretch and by how much?
Thanks!
Hello Natalie,
Thank you for reaching out! This will depend on the persons head, but It won’t be a significant stretch. The most important measurement for this hat is the ribbed band.
I hope this helps and happy knitting!
-Marilla
Thanks Marilla,
Thanks for your help.
The point I am confused about is that for the adult size, the pattern says that it stretches to 18 1/2.
(The stockinette portion of the hat would be measured at 5 st/in or 17.6 inches total circumference for 88 stitches, un-stretched.)
So, if this is meant for an adult, it should be able to stretch beyond 18.5 inches, right? Since, adult heads are anywhere from 21-24 in. depending on gender.
(I’ve already started to make the adult version for a four year old (21 in. head) – and I’m hoping it will work. It’s the first time I am making this pattern.)
On a related topic, are the sizes for Purl Soho hat patterns consistent from pattern to pattern? If the adult size worked well for me in one hat pattern, can I assume that the adult version of another pattern would work similarly as well?
Thanks!
Hello Natalie,
Thank you for such a clear and detailed question! You are correct in assuming that the hat will stretch, but at the stockinette point of the hat is will begin to be less than the total circumference of the head. Our hat patterns are consistent and If you have had success in the past you should be totally fine.
I hope this helps and let us know how it goes!
Happy knitting,
Marilla
Hi,
I have a very large head, is there a way to measure my head and then adjust the pattern using a gauge swatch and multiple of 4 stitches to get the right size?
How do I measure my head properly for this hat?
Thanks
Hello Emily,
Thank you for reaching out! To measure you head, you will need a measuring tape to measure the circumference of your head. I would reccomend adding 8 stitch increments to make the decreases easier to adjust.
I hope this helps and happy knitting!
-Marilla
I wonder if it will work to use brioch stitch instead of stocking stitch, with th same size needle asthe ribbing. Thanks for your opinion!
Hi Rebecca,
Thanks for reaching out! Since brioche has a very different gauge from stockinette stitch, it’s hard to say what the results would be without knitting a gauge swatch in brioche and comparing the stitches per inch to our stockinette stitches per inch. Decreases are also quite different in brioche than in stockinette, so you may prefer to find a brioche hat pattern, such as our Fluffy Brioche Hat or our Color Dipped Hat. The color dipped hat is worked in Fisherman’s Rib which is a bit different to knit, but turns out just like brioche.
I hope that helps!
Julianna
Which pom pom maker is used for each size?
I have the clover pom pom makers (large), one is blue and one is green. Which size is which?
Thanks!
Hi Natalie,
Thanks for writing in! Although we didn’t record which size we used for these hats, I would suggest using the larger blue pom pom maker, since you can always trim the pom pom down to the correct size if necessary. The more you trim a pom pom, the fuller and fluffier it will appear!
I hope that helps!
Julianna
Tried knitting this with 89 stitches (added one intentionally because I wanted an odd number for design reasons), and the cuff was coming out way too small. I think I knit pretty tightly and was getting ~5.6 stitches/inch on the ribbing.
Should I try to add stitches? Or is there a good way I can work on knitting looser, while still getting a consistent tension?
Hi Ryan,
Thanks for reaching out! It sounds like your gauge is pretty close to ours and actually a little larger – our gauge for the ribbing is 24 stitches to four inches, and yours is 22.4 stitches to four inches, which will result in a bit larger hat. It is normal for the brim to appear small because ribbing is quite stretchy but contracts down to a smaller circumference when at rest. Since your gauge is fairly close to ours, if you still think the hat will be too small, you can add any multiple of 8 stitches to the cast on number.
I hope that helps!
Julianna
Is there a way to adapt this for a preemie hat? I love the pattern and finished hat and would love to make for nicu babies. Would you post the adjustments? Thank you so much!
Hi Shannon,
Thanks for reaching out, and what a lovely charity project! This hat works with any multiple of 8 stitches, so I would try casting on 56 or 48 stitches for a preemie size. When beginning the decreases, you will place your markers so that they divide the stitches into four even sections, and you can then follow the decreases as written.
I hope that helps, and happy knitting!
Julianna
Please help.
After the foundation 2 rows the pattern says….”Do not turn”. …this confuses me.
It seems I have to turn the work in order to have the yarn for the next row where I use the smaller circular needle to begin knitting K1,P1 rib stitches. When I get to the end of that row, I place marker and then join to work in the round. Next I knit the 2nd rib row. Do I have this right? I’m between a beginner and intermediate knitter.
Thank you!
Hello Yao-Hsin,
Thank you for reaching out! You are correct, once you finish your 2nd foundation row, you will join to knit in the round. This means that you don’t turn your work because when you join to knit in the round you keep your work on the same side.
I hope this makes sense and let me know how it goes!
Happy knitting,
Marilla
Hi,
Love the bright hues pictured here. Will Worsted Twist make a come back in these shades?
Hi Natalie,
Thanks for reaching out! While many of these colors have unfortunately been discontinued, we are looking forward to adding new colors to our Worsted Twist palette very soon! As long as you are subscribed to our newsletter you will be notified as soon as they are released – I do hope you enjoy the new colors as much as we do!
Best,
Julianna
I really love this pattern and the tutorial for the tubular cast on. The pattern is clear and classic enough to adapt it too. I used the tubular cast-on to add a cowl collar to make a matching poncho in my granddaughter’s school colors. I’d add a pic if I knew how. 😉 Thanks!
Hi there! Making this hat a part of a white elephant gift exchange. Can you recommend a scarf pattern that would go nicely with this hat?
Thanks!
Hi Caroline,
Thanks for writing in, and how very generous of you! I think our No-Purl Ribbed Scarf would go quite well with this hat!
Happy knitting!
Julianna
I feel like I must be doing something wrong bc I’ve ready so many of the posted comments and no one seems to be having this problem…
I cast on 88 stitches to my 16″ needle (I am just doing long tail cast on as I’m new to knitting) but the needle is way too long to be able to join in the round – am I supposed to be using a magic loop or are the 88 stitches really supposed to stretch that far?
Hello Emma,
Thank you for reaching out! 88 stitches will work for a 16″ needle because your hat has a 18 and a half inch circumference. However, it might feel a bit stretched in the beginning because your ribbing, on a US5 needle, has a circumference of 14 inches. I hope this makes sense and let us know if you have any further questions!
-Marilla
Hi, and thank you for the super detailed instructions! You actually made me want to knit again, after a very long pause! I was looking for a classic cuffed hat pattern for the old baby alpaca & merino wool that I have in stock (Rowan Lima), and when I saw your detailed instructions I wanted to give it a try.
I made some tests with different needles, and it seems like I would need 104 stitches for the adult version. Now I’m wondering how to shape the crown with 16 extra stitches. Do I just repeat rounds 2 and 3 two times more, or should I skip the round 2s, to keep the crown nice and round (and not like something a Christmas elf would wear)?
Also, the Tubular Cast On looks super interesting – and again, the instructions are really great. However, I would prefer a ribbing with K2, p2. Is is possible to use Tubular Cast On for that?
Hi Anna,
Thanks for reaching out! As long as you are starting with a multiple of 4 stitches, you won’t have to make any drastic changes to the decreases. When you are working the set up round for the decreases, you will just have to make sure your markers are placed so they divide your stitches into 4 equal parts, and then repeat the increases rows until you end with the same number of stitches we did.
It is possible to use a Tubular Cast On for 2×2 ribbing, though it does take an extra step! Follow the tutorial, working the foundation rows as directed. While you work the first round of 2×2 ribbing, simply rearrange the order of the stitches on the needle so that you have 2 knits followed by 2 purls and repeat until the end. The following round will be a regular round of 2×2 rib.
Happy knitting!
Julianna
Can I use an Arab weigh for this project?
I have a superwash merino.
What changes could I do to make it work?
Amanda
Hi Amanda,
Thanks for reaching out! Our Worsted Twist is an aran weight yarn, so you shouldn’t have to make any pattern changes! It is always a good idea to knit a gauge swatch, and as long as your gauge matches ours, you can follow the pattern as written.
Happy knitting!
Julianna
Hi Purl Soho
Is it possible to change this pattern to knitting ‘flat’ rather than in the round? I’m trying to teach a friend who has never knitted before, and think that might be easier for her than learning to magic loop as her first project!
Thanks
Robyn
Hi Robyn,
Thanks for writing in! This should be a fairly easy pattern to convert to straight needles! The only necessary modification would be to work the main body of the hat in flat stockinette stitch by purling every other row. You may wish to also add two selvage stitches to the cast on since you will use up two stitches when seaming the hat, but otherwise you should be able to follow the pattern as written.
Best,
Julianna
Just wondering if the rubbed cuff is meant to fold over the toque to create a 4 inch cuff (let’s say for an adult large) or a 2 inch cuff?
Hi Amy,
Thanks for reaching out! The folded up cuff will be the full length of the ribbing, but you can always fold it up less if you need a slouchier or taller hat!
Best,
Julianna
Dear Purl Soho Folk,
Your knit patterns are always beautifully designed! Thanks also for some very helpful videos, including the tubular cast-on for the classic hat, which I’m now trying to make in a worsted organic cotton. Atypically, my gauge is way off–much too big. I tried dropping down a needle size, but it’s still too big. I really don’t want to be knitting in worsted on size 2 or 3 to get gauge–it will look too tight and take forever. Can I reduce the stitch numbers for rib/body for an adult hat (head size 23″) and use the 5/7 needles? If so, how much should I reduce? My ribbing on the 5 came out at like 17″ (!) so I have frogged it, awaiting your helpful reply! Thank you so much!! Amy
Hi, Helpful Folk,
This is an addendum to the “help!” request I sent last night about not being able to get gauge for this hat. I’m wondering if the problem is that I’m using worsted organic cotton rather than a more elastic wool like your yarn is. Mine is Blue Sky and it is actually labeled on the front tag “worsted/multi” so A. maybe it’s thicker than a wool worsted and B. it doesn’t have enough stretch to make a good hat (?). This was a requested hat from a family member in this yarn, but maybe I should tell her it won’t work as a hat?? I don’t usually knit with cotton, so IDK! Please advise. Thanks so much!! I do love your patterns. Best, Amy
Hi Amy,
Thanks for reaching out! Getting gauge with cotton can be tricky when you are used to knitting with wool yarn. Blue Sky Worsted Cotton is a pretty dense yarn, and even though it may seem like it’s knit very tightly when at the correct gauge, that’s probably a good thing for a hat because cotton does stretch out over time and you don’t want the hat to end up too big after it is worn for a while. Cotton also doesn’t draw in as much as wool in ribbing, so as long as you get the correct gauge in stockinette, I would just work the ribbing on a needle two sizes smaller and not worry if it ends up a bit larger in the ribbing than you are expecting. I would also recommend washing and blocking your swatch to see if that affects the gauge and hand of the fabric – this yarn softens up a lot after washing, so you may find that even if you thought the fabric at the correct gauge was too tight, it feels great after a bath!
I hope that helps, and happy knitting!
Julianna
Thank you, Julianna. That is very helpful!
Hello! I love the look of this pattern, but I am having a hard time finding the yarn colors to buy. The link to the worsted twist yarn is broken, and when I search worsted twist on the purl soho site, I see other colors, but none of these. Can you help?
Thanks!
Robin
Hi Robin,
Thanks for reaching out! I am so sorry that the links to Worsted Twist were broken. We have fixed them and they should be working correctly now. Please know that many of the colors that we used for this hat have been retired and are no longer available. All of the current colors of Worsted Twist can be found here! We know that our current palette differs from the one here but hope that it provides some inspiration for some lovely hats using this pattern!
Best,
Cassy
Hi,
I have 80 grams each of two colors left over from the color tipped scarf pattern. Will this be enough to complete two adult hats?
Thanks.
Debra
Hi Debra,
Thanks for reaching out! Unfortunately the adult hat without a pom pom uses nearly an entire skein of Worsted Twist, so you won’t have enough for two hats; however, you could make one striped hat and have plenty of yarn for a nice full pom pom!
Best,
Julianna
Hi! I’m just finishing my first Classic Cuffed Hat knit in your Worsted Wool. I am new to knitting and realize that I should have knit the ribbed brim more tightly to meet the recommended gauge. Is there a technique for blocking/shrinking just the brim of the hat once it is knit to tighten it up a bit? Thanks!
Hi Diana,
Thanks for reaching out! Unfortunately it can be difficult to block something smaller, especially an item like a hat that will get repeatedly stretched out when worn. I would definitely recommend being very gentle when blocking the hat and pushing or squishing the ribbing together while it is wet so it stays as narrow as possible while drying, but you may find that it will get loose again after wearing it for a while. If you are feeling adventurous, you could try cutting the ribbing off of the hat, returning the live stitches to a smaller needle, and re-knitting the ribbing in the opposite direction!
Best,
Julianna
Hi,
Is it possible to do a 2 x 2 rib instead of a 1 x 1 rib for thus pattern?
Regards
Sarah
Hi Sarah,
Great question – thanks for reaching out! A 2 x 2 rib would absolutely work for the Classic Cuffed Hat!
Happy Knitting!
Cassandra
Hi,
I’d like to knit this hat for my husband but he has a really big head! I would need the circumference to be inches. Would it be possible to add an xlarge size for this hat please? And would it use the same size 16 inch circular needles or would it need a longer size?
Many thanks,
Vikki
Hi Vikki,
Thanks for asking about this – I’ll pass on your request to the design team for an extra large size for this pattern. Most hats can be made on a 16″ circular needle, but there’s also a twenty inch needle length in circulars if you’re working with a thicker yarn or larger size. Anything bigger than that would likely stretch the stitches out too much. I know that this is a totally different yarn/pattern, but our Boyfriend Hat has a larger range of sizes, which might be what you’re looking for, and it’s also a classic!
Happy Knitting!
Cassandra
Can I use a bulky weight wool for this hat if I gauge it?
Hi Wendy,
Thanks for writing in! You definitely could do that! Another option is a few patterns we have that would work for a thicker yarn, Super Soft Merino Hats for Everyone! and Giant Twisted Rib Hat
Hope this helps!
Happy Knitting
Jessica
I have a size2 16″ inch circular needle and fingering weight yarn I ordered by mistake. Can I make a toddler hat for a two year old with this pattern? How do I armistice the directions?
Hi Mae,
Thanks for writing in! Unfortunately that is quite a jump in gauge, so I’m afraid we aren’t able to rewrite this pattern for a fingering weight yarn. You might be interested in our Tiny Stripes Hat, Reversible Hat, or Color Dipped Hat!
I hope that helps!
Julianna
I am making hats for my 2.5 year old twin boys. Their head circumference is in the 19-20″ range – do you suggest I make the baby or child sizer? Thanks so much!
Hi Sarah,
Great question! Hats fit best with about two to four inches of negative ease, meaning the finished measurement of the hat should be two to four inches smaller than the wearer’s head. In this case, I would probably go with the Kid size, since it should still fit well but will have a little bit of room to grow!
I hope that helps!
Julianna
Hi there,
What length of double pointed needle should I use?
Thanks!
Hi Michele,
Thanks for writing in! Since you will only be using the double pointed needles for the very top of the hat, where there aren’t too many stitches left, you can use either 5 or 7 inch needles, whichever you prefer!
Best,
Julianna
Thank you!
Hi! I want to make to hat for my 2 years old boy. I’m new to the all circular needle thing, I normallhy use the straight ones, but I’m having an hard time from the very beginning. I have a 41 cm circular needle (I believe it’s 16 inch), I casted 80 stitches on it but it is too short and I cannot join the work. It could be maybe because I used a different tubular cast on that doesn’t stretch enough?
Also I dont’ have double pointed needle, is there a way to finish the hat without them?
Sorry for my English, wasn’t easy to explain!
Hi Barbara,
Thanks for reaching out! This pattern actually has the options to start off with straight needles for the cast on. Using a set of US size 6 or 7 straight needles with our Long Tail Tubular Cast On method and then moving to the #5 16″ circular needles when it is time to join the work in the round should help. You can also use the Long Tail Cast On directly onto the circular needles, join the work in the round and then directly begin the ribbing section.
If you would prefer not to use the double pointed needles you can try the Magic Loop method to finish off the hat!
I hope this helps, happy knitting!
Gianna
Hi there
I’m looking to make this hat for a newborn, will the baby size dimensions work?
Thanks!
Hi Michele,
Thanks for reaching out! The baby size may be slightly large for a newborn but should be a pretty close fir depending on the dimensions of the baby’s head!
I hope this helps, happy knitting!
Gianna
Hello thanks for the pattern. In ‘work the body’ description, are the sizes to work from rim in inches? Thanks
Hi Lisa,
Thanks for reaching out! Yes the measurements are in inches!
All the best,
Gianna
Hello! I’d like to make this in Jade Sapphire cashmere (2 ply). Will that work? Many thanks!
Hi Elizabeth,
Thanks for reaching out! You could use Jade Sapphire 2 Ply but since that is a fingering weight and this pattern is written for a worsted weight which is much heavier, you would need to adjust the pattern quite a bit to accommodate a thinner yarn! I would recommend using Jade Sapphire Zageo 6-Ply or 8-Ply instead since they are a closer weight to what we use in the pattern!
All the best,
Gianna
Should the hat be blocked with cuff up or straight down?
Thank you.
Hi Anita,
Thanks for reaching out! You can block it either way, when I have made this hat I prefer to block it with the cuff folded to give it a crisp edge!
All the best,
Gianna
I’d like to add mohair to the body of this hat at what point would you add it?
Hi Krista,
Thanks for reaching out! That is a great idea and would be a beautiful effect! I recommend adding in our yarn Tussock and holding the mohair double with the Worsted Twist from the beginning, and casting on with both.
All the best,
Gianna
Hello! I’m a newby and this is my first beanie. I’ve gotten to the Shape the Crown section and am having a hard figuring out the pattern, particularly this part:
k13 (15, 17), k2tog, place a marker that is a different color than the end-of-round marker] three times, k1, ssk, k13 (15, 17), k2tog. [64 (72, 80) stitches]
Is k13 referring to “on the 13th knit loop”? And is the last part in brackets referring to the number of stitches that will be left, depending on the size, after the first round? Thanks and sorry if it’s a simple answer, I just couldn’t figure it out when I searched online.
Thank you!
Hi Rachael,
Thanks for reaching out! When we say K13 it means to knit 13 stitches (knit loops) starting at the beginning of the round! And yes the numbers in the brackets at the end are the amount of stitches you should have in total for each size after completing the first round of decreases!
I hope this helps and please feel free to reach out with any more questions going forward!
Happy knitting!
Gianna
I am vision challenged so I have a LOT of trouble searching for patterns for toddler hats. This looks like it will work perfectly from what I can see of the pattern. I need to make this in a toddler size for a 19 1/2 “ head. Would someone be willing to help me out on stitch count cast on and decrease counts? Or would the kid size work out ok? I would REALLY appreciate it! Thank you for the help! Once I have the correct counts my husband will print it out for me in a large format and I will be able to “feel” my stitches and hopefully be able to make my grandbaby a nice warm winter hat!
Hi Jacqulyne,
Thanks for reaching out! This is such a great hat pattern and I think the child size should fit perfectly on a 19 1/2″ head. I would recommend working the pattern cast on and increases for the child size as written! I hope this helps and please feel free to reach out with any more questions!
Happy knitting!
Gianna
Any ideas on how to make it so the pom pom is not super floppy on the top of the hat? I secured it as instructed but it still flops over quite a bit, as it is fairly large. I’m using the yarn recommended by the pattern. Maybe sew a fleece patch underneath? Or use an anchor of some sort?
Hi Rachel,
Thanks for reaching out! Unfortunately when you have a big pom pom some flopping is to be expected, I think sewing a little fleece patch underneath would be a great way to anchor down the pom pom and relieve some of the floppiness!
I hope this helps!
All the best,
Gianna
Update for Gianna- You were right – the child size fit my grandbaby perfectly! THANK YOU FOR THE HELP!! It doesn’t matter that my eyes don’t work very well – my hands and heart know what to do! Lots more hats coming this winter for everyone in my family! They are all very excited. YAY!!!
Hi Jacqulyne,
Thank you for writing in again and for your kind words! I am so glad I could help and that the hats turned out so great!
All the best,
Gianna
I’m confused about how to switch to the circular needles after doing the tubular cast-on on straight needles. The last instruction in the “Begin” section says “do not turn” after the third foundation row of the tubular cast-on. I was thinking that after the third foundation row, I would knit the first row of ribbing off of the #7 straight needles and onto the #5 circular needles, but how can I do that without turning the work after the third foundation row?
Hi Kaitlyn,
Thanks for reaching out! For this pattern you are only working 2 foundation rows and then moving on to the ribbing section! We say do not turn at the end of Row 2 because you are not continuing to work on the straight needles but transferring your stitches to the circular needles. So after finishing Row 2 move directly on to the RIB THE CUFF section, and using the smaller circular needles (US #5 16-inch) place a marker and join to work in the round and then begin the 1×1 rib.
I hope this clarifies things!
Warmly,
Gianna
Sorry, I meant second foundation row, not third! So, just to clarify, when I finish the second foundation row I’ll have all of the stitches on the straight needle in my right hand. To start the RIB THE CUFF section, don’t I need to switch that straight needle to my left hand (thereby turning the work) so that I can use the circular needle in my right hand to knit the 1×1 rib row? Or am I misunderstanding something?
I’m also confused about how I can join to work in the round immediately after Row 2, since the stitches aren’t on the circular needle yet. Thanks so much!
Hi Kaitlyn,
Thanks for reaching out again! The wording may be a bit confusing since you aren’t turning the work in the sense that you are not continuing to work on the straight needles but you are turning the work in the sense that you are going to begin working on the circular needles, establishing the 1×1 rib pattern and joining the work in the round.
I hope this clarifies things!
Warmly,
Gianna
Hello,
My boyfriend has a small head, 21.5 in at greatest circumference. He wears a 6 7/8 fitted hat size. Would you recommend that I make the kid or adult size for this beanie?
Thanks!
Louie Purrl
Hi Louie,
Thanks for reaching out! The adult size has a finished body circumference of 18 1/2 inches, and a finished Ribbing Circumference (unstretched) of 14 inches, so I believe the adult size should fit him! I think the kid size would be a bit too tight for a 21 1/2 circumference!
I hope this helps, happy knitting!
Gianna
Hi there! I have some Baby Yak Medium yarn, and it’s gauge is slightly different from the worsted yarn recommended in this pattern. I’d so love to make this hat! Do you know how many yards I will need to make an adult sized hat? And how I adjust the number of stitches I cast on? I thought I would use size 4.5 needles for the ribbing, and 5 for the crown given the different weight. I tried with 84 cast on stitches, but ran out of yarn before I could finish the crown. Tragic!
Thank you so much for your help and wisdom!
Hi Maya,
Thanks for reaching out! We used approximately 328 Yards of worsted weight to make the Adult hat! The best way to figure out how many stitches to cast on is to work a gauge swatch with the yarn you want to use and an appropriate needles size and compare that to the written gauge of the pattern! Our tutorial All About Gauge is an excellent resource to use!
I hope this helps!
Warmly,
Gianna
Hello! I am using two strands of good wool so I may need to add stitches. Is this pattern any multiple of 8? Or any even number +8? Thanks so much!
Hi Norma,
Thanks for reaching out! I would recommend working a gauge swatch first to know for sure if you will need to add stitches or if it will work with the recommended cast on amounts and possibly just a different needle size! I recommend checking out our All About Gauge tutorial, it is an excellent resource to use! For the decreases to work accurately you will need to cast on a multiple of 8!
I hope this helps, happy knitting!
Hello! I would like to knit this hat for my husband who has a rather large head (almost 24” circumference). It seems like the 18.5” would be a bit small even with negative ease? What do you think about knitting as written but on a #6\#8 needle set (still in worsted weight yarn) instead just to give him a little more wiggle room on the adult size? I’d like to not mess with this classic pattern too much!
Hi Rebecca,
Thanks for reaching out! I think you could certainly use a bigger needle to increase the size a bit! I would suggest working a gauge swatch first and compare it to the gauge of the pattern to insure that it is not too big before you begin!
I hope this helps, please let me know if you have any other questions!
Warmly,
Gianna
Left-handed beginner here! For the “ssk” and “k2tog” stitches, do you recommend I do the opposite? Or is it okay to follow the pattern as is? I am having trouble wrapping my head around whether or not mirroring the directions will affect the pattern. Thanks for your help!
Hi Linda,
Thanks for reaching out! That is a great questions- I would recommend trying to work the pattern as is instead of mirroring it!
I hope this helps, happy knitting!
Gianna
Hi,
Thank you for the pattern. I’m also having trouble transitioning from the foundation to “ribbing the cuff”, in other words “join to work in the round”.
Am I supposed to transfer the stitches from the straight needle to the circular needles then knit? Or can I knit the next set onto the circular needles from the straight? Is the the joining step? Or am I supposed to do something extra to join the 2 ends during this transition to knitting in the round? Any further explanation would be appreciated.
Hi Emilie,
Thanks for reaching out! Once you have finish row 1 and 2 of the Tubular Cast On, you will then transfer the needles onto the smaller circular needles and join the work in the round!
I hope this helps, let me know if you have any more questions!
Warmly,
Gianna
I am looking forward to knitting this hat pattern. I plan to make it to fit a 2 year old. Would that be considered a baby or kid for pattern instructions?
Thanks
Hi Carol,
Thanks for reaching out! I love this pattern, it is so much fun to knit! Depending on the circumference of the 2-year-olds head you may be able to make either the baby or kid pattern, so I would suggest taking a few measurements and you can determine your size from there!
Happy knitting!
Gianna
My adult daughter has a 24 inch circumference head – as written this pattern is way too small, even using the largest size. Do you have any suggestions on how to make this bigger to fit her so I can make her a hat using this pattern? I love this pattern and use it a lot for hats for others. Thank you!
Hi Jacqulyne,
Thanks for writing in! Luckily this hat pattern is very versatile for more sizes than you would expect! Due to the stretchiness of the ribbing, the adult size should stretch quite a bit to fit a 21-24″ circumference comfortably! Keep in mind, when you asked about what size to make for the toddle with the 19 1/2″ circumference, the kid-size was a perfect fit, and the finished dimensions for that size are; Finished Body Circumference: 17 inches and Finished Ribbing Circumference (unstretched): 13 inches! If you are still a bit concerned the hat works over a multiple of 8 stitches, so you can add 8 stitches to the cast on (96 stitches!)
I hope this helps, happy knitting!
Gianna
Hi! I was wondering how many hats I can get out of a skein? Thinking a baby or smaller size to make. Thanks!
Hi Julie,
Thanks for reaching out! Unfortunately, since this is an older pattern of ours I don’t have the exact yardage breakdown for each size, but I think you will need most of a full skein for the baby size and you will definitely need 2 skeins for the kid-size! So I don’t believe it would be possible to get more than 1 hat from 1 skein!
I hope this helps, happy knitting!
Gianna
The classic cuffed hat appears to be just what I am looking for and much easier than the one my knitting instructor has suggested; however, I do not wish to print 11 pages. Also, printing the 11 pages in color would use lots of ink (I am budget-oriented.) Would you reformat the pattern showing one picture in one color, along with the directions? Thank you so much.
Hi Jean,
I completely understand wanting to keep the pattern as printer-friendly as possible! There’s a pretty easy way to adjust the pattern to eliminate sections or images to reduce the number of pages necessary. If you’re on a desktop version of the site, you will find a “print” icon in the right column just below the “Save To Favorites” button. If you’re on a mobile version of the site, you will find a “print” icon below the pattern and above the comments.
Follow the easy on-screen instructions to delete whichever parts of the pattern you don’t want to print or save. For example, you may decide to shorten the pattern by omitting certain images or the list of materials. To remove images, click the drop down next to the image icon and change from 100% to 0%.
I hope this helps!
Warmly,
Kelsey
Hi there!
Thank you for the pattern. I am wondering if the ribbing should be folded in half or the idea is for all of the ribbing being to be folded to the stocking stitches?
Thank you in advance!
Hi Lena,
Thanks for writing in! You can certainly wear the hat either way, depending on how it fits. The finished height of the hat ranges from 9.5 to 12.25 inches (depending on the size), so you can fold up as much of the ribbing as is comfortable! Hope this helps.
All the best,
Lili
Hi Lili,
Thank you so much for your reply and help! 😊
Lena
I’m confused when it says “do not turn” before the “Rib the Cuff” section. Am I supposed to start knitting without turning my work, like in this video? https://youtu.be/uX6KkJu0hAE
If so, for how long until I resume knitting normally with turning?
Hi Savanna,
Thanks for reaching out. The pattern indicates “do not turn” because you will be joining your work in the round at this point! The entire RIB THE CUFF section, as well as the remainder of the hat is worked in the round. Hope this helps clarify things!
All the best,
Lili
Hi there, can you explain what this means:
Hat with Pom Pom: 1 (2, 2) skeins of Purl Soho’s Worsted Twist,
Hat without Pom Pom: 1 (1, 1) skeins of Purl Soho’s Worsted Twist, 100% merino.
What does the 1(2,2) mean, versus 1(1,1)?
Hi Bonita,
Thanks for writing in! This is the amount of yarn you needed depending on the size you are planning on making, and since the hat comes in two styles you, one with a pom-pom and one without! So if you are making the Hat with Pom Pom you will 1 (2, 2) skeins of Worsted Twist and if you are making the Hat without Pom Pom you will need 1 (1, 1) skein. The hat comes in three sizes Baby (Kid, Adult), so for example, if you are making the kid size you will want 1 skein or 2 skeins depending on if you are making the pom-pom!
I hope this clears things up!
Gianna
This is my 4th time making the hat and my first time messing up the edge! I’m halfway through the hat and l would rather not pull it out- is there any way to fix the edge?
Hi Miriam,
Oh no! I’m so sorry to hear you’ve hit a snag in your project! Depending on where the edge is, you may be able to insert a lifeline below the problem area, and rip back to that lifeline to rework that section. We have a tutorial for how to thread in a lifeline right here, and this technique will help make it so that you don’t drop any stitches when ripping back your work! If the cast on edge itself is what you’d like to adjust, you can thread your lifeline in the first row of stitches and undo from your slip knot cast on tail (or pick up stitches over the cast on edge), and then work in the opposite direction to bind off these stitches for a smoother finish.
I hope this helps, and please let us know how this goes!
All the best,
Margaret
Hi Margaret!
Thanks so much for replying. I messed up the cast on. It doesn’t line up with the rib and it looks like a distinct stripe at the edge. Anything I can do to fix? Maybe a crocheted edge of some sort?
Thanks!
Miriam
Hi Miriam,
Thanks for the additional info! I would not recommend a crochet edge, since that will remove the elasticity of the ribbing, which will alter the fit of the hat. Instead, what you could do is wear the hat with the brim folded inwards instead of outwards!
All the best,
Lili
I only knit on 2 straight needles, could you give me any tips as to how to adapt this pattern please.
Hello,
Thanks for reaching out! To make this pattern on straight needles, I’d recommend knitting it flat and then seaming into the hat shape. You can begin at the bottom with the 1 x 1 ribbing, then work the body in stockinette, and finally work the crown decreases every other row. You may also want to cast on 2 additional stitches to make up for the stitches that get hidden when seaming. Hope this helps!
All the best,
Lili
Yes, that’s great thanks. I thought it might be more complicated but I will add 2 stitches as you have advised
Can I make it without a Pom Pom?
Hi Zoe,
Thanks for writing in. Yes, you can definitely make this hat without the pom pom!
All the best,
Lili
If you use the Long Tail Cast On, should you cast on to the larger needle then switch to the smaller needle for the ribbing or just cast on and knit the rib with smaller needle?
Hi Cynthia,
Thanks for writing in. Using the long tail cast-on, you can begin with the smaller needles right away!
All the best,
Lili
Help! I’m looking for a ribbed hat pattern. It’s knitted flat with straight needles from the top down. All of the hat patterns I’ve found are from the bottom up. I have a picture of the hat. Thank you!
Hi Katherine,
Thanks for writing in. I’m afraid that I’m not sure what pattern you’re thinking of off the top of my head! Can you send the picture you mentioned to [email protected]? If we can visualize it, that would make things easier!
All the best,
Lili
I am having trouble knitting to gauge with the smaller needles. To get a 4” square I am up to a 5 mm. Am I reading the pattern wrong?
Thanks in advance.
Hi Dana,
Thanks for reaching out. It’s not uncommon for knitters to use different needle sizes to achieve gauge! Every knitter has a different natural tension, so it’s likely that your is just different from the tension of the designer who made this pattern.
When swatching, I’d always recommend making a large gauge swatch (larger in both length and width than 4 inches), so that you can take the measurement from the central stitches, avoiding the edge stitches where the tension is uneven. I would recommend making a 6×6 inch swatch. Once you’ve knit a 6×6 inch square, you can measure the number of stitches and rows in the central 4 inches!
And if you’d like to learn more about the intricacies of gauge and swatching, I’d recommend checking out our tutorial called All About Gauge, which covers some incredibly helpful information. I even learned some interesting, new tidbits myself while looking over it, and you may, too! You can find it right here. Hope this helps!
All the best,
Lili
Hello,
I’d like to make this hat with some yarn I just purchased. It’s a worsted weight which I’d like to double up to make it about 3.5 or 4 stitches to the inch. Can you help me to adapt it to this pattern, please? THANK YOU!
Hi Lisa,
Thanks for reaching out. To make this pattern with a different gauge, you will just need to change the number of stitches you cast on so that it still comes to the correct size!
To figure out your cast-on number, you will want to first knit a gauge swatch in pattern. Once you know how many stitches you are getting per inch, you can multiply that number by the finished circumference of the size you’re planning on making and cast on the nearest multiple of 4. Then you can essentially follow the pattern as written!
Once you reach the SHAPE THE CROWN section, here’s how to work Round 1 with any multiple of 4 stitch count:
Round 1: [k1, ssk, k(cast-on / 4 – 5), k2tog, place a marker that is a different color than the end-of-round marker] three times, k1, ssk, k1(cast-on / 4 – 5), k2tog. [8 stitches decreased]
Hope this helps!
All the best,
Lili
SO helpful–thank you, thank you! So sad that the store is no longer in person, but so thankful for your help! Purl is the best.
Hi Lisa,
We’re so glad that Lili could assist you! We’re sad that the storefront is no longer open and really miss that aspect of our shop as well. On the bright side though, the benefit of having our shop be solely online now is that we have been able to create many more new yarns, projects, and products as well as develop a larger customer service team, 1-on-1 Zoom chats, and have even launched two Knit-Alongs! We are so grateful for our amazing crafting community and are committed to finding more and more ways to support and connect with our customers in real time.
Thanks so much again for writing in and hope you have a great rest of your day!
All the best,
The CS Team
I cast on in the bigger needles and don’t know if I should frog and start over? Thanks!!!
Hi Evan,
You could definitely restart the hat if you want since you’re still so close to the beginning! But I also don’t think it will make too much of a difference if you want to continue. The cuff will just be a bit looser!
All the best,
Lili
Hello! Would it be okay to use a regular long tail cast on instead of the tubular? I don’t knit too tightly so don’t usually have a problem with the ribbing not being stretchy enough. If I used a long tail cast on would I still do the foundation rows? Thanks so much. Sue
Hi Sue,
Yes, you can absolutely use a regular long tail cast-on for this hat! And you can jump straight into the pattern repeat–the foundation rows are only necessary for the tubular cast-on.
All the best,
Lili
Hello! This is my 6th or 7th time knitting this hat, I love this pattern. I noticed when my daughter’s hat was done that when I turn the brim up the side that shows isn’t as nice. I am now making my sons hat and I’m wondering if there is a way to change which side is the right side?
Thanks!
Hi Mariam,
Thanks for writing in! This sounds like you may be running into a tension issue which is quite common when working ribbing. I would recommend simply turning your work inside out and knitting the direction after you have completed the ribbing portion of your hat!
I hope this helps but please let me know if you have any questions and we would be happy to have a deeper look!
Happy knitting,
Gavriella
Hello!
I used a new tubular cast on method for my past 2 hats using a piece of spare yarn. It was much easier to do but one side is definitely nicer than the other. Unfortunately, the nicer side is hidden when you cuff the hat. Is there any way to change which side is the right side when knitting in the round? If not, is it possible to purl instead of knit or will that mess up shaping the crown?
Thanks!!!
Hi Mariam,
Thanks for your question! Instead of joining to work in the round on the first row, you could instead work back across your stitches as if knitting flat and then join to work in the rounds at the end of that row! You could use your tail to weave together any gaps you may get at the start of your knitting once you are finished with your hat! I hope this helps but let me know if you need any further clarification!
Happy making,
Gavriella
Could this pattern work for a bulky or super bulky yarn? What would the modifications be if so?
I’ve got 3x balls of 14ply merino wool and am keen to knit up a quick beanie for my 20mo old girl 🙂
Hi Alex,
Thank you for your question! To modify this pattern you will want to start with a gauge swatch. You will then measure your stitches per inch and multiply that number by the desired circumference of your blanket and that will give you your cast on number. One thing to keep in mind is that this hat pattern is worked over a multiple of two, so you will want to start with an even number of stitches. From there you can work out your decreases by splitting your sections into 4 equal parts to workout the new decrease sections.
I hope this helps!
Happy knitting,
Gavriella
Hi!
I have substituted Worsted Twist with Plenty so I am wondering if I need to cast on less stitches or are the yarns similar enough in gauge (4.5-5 vs. 4-4.25) that I should just follow the pattern as written? Or instead of using US 5 and US 7 needles, I go down a size to a US 4 and US 6? I apologize, as I see a similar question has already been answered, but want to be sure that I’m on the right track; I’m not yet confident about making modifications without help!
Hi Tracey,
We would recommend knitting a gauge swatch with the recommended needle size just to be sure you can match the tension of the pattern. I hope this helps!
Happy knitting,
Gavriella