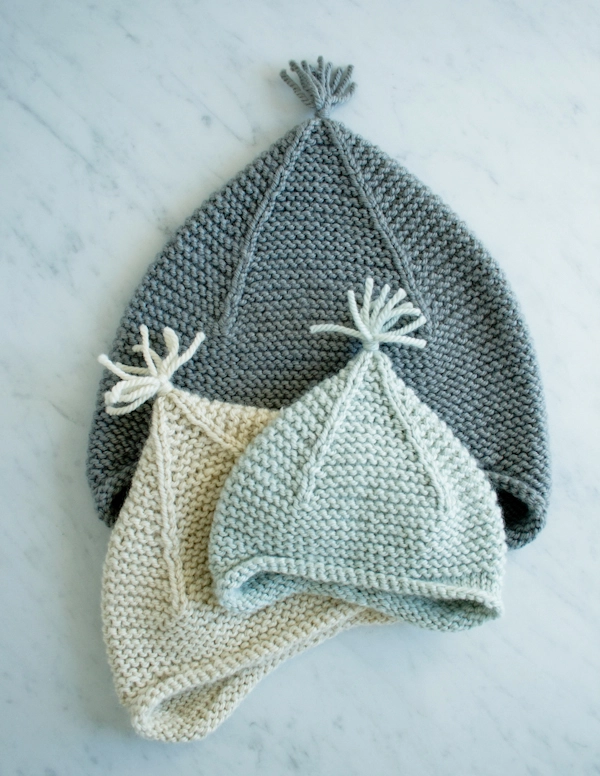

Garter Ear Flap Hat
This Garter Ear Flap Hat was an engineering feat to get me back on my feet. You see, I didn’t exactly have that quintessential fresh-start feeling that so often comes with the New Year. Instead, I spent January 1st in bed with the flu and its attendant fever, aches, chills, and delirium. Just as the worst was passing, Mother Nature blasted us with a Polar Vortex that I did not have the strength nor will to face.
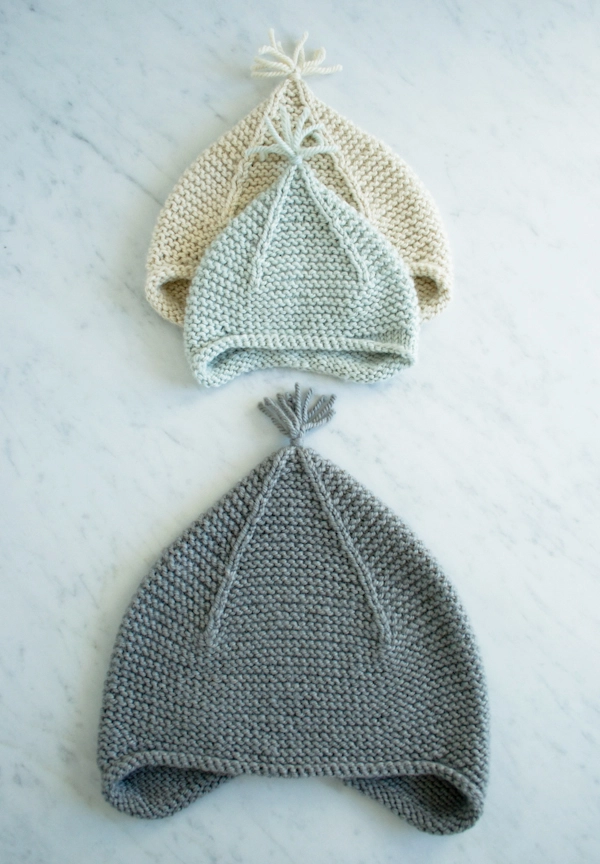
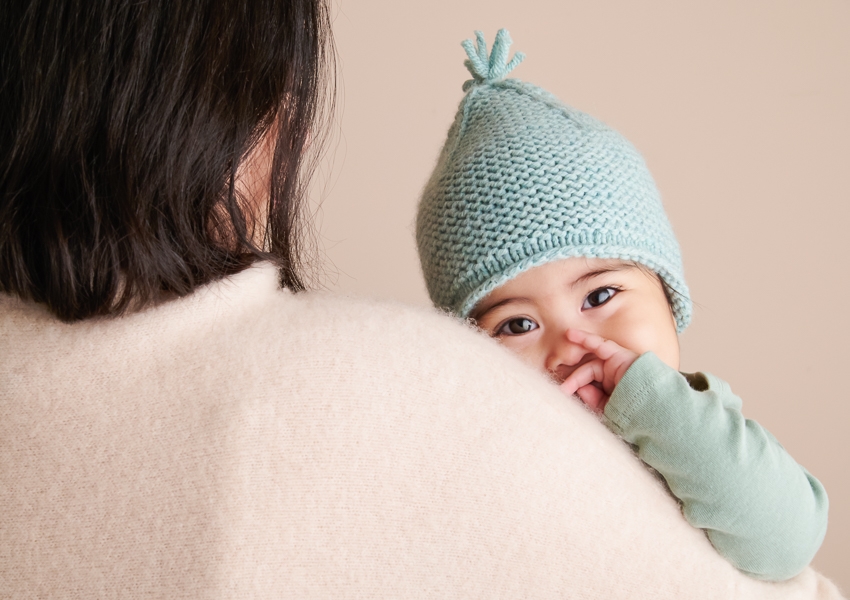
Cabin fever set in! Groggy from illness and stir-crazed from quarantine, I was determined to prove my health (and sanity), and so, making this hat became a triumphant product of my bruised spirit. I created this hat that simultaneously hangs on and hugs my head, which provides protection and insulation from a season that had been beating me down.
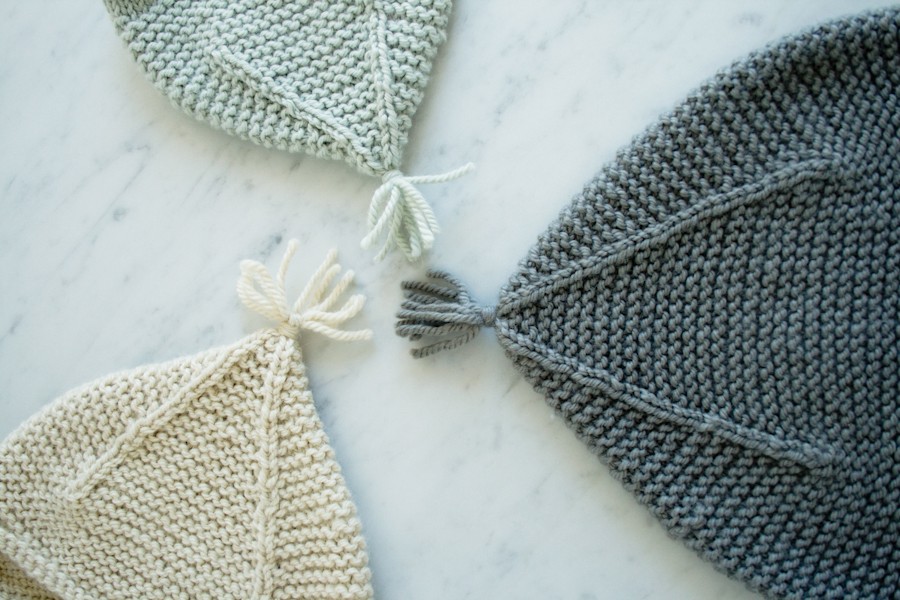
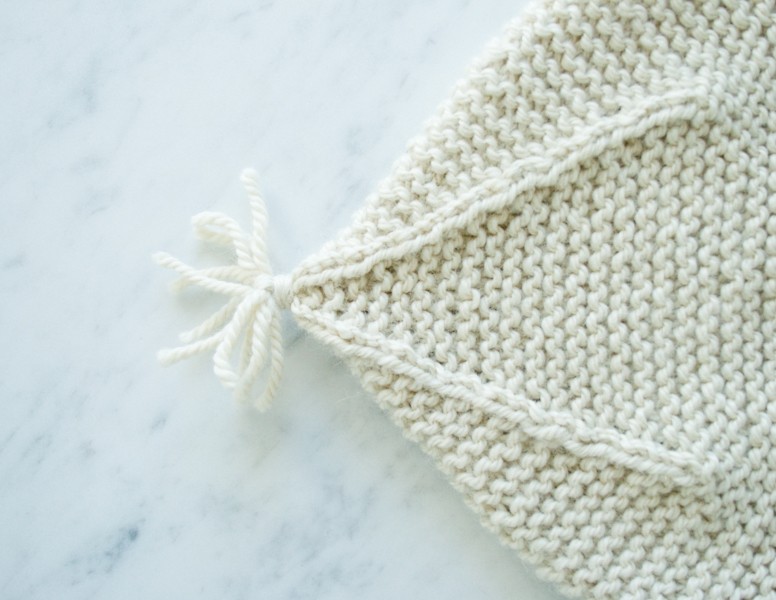
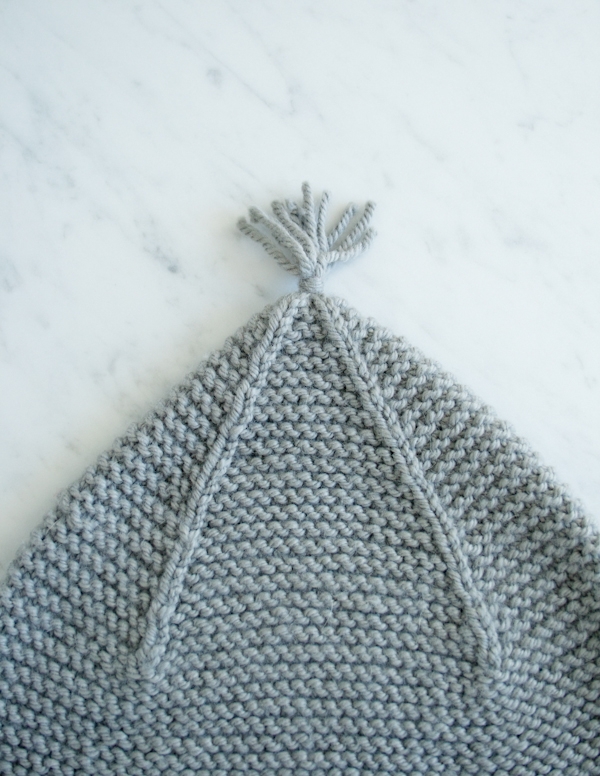
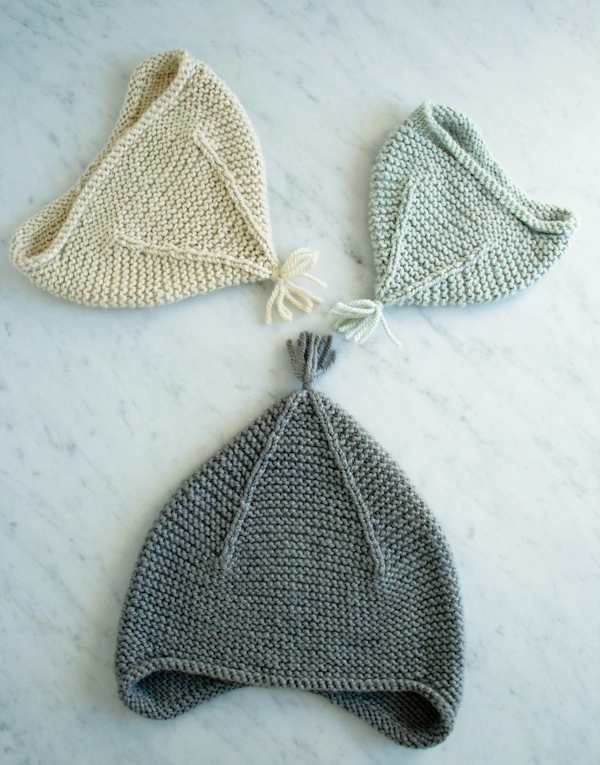
Still enamored with the ease of working short rows in garter stitch (as with my Knit Elbow Patches), I constructed this hat in one seamless piece using Purl Soho’s soft and lush Alpaca Pure. The more I knit with this incredibly comforting yarn, the better I felt. And the topper made it official. Slightly pointed with a tiny tassel, the finish delivered cheer and whimsy. I was back to my healthy self!
With my head toasty warm and back in full heath, that fresh-start feeling did arrive… just a little late this year. A belated Happy New Year to all! May it be a healthy one. -Laura
UPDATE: NOW IN PLENTY
DECEMBER 2022
In our soft and springy Plenty, our Garter Ear Flap Hat will keep your ears downright toasty! This 100% extra fine merino is as un-scratchy as wool gets, and it has a tidy, high twist that wards off pills… extra important for a hat that’s going to get as much use as this one! With over twenty colors of Plenty to choose from, surely there’s one to make you grin from ear to ear!
Designed by Purl Soho designer, Laura Ferguson.
Share your progress and connect with the community by tagging your pics with #PurlSoho, #PurlSohoBusyHands, and #PurlSohoGarterEarFlapHat. We can’t wait to see what you make!
Materials
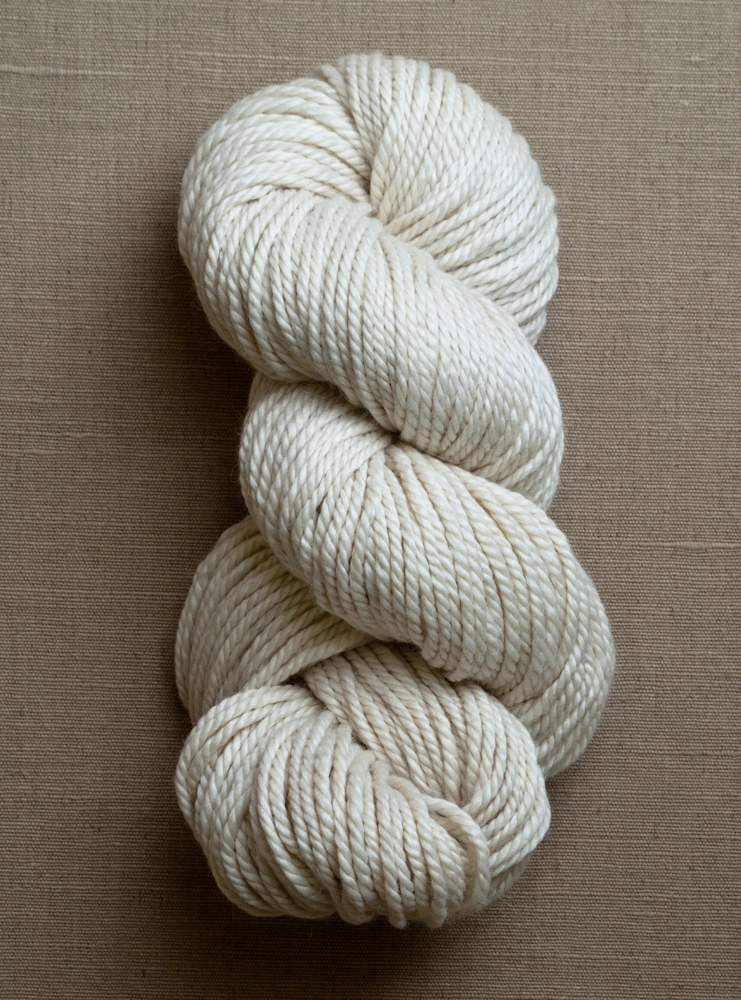
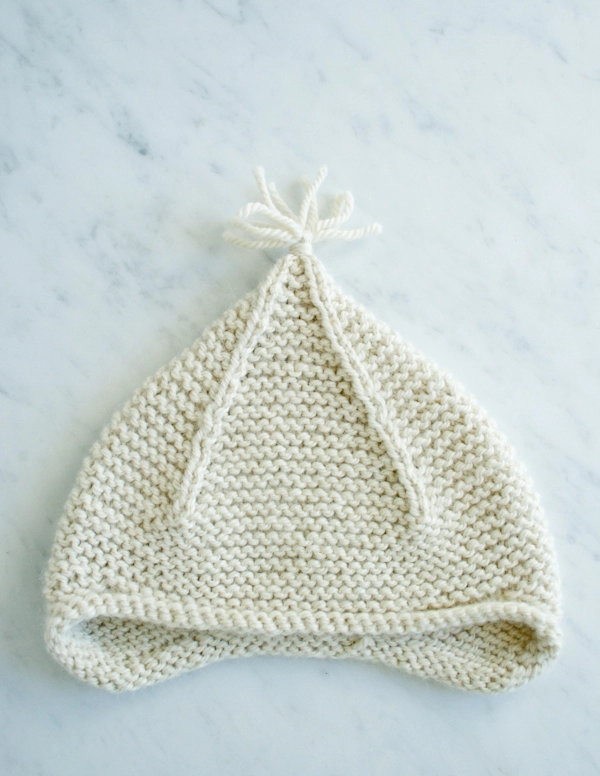
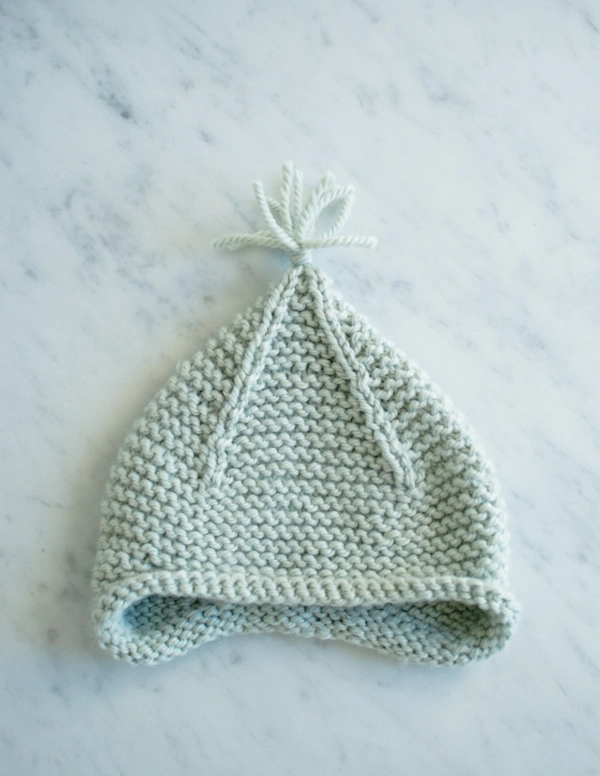
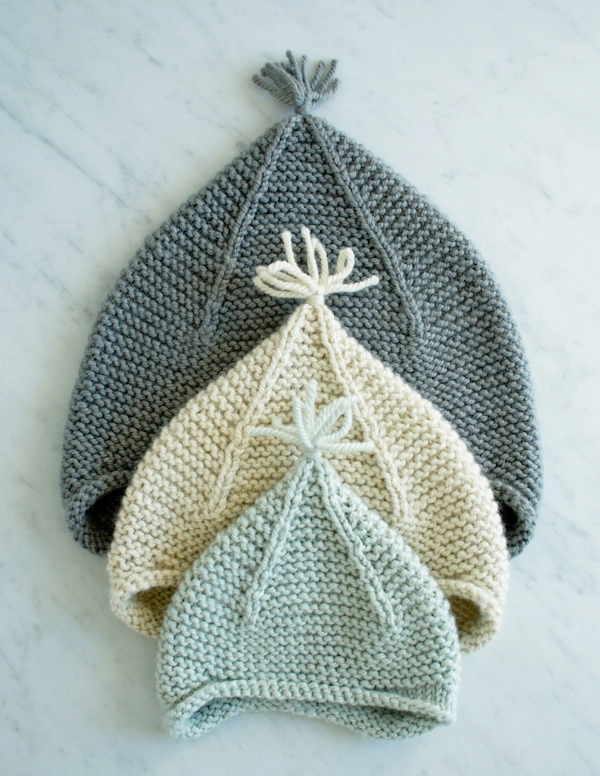
- 1 (1, 1, 2, 2, 2) skein(s) of Purl Soho’s Alpaca Pure, 100% alpaca, or another Aran weight yarn; approximately 55 (70 , 87, 120 , 153, 196) yards. We used the colors Heirloom White (Artemisia, Storm Gray) for the Baby (Kid, Adult Medium) hat.
- US 8 (5 mm), 12-inch (for Baby size) or 16-inch circular needle
- US 7 (4.5 mm), 12-inch (for Baby size) or 16-inch circular needle
- Set of US 7 double pointed needles
- Removable stitch markers, including 1 unique
Gauge
17 stitches and 32 rows = 4 inches in garter stitch with smaller needle
Sizes
Baby (Toddler, Kid, Adult Small, Adult Medium, Adult Large)
- Finished Circumference: 14 (16, 17¾, 19¾, 21¾, 23½) inches
- Finished Height: 7¼ (8, 9, 10, 11½, 12¾) inches, from bottom of ear flap to top of hat, not including tassel
Notes
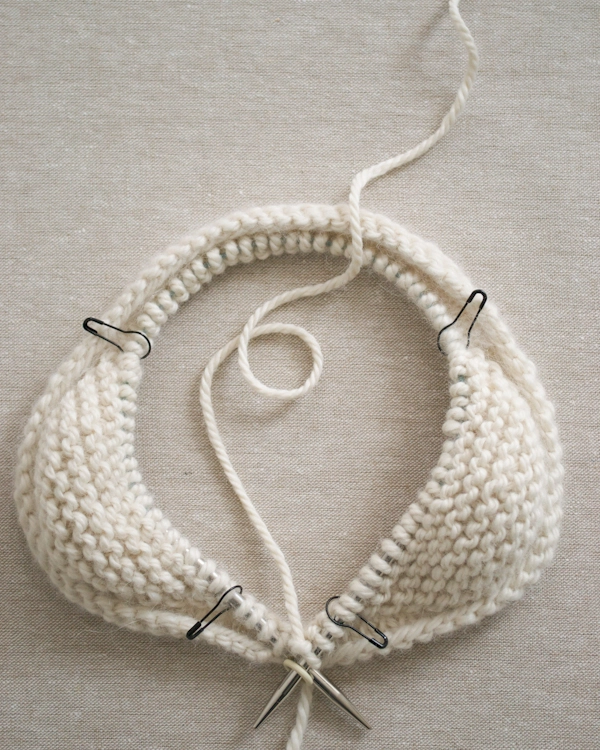
The Right and Left Ear Flaps are shaped using short rows. For our complete Short Rows Tutorial, please click here. NOTE: Because the short rows are worked in garter stitch in this pattern, you do not have to pick up the wraps; simply ignore the wraps when you come to them and work the wrapped stitch normally.
wrp-t [wrap and turn]: keeping the yarn in back, slip the next stitch purlwise from the left needle to the right needle. Bring the yarn forward as if to purl. Return the stitch from the right needle back to the left needle. Turn the work.
s2kp [slip slip knit pass]: Slip two stitches together knitwise, knit 1, pass slipped stitches over knit stitch and off needle. (2 stitches decreased)
Pattern
Begin
With larger needle, cast on 60 (68, 76, 84, 92, 100) stitches. We used a basic Long Tail Cast On.
Place marker and join for working in the round, being careful not to twist the stitches.
Knit 2 rounds.
Change to smaller needles.
Next round: Knit 3 (4, 4, 4, 5, 6) stitches, place marker (pm), knit 16 (18, 20, 23, 25, 27) stitches for Left Ear Flap, pm, knit 22 (24, 28, 30, 32, 34) stitches for Front, pm, knit 16 (18, 20, 23, 25, 27) stitches for Right Ear Flap, pm, knit to end.
Shape Left Ear Flap
NOTE: For this portion of the pattern, you will be working in Short Rows, back and forth, turning the work part way through each round, rather than continuing to the end of the needle. For a tutorial, click here.
NOTE: If a dash (” – “) appears in place of a number for your size, omit this line of instruction.

Next Row (right side): Knit to 7 (8, 9, 10, 11, 12) stitches before second marker, wrp-t.
Next Row: Knit to 7 (8, 9, 10, 11, 12) stitches before next marker, wrp-t.
Next Two Rows: Knit to – (-, -, -, -, 11) stitches before next marker, wrp-t.
Next Two Rows: Knit to – (-, -, -, 10, 10) stitches before next marker, wrp-t.
Next Two Rows: Knit to – (-, -, 9, 9, 9) stitches before next marker, wrp-t.
Next Two Rows: Knit to – (-, 8, 8, 8, 8) stitches before next marker, wrp-t.
Next Two Rows: Knit to – (7, 7, 7, 7, 7) stitches before next marker, wrp-t.
Next Two Rows (all sizes): Knit to 6 stitches before next marker, wrp-t.
Next Two Rows: Knit to 5 stitches before next marker, wrp-t.
Next Two Rows: Knit to 4 stitches before next marker, wrp-t.
Next Two Rows: Knit to 3 stitches before next marker, wrp-t.
Next Two Rows: Knit to 2 stitches before next marker, wrp-t.
Next Two Rows: Knit to 1 stitches before next marker, wrp-t.
Shape Right Ear Flap
NOTE: For this portion of the pattern, you will once again be working in Short Rows.
NOTE: If a ” – ” appears in place of a number for your size, omit this line of instruction.
Next Row (right side): Knit to 7 (8, 9, 10, 11, 12) stitches before fourth marker, wrp-t.
Next Row: Knit to 7 (8, 9, 10, 11, 12) stitches before next marker, wrp-t.
Next Two Rows: Knit to – (-, -, -, -, 11) stitches before next marker, wrp-t.
Next Two Rows: Knit to – (-, -, -, 10, 10) stitches before next marker, wrp-t.
Next Two Rows: Knit to – (-, -, 9, 9, 9) stitches before next marker, wrp-t.
Next Two Rows: Knit to – (-, 8, 8, 8, 8) stitches before next marker, wrp-t.
Next Two Rows: Knit to – (7, 7, 7, 7, 7) stitches before next marker, wrp-t.
Next Two Rows (all sizes): Knit to 6 stitches before next marker, wrp-t.
Next Two Rows: Knit to 5 stitches before next marker, wrp-t.
Next Two Rows: Knit to 4 stitches before next marker, wrp-t.
Next Two Rows: Knit to 3 stitches before next marker, wrp-t.
Next Two Rows: Knit to 2 stitches before next marker, wrp-t.
Next Two Rows: Knit to 1 stitches before next marker, wrp-t.
Next Row: Knit to end of round.
Work Body of Hat
Round 1: Purl (removing 4 stitch markers).
Round 2: Knit.
Repeat Rounds 1 and 2 until piece measures 4 (4¼, 4¾, 5¼, 6¼, 7) inches from the rolled edge at the center of an Ear Flap, or until approximately 3¼ (3¾, 4¼, 4¾, 5¼, 5¾) inches shy of desired finished height.
Shape Crown of Hat
NOTE: Switch to double pointed needles when necessary.
Set-Up Round: P7 (8, 9, 10, 11, 12), k1, place removable marker on previous stitch, [p14 (16, 18, 20, 22, 24), k1, place removable marker on previous stitch] three times, purl to end of round.
Round 1: [Knit to one stitch before next marked stitch, remove marker, s2kp (see Pattern Notes above), place removable stitch marker on the s2kp] four times, knit to end of round. [8 stitches decreased]
Round 2: [Purl to marked stitch, k1] four times, purl to end of round.
Round 3: Knit.
Round 4: Repeat Round 2.
Repeat Rounds 1-4 five (6, 7, 8, 9, 10) more times. [12 stitches]
Next Round: Repeat Round 1. [4 stitches]
Next Round: Knit.
Finish
Cut yarn leaving a 24-inch tail, thread onto tapestry needle and pull through remaining stitches. Make a Tiny Attached Tassel by following the instructions found here.
Weave in your ends and block as desired.


Ever since getting past the ear flaps, I’ve been knitting with the wrong side of the hat facing me. And now that I’m decreasing, it looks like the four places of decrease are just slightly not centered with front and back of hat. Could it be that at end of last flap I didn’t knit to end of row and went wrong way? I am pretty sure I’m doing the decreases correctly, especially after reading others’ comments. The decreases are set in, rather than raised, on the right side. Thank you.
Hi Christy,
Thanks for reaching out! Did you place your stitch markers in the correct places? That is the most important step of getting correctly spaced decreases, in the set up round prior to the crown shaping you should P7 (8, 9, 10, 11, 12), k1, place removable marker on previous stitch, [P14 (16, 18, 20, 22, 24), k1, place removable marker on previous stitch] three times, purl to end of round. This will then tell you exactly where all of the decreases should be going forward!
I hope this helps, happy knitting!
Gianna
Are there a total of sections of 14 purls plus 1 knit or only three?
Set up round. Purl 7 place marker on previous st. Purl 14, k 1 place marker on previous st. 3 times. 3 more times or 3 times total?
Hi Sue,
Thanks for reaching out! For this section: P7 (8, 9, 10, 11, 12), k1, place removable marker on previous stitch, [p14 (16, 18, 20, 22, 24), k1, place removable marker on the previous stitch] three times, purl to end of round, means that you will repeat the section that is within the brackets [p14 (16, 18, 20, 22, 24), k1, place removable marker on the previous stitch] three times total, then you will finish the round by purling to the end.
I hope this helps clear things up!
Gianna
When working the crown decreases, on the garter rounds do you knit the stitch with the marker or the stitch right after it?
Hi Barbara,
Thanks for reaching out! For the decrease round you will be knitting to one stitch before next marked stitch, remove marker, s2kp (see Pattern Notes), and then replace the removable stitch marker on the s2kp. You will repeat that four times and knit to end of round!
I hope this clarifies things, happy knitting!
Gianna
Just finished garter ear flap hat and my suspicions were correct. All the decreases slant to the left in a gradual curve to the top, instead of diagonally “straight”. I was so careful to do the decreases exactly on the s2kp. What could be wrong? I started the whole hat over so many times and got all the other issues figured out. Each time I began the 4-row repeat for the decrease, the decrease is one step to the left of last 4-row decrease, giving a staggered look. Should I not have done the s2kp stitch starting right on the marked knit stitch from row before? Thanks.
Hi Christy,
Thanks for writing in again! I am not sure what could be causing the issues with the decreases, please email us a photo of your work to our team at customerservice@purlsoho.com and they can trouble shoot further from there!
All the best,
Gianna
I am having the same issue. I have tried slipping the marked stitch with the stitch before it and with the stitch after it which. Either way my line seems to be staggered. Now I wonder of I’m knitting the wrong stitch in the garter row?
Hi Barbara,
Thanks for reaching out! It is likely that your stitch marker is in the wrong place, I would double check that you have accurately placed all of your markers prior to beginning the crown shaping (For this hat, you have to use a removable stitch marker and place it directly in the stitch indicated, not on the needle, so that the decreases stack correctly. This is what happens if you place your stitch marker on the needle instead.)
I hope this helps!
All the best,
Gianna
Explication en français svp
Hi Oehler,
Thanks for writing in! At this time we only offer patterns in english, but thank you for expressing your interest!
Warmly,
Gianna
I have the same issue. Markers at the right place and all.
Help, please!?
Martina
Hi Martina,
Thanks for reaching out! It is likely that your stitch marker is in the wrong place, I would double-check that you have accurately placed all of your markers prior to beginning the crown shaping. For this hat, you have to use a removable stitch marker and place it directly in the stitch indicated, not on the needle so that the decreases stack correctly. If you are still having issues after checking your markers are correctly placed in the stitches, then please email our customer service team with the information above and a clear photo of your work to customerservice@purlsoho.com and they can troubleshoot further from there!
I hope this helps!
Gianna
HI there, I see you don’t sell the Alpaca pure, what yarn substitution would you recommend?
Hi Ali,
Thanks for reaching out! Yes that is correct, Alpaca Pure has been discontinued but in its place you could use Worsted Twist or Linen Quill Worsted!
All the best,
Gianna
I was hoping somebody would have reached out about this already as I’ve been lost in desperation!
Thank you for your kind answer, this helps a lot!
Such a lovely hat!!!
Hi – I have made several of these in kid sizes. Just tried an adult size. Cast on 84 sts as directed, ear flaps went fine. Then to start the decreases, it says K 10, pm, K20, pm, K20, pm, k20 pm, K10. This only equals 80 sts. What am I missing here? Thanks for your help! I love the pattern design!
Shelley
Hi Shelley,
Thanks for writing in! Going into the decreases, for the set up round for the adult small you should be P10, k1, place removable marker on previous stitch, [P20, k1, place removable marker on previous stitch] three times, purl to end of round. So for example after you purl 10, you knit one stitch and that is where you place the marker and you do the same with the rest of the placement!
I hope this clarifies things, happy knitting!
Gianna
I can’t believe that I am writing this, because I used to do short rows for heels in socks, but I have been away from knitting for a bit and I am stumped. After I wrap and turn for the earflap , how far do I knit across before I wrap and turn again? Am I knitting to the marker? I know it’s not the whole row, but how far across?
Hi Marsha,
Thanks for reaching out! Depending on the size you are working on, for the first row in the shaping section for example (right side): Knit to 7 (8, 9, 10, 11, 12) stitches before your second marker, wrp-t. then for the next row Knit to 7 (8, 9, 10, 11, 12) stitches before next marker, wrp-t. If a dash (” – “) appears in place of a number for your size, omit this line of instruction and continue on.
I hope this clarifies things!
Warmly,
Gianna
When measuring from the rolled edge, did you flatten it out or leave it rolled?
Hi Hope,
Thanks for reaching out! When measuring from the rolled edge we leave it rolled not flattened!
I hope this helps!
Warmly,
Gianna
Beautiful pattern, but once you get to the ear flaps what do the dashes mean in the size selection? Example “Knit to – (-, -, -, -, 11)”
As the pattern continues the number denominations continue to change..say I wanted to do a kids size, what would I knit in place of these blank dashes?
Hi Shaun,
Thanks for reaching out! If a dash (” – “) appears in place of a number for your size, omit this line of instruction and move on to the next line where there are instructions for the size you are making! For example, the kid size after working the first two rows of the shaping section you would skip the next 3 rows where the dash appears and continue on to the Next Two Rows: Knit to – (-, 8, 8, 8, 8) stitches before next marker, wrp-t.
I hope this clarifies things!
Warmly,
Gianna
Hi, I’m interested in making this hat but notice that it’s made in the round on a circular needle. If all the stitches are knit, how are you getting a garter stitch. Nobody else seems to ask this question so it must be something I’m missing. Please let me know soon since I’m ready to begin. It’s a really cute hat!
Hi Barbara,
Thanks for reaching out! To get the garter stitch in the round you are purling one row and knitting the next except in the shape ear flap rows since you are working short row and flipping the fabric over, you knit both sides as usual for garter.
I hope this helps!
Warmly,
Gianna
When I do it this way I get the return short row out of stitch (aka purled) also. With the turn, shouldn’t the return stitches maintain stockinette?
Hi Suzanne,
Thanks for reaching out! Yes, as I explained previously when working the short rows you are knitting every row to maintain the garter stitch since you are working over both sides of the fabric. Once you move onto the WORK BODY OF HAT section you will then be knitting one row and purling the next to maintain the garter stitch since for this section you are only working over the right side of the fabric instead of both sides as you were while working the short rows.
I hope this clarifies things!
Warmly,
Gianna
Hi, I am confused with the wrap and turn. When you wrap and turn after knitting, the yarn is in place to purl but every row is knitting. How do I get the tail in the back to knit without unwrapping the stitch?
Jill
Hi Jill,
Thanks for reaching out! When working wrap and turn ins garter it is very easy, to see this technique in action, visit our Short Row Tutorial and follow along with the wrap and turn on the knit side section (at 0:30 seconds), except do not bring the yarn to the back before you turn, this will insure that when you turn the work the yarn will be ready for you to continue knitting!
I hope this helps!
Warmly,
Gianna
I’m having the same problem as Barbara and Christy! Is the marker placed on the knit stitch or on the (previous) stitch before the knit stitch to begin with? It might help me to know the number of the stitch on which to place the marker (ie. the 7th stitch from the beginning of the round and then maybe the stitch number for each successive section and round? (at least for the first couple of rounds which include the decreases). I have torn this out several times as well. Each time I start over I’m careful to move the marker, but get the leftward slant rather than vertical /diagonal decrease. I spoke with a friend who did this pattern andit took her a long time to figure out, as well. Unfortunately, she can’t remember how she did it.
Is there a chance you’ve done a video for this kind of decrease?
Thank you!
Cyd
Hi Cyd,
Thanks for reaching out! I am happy to help get this figured out! For the set up round you should be P7, then you k1, and place a removable marker on previous stitch (On the knit stitch directly after you have P7) making sure you are placing the marker on the stitch itself and not on the needles! We have a tutorial for the decrease you can follow here: Slip Slip Knit Pass (s2kp).
I hope this helps and please feel free to reach out with any more questions!
Warmly,
Gianna
Thank you, thank you!
I started the setup row for crown shaping, and I admit I was confused with p–, k1, place removable stitch marker on previous stitch. I debated if it was the knit stitch or the purl stitch previous… *sigh.
Hello, I love this pattern but just need some clarification – when it says ‘measure from the rolled edge on an ear flap’, does that mean measure from the rolled part that is rolled up inwards towards the hat, or the part that makes up the actual edge of the hat (in place of the cast on edge that is hidden inside)? I hope that makes sense. Thanks, Jules
Hi Jules,
Thanks for reaching out! When we say “measure from the rolled edge on an ear flap” it means to measure from the rolled edge as is, not to unroll and measure from the original cast on edge.
I hope this clarifies things!
Warmly,
Gianna
Loved this pattern, made 2 baby versions and then one for mom, dad and his two big sisters. Knitted very smoothly. Thanks. Look forward to looking into other patterns available here.
I’ve knit this twice but does not end up looking like garter stitch, what on earth could I be doing wrong please looks as should on ears then goes awfully wrong
Thanks
Hi Vicky,
Thanks for reaching out! I am sorry to hear that! Feel free to send us some photos of your work to our email customerservice@purlsoho.com and we can troubleshoot further from there!
Warmly,
Gianna
Hi there, this is a lovely pattern but I seem to have made a little mistake and am not sure how to fix it.
Just to confirm, after finishing the left ear flap, we knit toward the center and past the end of round stitch market, then to 7 stitches before next marker (in stitch)?
What I am getting is an extra knit row just above right ear flap, in the same round as the gap from the wrap (just before i start the body of the hat).
I hope this makes sense. I woke up thinking about this and it’s 2:30am, haha!
Hi Abi,
Thanks for reaching out! After you complete the shaping for the left ear flap you will then knit across to 7 (8, 9, 10, 11, 12) stitches before fourth marker, and then wrp-t. So you will be working over the end of round marker to the 4th marker that you placed, you will then begin shaping the right ear flap!
I hope this helps, happy knitting!
Gianna
Great pattern. No problems at all. Thanks fo r sharing
It’s my first time working in the round, so when I changed to DPN,s my work started to be in stockinette, is there a way to rectify this please 🙏🏻
Hi Vicky,
Thanks for reaching out! It sounds like when you switched needles you got off pattern and began knitting every row, in order to maintain the garter stitch when working in the round you will be knitting one row and purling the next as we instruct in the pattern! Unfortunately the best way to fix this would be to take out your knitting to the point the stockinette started and then you can continue working in garter! Just be sure to pay extra attention to the written pattern so that you can maintain the garter stitch!
I hope this helps, happy knitting!
Gianna
Can I ask please, when finishing the last wrap and turn for the right ear flap should I end up and carry on working on the wrong side? Thanks
Hi Vicky,
Thanks for reaching out! You will finish the the short rows on the right side so that you can continue working in the round for the body and crown of the hat!
I hope this helps, happy knitting!
Gianna
Hi,
I am having an issue with the number of stitches when starting the decrease relative to what the pattern calls for.
I cast on 60 stitches
The pattern at the set-up round for the decreases calls for the following
P7, K1, P14, K1 x 3 = 69 stichtes ( not 60)
What am I missing?
Hi Katja,
Thanks for reaching out! For the set up round you will be P7, k1, place removable marker on the previous stitch, then you will [p14, k1, place removable marker on previous stitch] three times (just repeating what is in the bracket) then purl to end of round. so 7+1, then 14+1×3= 45. So if you take 45 plus the 8 stitches from the beginning you get 53, leaving you with 7 stitches after placing the markers to purl across till you reach the end of round marker! 60 stitches total!
I hope this clears things up!
warmly,
Gianna
I’m confused on the gauge. Is 4 and 1/4 sts and 8 rows? How do you count a 1/4 stitch?
Hi Heather,
Thanks for reaching out! I know this is a tricky gauge measurement! Essentially, for an accurate gauge measurement, you will want to make sure above all that you have 4 stitches for 1″. The 1/4 measurement basically is just a small portion of the 5th stitch after the 4 for the 1″, it will be not be quite to the center of the stitch but will be half of the first leg of the stitch!
If you would like to have a more accurate measurement you can calculate the stitches for 4″ rather than 1″. For that, your gauge should measure 17 stitches for 4″ (4.25 x 4)
I hope this helps, happy knitting!
Gianna
I love this pattern as it’s one of the very few baby/child size that I’ve found that covers ears and actually stays in place! Thank you!
Thank you very much for this pattern. I love it and have made several now. Do you have any hints to get the decrease stitches to line up nice and neatly? Mine always seem wonky.
If I decrease every other row they look fine but doing the pattern as written, decreasing every 4 rows makes them appear uneven looking.
Thank you!
Hi Lori,
Thanks for reaching out! I would suggest following the decreases as written in the pattern to ensure you have the correct amount of rows (and the accurate height!) My best tip is to make sure that you are using the removable stitch marker and that you have it marked on the stitch rather than on the needle. This will ensure that you are working the decrease at the correct stitch each time. Also blocking the hat once you have finished will give you the chance to re-distribute the stitches and make sure everything is tidy and even. I would suggest checking out our Blocking tutorial, it is an excellent resource to use!
I hope this helps and please let me know if you have any more questions!
Gianna
This pattern stymied me until I read the comments. When a pattern says knit, I knit. But that is not what you do here. You knit in garter stitch in the round which is knit one row purl the next except the flaps. Have you thought about adding these directions to the patterns for those of us who prefer to follow the rules to a T?
Hi Suzan,
Thanks for writing in! That information is already stated in the written pattern. Since the ear flaps are worked flat you are instructed to knit every row and for the body, since you are knitting in the round, we instruct you to purl one row and knit one row, see WORK BODY OF HAT and SHAPE CROWN OF HAT section!
I hope this clears things up, happy knitting!
Gianna
I am not familiar with the yarn used for this pattern, and I can’t seem to find it. What is the weight of the yarn used, OR what would be a currently available substitute yarn?
Hi Mary,
Thanks for reaching out! Alpaca Pure is an older yarn of ours that has been discontinued. Luckily we have some options that are pretty close to Alpaca Pure! I recommend using WOOLFOLK Tov, Campo, or even Worsted Twist! I also suggest starting off by working a gauge swatch prior to beginning, to ensure you are consistent with the pattern.
I hope this helps and please let me know if you have any more questions!
Gianna
I plan to knit this adorable hat for a baby born in July, so I’m looking for a 3-6 month fit. Would the baby size still fit, or do you recommend going up to the toddler size?
Hi Elise,
Thanks for reaching out! I think you could certainly still use the baby size for a 3-6-month-old, these hats also will stretch quite a bit to accommodate a growing head!
I hope this helps, happy knitting!
Gianna
Hi ,
Can I use a DK yarn for this project ?
Would I need to alter the needle size ?
I bought the wrong yarn!!
Thanks,
Sarah
Hi Sarah,
Thanks for reaching out! I would suggest starting off by working a gauge swatch on an appropriately sized needle and see how it compares to the gauge of the pattern, from there you can make any further adjustments if necessary.
Happy knitting!
Gianna
Any tips for sizing down for a newborn size?
Hi Brookes,
Thanks for reaching out! If you wanted to size this hat down for a newborn, I would recommend using a slightly thinner yarn and going down a needle size (maybe a US5 instead of the US7)! That way, you won’t have to worry about changing the pattern too much to get a smaller fit. I’d suggest using our Season Alpaca or Cashmere Merino Bloom as a substitute for the Alpaca Pure. Both these yarns are incredibly soft and cozy and will keep baby’s head warm and snug!
Warmly,
Kelsey
Can you tell me your method of casting on? I did a small swatch before I started the actual hat and see that my cast on edge is much more ‘loopy’ on the bottom than your nice tidy edge. ….
Hi Candace,
Thanks for reaching out! We used a basic Long Tail Cast On for this hat!
Warmly,
Gianna
Could you tell me how many stitches I should have on my needles for each finished ear flap , size kid, . Currently I have one ear at 20 and another at 21.
I also have one hole at the top corner of each ear flap that I can’t seem to get rid of, but I think I am going try to just be content with that particular problem.
Hi Candace,
Based on the size you’re making, you should have 20 stitches on your needles for each finished ear flap! The number of stitches here should remain constant for the entire Shape Ear Flap sections, so I have a feeling you may have placed one of your stitch markers incorrectly to begin with.
I’m not quite sure why you’re ending up with holes at the corners of your ear flaps. It potentially could be because you have stitch markers there, and thicker stitch markers sometimes cause little gaps in the stitches that they’re between. But other than that, I can’t think of a reason that that’s happening. These holes might even disappear when blocking the hat!
All the best,
Lili
I have taken this out several times, the shaping of the crown has the knit detail on the inside. The decreases are set in, rather than raised, on the right side 😞 Thank you.
Hi Pat,
Thanks for reaching out! Please send the information above along with photos of your work to our customer service team at customerservice@purlsoho.com and they can troubleshoot further from there!
Warmly,
Gianna
This project was new to me in that I had not experienced the wrap and turn to make the short rows. I used SugarPlum Circus merino is a lovely pink for a friend’s baby! I love the look. Thanks for sharing the pattern!
I love this hat and I am determined to do it but I cannot get past the ear flaps. I get the front side fine but the turned side is wrong. I have frogged so many times. Is there any chance you can do a video tutorial of the earflap section ?
Hi Angie,
Thanks for reaching out about this. While we do not currently have the resources to make a tutorial video on this pattern, I will absolutely pass on your suggestion to my team! I also would like to suggest sending along some photos of your work to customerservice@purlsoho.com. We may be able to give you more detailed help with the ear flaps if we can visualize what’s going on in your project!
All the best,
Lili
Thank you very much. I will do that. Could use all the help I can get.
I couldn’t read through all these comments, but I’m only past the first ear flap and I find the instructions incomplete. For instance, doing the short rows created gaps in the work. The tutorial addresses this, but the pattern instructions do not. And when I finish one ear flap, am I to simply intuit how I get over to the other ear flap area? I just knitted to get there, but that seems like the whole thing may end up lopsided. Just so we don’t have this question: I counted the placement of my markers twice, matching each section against what was called for in the pattern. So my markers are *not* in the wrong places. This is my first attempt at short rows, so it’s not pretty—that I can live with, but I don’t have the skill to infer and intuit how to work this pattern in the absence of clear and explicit direction.
Hi Caroline,
Thanks for writing in. I’m glad to hear that your stitch markers are in the correct places, since that’s definitely something that’s been tricky for others! In answer to your question about where to begin the right ear flap, take a look at Next Row (right side), which is the first row under the SHAPE RIGHT EAR FLAP heading. By working through this row as written, you will end up in the exact spot to begin the right ear flap. The ear flaps are not directly opposite each other on the hat–they’re both closer to the back side of the hat than the front. While this may feel lopsided, it works out in the end because that’s actually where our ears are!
I hope this helps clarify things, but if you’re still having trouble visualizing it, please don’t hesitate to send us photos of your work! You can send them to customerservice@purlsoho.com, and we will be happy to take a look and offer you more specific advice.
All the best,
Lili
I just made 5 of these hats. I love them! I recommend reading some of the comments if you are not absolutely certain how to do the decreases. They answered all of my questions and really helped. I got to a point where I did not need the stitch markers for the decreases.
Hi Jan,
We’re so happy to hear that you enjoyed making this hat pattern!
Thank you for your kind words. Hope you have a great day!
All the best,
Cat
Your instructions up to Shape Ear Flap do not say when to purl the next row.
Knit two rounds
Change to smaller needle
Next round Knit.
Then Shape left ear flap
I understand the wrap and turn rows are knit purl but when I the beginning do I start to purl rounds. Every other row? even though the instructions say to knit? I have been knitting for many years and I am having problems with these instructions. It is a popular hat pattern and Inseem to be the only one who is confused.
Hi Sue,
Thanks for reaching out. Actually, you’ll want to knit every single short row in order to maintain the garter stitch pattern! Since you’re working back and forth in rows, and not in the round, you do not need to purl at all. Once you finish all the short rows and move on to the body of the hat, you’ll need to alternate knit and purl rows to maintain the garter stitch pattern in the round. I hope this helps clarify things!
All the best,
Lili
I’m completely stumped by this pattern. If we’re working in the round, wouldn’t knitting each row make stockinette stitch, not garter? I initially thought that the hat was turned inside out after finishing, but the inside of the hat in the pictures looks like garter too!! help!
Hi Mae,
Thanks for reaching out. The first few rows of this hat are indeed in stockinette stitch and not garter stitch yet, though it can be hard to notice that since the brim rolls up a bit! The next section is the short row section, and because short rows are always worked flat, every row will be knit, which will create garter stitch. Finally, once you reach the WORK BODY section of the hat, you’ll alternate knit and purl rows like typical garter stitch in the round. Hope this helps clear things up!
All the best,
Lili
I have a question regarding the next to the last row of the Garter Ear Flap Hat. At this point, I have 20 stitches left on my needles. What exactly is 4{4,4,4 etc. Am I simply decreasing 8 stitches for the round? Of course, I would then have 12 stitches and knitmy last row. Am I correct?
Hi Connie,
Thanks for reaching out. The “[4 (4, 4, 4, 4, 4) stitches]” just means that you’ll end up with 4 stitches on your needles after working this round! However, if you still have 20 stitches, then it sounds like you’re not quite up to this round yet. You’ll need to get down to 12 stitches before it’s time to work this round, so you may still need to do one more decrease round beforehand. Hope this helps clarify things!
All the best,
Lili
I had previouly asked a question about the next to the last round on this cute little beanie! Maybe I should rephrase my question. How many stitches should be left on my needles (toddler size) when I finish the last round? Thank you!
Hi Connie,
Thanks for clarifying! You should have 4 stitches left on your needles after you knit the last round of this pattern.
All the best,
Lili
Love to make this , but seeing all the comments, I’m feeling a bit daunted by the confusion on how to make it. Any chance of a link to a video tutorial please?
Hi Hilary,
Thanks for reaching out! Unfortunately, we don’t have a tutorial for this pattern, but I would be more than happy to walk through any of the parts you find confusing in more detail!
Warmly,
Gianna
Hi. I am up to the shake crown of hat. I am not sure where to place the markers. making the baby size. After I p7, k1, do I put the marker in the k1 stitch or the 7th purl stitch. And same question for the p14, k1. Does the marker go on the k1 stitch or the 14th purl stitch? Hope this makes sense to you so you can help!
Lori.
Hi Lori,
Thanks for reaching out. You’ll be putting the removable stitch marker on the stitch you just worked–this is the “k1”! I hope this helps clarify things.
All the best,
Lili
Ahhh. Yes. This helps clarify things so much. Now i get it. This hat is just adorable and i plan to make a few of them! Thank you for getting back to me so quickly.
Lori
Hi I am trying to work this hat and after I knit the left ear flap the pattern jumps straight to working the right ear flap. But my question is how should I get there. Do I knit back all the way around. Or flip stitches backwards until I get to the right ear flap?
Hi Rebecca,
Thank you for your comment! Your first instinct was right; there is no need to work backwards to get to the right earflap. For this hat, the right ear flap position is found by knitting to 7 stitches before the 4th marker on your needles. This means that you knit across the entire front of the hat after finishing the left ear flap, which will bring you to the beginning of the right ear flap short row section.
I hope this answered your question!
Best,
Margaret
The notes and link for Wrap and Turn illustrate how to W&T on stockinette fabric, so it’s confusing doing it on the garter stitch fabric because the methods are slightly different. Also, the pattern doesn’t say to pick up the wraps, but the tutorial on W&T does say to pick up the stitches. Is that usually mentioned in the pattern? It’s a cute hat. I hope I figure it out.
Hi Michele,
Thanks for writing in with such great questions! You won’t need to pick up any of the wraps in this pattern because the bumpy texture of garter stitch camouflages the wraps really well. This means you only need to follow the tutorial instructions for the wrap + turn on the knit side, since in garter stitch, every side is a knit side!
It’s more common to have to pick up the wraps in projects that use stockinette stitch like what’s shown in the tutorial. The instructions should always specify but we’re glad you’ve taken the time to look ahead and be sure!
I hope this is helpful for you, but please let us know if you have any questions.
All the best,
Margaret
I’m wondering if you would be able to follow the pattern as written for the ear flaps and then work the body of the hat in stockinette stitch, rather than garter stitch?
Hi Lisa,
Thanks for reaching out. Yes, you can absolutely work the ear flaps as written and then use stockinette for the rest of the hat! The one thing to take into account though, is that stockinette has a taller gauge than garter stitch, so you might want to adjust how long you knit the body for. Also, the crown of your hat will turn out taller and pointier (which I think will look super cool)! Hope this helps!
All the best,
Lili
I have one question about this part of the instructions for the Garter Ear Flap Hat that I don’t see asked above:
“For the set up round you will be P7, k1, place removable marker on the PREVIOUS STITCH”.
I’m having trouble understanding what exactly is meant by “the previous stitch”? Does it mean the k1 stitch or the purled one before that? So that when you come to 1 stitch before it (now marked) to do the S2KP, you’re slipping a purl and then a knit (together) OR a knit and then a purl? Thanks!
Hi Sue!
Thank you for your comment! In the set-up round, the “previous stitch” the pattern is referring to is the K1 you just completed. When you reach the s2kp in the next round, you are knitting the marked stitch (K1 from the previous round) and the purl stitch before it together, then placing the removable marker on the s2kp.
I hope this helps!
All the best,
Margaret
Is there supposed to be a seam where the rows end or am I supposed to be doing something to make it invisible?
Thanks!
Hi Tina,
Thanks for reaching out. Since this hat is knit in garter stitch in the round, there will naturally be a seam at the back! That’s because you’re switching from knitting to purling (or vice versa) at that spot, so that transition will always be visible. Hope this helps clarify things!
All the best,
Lili
I’m beginning the right ear flap and having trouble determining where to start. If I am counting 7 stitches before the fourth marker, then I seem to be in the middle of the left ear flap. That doesn’t seem correct? Is the first marker the one placed when originally joining in the round? Thank you!
Hi Shanna,
Thanks for reaching out. The fourth marker is the final marker on your needles before the end-of-round marker! After you work the wrp-t on the final short row of the Left Ear Flap, you’ll knit past the 2nd and 3rd stitch markers and then work the next wrp-t 7 stitches before the 4th one. You should end up doing this in the middle of the Right Ear Flap (which hasn’t been created yet, so it will just look flat at this point)!
All the best,
Lili
I just added a question to my first comment.
Hi. I am making the baby size. I just want to make sure the ear flaps are in the right place. Do they go between the 16 stitches from the markers? When i went to the right ear flap, i did 7 stitches before the 3rd marker (i think) and that puts them between the 16 stitches. Otherwise, they would be very close together. I know they are not supposed to be symmetrical .
Now i have the 22 stitches between place markers which would be the front and then both ear flaps between the both 16 stitches. There are 6 stitches between the ear flaps. Is this correct?
Hi Lori,
Yes, that is correct! Each ear flap is the 16 stitches between markers, the front of the hat is 22 stitches, and the back of the hat is 6 stitches (3 on either side of the end-of-round marker). Hope this helps clarify things!
All the best,
Lili
Yes. This definitely clarify things. Thank you so much for getting back to me so quickly.
I am left handed and my decrease rounds have a zig zag patters, have other lefties ever reversed so the decrease happens with the K stitch and the stitch before rather than the stitch after? I usually just follow patters as they are written, but I am struggling with this part.
Thanks in advance,
Jen
Hi Jen,
Thanks for reaching out! I’m a righty, but I’ve taught myself how to knit lefty/mirrored, so I’d love to try and help. Would you be able to send a photo of your work to customerservice@purlsoho.com? That way I can take a closer look!
All the best,
Lili
I believe I’m knitting the ear flaps correctly (they look right!) but when I continue to purl the first round of the body I’ve gotten two tiny holes before the start of the left ear flap and before the start of the right ear flap. What am I doing wrong? Appreciate your help!
Hi Jillian,
Thank you for writing in! It sounds like this is a natural result of the short-row shaping. Depending on how tightly you knit your wrap and turns can change the look of the finished product. I would recommend to continue knitting and these holes should block out pretty well. If you don’t feel like they are small enough to block out, you can also email us a photo so we can better visualize what’s going on! You can send the photos to customerservice@purlsoho.com!
All the best,
Gavriella