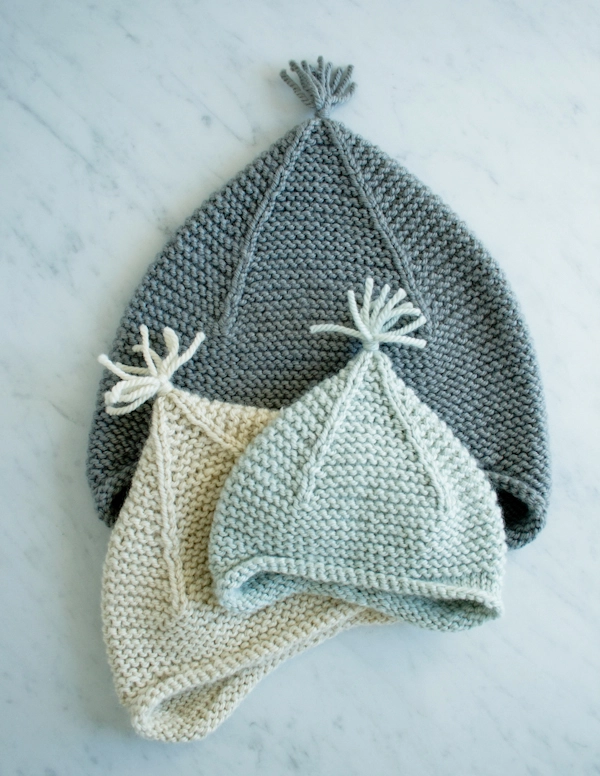
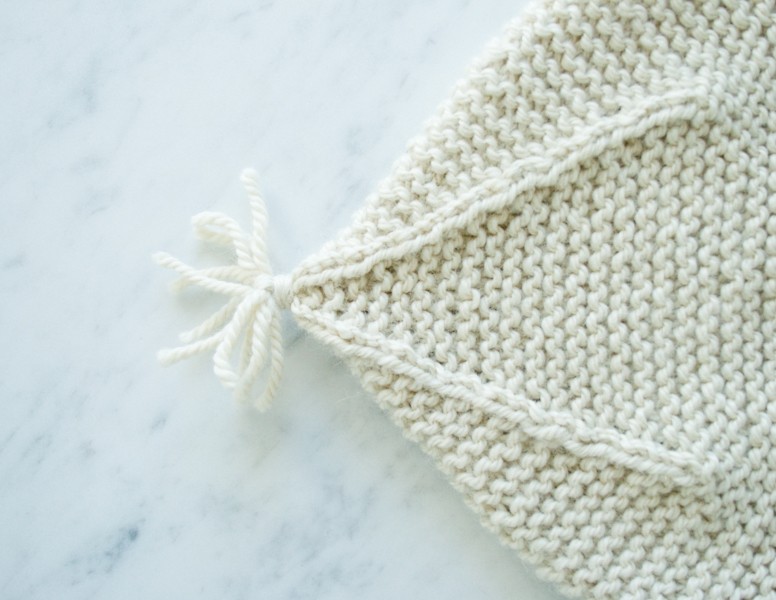
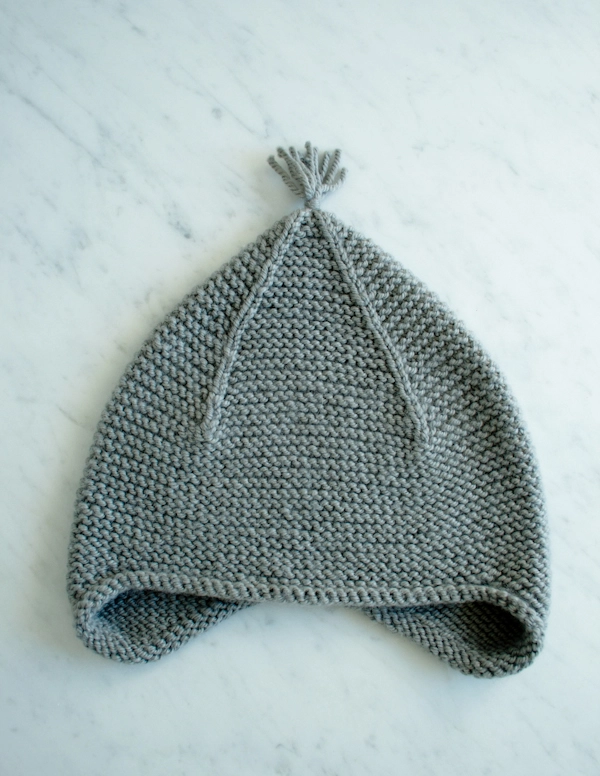
Garter Ear Flap Hat
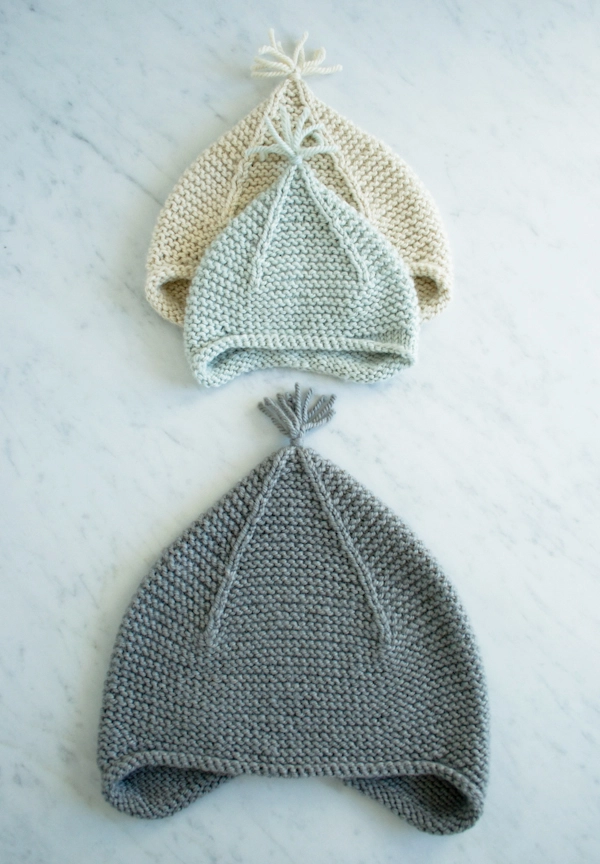
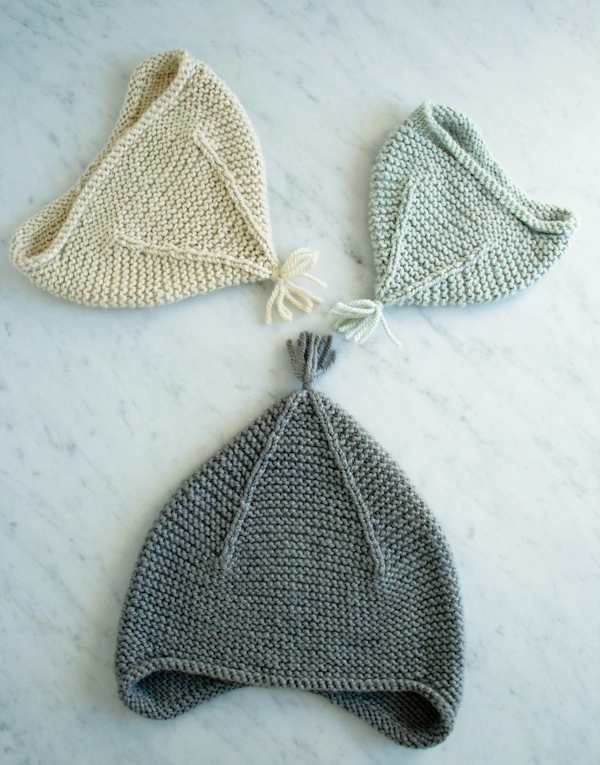
This Garter Ear Flap Hat was an engineering feat to get me back on my feet. You see, I didn’t exactly have that quintessential fresh-start feeling that so often comes with the New Year. Instead, I spent January 1st in bed with the flu and its attendant fever, aches, chills, and delirium. Just as the worst was passing, Mother Nature blasted us with a Polar Vortex that I did not have the strength nor will to face.
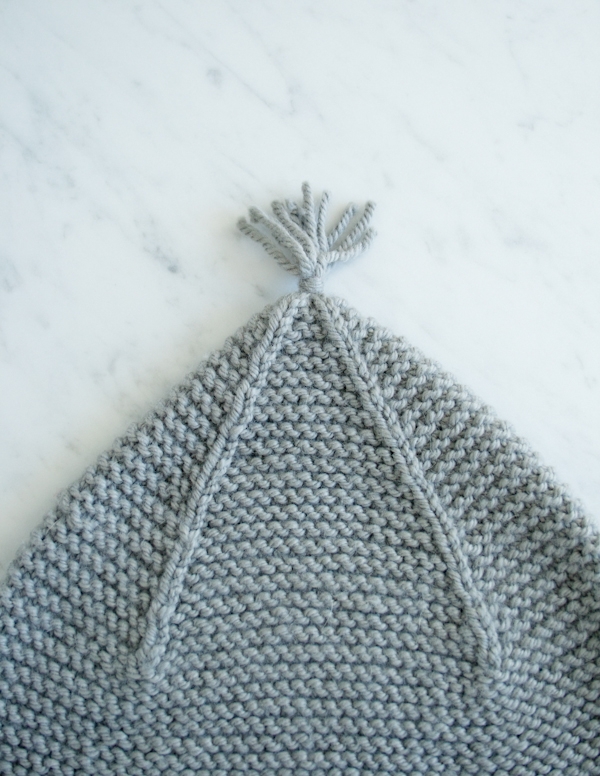
Cabin fever set in! Groggy from illness and stir-crazed from quarantine, I was determined to prove my health (and sanity), and so, making this hat became a triumphant product of my bruised spirit. I created this hat that simultaneously hangs on and hugs my head, which provides protection and insulation from a season that had been beating me down.
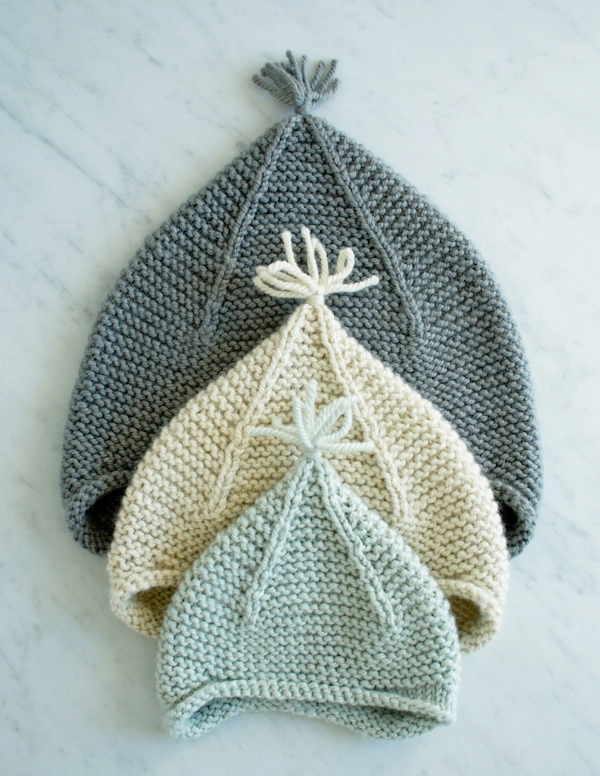
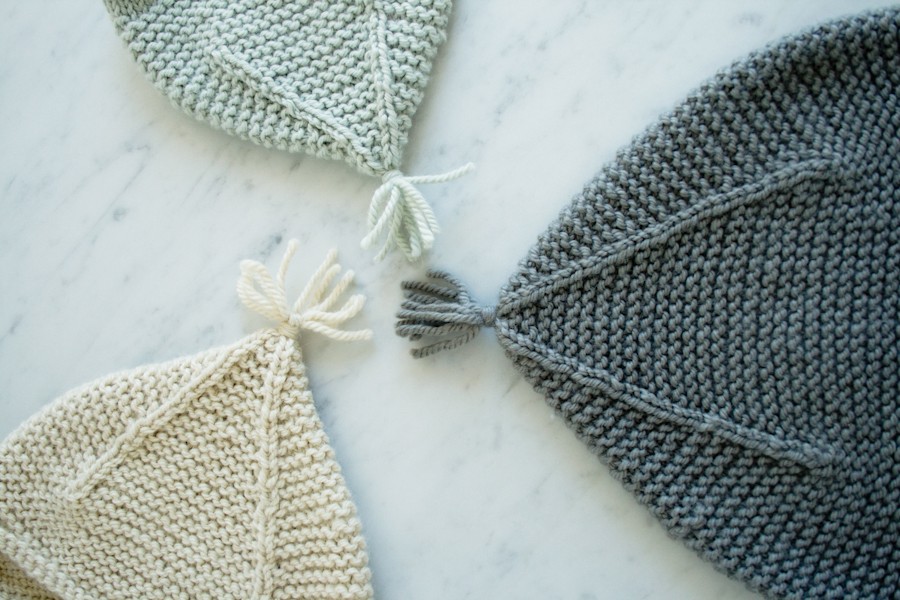
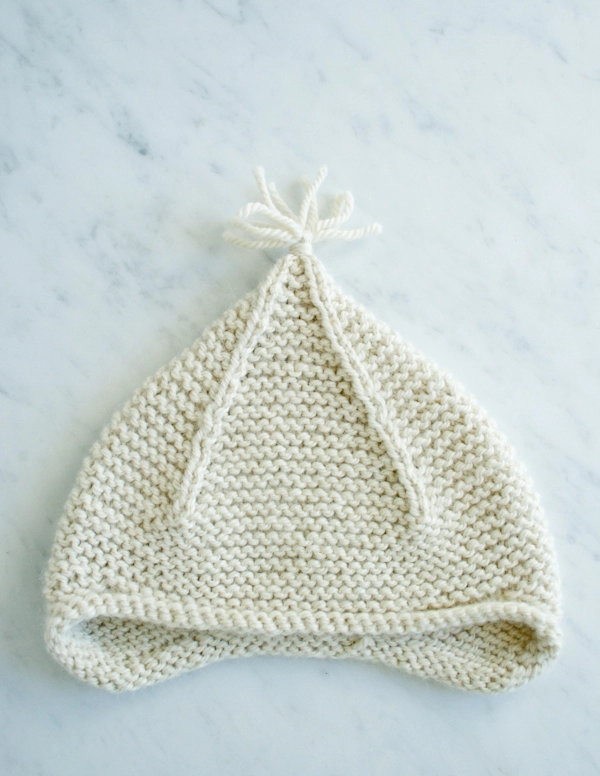
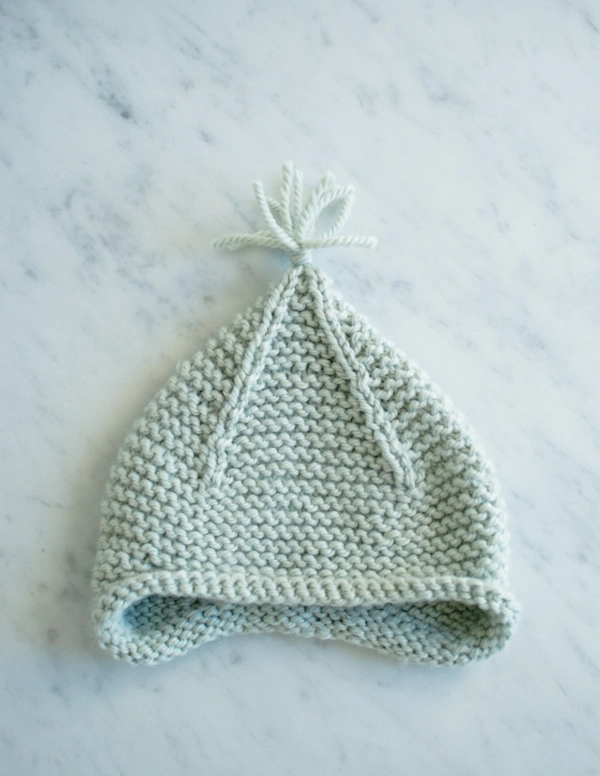
Still enamored with the ease of working short rows in garter stitch (as with my Knit Elbow Patches), I constructed this hat in one seamless piece using Purl Soho’s soft and lush Alpaca Pure. The more I knit with this incredibly comforting yarn, the better I felt. And the topper made it official. Slightly pointed with a tiny tassel, the finish delivered cheer and whimsy. I was back to my healthy self!
If you love the yarn used in this project, you’ll love all of our other yarn, too! Explore our 35+ lovingly created yarn collections, in nearly every natural fiber and spectacular color you can imagine… Only available here at Purl Soho’s online yarn shop!
With my head toasty warm and back in full heath, that fresh-start feeling did arrive… just a little late this year. A belated Happy New Year to all! May it be a healthy one. -Laura
UPDATE: NOW IN PLENTY
DECEMBER 2022
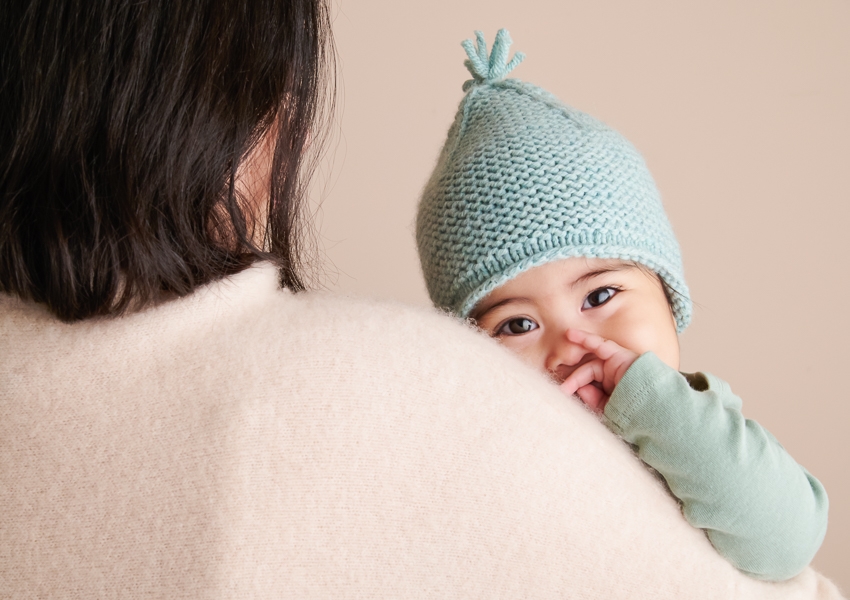
In our soft and springy Plenty, our Garter Ear Flap Hat will keep your ears downright toasty! This 100% extra fine merino is as un-scratchy as wool gets, and it has a tidy, high twist that wards off pills… extra important for a hat that’s going to get as much use as this one! With over twenty colors of Plenty to choose from, surely there’s one to make you grin from ear to ear!
Update: Now In Nigh Fine + New Baby Booties!
October 2024
Enjoy a new version of this popular hat pattern in 100% Mongolian cashmere Nigh Fine, now accompanied by dear little booties with the same short row shaping, centered double decreases, and stockinette rolled edge. You’ll hold this feel-it-to-believe-it soft yarn double so you can knit it at a finer sport-weight gauge. The Little Garter Hat + Booties pattern in Nigh Fine comes in sizes for newborns and babies, and there’s an extra hat size for toddlers, as well!
Designed by Purl Soho designer, Laura Ferguson.
Share your progress and connect with the community by tagging your pics with #PurlSoho, #PurlSohoBusyHands, and #PurlSohoGarterEarFlapHat. We can’t wait to see what you make!
Materials
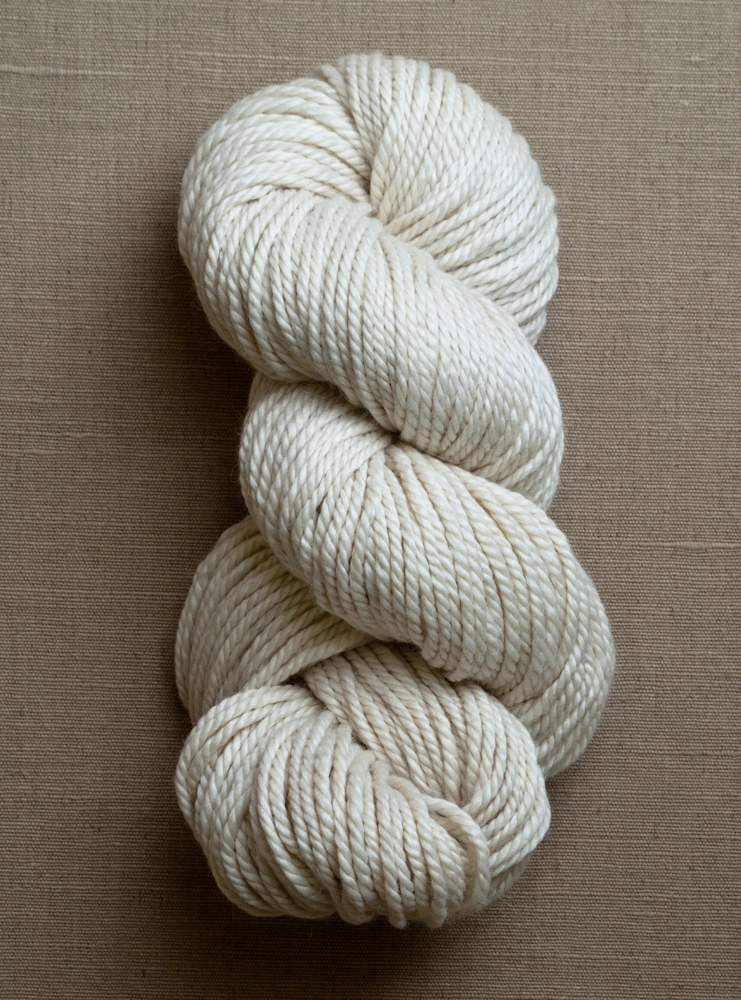
- 1 (1, 1, 2, 2, 2) skein(s) of Purl Soho’s Alpaca Pure, 100% alpaca, approximately 55 (70, 87, 120, 153, 196) yards. We used the colors Heirloom White (Artemisia, Storm Gray) for the Baby (Kid, Adult Medium) hat.
- US 8 (5 mm), 12-inch (for Baby size) or 16-inch circular needle
- US 7 (4.5 mm), 12-inch (for Baby size) or 16-inch circular needle
- Set of US 7 double pointed needles
- Removable stitch markers, including 1 unique
Gauge
17 stitches and 32 rows = 4 inches in garter stitch with smaller needle
Sizes
Baby (Toddler, Kid, Adult Small, Adult Medium, Adult Large)
- Finished Circumference: 14 (16, 17¾, 19¾, 21¾, 23½) inches
- Finished Height: 7¼ (8, 9, 10, 11½, 12¾) inches, from bottom of ear flap to top of hat, not including tassel
Notes
The Right and Left Ear Flaps are shaped using short rows. For our complete Short Rows Tutorial, please click here. NOTE: Because the short rows are worked in garter stitch in this pattern, you do not have to pick up the wraps; simply ignore the wraps when you come to them and work the wrapped stitch normally.
wrp-t [wrap and turn]: keeping the yarn in back, slip the next stitch purlwise from the left needle to the right needle. Bring the yarn forward as if to purl. Return the stitch from the right needle back to the left needle. Turn the work.
s2kp [slip slip knit pass]: Slip two stitches together knitwise, knit 1, pass slipped stitches over knit stitch and off needle. (2 stitches decreased)
Pattern
Begin
With larger needle, cast on 60 (68, 76, 84, 92, 100) stitches. We used a basic Long Tail Cast On.
Place marker and join for working in the round, being careful not to twist the stitches.
Knit 2 rounds.
Change to smaller needles.
Next round: Knit 3 (4, 4, 4, 5, 6) stitches, place marker (pm), knit 16 (18, 20, 23, 25, 27) stitches for Left Ear Flap, pm, knit 22 (24, 28, 30, 32, 34) stitches for Front, pm, knit 16 (18, 20, 23, 25, 27) stitches for Right Ear Flap, pm, knit to end.
Shape Left Ear Flap
NOTE: For this portion of the pattern, you will be working in Short Rows, back and forth, turning the work part way through each round, rather than continuing to the end of the needle. For a tutorial, click here.
NOTE: If a dash (” – “) appears in place of a number for your size, omit this line of instruction.
Next Row (right side): Knit to 7 (8, 9, 10, 11, 12) stitches before second marker, wrp-t.
Next Row: Knit to 7 (8, 9, 10, 11, 12) stitches before next marker, wrp-t.
Next Two Rows: Knit to – (-, -, -, -, 11) stitches before next marker, wrp-t.
Next Two Rows: Knit to – (-, -, -, 10, 10) stitches before next marker, wrp-t.
Next Two Rows: Knit to – (-, -, 9, 9, 9) stitches before next marker, wrp-t.
Next Two Rows: Knit to – (-, 8, 8, 8, 8) stitches before next marker, wrp-t.
Next Two Rows: Knit to – (7, 7, 7, 7, 7) stitches before next marker, wrp-t.
Next Two Rows (all sizes): Knit to 6 stitches before next marker, wrp-t.
Next Two Rows: Knit to 5 stitches before next marker, wrp-t.
Next Two Rows: Knit to 4 stitches before next marker, wrp-t.
Next Two Rows: Knit to 3 stitches before next marker, wrp-t.
Next Two Rows: Knit to 2 stitches before next marker, wrp-t.
Next Two Rows: Knit to 1 stitches before next marker, wrp-t.
Shape Right Ear Flap
NOTE: For this portion of the pattern, you will once again be working in Short Rows.
NOTE: If a ” – ” appears in place of a number for your size, omit this line of instruction.
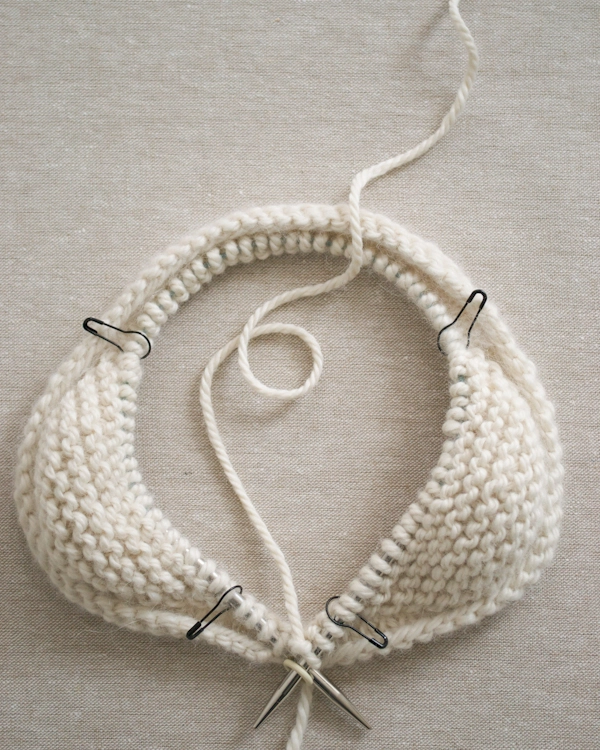
Next Row (right side): Knit to 7 (8, 9, 10, 11, 12) stitches before fourth marker, wrp-t.
Next Row: Knit to 7 (8, 9, 10, 11, 12) stitches before next marker, wrp-t.
Next Two Rows: Knit to – (-, -, -, -, 11) stitches before next marker, wrp-t.
Next Two Rows: Knit to – (-, -, -, 10, 10) stitches before next marker, wrp-t.
Next Two Rows: Knit to – (-, -, 9, 9, 9) stitches before next marker, wrp-t.
Next Two Rows: Knit to – (-, 8, 8, 8, 8) stitches before next marker, wrp-t.
Next Two Rows: Knit to – (7, 7, 7, 7, 7) stitches before next marker, wrp-t.
Next Two Rows (all sizes): Knit to 6 stitches before next marker, wrp-t.
Next Two Rows: Knit to 5 stitches before next marker, wrp-t.
Next Two Rows: Knit to 4 stitches before next marker, wrp-t.
Next Two Rows: Knit to 3 stitches before next marker, wrp-t.
Next Two Rows: Knit to 2 stitches before next marker, wrp-t.
Next Two Rows: Knit to 1 stitches before next marker, wrp-t.
Next Row: Knit to end of round.
Work Body of Hat
Round 1: Purl (removing 4 stitch markers).
Round 2: Knit.
Repeat Rounds 1 and 2 until piece measures 4 (4¼, 4¾, 5¼, 6¼, 7) inches from the rolled edge at the center of an Ear Flap, or until approximately 3¼ (3¾, 4¼, 4¾, 5¼, 5¾) inches shy of desired finished height.
Shape Crown of Hat
NOTE: Switch to double pointed needles when necessary.
Set-Up Round: P7 (8, 9, 10, 11, 12), k1, place removable marker on previous stitch, [p14 (16, 18, 20, 22, 24), k1, place removable marker on previous stitch] three times, purl to end of round.
Round 1: [Knit to one stitch before next marked stitch, remove marker, s2kp (see Pattern Notes above), place removable stitch marker on the s2kp] four times, knit to end of round. [8 stitches decreased]
Round 2: [Purl to marked stitch, k1] four times, purl to end of round.
Round 3: Knit.
Round 4: Repeat Round 2.
Repeat Rounds 1-4 five (6, 7, 8, 9, 10) more times. [12 stitches]
Next Round: Repeat Round 1. [4 stitches]
Next Round: Knit.
Finish
Cut yarn leaving a 24-inch tail, thread onto tapestry needle and pull through remaining stitches. Make a Tiny Attached Tassel by following the instructions found here.
Weave in your ends and block as desired.
Looking for more inspiration? Explore all of our free knitting patterns and knitting tutorials, buy one of our many knitting kits and yarn bundles, and shop for beautiful yarn. We have over 35 gorgeous natural fiber yarns in 100’s of magnificent colors, designed to bring integrity, beauty, and joy to your next knitting project and only available at Purl Soho!
What a cute pattern, thanks for sharing, will definetly try it! 😀
Great hat! This may be the project to finally tempt me to try circular needles.
Looks amazing–could you post a photo of this hat on a model?? Curious to see how it looks in 3D!
Thanks for sharing your pattern! I love the ear flaps and their construction method.
I am always on the lookout for fun hat patterns–this one is great! It's very cold here right now and would be a perfect project to whip up and wear when I go cross-country skiing or snowshoeing.
Please could you post a photo of it being worn! I like to see hats on models to see how a hat would sit especially with me having shorter hair these days! I find it hard to judge if it would suit me! 😀 also love the construction in which the hat has been made and would to give it a knit! X
Hi Vanessa and Carla-
We will take a photo of the hat being worn next week and post it on Instagram. Thanks so much for getting in touch about this!
Molly
Instagram? Not a member, could you also post a picture of the hat being worn, with the pattern? Thanks a bunch!! Sara
when you say "ignore the wraps" do you mean skip them, or knit them like a regular stitch? thanks.
curious about those stitch markers. I don't see any like them on purlsoho. Who makes them? What a SWEET hat!
Hi Sara-
You don't need to be a member to look at our Instagram pictures online!
http://instagram.com/purlsoho
We will update the comments to let you know when it's posted.
Thanks!
Molly
After the first wrap and turn, if you knit won't you be creating purl bumps on the right side? It's hard to tell from the pictures if that's how the pattern is supposed to read.
Cutest hat ever, thank you!
hi,
i got some leftover wool with a gauge of 12 stitches/4inch.
can u kindly inform me how to downscale the pattern to knit a hat for a baby.
and can i use the smallest size pattern to get a hat done for a 4year-old?
thanks
Hey Elizabeth,
What a keen eye you have.
Those are Bulb Pins made by Merchant Mills. Aren't they lovely! They currently aren't categorize as stitch markers, or rather removable stitch markers, on our website. But we will be sure to change that. They fit needles up to size US #11. They are by far my my favorite ones.
Thanks for asking and bringing this to our attention!!!!
Laura
https://www.purlsoho.com/purl/products/item/8863-Merchant-Mills-Bulb-Pin
Rebekah,
Great question. I am going to clarify the pattern right after responding to you.
When I say ignore the wraps, I mean, knit the wrapped stitches as you would any normal stitch. You need not pick the wrap up and work it with the wrapped stitch as you would if working in stockinette or reverse stockinette.
Thanks for asking and writing in.
Laura
Hello Rajanee,
The smallest size pattern with 60 stitch at 3 stitches to the inch is going to result in a 20-inch circumference. This is closer to a Large Toddler / Small Kid size head. It would fit my 4-year old niece perfectly, but she has kind of a large head. It might be a bit large, in other words, but that means it will fit her next winter too probably!
As for re-writing the pattern for 3-sttich-to-the-inch gauge… Unfortunately we do not have the resources to do this at the moment. There are proportions between the flaps and fronts/back, proportions of the front to back, as well as a 4-point decrease and row gauge to consider… all of this has to go together seamlessly. Thank you for your interest though and maybe you could check out these patterns which are closer to that gauge:
https://www.purlsoho.com/create/the-purl-bee/2013/3/10/whits-knits-cozy-ear-flap-hat.html
https://www.purlsoho.com/create/the-purl-bee/2012/12/11/mollys-sketchbook-super-simple-super-soft-merino-baby-hat.html
Laura
Hey Lydia.
The beauty of working short rows in garter stitch is that you do not have to work the wraps together with the wrapped stitches. The reason being that the wraps look like a stitch from the previous row, blending in with the ridges created by garter stitch. (I go into this a little in the PATTERN NOTES section.)
As for that very first row with the wrapped stitches, since you work a few rows of stockinette just before, there is a nicely rolled edge that curl up around that the first round of garter stitch, creating a soft edge and hiding those first wraps.
If you are more comfortable working the wraps with the wrapped stitches, by all means, do it.
Thanks for asking.
Laura
I am having a bit of trouble making the peak of the hat, my knit stitches aren't lining up. I am assuming my problem is with the sskp. Also with where the marker goes in the set up row. Please a bit more clarification would be appreciated. I really never have any problems with your patterns, this one has thrown me for a "loop".
Hi Lynn.
Oh no, let's get this figured out.
Where are your stitches not lining up? Do you mean on the back side of the hat, where the end of round is. The garter ridges do no align perfectly. It's just part of working garter stitch in the round. This is why I structured that hat with the join in the back.
As for where the marked stitches go for the Crown Shaping…
Set-Up Round: P7 (8, 9, 10, 11, 12), k1, mark previous stitch, [p14 (16, 18, 20, 22, 24), k1, mark previous stitch] three times, purl to end of round.
So, what you are going to do is… purl the amount of stitches directed, then knit one, then using a removable stitch marker, mark that stitch you just knit, then continue purling, knitting 1 and then marking that one knit stitch…
Does this help?
Please let me know if you need more clarification.
Thanks for writing in.
Laura
RE: Set-Up Round: P7, k1, mark previous stitch…So, what you are going to do is… purl the amount of stitches directed, then knit one, then using a removable stitch marker, mark that stitch you just knit…
My question is: on the next round, do I knit 6 and then slip the 7th purl stitch with the knit stitch or do I slip the 6th & 7th purl st, and then k1?
Hi Donna.
Yes, on the next round, if you’re working the smallest size, you’ll start the round by knitting up to one stitch before the marked stitch which would mean knitting 6 stitches, then you’ll, slip the next two stitches (the 7th stitch and the marked stitch) together knitwise, knit 1, pass slipped stitches over knit stitch and off needle…
Please let me know if you have any questions at all!
Laura
I am having the same issue as I am shaping the crown..two questions, on the purl row do I knit one before or after the marker. I am currently knitting one after. Question 2, during the slip decrease am I decreasing one or two? I have been just decreasing 1 and think I should be decreasing two at each marker.
Hi Gina.
First off I’d love to just make sure that you are making an actual stitch with a removable stitch marker and not simply placing a marker on the needle. This may be where some of the confusion is coming from.
As for the purl rounds… you’ll work up to the marked stitch and then knit that marked stitch.
As for the decrease… sskp is a double decrease resulting in the subtraction of two stitches, not just one. There is a blurb in the NOTES section of that pattern that explains it in full.
I hope this helps! Please write me back with any questions you may have.
Thanks.
Laura
Hello Laura you are right! I am simply placing a marker. Last night I ripped back and got the skip skip knit pass corrected but am having a traveling rib issue. I do know what removable markers are but never used one. I think I get it but need to tear back and try again. I love this pattern and am determined to fix it. And thank you so much! Gina
Hi Gina, I also have the problem with the “traveling rib”. It would fantastic if you could tell me your solution – at the moment I’m knitting more backwards instead of forwards…
Many thanks! Ingrid
Hi Ingrid,
Thanks so much for writing in with your question! After I have knit my traveling rib, I use my needle point to loosen or tighten any uneven stitches. Sometimes if you stretch the rib a little bit with your hands, you can manipulate the stitches to be a little neater. I hope that helps! And Gina (Battiste), if you have a solution to this problem, I’d love to hear it! I always enjoy learning what worked for others.
All my best to you both,
Gina (Rockenwagner)
Thanks so much Laura! I got it figured out! And I’ll surely make more! Gina
Hi Gina.
Wonderful!!!
Glad to hear it.
Laura
Wonderful, thanks for sharing and Happy Knitting!
Made this little hat in the baby size and love it. Working on a design for a pair of booties to go with it that are bottom up and seamless. Will put pattern up for free on Ravelry when ready. like2makethings
What about 'ease?' The babe I wish to knit for (10 mos) has head circum of 17.5" … any suggestions which size I should choose?
Thanks tons… cheers!!
Carolyn
On the left ear short rows after the last wrap and turn I end up on the wrong side. Am I missing something?
I am having that same problem, if I follow the pattern as written for starting right ear flap, on right side, I will be doing short rows on top of left ear flap. Did you find out the solution?
Hi Debbie.
I am so sorry, but I’m not fully understanding your question. I’d love to help figure it out though. What is the problem you’re having?
I look forward to hearing back from you and hope we can get the problem all sorted out!
Thanks for writing in.
Laura
I wish you many flu-free years ahead. God bless you for hanging on and managing some humor and a lovely pattern in many sizes (thanks!) with it.
since it is garter stitch I will always be following the instructions for short rowing on the knit side, no matter which side I am on, CORRECT??
Oh my gosh – the cutest thing ever. I made one right away in the child's size – took me less than a day – and I love it.!!! Will be making an adult size next. Thank you for this awesome pattern!
I almost wept with delight when I saw this pattern as I am expecting a baby grandson in March and this is absolutely perfect. I am a better crocheter than knitter and previously when I have tried short rows, I have just failed to 'get it' wondering whether to stay on short rows or continue knitting after two rows… I have given up in the past as it made my brain ache but now I simply must make this hat so it is a great incentive to learn short rows.
Thank you so much for taking the time and trouble to create this pattern, I suspect this is going to be like chicken soup for knitters – food for the soul indeed.
I am so glad to hear you are feeling better and that creating this hat helped. I can see why as it is such a harmoniously beautiful hat – it ticks all the boxes for me.
Thank you so much.
I'm sorry the year started out so poorly for you, but I thank you for the birthday gift. I love garter stitch and hats that actually cover the ears, and you posted in on my birthday! Perfect! Thank you.
Hi Liz,
Thanks for writing in. The last line of instruction under SHAPE LEFT EAR FLAP has you working a "wrong side" row and at the end of it you turn your work. Then, with the right side facing, the first line of instruction under SHAPE RIGHT EAR FLAP is a "right side" row which will bring you close to the fourth marker for shaping the next ear flap.
Please let me know if you would like more clarification.
Laura
Hi joanlvh,
You can find instruction for how to do wrp-t in garter stitch in the section titled PATTERN NOTES.
wrp-t is a different process for different stitches. In stockinette, on the knit side, with you wrap and turn you want your working yarn to end up in what will be the front of your work on the next row, since you'll be purling that row. But in garter stitch, for both right and wrong sides, when you wrap and turn, you want your working yarn to end up in what will be the back of your next row since you'll be knitting that next row.
The link to our Short Rows tutorial is to familiarize the Short Row novice to the technique. But definitely check out the PATTERN NOTES above for this specific project.
I do hope this helps. Please write us back if you have any questions!
Laura
Hi Carolyn.
Wonderful question. The hat actually fits best (and feels best) with a little bit of room. It isn't like a ribbed hat where you'd want it measuring 2 inches smaller than the circumference of the wear-er's head. So for a 17 1/2-inch head, I would recommend the KID SIZE (giving you that 1/4-inch of ease).
But, one other note from me… if you have access to this babe, I would measure from the bottom of the ear lobe up to the crown of the head to see what height you'd want the hat to end up. After working the Ear Flaps you work evenly in garter for a bit. This is a good place to modify the height.
Please let us know if you have more questions!!!
Laura
Such a cute hat! I can definitely see it on a baby or small child, but I'll have to see how it looks on an adult. I'lll keep an eye out on Instagram! Great pattern though – I've recently discovered the magic of short rows and it has expanded by knitting world ten fold!
All of my decreases are headed to the right, hence my decrease line won't make the triangle in the front. Im confused because it says I need to sskp 1stitch before every marker. Are all decreases heading right okay? I just don't see it working out?
Hi would love to knit this can you give me an alternative wool I can buy in the UK? I have looked and there are many 100% Alpaca wools to buy – what ply is the purlsoho one? I do hope you can help
Thanks
Hi Chrissie-
We ship to the UK all the time but you can use any kind of fiber you like as long as it gets the correct gauge, it doesn't have to be 100% Alpaca. All the info on this yarn can be found here: https://www.purlsoho.com/purl/products/item/9307-Purl-Soho-Alpaca-Pure
It's a Chunky weight yarn which would probably be equivalent to a 12 ply yarn.
Thanks for writing in!
Molly
Hi Brenda,
Sskp is a double decrease (eliminating two stitches) and it is centered, without direction. It is done a little differently than say a k2tog or an ssk.
For instance, you mark the actual stitch, placing a removable marker on a stitch, rather than a standard stitch marker on the needle. The reason is because you want to mark the actual stitch that you want to be in the center of this decrease.
After you've worked the set up round, marking the 4 stitches and you get to your first decrease round… you work up to one stitch before the marked stitch, you slip it and the marked stitch together as if to knit, then you'll knit one, then pass those two slipped stitches over the knit stitch and off the right needle, decreasing two stitches. You'll see that marked stitch is on top, centered.
At this point move the removable stitch marker up to the stitch you just worked. This way, it will be easy to identify your marked stitch in the following decrease round.
Please let me know if you have any other questions.
Laura
This is SUPER helpful. I wish it was noted in the pattern. I’m used to a PM/place marker. When I google searched “mark previous stitch,” I couldn’t find any help explanation.
The way you explain the sskp here should be how you describe it in the pattern notes. I also ended up with right-leaning decreases because the directions in the notes weren’t clear that you slip the two stitches together. I was slipping them one at a time, which sounds like the same problem Brenda was having. Thanks for the clarification!
Hi Mary Anne.
I am so sorry for the delayed response. I had seen your comment and could have sworn I responded. My apologies.
Regarding the sskp… If you take a look in the NOTES section, just under MATERIALS, GAUGE and SIZES, you’ll see an explanation of wrp-t as well as sskp.
Thanks for writing in and again, my apologies on the delayed response. Best! -Laura
To everyone asking about seeing this hat on a model-
We have posted a pic of the kids size on Instagram: http://instagram.com/p/jwlmnKjhcv/
Thank you for your interest and please let us know if you have any more questions about the project!
Molly
Thank you for posting this hat! It's adorable. I am a beginner and so far so good. I am now working on the crown, but I don't understand the last part of this instruction, the '12 stitches'.
Repeat Rounds 1-4 five (6, 7, 8, 9, 10) more times. [12 (12, 12, 12, 12, 12) stitches]
Thank you for your help.
Hi Laura,
congratulations — what a cute hat!
Charity knitting is a growing movement here in Sweden, and some knitters have asked for a translation of this pattern (I posted a link on a Facebook page called Vrma liten). Would that be OK for you? Can we post it on a blog (we'll make sure to link to this page and give the name of the designer and rights owner, of course)?
Best wishes,
Anna
What a fun pattern, and knits up so quickly!! Instead of finishing with a tassel, I did a short section of 4-stitch i-cord – looks like a little pixie hat!
(jc, the [12 stitches] referenced just indicates how many stitches you should have remaining after finishing the repeats of rounds 1-4)
Hi JC,
The number inside the brackets is the stitch count. After you have "Repeat Rounds 1-4 five (6, 7, 8, 9, 10) more times.", 12 stitches will remain.
Hope this helps clear things up.
Let me know if you have any other questions.
Best,
Laura
Hi – Beautiful hat but I have a problem with one area. I was fine until I hit the ear flaps. I put all the markers in place then got stuck. When you say "Next Row (right side): Knit to 7 (8, 9, 10, 11, 12) stitches before second marker, wrp-t." what second marker do you mean and how many stitches do you knit before wrp-t? I am lost at this point. I am trying to make a toddler size and area marked off for the first ear flap is 18 stitches so do I knit 10 stitches, then wrp?? Help?
Hi Brenda.
Let's get this figured out for you.
The second marker refers to the second marker you encounter in the round, this is not counting the beginning/end-of-round marker. So you'll knit to the first marker, slip it, then you knit up to 7 (8, 9, 10, 11, 12) stitches before second marker, then you'll wrap and turn (wrp-t).
In other words… K4 to reach the first marker, slip marker, then k10 stitches, then wrap and turn.
The number 10 comes from 18-8=10
Hope this helps.
We're here if you have any more questions.
Laura
I having problems with the ear flaps, I don't get it. We have 23 st for each ear flaps, and in the pattern said we work only in 10 st and turn ???? Please help me, I am new in the Short Row and wrp-t.
Hi Nadia.
Yes. At first you only work a portion of the Ear Flap stitches, but then you work a few more and a few more and a few more until you've worked them all of them. And while knitting these short rows, you're building up your fabric to shape the ear flap.
Understanding short rows will expand your knitting repertoire immensely. They are definitely a bit strange / confusing upon first sight, but well worth the effort.
Have you explored our Short Row Tutorial page? Please note the tutorial is done on stockinette fabric which is different than what you are doing here (there is a note about this in PATTERN NOTES above). The tutorial explains the grander concept behind the technique though.
https://www.purlsoho.com/create/knitting-tutorials-advanced-te/2008/6/18/short-rows.html
I hope this helps, but definitely write back with any additional questions!
Laura
I love this pattern. It was fun and easy. I actually prefer to ear the hat "inside out" with the decrease seams inside. I like the smoother look and the ear flaps hug my ears. I'll definitely be using this pattern more.
Thanks
Mary Ann,
Thanks for sharing your experience with the pattern. It's alway wonderful, and educational, for us and our readers to hear how other people have modified the pattern. I'm glad you like this one. I found it to be particularly rewarding. Quick and easy but with some interest…
Thanks again.
Laura
This is a darling hat and I know that I'll make several. I'm so grateful for the comments and your responses here. I was also having trouble getting my decrease rows to line up properly and see now that it's because I had my stitch markers are in the wrong place.
Thank you!
P.S. I also love your website.
Currently hosting a test for a darling pair of booties that I designed to match this baby hat. Check out the test if you are interested. Pattern will be offered after the test through Ravelry.
http://www.ravelry.com/discuss/free-pattern-testers/2847550/1-25#4
A US #8 12 (for Baby size) or 16-inch circular needle
A US #7 12 (for Baby size) or 16-inch circular needle
This means 12-inch circular for baby?
So adorable!! Thank you!
Hi Marny-
Yes, you use a 12-inch circular for the baby size and the 16-inch circular for the larger sizes.
Thank you for your question!
Molly
The bulb pin page describes the pins to be 1 3/4 in. long which seems quite big. Did you mean 3/4 in long instead which seems more plausible?
https://www.purlsoho.com/purl/products/item/8863-Merchant-Mills-Bulb-Pin
Thanks for all the wonderful patterns, supplies and the knitting advice, it's much appreciated!
kenza
Hi Kenza,
Thank you so much for writing in about this. These bulb pins measure 21mm (approximately 0.8 inches) in length. We are going to get that descriptions on Purl Soho dot com fixed ASAP. I really appreciate you taking the time to write us!
Best,
Laura
I printed out this pattern and knit it quickly in a small size to try the method. Lots of fun. Unfortunately I misunderstood the directions for the top of the hat and worked the decreases every other round instead of every fourth round. The result is a short hat with earflaps and a flat top! It will fit a small child anyway, and I intend to make more hats from this pattern, and work the decreases as written instead!
Love this pattern. I started one last night, it is one
Of those projects I can't seem to put down. Thank you!
Hello
I feel like a complete dummy but I do not understand the instructions! What does it mean "knit to 10 stitches before second marker"? Knit all the stitches until 10 remain? This makes little sense to me, why mark it with a marker if you are going to leave stitches before it? HELP!
I know how to work short rows so I am completely confused.
Thanks!
Hi Maya.
The markers are placed to indicate where the ear flaps will go. The ear flaps are worked in short rows, back and forth, between a pair of markers. With each short row you work closer and closer to the markers.. "knit to 10…" "knit to 9…" " knit to 8…" in order to build up the ear flap.
If you are not familiar with short rows, please take a look at our tutorial, but ALSO be sure to read the NOTES section on this pattern because the tutorial is demonstrated on stockinette stitches and this garter stitch hat has a few different rules.
https://www.purlsoho.com/create/knitting-tutorials-advanced-te/2008/6/18/short-rows.html
Thanks,
Laura
purl bee I’m making this pattern. I think what’s being pointed out is that the ear-flaps instructions make you have to go to another place but I could make them simpler myself:
knit until first earflap marker, K9,wrp-t,K2,wrp-t,K3,wrp-t,K4,wrp-t,K5,wrp-t,K6,wrp-t,K7,wrp-t,K8,wrp-t,K9,wrp-t,K10,wrp-t,K11,wrp-t,K12,wrp-t,K13,wrp-t,K14,wrp-t,
This is a lovely hat! I'm making one for a newborn, but I'm using DROPS Cotton Merino and my gauge was smaller, I have about 5 sts in 1 inch, so I went up a size and it's look fine. I'd like to know…7 1/4 inches are not too many for a baby hat height?
Thanks a lot
Alessia
Hi Alessia,
7 1/4 sounds a little tall for a newborn, but probably not too far off. Some people have even added a round or two because 7 1/4 is a bit too short for their baby. So I can't imagine it'd be too too far off for a newborn. You can always work a round or two fewer after you work the ear flaps.
Please let me know if you have any questions.
Laura
Hi Laura, this is such a cute hat! I'm new to knitting and was almost put off by the whole wrap & turn technique but your tutorial was easy to understand and I worked through it 🙂 My question about this is – I'm knitting the toddler size and am curious to know before I start the shaping the crown if I should have 86 stitches? I know I've made some mistakes up to this point, but I'd like to know first if that's the right amount before I start the shaping. Thanks, Ali 🙂
Hi Ali,
I'm glad you got through the wrap and turns. Short rows are fantastic!
When you start the SHAPE CROWN OF HAT section of the pattern you should have 68 stitches, the same number that you cast on.
Please let me know if you have any questions.
Laura
I completed the left ear flap and did the final wrap and turn, which leaves me with the entire ear flap on the left needle. This seems an impossible way to get to the fourth marker (which isn't even an ear marker, but is the round marker). I have come to this place on several occasions–I keep thinking that I've turned incorrectly or left off a row, but I can't seem to fix it. I love this pattern and REALLY want to do it well. Please help! Thanks so much.
Hi Cait.
There should be 5 markers total: 1 marking the beginning of the round, and two pairs of markers indicating where to shape for the ear flaps.
Once you have finished the final wrap and turn for the left ear flap, work across the left ear flap, pass one marker and then work up to 7 (8, 9, 10, 11, 12) stitches before the next marker (the fourth marker). You can refer to the pictures in the pattern to double check to see if you're in the right place.
Please let me know if you have more questions. I hope what I've said here helps, but let me know if I can help or clarify more.
Thanks.
Laura
Hi Laura,
I wanted to thank you for your help. It was very kind of you to refrain from saying "Just Trust Me!". I had such success that I have knitted two more hats and they are, indeed, quite easy to knit up once the pattern is in your fingers. Thanks again for the clarification. I will be shopping at Purl Soho in the future!
Hi- thank you for the pattern! If I were to skip the ear flaps and behin with the body of the hat, how many stitches would I cast on for the newborn size? Thanks!
Hi Shae,
Luckily, even if you aren't doing the earflaps, you still cast on the same number of stitches as instructed above!
Thanks for writing in.
Laura
Oh I’m so excited to make one of these, though I see many many more in my future!
I’m confused though, when I join the cast on stitches and knit every row it turns out stocking stitch rather than garter – any tips?
Oh I absolutely adore this pattern!
However I am totally confused because when I joined the cast on row into the round and continued knitting, I end up with stocking stitch instead of garter stitch. Am I meant to purl every second row? I would really appreciate some tips as I have cast on 3 times now and can’t seem to get it (but there are lots of people who have successfully made these so I’m worried I’m missing something completely obvious!)
Thanks.
Jane! Hello. You are not missing anything obvious. And you are absolutely right, the first few rounds are knit and therefore stockinette. I started with a few rounds of stockinette so that the edge would roll up a bit to where the garter stitch begins, creating a nice smooth soft edge around the hats. The garter stitch starts with the earflap shaping. Please let me know if you have any questions at all! Laura
Love your site! I’m having trouble with the first ear flap. I started knitting it and once I got about six rows in I noticed it was not between the first two same color stitch markers. Am I resetting to the start of the round (first place marker) with every wrap turn? Also, I’m confused as to what is considered 2 rows. Is it knitting one row and turning considered one row? Or is one row knitting, turning and knitting one row? Thanks!
Hi Gabriela,
I am not sure I fully understand what you mean by resetting to the start of the round with every wrap and turn. The basic structure of the hat is as follows…
The beginning of round is at the center of the back of the hat. It needs to be there for the decrease rounds for shaping the crown to work. The short rows are worked on either side of the hat.
As for the 2 rows… Knitting and turning is one row and then knitting and turning again makes 2 rows. At which point you’ll have the “right side” facing you and you’ll be ready to work the next 2 rows.
Please let me know if I’m not being clear. I’d love to help you figure all of this out!
Thanks for writing in.
Laura
Help! what happened to the tassel tutorial??
Carrie.
Thanks so much for writing in! I fixed the link to the tassel tutorial. Here it is though…
https://www.purlsoho.com/create/2013/07/18/tassel-tiny-attached-tassel/
Thanks again.
Laura
yay! done! thank you so much. cutest baby hat i have ever made–maybe cutest one i’ve ever seen!
Hi Carrie, I’m stuck with the tassel. Could you pls help? I have a 24″ tail after threading through last 4 stitches and pulling through but not sure what to do next. Thanks!
I just made this hat and loved creating it. The pattern, as all your patterns are, was so clear and well written. I have been knitting for five months now. Your patterns have made me feel like such an accomplished knitter. Their timeless elegance and beauty. I so appreciate it and know I can never go wrong with Purl Bee. I knitted this up in a day and can’t wait to give it to my nephew! I did not use stitch markers for the decrease section but instead wrote out the pattern and counted. Much easier and faster for me. This is SO cute. Thank you thank you thank you!
The link to the mini Pom Pom seems to broken. Can you help me out please. I made it so far!
Hi Tracy-
The tutorial for the Tiny Attached Tassel should be working. Here is the link: https://www.purlsoho.com/create/2013/07/18/tassel-tiny-attached-tassel/
Maybe try it on another web browser if you’re having trouble loading it?
Thank you!
Molly
Thanks for the lovely hat pattern! I just threaded my tapestry needle through the last 4 stitches and cut a 24″ tail. I read the tassel tutorial. Do I start making the tassel without weaving the tail first? Not sure how to start the tassel. Thanks!
Hello, Telly!
Thank you so much for writing in! It looks like you knit this hat in the round, congrats! You’ll use the 24-inch tail to pull the remaining four stitches closed and then you use the remaining length of tail to create your tassel. Thanks again for your great question. Please let us know if you need futher help!
Best wishes,
Kumeko
As you start – do u count your first marker(start of row)?
I have 1 pink marker = start
4 green markers
So do I start at pink or with the green?
Ok, I’ve figured out the ear flaps – now I’m stumped on probably something really really simple – but I don’t get the directions that say (for baby) P7, K1, mark previous stitch
what does this mean? I’ve never read this before “mark previous stitch”
Nonetheless, as always this is a simple beautiful knit. I’m loving it so far
Hi Liz!
Glad you got the ear flaps figured out! As fore this “mark previous stitch”…. What you’re going to do is purl 7 stitches, then knit 1 stitch, and then you are going to take a removable stitch marker and mark the stitch previously knit (this will be the stitch closest to the tip on the right needle.
Please let me know if I can help clarify this further. It may make more sense once you do it and then get to the next round. Keep us posted!
Laura
Hi, I so want to try this pattern but do not have (yet) 12″ circs so I started on dpns. I thought I was doing ok but then realized I was working on the same left ear flap and not the right ear flap. Also, I did not quite understand the part about working across left flap pass 1 marker then up to etc., etc., etc. as you explained above to Cait. I am not a “seasoned” knitter but have done wrp+t before and I so want to try this. Should I give another go on dpns or get the 12″ circs first. Thanks for any assistance.
Hi Elena…
I think it is worth waiting for the circular needles!
I think it will help you keep the pattern straight and prevent extra frustration, not having to juggle all of the extra needles while negotiating the pattern and stitch markers, etc.
I am here if you come up with any new questions! Please feel free to write in as much as you need.
Thanks.
Laura
Thank you Laura…I just received my 12″ circs and can’t wait to try this! Thanks for offer to write again….chances are I will!
I don’t get the decrease set up. I am doing a newborn size and I did the p7,k1 them p14,k1 but I don’t understand the repeat 3 times?
Because then the decrease would be out of place with the pictures of the hats.
Please help:(
Confused in California
Colleen
Hi Colleen,
I’d love to help you figure this out. The hats pictured here were made exactly as the pattern is written.
Since you’re working on the smallest size, for the Set-up Round, you’ll purl 7, k1, use a removable stitch marker to mark that stitch you just knit, then [purl 14, k1, mark that previously knit stitch] three times… meaning you’ll do everything within those [brackets] three times total… and then purl to the end of the round.
Please let me know if this helps at all or if you have any questions!
Thanks for writing in.
Laura
Hi there!
I’m a bit confused about this portion of the instructions as well.
My intuition told me that placing the markers as instructed (I’m also making the smallest size) would lead to off-centered upward diagonals, and now that I’ve knit the sequence of rows that follows twice I appear to have those off-centered diagonals I was worried about!
How can they be centered if the first marker (in the back of the hat) is 7 stitches away from the start of the row and the last marker (also in the back) is 14 away from the end of the row? The 4 diagonals are symmetrically placed with regards to each other, they just aren’t centered on the body of the hat itself.
I hope I can salvage my work so far and fix whatever mistake I made in this portion of the pattern – I absolutely love this little hat!
Eirene
Hi Eirene,
I’d love to help you figure this out.
If you’re making the smallest hat, that means you have 60 total stitches. The set up round instructs you to…
Set-Up Round: P7, k1, mark previous stitch, [p14, k1, mark previous stitch] three times, purl to end of round.
If you take your 60 total stitches and subtract the stitches you’re instructed to work… 60 – p7 – k1 – p14 – k1 – p14 – k1 – p14 – k1 = you will have 7 stitches remaining, to purl before the end of the round. You start and end the round by purling 7. This means there are 14 stitches between each of the markers. So your marked stitches are both equally spaced and centered on the body of the hat. Please keep in mind that the ear flaps are farther towards the back of the hat because ears are farther towards the back of the head. The decreases are centered on the body of that hat, but they are not centered on the ear flaps. Perhaps this is what is throwing you off?
Please let me know if I can help clear anything up further.
Thanks for writing in.
Laura
Am working on this adorable hat in the toddler size now. I noticed the comment suggesting to measure from tip of babe’s ear lobe to crown of head to help determine desired final height of hat. How much should I add to this measurement to provide enough clearance for the narrower part of the hat on top? Thanks much!
Hi Amanda,
The Toddler size here measures 8 inches from the bottom of the ear flap to the top of the hat (not including the tassel).
For the Toddler size…
the ear flaps are done of 16 rows. If you are getting the same row gauge as me (8 rows = 1), then the flaps will add up to about 2 inches.
the crown shaping is done over 29 rounds. Again, if you’re getting my same row gauge, then the shaping will add up to a little over 3 1/2 inches.
If you measure your child from the tip of the head to the bottom of the ear lobe, you can take that number and subtract (2 + 3 1/2) inches to figure out how much of the body you’d like to work.
As for the clearance.. for the Toddler size, I’d say definitely no more than an inch. If you’re working in our Purl Soho Alpaca Pure, it so so wonderfully drapey, the hat will really take the the kid’s head. That top tip portion is really just a few rounds.
Hope this helps.
Please let me know if you have any questions!
Laura
Is there a printable version somewhere? I would like to print this but it doesn’t seem to be formatting properly!
Hey Valerie R!
I just added a printable PDF. You can find a note about it under PATTERN. But here is the link for quick reference: https://www.purlsoho.com/create/wp-content/uploads/2014/01/Purl_Bee_Garter_Ear_Flap_Hats.pdf
Thanks so much for your interest in the pattern.
Laura
When it says Purl to marked stitch, K1 does that mean you knit the marked stitch or knit the stitch after? Sorry for asking a straight forward question!
Thanks
Hi Lara,
Great question.
You are going to want to purl up to the marked stitch and then knit that marked stitch.
Please let us know if you have any other questions.
Thanks,
Laura
Hello!
I love this pattern. I was cruising along just fine through most of the decreases when I realized that the decreases are angled all in one direction (to the left). I can’t work out what I missed. Thanks for any feedback. It must get obnoxious to problem solve all the time! I really appreciate it.
THanks
Hi Bonnie.
Your comment made me chuckle. It doesn’t get obnoxious at all. It’s pretty awesome to know people are making my pattern and all the responses and trouble shooting with people definitely make me a better pattern writer! It’s great feedback.
As for your decreases… are you perhaps doing an ssk rather than the sskp? Ssk is a single-left-leaning decrease whereas sskp is a centered-double-decrease.
Let me know, we’ll figure this out!
Thanks for writing in.
Laura
Thanks for the response, Laura. I’m certain I’m doing sskp. I even went back and checked. I am using the magic loop method because I didn’t have the correct size circular needle or double pointed needles. Maybe the whole thing is just pulling weirdly. I took it off the needles to look closer and the decreases definitely slant in one direction but they are also converging. Is that something you’ve seen before?
Thanks,
Bonnie
Oh dear, Bonnie. You have me stumped. I can’t imagine that the magic loop method would cause your stitches to pull in one direction. That sounds fishy. I am at a bit of a loss. I am going to reach out to a few of my knitting gurus and see if they have any tips! Stay tuned. I’ll write back here soon!
Laura
Bonnie!
So I consulted some other knitters and someone suggested to me that perhaps you aren’t knitting up to the correct point before the sskp. Are you working up to one stitch before the marked stitch? Another place where something may be going wrong… when you moved the stitch marker up, is there a change that maybe you’re marking the wrong stitch?
I’m not totally sure whatelse it may be.
Let me know if this helps at all!
Laura
Hi Laura!
Thanks for the input. I ripped out the stitches down to right before the decreases. I’m going to start again and watch more closely. I’ll let you know what happens.
Thank you!
Bonnie.
Another knitting friend mentioned that perhaps you are using a stitch marker, but you aren’t marking the actual center stitch of the decrease. If you simply have a marker on your needle, rather than the center stitch, then you’ll definitely end up with slanting decreases. Does that make sense? It’s kind of hard to explain. Please let me know if you have any questions or thoughts on it and definitely keep us posted!
Thanks,
Laura
Hello!
I just found this pattern and can’t wait to make one for my 12 month old Granddaughter. Her head measures 18″, but since she’s just a barely 1 year old, wouldn’t the kid size be too big? Her Mom measured her head above the ears.
Hi Janet-
I think you should make the kid size. She would probably fit into the toddler size fine, since it has a lot of stretch, but the kid size will fit for a lot longer!
Thanks for your question!
Molly
this is super cute and i finally figured out the ear flaps! well, i THINK i have.
one quick question, though, that didn’t seem to be answered in the notes section.
when i’ve done short rows before (only once! haha!) – when i turned the work, and purled back, i needed to wrap the next stitch. do i need to do so here?
i hope that made sense!
thanks
Hi Kimberly.
Thanks for writing in. Glad you like the project!
After turning your work, you knit until instructed and then you do your next wrap.
No need to wrap as soon as you turn.
Hope this helps.
Please let us know if you have any questions.
Laura
love this pattern. It also make great ear warmers. Cast on the size required stitches. Then I knitted 7 rows of 2×2 rib. Then divided and worked short rows per the pattern. Then knitted 7 rows of 2×2 ribbing. Then bound off. My family loves these ear warmer!
Hi,
I’m using Malabrigo Rios to make this lovely hat, but I’m having trouble getting the correct gauge. I want to knit it in the baby size. I’m getting 5sts to 1″ on US7. I tried going up needles sizes, but it got too loose and I didn’t like the way it looked.
My questions are:
1. Do I knit the toddler size (which will give me the circumference of 13.6″) or the kid size (which will give me the circumference of 15.2″)? One will be a tad too small and the other one will be an inch too big.
2. Once I determine which size to knit…do I follow the finished height of the baby size?
Thanks for your help.
Heidi
Hi Heidi,
I would probably make the kid size. Those kids just keep on growing and having the hat a pinch larger is definitely better than it being too small. Unless of course you know the little one that you’re knitting for is very very petite?
As for adjusting the pattern… The kid size has 28 rounds of decreasing, so just be sure to divide 28 by your row gauge. Subtract that number from 6 1/2″ and be sure to work the body evenly for the number that is remaining.
Hope this helps.
Please let me know if you have any questions!
Laura
Hi Laura,
Just curious…where did you get the 6 1/2″ from?
Thanks,
Heidi
Hi Heidi.
I am so so so very glad you wrote back. My response to you was incorrect! I mixed up some of the different size round counts and dimensions together.
For the kids size you work 35 rounds to shape the crown of the hat. 35 rounds / 8 rounds per inch ~ 4 1/4 inches
You’ll need to take 35 rounds / your row gauge ~ X inches
Subtract X inches from the total height of the hat, either 8 inches for a toddler or 9 inches for a kid size, whichever you’d like. This will give you Y.
Be sure to work the body evenly until the piece measure Y inches. Then begin shaping.
Does this make more sense than my initial response. It’s the same principle, but with the right math!
Let me know if you have any questions at all!
Thanks so much for writing back.
Laura
If you’re making the larger size hats (other than baby) do you increase needle size or still use the 7’s and 8’s?
Thanks
Hi Kathy-
You still use the same needle sizes, you just get them in different lengths!
Please let us know if you have any more questions!
Molly
I’m a little confused about where to place the stitch markers, and how to use them in the decreases. The pattern says: “Knit to one stitch before next marked stitch, sskp” – so I have one stitch on each side of the stitch marker but I’m supposed to slip 2 stitches? So I end up slipping one stitch and then moving the marker, then putting the stitch back on the left needle and slipping 2 stitches. Seems cumbersome. What am I missing?
Also, it says “move stitch marker to the sskp”. So where does it go, before or after the knit stitch with the two slipped stitches?
Sorry if I’m being dense. I love the pattern! Just want it to turn out fabulously 🙂
Hi Lizzy.
Thanks for writing in. I hope I can help you figure this out.
Are you using normal stitch markers of removable stitch markers? The stitch marker should be on the center stitch of the decrease, not the needle. This is a common error.
So you’ll mark 4 stitches in the set up round and then in following rounds you’ll, be working up to one stitch before that marked stitch, you’ll work your decrease and then move the stitch marker up to the stitch you just worked.
Please write us back if this is unclear or if you have additional questions!
Thanks.
Laura
Yep! I was using the wrong stitch markers/marking the needle. I’ve figured it out and am almost done with the hat now 🙂
Hello, I love this pattern; however, I do not have a circular needle. Do you possibly have this pattern in a crocheting style? I crochet much better than knitting. Although, I am working very hard on my knitting because I love it.
Thank you so much for all of your help! Take care. These are beautiful!
Hi Esther-
We don’t have a crocheted pattern for these. If you don’t have a circular needle you could knit them entirely with double pointed needles but we do recommend the circulars- they make it a lot easier!
Thanks for your question!
Molly
Love this hat, but I am at crown shaping for child’s size (76) stitches and confused on set up row and where I am to place markers. Do I place them before the K1 or after? And then when I get to the sskp am a placing the markers after I am done with the sskp? Thanks for the help!
Hi Lisa.
Thanks for writing in.
You’re going to be marking the actual stitch. You’ll need removable stitch markers for this portion of the pattern rather than regular stitch markers.
Let me know if you have any questions.
Laura
Just finished knotting this hat (toddler size) for my 9 month old daughter and it is adorable! What a great pattern. Any suggestions for eliminating the jog at the back of the hat from K to p rounds?
Thanks!
Emily
Hi Emily.
I do not have a trick for this. Wish I did!
Purl Bee Readers,
Any suggestions?
What number of thread was that or if you use another thread what number would you suggest.
Hi Ruby.
I used Purl Soho’s Alpaca Pure. For more information on this yarn, visit our eCommerce site at this link: https://www.purlsoho.com/purl/products/item/9307-Purl-Soho-Alpaca-Pure
Thanks for writing in.
Laura
I love this hat for a baby, but my english is not very good. I can’t understand all the explications. Is it possible to read the text in french? I would be so happy to realise this hat… Thank you very much. Annie
Hello Annie.
Thank you for writing in and thank you for your interest in this pattern.
Unfortunately, we do not have the pattern translated into French.
Are you familiar with the knitting site Ravelry. Sometimes you can find people to translate patterns for you there!
Sorry to not be more helpful.
Thanks again for writing in.
Laura
Gibt es eine Deutdche Strickanleitung?
Wäre Toll
Hello Rosie.
Sadly, no. We currently only have this pattern in English. Perhaps one of our dear readers will translate it for you!
Thank you for your interest in the pattern!
Laura
I am trying to make this pattern as per your instructions but do not understand how to keep it in garter stitch while working the wrp-t. According to the instructions for the wrp-t you slip a stitch purl wise to the right needle, bring the yarn in front as if to purl, slip the stitch back to the left needle, turn the work and then bring the yarn in front again. That makes the wrap. This works great if you are on the right side of the work, but on the wrong side, the yarn is then in front as if to purl; how do I knit if the yarn is in front? If I don’t completely wrap the stitch have I not done the wrp-t correctly? This is really confusing me.
Hi Lori.
Thanks for writing in.
It sounds like you may be referring to the instructions in our Short Row tutorial which is for how you work wrp-t on stockinette stitch. The steps for garter stitch are a bit different and can be found in the NOTES section of the pattern. Also, I’ve pasted the note below!
Please let me know is you have any questions!
Laura
wrp-t [wrap and turn]: keeping the yarn in back, slip the next stitch purlwise from the left needle to the right needle. Bring the yarn forward as if to purl. Return the stitch from the right needle back to the left needle. Turn the work.
I have an ear flap question as well. I think I’m managing the wrap-turn okay but I’m getting a solid vertical line along the first marker and a nice slope at the second marker. This hard edge doesn’t seem to match the picture. I hope that description makes sense- I really want to make this hat!! I’m knitting the infant size.
Hi Jenna.
I’m surprised the wrap is creating a vertical line! Hum. That has me a bit stumped. You’re executing the wrap and turn in the same fashion on both sides? Is there a chance that it will block out or is it really strongly vertical? Sorry if this question seems obvious… but are you working in garter stitch? Sometimes people inadvertently switch to stockinette stitch along the way. I’m sorry there are not solutions jumping out at me. I’m going to keep thinking about it. I’m wondering if your tension is just tighter along one edge, but if you’re working in garter, that would be unusual. I’m going to keep thinking about this…
Thanks.
Laura
Hello. In the section on shaping the crown, can you tell me what “mark the previous stitch” means …? Should I put a marker on either side of the stitch, or maybe just after the stitch?
This hat is adorable … I look forward to finishing it and starting another.
I always enjoy Purl Soho patterns and have made countless Bandanna cowls as gifts!
Hi Laura.
Thanks for writing in. I just love that Bandana Cowl too. What luck friends you have to receive such gifts!
So for shaping the crown of this hat… Are you using normal stitch markers or removable stitch markers? Be sure that you are using a removable stitch marker (such as these: https://www.purlsoho.com/purl/products/item/9508-Fringe-Supply-Co-Removable-Stitch-Markers) and that you are marking the actual stitch, not placing the marker on the needle, but rather placing the removable stitch markers through the knit fabric.
Let me know if you have any questions!
Thanks again.
Laura
Thank you for this sweet pattern. I’m having a problem that I haven’t seen addressed in the comments. I end up with holes, just at the top of the earflaps. I’ve redone it 3 times and can’t figure out where I’m going wrong. Thanks for being so gracious with the help. 🙂
Hi Kelley.
Thanks for writing in.
Do you think the holes might be from wrapping the wrapped stitches too tautly? Extra pulling here may be creating the little gaps. But I guess if it were due to the wraps, the holes would be along the sides of the earflaps, not just at the top like you describe. You have me a bit stumped. I’ve not encountered this issue before. Can you describe where they are at the top of the earflap?
Sorry to not be more helpful.
Hope we can figure this out.
Laura
I apologize for the multiple questions. I thought they weren’t getting through. The hole is quite large. I am not picking up the wraps. At each short row there is a gap between the stitches just next to the wrapped stitch. This is what leaves the hole. But, like you mentioned, it’s only at the very top row. I’ll try to describe the position of the hole. After I’ve completed the left ear flap and knit across the front, headed for the place to begin the right ear flap, I have a gap at the right side of the left ear flap that doesn’t get closed up on the next round. I had the same gap at the left side of the left ear flap, but it got closed when I knit across it to get to the right ear flap. Does this make any sense? I’m so frustrated, but determined. Thanks so much for the help. 🙂
Hi Kelley!
No apologies necessary.
I am stumped by this one. I am going to reach out to a colleague and see if he has any suggestions. I’ll write back soon!
Laura
Hi Kelley.
I asked a fellow who works in our Soho shop what he though. He sees and helps tons of different knitters everyday. He said he thinks it’s common enough. That it’s like the “loose column” at the edge of a cable or rib. “I think it has to do with stitch manipulation, and different knitters just being different. I had the same kind of issue happen at the back of my bandana cowl. As far as a solution, I worked the yarn into neighboring stitches to close up the gap.”
So like Thomas mentioned, you can work the neighboring stitches slightly tighter to compensate for the gap.
I do hope this helps.
Thanks for writing in Kelley.
Laura
I love this hat, but cannot seem to figure out the earflaps. They go along beautifully, until I purl the first round after them, which leaves me with a hole on one end of each earflap. I’ve looked at countless tutorials on short rows and don’t see where I’m going wrong, but I must be. I don’t want this to beat me. Can you help?
Hi again Kelley.
Sorry for the delay on responding to your last question.
I’m thinking it’s that last wrap you’re doing is pulled too tautly. Is there any way you can get the tip of a tapestry needle in there and try to even out the tension? Or is the hole quite large? You aren’t picking up the wraps are you? You don’t have to when doing short rows in garter stitch. Kelley, again, I’m so sorry for not having an instant answer. I’m not totally sure where these gaps are coming from.
Laura
I love this pattern! Ijust can’t seem to get the earflaps right. Everytime, I get one hole on the right side of the top of each earflap. When I purl the first round after the short rows, the holes where the gap between stitches doesn’t close. On the left side of the flaps, the gap gets closed when I knit past it during the short row round. I’ve redone this 6 times, and don’t want to give up, but I’m at a loss. Can you help?
I am confused by the instructions for the first ear flap. I knit to 8 stitches before the marker and wrap and turn. I am then instructed to knit again. How is that possible when the W&T has me set up to purl.
Thanks!
Hi Ema.
I’m glad you wrote in.
I think maybe you’re doing your wrp-t slightly different than I describe in the NOTES section. Under NOTES there are instructions for how to do them for garter stitch, which is different than for stockinette stitch (maybe how you’re doing them?). I think this might be where the problem is. Take a look and let me know if you have any questions!
Thanks.
Laura
Thanks for creating this pattern. I have made 4 of them ( 2 baby, 2 child size. They have turned out sweet, but I am always confused as where to start my sskp. I have done it where I slip one stitch before the knit 1 stitch, so slip that, slip the knit 1 stitch, move the marker and knit that stitch, then do the passing over the 2 slipped stitches. It all works except as you move along the last sskp gets very close to end of round. Thanks for you help!
Thank you so much for the pattern.
qui pourrait m’aider en traduisant en français? j’aurais tellement aimer faire ce bonnet pour ma petite nièçe….
je remercie toute aide!
Marie, si vous avez encore besoin d’une traduction, je peut vous aide.
Oh oui please la traduction en français.
Merci
Bonjour,
Pouvez vous me traduire également le modele en francais merci beaucoup de votre gentillesse
Merci de votre aide pouvez vous me traduire les explications du modele s’il vous plait
Cher Mariette,
Merci de nous écrire! Nous n’avons pas en ce moment la capacité de traduire tous nos directions dans les langues demandées. Je vous souhaite bonne chance!
Cordialement,
Adam
This little hat is so cute … I will try to knit it in this weekend.
Hi!
Today I’ve finished this baby hat, and I wanna share my pictures with you:
http://www.knitting.diamonds/2015/04/12/Cute-Baby-Hat.html
It is a lovely pattern, thank you !
Hey,
We have a problem with the ear flap. Do you have a video tutorial about that? Or could we have a more detailed description? The problem is that my mom would like to knit it, but she doesn’t speak english, and as i cannot knit, I have some troubles translating it for her. But my baby is on the way so it would be nice to get this pattern.
Thanks a lot for you in advance!
Eszter, the Mom-to-be,
Kati, the Grannie-to-be and
Baby Szederke 🙂
Hi Eszter,
Thank you for the comment! Unfortunately we do not have a video tutorial for this project. If she is struggling with the short row portion of the pattern (the ear flap) we have a photo tutorial on our blog which you can view here;https://www.purlsoho.com/create/2008/06/18/short-rows/
If you need a video reference as well there are a ton on youtube in many languages. Here’s a good one I found; https://www.youtube.com/watch?v=QuN8fwVthUY
I hope this helps and feel free to write us back if you have anymore questions!
Happy Knitting!
Jake
I just finished the baby hat. It was somewhat confusing as to where to start the sskp but looking at it, I started over at that point and slipped the stitch before the marker, then slipped the knitted stitch, and knitted the next stitch, and slipped both over that. Then the pattern emerged. After that it was easy. To do the ear flaps, your instructions went fine. I looked how it should look with the garter stitch, and worked visually. Lovely hat. Will make a child size one. Thanks for the pattern. Lis, a grandma to be.
This adorable hat pattern has caused me considerable consternation! First, it would be helpful if, in the directions, you would STRESS removeable or moveable stitch markers, as I was using the circle ones and couldn’t figure out what ‘mark previous stitch’ meant, but reading these notes has been helpful. Second, my decrease rib is appearing on the WRONG side of the hat, and that ridge is one of the things I find so appealing about the pattern. Any idea what I have done wrong? I ended the body of the hat with a round 2, or k row and began the crown with a purl row.
Hi Cindy.
Thanks for writing in to us and sharing your experience with this pattern. The feedback is great.
As for the ridge being on the inside of the hat, I have no idea what could have caused this. It sounds like you’ve worked the crown right. Your set up round was a purl round and you finished with a knit round. I guess my only question would be… how did you do the double decrease? Did you slip the two stitches together knitwise, then knit one, then pull those two slipped stitches over the knit stitch and off the right needle? Is there any chance the hat was turned inside out at some point? I don’t believe anyone else has had this issue and I have to admit, I’m quite stumped.
Thanks again for writing in and please let us know if you have any additional questions or comments.
Laura
Just to let you know that it my decreasing ridges have appeared on the wrong side as well… It doesn’t make sense because there isn’t really any room for error in the pattern, I am decreasing as you have said. I’m thinking that I will tink back the last 4 rows and see what I can do.
I just wanted to say that although I had the same problem with the ridges on the wrong side, I have now fudged it a bit and it’s now right. I undid back to the start of the decreases and the only way to fix it was to turn and work backwards. It makes a tiny hole but was fixable. Otherwise a very cute pattern.
Mine ended up on the inside too! I just turned the hat inside out…
Georgia!
You are in luck. Another commenter just shared her experience with this… Did you by chance do the same thing RAD did?
Let us know! I’d love to figure out this mysterious inside out decrease situation.
Thanks!
Laura
I recently knit this hat up and had the same issue with the decrease ridge appearing on the wrong side of the cap. I see that you say someone figured it out, but I am sorry, I do not see RAD’s comment on here. What is the problem/fix? I’d love to knit this again and not have the same issue. Thanks!
Hi, Holly!
Thank you so much for your question! I am sorry to hear that you had trouble with the decrease ridge! RAD realized that a mistake had been made during the construction of the ear flaps. To fix it RAD wrote:
“At the end of one row, I did a wrap and turn so that I was not on the “inside” of the hat any longer. Have a small hole to cinch closed, but it solved my problem.”
I hope you find this helpful for future Garter Ear Flap Hats! If you have further questions, please let us know!
Happy knitting,
Kumeko
Hi, I had the same problem, but when I reviewed the instructions, I realized that I didn’t slip the two stitches “together” knitwise. I slipped each one separately and then K1 and passed the two slipped stitches. Once I slipped two of the 2 stitches “together” knitwise at the same time, it all worked out.
Thanks for this cute pattern!
Hi Cindy,
I can not understand either what “mark previous stitch” means.
Could you or anybody else help me?
Hello, Valentina!
Thank you so much for writing in! “Mark previous stitch” means that you’ll be marking the k1. The pattern reads:
“Set-up round: P7 (8, 9, 10, 11, 12), k1, mark previous stitch, [p14 (16, 18, 20, 22, 24), k1, mark previous stitch] three times, purl to end of round.”
So, you will P7 (8, 9, 10, 11, 12), k1 and hang a removable stitch marker from this k1 stitch, [p14 (16, 18, 20, 22, 24), k1 and hang a removable stitch marker from this k1 stitch] three times, purl to end of round.
If you have further questions, please let us know!
Happy knitting,
Kumeko
Just wanted to add to my question about the decrease ridge appearing on the INSIDE of my hat, in spite of that problem, I LOVED this pattern and found the ear flap directions spot on…no problems at all with that. I plan to make this in every size! Thanks for an adorable hat!
I’m lost in between shaping the left ear flap and the right. There is no direction between the wrap and turn and where I start knitting at the next stitch marker. I only ask because I have to pass two stitch markers to get to where I think is the proper place to starting the right ear flap.
Thanks!!
Hey Kate.
I’m glad you wrote in. Hopefully I can get you to that next ear flap! It sounds like you’re right on track and you know where you should be working to.
The last instruction of the SHAPE LEFT EAR FLAP is to wrp-t. So after you do that, you’ve got the right side of the hat facing you. Then the first line of instruction (after the notes) in the SHAPE RIGHT EAR FLAP is to “Knit to 7 (8, 9, 10, 11, 12) stitches before fourth marker, wrp-t.” So you are correct… This means you will pass the two stitch markers along the way.
Please let us know if you have any questions.
Thanks.
Laura
Is the infant hat #7 or #8 as it says both?
Hi Tish.
Thanks for writing in!
Every size hat uses a US #7 and a US #8. For the smallest size hat though, we suggest 12-inch length circular needles rather than 16-inch needles.
Let me know if you have any questions.
Thanks.
Laura
I’m not sure what size needle to start my gauge..the larger or smaller size and I am a relatively newby knitter?
Hello, Jessie!
Thank you so much for writing in! Sorry about the delayed response! For your gauge swatch you’ll want to work with the needles that the pattern calls for, in this case you’ll want to use the size 7 needle. The gauge you are looking for should be 4 1/4 stitches and 8 rows = 1 inch in garter stitch with the size 7. If you are getting more stitches per inch you’ll want to increase your needle size (maybe a US 8) and if you are getting less stitches per inch you’ll want to drop down your needle size (maybe a US 6).
If you have further questions, please let us know!
Thanks so much for fantastic pattern… I’ve just unpicked after the second ear flap, as it was way smaller than the first… I think what confused me was which was regarded as the ‘first’ marker… Do you count the first marker to be where you mark the join for the round, or the first marker to be the next one (i.e. the first marker specifically placed for the shaping)?
Thanks so much
Gail
Hi Gail.
Thanks for writing in. I’m sorry for the confusion. I do not count the end-of-round marker as the first marker. The first marker would be the first one you placed just before the SHAPE LEFT EAR FLAP section.
If you take a look at the photograph in that first ear flap section, there is an end-of-round marker that is very hard to see as it’s the same color as the yarn. The earflaps are worked between the 1st and 2nd marker and between the 3rd and 4th marker. The end-of-round maker is where the center back of that hat.
I do hope this helps! Please do not hesitate to write us back with any questions. -Laura
My 12-year-old lost her favorite hat and I have been looking for a pattern to make her a replacement. This seems to be just the thing. I can’t wait to get started! Thank you.
I have made this hat several times for baby gifts. The reviews on the hat are great. All mothers say how much they love it. It stays in place and the ear flaps stay down. Thank you.
Thank you for sharing this beautiful pattern. It certainly made me learn to love the garter stitch and see how pretty it is! The crown on my project didn’t come out quite as lovely as the hats in the photos. I followed the decreases exactly as it was written in the pattern, but the final result looks more ‘zig-zagy’ than a smooth slant. They also don’t quite meet, in the visual sense. Should proper blocking fix this? Because mine remained as I described it after blocking. I’ve seen other finished projects on ravelry, and everyone’s attempts looked successful.
Thank you in advance 🙂
R.T.
Hi RT.
I’m so glad you wrote in. I have not heard of this issue with anyone else before. I’m so curious what might have caused it. May I ask how you worked your sskp? Was it as instructed in the notes section or a different variation on that centered double decrease? And on your Round 2s, did you knit one in that column of stitches where you were decreasing or did you maybe just purl the whole round? I’ve heard of that causing some problems for some folks.
I did not have to block out any zigzagging. But perhaps some of our other readers has similar experiences and haven’t spoken up!?!
Purl Bee Readers,
Do you have any tips for RT?
RT,
I’m so sorry I don’t have a clear answer for you on this. I’m a bit baffled. Hopefully we’ll have some other chime in here and help us out!
Thanks again for writing in and please let us know if you have any better success if you decide to try the pattern again!
Thanks.
Laura
A little late to be helpful for RT, maybe, but I encountered the same issue and figured out where I went wrong. The stitch that you mark in the set-up round, the “previous stitch”, is the single knit stitch. I had marked the stitch before the k1, thinking that was the previous stitch. So when I worked my centered decreases, they were one stitch to the right of center. You want your decrease to go “slip (stitch before k1, and k1 stitch), knit one stitch, pass slipped stitches over”. This will put the knit stitch line in the center. Hope that makes sense.
I have knit many ear flap hats. The ear flaps in this pattern are pure genius! This pattern is exquisitely written. Read every word before you start. If you find a confusing part, stop and re-read again; sometimes I read it out loud so I can hear what I am missing. Thank you for this excellent pattern!
Hi,
When I finish the last instruction of the left ear flap, I have the right side of the work facing me. Then I do my turn and I have the wrong side of the work facing me. Your notes above indicate that the right side should be facing you, but I am not finding this possible. I am knitting the child sized hat. I do 9.9.9.8.7.6.5.4.3.2.1. The first 9 begins with the right side of the work, keep alternating and we are at 1 with the right side of the work. Turn the work and we are on the wrong side. How am I supposed to get to where I am supposed to be before the 4th marker? I really do not understand. Please help.
Hi Wendy.
Oh no! Let’s figure this out! Ok, for the Kids size…
First, on the Right Side, you knit up to 9 stitches before the second marker.
Then you turn your work and on the Wrong Side you work to 9 stitches before the next marker and turn.
Then on the RS, you work to 8 stitches before the next marker and turn.
Then on the WS, you work to 8 stitches before the next marker and turn.
RS, you work to 7 before and turn
WS, you work to 7 before and turn
RS, you work to 6 before and turn
WS, you work to 6 before and turn
RS, you work to 5 before and turn
WS, you work to 5 before and turn
RS, you work to 4 before and turn
WS, you work to 4 before and turn
RS, you work to 3 before and turn
WS, you work to 3 before and turn
RS, you work to 2 before and turn
WS, you work to 2 before and turn
RS, you work to 1 before and turn
WS, you work to 1 before and turn… which will put you on the Right Side in order to get to work up to that 4th marker.
Be sure to skip any rows of instructions that have a ” – ” where your size is. I think maybe you worked up to the 9th stitch two times too many. Also, I’m not sure if you saw that in the pattern the instructions start out NEXT TWO ROWS in a lot of cases. If that was overlooked this might have also gotten you off pattern.
I hope these tips help get you back on track but please do not hesitate to write us back with any questions!
Thanks for writing in.
Laura
Laura,
Thanks so much for your help! After all that, I realized I did 9.9.9, when i was supposed to only do 9 twice.
Wendy
Hi! I’m so glad you’re back on track! Hope you enjoy the rest of the hat. Laura
Hi there
I started knitting your adorable hat but it did not look quite right. When you say knit you really mean knit and not purl? Or is it knit in reversible stockinette? When I knit the short rows they looked horrible and I did not get any garter stitch. I knit the first two rows as instructed but after that everything was in stockinette.
Please help!!
Ellemiek
Hello Ellemiek!
When you knit short rows, you are working back and forth by turning the fabric. Since you will be working on the right side and then the wrong side, knitting alone (without purling) will maintain the garter stitch pattern. Once you get to the section called “Work Body of the Hat”, you will be working in the round again and therefore will need to incorporate purling every other row so that garter stitch is maintained. Take a look at our tutorial for short rows: https://www.purlsoho.com/create/2008/06/18/short-rows/
Please don’t hesitate to write again if this wasn’t adequate! Best of luck! -Alyson
Hi did you sort this as I end up with stockinette too 🤨
Hi Vicky,
Thanks for reaching out! As you can see in the photos, when you begin the hat you are in fact working in stockinette (this gives the hat the cute rolled edge) before you move on to garter stitch for the body and the crown of the hat!
I hope this clears things up!
Gianna
I really enjoyed making this hat, thank you for the pattern. 🙂
Hi there! Really enjoying the project, but I’m not sure I’m on the right track—after doing the earflaps on the baby size, I have 88 stitches on my needles. I knit the wrapped stitches in the ear flaps (leaving some YO-looking holes, but the curl of the stockinette kind of covers it). Would it be possible that, if there are more stitches on the needles after the earflaps, we could get a count? And if I’ve done something really wrong, let me know!
Hello Kaitlyn!
While doing short rows, you should not be increasing or decreasing the total number of stitches. Also there shouldn’t be any Yo-looking holes! When you knit the wrapped stitches, you need to knit them together with the stitch that they are wrapped around.
Take a look at our tutorial here: https://www.purlsoho.com/create/2008/06/18/short-rows/
Hope this helps! Best of luck! -Alyson
Hi, Kaitlyn!
Thank you so much for writing in! I am sorry about the terribly late response! You shouldn’t have more stitches on your needles. The short rows don’t increase your stitch count. Did you skip the rows of instructions that have a “–” where your size is? Also, I’m not sure if you saw that in the pattern the instructions start out NEXT TWO ROWS in a lot of cases. If that was overlooked this might have also gotten you off pattern. Also, there shouldn’t be any Yo-looking holes. When you knit the wrapped stitches, you need to knit them together with the stitch that they are wrapped around.
Take a look at our tutorial here: https://www.purlsoho.com/create/2008/06/18/short-rows/
If you have further questions, please let us know! Again, thank you for writing in!
Best wishes,
Kumeko
I searched through soooo many patterns before finding this gem! I love the whimsy of the pointed top and tassel; the ear flaps really sell it, though.
After my first attempt (in which I somehow created the second ear flap on top of the first!), I am now well on my way to finishing this sweet hat for a friend’s newborn grandson.
Thank you so much for the free pattern!
Hello Michelle!
We’re so glad that you love this pattern! Happy knitting! -Alyson
hi,love the hat. Would like to made one since I just achieved d bandana cowl with the short rows in this pattern. I stuck in row :right side knit 10(adult small) stiches before second marker,wrap-t. When I turn d work that is garter stich facing me, should I purl or how? Cause ur next row is knit. Confusing me.
Hello Caryn!
Since garter stitch when knitting in 2-dimensional rows is made of simply knitting every row, you shouldn’t need to purl at all during the short row section.
We’re so glad you like the hat and please don’t hesitate to contact us if you have any further questions! Thanks! -Alyson
The same is happening to me with the decreases on the inside. Why does it do this….
Sincerely,
Frustrated.
Hello Jannah.
May I ask how you’re working your double decrease. sskp [slip slip knit pass]: Slip two stitches together knitwise, knit 1, pass slipped stitches over knit stitch and off needle. (2 stitches decreased)
Depending on how you’re working it or the subsequent rows, I guess the ridge of decreases could slip to the other side of the fabric. I haven’t figured out how exactly, but I suppose it’s a possibility. I’m so sorry you’re frustrated. I’m glad you wrote in. Write us back and maybe if you could go into more detail about how you’re working the hat we could figure out why this is happening.
Thanks.
Laura
I had a similar problem of the decrease ridge on the inside of the hat, and I realized that I had made a mistake in my ear flaps, and consequently ended on the wrong side instead of the right side. At the end of one row, I did a wrap and turn so that I was not on the “inside” of the hat any longer. Have a small hole to cinch closed, but it solved my problem.
It’s an adorable pattern. Thank you so much.
I have a yarn that is bulky weight (suggested needle 10 1/2, gauge 3.5 x 5 rows = inch). Would it be possible to use that and still use this pattern (I am trying to make the toddler & kid size)? If so, what might you suggest for needles so that I end up with the sizing in the pattern?
Thank you so much for your help!!
Hi Jolene.
Thanks for writing in!
I’m guessing the gauge you provided is for stockinette. Do you have the gauge of that yarn in garter stitch? Once you have that, you can take the cast on numbers and divide them by your garter stitch gauge, this will give you the finished circumference of the hat. For this example let’s just say that you’re getting 3 stitches to the inch in garter stitch.
60 (68, 76, 84, 92, 100) stitches / 3 stitches per inch = 20 (22.6, 24.6 … inches
So the smallest size pattern, casting on 60 stitches, is going to result in a 20-inch circumference hat. This would be an Adult Small size. Depending on your the kid, this could work for a kid as well, maybe just a little on the large size. Unfortunately, this gauge doesn’t work with any of the existing instructions for a toddler though.
Please let me know if you have any questions!
Thanks for writing in.
Laura
I love this little hat. I am making t for my grandson. I finished the ear flaps and the main part of the hat. It looks great. I did the set-up row and. Have a question about the markers. The directions say p 8 k1 place marker at previous stitch. I read that as placing the marker before the k. Is that correct? If not, please explain. Thank you.
Hello Barbara!
You actually need to use removable stitch markers in order to hook the marker onto the loop of the stitch directly. If you simply have a marker on your needle, rather than the center stitch, you may end up with slanting decreases. The directions are written assuming that your stitch marker is on the stitch and not floating on your needle. I hope this helps!
Best of luck! -Alyson
I think your short row tutorial links broke somewhere along the way. Both links above within the pattern link to “https://www.purlsoho.com/knitting-tutorials-advanced-te/2008/6/18/short-rows.html” (which appears to not exist anymore) rather than “https://www.purlsoho.com/create/2008/06/18/short-rows/” which is the link I found by searching your tutorials. Just wanted to let you know.
I’m halfway through a hat for my daughter and I love it! It’s my first adventure with short rows and it was so fun to see the ear flaps emerge.
Natalie!
Thank you so much for writing in. When we launch the new purl soho dot com site, we experienced some problems with our links redirecting to the proper new location. I’m relieved to hear you found what you were looking for. Thank you so much for taking the time to write to us about this. I am so sorry if it caused any frustration. We’re working as hard as we can to iron out all of these kinks!
I’m happy to hear you’re enjoying the hat pattern! It’s one of my most favorite designs!
Thanks Again!
Laura
I started knitting the baby size and I’m already having a difficult time making sense of the earflap shaping. The directions say for row 1 to knit 7 stitches before 2nd marker, wrap and turn. (did that) Now for the 2nd row, knit to 7 stitches before marker; that would be only 3 stitches??? That doesn’t make sense to me. What am I doing wrong? Thank you for your help.
Micky
Hello Mickey!
You’re not doing anything wrong! The magic of short rows creates the curved ear flap since you are knitting over a small group of stitches more times than others, which causes the fabric to push and pull downwards making a curve. The pattern is written that way so that the same instructions can be applied throughout the pattern. The second row you’ll only be knitting 3 stitches, but as you incorporate more into the ear flap, you’ll be knitting more and more until the short row shaping is complete.
I hope this makes sense! Best of luck! -Alyson
Thank you for asking this question! I was wondering the same thing!
Thank you! I was also confused before reading up to this!
My question pertains to shaping the crown. I do not understand where it says “three times” below. What do I do three times? Thanks so much!
“Set-Up Round: P7 (8, 9, 10, 11, 12), k1, mark previous stitch, [p14 (16, 18, 20, 22, 24), k1, mark previous stitch] three times, purl to end of round. “
Hello Lisa!
The “three times” refers to the instructions in the [brackets]. Since they are grouped together by commas, that’s what its referring to. Thanks for writing in–I bet some others had the same question! Have fun finishing up! -Alyson
Hi,
I may be a little late, but I was wondering what needles you use and the cable length… my husband just bought me some Addiclicks and I am not sure if I have a short enough cable.
Whitney
Hello Whitney!
What size hat are you making? The pattern calls for the following needles:
A US #8, 12-inch (for Baby size) or 16-inch circular needle and a US #7, 12-inch (for Baby size) or 16-inch circular needle
The only Addi Click set that comes with the 16″ cord is the Lace tip set. If you didn’t get that one, I would recommend making the whole hat on double points, as the short rows may be difficult if you tried to use a longer cord for the Magic Loop method.
I hope this is helpful, best of luck! -Alyson
I love this pattern but I just finished the left ear and I figured that I knitted it all in purl side there, I can’t see the first 2 rows that were knitted so what I’m figuring is that after joining in the round I have to knit 2 rows and then when I start working on the left ear I purl the next row instead of knit? I didn’t understand that part.
Thank you very much for taking the time to answer every question
Hello ! I finally could do it 🙂 and it worked perfect but now I’m having problems with the crown, my first question is if when you in the first round that I have to purl to marked stitch is including the one that is marked? and when I slip slip am I suppose to do both at the same time? (considering that 1 of those 2 stitches is knitted and the other one is purled from the last row)
I hope you understand my question
can’t wait to hear back from you so I can get back to knit
Hello Josefa!
When you have to “purl to the marked stitch, k1” you will purl until the stitch that is marked and then knit the actual marked stitch. You should slip the two stitches knitwise together, even though one of them was previously purled. I hope this helps!
Best of luck! -Alyson
I love the printing feature! Thank you so much for this addition!
I am having he same trouble as Mickey. On the first row it says to knit 7 sts. Why is there only 3 maybe you can exp;lain this to me so i can understand ? I am knitting the smallest hat using an 11 in circ. i would be casting on 60 sts. correct? need help getting started
Hi Shelia.
We’d love to help you get started.
An 11-inch circular needle sounds perfect for the smallest hat and yes! you should cast on 60 stitches! So far, you sounds perfectly on your way.
Now, regarding those 7 stitches… You’re not actually knitting 7 stitches, you’re knitting up until there are only 7 stitches left before the marker. Then you’ll turn your work and knit until there are just 7 stitches before the next marker. These are short rows. Short rows are a technique used for shaping the ear flaps. At first you work just a very short row, just a few stitches and then in the subsequent rows you’ll work more and more until you’ve built a nicely shaped ear flap.
I do hope this helps! Please do not hesitate to write us back with any questions!
Laura
Hi,
I really love this hat and wish to make one for my soon to be born son, but I am a beginner and have already got problems even at the beginning. I can find some tutorials on techniques but just couldn’t figure it out how to complete the project. Could you please please make a video??
Thanks
Yale
Wonderful pattern! Fun to knit! I recommend reading the comments before starting as they help explain the pattern. Thank you!
After reading previous comments, I finally manage it. What an exciting challenge for a beginner! Love it! 🙂
Bonjour,
ce modele est vraiment très joli. Y a t il possibilité d’avoir une traduction en français. Merci davance.
Hi Mariette-
I’m afraid none of us speak French so we aren’t able to translate patterns.
Sorry and thanks for getting in touch!
Molly
Hi,
I’m interested in teaching this as a class at my LYS. The short rows are perfect for a class. Is it possible to use this pattern?
Thanks,
Emily
Hello, Emily!
Thanks for getting in touch! It’s ok to teach a Purl Soho project as long as it isn’t advertised as a Purl Soho class. Also, if possible we ask that everyone in the class be given a link to download their own pattern before beginning. Or if that’s not possible, we ask that you clearly state on the handout that the pattern is from our site and gives the direct link to the pattern.
Thank you again for your question!
Best wishes,
Kumeko
I was knitting a baby hat, and after two tries with the same mistake, I’m thinking I’ve misunderstood something.
It’s the garter earflap hat. After doing the left ear and starting on the right ear, I am on a knit row, but this breaks the garter stitch pattern, is this normal? What am I doing wrong?
Thank you in advance for your help.
Hi, Patricia!
Thank you for writing in! When you say that you are on a knit row upon finishing the left ear do you mean that you have the wrong side of the fabric facing you rather than the right side? I know that you’ve tried the pattern twice, but are you sure that you’ve skipped the rows of instructions that have a ” – ” where your size is. Also, I’m not sure if you saw that in the pattern the instructions start out NEXT TWO ROWS in a lot of cases. If either of these things were overlooked this might have gotten you off pattern.
Please let us know if you have further questions! Again, thank you for your question!
Best,
Kumeko
Bonjour
Serait il possible que quelqu un puisse me traduire les explications de çe joli bonnet. Merci d’avance
Hi, Mariette!
Thank you so much for writing in! Unfortunately, none of us are proficient enough in French so we aren’t able to translate patterns.
Sorry and thanks for getting in touch!
Best wishes,
Kumeko
Dommage merci tout de même
Can this be done flat and not joined on circular needles? If so, do I modify instructions and just knit where it says to purl? I haven’t been knitting long but I have made a hat and joined using dpns. Thanks!
Hi, Telly!
Thank you so much for your question! This hat pattern would be quite tricky to knit flat due to the shaping of the ear flaps and the decrease stitching. I wouldn’t recommend knitting it flat. However, if you are up to the challenge go for it, you might learn some wonderful tricks or techniques from the experience. And to answer your question, you would knit where says to purl since you’d be knitting flat and not in the round. Please keep us updated on your progress and if you have further questions, please let us know! Again, thank you for writing in!
Happy knitting,
Kumeko
Can this hat be knitted on 2 needles?
Hi, Yvonne!
Thank you so much for writing in! This hat would be very tricky to knit flat (using two needles rather than circular needles) do to its shaping and the construction of the ear flaps. I recommend knitting it as written and if you’re new to knitting in the round a quick internet search will provide you with countless videos on knitting in the round. We’ve got a wonderful tutorial on knitting with double pointed needles here: https://www.purlsoho.com/create/2008/07/25/double-pointed-needles/.
Knitting this pattern in the round will be much easier than trying to knit it flat. If you have further questions, please let us know! Again, thank you very much for your question!
Happy knitting,
Kumeko
Regarding the instructions on the crown placing a marker, when you say k1, mark previous stitch, is that the same thing as k1, pm?
Hi Gloria.
That’s a great question! The answer is no… Rather than placing a standard stitch marker after the k1, what you should do here is use a removable stitch marker to mark the actual stitch, putting the marker on the stitch, not the needle.
I’m so glad you wrote in about this! Please let us know if you have any additional questions.
Best,
Laura
I just started this for my new grandson but the link is broken for the instructions for the short rows. Is there still a tutorial for that?
Hi, Shelly!
Thank you for your question! You can find the short row tutorial here: https://www.purlsoho.com/create/2008/06/18/short-rows/. If you have further questions please let us know!
Happy knitting,
Kumeko
This pattern is great, easy to knit and I love the short row construction. If you need support for a French version of the pattern, I will be happy to support!
Kind regards from France!
One more question…when I start the “WORK BODY OF HAT” should that purl round be on the right side of the hat? I was one of those that ended up with the hat inside out and I don’t want to make that mistake again. Thanks!
Hi Shelly,
Thanks for writing in and our apologies for the greatly delayed response! The first purl round should be on the outside of the hat. As the hat is worked in garter, you will need to alternate purl and knit rows to achieve the lovely garter texture in the round.
I hope that this helps!
Cassy
Love this pattern. Was a nice challenge since I’m a rather new knitter. Any hints on blocking?
Hi Sue,
Thanks for writing in and our apologies for the greatly delayed response! Welcome to the world of knitting and congratulations on completing your project. There are two main types of blocking, one involves spraying the item with water and stretching it and the other involves submerging the item in warm water. I prefer submerging the item or wet blocking. To do so, fill a large bowl or other vessel that will fit your item with warm water and full submerge the item, making sure it is fully soaked. Let it sit for 15 minutes. Then, squeeze water our of the item while being sure not to wring or twist the item. Roll your item in a dry towel and then lay it out to dry flat on the towel.
I hope that this helps!
Cassy
I am in the middle of making this hat for my nephew, and it’s looking so good! It’s been just a fun pattern –those short rows are genius!
Unfortunately, I ran out of yarn so I’m having to switch to a different yarn for the top (there’s not enough time to order another skein of Alpaca Pure). 🙁
I’m doing the adult small size and I ordered one skein per the pattern specification, but I ran out of yarn at the end of round 1 in the “Shape Crown of Hat” section on the 6th repetition. I’ve double-checked my gauge and it’s right on. I’m not sure if anyone else has had this issue, but I wanted to bring it up so a note could be added to the pattern if appropriate.
Thanks!
Hello, Cassy!
Thank you for writing in! I am so, so sorry for the delayed response! Also, I am sorry to hear that you ran out of yarn! We really appreciate you letting us know! I have not heard too many people who needed to dip into a second skein for the adult small, but we hope that you’re experience and comment will help guide others as they make their yarn purchases for this pattern.
Again, thank you for writing in!
Best wishes,
Kumeko
This hat pattern is fabulous. Love it. Thanks so much for sharing.
Is there a dutch pattern available??
Hi Kristine-
Unfortunately this pattern is only available in English.
Thanks for getting in touch and sorry we couldn’t be of more help!
Best-
Molly
I read over the comments and I think I understand now where the markers should be. For one, she isn’t placing markers on the stitch itself. We’ll look at it again today.
Hi, I have another question about your pattern we’re not sure of. On the 2nd to last row, where it say Repeat round 1. 4(44444) stitches. Does this mean you will have 4 stitches on each needle after you repeat Round 1?
Hello Angelle,
Thank you for your question! After you complete rounds 1-4 the amount of times instructed for your size, you will have 4 stitches total. You will then knit 4, cut a 24-inch tail and thread it through those 4 stitches. I hope that helps. Please let us know if you have any other questions.
All the best,
Allison
Thank you!! She finished it!
When purling on Row 1 of the body of the hat, should I be on the wrong side? I started this hat once before and ended up taking it all out, so I’m looking ahead. It seems the decorative stitches will be on the wrong side. It is a precious hat and I so much hope I will be able to complete it. I am making the toddler size.
Hi, Peggy!
Thank you very much for writing in! You are correct, when you start row 1 on the body of the hat you will be on the wrong side.
If you have further questions, please let us know!
Best wishes,
Kumeko
Thank you so much for sharing this pattern! I am also confused about being on the wrong side on the purl rows, and having the decorative decrease end up on the inside of the hat. I can’t figure out how to get the edge to roll outward (away from baby’s head) and still have the decrease stitches appear on the outside. All I can figure is that I somehow messed up the ear flap directions, because I also ended up with the join/seam running up the front of the hat, whereas in the pictures it seems the join lands between the ear flaps. Help!? It is so adorable I’ll be disappointed if I can’t complete this correctly.
Hi Janemn,
Thanks for writing us! It seems to me that you have knit your hat inside out. I have been in your position many times! If your ear flaps are closer together on one side of the hat than the other, then I would consider that side the back whether or not your beginning of round originates there. As for your increases appearing on the inside, this is actually ok! When you finish your hat, you will turn the piece inside out and consider the “wrong side” the “right side”. Finally, if you ear flaps are curling toward the face now, just remember that they will flip the other direction when you turn the hat inside out. Good luck on your project!
Best,
Adam
I’ve totally done it too – it’s easy to do with garter short rows where identifying a right and wrong side is tricky 🙂
Thank you for this great pattern!
I am following the instructions just fine, but when I get done with my ear flaps, and I do the first purl round where you remove the stitch markers, there ends up being a tiny hole at the right edge of each of the flaps- due to the final wrap and turn… Just wondering if this is normal, or if I’m missing something that might fix this? It isn’t a big deal, and may even almost disappear after blocking.
Thanks!
Yara
Hello, Yara!
Thank you so much for writing in! And thank you for your kind words! You shouldn’t have holes, when you knit the wrapped stitches, did you knit them together with the stitch that they are wrapped around? Doing that will prevent those holes. If they are tiny, they might disappear after blocking.
Again, thank you for writing in. If you have further questions, please let us know!
Best wishes,
Kumeko
Your instructions are confusing, I don’t know where to go after the first two rows. This a nice hat, but this instructions doesn’t help.
Hi Lorena,
Thanks for writing us! So sorry you are having trouble with this pattern. After you knit two rows you do the following:
Change to smaller needles.
Next round: Knit 3 (4, 4, 4, 5, 6) stitches, place marker (pm), knit 16 (18, 20, 23, 25, 27) stitches for Left Ear Flap, pm, knit 22 (24, 28, 30, 32, 34) stitches for Front, pm, knit 16 (18, 20, 23, 25, 27) stitches for Right Ear Flap, pm, knit to end.
This is a set up round because after this round you will shape the ear flaps. I hope this helps!
Best,
Adam
Hola todos, alguna amiga de este blog, podria traducirme estas instrucciones para hacer el gorrito?, mi ingles no es muy bueno y no acabo de entenderlo.
Muchas gracias
Conxita
Hi, Conxita!
Thank you for writing in! Unfortunately, we do not have a Spanish translation of this pattern, sorry.
Best wishes,
Kumeko
I think I’m confused about the pattern. On lines of instruction with a dash for your size, you omit the entire line(s) of instruction? This is a little scary. I just love this hat and want to finish a practice hat before I make one in the good yarn.
Hello, Michele!
Thank you for writing in! You are correct, you will omit the rows that have a dash for the size that you are making. Please keep us updated on your progress and if you have further questions let us know!
Best,
Kumeko
I am workin on the ear flap hat, and I’m at the point where I’m shaping the crown. However, the “knit” sts that are supposed to form a design going inward to the top of the hat, are not going in the right direction Am I moving the marker wrong? I did the sskp then placed the marker. I need help! Love the hat.
Hi Shelby,
Thanks for writing us! Starting at the set-up round, be sure that when you are “marking previous stitch” that you are marking the knit stitch you just did. This will be the decorative decrease. I suggest using a removable stitch marker for this part so you always see which stitch you are supposed to stop at before the decrease. Good luck and happy knitting!
Best,
Adam
can you make this cute hat without the earflaps …. seasons are changing!
Hi Maggie,
You can certainly make this hat without ear flaps! All you have to do is omit the ear flap shaping and continue working the body in the round. All shaping is as normal after that. I hope this helps!
Best,
Adam
Hi there, thank you very much for this adorable pattern 🙂
I’m having a bit of trouble on Round 2 of Shaping the hat (Round 2: [Purl to marked stitch, k1] four times, purl to end of round. ).
I just wanted to clarify – you’re supposed to purl UP TO the marked stitch, and then knit the marked stitch, right? Also, what should you do with the marker at this point? Do you move it to the knit stitch?
Reading ahead I’m a bit confused as to how you move the markers along. Do you move the marker on to whichever stitch falls on the marked stitch in each subsequent round?
Thank you very much for your help!
Sheryl
Hi Sheryl,
Thanks for writing in! You are correct that you need to purl up to the marked stitch and then knit the marked stitch. You will be moving the marker each round if you wish. This helps you see which stitch is creating the decorative decrease. Please see our tutorial for more info about this decrease. I’ve pasted the link below:
https://www.purlsoho.com/create/2016/03/14/slip-slip-knit-pass-s2kp/
Good luck and happy knitting!
Best,
Adam
I am working on the ear flap hat and am a bit confused with the ear flap part. When starting the left ear flap what do you do with the 3 stitches before the marker. Is the yarn cut then started at this spotband di you cut the yarn when doing the right ear flap or knit over to it.
Hi Renee,
Thanks for writing us. After short rowing the left ear you should end up at the marker 3 stitches in from your end of round marker. Knit across the left ear flap, front of hat and the right ear flap until 7(8,9,10,11,12) stitches before the fourth marker depending on which size you are making. Now you are ready to start short rowing the right flap. You will not be working the three stitches before and after the end of round marker until you start knitting the body of the hat. Also, there is no need to cut your yarn because you are just traveling from the left ear flap to the right one. I hope this helps.
Best,
Adam
I am confused at the part where you start the ear flap. I am at the end of my round. I have 3 stitches then a marker, then 16 stitches for my ear flap. Why am I only knitting 7 stitches then switching back. Knit 7 stitches to the fourth marker doesn’t make since because it will take either 3 stitches or 19 stitches to get to either of the markers. Sorry I am somewhat a beginner so I may be missing something basic.
Thanks,
Melissa
Hi Melissa,
Thanks for writing us! The ear flaps are created using a technique called short rows. This means that you are knitting more fabric in one area of the piece than in the other areas (in this case, the ear flaps). The directions tell you to knit to 7 stitches before the 2nd marker and then wrap and turn. Next you will be knitting until 7 stitches before the next marker (this is 2 stitches for the smallest size) and wrapping and turning. When you turn and knit back you will come across your wrap. Pick up the wrap and continue on with the directions, which is to knit to 6 stitches before the next marker. Please take a look at our Short Rows tutorial if you are still having trouble with the ear flaps. I hope this works out for you!
Thanks,
Adam
How do you knit that WS turn? The yarn is in the front due to the first wrap and turn. If you move it to the back you undue part of the first wrap…….?
Hi Courtney,
Thank you for writing in! If you take a look at our short row tutorial, you’ll see that on a knit wr-t we keep the yarn in back, transfer the stitch and then bring the yarn in front. When you turn the work to face the wrong side, the yarn will be in the back, putting you in position to knit again. Please let me know if you have any other questions. Best of luck!
-Adam
Hi Adam – The last step on the tutorial (for the knit side) is to bring the yarn to the back of the work as if to knit. Does your message above mean that we should skip that step keeping the yarn in the front until we turn which means it will then be in the back?
Hi Aubree,
Thanks for writing back! I think that I can help! In our tutorial, we are demonstrating the wrap and turn technique on stockinette stitch. As this pattern is in garter stitch, you will leave the the yarn in front when you complete the wrap and then turn the work and the yarn will be at the back, preparing you to knit your next row!
I hope that this clears things up!
Cassy
Is there no video tutorial on this specific pattern’s short rows? I’m still confused. The way I’m following the pattern, it doesn’t seem like the ear flaps are wide enough
Hi Maria,
Thank you for writing in. We don’t have a video tutorial for this pattern unfortunately. The ear flaps in this pattern are shallow because the body of the hat is long. The flaps will probably cover your ear halfway. If you’d like to elongate the flaps, you can knit up until your previous wr-t and wr-t just before it. If you’d like to make them wider and longer, then you can knit closer to the marker before the initial wr-t. Let me know if you have any other questions! Glad to help!
-Adam
hi! i knit this hat a couple months ago for a friend’s baby and it’s the cutest hat ever! i’m now knitting another one for another friend’s little one, and i cannot for the life of me remember how i “marked the previous stitch” when shaping the crown. i’m thinking i use an open-ended marker to mark the knit stitch? is that right? i had a little trouble with this last time but i know i ultimately prevailed…thanks in advance!
Hi Piper,
Thanks for writing us! Yes, you will mark the actual stitch with a removable marker. To see a tutorial on this decrease, click here!
Best,
Adam
I am knitting the Baby Size.
Just wondering when I have finished the Left Ear Flap ending with wrp-t do I knit the stitches (6) across back of hat to start Right ear Flap or knit across the Left Ear Flap and the front of the hat and then start the RightEar Flap.
The pattern is not clear about where to go from the end of the Left Ear Flap before starting Right Ear Flap.
Thank you
Hi Elizabeth,
Thank you for writing us! You will be knitting across the earflap and around the front of the hat, passing the third marker. This is because you are wrapping and turning your last short row, which leaves you facing the right side of the work. Good luck on the project!
Best,
Adam
I also have the join seems at the front of the hat. The last row before working the body, indicates to knit to end of round. I assume this means to the marker when we first joined the yarn. Where did I go wrong?
Thanks.
Hi Carole,
Thanks for writing in! I think that you might have accidentally placed your markers in the wrong spots. There should only be a few stitches in between the beginning of round marker and the ear flaps. If your ear flaps are close together at the middle of round, then use the middle of round as the center back point. Regardless of you ear flap location changing, your end of round will still remain in the same spot. So when it tells you to knit to the end of round you will knit to the front of the hat in your case. I hope this helps!
Best,
Adam
fantastic explanations!
Hi I have a question on the decreases. I’m knitting the baby sized hats and once I’ve repeated the four rounds of the decrease part of the pattern four times(i think four times I’ve had to frog it back to the beggining of thr decreases) I’ve reached the biggining of the round how am I supposed to do the next decrease when the knit or decrease stitch is at the beggining of the round?
Hi Heather,
This is certainly confusing but I think I have a solution! Move your marker to the left of the stacked decrease so it doesn’t get in the way. As long as your decreases all fall in line, you’re golden!
Best,
Adam
I am having trouble. I hope I’m just missing something simple. I am just starting the left ear flap, completed my first w&t. The instructions say to knit the next row but I’m on the purl side. Also, if I try to knit on that side, then it takes the wrap off the w&t. I hope you can tell me what I’m doing wrong. I have made lots of socks so I am familiar with short rows, not as familiar with w&ts but I have done them before. But I am stumped. I hope you can help me.
Thanks.
Hi Denise,
I’m so sorry this is giving you trouble! First, take a look at our short row tutorial for wrap and turn. Maybe this will clear up your losing the wrap when turning the work. Also, because the hat is in garter stitch, this means that you’ll be knitting both sides of the ear flap because garter is worked by knitting both the wrong and right sides. Please let me know if you have any more trouble!
Best of luck,
Adam
I’m a little confused with the ear flap on this project. I am new to short rows, which may be part of my problem. So, you knit to 7(I’m making a baby hat) before the marker, wrap and turn, then this starts the next row? So after the turn I knit to 7 to the next marker, instead of purling to the beginning? Then knit to 6, wrap and turn and again instead of the purling, I knit to 5?
I hope that makes sense. I really like this pattern and have had to redo the hat twice now just for the ear flap!
Hi Emily,
Thanks for writing us! Short rows will be fun once you figure them out! What is going on in short rows is that you are knitting the center of the fabric more than the edges so the center grows longer and the edges do not. You have to wrap and turn in order to avoid a hole in your knitting. So, you’ll knit to 7 stitches before the marker and wrap and turn the work to work back to 7 stitches before the next marker (you’ll be looking at the inside of the hat while working these stitches). The reason you are knitting to 7 stitches before the marker, wr-t, and then knitting back is that garter is worked by knitting both sides when flat. When you start knitting in the round again you will knit one round and then purl one round. I hope this clears things up!
Best of luck and happy knitting!
-Adam
Bonjour,
Je suis intéressée par un modele Garner Earl flap hat mais je ne suis pas assez douee en anglais pour le traduire. Auriez vous la Possibilite de ma le traduire en français? Merci d’avance de votre compréhension. Bonne fin de journee
Bonjour,
Malheureusement on n’a pas les resources de traduire nos directions en français à ce moment mais on va garder à l’esprit pour l’avenir. Merci!
-Adam
This is such a cute pattern…
Instructions indicate that I do not pick up the wraps, but in the comments it indicates that the wraps should be picked up. Which is correct? Also when measuring to begin decreases, do I include the rolled edge in the measurement or just measure from where the garter stitch starts? Love this pattern. Thanks.
Hi Janet,
Thanks for your question! You do actually pick up the wraps as you pass them. It isn’t specifically written out in the pattern but it is implied because you pass the wrap each row. For measuring the hat, you will measure from the bottom edge of the roll up to your live stitches. Do not unfurl the roll; keep it relaxed. Let me know if you have any other questions!
Best,
Adam
hello, the pattern specifically says, “Because the short rows are worked in garter stitch in this pattern, you do not have to pick up the wraps; simply ignore the wraps when you come to them and work the wrapped stitch normally.” But here you write that the wraps should be picked up?
I end up with a tiny hole at the right end of the flaps, like a in a comment above.
Thanks for your help!
Hi S,
Thanks for writing back. I suggest you pick up the wraps if you are getting holes in the fabric. Let me know if you have any other questions!
-Adam
I’m having trouble with the decreases. My decorative line of knits are not going in the same direction as the picture shows. they are all slanting left. What am I doing wrong?
Hi Natalie,
I’m so sorry about this! S2KP is an advanced increase, but once you get the hang of it, it’s a piece of cake. I would rip back until your first decrease round and restart the decreases. Be sure to knit until one stitch before your marked stitch, slip two together knitwise, knit one and then pass the slipped stitches over. If this doesn’t make sense, I’d watch Laura’s S2KP tutorial! Let me know if this helps!
Best,
Adam
I’m having the same problem and not sure why. Have used S2KP many times, and usually counter with a right-leaning decrease – eg K2tog. My decreases are both leaning left. ??
Hi Harriet,
Thank you for writing us! Sorry you are having trouble with the pattern! S2KP is actually a centered decrease and shouldn’t be veering left or right. It only seems that way in the picture because the total amount of stitches continues to diminish as you shape the crown. It’s really important with S2KP that you knit up until one stitch before the marked stitch (aka the pronounced decrease). If you go beyond the pronounced decrease, your decrease will indeed veer left. I’d take a look at the tutorial and see if you are doing it the same. Let me know if you have any other questions — I’d be glad to help!
Best of luck,
Adam
I already made one, and I love the fit and how the earflaps are made!! I have one question though: Can I make this in stockinette stitch too, without further adjustments? I have something special in mind that just won’t work with garter stitch. Please help!
Hi Sarah,
Thanks for writing in and what a lovely idea! Yes, you can certainly do this in stockinette stitch, but the edges will curl up. I suggest, instead of doing the stockinette in the round at the very beginning, do a rib or a garter stitch to flatten out the bottom edges. When you get to the earflap portion, you will purl the wrong side as if working stockinette flat. Let me know if you have any other questions! Good luck!
-Adam
I read in the last comment that I should be on the WRONG side when purling the first round of the body of the hat. Okay…I ripped back a row and turned back to the wrong side to do that. I was glad to see that move was a cure for the big holes I had next to each earflap. But now…should I continue to knit the rest of the hat on the inside?
Hi Karen,
Thank you for writing in! You should only be working the inside of the hat when you short row the ear flaps. Other than that, you should end up ending the short rows by knitting to the end of the round. Your first move for the body of the hat is to purl because you are creating garter stitch in the round. This involves you knitting one round and purling the next, etc. Let me know if you have any other questions — I’d be glad to help!
-Adam
I just completed the setup round for the toddler size and am really confused – there were not enough stitches to accommodate the instructions. Are the numbers in BRACKETS there to show how many stitches you should have total? Or are the instructions saying p8, k1 and then p16, k1 and repeat that 3 times? That equals 128 stitches which is more than I have on my needles. So confused! Thanks for any help.
Hi Miranda,
Thanks for writing in and sorry for the confusion! You will purl 8 and then follow the instructions inside the brackets three times. You won’t repeat the purl 8 each time because it’s outside the brackets. Hope this is clear!
-Adam
Hi! I really like the look of this hat, but the pointy tip – not so much. Could you suggest how to alter it, so it has a round top instead? (I wish I were advanced enough as a knitter to figure it out myself, but I am still a beginner :/ ) Thank you very much in advance! Fran
Hi Fran,
Thanks for writing in! This sounds like a great idea and I’d be glad to help you work it out! I suggest that you only complete about 3/4 of the the decreases recommended in the pattern and cinch up the top of the hat to create a rounder shape. You might want to knit a longer hat body by about an inch or two depending on the size you are making. I hope this helps! Let me know if you have any other questions!
Best of luck!
-Adam
I am so confused!
In toddler size, are there 18 sts for the first earflap?
And then after wrapping and turning do yo knit back to that 1st marker.
Am ready to frog the whole thing and look for another earflap pattern.
Thanks for any insight you may have.
Hi Belinda,
Thanks for writing us! Sorry you are having trouble with the pattern! You will be working the ear flaps in short rows. So, for this part you will be knitting until a certain amount before the marker and then wrapping and turning. When you do short rows in this pattern, you don’t work the entire row in order to create more fabric in the center of the ear flap. I hope this helps!
Best of luck,
Adam
Hi! Question: I’m having a difficult time with the ear flaps. I’ve had to rip this hat out three times. I just finished the right ear flap and I’m not sure if the picture is deceiving, but i end up having to knit on the wrong side in order to cross the front to start the left ear flap. According to the picture, you should finish the ear flap with the work on the left needle… if that’s the case, in order to cross the front, you either have to knit backwards or knit on the wrong side, which I’ve found has caused problems with the garter pattern once i start the body of the hat. What am I missing? Help! please and thank you!
Hi Martha,
Thanks for the question! The last direction on the left ear flap is to wrap and turn, so you should end up on the right side of the work. You’ll then knit across the ear flap and all the way to however many stitches before the fourth marker. Hope this makes things clear!
-Adam
This pattern is magic! I’m making these for the whole fam. Thank you~
Beautiful and easy to knit.
Loved this pattern
Thank you for sharing.
B.Regards
May.
Hi,
I am starting the decreasing on the wrong side, the bottoms are curling inward and to make it look like the hat I will have to turn it inside out. However as I start the decreases are on the wrong side, the side I’m knitting on. So when I flip it inside out I can’t see the pretty decreases. Did I do something wrong? What should I do?
Thanks!
Hi Julia,
Thanks for writing in to us. It looks like after the last short row ear flap you didn’t wrap and turn to knit the face side of the fabric. I hope this makes sense! The only way to fix this is to rip back the body of the hat to right before you ended your last ear flap. This way you can turn the work to work on the outside of the hat, not the inside. If you have any questions about this, feel free to write back in!
-Adam
omygoodness—
Had to find the right needles for my stash yarn, and then I dove into your pattern.
WOW! FIVE STAR!! perfect.
Looks like I will be making two dozen of them—in all sizes—this holiday season.
Absolutely adorable, squishy, and practical to boot.
Thanks SOHO for making me look good; in your hat and as a knitty nana!
x-x-xx-x-x-x-x-x-x-x
Teri
Oregon
ps. trust the pattern everybody; it works!
I just started this hat and I’m a bit confused. If I follow the first few steps exactly (right up to where you start the first war flap) I end up in stockinette stitch instead of garter. I see no way around this if I follow the instructions since knitting 2 rounds is always going to end up as stockinette. Obviously I’m missing something since I don’t really see anyone else having ghus problem but I cannot put my finger on it.
Hi April,
Thanks for writing us! You actually haven’t done anything wrong at all. The hat has a stockinette rolled border at the bottom edge. You don’t start knitting garter until the ear flaps on. Thanks!
-Adam
I am so excited to knit this hat. When I switch needles do I knit the stitches onto them for a third row of knit? Thank you!
Hi Kate,
So glad you’re excited! You can either slide all your stitches on to the new needle or you can simply take your empty needle and knit on to it. I hope this answers your question! Let me know!
-Adam
It says to use size 7 and 8 needles for the baby size. What size needle do I use for larger sizes? I want to make a toddler version of this (my infant’s outgrown the baby-sized one I made her!).
Hi Birch,
Thanks for the question! You’ll make the hat with the same size needles, but instead you’ll follow the directions for a larger size. Best of luck!
-Adam
I finally managed to get this nice little hat finished – only the last link does not open up, instead I read that this is not available any more. Can you help me here o complete this very nice pattern, which should be finish before christmas day!
I’ve done it with other wool, smaller needles – with a little bit of math it was possible, even though I had to think a while, how to figure it out. Now I am looking forward to the last bit to finish it finally.
Wish you a merry christmas and a happy New Year.
Sylvia Mueller
Hi Sylvia,
Thanks for writing in! Can you tell me which link were you referring to? I checked the last link for the tiny tassel and it appears to be working at present (https://www.purlsoho.com/create/2013/07/18/tassel-tiny-attached-tassel/). If there is another link that is not working, please do let us know and we will do our best to correct it!
Happy knitting!
Cassy
How do I avoid a “seam”? At the beginning of my rounds where I switch from k to p there is a very visible seam going up the hat. How do I make this invisible?
Hi Tina,
Thanks for writing in! There is a seem on this hat at the back where the rounds start and end! With garter stitch in the round, this seem is unavoidable. I think of it as an easy way to determine the back of the hat and get it on quickly for those cold and snowy days!
Happy knitting!
Cassy
Hi,
Thank you for the pattern for the beautiful hat. I’m a beginner of knitting and I would like to try this hat. May I know where I could find the pattern of adult? Around 52cm of head circumference
Hi Tien,
Thanks for writing in! This pattern is available above in Baby (Toddler, Kid, Adult Small, Adult Medium, Adult Large) sizes which measure in at 14 (16, 17 3/4, 19 3/4, 21 3/4, 23 1/2) inches. For the 52 cm that you are quoting, I think that you would knit the Adult Small or Adult Large which would be the 5th or 6th set of stitch measurements in the sections where there are multiple stitch counts listed.
I hope that this helps!
Cassy
I’m confused on the ear flap. I’m making the largest size. When it says to knit 12 before second marker, does that mean just knit 12 then do the turning your work part? Or knit until there are 12 stitches left? Then after I turn work, confused on how you knit 11 until next marker
Hi Libby,
Thanks for the question. The ear flaps are made using short rows, which is a technique where you don’t knit the entire round. Instead you’ll work a certain section of the round, creating more fabric in that area compared to the rest of the hat. In this case the ear flaps — the sections in between the markers. When you get to 12 stitches before your marker, you’ll wrap and turn your work so the wrong side is facing you and you’ll knit the following directions until your ear flap is complete. Hope this clears everything up!
-Adam
I have the same question with Libby. Shall I knit 12 stitches for the row, or it means knit more than 12 stitches, only 12 stitches left (without knitting) before the second marker.
Hi Cheueh,
Thanks for writing us. Starting at your beginning of round marker you’ll knit up to 12 stitches before your second marker. This means that you will not pass your second marker — you’ll wrap and turn 12 stitches before it. Thanks!
-Adam
Hi,
I don’t get what you mean by mark your stitch? I know what putting a stitch marker in means but what does mark mean? Do you mean hang or clip one of those safety pin type markers on the next stitch you’re about to do? or put a stitch marker just before the next stitch you’re about to do? You don’t say slip marker either?? I’m confused. Thanks
Hi Liane,
Thanks for writing in. S2KP is a tricky decrease and I would click here to see a tutorial. Basically, you are going to mark the stitch before your S2KP by hanging a removable marker on the actual stitch (not on the needle). Take a look at the tutorial and let me know if you have any other questions.
-Adam
Hi!
I need to make a size in between the baby and the toddler. I made a baby size and the “big headed little nugget” has grown out of his baby hat and mom would like another one. Could I make an “in between” size by uniting the toddler size but with smaller needles, say using a 7 and 6 or go even smaller on the needle size with 6and 5? Thoughts? Mom is chomping at the bit to get another one!
Regards,
Carrie
Hi Carrie,
Thank you for writing in. Glad mom loves the hat! Going down a needle size will definitely make the hat smaller. Although I’m not sure if it will make the hat an in between size. You’ll have to try to find out or make a gauge swatch in the round. You could always make the toddler size and have the child grow into it as well. Best of luck!
-Adam
I’m confused what size needles your telling us to use. The way it’s written you have a us 7 and 8
What needle sizes do I need for an adult one please. Thanks.
Hi Jackie,
Thanks for writing in! For an adult hat you will need a US #8 16-inch circular needle, a US #7 16-inch circular needle and a set of US #7 double pointed needles. For the smaller hats, you need 12 inch circulars instead of 16 inch circular needles.
I hope that this helps!
Cassy
Hi! I’m in the middle of making this hat for my little baby boy and I’m loving it! Is it alright if I sell hats made from this pattern, making sure to credit Purl Soho for the pattern? I didn’t see anything about permission written anywhere. Thanks!!
Hi Jessica,
Please see the below excerpt from our Terms of Use on the website. You can find this at the bottom of our webpage.
Copyright and Ownership
All Site content, design, text, graphics, and interfaces, the collection, selection, and arrangement thereof and all software are the property of, or duly licensed to purlsoho.com. Consent is granted to view, electronically copy, and print in hard copy portions of this site for the sole purpose of placing an order with purlsoho.com for your use. Any other use of materials on this site, including modification, distribution, or reproduction for purposes other than those noted above, without the prior written permission of purlsoho.com is strictly prohibited. You acknowledge that purlsoho.com and/or third party providers remain the owners of such material and that you do not acquire any of those ownership rights by downloading copyrighted material. purlsoho.com reserves the right to revoke this authorization at any time, and any use shall be discontinued immediately on written notice from purlsoho.com.
Thanks,
Adam
Hi Purl Bee! I am now making this hat for the sixth time and just wanted to thank you for such a great pattern! Like many others, I had some difficulty with the short rows initially, fortunately, if you read very carefully, all becomes clear. Thanks again for a lovely knit!
When I go to do the baby version of the hat and I continue past the ear flaps onto the body of the hat… there is a visible hole in one spot on both ear flaps (on the one edge where I had done the last wrap and turn) and I’m not sure how to get rid of them? I have pulled out my work 4 times and started again but it happens every time. Any idea why?
Hi Mary,
Thanks for writing in. It might help if you pick up that wrapped stitch and knit it with the live stitch. This could close up the hole or simply sewing up the hole at the end will do it. Best of luck!
-Adam
Hi, thank you for this pattern, it’s adorable.
I’m a little confused about these instructions: “Repeat Rounds 1 and 2 until piece measures 4 inches from the rolled edge at the center of an Ear Flap, or until approximately 3 1/4 inches shy of desired finished height.”
Can you explain what the rolled edge at the center of the ear flap is? Like, where am I supposed to be measuring from? The cast-on edge?
Hi Sara,
Thanks for the question. You’ll measure from the cast on edge at the edge of the ear flap. Since this edge is curled you’ll want to measure it with the edge rolled up. I hope this clears things up!
-Adam
But the pattern says specifically to measure from the center of the ear flap. If you measure from the front of the hat it will be very tall; more like a Santa style hat than this elf-like shape. I have made two and measured from the cast on edge at the center of an ear flap up to my live edge and they both turned out just like the pictures. If you look at the smallest hat, it does not appear to be 4 inches from the cast on edge at the front to the beginning of the decreases. Am I missing something?
Hi Jenifer,
Thank you for catching that! I am terribly sorry for the confusion! You will indeed measure from the bottom edge of the ear flap and not the front or back edge. I have fixed my comment response so there will be no confusion going forward. Thanks again!
-Adam
Excited to knit this hat! Having a hard time figuring out the ear flaps. After the wrap turn, do I purl, or continue knitting? I know it says knitting, but if I’ve turned, aren’t I now on the purl side?
Thanks so much!
Hi Polly,
Thanks for writing in! After the wrap and turn on each row of the ear flaps, you will move onto the next row. The majority of each of these rows will be knits to preserve the garter look.
I hope that this clears things up!
Cassy
I am knitting garter ear flap hat – am confused when u wrap & turn and then u r on purl row is that a second row? And do u wrap and turn on purl rows?
Hi Joan,
Thanks for writing in! As you are knitting flat on the ears, you will not have purl rows on the ear flaps. Once you wrap and turn, you are on the next row and will follow the knit instructions. So for the example, t”he row instructions that read “Next Two Rows: Knit to – (7, 7, 7, 7, 7) stitches before next marker, wrp-t”, you will knit to 7 stitches before the marker, wrap and turn and then knit to 7 stitches before the marker and wrap and turn.
I hope that this clears things up for you!
Cassy
I just started the body of the hat and it seems that the last 3 purl stitches of the round and the first 3 purl stitches of the round don’t line up. I counted my short rows to make sure I had the same amount on each side ( I got the same amount on each side). I did the ear flaps again anyways and ran into the same problem when I started the body. The purl stitches at the end of the round appear a row above the stitches at the beginning. It seems like there is an extra row at the end of the round. It might not look too bad after blocking. Any insight would help.
Hi Theresa,
Thanks for writing us. Because the ear flaps are completed in one round, there shouldn’t be an extra row on one side of the marker. When knitting in the round you are actually knitting in a spiral and not stacked rounds. This means that when you pass your beginning of round marker you will sometimes get a jog. This jog is especially visible when doing stripes or changing stitch patterns. The last stitch will seem to float above the first stitch by almost an entire stitch. I’d search the internet for jogless stripes — there are many tutorials and the jogless stripe pertains to your situation because you are changing stitch patterns instead of colors. Best of luck and let me know if you have any questions!
-Adam
Hello,
I would just like to say thank you! This is such a wonderful pattern and I appreciate that you have introduced me to the short row ear flap making! This will be very useful in many more hat project.
So again Thank you.
Thank you for sharing this cute hat pattern. I am a skilled knitter/crochet. However reading patterns can sometimes be a challenge. I have put 68 sts and 4+1 markers on my circular needle. I have knitted 2 rows. My problem is the ears. I understand short rows but am having a problem. Looking at 18sts for the ear – only working across 8sts ending at 1 st does not work you across the full 18sts. (only part of the way across). Am I right in wrp-t at each end of the rows? I did and only 1 side of the ear shapes. the other side end/rap around 1 st. alone. I am working in a garter stitch. Thank you for your help. Maureen
After a week –I got it! I got it! I cracked the code for the ears. It is not the first 8sts you are working on(out of 18) for wrp-t. You work until you reach the last 8sts of the 18sts for the ear, then start to wrpt-t back and forth (until you get to 1st. Thanks again, Maureen ( have one ear done).
Hi Maureen,
Thanks for writing in! You have got it exactly!
Happy knitting!
Cassy
Hi
I love this hat but I’ve had huge problems following the pattern, and from the number of comments and queries, I’m not the only one!
Given that the pattern is a mix of straight rows and knitting in the round, and that garter stitch has to alternate knit and purl rows when in the round, would it not be much easier if you actually specified the rows as knit or purl instead of writing everything as knit?
Just a thought!
Hi Jo,
Thanks for writing in! We totally understand that this hat is a bit of a challenge to wrap one’s brain around given that it is garter and there are quite a bit of short rows. We do indicate knit and purl for each row of this lovely pattern. In the short row section, as you are working back and forth, each row will be knits. Once you get back to working in the round, we indicate alternating between purl and knit rows.
I hope that this clears things up!
Cassy
Hello, I’m just wondering whether it’s possible to knit this all on double pointed needles rather than circular needles? I’m in Australia and I’m having trouble finding 12inch circular needles. I’ve never used circular needles before, so I’m not sure whether they are necessary to this pattern.
Thanks in advance for your help!
Oh and if the answer is that circular needles are needed, would 40cm (approx 16inch) be ok for the baby size hat? This seems to be the smallest length available here!
Thank you
Hi Nat,
Thanks for writing in. You can use a 16″ circular needle for this pattern, but if you are having trouble joining your stitches in the round, you can always use double points. They work just as well! Whatever works for you or whatever you have available in the right size will do just fine!
All the best,
Adam
Hi Nat,
I’m in Australia too. Google ‘magic loop technique’ – basically you just use really long circular needles for everything so you don’t have to buy all different lengths for every project.
It’s really easy once you get the idea of it.
I’ve made loads of the garter ear flap hats using it and socks etc – anything where I used to use double point needles,
Good luck!
I, too, use nothing but 60″ long Red Lace circs. Saves on purchasing all of the different lengths for each needle size. More $$ for Stash!! lol
Hi, a question, I would like to ask is, if there already is a german translation of this pattern?
We are a group of german knitters who make wooly hats for people in buddhist charities in Nepal. You can contact me and I can give you the link to the organization, we are supporting.
Hi Dominik,
Thank you for writing in! Love what you do! Unfortunately we don’t have a German translation for this pattern — Sorry!
-Adam
Hi Dominik,
Do you still need help with a translation into German?
Kind regards,
Antje
I could do the translation, if you allow me, and would also like it, if it can be included at the ravelry page for the pattern, so people whose english is not well enough to work with the english pattern can have the translation as orientation.
We have a few people in our group, who would have less struggles with the translation.
Hi Dominik,
Thanks for writing in. You are more than welcome to translate the pattern for your own use but we cannot use your translation on our website or our Ravelry page. For the time being our patterns are in English only but that is not to say we won’t translate our patterns in the future. I’ll be sure to note your request! Thanks again!
-Adam
Thanks Adam, then I will translate it for our group and am looking forward to many warm heads in Nepal through our group effort.
Hi Dominik,
Is it somehow possible to get your translation of the pattern? My english seems not to be good enough but I really would like to knit this hat for my daughter.
Viele Grüße Lisa
Hi Dominik,
would you please bee so kind to send the German version to me too.
Viele Grüße Christel
Hi,
I would love to get the german translation, too.
Is it possible to send it to me?
Thanks,
Jenni
Please Fan i have the german tramNslation too
Hi Gertraud,
Thanks for writing in! At present, our patterns are only available in English. We certainly appreciate the request!
Best,
Julianna
Hi Dominik.
I would love to get the german translation.too.
We will have a new baby in our family soon and I would love to knit that hat.
greetings
Silke
I love this hat, but I’m stuck on the left ear flap. I’ve watched the short rows tutorial, which seems straightforward, and read all previous comments, but I’m still not sure how to proceed. Two questions: 1. After the first short row, I wrapped and turned as directed in the tutorial, but when I turn, the yarn is now in front, as if to purl. The pattern, however, tells me to knit. Do I just move the yarn to the back and knit, picking up the wrap by knitting it and the first stitch together? 2. To get to this point, I started at the beginning of the row and knitted the first short row to 11 stitches before the second marker. Now that I’ve wrapped and turned, the pattern is telling me to knit to 11 stitches before the next marker. But, moving back in the direction from which I came, there are only 9 stitches to the 1st marker and another 5 to the marker where I joined the round. What am I doing wrong?
Many thanks for any help–
Holly
Hi Holly,
Thanks for writing in! I am happy to try to help you with your questions.
1. After you wrap and turn the first short row, you will move the yarn to the back and knit as directed in the pattern. Our tutorial is based on stockinette and not garter as if used in the pattern and thus there is a difference in the tutorial from the needs of this pattern.
2. Based on the number of stitches that you are mentioning, it sounds as though you are doing the adult medium size. For the size that you are working, there should be 25 stitches between the first and second stitch markers. Based on that size, for the first short row, you knit to 11 stitches before the second stitch marker (this will be 14 stitches into the 25 stitch ear flap). You will wrap and turn the next stitch. Now when the work has been turned, there should be 14 stitches before the stitch marker. IF you only have 9 stitches, there may be too few stitches for the ear flap.
I hope that this helps clear things up! Please let us know if you have any additional questions!
Cassy
Could I use 5 ply and change my needles?
Thankyou.
Hello Lynette,
Thanks for writing in! If you want to use 5 ply yarn and go down in needle size The whole hat will come out smaller. Depending on which size you want to knit you could just knit a size up to correct this. Otherwise you will have to adjust the pattern.
I hope this helps! Let me know if you have any further questions.
Warmly,
Marilla
Hello. I would really like to knit this hat, but I had to ravel three times. I do not understand first line of instructions for ear flap. Do I need to knit all stiches until the seven before second marker? Or do I have to place all stitches on right needle and knit just seven stitches before second marker? I amm confused but in love with hat.
Hello Hana,
Thank you for reaching out. I’m sorry to hear you are having this frustrating experience! For the first row you are knitting all the stitches until you get to 7 stitches before the second marker at which time you will wrap and turn. I hope this clears things up for you!
Warmly,
Marilla
Hi there, i an having trouble with my rows of wrap and turn. I am fine starting out and going to 9 stitches before the second marker, but from there on it says knit to 8 etc before the next marker…but the next marker is very close to my wrp-t…should I be going one marker past that? I have done this many times both ways and it is not working out for me. Thanks for your help!
Hello Tiffany,
Thanks for writing in! Which size are you knitting? I can’t be totally sure without knowing which size you are knitting, but if the pattern says to knit to a number before next marker you will not go past the marker. The number of stitches you knit before your wrap and turns should be going down by one each row to create the ear flap. I hope this all makes sense, please let me know if you have any further questions.
Warmly,
Marilla
hi,
I’d like to knit this up as a gift for my twin neice and nephew. they’re 9 months at the moment and will be 12m when i give the gift. is the toddler size from 12months?
thanks
Taylah
Hello Taylah,
What a lovely idea! I would say the toddler size is appropriate for this situation.
Happy knitting!
-Marilla
Hi – My twin granddaughters heads measure 19 3/4″ & 19 1/2″. They will be 3 in December. Based on these circumferences, I am wondering which size hats to make? I don’t know the rule regarding sizing . . . a small adult sounds a bit large for a 3 year old.
Thanks!
Hi Karen,
I would suggest doing the adult small it measures 19 3/4 I think the size down would be to small.
I hope this helps,
Melissa
Thanks!
Hi Karen! I’m also knitting this pattern for a 3-year-old with a 19+” head circumference. I opted for the small adult size and so far it looks like I made the right choice. When I got to the point of completing the body, before starting on shaping the crown, I split the diff on when to stop and stopped when the piece measured 5″ (pattern indicates 5 1/4″ for small adult size, 4 3/4″ for kid size).
I am to the shaping of the crown, but am a little confused by the wording in the pattern, “mark previous stitch”.
Set-Up Round: P7 (8, 9, 10, 11, 12), k1, mark previous stitch, [p14 (16, 18, 20, 22, 24), k1, mark previous stitch] three times, purl to end of round.
Do I purl my 7, knit 1, then place the marker, or do I place the marker before I knit 1?
Hi Marci,
I would Purl 7 and place your marker then knit one.
Enjoy,
Melissa
Ooohhh….I thought it was ‘p7, k1, THEN place marker,’ so now I have to undo the entire row. That one was unclear to me as well.
Hey Melissa- are you sure about this? The pattern says k1, mark previous stitch which would be the k1. If it actually means mark the last purl stitch before k1, then why wouldn’t it be written that way? Can someone clarify because I’ve been doing this all wrong! Thanks 🙂
Hi Claire,
I think I can help! Since the Garter Ear Flap Hat uses double decreases, it is actually not helpful to place your marker on the needle, as you will have to move it out of the way on each row. The best way to mark this stitch is to use a removable stitch marker, and place it in the previous stitch itself, in the row just under the needle. After a few decrease rows the stitch will be very easy to find even without the marker since there will be a column of stockinette stitches and decreases standing out from the surrounding garter stitch, but you can also move the marker up the column of stitches if necessary.
I hope that clears things up! Good luck!
Julianna
I was also confused at this portion. Thank you for the clarification to use a removable stitch marker, but now I’m a bit confused after reading these comments which stitch I am supposed to put the removable stitch marker in? The knit stitch or the last of the purl stitches?
Thank you!
Hi Sarah,
I’m glad that tip was helpful! The stitch marker should be placed in the column of knit stitches.
Happy knitting!
Julianna
That was indeed very confusing. I was putting the marker in the last purl stitch before the knit stitch, and of course had to frog several rows when nothing was lining up right. Why not clarify the instructions in the pattern, after so many knitters have had a problem?
Hi Paula,
Thank you for your feedback! We do try to convey this step in the pattern by using the phrase “mark the previous stitch,” which means to place a marker in the stitch, rather than the usual “PM” or “Place Marker,” which means to place a marker on the needle. I will be sure to pass your suggestion along to the design team!
Best,
Julianna
Hi there! Loving the pattern but I’m having trouble in Round 1 of the crown of the hat, where it says to knit to one stitch before the next marked stitch, then s2kp, then move the stitch marker to the s2kp. If I’m knitting to one stitch *before* the marker does that mean the last stitch before the marker gets knitted? or am I stopping when I get to that last stitch before the marker? I’m just not sure when to slip two stitches — last stitch before marker plus 1? or stitch right up to the marker, then do the s2kp? And then where do I put the marker at that point? Thank you for clarifying for me!
Hi Andrea,
You are going to knit to the stitch before the marked stitch so you will have 2 stitches before the marker. Then you would do s2kp. Slip those 2 stitches together knitwise, then with the marker still on left needle knit into the stitch next to the other side of the marker, leaving the marker in place, the stitch is still on both the right and left needle,slip the marker to the right needle completing the stitch. The sequence is now done, at the end of the right needle, you will have 2 slipped stitches, 1 knitted stitch and 1 marker. Slip the marker back to the left needle, you will then pass the 2 slipped stitches over the knitted stitch. You have now completed the s2kp. You will do this 4 times.
I hope this helps,
Melissa
This explanation has been pretty helpful. I was also confused by the directions. I would love to see a video of this though to make sure that I am doing it properly.
Hi Robin,
Thanks for writing back! I am so glad that the description was helpful. At present, we do not have the resources to make a video for this pattern but we will certainly keep your request in mind!
Best,
Cassy
Hi!!
Do you want to make a video with the beginning? 😉
I’m trying to make a baby cap. 60 stitches
I noticed the shortened careers, but I tried to do it and the earlobes did not stay in my ear.
Thanks
Susana Pinto
Hi Susana,
Thanks for writing in! We do not have a video for the start of this pattern. I find that it is helpful if I say the pattern out loud as I knit it as it clarifies things for me. I am not sure that I understand the second portion of your question but I would be happy to answer any other questions that you may have regarding this pattern!
Best,
Cassy
Hello,
I am wondering if the new Season Alpaca might work for this pattern? I know the gauge is off but are there any adjustments that could be made?
Thank you!
Hi Virginia,
Unfortunately we don’t have a version of this pattern with a DK weight yarn. I’ll be sure to pass along your comment!
Best,
Carly
How do you get the garter stitch with knitting in the round? If I start knitting the cast on stitches it comes out as stockinet stitch. Is it because I start knitting in the same direction from where I cast on or should I go the other way? Many thanks! Jana
Hi Jena!
Thanks for your question! When you are knitting garter in the round you need to alternate knitting a row then purling a row.
I hope this helps!
Carly
I’m having a really hard time with the decreasing/shaping of this hat… is there a chance anyone could share directions without the whole moving-of-the-marker thing? I feel like it should be straightforward enough. I can’t determine whether to start my sskp on the knit stitch… or after? Darn it… things just aren’t adding up for me!
Hi MOnica,
Thanks for writing in! I am sorry to here that you are having challenges with this pattern. Unfortunately, you will need to move the marker to maintain the look of this hat. The marker is always attached to the decrease to maintain the columns of decreases. As you will be decreasing 2 stitches at each decrease point, the completed stitch itself will need to be marked. You will knit to 1 stitch before the marked stitch, then slip the next stitch and the marked stitch knitwise. You will then knit 1 stitch, pass slipped stitches over knit stitch and off needle and move the stitch marker from the formerly marked stitch to this newly completed decrease.
I hope that this helps and clears things up!
Cassy
Why can’t you just say purl 7 pm k1 instead of p7 k1 place marker on previous stitch ?
This is wording that confuses .
I am grateful for free pattern but it is very confusing
Hi Leslie,
Thanks for writing in! I think that I see the confusion. You will be marking the stitch instead of placing the marker between two stitches. You will need to use a removable stitch marker to put onto the stitch that you just completed. Thus you will need to knit the stitch first.
I hope that this helps clear things up!
Cassy
Hi all, I love this hat and all works well up until the set up row for shaping the crown. When I follow the instructions for the set up round, my decreases end up off-center in both the back and front of the hat. The only thing I can think of to do is to change the number of purl stitches in the set up round so that the decreases end up centered. Any advice? Thank you!
Beth
Hi Beth,
Thanks for writing in! A pickle indeed! I am not sure what could have gone wrong. I would suggest checking to make sure that you have the proper number of stitches before beginning the set-up round. You should have the same number of stitches as when you cast on. If you have too few or too many, this may explain why your decreases are not quite on center. If you do have the correct number of stitches, I would be sure that you have the end/beginning of round marked correctly.
I hope that this helps!
Cassy
The same thing happened to my first attempt at this hat. I am now working on my second and was alerted that the decreases were uneven after the first round. I just backed up to the start the shaping row again and will need to adjust where the decreases go in order for them to be symmetrical. I checked and still have the same number of stitches that I started with. Could this be a problem with the pattern?
Hi Joanne,
Thanks for reaching out! We have had hundreds of knitters complete this hat successfully, but you never know! Can you let me know what size you are knitting so I can check the pattern and try to clarify it for you?
Best,
Julianna
Love this hat and wanted to know:
Do I need to make any adjustments if I do the ear flaps and a few rows in garter and then switch to stockinette? and second, my yarn calls for size 4 (USA) needles. How many stitches do you recommend that I cast on for the toddler size hat (gauge is 23 stitches = 4″)?
Hi Joanne,
Thanks for writing in! At present this lovely little hat pattern is only available for worsted weight yarn. Given your gauge, you can try casting on for the second largest size and knitting to the length for the toddler size but this may take some trial and error. (23 stitches = 4 inches or 5.75 stitches per inch x 16″ circumference = 92 stitches which would be the adult medium size) Adjusting from garter to stockinette would change the look of the hat and you would have to adjust the short rows to work in stockinette. While it may be some work to adjust the pattern, you can certainly do it!
I hope that this helps!
Cassy
SUPER grateful for this very cute pattern.
I am stuck at the part about “mark previous stitch” i have never seen this and I don’t know what it means. I dont want to mess up my hat.
Hi Kate,
Thanks for writing in! This part can be a bit tricky! Essentially, to keep the decreases centered, you will be marking the stitch using a locking stitch marker (place the marker around the completed stitch). You will be moving this marker each time that you worked the mark stitch to mark the new stitch.
I hope that this clears things up!
Cassy
So….is the ‘knit’ stitch the ‘completed’ stitch? Or is the worked ‘S2KP’ the completed stitch?
I am doing the smallest size, so would that mean:
Set-Up R: P7, PM, K1, [P14, PM, K1] 3 times, P to end of round.
R1: [K to marker, SM, S2KP] 4 times, K to end of round.
R2: [P to marker, SM, K1] 4 times, P to end of round.
R3: K
R4: Repeat R2.
Is that correct?
Hi Shelley,
Thanks for writing in! For this pattern, you will not be placing stitch markers in the traditional sense but rather placing them on a stitch rather than between two stitches. For the smallest size, your crown decreases should read:
Set-Up Round: P7, k1, mark previous stitch, [p14, k1, mark previous stitch] three times, purl to end of round.
Round 1: [Knit to one stitch before next marked stitch, s2kp, move stitch marker to the s2kp] four times, knit to end of round. [8 stitches decreased]
Round 2: [Purl to marked stitch, k1] four times, purl to end of round.
Round 3: Knit.
Round 4: Repeat Round 2.
In the set-up round, you will be placing the marker on the K1 that comes after the P7. The way in which you have it written, you are placing the marker between the p7 and k1 and this will not mark the stitch in the way that you will need for the next rounds.
For round 1, you will want to knit to 1 stitch before the marked stitch (this will be the k1 that you placed the marker on). That is to say that you will want to knit 6 stitches (1 before the marked) and then s2kp. You will then remove the marker from the stitch that you had marked and placed it on the s2kp. The same follows for round 2 and 4. You will always want to be marking the stitch and not placing the stitch marker between stitches. This it to keep the decrease detail even as you move up as the sk2p is a double decrease!
I hope that this clears things up!
Cassy
Looking for your Men’s Ear Flap Hat Pattern with Size 13 needles, Lion Brand Wool Ease Thick &Quick yarn. Thank you in advance…
Hi Sandra,
Thanks for getting in touch! The Cozy Ear Flap hat uses size 11 needles and our Super Soft Merino and is our chunkiest hat with ear flaps. I hope that this works for you!
Best,
Cassy
Hi there, I’m knitting the hat in toddler size and just realized that when doing the first part of the short rows for the earflap I️ knit to the 7th stitch before the marker, not the 8th. Will this effect anything? I️ would hate to have to take it all out, but best to be sure before I️ go any further. Thanks
Hi Sydney,
Thanks for writing in! This might make the short rows for the ear a touch lopsided but overall things should work out just fine if you are loath to pull it out. That said, I have never regretted frogging back. If it bothers you now, it is always best to rip back and fix the issue!
I hope that this helps and happy knitting!
Cassy
Hello – I am planning to make this hat for children with head circumferences of 17.5″ and 18.5″. Do you think I should make the Adult Small for both or is there some stretch to the hat?
Thank you –
Gretchen
Hi Gretchen,
Thanks for writing in! These hat do have stretch built in. Generally hats have a bit of negative ease so that they don’t slink down. That said, I think that the toddler and kid size would work for your little ones. Perhaps make the larger of the two sizes first and see if it fits for the larger head and/or the smaller head and decide from there!
I hope that this helps!
Cassy
Any suggestions to reduce the seem where each round shifts from knit to purl on the back side of the hat? It’s definitely rock-able with the seem look, I was just curious.
Thanks!
Hi Allison,
Thanks for writing in! When knitting garter in the round, the seam is unavoidable (many have tried!). Here we like to think of it as a design element and a good way to tell the back from the front!
Happy knitting!
Cassy
I just want to thank you so much for this wonderful pattern… I am now making my 5th one for my baby-in-waiting. I sew, I do not knit, yet every year as it begins to get cold I fetishize over wool and patterns… this is the only one I have ever really made. I added strings to do up under baby’s chin and converted it for 4 ply soft soft merino wool. It has been the emblem of my sons’ winters, and 2 nephews too. You have a truly magical hand-mind combination, thank you again for generously sharing!
Hello Anna,
Thank you for your generous words! I’m so happy you have had this experience with our patterns.
Warmly,
Marilla
Thank you very much for offering such a cute pattern. I stuck however at the Crown part making, until the setup round…I realized I have 78 stitches left (I casted on 76st. to make a child size). is it possible I counted wrong at beginning? or I made mistake during the ear shaping? anyway, can I continue? and how to adjust the setup round? Thanks a lot for your help. I can’t wait to see it on my sone for this cold winter…
Lilu
Hi Lilu,
Thanks for writing in! I think that we can get you back on track! You will work an additional round before the set-up round. For that round you will, k 18, k2tog, k38, k2tog, knit to the end of the round. This is decrease of 2 stitches and will get you to the 76 stitches. Then work the set-up round as written and you should be all set!
I hope that this helps!
Cassy
Cassy,
Thank you very much for your reply. Does it mean if I have to adjust size, have to cast on times 8 stitches, became of the decreases? I did got back to 76 and finished it nicely. Only I want to point out is the child size turned out a bit small for my 4years old. Not the head but the height. Will have to make another one! Thank you anyway for a lovely pattern and full support with help.
Best,
Lilu
Hi Lilu,
Thanks for writing back! There are 8 stitches between each size of this lovely hat. However, if you want to adjust for smaller or larger sizes than we have hear, you may need to do a fair bit of reworking to ensure that the ear flaps come out ok!
Head height can be easily adjusted by knitting a bit longer before decreasing! Each head is a little different and the great thing about knitting is that we always adjust to fit ourselves or our recipients!
I am so glad that the hat worked out and please do not hesitate to ask any additional questions!
Cassy
Do you think this could be resized for a newborn? I’m participating in the little hats, big heart campaign and would love to make a bunch of these, but I feel like it’s a little on the big size. Any ideas?
Hello Laura,
Thank you for reaching out! I think you should be able to do this, especially because you don’t need to make it that much smaller than the baby size. It may take a little bit of experimenting, but I think the simplest solution could be to take out a couple of stitches between the earflaps. You might have to do a bit of math when you get to the decreases.
I hope this helps and let us know how it goes!
Happy knitting,
Marilla
I’ve read through the pattern and comments and I’m still a bit unsure where the wraps take place. I’m attempting to make the baby sized hat and I’ve made my first wrap on the left ear flap. The next row says knit to 7 (8, 9, 10, 11, 12) stitches before next marker, wrp-t. Does this mean the first marker I get to or would it be the end of row marker (the second one)? If I knit to the first marker I’d only be knitting one stitch before my wrp-t.
Thanks for your help!
Hi Kaitlyn,
Thanks for writing in! I think that I can help! For the very first wrap and turn, you will knit to 7 stitches before the second marker (for the baby size, this will be 9 stitches) and then wrap and turn your work. Your next row will be to knit to 7 stitches before the next marker (for the baby size this will be 2 stitches) and then wrap and turn your work.
I hope that this helps clear things up!
Cassy
Hola , me gustaría q hubiera el paso a paso en video. Muchas gracia
I have attempted this hat three times and every time ended up with a hole at the edge of one of my ear flaps when i knit back around over the wrap. It only seems to happen on one side, and I haven’t been able to figure out why. Could I be using the wrong wrp-t method? Should it be the wrp-t for purl side or knit side when i’m doing the short rows? And then I assume when I knit back over the wrap I need to follow the instructions for picking up the wrap to prevent the hole, correct? I’ve made this hat before with no problems so I’m confused on what I’m doing wrong here.
Hi April,
Thanks for writing in! So long as you are following our short row tutorial, you should be doing the correct wrap and turn method. This method should be the same on both sides of the fabric. If you are getting a hole at the same time each time, you could try picking up the wrap at that point and knitting it together with the stitch that it is wrapped around and this should close up the hole!
I hope that this helps!
Cassy
I just asked this same question! So we don’t follow the note that says to ignore the wrapped stitich? At what point during the pattern does this happen? Any additional step by step direction on this would be helpful!! I am consistently getting a hole on one side of either ear flap.
Hello Delpha,
Thank you for reaching out! Typically with garter stitch you don’t need to pick up the wrap, but with stockinette you do. However if you are getting holes with the garter stitch picking up the wrap will tighten it up and help eliminate the hole. If you are getting holes I would recommend going ahead and picking up your wraps with your stitches as they do in the short row tutorial.
I hope this is helpful and let us know how it goes!
-Marilla
I had that issue too, until I figured you have to knit the wrap and turn stitch after the stitch markers while on the row that tells you to remove them. I found I still had that one wrap and turn stitch left. This should help you, it did me.
I am loving knitting this adorable hat for myself and somehow I ended up knitting it inside out! I am about one inch from beginning the crown shaping and do not want the lovely decreases to be on the inside of the hat instead of the outside. This may be such a silly question but have I permanently mucked this up?
Inside Out Maija
Hi Maija,
Thanks for reaching out! Oh no! While it is not really straightforward to work the decreases on the inside so that they look the same, there is something that you can try before you rip back and start over. You can try turning the hat right side out when you are at the seam in the back and wrapping and turning the next stitch. This should get you knitting in the correct direction. I would suggest doing this at least a few rows before the decreases. This may look a touch wonky at the join but I think that it is worth a try!
I hope that this helps!
Cassy
Hi,
I seem to be missing something…after completing the last row of the left ear flap, do I knit to the end of the round? how do I transition to start the right ear flap?
Thanks!
Hi Amy,
I think I can help! After finishing the left ear flap instructions, you will be in the middle of a row. If you look ahead to the first row of instructions in the “Shape Right Ear Flap” section, you are to continue knitting “to 7 (8, 9, 10, 11, 12) stitches before fourth marker, wrp-t,” which should put you in the correct section of the hat to shape the right ear flap. If you are having trouble keeping your stitch markers straight, I always like to use a different color or style of stitch marker for my beginning of round marker, which will make it easier to determine which one is your fourth marker.
Once you get the hang of it this is such a fun hat to make – it’s my go-to for last minute baby gifts! Good luck!
Julianna
Helloooo
I love this hat! I have a question though, after casting on and the knit two rounds it says change needles, do I knit a third round on the smaller needles? Or start the pattern with the smaller needles (I realize this is a total newbie question but I’m just not trusting what google is telling me!)
Thanks!
Hi Claire,
Thanks for writing in! You are correct, you will switch needles by knitting the third round with the smaller needles, and continue on with them for the rest of the hat.
Best,
Julianna
If you ever update your pattern, it would be helpful maybe to number the rows instead of labeling them all “next row”, etc. I get kind of lost. Beautiful hat, by the way, thanks!
Hi Kathy,
Thanks for the kind words! It can be helpful to print the pattern and keep track of your place with a sticky note in patterns written like this, but we will definitely keep your advice in mind for future updates!
Best,
Julianna
Hello! I’m very excited to start this hat! Just starting knitting hats and trying to get the swing of things. I’m having a little trouble when it comes to starting the first eat flap. I’m kind of lost where to start. I knit the first 2 rounds with the stitch markers in place. The directions seemed straight forward but didn’t work out when it tried. Any tips for how to make it easier on myself? Thank you!!
Hello Aline,
Thank you for reaching out! For this portion of the pattern you are using short rows, which means you are actually knitting within your established row to create extra fabric. This means that you are turning your work back and forth rather than continuing to knit in the round, for the ear flap portion. What specifically seems to be going wrong in the short row portion? Is the earflap not lining up correctly or are you stuck getting started??
I hope I can help!
Warmly,
Marilla
Hi there! I love this pattern but am stuck on the ear flaps. When you first start on the flaps, it tells you to knit to 7 before the second marker, then wrp-t. But it doesn’t tell you to where? Like where to stop. Do you go back to the beginning of the row or to that first marker?
Hello Amber,
Thank you for reaching out! After you do your first wrap and turn you will simply move on to the next row and follow the instructions. In this case the next row tells you to “Knit to 7 (8, 9, 10, 11, 12) stitches before next marker, wrp-t.” .
I hope this clears things up for you and happy knitting!
-Marilla
I’m doing the large, 100 stitches but the body set up is 114 stitches. Unless I counted wrong (12+1+24+1)x3=114??? Did I miss increases or am I doing the body set up wrong??
Hello Ruth,
Thank you for reaching out! I hope I can clear things up for you. Your set up round is- “P7 (8, 9, 10, 11, 12), k1, mark previous stitch, [p14 (16, 18, 20, 22, 24), k1, mark previous stitch] three times, purl to end of round.”
This means that if we wrote out your it would be;
Purl 12, K1, P24, K1, P24, K1, P24, K1, purl to end of round(p12 for your size).
I hope this clears things up for you and let us know if you have any questions!
-Marilla
Based on the comment section, I ignored the notes and picked up the wraps while knitting short rows and also for the following row where you are instructed to purl the round and remove the markers. STILL getting 2 holes, one on each ear flap albeit smaller than when I didn’t do any of the above. What else am I missing? This seems like a recurring issue but others knit this hat with no problems. Love the look and still think this is an easy but impressive looking hat. Would love to solve this ear flap hole issue once and for all!!
Hi Delpha,
Thank you for writing- I’m happy to hear your hat is primarily hole free now! Its hard to know without seeing your hat, but are the two holes at the spot where you you begin knitting in the full round again? I would love to solve this as well!
Warmly,
Marilla
Thanks for the replies! I circled back around to this pattern for the holiday as gifts and with fresh eyes I think I figured it out. The two holes on either side are where you begin the short rows. I ignored the wraps while working the flaps BUT once both ear flaps were shaped and it came time to purl the full round I DID pick up the wrap ONLY at these two spots and slipped it behind the active stitch as per the tutorial notes re: picking up wraps purl side. The holes are still there barely and the yarn lays over and it disappears from view. Pretty happy I found a solution! Hope this helps anyone else that is having trouble.
I’m confused about where the purl rows are in the instructions. Do I just add them in between the knit rows listed in the instructions? I feel I’m missing something. Thanks!
Hello Karen,
Thank you for writing us! Yes, because you are knitting in the round you are alternating knitting and purling every other row to create a garter stitch.
I hope this clears things up and let us know if you have any further questions!
-Marilla
Thank you, Marilla! I was questioning myself because I didn’t see “purl” written in the instructions, but knew they needed to be there. Mainly, I thought I had missed something. I appreciate your quick response 🙂
Thanks for this gorgeous hat pattern! I’m planning to make the kid version for my 3 year old. Is there any easy variation that would lead to the hat being pointier/the point being longer? Thanks in advance!
Hi Beatrice,
Thank you so much for the kind words! If you would like to elongate the tip of the hat, you can work more plain rows in between decrease rows – for instance, in our pattern, we worked 3 plain rows in between decrease rows. You could work any odd number of rows – 5, 7, or more! – between the decrease rows to create more a stocking cap tip.
Best of luck and happy knitting!
Julianna
I want to knit this hat in reverse stockinette ( I want to add cables going vertically up the hat). Can I follow the short row earflap directions just as written?
Hi Rita,
Thanks for reaching out! I am happy to help! I think that if you want to do reverse stockinette, you will need to knit the back side rows and purl the front side of the ear flaps to keep a consistent line from the ear flaps to the body of the hat. You can then follow the directions for the ear flaps (the wraps and turns) while just being sure to use reverse stockinette instead of garter!
I hope that this helps!
Cassy
What kind of cast on did you use (is best )for this hat to have that lovely edge?
Hi Rita,
Great question! For this, and most of our patterns, we like to use a long tail cast on! We think that it creates a neat, tidy and elastic cast on!
Best,
Cassy
So, what happens to the SM after 14 on row one. Should I decrease after it, same as after 7. And then afterwards on following rows. I am making the baby. Thanks!
Hello Margarett,
Thank you for reaching out! I just have a couple of questions about which sections you are working on. Are you working on Shape Crown of Hat? Which row are you referring to as 7?
I hope I can help!
-Marilla
Hello! I fell in love with this pattern and excitedly pulled out my knitting needles and began to knit. I quickly discovered that short turns are in fact challenging…so I watched the tutorial and practiced. I watched and read other methods and tutorials. I then read all 496 comments before trying again. I am determined to figure this out. I have made this hat some 10 times now. I’m frustrated because no matter what I do I can’t get rid of two holes (one at the back of the left ear flap and one on the front of the right earflap). I have tried everything and no matter what – there they are. Help please!
Hi Anna,
Hmmm, that is a tough one! I have made this hat a few times myself and haven’t seen any holes. Are you noticing the holes immediately after completing the ear flaps, or are you working a few rows of the garter stitch body of the hat before starting over? Although unresolved short rows will leave visible holes in stockinette stitch, usually in garter stitch you can’t see the holes so it’s not necessary to take any extra steps. If you haven’t already, I would try working the first few rows of garter stitch after the ear flaps to see if that solves the problem. If not, please feel free to send a picture to [email protected] so we can try to troubleshoot this for you!
Best,
Julianna
Hello!
I was wondering what the purpose of the larger needles for casting on and the first 2 rows are. Is it to avoid a too tight edge? Could the #7 needles be used the whole time if used very loosely during the beginning?
Thanks!
Hi Kristen,
Great question! It is to keep the cast on edge loose – especially since you will be working short rows to curve the cast on edge around the ear flaps, you want to make sure it is not too tight. However, if you only have size 7 needles, it should be fine to cast on quite loosely!
Best of luck and happy knitting!
Julianna
Hi! Thanks for this great pattern!
I am having a little trouble understanding the end where it says “Repeat Rounds 1-4 five (6, 7, 8, 9, 10) more times. [12 (12, 12, 12, 12, 12) stitches]” – does this mean that you have to repeat the rounds until there are 12 stitches left?
Hello Camila,
Thank you for reaching out! That is correct, following these instructions you should have 12 stitches remaining.
Happy knitting,
Marilla
Je souhaiterai faire ce modèle de tricot. Y a t il une possibilité de m’envoyer les explications en langue française. Merci beaucoup de votre aide.
Cordialement
Hi Marie,
Thank you for this lovely comment! We do not currently have the resources to translate our patterns, but hopefully at some point in the future this will be more of a possibility. In the mean time I will certainly pass along your suggestion!
Best,
Julianna
Hello. Thanks for great pattern. I have one question. I’m making hat for toddler. I ended my wrap and turn rows and when I turned my work and started purl round I’m on the wrong side and I’m knitting hat inside out. Should I continue it I did something wrong?
Hi Karolina,
Thanks for reaching out! Although it’s hard to say what exactly went wrong without seeing your work, I suspect you may have missed a short row since this purl row should be worked on the right side of the hat – there are an even number of short rows, beginning with a right side short row and ending with a wrong side short row, so after the final wrap and turn on the wrong side you will then have the right side facing for the rest of the hat.
I hope that helps!
Julianna
Hi!
I am attempting to create a baby sized garter stitch earflap hat for my brand new grandson. I love the design but can’t seem to follow the instructions. ? I am using circular needles and believe I must alternate rounds from knit to purl to get the garter stitch pattern. Am I Correct?
My second question is do I need to alternat k, p for the eat flap short rows?
My third question is regarding the wrap-t…if I am alternating the rows k and p do I still keep the yarn in back?
Sorry, but I have a final question. Why do the pattern instructions change from using the term next ROUND to saying next ROw? Is a round different from a row when using circular needles?
Hopefully you are able to understand my queries and I will successfully complete this adorable little hat.
Thank you!
Kathleen
Hi Kathleen,
Thanks for reaching out! A round is essentially the same as a row, but the two words are used to differentiate between knitting back and forth and working in the round. In the beginning of the hat, when you are working back and forth in short rows, the word “row” is used, but once you complete that section and start working in the round, the word “round” will be used for the rest of the pattern.
If you look at the instructions for the ear flaps, you will see that every short row in this section is knitted. You may find our Short Row Tutorial helpful to see how to do the wrap and turns! Once you have completed the ear flaps, you are correct that you will have to alternate knit and purl rounds, but this is indicated in the “Work Body of Hat” section.
I hope that helps!
Julianna
Thank you so much for the pattern. It was great to knit it <3
At Shape Crown of Hat, I do not understand the expression “mark previous stitch”. I am used to “pm” (place marker) instead. Exactly where does the marker go?
Hello Robin,
Thank you for reaching out. This part can be a bit tricky! Essentially, to keep the decreases centered, you will be marking the stitch using a locking stitch marker (place the marker around the completed stitch). You will be moving this marker each time that you worked the mark stitch to mark the new stitch.
I hope this helps and happy knitting!
-Marilla
I’m knitting the toddler size and am stuck at the set up row. I believe I’d made some errors along the way and am confused as to how to proceed.
I cast on 68, completed my short rows and knit the body. I hadn’t counted my stitches until the set up row but I have 71. How many should I have at this point?
As far as the set up row… purl 8, knit 1, mark the previous stitch (place a movable marker on the knit stitch, correct), purl 16, knit 1, mark previous stitch…. 3 times and purl remaining. 26×3=78.. plus any stitches left over.
Perhaps I did my short rows wrong and there were meant to be increases that I didn’t knit. It sounds like I’ve made errors in a couple places and am wondering where I may have gone wrong. I’m not opposed to frogging it and starting again, but I wouldn’t want to make the same mistakes. In the meantime, I’ll keep browsing through comments and Ravelry to see if anyone else had the same problem.
Hello Jena,
Thank you for reaching out! At this point you should still have your 68 stitches. Your set up row- “p8,k1, mark previous stitch, [p16, k1, mark previous stitch] three times, purl to end of round” – comes to 8 + 1 + (16+1)x3 + 8 = 68. This means that you could evenly decreases by three stitches and then proceed with the pattern as written, or you could of course frog and start from the beginning.
I hope this helps and let us know how it goes!
Happy knitting,
Marilla
Ah ha, I was miscalculating. I’ll proceed from here and see how it goes. Thanks!
I got confused with where to place the stitch markers when decreasing at the top of the hat. The directions said to mark the previous stitch… does that mean the marker should go before or after the decrease stitch? As I finished the hat, I ended up with the stitches between the decrease seams being really uneven, which I assume is because I didn’t have the markers in the right spot. I made the hat too big, so I’m remaking it and I want to get it right this time!
Hi Caitlin,
Thanks for reaching out! Since the Garter Ear Flap Hat uses double decreases, it is actually not helpful to place your marker on the needle, as you will have to move it out of the way on each row and it can be tricky to tell where to place it. The best way to mark this stitch is to use a removable stitch marker, and place it in the previous stitch itself, in the row just under the needle. After a few decrease rows the stitch will be very easy to find even without the marker since there will be a column of stockinette stitches and decreases standing out from the surrounding garter stitch, but you can also move the marker up the column of stitches if necessary.
I hope that helps!
Julianna
Thank you! I was marking the immediately previous stitch, not the same stitch in the previous row. This makes much better sense! Maybe that should be clarified in the pattern?
Hi Caitlin,
I’m so happy that I was able to help! In general, if a pattern says to “mark a stitch” instead of “place marker,” this indicates to place a removable marker on the stitch itself instead of on the needle, but I will pass your edit suggestion along to the design team!
Best,
Julianna
Hi! I also had issues understanding this. Maybe the explanation could go up where the notes for wrapping and ss2k are? Thanks!
Hi Hollie,
Thanks for the suggestion! I will certainly pass this along to the design team to consider when this pattern is up for editing!
Best,
Julianna
Thankyou for the lovely pattern! Im knitting the baby size, i have a question about how to continue once the first ear flap has been shaped. (Directly after the short rows) in the pattern it ends with “Next Two Rows: Knit to 1 stitches before next marker, wrp-t.” And then moves straight on to the next ear flap. I have a wrapped stitch left on my left needle and a stitch marker after that. Do i turn and knit across the ear flap ive just done and then the last few stitches to get to the end and then knit a row in between starting the next ear flap? Or do i continue on to knit the rest of the stitches for that row (across the other 3 markers) even if the yarn is purl wise to begin with? I dont think its clearly explained in the pattern itself 🙂 confused at this point- i am a visual learner and deciphering the pattern has been tricky so far.
Hi Laura,
Thanks for reaching out! You are correct that you will be leaving one wrapped stitch on the first ear flap while you work the second ear flap, and, similarly, after finishing the second ear flap, you will also have one wrapped stitch left over when the flap is complete. Once you finish the second ear flap, you will then knit one round all the way around the hat. Some people find that that these two leftover wrapped stitches create holes in the corners of the ear flaps, so if that is the case for you, you can knit the wrap together with its stitch as we show in our Wrap and Turn Short Rows tutorial during this knit round.
I hope that clears things up!
Julianna
So we are continuing around the front to then start the next eat flap. Is that correct?
Hi Pamela,
Yes, you’ve got it! After completing the first ear flap, you will knit across the front of the hat to get to the other side and knit the second ear flap.
Happy knitting!
Julianna
Question, after completing the 1st ear flap “where in the instructions“ does it indicate to knit around the front of the hat to get to the other side and start the 2nd ear flap. Not sure where I am missing that as I thought I was following instructions finishing the 1st ear flap but upon following instructions to start 2nd ear flap I was still knitting on the 1st ear flap.
Thanks.
Hi Lisa,
Thanks for reaching out! You begin the shaping the 2nd ear flap under where it says “SHAPE RIGHT EAR FLAP.” The first row under that sections instructs you to Knit to 7 (8, 9, 10, 11, 12) stitches before fourth marker, wrp-t and that is the beginning of the 2nd flap.
I hope this helps, happy knitting!
Gianna
When you do your first wrap turn you end up with your yarn as purl do you purl back to the beginning stitch marker of the ear flap or knit? It doesn’t make sense because your yarn is in purl position not knit. Help?!
Hi Lauren,
Thanks for reaching out! After working the wrap and turn, you will simply move your yarn to the back so you are ready to knit the next set of stitches.
I hope that clears things up!
Julianna
Hello!
I am also confused on this. After completing the first wrap and turn I’m now on the purl side. If I bring my yarn to the back and knit, that only leaves me two stitches before 7 ahead of the next marker. Is that right? But rather,? if I purl back like the video suggests should I stop at the marker or the beginning of the round before the next wrap and turn and thus beginning the knit to 7 stitches ahead of the next marker?
Hi Courtney,
Yes, on some sizes of the hat, you will only have a few stitches to knit before you have to work the next wrap and turn, so that sounds correct! Our video is a general wrap and turn tutorial and shows how to work them in stockinette stitch, but since this hat is in garter stitch, it is correct to knit on both sides of the work.
Best,
Julianna
When knitting the ear flap it says knit the next two rows to 6 before marker. So my question is I knit to 6 before marker wrap and turn and knit back to six before marker..is that the second row? Or am I going back and forth twice? It seems that the ear flap is to big if you go back and forth twice. This is the baby size.
Hi Carol,
Thanks for reaching out! For these short rows, you will only be knitting two rows total, one on the wrong side and one on the right side, for each step.
I hope that clears things up!
Julianna
I am making the toddler size hat and the number of stitches cast on (68) does not match to number of stitches on the 3/4 row when you start placing the place markers-that totals 64….I’m confused and struggling to read through 524 comments to see if there is an answer….
Hi Christine,
Thanks for reaching out! It is true that the stitch counts in this row only add up to 64, but after you place the last marker, the last step in the instructions for this row is to knit to the end of the row, so you will knit the last four stitches for a total of 68 and then continue on to the next row.
I hope that clears things up!
Julianna
Is it just the ear flaps that are in garter stitch then it changes to stocking stitch with the reverse side showing.
Thanks so much Judy
Hi Judy,
Thanks for reaching out! The body of this hat is actually entirely in garter stitch – once you complete the ear flaps, you will work the rest of the hat in garter stitch in the round by alternating knit and purl rounds.
I hope that clears things up!
Julianna
Hi! I’m making this again and it appears the pure alpaca is on its way out. What other yarn do you suggest using? The 8-ply cashmere looks like it might work (and looks amazing!) What about worsted hand dyes? I’m concerns about it being soft enough for a baby!
Hello Laura,
Thank you for reaching out! Wow, both of those options would be perfect, they are what I would have reccomended! They are both so soft and beautiful.
Happy knitting!
-Marilla
Thanks Marilla! I’ll try both! 🙂
Hi! i made this hat last winter and absolutely loved it and also the alpaca pure is excellent quality yarn. Will there be more colors available in alpaca pure before winter? I want to make a larger one for my baby.
Hello Carroll,
Thank you for reaching out! While our Alpaca Pure yarn has been discontinued, this hat would be beautiful and soft in our Worsted Twist which is 100% Merino Wool with lots of color options.
I hope this helps and happy knitting!
-Marilla
Hi, I love this hat but I am really struggling with it. Should the first two rows be knit or should one be Purl? Otherwise isn’t it stockinette when In the photos it’s clearlt garter. Also on the right ear flap, if I wrap and turn at the last stitch before the last marker ie the last wrap and turn, then I’m knitting back the wrong way surely? I guess it is me not understanding it as lots of others have managed it but advice would be appreciated. Thanks
Hi Elspeth,
Thanks for reaching out! You will be knitting the first two rows to create a narrow rolled stockinette edge, and will then work the rest of the hat in garter stitch. It does look like the edging is also garter stitch in some of the pictures, but it’s just because it rolls so tightly so only the purl side is visible. When working the ear flaps, each short row is worked twice, first on the right side and then on the wrong side, so after knitting the final short row the second time, you will turn back to the right side to knit the final row and continue on with the rest of the hat.
I hope that clears everything up!
Julianna
My query is similar to that from Laura Swaby 22 May 2019.
When I finished knitting the Left ear flap, that is knitting 1 stitch before marker,( which is done twice) the pattern says wrp-t ( wrap and turn).
So by turning you are looking to knit across the Left flap.
Should it be that instead of turning at the end of the flap I should be knitting across the three markers to start the right Flap?
Thanks
Hi Elizabeth,
Thanks for reaching out! When working the short rows for the ear flap, you will be working each short row twice, first on the right side and second on the wrong side, ending with a wrap and turn, so you will have the right side facing at the end of the left ear flap. At the beginning of the right ear flap, the first row instructs you to knit to 7 (8, 9, 10, 11, 12) stitches before the fourth marker, which will include knitting over the left ear flap one more time.
I hope that clears things up!
Julianna
Hi, it’s my first time to do a wrap and turn. What do you mean by “knit to 11 stitches before the marker”? Does it mean the 11th stitch from the marker also gets knitted? Or does it mean 11 stitches are free of knitting from the marker?
Hello Precious,
Thank you for reaching out! Great question, it means that you will have 11 stitches un-knit between the stitch you just knit and your marker.
I hope this helps and happy knitting!
-Marilla
I have a visible line at the end of my rows. I suspect a jog from knitting row to purling row; it looks as if I have seamed the back. Any suggestions?
Hello Diana,
Thanks for reaching out! Yes, it sounds like you accidentally have two purl rows in a row or two knit rows in a row this would disrupt your garter stitch pattern and give you a line. If this line is bothering you, unfortunately the only way to eliminate the line is to go back and fix it.
I hope this is helpful and let us know if you have any further questions!
Happy knitting,
Marilla
Hi! I’m having such trouble setting this up for child’s size. I have 76 stitches. And the first 3 stitch markers of the set up ear flap part are in place, but for the last one I can only knit 14 stitches before landing back at the BOR marker. Please help me understand where I’ve gone wrong. Thank you so much!
Hello Heather,
Thank you for reaching out! When setting up you round your markers should be placed as follows; Beginning of the round marker – 4 stitches – 1st marker – 20 stitches – 2nd marker – 28 stitches – 3rd marker – 20 stitches – 4th marker – 4 stitches- back to the beginning of the round marker.
I would just double check you cast on and double check your marker placements and I’m sure you will figure out what is amiss!
I hope this helps and happy knitting!
-Marilla
This is my first time knitting the wst to make ear flaps. I think I did pretty ok except my ear flaps look like little bubbles. Will they flatten out once I complete the infant hat? Thank you! The pattern is so cute – I’m sure my next go will be even better.
Hello Hannah,
Thank you for reaching out! How extreme are the bubbles? This sounds like it will be fine, as you knit the body of the hat your earflaps will form into the dome shape of your hat. In the photo under “SHAPE RIGHT EAR FLAP” you can see a slight bubbling of the earflaps.
I hope this is helpful and let us know how it goes!
-Marilla
Can you use Posy to make this hat? I’m thinking of making one to go with the vintage taxi booties and would like the colors to match!
Thanks!
Hi Liadin,
Thanks for reaching out! As always, I would recommend knitting a gauge swatch to make sure, but Posy should work out wonderfully in this pattern as long as you hold it doubled!
I hope that helps, and please do let us know how your finished hat and booties set turns out!
Julianna
Hi- can you suggest a washable yarn for this hat? Something in cotton? Thanks so much!
Hi Ali,
Thanks for writing in! Blue Sky Worsted Cotton would be a lovely easy care yarn to use for this hat! Although the official washing instructions for this yarn are the hand wash and lay flat to dry, we have had great success machine washing it in a gentle cool cycle and drying on cool as well.
Happy knitting!
Julianna
What yarn would you recommend that you currently stock? Is mulberry merino a good option?
Hi Ashley,
Thanks for reaching out! Unfortunately Mulberry Merino would be too light weight for this hat, which is written for an aran or worsted weight yarn. I would suggest using Worsted Twist or Cashmere Tend instead!
Happy knitting!
Julianna
Hello,
I’m French and I’ll try to explain troubles I’ve meet …
As some others I mistook around decreases. I reed comments and yours answers, so I’m going to knit again this part of pattern and I hope I win…
Thanks a lot for this very cute free pattern !
Hi,
A question regarding the crown area decreases – it says to knit to one stitch before marked stitch, then do sskp – does this mean that one of the 2 stitches I’ll be slipping together will be the singular knit stitch from the previous row? I’m confused as to whether that knit stitch is supposed to line up with all of the sskp/other knit stitches to come (in which case, on each decrease row, I’d always be slipping the 2 stitches before the knit stitch/sskp stitch, no?)
Thanks,
Jonathan
PS in the latter decrease rows, do we decrease past the end of row/join in the round marker, since we end up decreasing a total of 14 stitches, and the first marker is less than 14 stitches from the beginning of the row?
Hi Jonathan,
Thanks for writing in! Yes, it sounds like you have it, the marked stitch will be one of the two slipped stitches in the S2KP. Since S2KP is a centered double decrease, it will turn out centered on the existing column of knit stitches if you work it as directed. There aren’t any decreases worked at the beginning of round marker, so although the first marker is only 7 stitches from the beginning of round marker, it is 14 stitches away from the last decrease marker, so the beginning of round marker won’t be affected.
I hope that clears things up, and please let us know if you run into any other questions!
Julianna
Hi Julianna,
It does – thanks! Appreciate the help : ).
Jonathan
I have a similar question, except I think I’m getting confused by where to “mark.” Should the stitch marker be before or after the knit stitch? I was confused by “mark the stitch before.” Similarly, will the knit stitch be the first or second stitch in the s2kp?
Thanks!
Hello Ashley,
Thanks for reaching out! When the pattern says to move stitch marker to the s2kp, you are placing the removable stitch marker on the stitch itself, rather than between two stitches.
I hope this clears things up, but let us know if you have any questions!
Happy knitting,
Marilla
Love this hat! My concern with the hat… Is unsupposed to be loose fitting. Made according to head measurement, but seems very loose. I’m a tight knitter. I did use 8 and 7 size needles using baby alpaca\ merino wool yarn. Any comments?
Hi Laurie,
Thanks for reaching out! This hat should fit fairly snugly. If you are going by the finished measurements given in the pattern, keep in mind that hats should fit with 2 to 4 inches of negative ease, so you should select a finished measurement that is a few inches smaller than the head of the recipient. Also, everyone knits a little differently, so I would recommend checking your gauge to make sure you are matching our gauge of 4 1/4 stitches and 8 rows to 1 inch in garter stitch.
Best of luck and I hope that helps!
Julianna
Hi
Thank you so much for your input. You have answered my concern with pleasure. I did start the adult medium..realizing it was too large. Happily made the adult small. Which is perfect.
Best regards
Laurie
Thank you for your instruction. Thanks to it, I made 2 red ones for my close friend’s children for the coming Xmas. They love them so much!
Thanks again!
Regards
Hello Thu,
I’m so happy to hear how much you enjoyed this pattern!
Happy knitting,
Marilla
Hi
I am knitting the “kid” size hat and am on the “shape crown” section. The instructions are: P9, K1 PM, P18, K1, pPM 3x. With 76 stitches, I can only complete this section 2 times with 18 stitches remaining.
Help! Thanks. It’s an adorable pattern.
Hi Deirdre,
Thanks for reaching out! When working this row, you will only be repeating the section in the brackets. So, when working the row, which in full reads, “P9, k1, mark previous stitch, [p18, k1, mark previous stitch] three times, purl to end of round,” you will purl 9 stitches and knit 1 once, then purl 18 and knit 1 three times, then purl to the end of the round. That should turn out to 76 stitches!
I hope that clears things up!
Julianna
Many thanks for the clarification Julianna!
I am knitting the adult S size. I did four decreases for the crown of the hat so far and just noticed that the two decreases ( the two lines of knit stitches that go up) in the front are not centered. I also noticed that they are not the two stitches that are farther apart, but instead the ones that are closer together. I have no idea what I did wrong? Would you be able to help?
Hello Christine,
Thank you for reaching out! It sounds like your beginning of the the round marker might be placed incorrectly. Or your markers were just placed incorrectly when you did your set-up round. “P10, k1, mark previous stitch, [p20, k1, mark previous stitch] three times, purl to end of round.” Is it possible that you did not complete the bracketed section three times? I would do a count to see how many stitches you have between each marker, this will help to figure out what went wrong.
I hope I can help and happy knitting!
-Marilla
About how many yards for the baby size? Am using the cashmere tend — which has fewer yard than the alpaca pure had…but not sure the difference.
Thanks!
Hi Rebecca,
Great question! We used about 55 yards for the baby size, so you should have plenty with one skein of Cashmere Tend!
Happy knitting!
Julianna
I’m working step 1 of the left ear flap. I’m doing the toddler size so I’ve knit until I have 8 stitches between where I am and the next marker. I wrapped and turned but now I’m in the purl position. Now what do I do? Do I purl back to the first marker and then turn and knit until I get back to 8 before the second marker? Or back to the beginning? Or something else? I’m very confused at the next step I’m supposed to take because the next step says knit until 8 before the next marker which makes no sense (that would be the 1st marker and would only allow me to knit 2 stitches)… Help please!
Hi Katy,
Thanks for reaching out! That is actually correct! The short rows for these ear flaps start out very short indeed – only two stitches for the first one – and will then get longer by one stitch each time you turn.
I hope that clears things up!
Julianna
Hi! Why does it look like the right flap on the baby hat is worked in stockinette stitch instead of garter stitch in the photos? I’m probably just missing something, so I want to understand before I cast on. Thank you!
Hi Amanda,
Thanks for reaching out! I also see what you are seeing on the right ear flap of the baby sized hat, but I believe it’s just an optical illusion! The hat starts with two rows of stockinette which usually rolls up, but it looks like it is visible in a few of the pictures. I assure you that, following the pattern as written, your ear flaps will turn out in garter stitch!
Best,
Julianna
Hi! I’m sure this question has been asked before and I have tried to get it answered elsewhere before bothering you but alas no luck so here I am. I’m at the first ear flap and the first wrap & turn. I’m so confused. You do the wrap & turn, after the turn you’re actually going to be working the inside of the hat correct? So you would be knitting for garter stitch, but the yarn is in the purl position. Am I overthinking this? Probably. If you could help me out I would really appreciate it. Thank you so much!!
Hi Linda,
Thanks for reaching out! Yes, that is correct, your yarn will be in the front of the work after you turn to the wrong side – you will simply need to move it to the back of the work by passing it between the needles, just as you would when switching between a purl and knit stitch, so you are ready to knit the next row!
I hope that clears things up!
Julianna
I love this little hat. I tried it for the first time this week making the baby size. After 3 attempts I got my kinks worked out except one.
It says to work the body until until piece measures 4 inches from the rolled edge at the center of an Ear Flap, which I did. However it seems like too much space before the decrease. Should it really be 4 inches? The photos don’t look as if they’re done this way. Thanks so much for posting your patterns and instructions!
Hi Rosalyn,
Thanks for reaching out! Because the hat continues into a long point, this is correct! The four inches includes the length of the ear flap, so the body of the hat measured at the center back marker should be only about 2.5-3 inches long.
I hope that clears things up!
Julianna
What yarn can be substituted? Appears that this Alpaca is no longer available? Thanks
Hello Lisa,
Thanks for reaching out! Worsted Twist or Cashmere Tend, would both be beautiful substitutes for this project.
Happy knitting!
-Marilla
Can this hat be made with a bulky weight yarn?
Hi Deborah,
Thanks for reaching out! Unfortunately we do not have instructions for knitting this hat in a bulky weight yarn, but I will certainly pass your suggestion along to the design team!
Best,
Julianna
What a cute hat! Thank you for such a great pattern! I was in a bit over my head since I’ve never done short rows or s2kp, but your video tutorials and insanely patient problem solving in the comments section got me through it.
Hi Elena,
Thank you so much! We are so delighted to hear that and glad that our tutorials have helped you get through this pattern sucessfully!
Best,
Cassy
I’ve loved knitting this hat but have clearly got the decreasing wrong.
When you say knit to marked stitch does that include the marked stitch?
Many thanks for a lovely pattern.
Hi Jane,
Thanks so much for the kind words! For this pattern, you will need to use removable stitch markers and place them on the actual stitch indicated instead of on the needle. When knitting to the marked stitch, you will stop right when you get to the stitch that has the marker on it.
I hope that clears things up!
Julianna
Hello,
I am knitting the Toddler hat. Can you explain the directions?
I know I need to use a removable stitch marker. What does P 8, K1, “MARK PREVIOUS STITCH” mean?
So I Purl 8, then I knit 1, then do I” MARK THE KNIT 1 STITCH WITH A REMOVABLE STITCH MARKER’, OR IS IT THE STITCH RIGHT AFTER THE KNIT 1?
Set-Up Round: P7 (8, 9, 10, 11, 12), k1, mark previous stitch, [p14 (16, 18, 20, 22, 24), k1, mark previous stitch] three times, purl to end of round.
Thanks so much,
Sandra
Hi Sandra,
Thanks for reaching out! When the pattern has you mark the previous stitch, you will place the removable marker in the last stitch that you just knitted, which will be the knit stitches in this round.
I hope that clears things up!
Julianna
Thank you for the pattern.
I just knitted 2 hats for my daughter that has twin boys!
They turned out so cute! Will be knitting more of these.
Thanks so much~
Hi there! I’m hoping to get away with using 16 in circular needles as I don’t own 12 in. Has anyone tried and had luck with this? I’m willing to have a little stretch and switch to double pointed needles early. Thanks for your thoughts!
Hi Mariel,
The 12″ circumference needle is only used for the baby size version of the hat. If you already have the double points, it might be easiest to just use them from beginning to end of the project. You can also experiment and see if you can stretch the 14″ circumference over the 16″ circular – it’s definitely worth a try!
Happy Knitting!
Cassandra
I’m confused I think round one decrease ending w 52 sts for baby size then round 2 u purl doing decreases? Round 3 knit doing decreases or just straight knit
Hi Joan,
Thank you for writing in! I’m not sure which section of the pattern you are referring to- would you be able to clarify? In the Shape Crown section, you’ll be working decreases on Round 1, followed by Rounds 2, 3, and 4, according to the pattern, and repeating these 1-4 five more times. Let me know if this is helpful!
Best,
Gaby
Ok! So about 50xs later, I just do not understand the left ear wrap turn!!! I am left handed but generally follow right handed patterns. I have tried every which way to wrap and turn. I understand the directions, watched the tutorial, but the stitches end up backwards. Maybe I am supposed to start knitting on the wrong side, as opposed to the right side, to the 11 stitches from 2nd marker, and THEN wrpt??? I just tried that but it doesn’t
Hi Lulu,
Thanks for reaching out, and I’m sorry to hear that you are having so much trouble getting started! Keep in mind that the ear flap is be in garter stitch, so if you find that you are knitting on the wrong side of the hat, that is correct. I’m not sure what else could be the problem, so if that doesn’t answer your question, please feel free to send a picture of your work to [email protected] and we’ll be happy to take a look!
Best,
Julianna
Love this pattern! I’ve had fun doing two different sizes. It looks so strange off my head and is so very comfy on. I will be making more for special people….!
Thanks for this pattern!
How would this work with the surpentina?
Thanks, Stephanie
Hi Stephanie,
Thanks for writing in! Although you will need to knit a gauge swatch to make sure, I think Serpentina would be a wonderful alternative for this hat!
Best,
Julianna
Dear Purl Soho,
This is a wonderful site and have enjoyed seeing what you are doing.
Just one thing, is there any way of doing this pattern with straight needles? My circular needles are too long and for doing just 1 pattern it would be such an environmental waste (though I am teaching my grandchildren how to knit).
Thanks so much,
Bunny
Hi Bunny,
Thank you so much for the kind words and for writing in! Unfortunately, we don’t have instructions for knitting this pattern flat, but I will certainly pass your request along to the design team!
Best,
Julianna
Hi. I love this pattern. I am making the adult small size for a large headed 2 year old! I thought I was doing very well following the directions with the flaps etc. I noticed that my spacing for the decreases were not in the correct spots. I finished up the hat so I could check the fit on my grandson and want to fix it. I must have done something wrong. Also, is there a way to not have a line when following the garter stitch in the round- when changing from knit and purl rows? I am trying to get this and done for a Halloween costume with the sweater you posted on Instagram, so I would appreciate help ASAP. Thanks in advance!!
Hi Jane,
Thank you for reaching out and for your kind words! In order to make sure the decreases line up together in the correct spots make sure you follow the instructions closely for placing the stitch markers, they are your guide! Since you are doing multiple stitches in the same pattern there will be some definition between the knit and purls to garter stitch. Make sure you are on the correct side of the fabric when switching to garter to ensure a clean line!
I hope this helps, happy knitting!
Gianna
Hi again. I have been looking up about the jog made doing garter in the round. I do have to start my hat all over because the jog is in the front right side of the hat. Does that give you an idea of what I did wrong? Thanks for your help in advance!!
Hi Jane,
Thanks for reaching out again! I believe that you may have not had the correct placement of your stitch markers leading to the decreases not being in the right spots.
I hope this helps, happy knitting!
Gianna
Hello, regarding the last line of instructions of the “shape right ear flap” section that states “Next row: Knit to end of round”, does that mean I knit all the way around the hat until I come to the very first marker I placed when joining the cast on stitches to begin working in the round?
Hi Lisa,
Thanks for reaching out! Yes, you knit to the end of the round where the you first joined the work in the round!
Happy knitting!
Gianna
Hello! Since you do not sell the alpaca pure anymore, what is your suggestion for yarn?
Thank you!
Hi Emily,
Great question! Worsted Twist and Cashmere Tend are both excellent substitutes for Alpaca Pure, and would work beautifully for this hat.
Happy knitting!
Julianna
I have found the Purl Soho patterns I have made to be beautifully written and until I came to the decreases of this pattern felt the same about this pattern. I agree with Caitlin Powell’s comment that the marker placement should be added to the notes. I was a bit confused until I read your response to Caitlin’s question. I don’t think everyone should have to read the comments to understand the pattern. Otherwise I found everything else easy to understand and it turned out perfectly.
Hi Catherine,
Thanks for reaching out! Generally if a pattern says to “mark a stitch” instead of “place marker,” this indicates to place a removable marker on the stitch itself instead of on the needle, but I will pass your edit suggestion along to the design team! I am glad to hear that the hat worked out for you!
Best,
Gianna
Hello! I have 2 skeins of the original Cotton Pure and would like to use them for a toddler size hat; can I use two strands together and follow the same directions? The baby isn’t a year yet so if the hat is a little on the small size it should be perfect. Thank you!
Hi Marcie,
Thanks for reaching out! I would recommend working up a gauge swatch holding the Cotton Pure double to see what the gauge ends up being compared to the pattern! It should work out but this way you will know if you need to make any adjustments to the pattern from there!
Let us know if you have any more questions moving forward!
Gianna
Love this hat! I made the child size for a 2 yo. I am wondering if it will stretch enough to fit his 19.5 inch head?
Thank you for the free pattern.
Hi Cindy,
Thanks for reaching out! The child size may stretch enough to fit a 19.5″ head, but I may recommend sizing up to the Adult Small size!
All the best,
Gianna
HELPFUL HINTS: I finally worked my way through this pattern without surfing the 600+ comments and managed to figure it out so I’m offering a few of easy edits and/or tips as I see others were just as confused as I was:
1) After completing the first (L) ear flap, you need to knit across the front of the hat to begin the other (R) ear flap. As you continue to K across you accomplish the first RS row of the ear flap pattern. 2) I found it VERY helpful to use two different color markers for the R & L ear flaps as it is easy to get turned around (forget if you’ve turned once or twice, etc) if the markers all look the same. Finally, 3) the pattern pictures show 4 movable stitch markers and a barely recognizable one for the center back (it’s tiny and white and looks like a stitch if you con’t look very closely). Then, when beginning the first ear flap, the pattern references knitting to somewhere before a “2nd” marker … but that does NOT take into account the one that marks the beginning of a round. I made the mistake of counting it as my first marker – don’t do that! You will need to know where that beginning is later for the center back shifting from K to P everyother row, so recognize it but don’t count it as one of those first two for the ear flap. In the end I found using THREE colors best: One color to indicate the new round, a 2nd color for the L ear flap, and a 3rd color for the R ear flap. I hope this helps others … and Purl Soho, these clarifications in the pattern would help make an otherwise very simple hat a lot less complicated at the beginning, IMHO. Super cute! Now that I know what I’m doing, I’m going to go make another but all in stockinette! Wish me luck
😉
Hi. I am really interested in making this hat. I’ve started twice. And have only got as far as the wrp-t for three turns ( the video is very helpful by the way:)
Since it is on a circular needle, knitting in the round produces a stockinet stitch on one side and a plain stitch on the reverse. A garter stitch is completely reversible. Should I be altering my rows at the centre marker- knit 1 round then purl 1 round? Do I just turn the hat inside out? In this case should I do the wraps so that the yarn lies on the stockinet side instead of the purl side?
Thanks
Hi Laura,
Thanks for reaching out! When working the ear flaps and wraps and turns you are turning the work so that you are knitting both sides which creates the garter stitch, not stockinette stitch!
I hope this clarifies things!
All the best,
Gianna
Hi. I love this pattern but am new to wrap and turn and am confused!
After completing the short rows I had way too many stitches. After looking through the comments and studying the tutorial I realised that I hadn’t been knitting the wraps. However the pattern says the wraps do not have to be picked up, is this something different?
Hope that makes sense and thank you for your help!
Hi Sandra,
Thanks for reaching out! When you work a wrap and turn it should not have an effect on the amount of stitches you have and should not be adding any stitches onto your needles. The wraps should be along the base of the stitch so whether you pick up and work the wraps or not should also have no effect on the amount of stitches you have. If you have extra stitches on the needles you may have not worked the wraps correctly. Also that is correct, for this pattern you are not going to be picking up and working the wraps!
I hope this helps!
All the best,
Gianna
I’d like to make oneof these hats for myself after making many for that new babies in my life! My head is measuring 22 1/4 in in circumference, and I’m not sure if I should make the Adult Medium or Large. Any advice? I know the hat stretches, but don’t want to malt it too small – or too loose! Thanks!
Hi Olivia,
Thanks for reaching out! I would recommend making the adult medium size, It will stretch a bit when wearing and you can also get a bit more stretch if you need by blocking the finished hat!
All the best,
Gianna
Ever since getting past the ear flaps, I’ve been knitting with the wrong side of the hat facing me. And now that I’m decreasing, it looks like the four places of decrease are just slightly not centered with front and back of hat. Could it be that at end of last flap I didn’t knit to end of row and went wrong way? I am pretty sure I’m doing the decreases correctly, especially after reading others’ comments. The decreases are set in, rather than raised, on the right side. Thank you.
Hi Christy,
Thanks for reaching out! Did you place your stitch markers in the correct places? That is the most important step of getting correctly spaced decreases, in the set up round prior to the crown shaping you should P7 (8, 9, 10, 11, 12), k1, place removable marker on previous stitch, [P14 (16, 18, 20, 22, 24), k1, place removable marker on previous stitch] three times, purl to end of round. This will then tell you exactly where all of the decreases should be going forward!
I hope this helps, happy knitting!
Gianna
Are there a total of sections of 14 purls plus 1 knit or only three?
Set up round. Purl 7 place marker on previous st. Purl 14, k 1 place marker on previous st. 3 times. 3 more times or 3 times total?
Hi Sue,
Thanks for reaching out! For this section: P7 (8, 9, 10, 11, 12), k1, place removable marker on previous stitch, [p14 (16, 18, 20, 22, 24), k1, place removable marker on the previous stitch] three times, purl to end of round, means that you will repeat the section that is within the brackets [p14 (16, 18, 20, 22, 24), k1, place removable marker on the previous stitch] three times total, then you will finish the round by purling to the end.
I hope this helps clear things up!
Gianna
When working the crown decreases, on the garter rounds do you knit the stitch with the marker or the stitch right after it?
Hi Barbara,
Thanks for reaching out! For the decrease round you will be knitting to one stitch before next marked stitch, remove marker, s2kp (see Pattern Notes), and then replace the removable stitch marker on the s2kp. You will repeat that four times and knit to end of round!
I hope this clarifies things, happy knitting!
Gianna
Just finished garter ear flap hat and my suspicions were correct. All the decreases slant to the left in a gradual curve to the top, instead of diagonally “straight”. I was so careful to do the decreases exactly on the s2kp. What could be wrong? I started the whole hat over so many times and got all the other issues figured out. Each time I began the 4-row repeat for the decrease, the decrease is one step to the left of last 4-row decrease, giving a staggered look. Should I not have done the s2kp stitch starting right on the marked knit stitch from row before? Thanks.
Hi Christy,
Thanks for writing in again! I am not sure what could be causing the issues with the decreases, please email us a photo of your work to our team at [email protected] and they can trouble shoot further from there!
All the best,
Gianna
I am having the same issue. I have tried slipping the marked stitch with the stitch before it and with the stitch after it which. Either way my line seems to be staggered. Now I wonder of I’m knitting the wrong stitch in the garter row?
Hi Barbara,
Thanks for reaching out! It is likely that your stitch marker is in the wrong place, I would double check that you have accurately placed all of your markers prior to beginning the crown shaping (For this hat, you have to use a removable stitch marker and place it directly in the stitch indicated, not on the needle, so that the decreases stack correctly. This is what happens if you place your stitch marker on the needle instead.)
I hope this helps!
All the best,
Gianna
Explication en français svp
Hi Oehler,
Thanks for writing in! At this time we only offer patterns in english, but thank you for expressing your interest!
Warmly,
Gianna
I have the same issue. Markers at the right place and all.
Help, please!?
Martina
Hi Martina,
Thanks for reaching out! It is likely that your stitch marker is in the wrong place, I would double-check that you have accurately placed all of your markers prior to beginning the crown shaping. For this hat, you have to use a removable stitch marker and place it directly in the stitch indicated, not on the needle so that the decreases stack correctly. If you are still having issues after checking your markers are correctly placed in the stitches, then please email our customer service team with the information above and a clear photo of your work to [email protected] and they can troubleshoot further from there!
I hope this helps!
Gianna
HI there, I see you don’t sell the Alpaca pure, what yarn substitution would you recommend?
Hi Ali,
Thanks for reaching out! Yes that is correct, Alpaca Pure has been discontinued but in its place you could use Worsted Twist or Linen Quill Worsted!
All the best,
Gianna
I was hoping somebody would have reached out about this already as I’ve been lost in desperation!
Thank you for your kind answer, this helps a lot!
Such a lovely hat!!!
Hi – I have made several of these in kid sizes. Just tried an adult size. Cast on 84 sts as directed, ear flaps went fine. Then to start the decreases, it says K 10, pm, K20, pm, K20, pm, k20 pm, K10. This only equals 80 sts. What am I missing here? Thanks for your help! I love the pattern design!
Shelley
Hi Shelley,
Thanks for writing in! Going into the decreases, for the set up round for the adult small you should be P10, k1, place removable marker on previous stitch, [P20, k1, place removable marker on previous stitch] three times, purl to end of round. So for example after you purl 10, you knit one stitch and that is where you place the marker and you do the same with the rest of the placement!
I hope this clarifies things, happy knitting!
Gianna
I can’t believe that I am writing this, because I used to do short rows for heels in socks, but I have been away from knitting for a bit and I am stumped. After I wrap and turn for the earflap , how far do I knit across before I wrap and turn again? Am I knitting to the marker? I know it’s not the whole row, but how far across?
Hi Marsha,
Thanks for reaching out! Depending on the size you are working on, for the first row in the shaping section for example (right side): Knit to 7 (8, 9, 10, 11, 12) stitches before your second marker, wrp-t. then for the next row Knit to 7 (8, 9, 10, 11, 12) stitches before next marker, wrp-t. If a dash (” – “) appears in place of a number for your size, omit this line of instruction and continue on.
I hope this clarifies things!
Warmly,
Gianna
When measuring from the rolled edge, did you flatten it out or leave it rolled?
Hi Hope,
Thanks for reaching out! When measuring from the rolled edge we leave it rolled not flattened!
I hope this helps!
Warmly,
Gianna
Beautiful pattern, but once you get to the ear flaps what do the dashes mean in the size selection? Example “Knit to – (-, -, -, -, 11)”
As the pattern continues the number denominations continue to change..say I wanted to do a kids size, what would I knit in place of these blank dashes?
Hi Shaun,
Thanks for reaching out! If a dash (” – “) appears in place of a number for your size, omit this line of instruction and move on to the next line where there are instructions for the size you are making! For example, the kid size after working the first two rows of the shaping section you would skip the next 3 rows where the dash appears and continue on to the Next Two Rows: Knit to – (-, 8, 8, 8, 8) stitches before next marker, wrp-t.
I hope this clarifies things!
Warmly,
Gianna
Hi, I’m interested in making this hat but notice that it’s made in the round on a circular needle. If all the stitches are knit, how are you getting a garter stitch. Nobody else seems to ask this question so it must be something I’m missing. Please let me know soon since I’m ready to begin. It’s a really cute hat!
Hi Barbara,
Thanks for reaching out! To get the garter stitch in the round you are purling one row and knitting the next except in the shape ear flap rows since you are working short row and flipping the fabric over, you knit both sides as usual for garter.
I hope this helps!
Warmly,
Gianna
When I do it this way I get the return short row out of stitch (aka purled) also. With the turn, shouldn’t the return stitches maintain stockinette?
Hi Suzanne,
Thanks for reaching out! Yes, as I explained previously when working the short rows you are knitting every row to maintain the garter stitch since you are working over both sides of the fabric. Once you move onto the WORK BODY OF HAT section you will then be knitting one row and purling the next to maintain the garter stitch since for this section you are only working over the right side of the fabric instead of both sides as you were while working the short rows.
I hope this clarifies things!
Warmly,
Gianna
Hi, I am confused with the wrap and turn. When you wrap and turn after knitting, the yarn is in place to purl but every row is knitting. How do I get the tail in the back to knit without unwrapping the stitch?
Jill
Hi Jill,
Thanks for reaching out! When working wrap and turn ins garter it is very easy, to see this technique in action, visit our Short Row Tutorial and follow along with the wrap and turn on the knit side section (at 0:30 seconds), except do not bring the yarn to the back before you turn, this will insure that when you turn the work the yarn will be ready for you to continue knitting!
I hope this helps!
Warmly,
Gianna
I’m having the same problem as Barbara and Christy! Is the marker placed on the knit stitch or on the (previous) stitch before the knit stitch to begin with? It might help me to know the number of the stitch on which to place the marker (ie. the 7th stitch from the beginning of the round and then maybe the stitch number for each successive section and round? (at least for the first couple of rounds which include the decreases). I have torn this out several times as well. Each time I start over I’m careful to move the marker, but get the leftward slant rather than vertical /diagonal decrease. I spoke with a friend who did this pattern andit took her a long time to figure out, as well. Unfortunately, she can’t remember how she did it.
Is there a chance you’ve done a video for this kind of decrease?
Thank you!
Cyd
Hi Cyd,
Thanks for reaching out! I am happy to help get this figured out! For the set up round you should be P7, then you k1, and place a removable marker on previous stitch (On the knit stitch directly after you have P7) making sure you are placing the marker on the stitch itself and not on the needles! We have a tutorial for the decrease you can follow here: Slip Slip Knit Pass (s2kp).
I hope this helps and please feel free to reach out with any more questions!
Warmly,
Gianna
Thank you, thank you!
I started the setup row for crown shaping, and I admit I was confused with p–, k1, place removable stitch marker on previous stitch. I debated if it was the knit stitch or the purl stitch previous… *sigh.
Hello, I love this pattern but just need some clarification – when it says ‘measure from the rolled edge on an ear flap’, does that mean measure from the rolled part that is rolled up inwards towards the hat, or the part that makes up the actual edge of the hat (in place of the cast on edge that is hidden inside)? I hope that makes sense. Thanks, Jules
Hi Jules,
Thanks for reaching out! When we say “measure from the rolled edge on an ear flap” it means to measure from the rolled edge as is, not to unroll and measure from the original cast on edge.
I hope this clarifies things!
Warmly,
Gianna
Loved this pattern, made 2 baby versions and then one for mom, dad and his two big sisters. Knitted very smoothly. Thanks. Look forward to looking into other patterns available here.
I’ve knit this twice but does not end up looking like garter stitch, what on earth could I be doing wrong please looks as should on ears then goes awfully wrong
Thanks
Hi Vicky,
Thanks for reaching out! I am sorry to hear that! Feel free to send us some photos of your work to our email [email protected] and we can troubleshoot further from there!
Warmly,
Gianna
Hi there, this is a lovely pattern but I seem to have made a little mistake and am not sure how to fix it.
Just to confirm, after finishing the left ear flap, we knit toward the center and past the end of round stitch market, then to 7 stitches before next marker (in stitch)?
What I am getting is an extra knit row just above right ear flap, in the same round as the gap from the wrap (just before i start the body of the hat).
I hope this makes sense. I woke up thinking about this and it’s 2:30am, haha!
Hi Abi,
Thanks for reaching out! After you complete the shaping for the left ear flap you will then knit across to 7 (8, 9, 10, 11, 12) stitches before fourth marker, and then wrp-t. So you will be working over the end of round marker to the 4th marker that you placed, you will then begin shaping the right ear flap!
I hope this helps, happy knitting!
Gianna
Great pattern. No problems at all. Thanks fo r sharing
It’s my first time working in the round, so when I changed to DPN,s my work started to be in stockinette, is there a way to rectify this please 🙏🏻
Hi Vicky,
Thanks for reaching out! It sounds like when you switched needles you got off pattern and began knitting every row, in order to maintain the garter stitch when working in the round you will be knitting one row and purling the next as we instruct in the pattern! Unfortunately the best way to fix this would be to take out your knitting to the point the stockinette started and then you can continue working in garter! Just be sure to pay extra attention to the written pattern so that you can maintain the garter stitch!
I hope this helps, happy knitting!
Gianna
Can I ask please, when finishing the last wrap and turn for the right ear flap should I end up and carry on working on the wrong side? Thanks
Hi Vicky,
Thanks for reaching out! You will finish the the short rows on the right side so that you can continue working in the round for the body and crown of the hat!
I hope this helps, happy knitting!
Gianna
Hi,
I am having an issue with the number of stitches when starting the decrease relative to what the pattern calls for.
I cast on 60 stitches
The pattern at the set-up round for the decreases calls for the following
P7, K1, P14, K1 x 3 = 69 stichtes ( not 60)
What am I missing?
Hi Katja,
Thanks for reaching out! For the set up round you will be P7, k1, place removable marker on the previous stitch, then you will [p14, k1, place removable marker on previous stitch] three times (just repeating what is in the bracket) then purl to end of round. so 7+1, then 14+1×3= 45. So if you take 45 plus the 8 stitches from the beginning you get 53, leaving you with 7 stitches after placing the markers to purl across till you reach the end of round marker! 60 stitches total!
I hope this clears things up!
warmly,
Gianna
I’m confused on the gauge. Is 4 and 1/4 sts and 8 rows? How do you count a 1/4 stitch?
Hi Heather,
Thanks for reaching out! I know this is a tricky gauge measurement! Essentially, for an accurate gauge measurement, you will want to make sure above all that you have 4 stitches for 1″. The 1/4 measurement basically is just a small portion of the 5th stitch after the 4 for the 1″, it will be not be quite to the center of the stitch but will be half of the first leg of the stitch!
If you would like to have a more accurate measurement you can calculate the stitches for 4″ rather than 1″. For that, your gauge should measure 17 stitches for 4″ (4.25 x 4)
I hope this helps, happy knitting!
Gianna
I love this pattern as it’s one of the very few baby/child size that I’ve found that covers ears and actually stays in place! Thank you!
Thank you very much for this pattern. I love it and have made several now. Do you have any hints to get the decrease stitches to line up nice and neatly? Mine always seem wonky.
If I decrease every other row they look fine but doing the pattern as written, decreasing every 4 rows makes them appear uneven looking.
Thank you!
Hi Lori,
Thanks for reaching out! I would suggest following the decreases as written in the pattern to ensure you have the correct amount of rows (and the accurate height!) My best tip is to make sure that you are using the removable stitch marker and that you have it marked on the stitch rather than on the needle. This will ensure that you are working the decrease at the correct stitch each time. Also blocking the hat once you have finished will give you the chance to re-distribute the stitches and make sure everything is tidy and even. I would suggest checking out our Blocking tutorial, it is an excellent resource to use!
I hope this helps and please let me know if you have any more questions!
Gianna
This pattern stymied me until I read the comments. When a pattern says knit, I knit. But that is not what you do here. You knit in garter stitch in the round which is knit one row purl the next except the flaps. Have you thought about adding these directions to the patterns for those of us who prefer to follow the rules to a T?
Hi Suzan,
Thanks for writing in! That information is already stated in the written pattern. Since the ear flaps are worked flat you are instructed to knit every row and for the body, since you are knitting in the round, we instruct you to purl one row and knit one row, see WORK BODY OF HAT and SHAPE CROWN OF HAT section!
I hope this clears things up, happy knitting!
Gianna
I am not familiar with the yarn used for this pattern, and I can’t seem to find it. What is the weight of the yarn used, OR what would be a currently available substitute yarn?
Hi Mary,
Thanks for reaching out! Alpaca Pure is an older yarn of ours that has been discontinued. Luckily we have some options that are pretty close to Alpaca Pure! I recommend using WOOLFOLK Tov, Campo, or even Worsted Twist! I also suggest starting off by working a gauge swatch prior to beginning, to ensure you are consistent with the pattern.
I hope this helps and please let me know if you have any more questions!
Gianna
I plan to knit this adorable hat for a baby born in July, so I’m looking for a 3-6 month fit. Would the baby size still fit, or do you recommend going up to the toddler size?
Hi Elise,
Thanks for reaching out! I think you could certainly still use the baby size for a 3-6-month-old, these hats also will stretch quite a bit to accommodate a growing head!
I hope this helps, happy knitting!
Gianna
Hi ,
Can I use a DK yarn for this project ?
Would I need to alter the needle size ?
I bought the wrong yarn!!
Thanks,
Sarah
Hi Sarah,
Thanks for reaching out! I would suggest starting off by working a gauge swatch on an appropriately sized needle and see how it compares to the gauge of the pattern, from there you can make any further adjustments if necessary.
Happy knitting!
Gianna
Any tips for sizing down for a newborn size?
Hi Brookes,
Thanks for reaching out! If you wanted to size this hat down for a newborn, I would recommend using a slightly thinner yarn and going down a needle size (maybe a US5 instead of the US7)! That way, you won’t have to worry about changing the pattern too much to get a smaller fit. I’d suggest using our Season Alpaca or Cashmere Merino Bloom as a substitute for the Alpaca Pure. Both these yarns are incredibly soft and cozy and will keep baby’s head warm and snug!
Warmly,
Kelsey
Can you tell me your method of casting on? I did a small swatch before I started the actual hat and see that my cast on edge is much more ‘loopy’ on the bottom than your nice tidy edge. ….
Hi Candace,
Thanks for reaching out! We used a basic Long Tail Cast On for this hat!
Warmly,
Gianna
Could you tell me how many stitches I should have on my needles for each finished ear flap , size kid, . Currently I have one ear at 20 and another at 21.
I also have one hole at the top corner of each ear flap that I can’t seem to get rid of, but I think I am going try to just be content with that particular problem.
Hi Candace,
Based on the size you’re making, you should have 20 stitches on your needles for each finished ear flap! The number of stitches here should remain constant for the entire Shape Ear Flap sections, so I have a feeling you may have placed one of your stitch markers incorrectly to begin with.
I’m not quite sure why you’re ending up with holes at the corners of your ear flaps. It potentially could be because you have stitch markers there, and thicker stitch markers sometimes cause little gaps in the stitches that they’re between. But other than that, I can’t think of a reason that that’s happening. These holes might even disappear when blocking the hat!
All the best,
Lili
I have taken this out several times, the shaping of the crown has the knit detail on the inside. The decreases are set in, rather than raised, on the right side 😞 Thank you.
Hi Pat,
Thanks for reaching out! Please send the information above along with photos of your work to our customer service team at [email protected] and they can troubleshoot further from there!
Warmly,
Gianna
This project was new to me in that I had not experienced the wrap and turn to make the short rows. I used SugarPlum Circus merino is a lovely pink for a friend’s baby! I love the look. Thanks for sharing the pattern!
I love this hat and I am determined to do it but I cannot get past the ear flaps. I get the front side fine but the turned side is wrong. I have frogged so many times. Is there any chance you can do a video tutorial of the earflap section ?
Hi Angie,
Thanks for reaching out about this. While we do not currently have the resources to make a tutorial video on this pattern, I will absolutely pass on your suggestion to my team! I also would like to suggest sending along some photos of your work to [email protected]. We may be able to give you more detailed help with the ear flaps if we can visualize what’s going on in your project!
All the best,
Lili
Thank you very much. I will do that. Could use all the help I can get.