

Knit Elbow Patches
It’s astounding how many sweaters my dear friend Taylor has with elbow holes. It wasn’t until I spotted her plinking away at a computer keyboard that I realized the cause… she’s a leaner, a focused leaner. The more she focuses, the more she leans, and the more she leans, the more worn her wares become. She most definitely puts her sweaters to work.

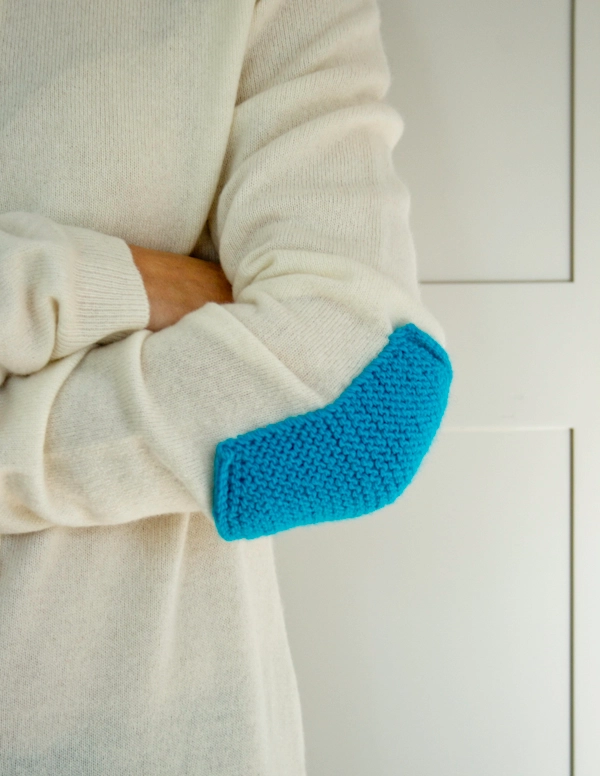
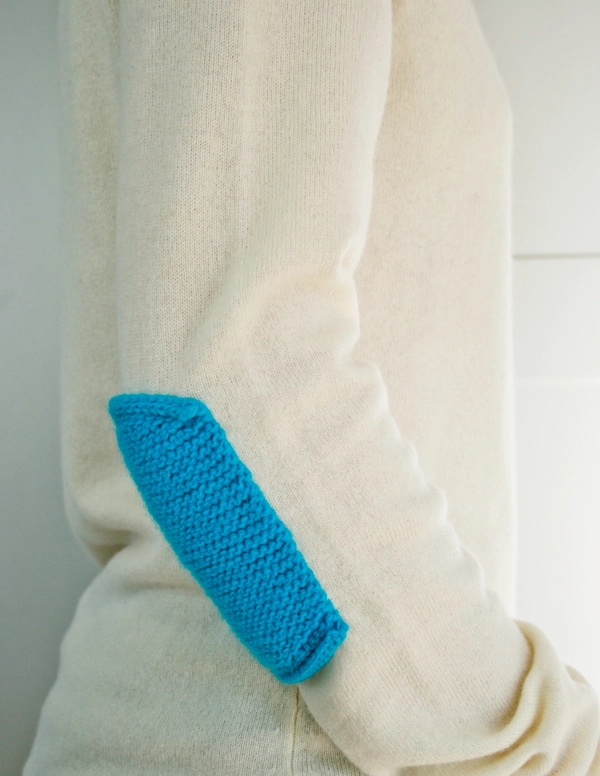
These Knit Elbow Patches were developed with Taylor in mind, out of love and necessity. To knit up these Patches I used two strands of Purl Soho’s brilliantly colored, 100% merino Line Weight, and to sew them onto the offending elbows, I used a single strand of the same. These super simple shapes feature little details that make them work: short row for a tailor-made shape and edges that perfectly hide sewn stitches.

Are you or is someone you know a leaner? Help protect those elbows. Or maybe you didn’t score that sweet sweater you asked for from Santa? Revitalize your old, holey favorites! These Knit Elbow Patches are my solution (and my New Year’s resolution). Happy mending! -Laura

Designed by Purl Soho designer, Laura Ferguson.
Share your progress and connect with the community by tagging your pics with #PurlSoho, #PurlSohoBusyHands, #PurlSohoKnitElbowPatches, and #PurlSohoLineWeight. We can’t wait to see what you make!
Materials
To make 1 pair of Elbow Patches…
- 1 skein of Purl Soho’s Line Weight, 100% merino. Each skein is 494 yards/ 100 grams; approximately 65 (98, 130) yards required (1 skein will make 7 5, 4 pairs.)
- US 4 (3.5 mm) straight or circular knitting needles
- Straight pins (for securing patch before sewing it on garment)
- A ball point needle or fine tapestry needle (for sewing patches to garment)
Gauge
6½ stitches and 12 rows = 1 inch in garter stitch, with yarn doubled
Sizes
Small (Medium, Large)
Dimensions: 3 (3½, 4) inches wide by 4½ (5¼, 6) inches long
Notes
The curved ends of the patches are formed using Short Row shaping. For more information on Short Rows, see our tutorial here.
wrp-t (wrap and turn): Keeping the yarn in back, slip the next stitch purlwise from the left needle to the right needle. Bring the yarn forward as if to purl. Return the stitch from the right needle back to the left needle. Turn the work. NOTE: Because the short rows are worked in garter stitch in this pattern, you do not have to pick up the wraps; simply ignore the wraps when you come to them.
Pattern
Begin
With yarn doubled, cast on 19 (23, 27) stitches. We used a basic Long Tail Cast On.
Row 1 (right side): Knit.
Row 2: Purl.
Rows 3 and 4: Knit.
Shape the First Curve
NOTE: If a ” – ” appears in place of a number for your size, omit this row.
Starting with a right side row…
Next Two Rows: Knit to last – ( – , 10) stitches, wrap and turn (wrp-t).
Next Two Rows: Knit to last – (8 , 8) stitches, wrp-t.
Next Two Rows: Knit to last 6 (6, 6) stitches, wrp-t.
Next Two Rows: Knit to last 4 (4, 4) stitches, wrp-t.
Next Two Row: Knit to last 2 (2, 2) stitches, wrp-t.
Next Row: Knit to end of row.
Work Body of Patch
Work in garter stitch, knitting each row, until piece measures 3½ (4, 4½) inches from center of rolled cast on edge (or when you have approximately 21 [24, 27] “ridges” [1 ridge = 2 rows]), ending with a wrong side row.
Shape the Second Curve
NOTE: If a ” – ” appears in place of a number for your size, omit this row.
Starting with a right side row…
Next Two Rows: Knit to last 2 (2, 2) stitches, wrp-t.
Next Two Rows: Knit to last 4 (4, 4) stitches, wrp-t.
Next Two Rows: Knit to last 6 (6, 6) stitches, wrp-t.
Next Two Rows: Knit to last – (8 , 8) stitches, wrp-t.
Next Two Rows: Knit to last – ( – , 10) stitches, wrp-t.
Finish
Next Three Rows: Knit.
Next Row (wrong side): Purl
Next Row: Knit.
Bind off knitwise.
Weave in you ends and block as desired.
Sew On the Elbow Patch
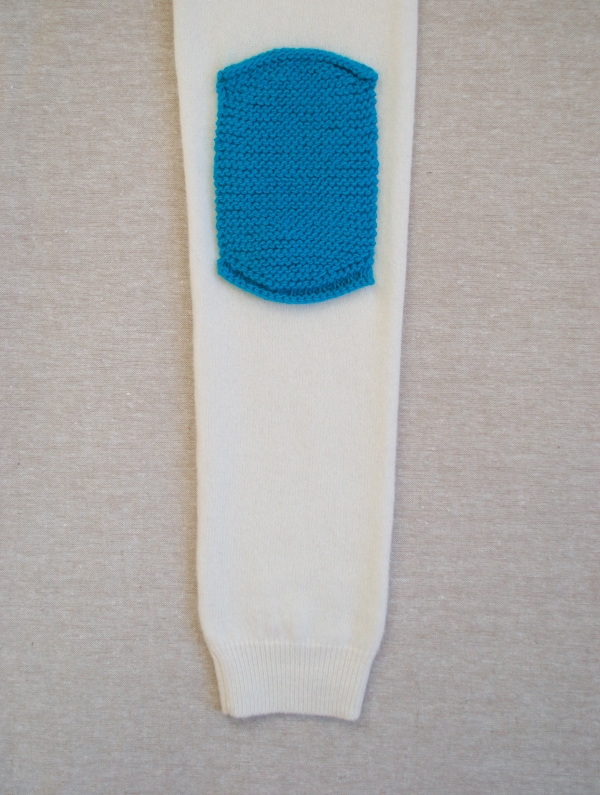
Place the patch over the hole-ridden elbow area of your sweater.
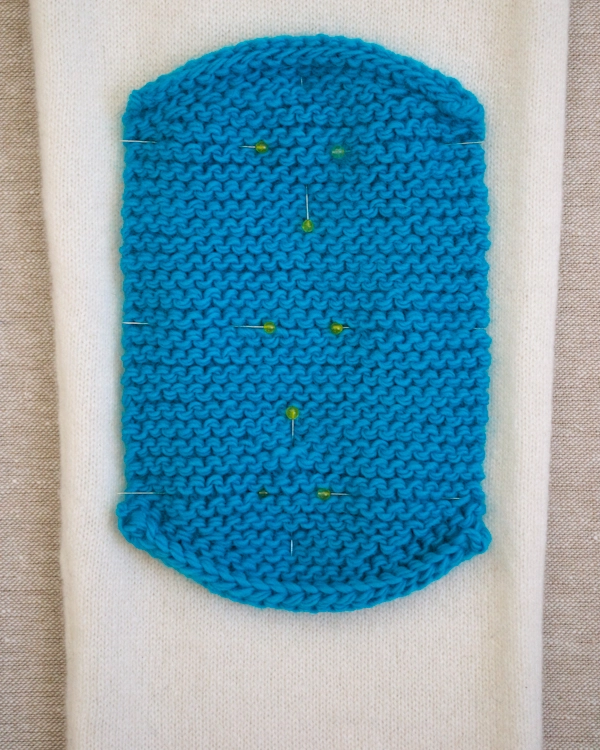
Use straight pins to secure patch in place.
With a ball point needle or tapestry needle threaded with single strand of yarn, sew the patch to your sweater. Here’s how…

Along the vertical edges, use a whip-stitch, bringing the needle from the back of the garment to the front of the patch, coming out between two garter stitch ridges. Take one stitch between each ridge.

Along the curved edges, use a running stitch. Bring the needle from the front of the patch through to the back of the garment, then bring the needle up through the garment and patch approximately 1 knit stitch from where you last went in.
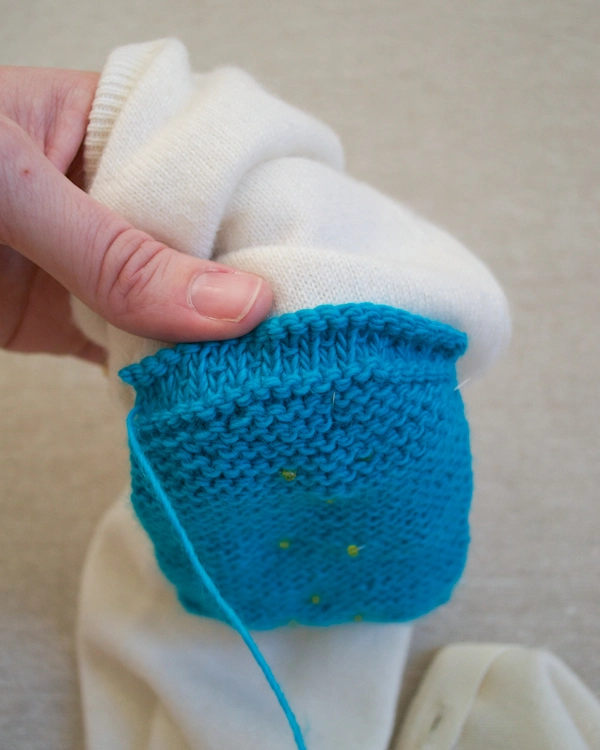
Continue to bring the needle from front to back and back to front at 1-knit-stitch increments all along the stockinette stitches. Once you’ve completed the curved edge, the edge will roll back up, hiding the stitches.


Only you folks could make darned elbos into a fashion statement. 🙂
I love it!
Brilliant!
What does it mean by, "with yarn doubled" for the cast on?
Hi How Do I Cast On-
The yarn in this project is knit doubled, meaning that you hold two strands together and knit them as if they were one.
Hope that answers your question! Thanks for writing in!
Molly
Hi! Would these patches be considered machine washable on cold?
Thanks!
I had been scouring the internet for nice elbow patches. The left elbow of my hoodies always wears out first for some reason 🙂 Thanks for sharing this pattern!
Hi Megan,
I think if you wash them on a gentle cycle on cold you should be fine. You might want to test one before sewing it on your garment to be sure though.
Thanks for writing in.
Laura
hooray, adding these to my sweatshirt sweater!
My patch came out with mirrored asymmetric curves; on the vertical edges, one edge is a couple inches longer. Any ideas what I did wrong?
Hi Suzanne.
I am not sure what happened. Did you follow the short row portion of the pattern correctly? On one end you work wider and wider and the other you work narrower and narrower. It's hard to trouble shoot without seeing the patches. Do you have an hunches about what might have gone wrong? Did any portion of the pattern trip you up?
Would love to try and figure this out with you.
Laura
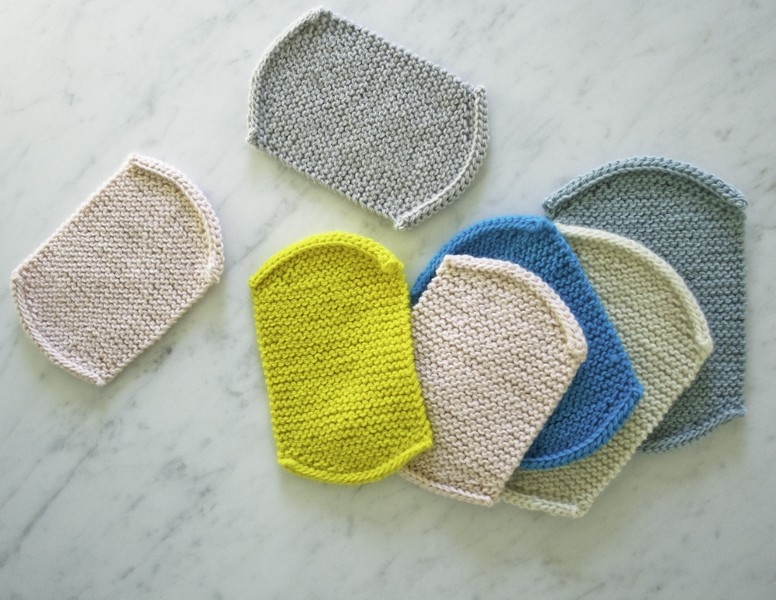
I'm trying to choose my favorite color yarn to order but I'm sure which is which in the images. Can you please share the yarn colors of the patches you photographed?
Hi Stephanie.
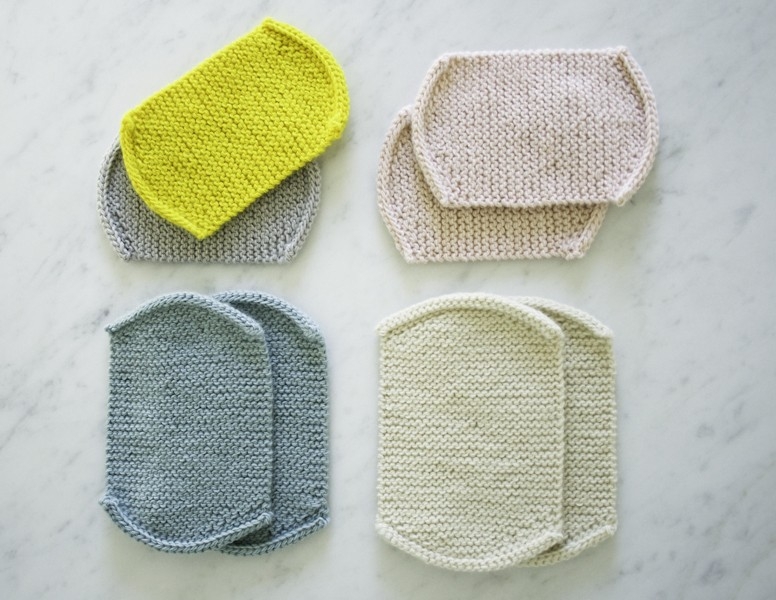
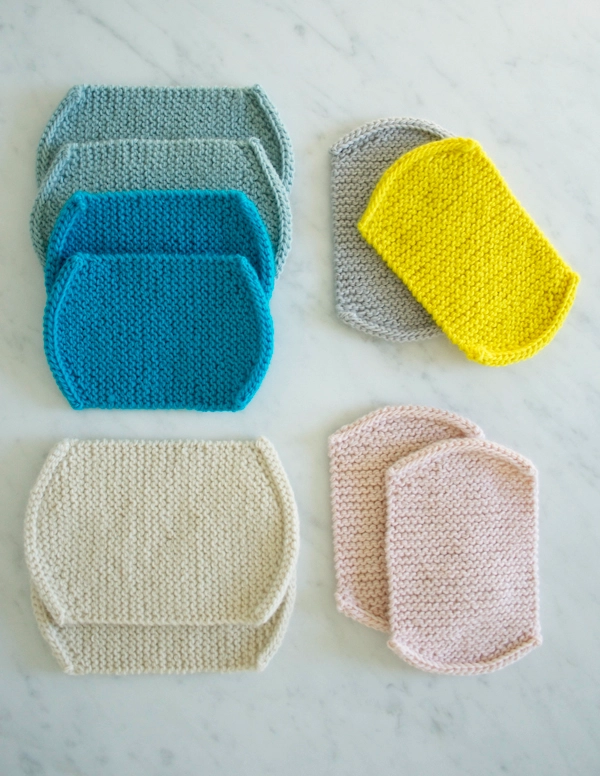
Yes! I would love to share the colors shown here. If you look at the third image from the top…
Ballet Pink
Yellow Yellow
Desert Blue
Heirloom White.
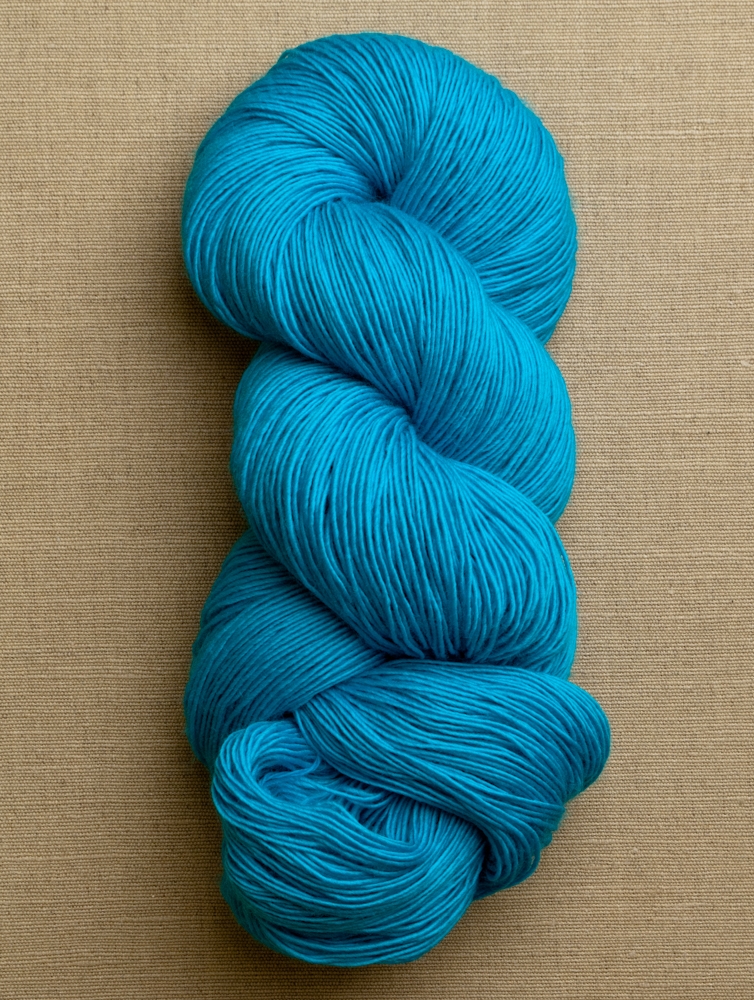
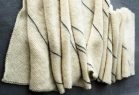
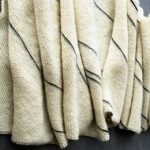
The gray color shown in the second and fourth image is Oyster Gray.
The blue in the how-to photos is Dragonfly Blue.
Hope this helps.
Let me know if you have any questions.
Laura
gracias , es muy importante su documento me gusta y lo hare
Hello
I am looking for patches for little children 5 years . How can I transform this pattern into a little one? Thanks for answering.
Hi Ingrid,
Thank you for your question! First, we’d recommend cutting out a rectangle (cutting from a piece of paper would totally work!) that’s the same measurements as the smallest size of these Elbow Pads, which is 3 inches by 4.5 inches, and seeing if that size might work for what you have in mind!
If you still need a smaller Elbow Pad, I would next recommend casting on 4 less stitches (15 sts), then doing only the last 2 sets of short rows for shaping the first curve (Next Two Rows: Knit to last 4 (4, 4) stitches, wrp-t; Next Two Rows: Knit to last 2 (2, 2) stitches, wrp-t) and then knitting to the end of the row. Then you would work 18 ridges, do just the last 2 sets of short rows for shaping the second curve (just like the first curve), and finish and bind off as it’s written in the pattern.
I hope this was helpful! Don’t hesitate to reach out if you have more questions!
All the best,
Cat
Hello, love this pattern.
I would love to make a table runner for my oval table. I am planning on using 3.75/5 needles.
What is the rule to follow for the curve?
I think I will CO ~75-80 stitches.
Hi Wren,
Thanks for reaching out–and that sounds like a wonderful idea! However, I’m afraid there isn’t a simple way to modify these to be larger, but I can try to give you an idea of what sorts of adjustments you’ll need to make. Basically, the curves are formed with short rows, and because we designed these on such a small scale, the angle that the short rows create gets smoothed out into a curve very nicely. But this won’t be able to happen on a larger scale. So what you’ll need to do to ensure that you get nice curves is vary the rate of the short rows. On the first curve, this means that you’ll need to place the wrap and turn consistently closer to your previous wrap and turn. And then the opposite for the second curve–you’ll need to place the wrap and turn consistently further away from the previous one. This way, you’ll get a nice and smooth curve, rather than an angular edge! Apologies that I can’t give more exact advice on this, but I hope this helps you plan your project.
All the best,
Lili
Hello! I am a knitter, and I recently adapted this pattern with stripes and stockinette to make a pair of elbow patches for myself. I have a small Etsy shop, and I was wondering if I could sell patches with my adjustments — crediting this pattern and including a link, of course. Thank you!
Hi Katelyn,
Thank you for your interest in our patterns! While we’re happy you like our Knit Elbow Patches, our patterns and designs are copyrighted and are for home use only. This means that you can’t use our patterns to make things for sale. We hope you understand!
Thank you for checking with us about this!
All the best,
Lili
Thank you for letting me know, Lili. I totally understand, and I appreciate your time!