Your basket is empty.
Continue Shopping
Blueprint Blanket
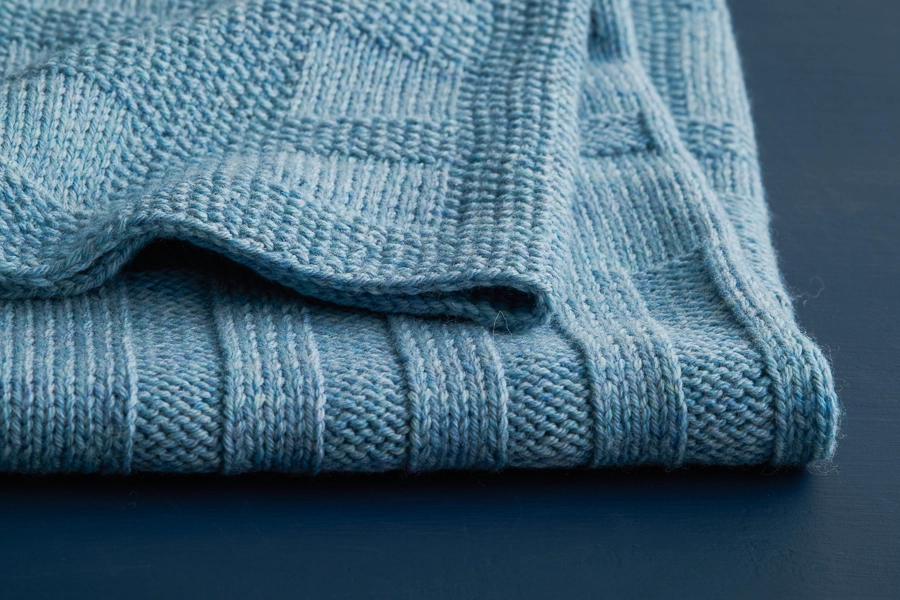
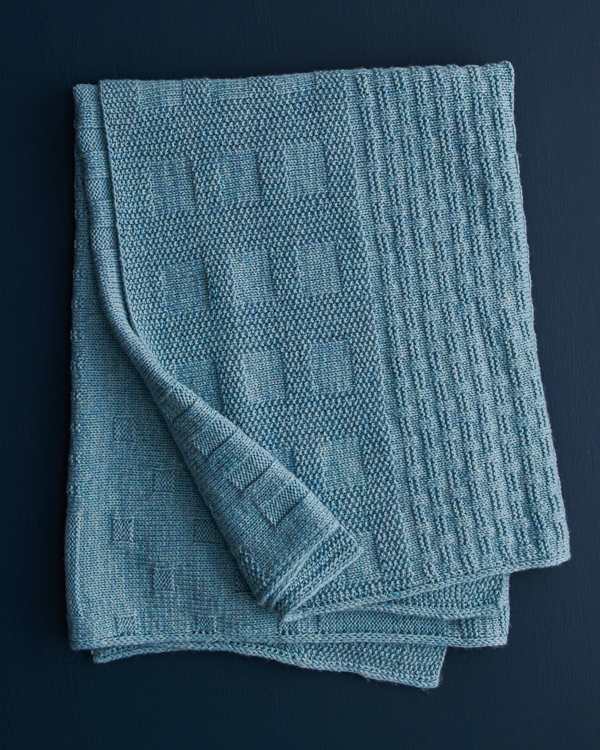
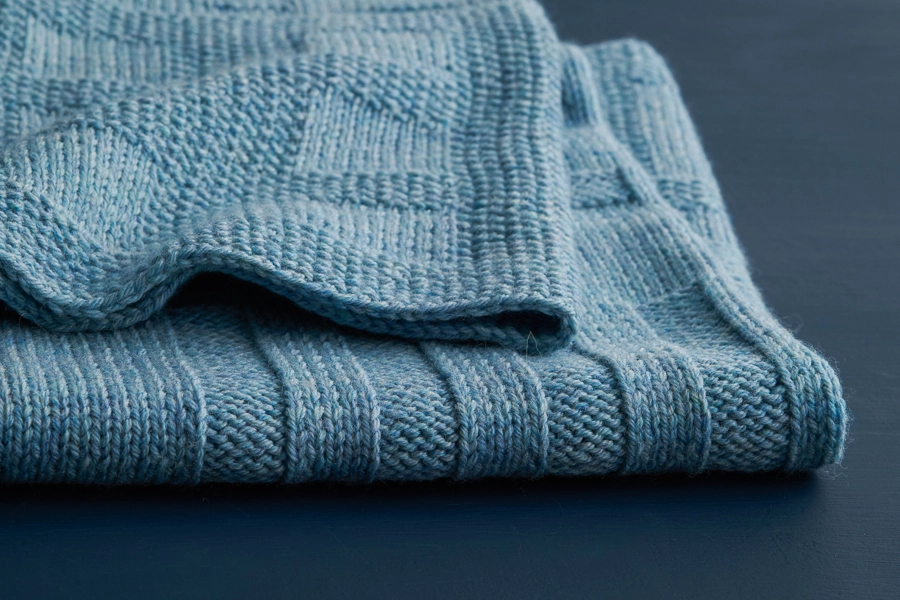
Inspired by the quiet logic of architectural design, our beginner-friendly Blueprint Blanket pattern takes shape in engaging knit-and-purl stitch patterns, culminating in a grid of orderly, geometric forms. Knitting Yarn DK On A Cone—a generous 1,000 grams of gorgeous merino wool—gives the blanket a strong, classic foundation and a soft, inviting feel.
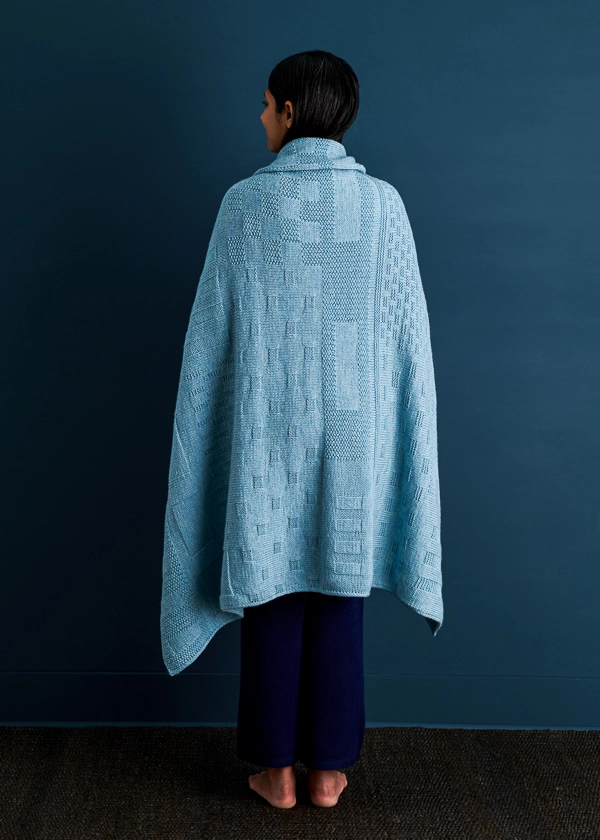
Every stitch pattern in the Blueprint Blanket is created from knitting’s most essential building blocks—fields of stockinette, reverse stockinette, garter stitch, and seed stitch—each fitting together like a well-drawn schematic. What a rewarding exploration of the power of knits and purls!
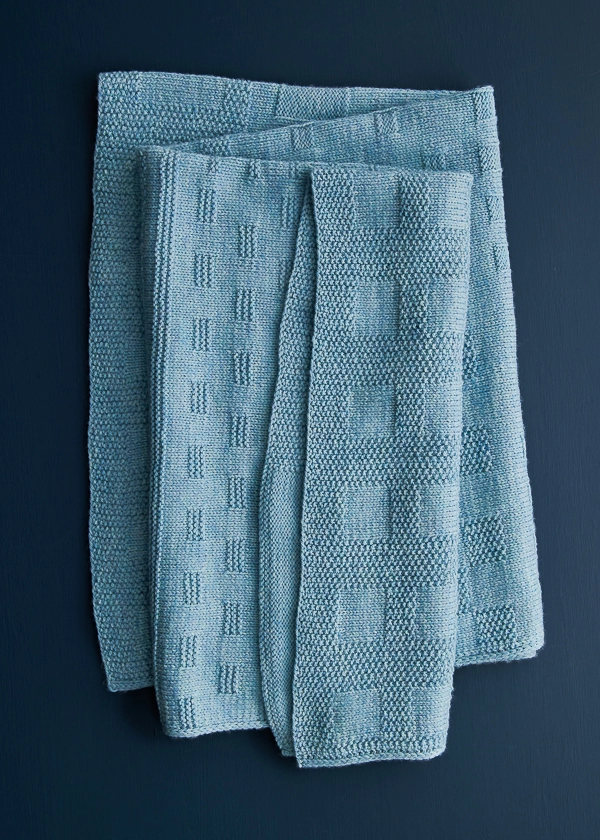
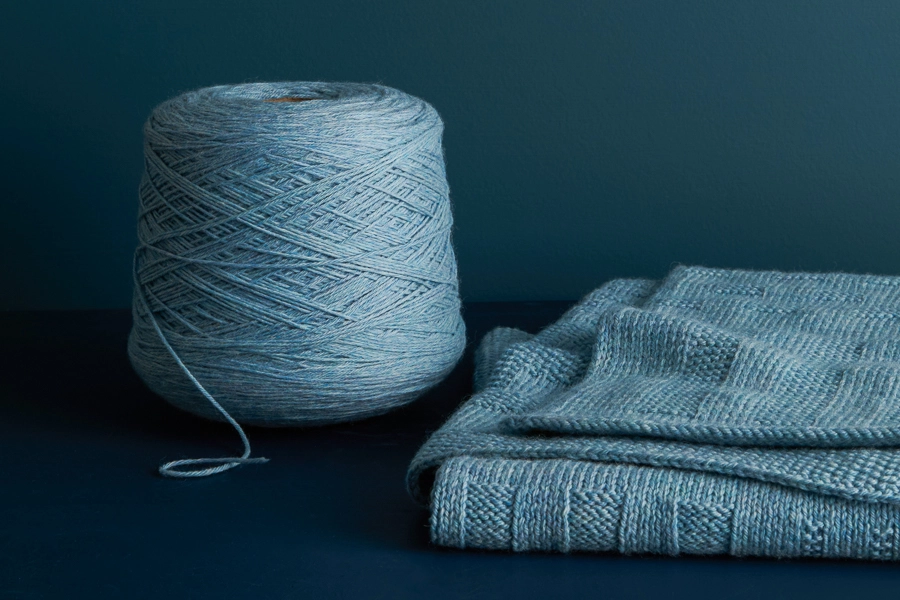
With its round 4-ply spin and cushiony light-worsted weight, Knitting Yarn DK gives your Blueprint Blanket clear stitch definition and a bold architectural presence. You only need one Knitting Yarn DK On A Cone to knit the blanket, which means 2,187 yards of satisfying knitting to look forward to, with no skeins to wind and only two ends to weave in when you’re finished.
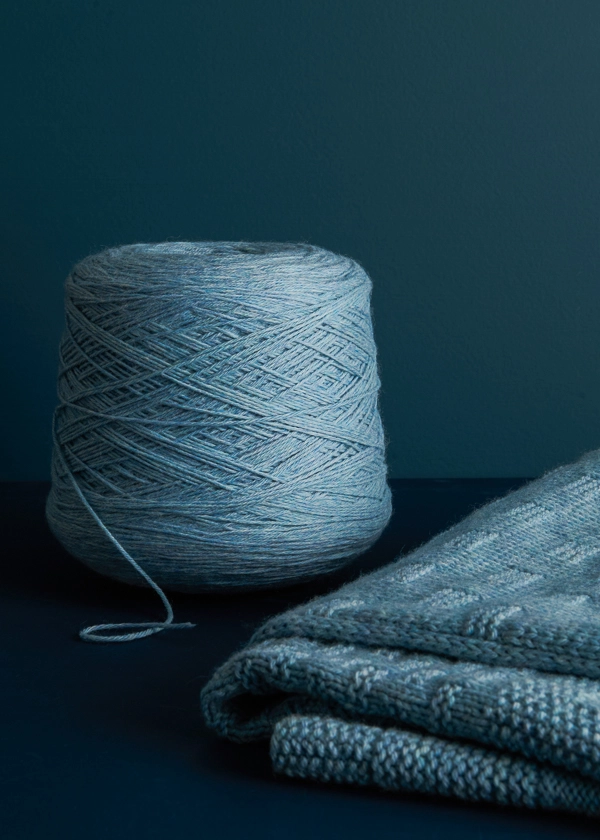
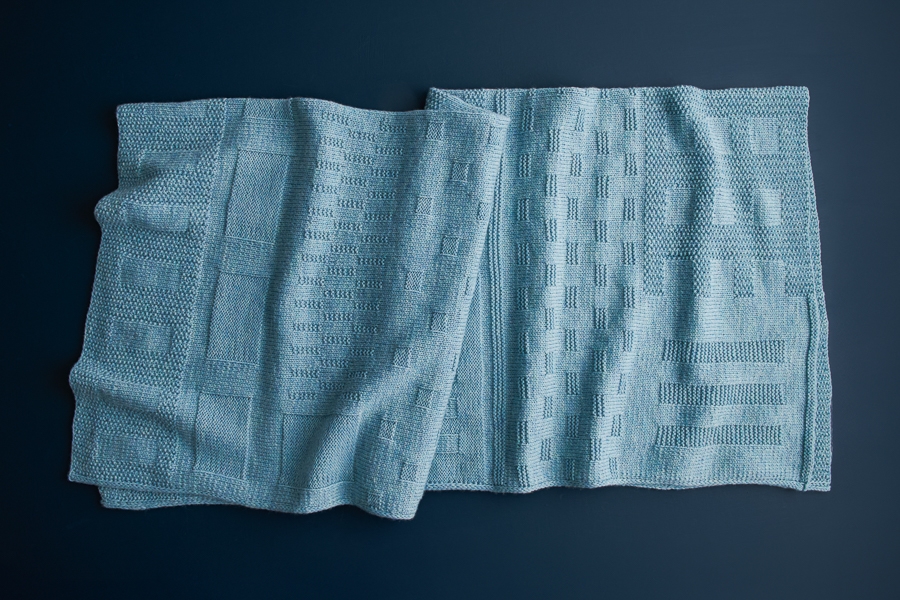
We knit our Blueprint Blanket in Spring Sky, a gentle blue whose luminosity highlights the pattern’s stitchwork. But like any good plan, this design is meant to be interpreted, so choose from any of Knitting Yarn DK On A Cone’s 37 fascinating colors to make it your own.
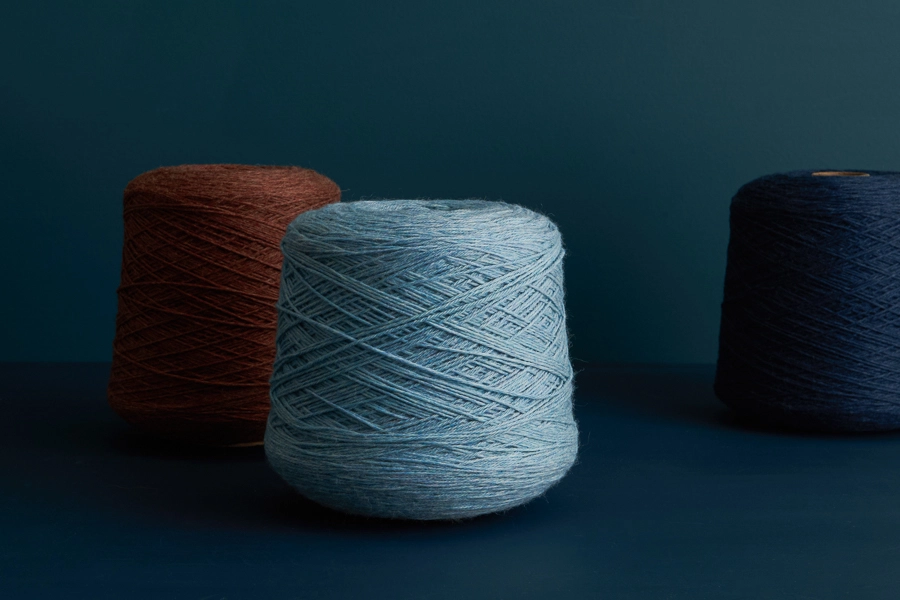
The Blueprint Blanket is a real pleasure to knit, a thoughtful design built stitch by stitch and block by block. Pick up a cone of Knitting Yarn DK and cast on for a knitting experience that celebrates care, craft, and beautiful materials.
Yarn lovers, if you adore the yarn used in this project, you’ll love exploring all of our other yarn collections! Discover over 55 thoughtfully designed yarns in nearly every natural fiber and in every spectacular color you can imagine. Only available here at Purl Soho’s online yarn store, where every skein is created with care and your creativity in mind!
Pattern designed and written by Purl Soho designer, Hiromi Glover. See even more of Hiromi’s work on her Instagram!
Story written by Andrea Lotz for Purl Soho.
Want to print this pattern? On desktop, find the “print” icon in the right margin, and on mobile, scroll to the end of the pattern for it. Use the on-screen instructions to remove anything you don’t want to print!
Materials
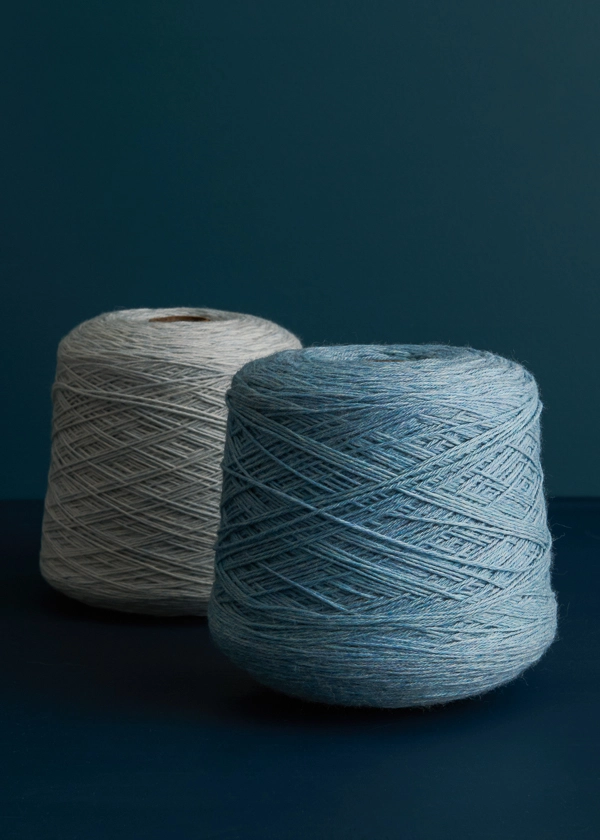
- 1 cone of Purl Soho’s Knitting Yarn DK, 100% merino wool yarn. Each cone of this light worsted/dk-weight yarn is 2,190 yards/1,000 grams; approximately 1,970 total yards required. We used the color Spring Sky.
- US 6 (4 mm), 47-inch circular knitting needles
- Stitch markers
GAUGE
20 stitches and 29 rows = 4 inches in seed stitch (see Notes)
SIZE
Finished Dimensions: 45 inches wide x 53½ inches tall
NOTES
SEED STITCH (FOR GAUGE SWATCH)
Cast on an odd number of stitches.
Row 1: *K1, p1, repeat from * to last stitch, k1.
Repeat Row 1 to desired length.
SLIP STITCHES
On right-side rows: Slip stitches purlwise with yarn in back (wyib).
On wrong-side rows: Slip stitches purlwise with yarn in front (wyif).
PATTERN
Cast on 225 stitches. We used a basic Long Tail Cast On.
Set-Up Row (wrong side): Slip 3 (see Notes), k2, *p1, k1, repeat from * to last 4 stitches, k1, p3.
SECTION A
Row 1 (right side): Slip 3, p1, *k1, p1, repeat from * to last 5 stitches, k1, p1, k3.
Row 2 (wrong side): Slip 3, k2, *p1, k1, repeat from * to last 4 stitches, k1, p3.
Repeat Rows 1 and 2 six more times.
SECTION B
Row 1 (right side): Slip 3, [p1, k1] 3 times, *k7, [k1, p1] 4 times, k1, repeat from * 6 more times, k7, [k1, p1] 2 times, k1, place marker (pm), p88, p1, k3.
Row 2 (wrong side): Slip 3, knit to marker, slip marker (sm), [k1, p1] 2 times, k1, *p7, [k1, p1] 4 times, k1, repeat from * 6 more times, p7, [k1, p1] 2 times, k2, p3.
Repeat Rows 1 and 2 twelve more times, slipping Row 1 markers instead of placing them.
SECTION C
Row 1 (right side): Slip 3, *p1, k1, repeat from * to marker, sm, purl to last 3 stitches, k3.
Row 2 (wrong side): Slip 3, knit to marker, sm, *k1, p1, repeat from * to last 5 stitches, k2, p3.
Repeat Rows 1 and 2 three more times.
SECTION D
Row 1 (right side): Slip 3, p1, knit to marker, sm, purl to last 3 stitches, k3.
Row 2 (wrong side): Slip 3, knit to marker, sm, purl to last 4 stitches, k1, p3.
Repeat Rows 1 and 2 three more times.
SECTION E
Row 1 (right side): Slip 3, p1, k5, [p23, k9] 3 times, p23, k5, sm, purl to last 3 stitches, k3.
Row 2 (wrong side): Slip 3, knit to marker, sm, p5, [k23, p9] 3 times, k23, p5, k1, p3.
Repeat Rows 1 and 2 nine more times, removing marker on last repeat of Row 2.
SECTION F
Row 1 (right side): Slip 3, p1, knit to last 4 stitches, p1, k3.
Row 2 (wrong side): Slip 3, k1, purl to last 4 stitches, k1, p3.
Repeat Rows 1 and 2 six more times.
SECTION G
Row 1 (right side): Slip 3, p1, k5, pm, p20, pm, k84, pm, [p5, k5] 3 times, p5, pm, k31, pm, [p5, k5] 3 times, p5, k7, p1, k3.
Row 2 (wrong side): Slip 3, k1, p7, [k5, p5] 3 times, k5, sm, purl to marker, sm, [k5, p5] 3 times, k5, sm, p6, [k2, p4] 13 times, sm, knit to marker, sm, p5, k1, p3.
NOTE: Whenever you repeat Row 1 for the remainder of this section, slip the markers as you come to them, rather than placing new ones.
Rows 3–12: Repeat Rows 1 and 2 five more times.
Row 13: Repeat Row 1.
Row 14: Slip 3, k1, p7, [k5, p5] 3 times, k5, sm, purl to marker, sm, [k5, p5] 3 times, k5, sm, p9, [k2, p4] 11 times, k2, p7, sm, knit to marker, sm, p5, k1, p3.
Rows 15–24: Repeat Rows 13 and 14 five more times.
Repeat Rows 1–12 one more time, removing all markers on Row 12.
SECTION H
Repeat Rows 1 and 2 of Section F five times.
SECTION I
Row 1 (right side): Slip 3, p5, [k15, p5] 6 times, k12, pm, *[k1, p1] 4 times, k10 repeat from * 3 more times, [k1, p1] 5 times, k3.
Row 2 (wrong side): Slip 3, k1, *[k1, p1] 4 times, k1, p9, repeat from * 3 more times, [k1, p1] 4 times, k1, sm, p12, [k5, p15] 6 times, k5, p3.
Rows 3–6: Repeat Rows 1 and 2 two more times, slipping Row 1 markers instead of placing them.
Row 7: Slip 3, p1, k136, sm, *[k1, p1] 4 times, k10, repeat from * 3 more times, [k1, p1] 5 times, k3.
Row 8: Slip 3, k1, *[k1, p1] 4 times, k1, p9, repeat from * 3 more times, [k1, p1] 4 times, k1, sm, purl to last 4 stitches, k1, p3.
Rows 9–12: Repeat Rows 7 and 8 two more times.
Row 13: Slip 3, p1, k9, [p5, k15] 6 times, p5, k2, sm, *k10, [p1, k1] 4 times, repeat from * 3 more times, k9, p1, k3.
Row 14: Slip 3, k1, *p9, [k1, p1] 4 times, k1, repeat from * 3 more times, p9, sm, p2, [k5, p15] 6 times, k5, p9, k1, p3.
Rows 15–18: Repeat Rows 13 and 14 two more times.
Row 19: Slip 3, p1, knit to marker, sm, *k10, [p1, k1] 4 times, repeat from * 3 more times, k9, p1, k3.
Row 20: Slip 3, k1, *p9, [k1, p1] 4 times, k1, repeat from * 3 more times, p9, sm, purl to last 4 stitches, k1, p3.
Rows 21–24: Repeat Rows 19 and 20 two more times.
Repeat Rows 1–24 one time, then repeat Rows 1–12 one more time, removing marker on last repeat of Row 12.
SECTION J
Row 1 (right side): Slip 3, p61, pm, *k1, p1, repeat from * to last 3 stitches, k3.
Row 2 (wrong side): Slip 3, k2, *p1, k1, repeat from * to marker, sm, knit to last 3 stitches, p3.
Repeat Rows 1 and 2 four more times, slipping Row 1 markers instead of placing them.
SECTION K
Row 1 (right side): Slip 3, p10, [k5, p5] 3 times, k5, pm, p16, sm, [k1, p1] 9 times, k1, pm, k35, pm, [k1, p1] 15 times, k1, pm, k63, pm, [k1, p1] 5 times, k3.
Row 2 (wrong side): Slip 3, k2, [p1, k1] 4 times, sm, purl to next marker, sm, [k1, p1] 15 times, k1, sm, purl to next marker, sm, [k1, p1] 9 times, k1, sm, k16, sm, [p5, k5] 3 times, p5, k10, p3.
Repeat Rows 1 and 2 seven more times, slipping Row 1 markers instead of placing them and removing all markers on last repeat of Row 2.
SECTION L
Repeat Section J one time, removing marker on last row.
SECTION M
Row 1 (right side): Slip 3, p1, knit to last 4 stitches, p1, k3.
Row 2 (wrong side): Slip 3, k1, purl to last 4 stitches, k1, p3.
Rows 3 and 4: Repeat Rows 1 and 2.
Row 5: Repeat Row 1.
Row 6: Slip 3, knit to last 3 stitches, p3.
Rows 7–10: Repeat Rows 5 and 6 two more times.
Rows 11 and 12: Repeat Rows 1 and 2.
SECTION N
Row 1 (right side): Slip 3, p1, k105, pm, knit to last 4 stitches, p1, k3.
Row 2 (wrong side): Slip 3, k2, [p2, k4] 18 times, p3, sm, purl to last 4 stitches, k1, p3.
Row 3 and all right-side rows: Slip 3, p1, knit to last 4 stitches, slipping marker as you come to it, p1, k3.
Row 4: Repeat Row 2.
Row 6: Slip 3, k1, purl to marker, sm, p3, [k6, p6] 8 times, k7, p3.
Row 8: Slip 3, k5, [p2, k4] 18 times, sm, p3, [k6, p6] 8 times, k7, p3.
Row 10: Repeat Row 8.
Row 12: Slip 3, k1, purl to last 4 stitches, slipping marker as you come to it, k1, p3.
Row 14: Repeat Row 2.
Row 16: Repeat Row 2.
Row 18: Slip 3, k1, purl to marker, sm, p9, [k6, p6] 8 times, k1, p3.
Row 20: Slip 3, k5, [p2, k4] 18 times, sm, p9, [k6, p6] 8 times, k1, p3.
Row 22: Repeat Row 20.
Row 24: Repeat Row 12.
Rows 25–48: Repeat Rows 1–24 one more time.
Rows 49–61: Repeat Rows 1–13.
Row 62: Repeat Row 12, removing marker as you come to it.
SECTION O
Row 1 (right side): Slip 3, p1, k52, pm, *k1, p1, repeat from * to last 5 stitches, k1, p1, k3.
Row 2 (wrong side): Slip 3, k2, *p1, k1, repeat from * to marker, sm, purl to last 4 stitches, k1, p3.
Rows 3–10: Repeat Rows 1 and 2 four more times, slipping Row 1 markers instead of placing them.
SECTION P
Row 1 (right side): Slip 3, p1, k10, pm, k30, pm, k12, sm, *k11, [p1, k1] 3 times, p1, k11, [p1, k1] 4 times, p1, repeat from * 3 more times, k11, p1, k1, p1, k3.
Row 2 (wrong side): Slip 3, k2, p1, k1, *p11, [k1, p1] 3 times, k1, p11, [k1, p1] 4 times, k1, repeat from * 3 more times, p10, sm, purl to marker, sm, [k6, p6] 2 times, k6, sm, p10, k1, p3.
Rows 3–12: Repeat Rows 1 and 2 five more times, slipping Row 1 markers instead of placing them.
Rows 13: Slip 3, p1, [knit to marker, sm] 3 times, *k1, p1, repeat from * to last 5 stitches, k1, p1, k3.
Row 14: Slip 3, k2, *p1, k1, repeat from * to marker, sm, purl to marker, sm, [k6, p6] 2 times, k6, sm, p10, k1, p3.
Rows 15–22: Repeat Rows 13 and 14 four more times.
Repeat Rows 1–22 one more time.
Repeat Rows 1–12 one more time, removing markers as you come to them on Row 12.
SECTION Q
Repeat Rows 1 and 2 of Section O five times, slipping Row 1 markers after the first repeat instead of placing them.
SECTION R
Row 1 (right side): Slip 3, p1, knit to marker, sm, *k1, p1, repeat from * to last 3 stitches, k3.
Row 2 (wrong side): Slip 3, k2, *p1, k1, repeat from * to marker, sm, knit to last 3 stitches, p3.
Repeat Rows 1 and 2 one more time.
FINISHING
With right side facing you, bind off in pattern as follows…
Slip 1, [k1, pass first stitch over second stitch] 2 times, p1, pass first stitch over second stitch, bind off knitwise to marker, remove marker, bind off in seed stitch pattern (knitting the purls and purling the knits) to last 4 stitches, p1, pass first stitch over second stitch, bind off last 3 stitches knitwise.
Weave in the ends and gently wet block to finished dimensions.
Share your progress and connect with the community by tagging your pics with #PurlSoho. We can’t wait to see what you make!
Learn About Knitting Yarn DK On A Cone + All Our Beautiful Yarns
Knitting Yarn DK On A Cone is an absolute dream for knitting blankets and garments! A beautiful, ready-to-knit 1000-gram cone of light worsted/DK-weight yarn means that for 2,187 yards of knitting, you’ll only have two ends to weave in… What could be better? Made with 100% beautiful merino wool, Knitting Yarn DK’s 4-ply spin and toothy feel gives textures, cables, and colorwork incredible stitch definition and cushiony dimension. Need some contrast colors or not quite so much yarn? Shop our collection of Knitting Yarn DK in 100-gram balls, too!
More Free Knitting Patterns
- Be sure to explore our vast collection of (mostly free!) Knitting Yarn DK knitting patterns and cast on!
More Light Worsted/DK-Weight Yarns
- Shop our entire collection of light worsted/DK-weight yarns (What does DK-weight yarn mean, really? Our guide to DK yarn will answer your questions and demystify.)
- If you want to use a different yarn, be sure to take the time to get the correct gauge. Need help? Check our All About Gauge Tutorial, our Yarn Substitution article, and our Complete Guide To Yarn for lots of helpful information.
More Yarns With Similar Fiber
- Shop Knitting Yarn Fine, this yarn’s fingering- to sport-weight sibling
- Shop merino wool yarn
Looking for more inspiration? Explore all of our knitting patterns (including tons of free knitting patterns) and knitting tutorials, buy one of our many knitting kits and yarn bundles, and shop for beautiful yarn. We have over 55 gorgeous natural fiber yarns in 1,000s of magnificent colors, designed to bring integrity, beauty, and joy to your next knitting project and only available at Purl Soho!





Love this, my hobby is knitting it’s something my mother taught me
Hi Isabelle,
We’re so glad that our new Blueprint Blanket caught your eye, and we’re so glad your mother taught you to knit!
Warmly,
Andrea
Is there a pattern to make it crochet?
Hi Olga!
Thank you for writing in! At this time, the Blueprint Blanket is only available as a knit pattern, and we don’t have a crochet version. We really appreciate your interest, though!
Warmly,
Megan
Very beautiful afghan that looks like it would be interesting to knit. If you wanted to make it 60” wide and 70” long, how would I adjust the pattern?
Hi Fran!
Thank you so much for writing in! Unfortunately, Blueprint doesn’t have a repeating stitch pattern. Each block is placed individually to create the overall design. Because of that, resizing would require rearranging the blocks in each section rather than adjusting a simple repeat.
Warmly,
Megan
Can the Blueprint Blanket be modified to make a shawl? If so would you share the stitch count calculations?
Hi Margaret!
Thanks so much for writing in. Unfortunately, the Blueprint pattern doesn’t have a repeating stitch pattern. Each block is placed individually to create the overall design. Because of that, resizing isn’t straightforward and would require rearranging the blocks in each section.
Warmly,
Megan
Is the pattern reversible?
Hi Mindy,
We’re so glad our new Blueprint Blanket has caught your eye! The pattern is not the same on each side, but there is a lot of visual interest on both sides of the blanket and looks beautiful on both sides.
I hope this helps! Please let us know if you have any other questions!
Warmly,
Andrea
What an interesting pattern to knit. Thank you. My question: Is the cast on edge the 45” side or the 53.5 side?
Hi Angela,
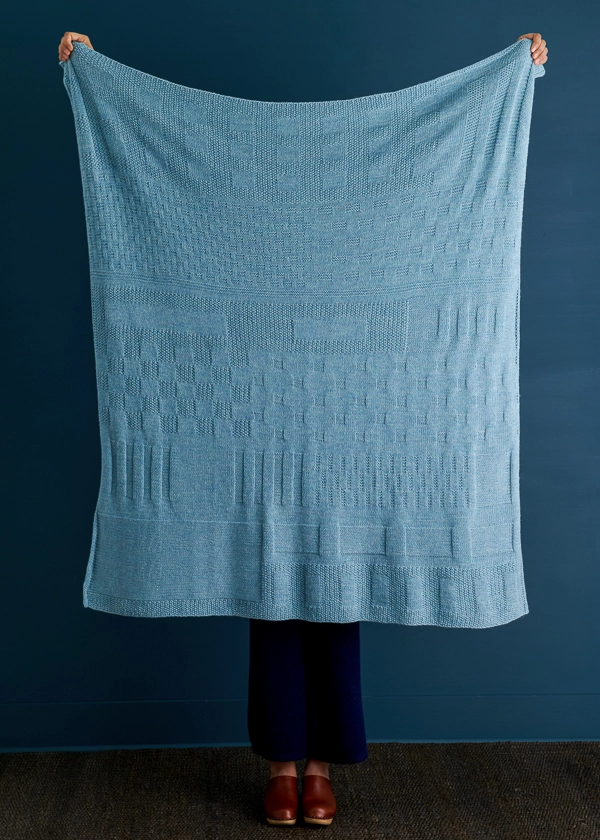
We love that Hiromi was able to create so much visual interest with just knits and purls! The cast on edge is the 45″ side. If you look at the photo with the blanket held up, the blanket is knit from the bottom edge up.
I hope this helps! Please let us know if you have any other questions!
Warmly,
Andrea
I’d like the Blueprint pattern
I’ll buy the yarn in the green I can’t save or print
Hi Anne-Marie,
We’re so glad this new pattern caught your eye, and thanks so much for asking about printing! On desktop, find the “print” icon in the right margin, and on mobile, scroll to the end of the pattern for it. Use the on-screen instructions to remove anything you don’t want to print!
I hope this helps! Please let us know if you have any other questions!
Warmly,
Andrea
Love love love the pattern! Is it possible to substitute the Cotton on the Cone for this? I live one the Southwest desert and a cotton blanket would be more practical.
Hi Joanne,
Thanks so much for your question!
Cotton Pure is a great option for this blanket! Because Cotton Pure is a little bit thinner and a different fiber, we recommend knitting and blocking a swatch to make sure you are able to make gauge and you like the look and feel of the final fabric. You may prefer the fabric that is made with smaller needles and has a tighter gauge. If that is the case, you’ll have a smaller finished blanket.
I hope this helps! Please let us know if you have any other questions!
Warmly,
Andrea
I purchased Purl Soho Cotton Pure On A Cone a few months back for a different project but love this pattern – is this a suitable yarn to use for this blanket?
Hi Beth!
Thank you for writing in! Yes, you can absolutely use Cotton Pure for this blanket. Since Cotton Pure is a sport weight and the pattern is written for Knitting Yarn DK, you’ll just want to knit a gauge swatch and adjust your needle size as needed. The good news is that with Cotton Pure on a cone, you’ll definitely have plenty of yarn for the project.
Happy knitting!
Megan
Thank you for sharing the beautiful pattern ! Wondering if I can make this with 10 skeins of Good wool-any change in size?
Hi Utako,
We’re so glad our new Blueprint Blanket has caught your eye!
Good Wool would be a great choice for this blanket. Good Wool is a bit loftier than Knitting Yarn DK, so we recommend knitting and blocking a swatch to make sure you are able to meet gauge and you like the look and feel of the final fabric. As long as the gauge is the same as the gauge in the pattern, you’ll see no change in the final size!
Please let us know if you have any other questions!
Warmly,
Andrea
What color is the blanket in the photo of this pattern? I’d like to get a cone of it.
Hi Antonia,
We’re so glad you love the Blueprint Blanket! We used the color Spring Sky for our sample.
Please let us know if you have any other questions!
Warmly,
Andrea
I would knit it in my favorite color..pastels of mauve..
Purple
Hi Olive!
This blanket would look gorgeous in Lavender Fog or Chive Blossom! Please send us a photo if you make it! We’d love to see!
Warmly,
Andrea
Love the pattern!
It would be great if were converted to a baby/crib size!
In Section N, row 5 is missing instructions. (row 4 is repeat row 2) and then jumps to row 6.
Thank you,
Terri
Hi Terri!
Thank you so much for writing in! You’re absolutely right to pause there. In Section N, Row 5 is worked the same as Row 3. All right-side rows in that section follow the same instructions. So Row 5 isn’t missing, it just repeats that established right-side row.
As for converting it to a baby or crib size, since the design is made up of individually arranged blocks rather than a simple repeating stitch pattern, resizing would involve reorganizing and scaling down the block layout rather than adjusting stitch counts evenly across.
Warmly,
Megan
Hello- Can I knit this on long straight needles? Does it change anything about the pattern?
Thank you!
Hi Jill!
Thanks so much for writing in with your question!
We recommend knitting this blanket on circular needles because they provide ample space for your 225 stitches. I wouldn’t recommend knitting this on straight needles, because you’ll have a hard time fitting the stitches… (The maximum on most long straight needles is somewhere around 150).
I hope this helps! Please feel free to reach out with any other questions you might have!
Happy knitting!
Hills
I am knitting the Blue Print Blanket pattern. Section B, Row 2 instructions only add up to 224 stitches, not 225. I have calculated it many times and come up with the same numbers. What am I doing wrong?
Thank you
Hi MJ!
Thanks so much for reaching out with your question! I totally see how this could be tricky, and I think I can see where the confusion may be arising. On Row 2, it says “”knit to marker”” which should include your 3 slipped stitches and 89 purl stitches from the row before, totaling 92 stitches. On the other side of the marker, you should have 133 stitches.
Keep an eye out for “more times” vs. “times,” like when it says to repeat the pattern within the asterisk 6 more times vs. repeat what’s within the brackets 2 times. One note, the stitch count from the section within the asterisk ought to add up to 112, and, just before that section, there’s a lone K1.
Please feel free to reach out with any other questions you might have… we’re happy to help! I hope you enjoy knitting the rest of your Blueprint Blanket!
Happy crafting!
Hills
Thanks Hillary. My mistake was that I thought the knit to marker was 88 stitches like Row 1 (not 89)
Love this pattern!
Hi MJ!
Thanks so much for getting back to me, it really helps to know what the solution was in the end! I’m so glad you found the resolution and its working well for you! I’m also so happy to hear you love the pattern, too. You’ve got this and we can’t wait to see the result!
Happy knitting!
Hills
Love the Blueprint Pattern because it’s interesting to see how the pattern and stitches unfold. The cone smells strong. The blanket not as strong. How do you wash and dry this big blanket?
Hi CS!
Thanks so much for writing in! I’m so glad you’re excited about the Blueprint Pattern! I haven’t heard this concern yet regarding Knitting Yarn DK On A Cone, but sometimes smells can enter through transit, etc. I would recommend sending an email to [email protected] and we would be happy to look into this further for you!
Happy knitting!
Hills
Hi in row I, the stitches add up to 207? Or am I miscounting? Slip 3+ p5+ [k15,p5]x6=120+ 12+[18]x3+10+k3
Hi Shirley!
Thanks so much for writing in with your question! Great work so far on your Blueprint Blanket! I think I see where the hiccup may be… I can see how this could be tricky, and I’m happy to help clear up any confusion!
I rewrote your math below:
Slip 3+ p5+ [k15,p5]x6=120+ 12+[18]x4+10+k3
The row is written… Row 1 (right side): Slip 3, p5, [k15, p5] 6 times, k12, pm, *[k1, p1] 4 times, k10 repeat from * 3 more times, [k1, p1] 5 times, k3.
So you were just missing a repeat between the asterisk where it says “3 more times” times instead of “3 times.”
I hope this helps! Please feel free to reach out with any other questions you might have!
Happy knitting!
Hills
Section I Row 20
Last instruction:
…p to last 4 sts, SM, k1, p3
SM – should it be PM.
Why do you need a marker?
Hi C!
Thanks so much for reaching out with your thoughtful question. Great work on your Blueprint Blanket so far!
We took a look at this section of the pattern and removed the SM from row 20. Thank you so much for letting us know!
Please feel free to reach out with any other questions you might have!
Happy knitting!
Hills
Hello, is there a schematic for the patterns that show the stitches visually by row?
Hi Silke,
Thank you so much for reaching out! I sent you an email, which I hope will be helpful for you!
Please feel free to reach back out with any other questions!
Happy knitting,
Hills
Is it possible to get a chart for this pattern?
Hi Helen!
Thanks so much for reaching out. I’m so glad you’re considering the Blueprint Blanket!
Sadly, I don’t have a chart available for this pattern, but I’ll be sure to pass your interest along to our team. Thank you so much for sharing your thoughts with me! If you’re looking for a blanket pattern which uses a chart, I’d suggest the Porto Blanket! They have a similar style, too.
I hope this helps, and happy knitting!
Hills
I love interesting blankets and this surely fits the bill. I was wondering whether I could use a worsted / aran weight yarn? (I have a big stash!) I am not sure how I would go about adjusting the gauge? I know this would take more yarn too – is there a way of estimating the amount required? Thank you for your time, too. You always provide very thoughtful responses to everyone’s questions. I’m sure I speak for most when I say how much we appreciate that.
Hi Sue,
Thank you so much for reaching out. I’m so glad to hear the Blueprint Blanket caught your eye!
A very rough estimate would be to purchase 10% more yarn. This pattern calls for 1970 yards, so you may need 2167 yards… I’d always recommend knitting (and blocking) a gauge swatch to ensure you like the look and feel of the resulting fabric for your needle choice. You can also use the weight of your swatch to make a more specific yardage estimate. I’d recommend searching for “how to use your swatch to estimate yardage” in your favorite search engine for more information.
I hope this helps, and please feel free to reach out with any other questions you might have!
Happy knitting,
Hills
Quick question: I’m almost finished with the blanket and notice that section Q (a repeat of section O) is the same as section R. So, in effect, I’m finishing the blanket with a total of 14 rows of section O. Do I have this right? Thanks.
Hello Kathy,
Thanks so much for reaching out with your great question! You’re absolutely correct!
Section Q should repeat the first two rows of Section O five times total. This should add up to 10 rows. Section R then repeats two rows twice, for 4 rows total. That brings us to 14 rows! You’re ready to cast off following the finishing instructions.
I hope this is helpful, and please reach back out with any other questions you have!
Edit: An eagle-eyed knitter brought this error to my attention, thank you so much! Section R is repeating two entirely separate rows than those from Sections O + Q. You should have 14 rows total: 10 from section Q’s repeat of Section O, and 4 from Section R. I’m really sorry for any confusion this caused!
The instructions:
Expanded:
Happy knitting,
Hills
Is this an AI response? For Kathy, the difference between section O and R is that after you slip the marker on the wrong side, you Knit to the last three stitches rather than Purl like in section O.
I came looking for a different answer. In section R, wrong side: is there really an additional k1 before slipping the marker to knit to the end? Would it not be the same slip 3, k2, *p1,k1 *to marker, sm, knit to last 3.
Hi Lindsay,
Thanks so much for bringing this to my attention…I’m really sorry for the trouble it caused. I genuinely appreciate you pointing it out!
I went back into the previous comment to make a clearer edit so it’s easier to follow. I also want to reassure you that it’s really us (human beings) reading and replying to all of our wonderful community’s questions and comments. We absolutely love hearing from our knitters, and your feedback means so much to us. I’ll definitely keep your thoughts in mind moving forward.
I’ve also talked to our design team, and I’m excited to let you know that they’ve corrected the wrong side row in Section R after reviewing your comment. Thanks again for your sharp eyes! We’ve removed the k1 before the slipped marker, and the row now reads:
We’re so grateful for our super observant community and for the skills it takes to catch these kinds of things. Thank you for sharing your expertise with us.
I hope you’re really enjoying working on your Blueprint Blanket! Finishing a blanket is such a milestone…congratulations in advance!
All the best,
Hills
Is this really “beginner-friendly?” (I sure hope so. I really love it.)
Hi Donna,
Thank you so much for reaching out! I’m so glad to see you found the Blueprint Blanket (and glad to hear you love it as much as we do!).
This could be a really great project for a beginner (and welcome to the craft!). All of the patterns throughout this blanket are made with combinations of knits and purls. It would be a great way to learn the different patterns these stitches alone can create, as well as an opportunity to grow skills in reading your knitting and using stitch markers to keep track of your patterns… I think this could be a great way to hone these skills!
I hope this project works out for you, and please don’t hesitate to reach out with any questions you might have as you work.
Happy knitting!
Hills
Is Section J the start of a 1×1 ribbing, or am I doing something wrong and it should be seed stitch? It would be very helpful to have a snippet of the pattern either graphically or just a photo of the section of the blanket highlighted for each to make sure we’re getting the look intended.
Hi Ashley,
I’m so sorry to hear this is causing some frustration for you, and I’m happy to help. I absolutely love this suggestion and I’ll be sure to pass it along to our team. Thank you so much for sharing this idea with us.
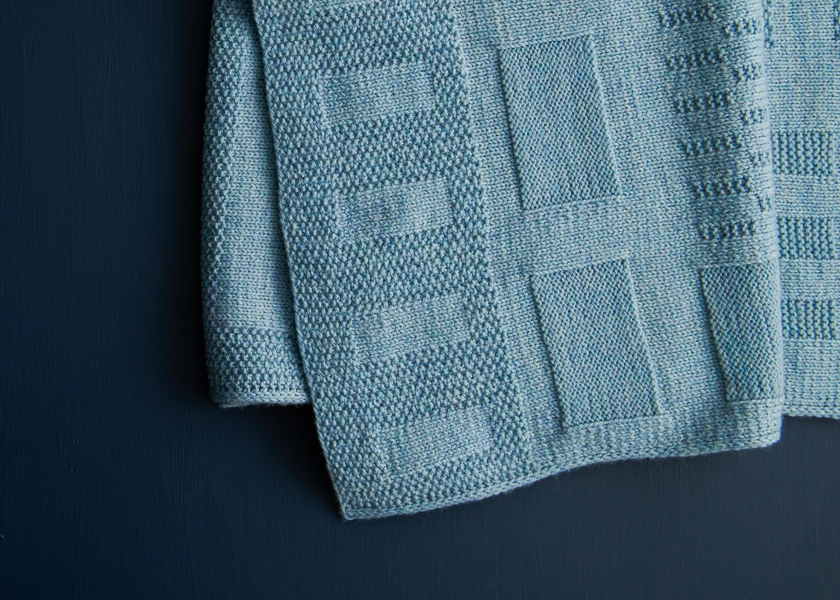
In the meantime, it looks like Section J is at the center of the blanket, just after the section with the repeating squares. It features ribbing surrounding two stockinette rectangles and some narrow columns at the far end. You can take a look in the photo at the bottom of the page.
If you’re still running into trouble, please feel free to email us at [email protected] or to schedul;e some time to work on it together through a 1-on-1 Help session. We would love to help this be a stress-free, and fun project.
I hope this helps, and please don’t hesitate to reach out with further questions or suggestions!
Happy knitting,
Hills
Do you have any suggestions for blocking this large blanket?
Also, the recommended yarn on the cone I am using is not washable. Any suggestions on cleaning the blanket?
Hi Marcia,
Thank you so much for reaching out! I am so excited for you to finish your Blueprint Blanket!
This is such a great question. I’d suggest blocking the blanket in the tub or a bucket. You can lay it flat on a table with a towel under it! You might also consider blocking wires for the length which would allow you to string the wires through the edges and pin the wire down instead of pinning the project…these are pretty helpful for projects with larger lengths like shawls, scarves or blankets. I’d also suggest spot cleaning to avoid having to wash a large project many times (with the seasonal full wash).
I hope this works well for you!
Happy knitting,
Hills
Hi,
Im on section P and somehow im finding the number of stitches is not matching to cast on. What could I be doing wrong? First section to last marker 56 then 18,20
,18,20,18,11,7? That is 168?
Thank you!
Hi Kari,
Thanks for reaching out about this! We’re happy to help clarify… Section P should have the same number of stitches as the cast on (225). I think the issue is coming from not working the 38-stitch section enough times (it should be worked 4 times total). Here is the first row of this section, for reference:
Row 1 (right side): Slip 3, p1, k10, pm, k30, pm, k12, sm, *k11, [p1, k1] 3 times, p1, k11, [p1, k1] 4 times, p1, repeat from * 3 more times, k11, p1, k1, p1, k3.
The stitch count between the markers is: 14 | 30 | 12 | 169, which will give you the 225 stitches that you need.
The largest section of 169 stitches breaks down into a working a 38-stitch section four times, and then working the final 17 stitches. [38 x 4 = 152] + 17
We hope this helps, but please let us know if you have any other questions!
Kindly,
Allison
Great, thanks ill get back working!
Kari
Hi, I am working on Section B and am having some difficulty with the instructions for Row 1. After double and triple checking to be sure I have 225 stitches in total, I still haven’t been able to get the stitch count to work out properly. I see from prior questions there should be a total of 112 stitches just prior to the purl 88 stitches and, try as I might, I cannot get that part correct. I think I’m not understanding the number of times the extra knit one should happen. Any suggestions would be most appreciated.
Hi Karen,
I’m so sorry to read that you’ve found yourself having a bit of trouble here, and I’m happy to help.
I’ve pasted Section B below with expanded instructions.
SECTION B
I hope this is helpful, and please feel free to reach back out with any follow-up questions.
Happy knitting,
Hills
I feel silly asking, but how do I slip 3, and purl 1. It is in the beginning of the pattern. 😆I am stuck right at the beginning. This is going to be a long project.
Hi Shirley,
This isn’t silly at all! We’re always so happy to answer your questions.
This technique can feel a little awkward at first! I totally understand your hesitance. As you continue to work this I-cord selvage edge, you’ll find the spot where you slip 3 cinches up into a tube. It can take a few inches of work to really see this construction zip up. You may consider holding your tension a little more tightly when holding the yarn in the front and purling the next stitch. This can help keep the structure of the I-cord a bit more uniform as you work it up.
I hope this is helpful. If you find you have any other questions, please don’t hesitate to reach back out. There are no silly questions in knitting… One of the coolest parts of the craft is that there is always something new to learn, regardless of your skill level! We’re all just learning and sharing knowledge here, and we’re so very happy you’re here with us!
Happy knitting!
Hills
Yes! Thank you for asking that question Shirley! I came here to ask the very same question. I’m glad I read through all the questions and answers first so I didn’t have to bother Hills with a duplicate.
And thank you so very much for all your help Hills!!!
Hi Lorrie,
Never a bother 🙂 I’m so glad you found what you were looking for! And I really hope you enjoy the Blueprint Blanket. Please don’t hesitate to reach out with any questions, anytime. We’re genuinely thrilled to help out.
Kindly,
Hills
About 2/3 done knitting this blanket. The ever changing pattern keeps me interested and the pattern looks so nice. Love it! Yarn is nice to work with and love the single cone. Thinking ahead to washing and blocking the finished product. How do you recommend washing it? Wool has a noticeable “sheepy” smell. Thx!
Hi Patricia,
Great work on nearing the finish line with your Blueprint Blanket! I’m really glad to read that you’re loving the pattern and the yarn…thank you for your kindness!
We recommend handwashing and laying the project flat to dry. You might find it helpful to use a “strucket” (a bucket with a built-in strainer) for larger projects. You might also consider picking up some Sweater Soap or wool wash… they come in lovely scents! You can read more about hand washing your knits in our tutorial called, “How to Hand Wash a Sweater“.
I hope this is helpful!
Happy knitting,
Hills
Hello, can this pattern be modified for the baby blanket size? If so, could you please advise. Thank you. Katya
Hi Katya,
Thanks so much for reaching out. I’m really glad to see you’re interested in a baby blanket as your next project!
Since the Blueprint pattern doesn’t have a repeating stitch, each block is placed one by one to build the overall design. That makes resizing a bit tricky and would involve rearranging the blocks in each section.
You might consider taking a look at the Stitchwork Blanket for a similar feel in a crib sized blanket. You could also consider the Gemwork Blanket, or the Chamomile Blanket which can both be worked in a crib size, as well.
I hope you find the perfect next project! Please feel free to circle back anytime.
Happy knitting,
Hills
I’m about 1/3 of the way completed with my blanket, but I dropped some edge stitches and I have no idea how to pick them back up, so I’m at a stand still. I’d love to be able to send a picture and would appreciate some advice for how to fix my mistake so I can keep moving forward. Thank you! I’m loving working up the blanket so far!
Hi Lindsey,
Oh no! I’m so sorry to read that you’ve dropped some edge stitches! It can be a little tricky to pick up stitches from the I-cord edge, and I’m happy to help.
One thing to consider: the stitches are slipped every other row, so you will have half as many rows to repair when compared to the body of the blanket. I typically will place a removable marker on each dropped stitch. Then, one by one, I’ll ladder up with a repair hook (or small crochet hook), keeping in mind there should be a bar in front of each of the 3 slipped stitches, which wraps around to the other side, creating the lovely I-cord effect.
If you’re still running into trouble, please don’t hesitate to reach out via email for more troubleshooting! We can be reached at [email protected]. You may also find it helpful to search for tutorials for I-cord repairs. We also offer 1-on-1 Help sessions, which may be on pause for the moment… You can also reach us by telephone at (800) 597-PURL to verbally walk through this concern.
Wishing you the best of luck on this repair! We’ll keep an eye out for a reply from you, just in case!
All the best,
Hills
I’m very allergic to wool. What would you recommend as a replacement that won’t require changing parts of the pattern instructions?
Hi Dg,
Thank you so much for reaching out! I’m very happy to consider some wool alternatives with you.
The best option for this pattern would be Simply Yak. It would still maintain most of the properties of wool, while being hypoallergenic! Another option might be Cotton Chirp. It would knit up a bit differently due to the difference in fiber properties; you may notice extra drape and a lack of memory or elasticity in the fiber. Folks have knit in cotton, though, with success here.
I’d always recommend knitting and blocking a gauge swatch. This is a fantastic opportunity to check that you achieve the gauge listed in the pattern, or whether you need to resize your needles. It’s also a great chance to see how you like the look and feel of the finished fabric. All of our gauges are listed for blocked swatches.
I hope this helps, and that you find the perfect yarn substitute. Please feel free to reach out anytime.
Kindly,
Hills
Hi! I’m struggling in section G, where you go back to knitting the first row and alternate with row 14. The stitch markers don’t seem to line up with the stitches even though I know they should, maybe I need to count and make sure I didn’t drop any :(. I love this pattern but I can’t seem to get this part right! Is there anyone who has mapped the different sections to what they’re supposed to look like? I think if I had a visual it might help.
Hi Jennifer,
I’m so sorry to read that you’ve run into some trouble here, and I’m happy to help!
While we don’t currently have a “map” or legend for this project, I think it’s a great idea and will be sure to pass it along to our team. In the meantime, it might help if you take a look at the last photo in which the blanket is being held up in its entirety. That sample starts with Section A at the bottom, moving up through the sections alphabetically.
I hope that helps guide you in the right direction. If you’re still running into trouble, please feel free to email us a photo of your work at [email protected]. We’re eager to get you back on track!
All the best,
Hills
Hello, is there a schematic for the patterns that show the stitches visually by row? It would help to identify the blocks on a diagram or photo of the blanket.
Hi Patti,
I’m really sorry to hear you’re having some trouble, and I’m more than happy to help!
We don’t have a schematic for this project right now, but I think that’s a fantastic idea, and I’ll be sure to share it with our Design team. In the meantime, you might find it helpful to look at the last photo, where the blanket is fully spread out. The sample begins with Section A at the bottom and goes up through the sections alphabetically.
I hope this points you in the right direction. If you’re still having trouble, please don’t hesitate to send us a photo of your work at [email protected]. We’re excited to help you get back on track!
All the best,
Hills
Can you please recommend a color choice between tabby cat and brown date? Which would show the pattern better? Thanks!
Hi Mary,
Thanks so much for reaching out. I’m happy to help! It seems like you may be looking at Cotton Pure on a Cone rather than the Knitting Yarn DK on a Cone called for in this pattern.
Cotton Pure is a great option for the Blueprint Blanket! Since Cotton Pure is a smidge thinner and a different fiber, we recommend knitting and blocking a swatch to make sure you are able to make gauge and that you like the look and feel of the final fabric. You may prefer the fabric that is made with smaller needles and has a tighter gauge. If that is the case, you’ll have a smaller finished blanket.
Typically, lighter colors will show the most stitch definition. With that in mind, I would suggest Tabby Cat for the highest stitch definition.
I hope this is helpful for you, and please feel free to reach back out anytime.
All the best,
Hills
I am on Section P row 13 of Blueprint Blanket and suddenly having a brain fart. When it says to [knit to marker, sm] 3 times does that mean to knit the first 3 markers placed at 14-30-12 which is 52 stitches a total of 3 more times – which would mean placing a marker at the very end of 156 stitches and then begin the *k1,p1 to last 5 stitches?
I am so close to the end – yay! but must admit I have had to pull out many rows because in some sections did not concentrate well enough or read the instructions carefully only to discover 3 or more rows down the line I was off by 1 or 2 stitches in the pattern. This is a beautiful pattern and my blanket despite all my do overs is looking very nice.
Hi Stephanie,
Congratulations on nearing the finish line with your Blueprint Blanket, and I’m happy to help!
When Section P writes, “Rows 13: Slip 3, p1, [knit to marker, sm] 3 times, *k1, p1, repeat from * to last 5 stitches, k1, p1, k3,” it’s letting you know that you should work slip 3, p1, and then knit past the next 3 markers, slipping them as you come to them. You should be left to work the 1 x 1 ribbing until the last 5 stitches.
I hope this helps clarify and that you can finish up this project with confidence. It’s such an endeavor to make a blanket…great work!
Happy knitting,
Hills
Hills,
Thank you for clarifying or I would be ripping out some more rows.
Now that you’ve explained it I’m “why couldn’t I figure that out”.
Hi Stephanie,
Thank you so much for your reply! I’m really glad this was helpful! There will always be new skills to learn (for knitters of all levels), and we’re always happy to help. Feel free to reach out anytime!
Happy knitting,
Hills