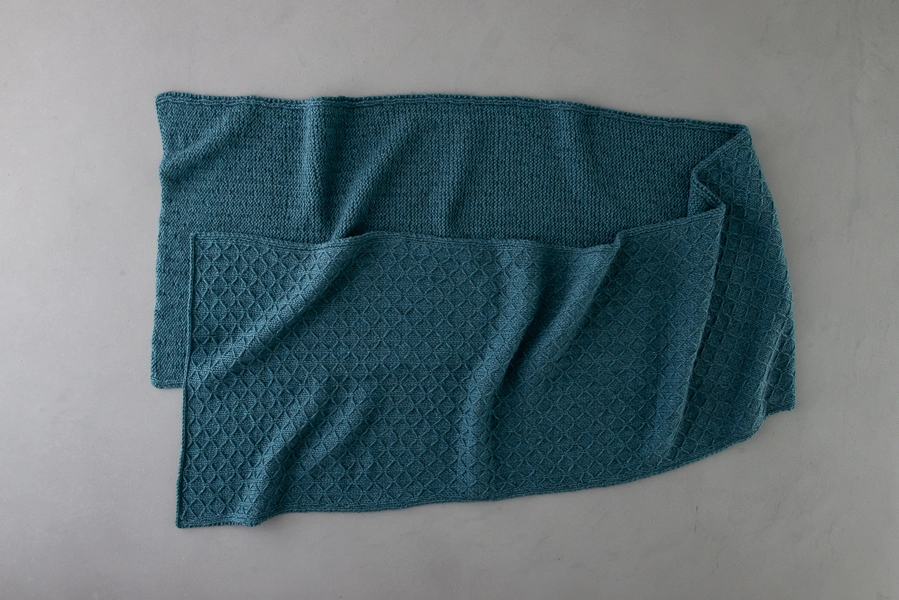
Trellis Wrap In Understory
The art of smocking may hide in its own corner of the sewing world, but hidden corners are our comfort zone. So when our Trellis Wrap, with its smocked stitch pattern, borrows from sewing’s secrets we know we’re in our kind of corner!
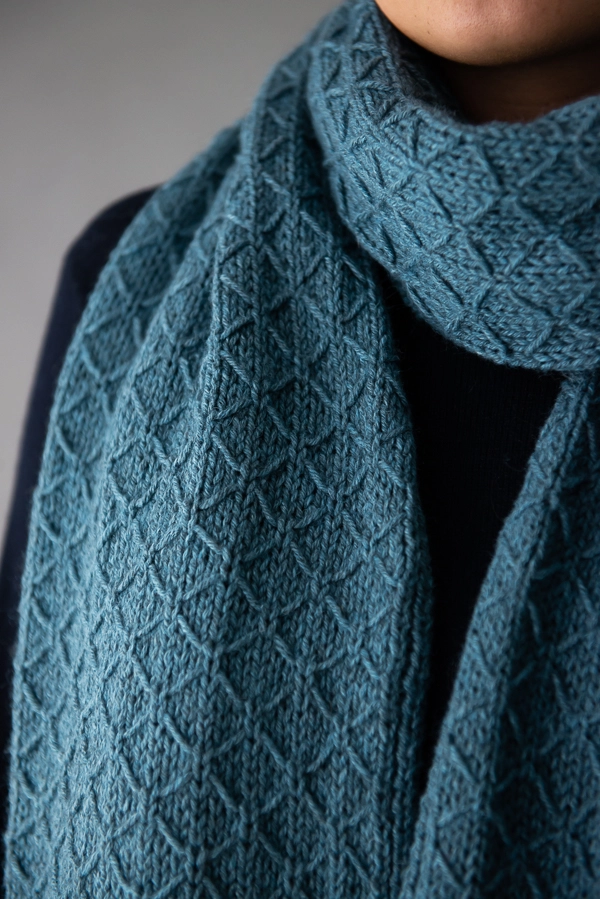
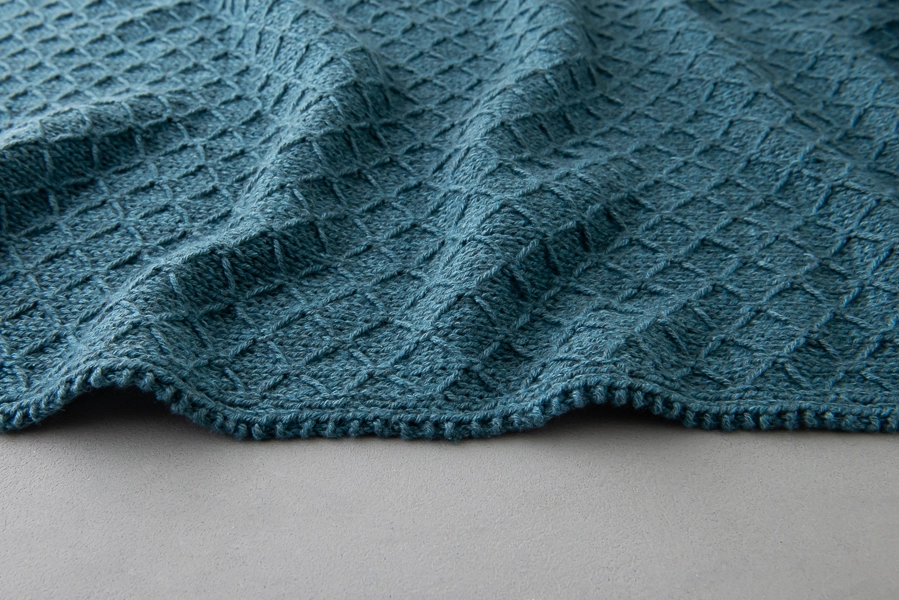
The trick is simple and is fully demystified in our Knit 1 Under Loose Strand Tutorial. A handful of slip stitches whose float is worked in a couple of rows later, the result is wonderfully sweet, a bit old fashioned (like smocking!) but fresh, too (like all new things!).
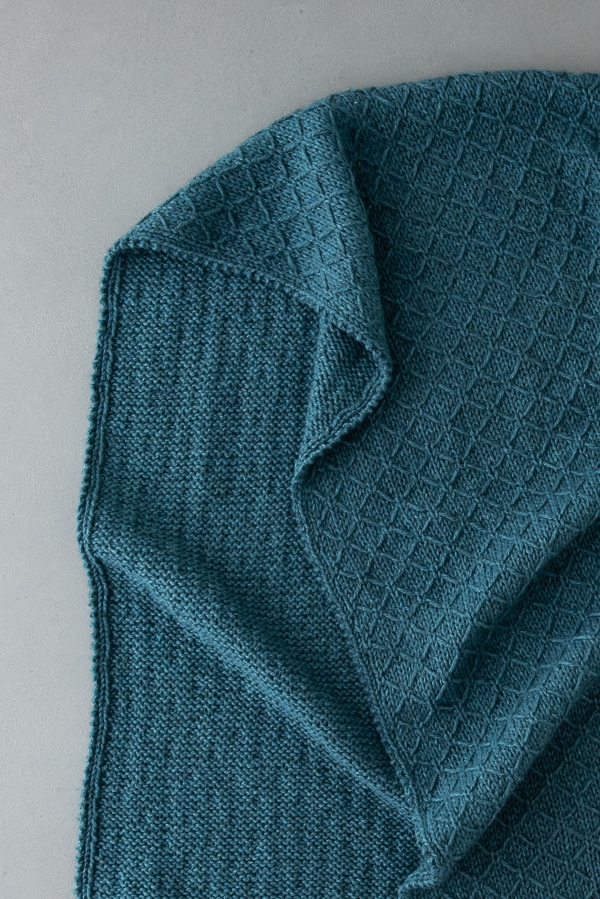
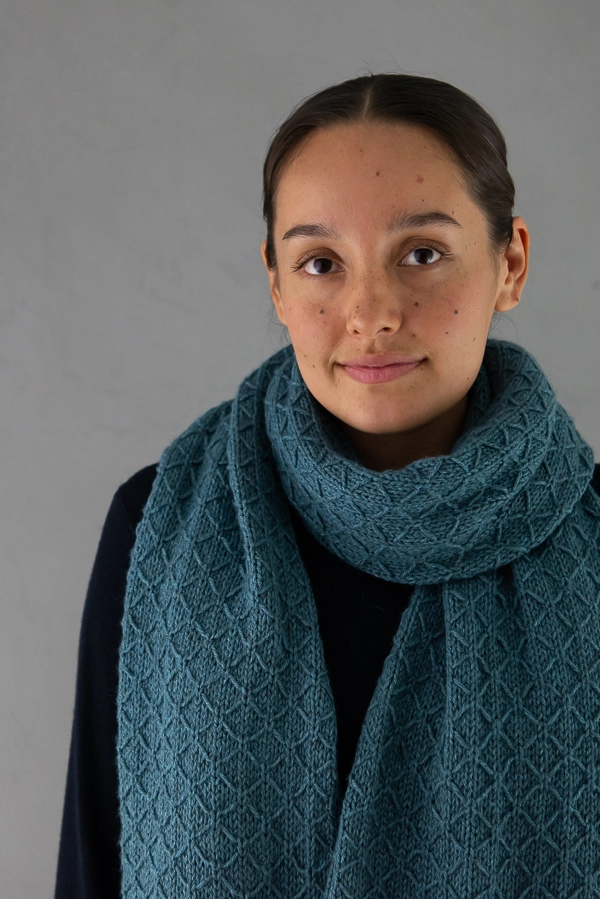
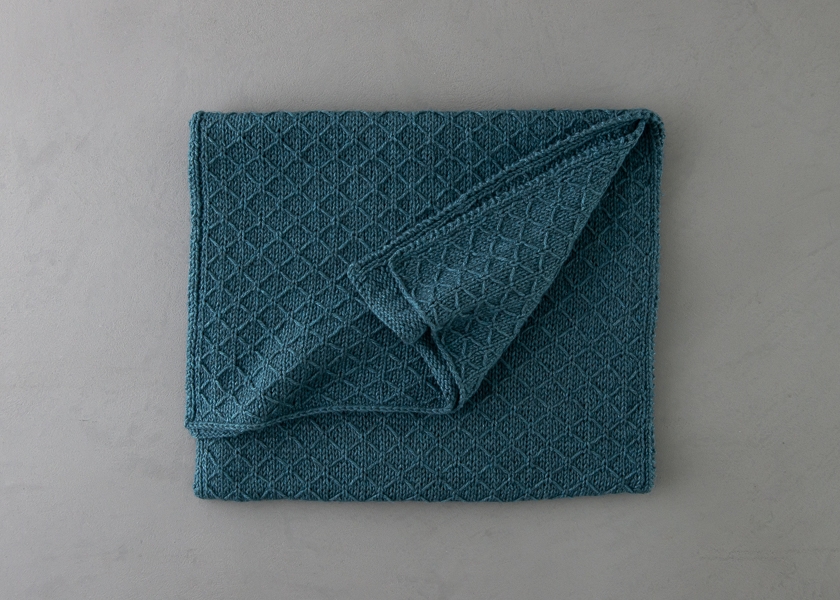
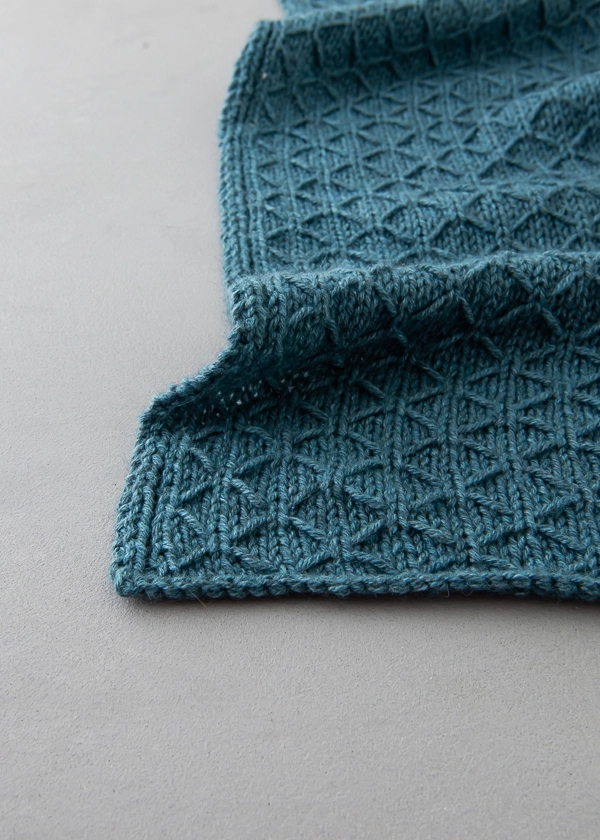
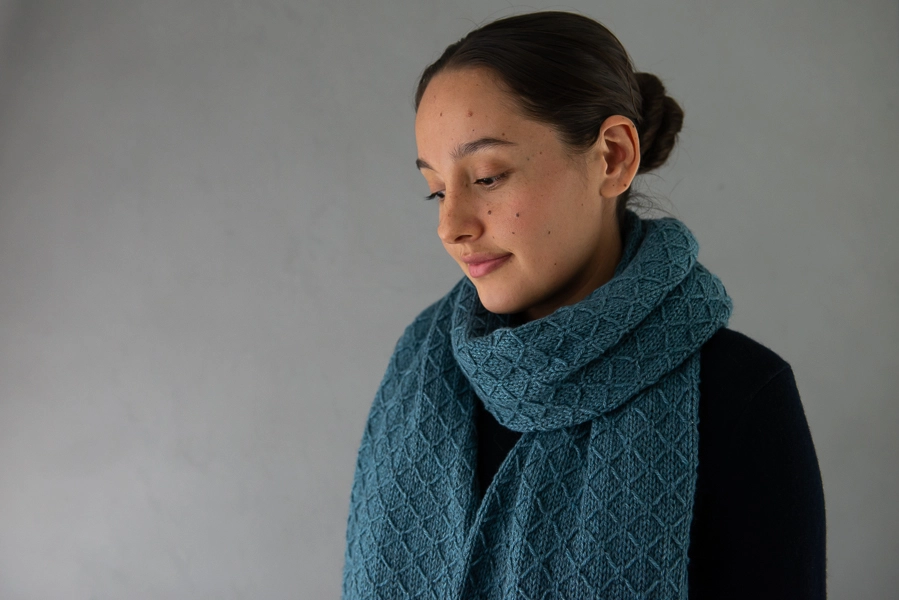
We love how our Understory brings its personality to this stitch pattern’s beauty: Its crisp definition shows the details; its rustic color keeps things from getting too precious; and its super soft baby alpaca, baby yak, and silk blend mean that you’ll love wearing your Trellis Wrap, too!
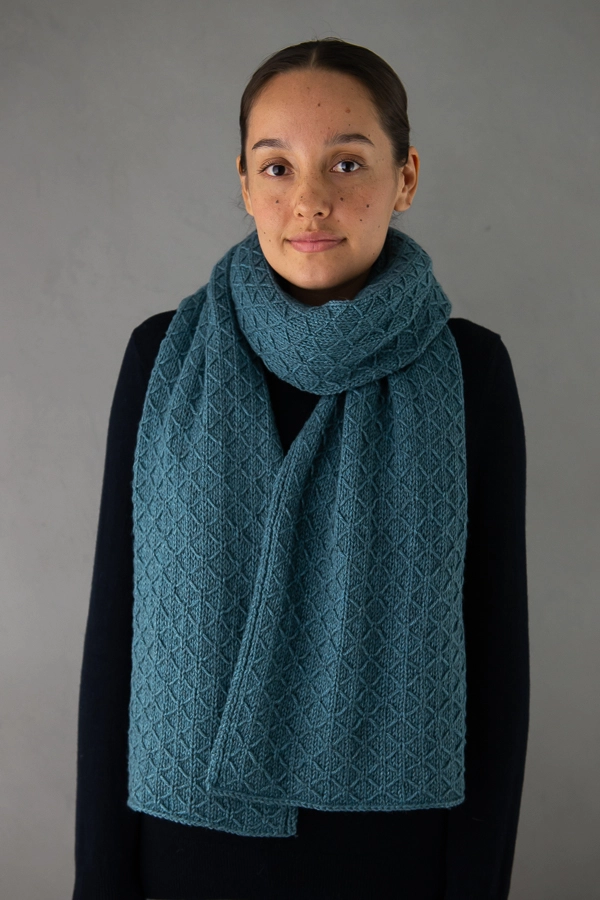
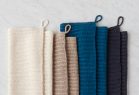
We just added five incredible new colors to our Understory collection, including this dreamy Teal Sea. Pick up just two skeins for a scarf and four for a wrap, then find your corner and cast on!
Designed by Purl Soho designer, Laura Ferguson.
Share your progress + connect with the community by tagging your pics with #PurlSoho, #PurlSohoBusyHands, #PurlSohoTrellisWrap, and #PurlSohoUnderstory. We can’t wait to see what you make!
Materials
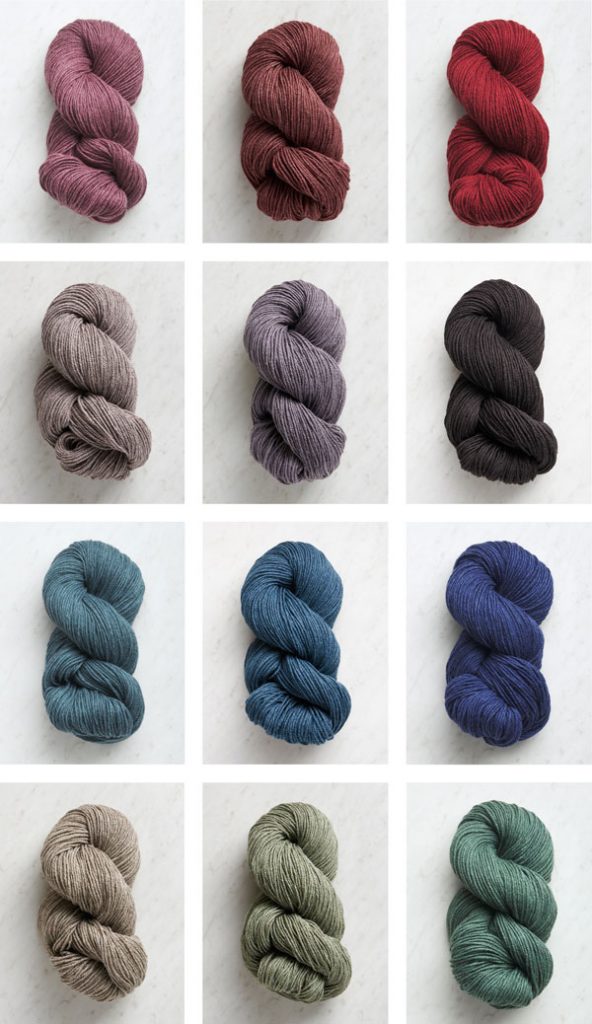
- 2 (4) skeins of Purl Soho’s Understory, 50% baby alpaca, 25% baby yak, and 25% silk. Each skein is 250 yards/100 grams; approximately 500 (949) yards required. We used the color Teal Sea. (NOTE: We no longer offer Understory, but choose from one of our other light worsted/dk weight yarns.)
- US 7 (4.5 mm), 24-inch circular or straight needles
Gauge
18 stitches and 30 rows = 4 inches in stitch pattern
Size
Scarf (Wrap)
Finished Dimensions: 9½ (17½) inches wide x 70 inches long
The sample shown here is the wrap size.
Notes
Stitch Multiple
This pattern works over a multiple of 6 + 1 stitches.
Slip Stitches
Slip all slipped stitches purlwise with yarn in front, unless indicated otherwise.
K1 ULS
k1 uls [knit 1 under loose strand]: Insert right needle under loose strand and then into next stitch knitwise, from front to back. Knit stitch normally, then bring new stitch out from under strand.
For a video demonstrating how to work this technique, please visit our Knit 1 Under Loose Strand Tutorial.
Pattern
Cast on 43 (79) stitches. We used a basic Long Tail Cast On.
Row 1 (wrong side): K1, p1, k1, purl to last 3 stitches, k1, p1, k1.
Row 2 (right side): K2, p1, *k1, slip 5 (see Notes), repeat from * to last 4 stitches, k1, p1, k2.
Row 3 and all remaining wrong-side rows: Repeat Row 1.
Row 4: K2, p1, *k3, k1 under loose strand (k1 uls; see NOTES), k2, repeat from * to last 4 stitches, k1, p1, k2.
Row 6: K2, p1, slip 3, *k1, slip 5, repeat from * to last 7 stitches, k1, slip 3, p1, k2.
Row 8: K2, p1, *k1 uls, k5, repeat from * to last 4, k1 uls, p1, k2.
Repeat Rows 1-8 until piece measures approximately 70 inches or until just shy of desired finished length.
Repeat Row 1.
Bind off knitwise.
Weave in the ends and block as desired.


Would your Mulberry Merino work with this pattern?
Hi Nannette,
Thanks for writing in! Mulberry Merino is a little lighter weight than Understory, but you could follow the instructions for our Trellis Scarf + Wrap in Season Alpaca, which is the same stitch pattern but written for a sport weight yarn!
Happy knitting!
Julianna
This is such a pretty pattern. I live in Florida where the called for yarn will be too warm. Would you please suggest another yarn to possibly use? Thanks so much. Marcia
Hi Marcia,
Thank you so much for the kind words! To create a warm-weather version of this wrap, I would suggest using our Cotton Pure and following the instructions for our Trellis Scarf + Wrap in Season Alpaca.
I hope that helps, and please do let us know how it turns out!
Julianna
Does this curl a lot at the edges?
Thank you,
Hi Stephanie,
Great question! Like all stockinette-based stitch patterns, this stitch will curl at the edges while you are working on it, but after wet blocking, it should lay quite flat!
Happy knitting!
Julianna
I love the look of this pattern
Id like to make a narrower version..
Is there a repeat to consider for that change? many thanks
Hi Robyn,
Thanks for writing in! Our pattern includes two widths, a 9.5 inch wide scarf or a 17.5 inch wide wrap, but if you would like to customize the width, you can cast on any multiple of 6 stitches plus 1!
Happy knitting!
Julianna
Hi Julianna! I just wanted to make sure I had this right –
If you want a narrower scarf, then cast on 37 or 31 or 25, etc? If you want a wider scarf (but not as big as the wrap) then you could cast on 49 or 55 or 61, etc?
Thanks so much! I just ordered the yarn and can’t wait for it to arrive! 🙂
Hi Kristin,
Yes, it sounds like you’ve got it! All of those cast on amounts will work perfectly with the multiple for the scarf!
Best,
Julianna
This is a gorgeous scarf and I want to knit it. However, from reading the pattern instructions, the k1 uls seems easy, but I don’t understand how the loose strand is formed. Can you please explain? Thank you!
Hi Amy,
Thanks for reaching out! The loose strands are formed on rows 2 and 6 when you slip 5 stitches with the yarn in front. The yarn will float across the front of these stitches and will then be picked up for the k1 uls on rows 4 and 8!
I hope that clears things up!
Julianna
That’s what I thought, but I wasn’t sure. Thank you so much!
is it possible there is a typo on row 8?
I think it should read.
Row 8: K2, p1, *uls, k5, repeat from * to last 4, k1 uls, p1, k2.
if it were as written
Row 8: K2, p1, *k1 uls, k5, repeat from * to last 4, k1 uls, p1, k2.
the ULS stitches would not line up.
one more correction..how the row ends. new line should read?
Row 8: K2, p1, *uls, k5, repeat from * to last 4, uls , p1, k2.
Hi Sean,
Thanks for writing in! I think the confusion comes from the abbreviation we use for the special stitch in this wrap! The full abbreviation for knitting one under the loose strand is “k1 uls,” so we don’t mean for you to knit an extra stitch, just to knit under the loose strand, whenever you see “k1 uls.” As long as you aren’t knitting an extra stitch, the pattern as written should line up correctly!
I hope that clears things up!
Julianna
Beautiful pattern, thank you for sharing. (Great website)
Question: Is Row 5 missing in the instructions (or have I overlooked it)?
(I’m a beginner and will not attempt this yet… but happened to look at the stitch instructions. )
Thank you!
Hi Patte,
Thank you so much for the kind words! If you take a look at Row 3, you will see a note that this row will be repeated for all odd numbered or wrong side rows, including Row 5.
I hope that clears things up!
Julianna
How many skeins 2 (4) I take that as depending on size 2 or 4.
Hi Robin,
Thanks for reaching out! Our pattern includes two widths, a 9.5 inch wide scarf and a 9 inch wide wrap, so whenever you see two numbers, the first number refers to the scarf and the second refers to the wrap. In this case, you will need two skeins of yarn for the scarf, or four for the wrap!
I hope that clears things up!
Julianna
I am a fairly new knitter and love this pattern. When it is stated “slip5”, it says see notes. I don’t see any explanation on “slip5” or a tutorial. Please explain.
Thx.
Hi Rose,
Thanks for reaching out! We don’t have a tutorial for slipping stitches, but it’s really quite easy! Whenever you see instructions to slip a stitch, that means you will insert your right-hand needle into the next stitch as if you were going to purl it and then move it over to the right-hand needle without actually working it. In this pattern, when you slip five stitches, you will just do that five times!
I hope that clears things up!
Julianna
Hi, Such a beautiful scarf! I would like to knit this pattern in the round so it would look the same on the front and the back as one would not see the inside of the tube. Would this be doable? Is there a lighter yarn I can use since the end result would be doubled? If yes, please recommend something that is not hairy and not cotton.
How would I finish off the top and the bottom so the scarf would not be an open tube? No fringes please. Along the length of the scarf, would I periodically have to connect the front and the back so over time the scarf would not get puckered, but would continue to be flat?
Thank you.
Hi Fran,
Thanks for reaching out! You should be able to modify this stitch for knitting in the round by knitting every odd numbered row instead of purling them. You might want to take a look at our Trellis Scarf + Wrap in Season Alpaca, which is much thinner and should suit your tubular scarf plan! To close up the ends seamlessly, I suggest starting with a provisional cast on, and then closing up both the beginning and end of the scarf with kitchener stitch. While you would have to do some sort of quilting or attaching of the layers in a wider piece like a blanket, it shouldn’t be necessary for a scarf or wrap!
I hope that helps, and happy knitting!
Julianna
Thanks for all you help explaining this beautiful pattern. It’s very helpful to read all these comments before I get started.
Has anyone tried this pattern in the round? I think it would make a beautiful cowl!
Hi Katherine,
Thanks for reaching out! We haven’t tried it ourselves, but you should be able to modify the stitch pattern for working in the round by knitting every odd numbered row instead of purling them.
I hope that helps, and happy knitting!
Julianna
Thank you for the above instruction – wonderful!!!!!!!
Hello. This would make a great sock. Can this pattern be knitted in the round? Any adjustments needed??
Hi Janet,
Thanks for reaching out! We haven’t tried it ourselves, but you should be able to modify the stitch pattern for working in the round by knitting every odd numbered row instead of purling them.
I hope that helps, and please do let us know how your socks turn out!
Julianna
I’m loving this pattern and yet am a bit concerned about the stiffness of Understory. I’m using the Ash Blue color. Will this yarn soften up a bit after soaking/blocking? Thank you!
Hi Jean,
Great question! Yes, Understory changes quite dramatically when it is first washed and blocked! The silk will become significantly more drapey, and the super soft yak fibers will bloom and fuzz up slightly, softening the surface of the fabric even more. If you still have it, I would suggest blocking your gauge swatch so you can get a preview of what the finished wrap will be like!
All the best,
Julianna
Hi and thanks for this lovely pattern. I have started knitting it and I am getting a ribbed effect on the wrong side. It looks nothing like the wrong side as shown in the picture. Is it correct that ALL wrong side rows are knitted in rib? Or should they all be purl? Thanks in advance!
Hi Shireen,
Thanks for writing in! I think you may have misread the wrong side row instructions! Row 1, which is repeated for every wrong side row, reads, “K1, p1, k1, purl to last 3 stitches, k1, p1, k1.” Although you work ribbing on the first and last three stitches of the wrong side rows, all the stitches in between should be purled!
I hope that clears things up!
Julianna
Hello,
I’ve been having so much fun with this pattern so far, just have one question (apologies if this has already been addressed)
Near the end of Row 8, after repeating is finished, the next stitch is k1uls, but the last stitch on the repeat for me is also k1uls, so I’ve been k1uls twice on the same loose strand, which seems to make the trellis effect disappear on the leftmost side, is this as it’s meant to be? It looks good, but want to make sure it’s right.
Hope this makes sense 🙂
Thank you!
Hi Hannah,
Thanks for reaching out! Keep in mind that every wrong side row is a repeat of row 1 (K1, p1, k1, purl to last 3 stitches, k1, p1, k1) so prior to row 8 row 7 should be a repeat of row 1 and you should be left with a row of only knits and purls! This should keep the k1uls stitches from getting loose or stretched out!
I hope this help, happy knitting!
Gianna
Hello,
I’m a mid-level beginner knitter. While I wait for my order of Understory yarn to arrive, I’m experimenting with this Trellis pattern using some yarn leftover from a previous project. The pattern itself is easy to do and is very pretty, but I’ve notice that my edges aren’t very neat or attractive. Do you have any tips for how to make neater edges? Thanks! Merideth
Hi Meredith,
Thanks for reaching out! I am glad to hear that you are enjoying this pattern! I recommend being extra mindful when working the first and last stitch and making sure to keep them tight and not stretched for a neat uniform look! You can also adjust the look of the edges when you block the wrap! You can stretch and re distribute the stitches to get a more uniform look throughout! Our Blocking tutorial is an excellent resource to use!
I hope this helps and please let us know how the wrap turns out!
All the best,
Gianna
Would three skeins of Burnish be enough to make this lovely scarf. If so, how many stitches should I cast on? Thank you, Deb
Hi Deb,
Thanks for reaching out! 2 skeins of Burnish would be plenty for the scarf size! However, since Burnish is a sport weight and Understory is a light worsted/dk weight you will need to make a few adjustments. I recommend working a gauge swatch with an appropriate needle size (US 2-4, I recommend a 4) you can then calculate your cast on from there!
I hope this helps, happy knitting!
Gianna
Love this pattern! Could it be done with two different colors, alternating rows, if they were similar shades? Like a Silver Berry and a Violet Gray? Or an Autumn Moor and a Ripe Plum?
Or would the pattern be too difficult to change colors each row? Perhaps every two rows? Trying to get the best blended effect.
Thanks!
Hi Thania,
Thanks for reaching out! I haven’t heard of anyone using two colors and alternating for this pattern yet but I think that would be beautiful! I would suggest testing this out on a swatch first, with some scrap yarn to see if the stitch pattern will work changing every row or every other row!
I hope this helps and please let us know how this turns out!
Gianna
This looks lovely , and it is great to learn a new stitch or two. The pattern states to see note for information on how to slip 5 . I cannot find any note here that references this. Can you help.
Hi Lois,
Thanks for writing in! The NOTES section is located just above the PATTERN section and right below the SIZE section!
I hope this helps, happy knitting!
Gianna
This pattern is so pretty, as is just about everything on Purl Soho! Would this pattern work for a baby blanket or would the baby’s fingers get caught too easily in the skipped stitches.?
If you think it would work, how many stitches should I cast on and about how long should it be?
Thank you so much for your help!
Hi Barab,
Thanks for reaching out and for your kind words! I think this would look absolutely lovely as a baby blanket, and I don’t think the skipped stitches are big enough or loose enough that the baby’s fingers could get caught, so that should be fine! Typically our baby blankets are around 30 inches wide x 37 inches long, so if your gauge is consistent with the pattern I suggest casting on 139 stitches, keeping in mind that this pattern works over a multiple of 6 + 1 stitches! You can then follow the pattern as written until you reach about 37″ or your desired length!
I hope this helps, happy knitting!
Gianna
Pattern:
Rows 5 and 7 directions are missing.
What should be done?
Hi Steph,
Thanks for reaching out! Rows 5 and 7 are not actually missing, as it states in row 3 all remaining wrong-side rows (odd rows) you will repeat Repeat Row 1!
I hope this clears things up!
Gianna
Hi Gianna –
Thank you so much for answering my question about knitting this beautiful pattern as a baby blanket. I’m going to give it a go!
Thanks, too, for all the beautiful yarns, patterns, and advice Purl Soho shares with all of us. I think we all really appreciate everything everyone at Purl Soho provides. I know I learn so much by just reading the questions everyone asks and the great answers provided to them.
Please let your associates how much all of your efforts are appreciated,
Barb
Hi Barb,
Thank you so much for your sweet words! I will certainly pass this along to the rest of the team!
Warmly,
Gianna
What is your preferred method for connecting a new skein mid-project? Thanks.
Hi Jan,
For this pattern (and for most projects in general), we recommend joining a new ball of yarn at the beginning of a new row. This makes the join less noticeable and it’s often easier to conceal your ends. I’d suggest joining your new ball and leaving a 2″ – 3″ tail of yarn from your old ball and another tail of the same length from your new ball so that you have enough to weave in comfortably!
We also have a few helpful tutorials you can take a look at; check out our Adding a Ball of Yarn, Weaving in Your Ends, and Wet-Splicing tutorials for more great tips for joining a new skein!
Warmly,
Kelsey
Today I finished this pattern! It was challenging but so worth it. Thank you for sharing this free pattern!!
Hello Purlshoho team! I love the texture of this knit! but I have a tiny question in regards to adaptations? I was wondering how it may be adapted into a sweater or top with regards to increasing or decreasing while keeping the pattern intact? I’m planning to make a soft armless turtleneck with this texture if that helps?
Hi Kayleigh,
Thanks for reaching out! That is an excellent question, and I am not sure how this stitch would work with increasing or decreasing and if this stitch would be the best to adapt for a garment. I would recommend starting off by working a swatch and trying out a few different decrease/increase options to see if it’s possible to keep the pattern intact!
Sorry that I couldn’t be of more assistance but please let us know how this turns out!
Gianna
I absolutely LOVE the color of the understory yarn I am working with. And the scarf pattern is lovely. It is just long enough to sit on my neck and as I tried it on I noticed it’s super scratchy. I use alpaca or alpaca/silk/bamboo blends almost exclusively when I knit, but I’ve read that yak is even softer. I am baffled as to why this would cause my skin to itch and feel like it’s poking me. Will it get softer after washing/blocking? I hate to use up all this yarn on a scarf I won’t wear 🙁 thank you!
Hi Nik,
Thank you for reaching out. We’re so sorry to hear that Understory is proving scratchy when you tried on your scarf project! Yak is indeed very soft and actually hypoallergenic, so that shouldn’t be contributing any scratchiness. Alpaca is also very soft, though some people still experience a bit of itch from that. The silk is what provides a beautiful drape, structure and strength, but as a result Understory isn’t as soft and cushy as other yarns with different fiber content. That might be what you’re experiencing! I’m glad to share that Understory gets much softer after washing and blocking, though! I would recommend knitting a small swatch and washing and drying it as you would the final project. This way you can see how the fabric behaves after this process and determine if you would like to continue with your current project.
I hope this helps! Please let us know if we can assist with anything else.
All the best,
Cat
Thanks for the reply. I will give it a wash and hope for the best. If I still can’t wear it I’ll finish it up and give it to someone who isn’t as sensitive. I bought some season alpaca so I’ll use that instead ❤️
Hi Nik,
You’re so welcome! That sounds like an excellent plan. A wrap in Season Alpaca sounds amazing! Have a great weekend!
All the best,
Cat
Any suggestions on how to keep the bottom few rows of the scarf from rolling up?
Hi Patti,
Thanks for reaching out! Because this project is knit mainly in stockinette stitch, there will always be a bit of a natural curl to the fabric. Once you block your project after finishing it, that should minimize the rolling significantly, but there will likely still be some due to the nature of the stitch pattern. If this bothers you, I’d recommend adding more of a border to the wrap! You can use a symmetrical stitch (like garter stitch, ribbing, seed stitch, etc.), and this will help prevent the edges from curling at all. Hope this helps!
All the best,
Lili
I’ve worked about 30 rows of this pattern and it doesn’t look like the picture of the scarf. The stitches within the diamond shape look like stockinette but if I knit every odd row k1, p1 I wouldn’t have a stockinette stitch within the diamond shape. Thanks for your help.
Hi Joan,
I’m sorry to hear that your project isn’t turning out as expected! Are you perhaps alternating knit and purl stitches all the way across the wrong side rows? If so, then that’s likely what’s causing the issue! The instructions for the wrong side row actually have you purl for most of the row, except for the first 3 and last 3 stitches. This might make it clearer:
Row 1 (wrong side): K1, p1, k1, purl to last 3 stitches, k1, p1, k1.
Hope this helps you get back on track!
All the best,
Lili