Bias Wrap
Like a walk over irregular terrain, in knitting there are sometimes meditative rolling hills and then perhaps a mountain pass that commands your full attention. Our gorgeous Bias Wrap is this kind of journey, rich in texture and techniques!
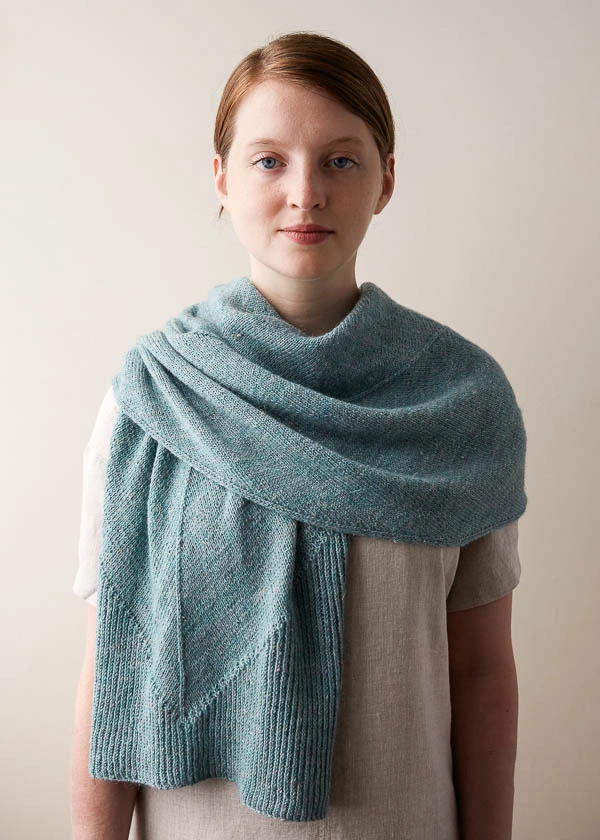
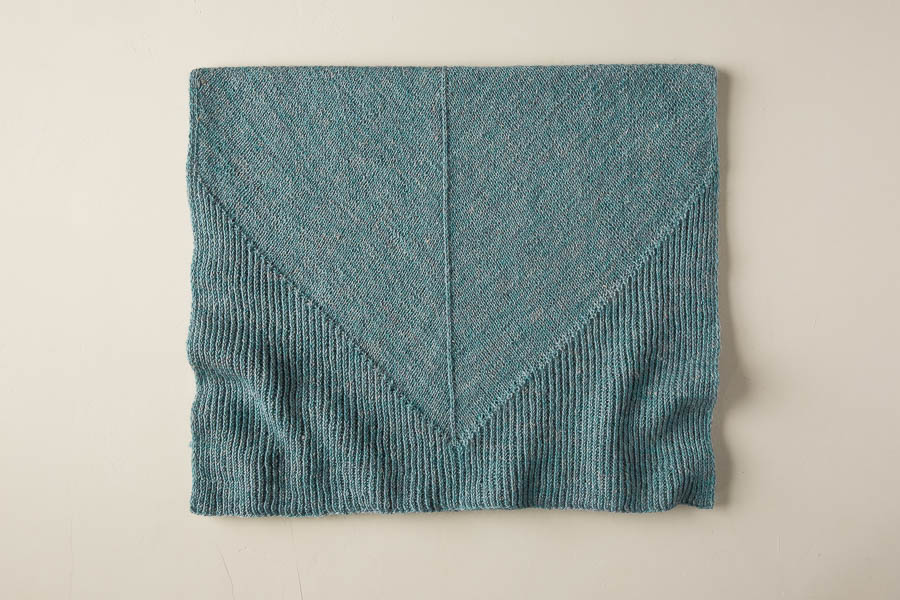
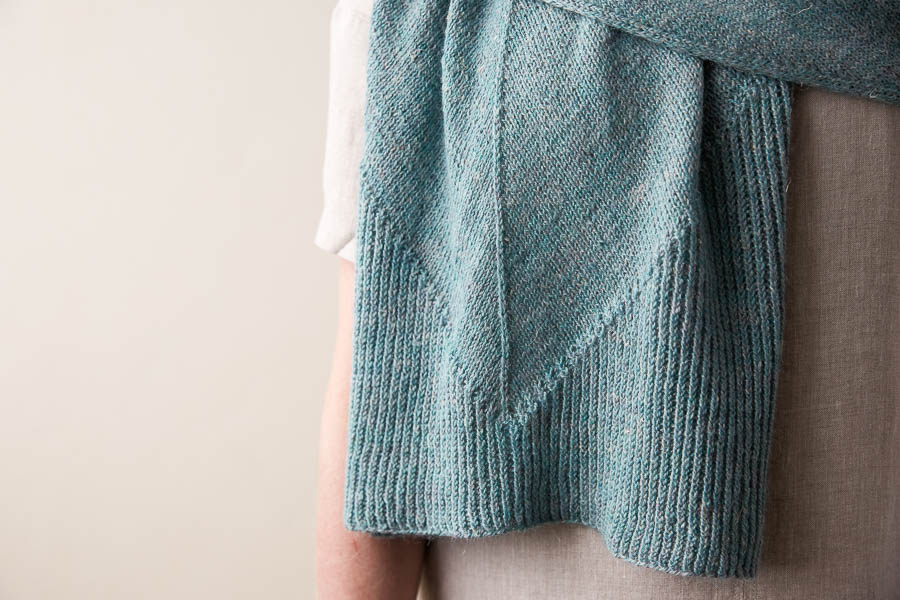
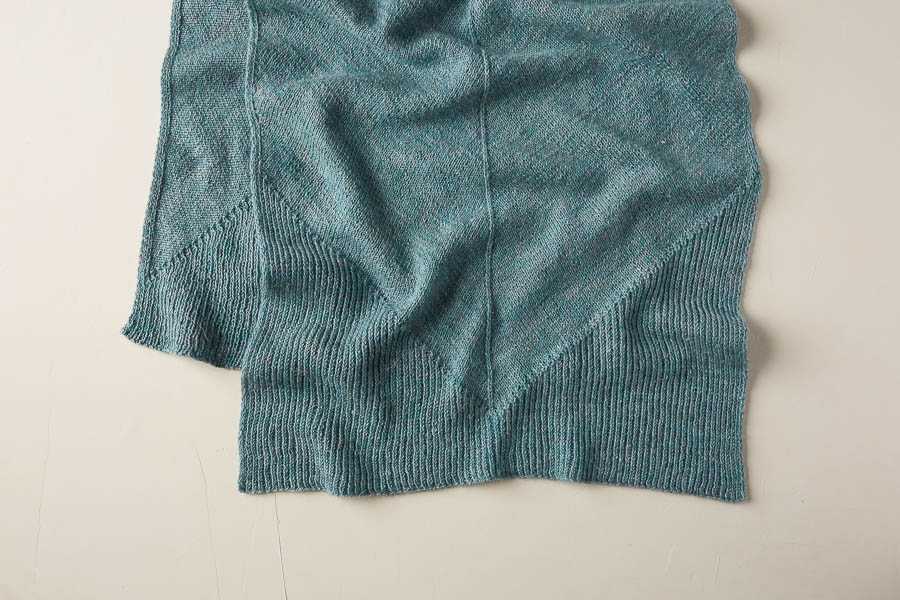
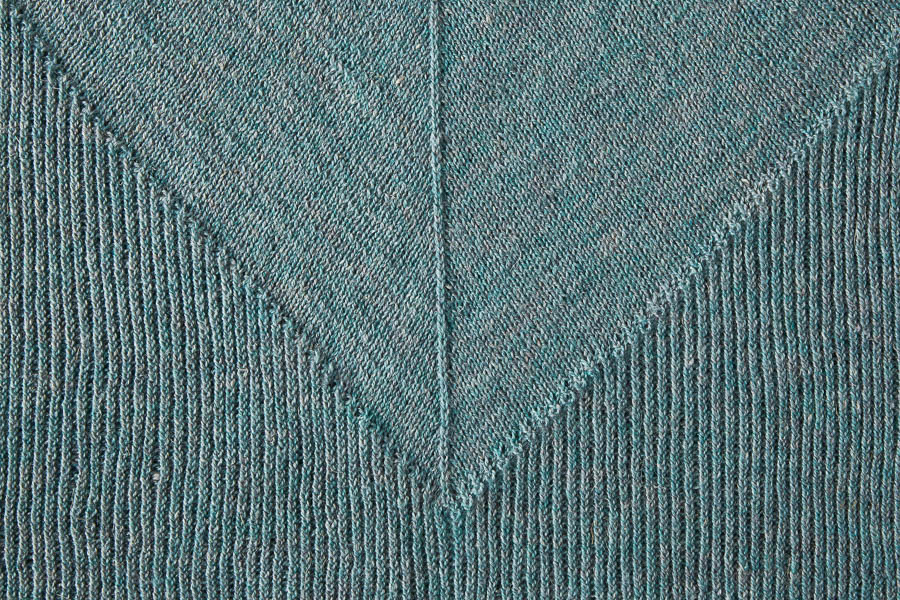
This pattern covers lots of ground, including twisted-half-rib ends, carved into chevron shapes by short row shaping. The middle section is a stockinette sprint, knit on the bias, with an increase at each edge and a double decrease in the middle that creates a pretty ridge down the length of the wrap.
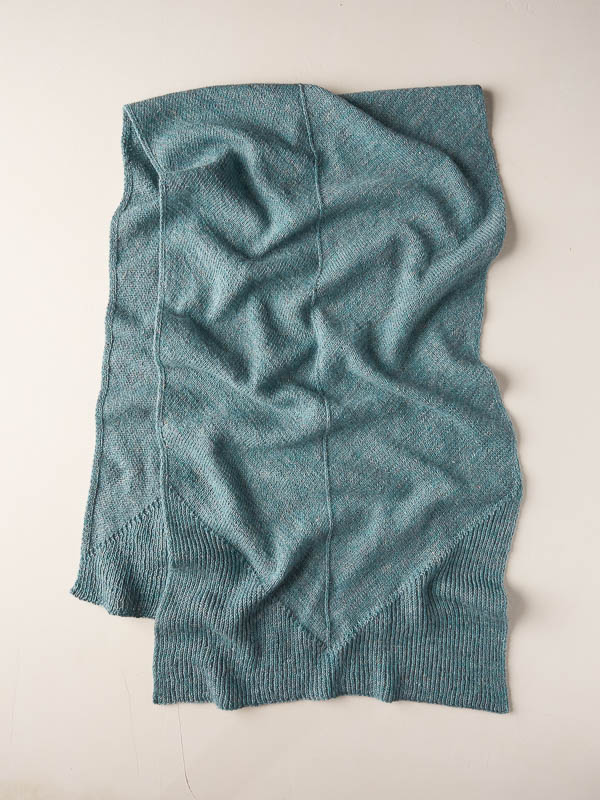
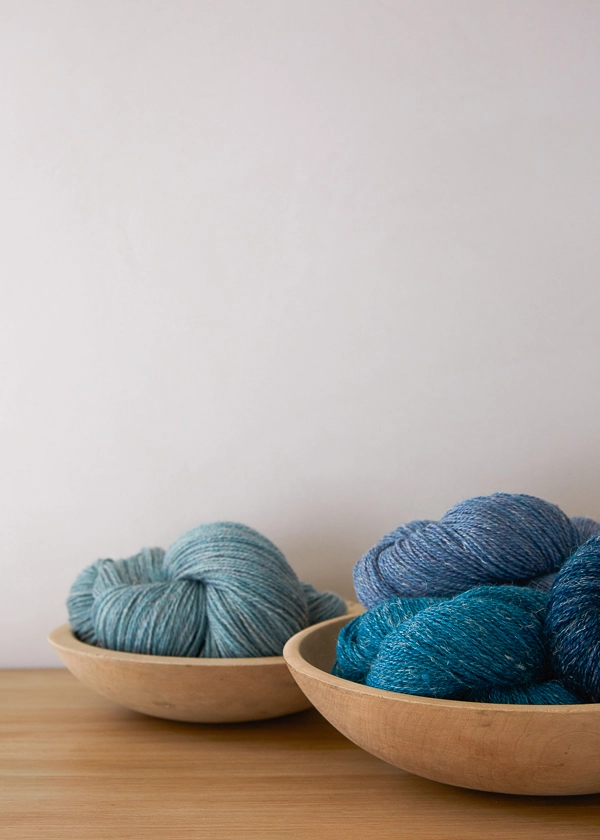
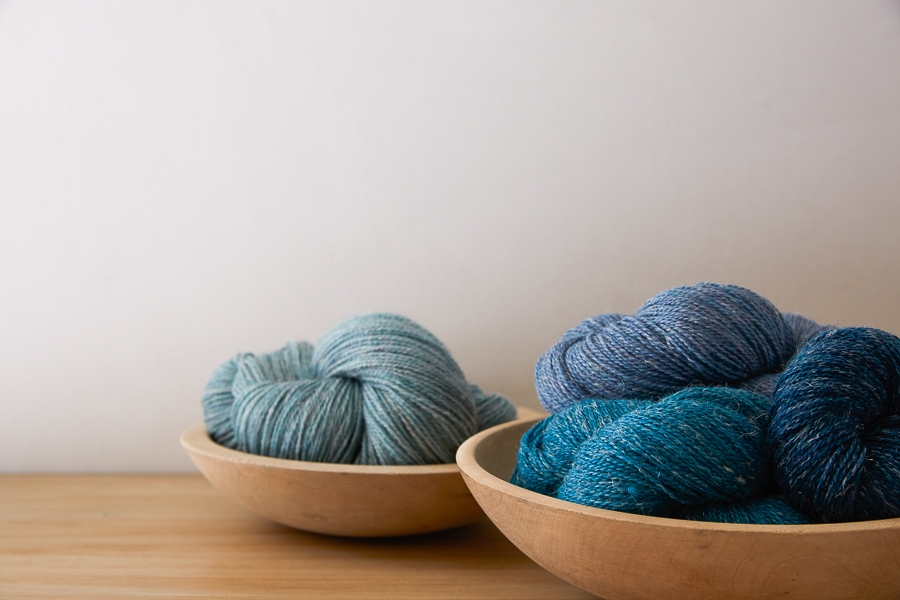
The pairing of yarn and project here is a natural. Our beautiful Linen Quill knits a compelling landscape of multi textured charm. We used the Vintage Celadon color, a gorgeous, watery blue-green blend, but explore the entire palette of over 30 colors, each its own adventure… Pick up four of your favorite!
Cast on for your own Bias Wrap trip with our pattern, below, then kick back and take in the view. Wrap yourself in it!
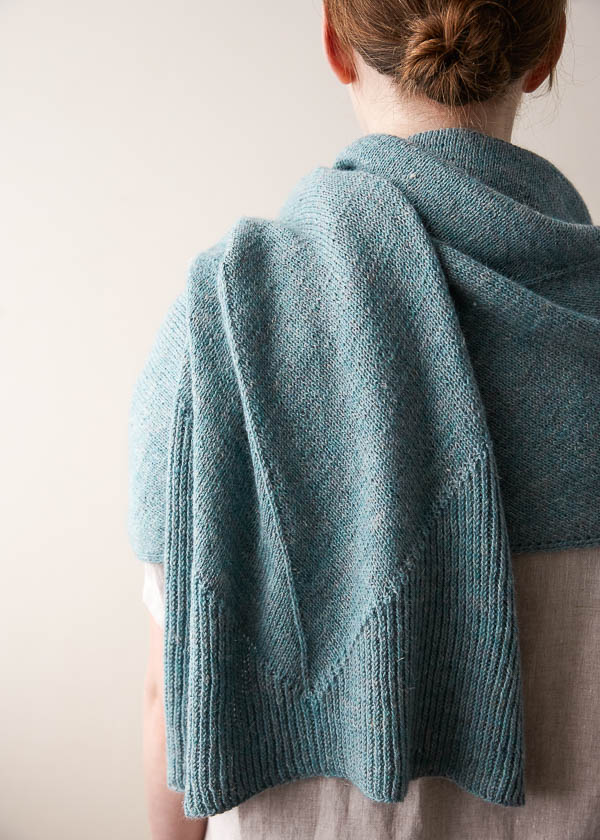
Designed by Purl Soho designer, Adam Aronowitz.
Share your progress and connect with the community by tagging your pics with #PurlSoho, #PurlSohoBusyHands, #PurlSohoBiasWrap, and #PurlSohoLinenQuill. We can’t wait to see what you make!
MATERIALS
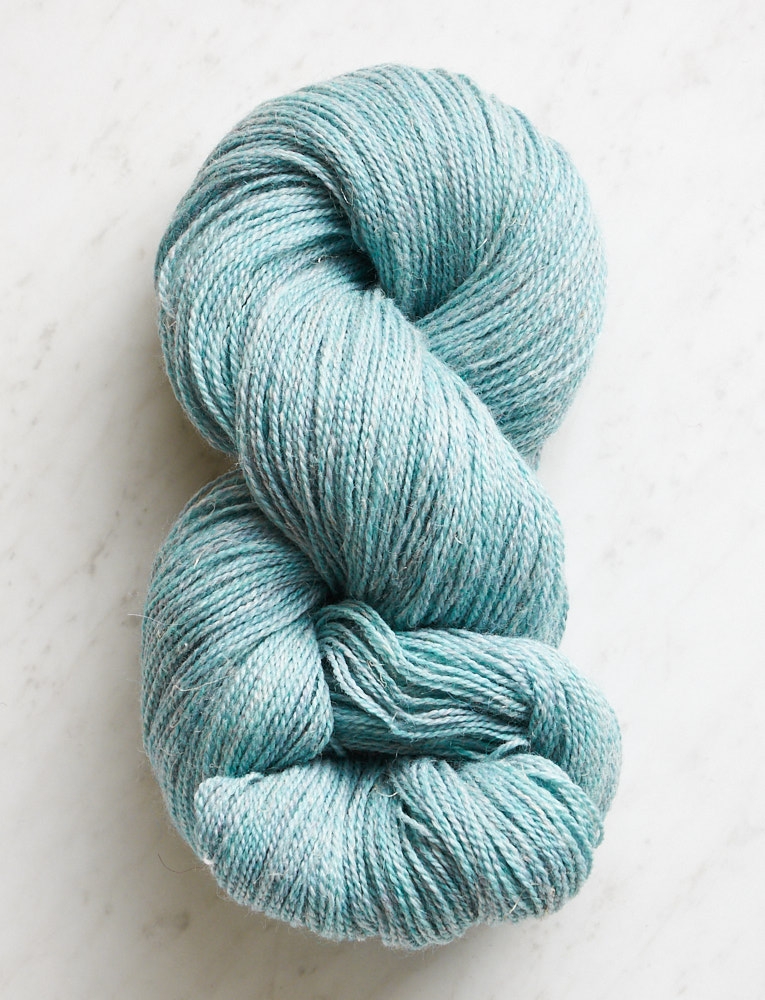
- 4 skeins of Purl Soho’s Linen Quill, 50% fine highland wool, 35% alpaca, and 15% linen. Each skein is approximately 439 yards/ 100 grams; approximately 1520 yards required. We used the color Vintage Celadon.
NOTE: You may only need 3 skeins, so if you leave the 4th unwound you can return it for a refund within 30 days of purchase, or within 6 months, for store credit. Our Return Policy has all the details!
- US 3 (3.25 mm) 32-inch (or longer) circular needles
- US 6 (4 mm) 32-inch (or longer) circular needles
- 1 stitch marker
GAUGE
28 stitches and 38 rows = 4 inches in stockinette stitch on smaller needles
36 stitches and 32 rows = 4 inches in half-twisted rib stitch on larger needles
SIZE
Finished Dimensions: 20½ inches wide by 72 inches long
NOTES
Construction
You work this piece from one short end to the other. You’ll work short rows to shape ribbing at the
ends, and in the middle, you’ll increase at selvages and decrease at center to create biased knitting.
Special Instructions
SLIP STITCHES
Slip stitches knitwise with yarn in back unless directed otherwise.
SHORT ROW SHAPING: WRP-T (WRAP AND TURN)
On the right side: Keeping yarn in back, slip next stitch purlwise from left needle to right needle. Bring yarn to front. Return slipped stitch to left needle. Bring yarn to back. Turn work so wrong side is facing you.
On the wrong side: Keeping yarn in front, slip next stitch purlwise from left needle to right needle. Bring yarn to back. Return slipped stitch to left needle. Bring yarn to front. Turn work so right side is facing you.
For more help with this technique, please visit our Short Rows Tutorial.
LIFTED INCREASES
RLI (Right Lifted Increase): Lift right leg of stitch below next stitch on left needle onto left needle and knit it. [1 stitch increased]
LLI (Left Lifted Increase): Lift left leg of stitch 2 rows below last stitch on right needle onto left needle and knit it through back loop. [1 stitch increased]
For more help with this technique, please visit our Lifted Increase Tutorial.
S2KP (SLIP 2 KNITWISE, KNIT 1, PASS)
Slip 2 stitches together knitwise, knit 1, pass 2 slipped stitches over knit stitch and off right needle. [2 stitches decreased]
For more help with this technique, please visit our Slip Slip Knit Pass Tutorial.
PATTERN
Cast On
Using a basic Long Tail Cast On, cast 85 stitches onto larger circular needles, place marker (pm) for Center, cast on 84 more stitches. Do not join for working in the round. [169 total stitches]
Bottom Ribbing
NOTE: Throughout pattern, slip Center marker when you come to it.
WORK RIBBING EVEN
Set-Up Row (wrong side): K2, *p1 through the back loop (p1 tbl), k1, repeat from * to last stitch, p1.
Row 1 (right side): Slip 1 (see Special Instructions), *p1, k1 through the back loop (k1 tbl), repeat from * to last 2 stitches, p2.
Row 2 (wrong side): Slip 1, *k1, p1 tbl, repeat from * to last 2 stitches, k1, p1.
Repeat Rows 1 and 2 until piece measures 2 inches from cast-on edge, ending with a wrong-side row.
SHAPE RIGHT RIBBING
NOTE: In this section, you will work Right Ribbing from right selvage to Center marker only. You will work back and forth in short rows, turning the work partway through each round. For extra help, see Special Instructions.
Short Row 1 (right side): Slip 1, *p1, k1 tbl, repeat from * to 2 stitches before Center marker, wrp-t (see Special Instructions).
Short Row 2 (wrong side): *P1 tbl, k1, repeat from * to last stitch, p1.
Short Row 3: Slip 1, *p1, k1 tbl, repeat from * to 2 stitches before previous wrap, wrp-t.
Repeat Shorts Rows 2 and 3 thirty-nine more times, then repeat Short Row 2 once more. [Right selvage measures approximately 12¼ inches from cast-on edge, and 3 stitches remain unworked to right of last wrapped stitch.]
Next Row (right side): Slip 1, work in established pattern to Center marker, purling wrapped stitches with their wraps, slip marker (sm), work in established pattern to last stitch, p1
SHAPE LEFT RIBBING
NOTE: In this section, you will work Left Ribbing from left selvage to Center marker only. You will again work back and forth in short rows.
Short Row 1 (wrong side): Slip 1, k1, *p1 tbl, k1, repeat from * to 2 stitches before Center marker, wrp-t.
Short Row 2 (right side): *P1, k1 tbl, repeat from * to last 2 stitches, p2.
Short Row 3: Slip 1, k1, *p1 tbl, k1, repeat from * to 2 stitches before previous wrap, wrp-t.
Repeat Short Rows 2 and 3 thirty-nine more times, then repeat Short Row 2 once more. [Left selvage measures 12¼ inches from cast-on edge, and 2 stitches remain unworked to left of last wrapped stitch.]
Next Row (wrong side): Work in established pattern to end of row, purling wrapped stitches with their wraps through the back loops.
Bias Knitting
Switch to smaller circular needles.
Row 1 (right side): Slip 1, [p1, k1] 2 times, LLI (see Special Instructions), knit to 2 stitches before Center marker, s2kp (see Special Instructions) removing marker, replace marker, knit to last 5 stitches, RLI (see Special Instructions), k1, p1, k1, p2. [2 stitches increased and 2 stitches decreased]
Row 2 (wrong side): Slip 1, k1, p1, k1, purl to last 4 stitches, [k1, p1] 2 times.
Repeat Rows 1 and 2 until piece measures
Top Ribbing
NOTE: In this section, you will again be working back and forth in short rows. When working wrapped stitches with their wraps on the right side, make sure wraps fall behind stitch and that stitch maintains its twist. To do this, slip wrapped stitch to right needle purlwise through back loop, return it to left needle in
new orientation, insert right needle tip under wrap and into wrapped stitch, then knit them together.
SHAPE RIBBING, BOTH SIDES AT ONCE
Switch to larger circular needles.
Set-Up Row (wrong side): Slip 1, *k1, p1 tbl, repeat from * to last 2 stitches, k1, p1.
Short Row 1 (right side): Slip 1, *p1, k1 tbl, repeat from * to Center marker, sm, p1, wrp-t.
Short Row 2 (wrong side): K1, sm, p1 tbl, wrp-t.
Short Row 3: Work in established pattern to Center marker, sm, work in established pattern to previous wrap, knit wrapped stitch with its wrap through back loops (see Note, under Top Ribbing, above), p1, wrp-t.
Short Row 4: Work in established pattern to Center marker, sm, work in established pattern to previous wrap, knit wrapped stitch with its wrap, p1 tbl, wrp-t.
Repeat Short Rows 3 and 4 thirty-nine more times. [3 stitches remain unworked on Right Side to right of last wrapped stitch; two stitches remain unworked on Left Side to left of last wrapped stitch.]
Partial Row (right side): Work in established pattern to end of row, working wrapped stitch with its wrap through back loops as before.
WORK RIBBING EVEN
Set-Up Row (wrong side): Slip 1, *k1, p1 tbl, repeat from * to last 4 stitches, knit wrapped stitch with its wrap, p1 tbl, k1, p1.
Row 1 (right side): Slip 1, *p1, k1 tbl, repeat from * to last 2 stitches, p2.
Row 2 (wrong side): Slip 1, *k1, p1 tbl, repeat from * to last 2 stitches, k1, p1.
Repeat Rows 1 and 2 for 2 inches, ending with a wrong-side row.
Bind off loosely in pattern, without knitting through back loop.
Finishing
Weave in all ends and block as desired.




Is this pattern worked on the long side of the wrap?
Hi Ellen,
Thanks for writing in! For the Bias Wrap, you will be casting on the width, or short edge, of the wrap.
I hope that clears things up!
Julianna
Hi, is there another comparable yarn for this pattern without alpaca? Unfortunately, I’m allergic to alpaca. If so, how many skeins of this yarn would I need? Thank you!
Hi Mona,
Thanks for reaching out! I think this wrap would be lovely in either our Line Weight or Cattail Silk for alpaca-free options! You would need 3 skeins of either yarn.
Best of luck and happy knitting!
Julianna
Love the pattern but could this be adjusted for a smaller width for a scarf ?
Hi Debbie,
Thanks for writing in! Although it will take a little bit of adjustment, you certainly can make this into a narrower scarf! You will need to be sure to cast on an odd number of stitches and adjust the placement of your center marker to be immediately before the center stitch, and then work fewer repeats of the short rows in the first and last sections of the wrap.
Best of luck and happy knitting!
Julianna
I have purchased the pattern for the bias wrap. I would like to make it a bit shorter – where would you suggest I make the changes to the length? Would 3 skeins then be sufficient?
Hi Warren,
Thanks writing in! You certainly can make the wrap shorter! You will simply repeat rows 1 and 2 until you are about 2 inches short of your desired length. The yardage is very close and you may only need three skeins anyway, so I do think that as long as you are knitting to the correct gauge, you will have plenty of yarn if you make your wrap a few inches shorter.
I hope that helps!
Julianna
Greetings,
Is it possible to shorten this pattern, perhaps in the stockinette portion?
Many thanks,
Jackie
Hi Jackie,
Thanks for writing in! You certainly can make the wrap shorter! You will simply repeat rows 1 and 2 until you are about 2 inches short of your desired length.
Happy knitting!
Julianna
Love your designs.
Would it be possible to make this wrap with Mulberry Merino? How many skeins would I need to get? Thanks!
Hi Maggie,
Thanks for reaching out! Although Mulberry Merino is a bit heavier weight than Linen Quill, I do think you could make it work with a few adjustments! I would suggest using US 4 and US 7 needles for your swatches and adjust your cast on based on the twisted rib gauge. You will need to be sure to cast on an odd number of stitches and adjust the placement of your center marker to be immediately before the center stitch, and then work fewer repeats of the short rows in the first and last sections of the wrap. You will need 5 or 6 skeins of Mulberry Merino for a similar sized wrap.
I hope that helps!
Julianna
You made me what to start knitting again. It been years and i just fell in love with the bias wrap look. Do you have a u-tube video for me to follow along before i buy pattern. I am not good at reading patterns and determining what they are saying is hard. Lot to do with my dyslexia. i would gladly buy but need to know its not going to be a waste. Thank you for your help Erika
Hi Erika,
Thanks so much for writing in and for the kind words! Unfortunately we don’t have the resources at the moment to do a video tutorial of this pattern. We will keep your request in mind though for the future! Thanks again!
Best,
Julianna
Hi, I purchased this pattern and got through the first two sections easily, but ran into a problem in section SHAPE LEFT SIDE RIBBING. When I tried to purl wrapped stitches with their wraps, it seemed much more difficult than it should be. And, the fabric just didn’t look right. I have watched several tutorials on this technique (including yours) and am still having problems. Any tips or suggestions? (Can I just purl the stitch without its wrap?.) Thanks very much!
Hello Lee,
Thank you for reaching out- I’m sorry this section of the pattern is causing so much frustration! Purling the wraps is always a bit more of a struggle than knitting your wraps. In my experience it doesn’t feel effortless, but It works. If you Purl your stitch without its wrap you will create a small hole. In what way does the fabric not look right? Is it possible that you are twisting your stitch, making it tighter around your needle? If you would like to send us a picture at Store@purlsoho.com we could take a closer look.
I hope we can help!
-Marilla
Hi Marilla,
Thanks for your response! I think part of the problem is that the yarn is so fine I’m not identifying the wrap correctly. I’m going to try a practice piece with heavier yarn and see how that goes. If I’m still having problems I’ll send you a picture. Thanks again for your assistance!
Lee
I have 2 skeins of Cattail Silk, do you think they would work up well in this pattern?
Thanks
Hi Mary,
Thanks for writing in! Although you should always knit a gauge swatch to be sure, Cattail Silk does knit up at the same gauge as Linen Quill, so I think it would be a fantastic substitution!
Happy knitting, and please let us know how your version turns out!
Julianna
I have a question about the SHAPE LEFT SIDE RIBBING section of the pattern. I am following the directions for the wrap-t on the wrong side from the Notes and after I do the turn of the wrap-t, the yarn is in the back. The first stitch of Short Row 2 in this section is a purl stitch, so am I just bringing the yarn back to the front to purl that stitch? Isn’t this undoing part of the wrap?
This pattern is so beautiful; I want to make sure I am doing it correctly. Thank you.
Hi John,
Thanks for reaching out! Although in this particular section you will be undoing the very last step of the wrap and turn as written, the important part of the wrap and turn (which is the wrap around the slipped stitch) will not be affected – despite bringing the yarn back to the front to purl, the yarn should still be wrapped around the slipped stitch which is now on your right hand needle after turning.
I hope that clears things up!
Julianna
I had this exact question! This clarifies it nicely. Thanks
Hi so I am at that exact point but don’t quite understand your answer. Should I be leaving the yarn at the back, where it is as I’ve just done a knit stitch, or what?
Before seeing the comments here, this is my original question, which is probably the same.
Hi, I am knitting the Bias Wrap, and have a question regarding short rows and picking up the wraps.
So I have finished the right side and worked across the next row picking up the wraps to get to the other side in order to start the Shape Left Side Ribbing.
In reading the instructions it says for Short Row 1 (wrong side) *p1,k1 tbl , k1, repeat * to 2 stitches before CM, wrap-t.
When I look at the notes for Wrp-t, it says: On the wrong side, KEEPING YARN IN FRONT, slip next stitch,…
My problem is, that on the wrong side, in this pattern the 2 stitches before CM is ending with a knit stitch before the wrap and turn, (same as right side). So my yarn is actually in the back, and not in the front.
Am I missing something somewhere? Please help… thanks.
So I really need clarification. Thanks
Hi Ginette,
Thanks for reaching out! Just as Julianna said above, it is alright if you come to this point and your yarn is in the back, you will simply bring the yarn forward to the front of the the work and then continue on with the written instructions!
I hope this clears things up!
Warmly,
Gianna
Hi,
I purchased this pattern and I wonder if circular needles are really needed for this wrap or if it can be knitted with regular needles ?
Thank you
Hello Helen,
Thank you for reaching out! This wrap can certainly be knit on straight so long as your straights are long enough to fit all your stitches.
Happy knitting!
-Marilla
Hi! I’m on the shorter side, so I would likely want to make the wrap 60 inches instead of 72, would I be able to get away with 3 skeins for this? Thanks!
Hello Christina,
Thank you for reaching out! Yes, you will be all set with three skeins.
Happy knitting,
Marilla
Could you suggest a few wool sub options (no alpaca) along with quantities?? I’d like to make this for cooler temps. Thanks!
Hello Michelle,
Thank you for reaching out! I think this wrap would be beautiful in our Cattail Silk.
I hope this helps and happy knitting!
-Marilla
Hi,
I have a question about the first row in the SHAPE LEFT SIDE RIBBING section. What is the technique for purling stitches with their wraps on the RS of the work? The tutorial demonstrates knitting stitches with their wraps on the RS and purling stitches with their wraps on the WS but not how to purl a stitch with its wrap on the RS. Thanks for your assistance!
Lee
Hi Lee,
Thanks for reaching out! Purling a stitch together with its wrap on the right side will be exactly the same as doing it on the wrong side; however, don’t forget about the note at the very beginning of this section on maintaining the twist of the stitch while working this step!
Best of luck, and please let us know if you have any other questions!
Julianna
Somehow I have 85 stitches at the beginning of my purl side where I should have 85 on knit side. When I start my short rows after I’m finished with the bias rows will it make a difference?
Thanks
Kathy
Hi Kathy,
Thanks for writing in! Once you start the short rows and ribbing at the end of the scarf, you should just be able to move your marker over one stitch without affecting the pattern much – if you look closely at the pictures, you will see that the center spine of the bias stitch aligns with a purl column of the ribbing, so at worst, your spine will align with a knit column instead! If you prefer, you could decrease a stitch at the beginning and increase a stitch at the end of the final purl row before beginning the short rows to realign your marker.
I hope that helps!
Julianna
I really want to knit this but I’m not an expert knitter. How difficult would you say it is and could you recommend a very similar yarn that I could get in the UK.
Many thanks, Catherine
Hello Catherine,
Thank you for reaching out! This is a pretty intricate pattern that includes short rows and lifted increases, but as long as you are up for a challenge it is a rewarding knit. You can knit this project with any fingering or 2ply yarn.
Happy knitting!
-Marilla
Hello!
I’d like to know how to knit the selvedge on the pattern. Thanks!
Élisabeth
Hello Elisabeth,
Thank you for reaching out! The first stitch of every row is slipped and in addition to this there are a few stitches of ribbing on either end of the middle portion.
Happy knitting!
Thanks for your answer…. but I have just finished the shape right side ribbing (crying…)… is there a way to fix it or I have to start over (for the third time… crying again…louder).
Otherwise I really like this &@:(@%# pattern
😉
Élisabeth
Hello Elisbeth,
I love your passion- we have all been there! Did you not slip your first stitch in this portion? Another thing to remember when slipping your stitches is that yo must slip stitches knitwise with yarn in back unless directed otherwise.
Good luck and let us know if you have any more questions!
-Marilla
Hi Purl Soho: I am already getting started on gifts for Christmas 2019 and have a stash of Posy yarn. I’m wondering whether it would be a suitable yarn for this scarf. If it isn’t, would you please recommend a couple of scarf patterns suitable for Posy?
Thank you.
Diane Hill
Hello Diana,
Thank you for writing- I’m so impressed and aspire to be more like you! Posy is a fingering weight yarn and will work beautifully for this pattern.
Happy knitting!
-Marilla
I am up to Shape Ribbing, Both Sides, towards the end of the pattern and I am totally confused. My question involves Short Row 2. Is this on the knit (right) side or on the purl (wrong side).
The directions read K1, sm, p1 tbl, wrp-t,. Does this mean you are only knitting 2 stitches on the wrong side before wrap and turn? Or are the wrong side rows simply done in pattern k1, P1 tbl and are all the wraps done on knit side. Please help as this is a present and I need to get it done!
Hi Rhonda,
Thanks for reaching out! Short Row 2 should be worked on a wrong side, or purl row, and you are correct that you will only work two stitches before the wrap and turn. As you continue on in this section, repeating Short Rows 3 and 4, Short Row 3 will always be worked on the right side of the wrap and Short Row 4 will always be worked on the wrong side, so you will be working wrap and turns on both sides of the work, but will be moving out one stitch farther on each row.
I hope that clears things up!
Julianna
Do you think I could use my Cashmere Ombre Wrap kit for this? Do you think I would have enough yarn in each of the end sections (lightest color and darkest color) to make it through the short rows? I think colors 1-7 I could just knit until I run out of yarn, but how would you go about making sure the first and last sections come out symmetrically? I suspect the issue may be knowing when to start the last section short rows. I hope this question even makes sense…
Hello Christine,
Thank you for reaching out- I love this idea! I think an easy way to do this is to have a smaller width. Perhaps a width of 18″, you will just want to be sure that you are casting on an odd number.
I hope this helps and happy knitting!
-Marilla
I am at the “Shape Ribbing, Both Sides” and have torn it out no less than 4 times! I’m confused about several things, but let’s start with my first concern: After working Short row 1 and doing to the wrap and turn on the right side, once I turn the work (with wrong side facing me now), the first stitch of Short row 2 is a K1. In order to do this I need to return my yarn to the back, which leaves me with an incomplete wrap and turn stitch. The next question would be regarding what is meant by ‘Work in established Pattern’ referred to in Short Row 3 and Short Row 4.
When I look at the photo of the finished piece on page 5, it appears the ribbing is reversed on the two ends. Is that correct?
Hello Kris,
Thanks for reaching out! To address your first concern, your wrap should start at the back and wrap all the way around to return to the back so that you can then knit your first stitch. I hope this gives you a clearer visual. I would also recommend checking out our tutorial.
When the pattern says to work in established pattern it basically means to just keep doing the stitch you have been doing. In this case it refers to the ribbing and that you want to continue to knit your knits and purl your purls in order to keep the rib stitch going.
The shapes made by the ribbing are reversed! You can also see this on the diagram on the last page.
I hope this answers your questions and let us know if you have any more!
Best,
Marilla
Thank you for the quick reply!
I am making a practice mini project of all the stitches since they are new to me, and it’s going fine until I try to transition from shaping the right side ribbing to the LEFT side ribbing.
The last instruction on the RIGHT side is to repeat short row 2. When that is finished, I’m now on the far right side of my piece and on the right side of the project.
The next instruction has me flummoxed. Slip 1, I get. But I don’t understand “work in the established pattern.” What is my “established pattern?”
Many thanks for all you do.
Hi Michele,
Thanks for reaching out! Your established pattern is your 1×1 twisted ribbing, so you will copy the stitch pattern you can see below the needles. On right side rows you will knit the knits to the back loop and purl the purls, and on wrong side rows you will knit the knits and purl the purls to the back loop.
I hope that clears things up!
Julianna
I’m having questions about the wrap and turn on the left side. I read your response to John and that cleared up the question of the yarn needing to be in the back to purl the next row. When the short rows are completed and you follow the established pattern on the wrong side , purling wrapped stitches with their wraps through the back loops, what is the best way to put the wrap on the needle? From front or back? I’m having trouble seeing this. Your explanation would be greatly appreciated.
Hi Sandy,
Thanks for reaching out! You can see how to pick up a wrapped stitch on a purl stitch in our Short Rows: Wrap & Turn tutorial! To pick up the wrap on a purl stitch, you will first insert your right hand needle from back to front in the back of the wrap, and then into the stitch as if to purl normally before purling them together. It is a bit trickier to pick up the wrap on a purl stitch than it is on a knit stitch, but it should get easier with practice!
I hope that clears things up!
Julianna
So I am at “SHAPE RIBBING” Shape right side ribbing … I did short row 1 , did the wrap turn. That left with me a stitch next to the space holder that doesn’t get into the wrong side row – is that correct.
And is there supposed to be a wrap turn stitch on the wrong side/short row 2? There is no wrp-t listed on short row 2 instructions but from reading above it sounds there is supposed to be one? Is that considered part of the wrp-t from row 1 and that you have to finish it when you turn the knitting around?
Hi CeeJay
Thanks for reaching out! It sounds like you did the Short Row 1 correctly. If you need a visual, we have a great Wrap and Turn tutorial to watch. There will be one stitch before the center marker that remains when you complete this row. On Short Row 2 (wrong side): *P1 tbl, k1, repeat from * to last stitch, p1, this will have you in pattern to the end of your work, you will turn and work Short Row 3. The wrap and turns will only be happening on the odd rows. I hope this helps!
Happy knitting
Jessica
So the directions say to complete Short row 1 until there are 2 stitches left before the center marker and then do the wrap turn. so after I do the wrap turn and am now starting the wrong side/row 2 I have 2 stitches left before the marker, not one. I am still confused …
Hi Cee Jay
Thanks for another great question! On Short Row 1 (right side): Slip 1, *p1, k1 tbl, repeat from * to 2 stitches before Center marker, wrp-t . You will be wrapping the second stitch before the marker. The stitch next to the marker will be unworked. I think my explanation might have confused you, I should have said 1 unworked stitch. After you slip the second to last stitch to the right needle, wrap it and slide it back to the left needle, then turn your work, you will have 2 stitches after the marker as you work back for Short Row 2. I hope this clears it up!
Best
Jessica
Hello! I just got this pattern last night and am so excited to get started on it! I have a couple questions.
First, if I want to make it wider than the 20.5″, how do you recommend doing that?
Second, I plan on using two yarns held together (trying to use up my stash!). The first is comparable to your Tussock (a mohair/silk lace weight), and the other is a fingering weight yarn that is 70% superwash merino, 20% silk, and 10% cashmere. 7-8 stitches=1″ on US Size 2. Do you think this would work? Are there adjustments you’d suggest making?
Thank you!!
~~emily
Hi Emily,
Thanks for writing in! You can adjust the width of this wrap by casting on any odd number of stitches, but your yarn substitution may do all the work for you! By adding a strand of lace weight mohair and silk to a fingering weight yarn, the combined yarn weight will be approximately a sport or DK weight, so I would recommend knitting a gauge swatch in the half twisted rib pattern using a US 8 or 9 needle. You can then multiply your stitches per inch by however wide you would like your wrap to be and compare that number to our cast on of 169 stitches. If you do go with a different amount of stitches, just make sure you place your stitch marker immediately before the center stitch on the needle so you can adjust how many short rows you work on each side of the ribbing!
I hope that helps, and happy knitting!
Julianna
Hi again! I’m nearly done with this project! I’ve gotten all the way to “Shape Ribbing, Both Sides”, but I’m encountering issues I just can’t figure out. The issue seems to be that my center spine continues to be a “knit” column, unlike the images on the pattern that show that once it switches to the ribbing it switches to a “purl” column. This seems to be throwing off the instructions for the short rows. Can you advise me on what I should do? (I can email pics if needed!). Thank you so much in advance!
Hi Emily,
Thanks for reaching out! Yes that would be great! Please send us some photos of your work to our email customerservice@purlsoho.com and we can troubleshoot further from there!
Warmly,
Gianna
I was having a hard time understanding how to pick up the wrap stitch, looked on YouTube and there is a very good demonstration on Very Pink Knits.
Hi, So I have come to the last part, Shape ribbing both sides. Short Row 1 (right side). I get to the part after slip marker P1, wrap-1. So my question here is,
(1) my yarn is in front after P1, so before I do the wrap, do I take my yarn to the back? Because instructions for wrap-1 is: “on right side, keeping yarn in back… but as I just noted, my yarn is in front after the purl stitch.
I just don’t want to start this incorrectly and then have to undo a bunch (which is what happened at the beginning when I started the wrap-1 rows).
And then to continue ready for the next knit stitch after turning.
Or:
(2) do I leave the yarn in front, slip stitch, bring yarn to back, slip stitch back to left needle, and then bring yarn to the front before turning ready for next knit stitch after turning?
Thank you in advance…
Hi Ginette,
Thanks for reaching out! Yes, that is correct! You will bring the yarn to the back of the work as stated in the instructions!
Happy knitting!
Gianna
Hi, I am so excited having bought this pattern last night. I was thinking of doing it in a 70% merino wool 30% silk. The yarn I have in mind is a hand-dyed one from Ireland called Life In the Long Grass (ceramic shade).Do you think a slightly variegated yarn would work or would a single solid colour be preferable?
Thank you
Hi Ciara,
Thanks for reaching out. I think a slightly variegated yarn would be lovely for this pattern! The textured sections of this pattern are very simple, so I don’t think the colors of the yarn will take away from that effect, or vice versa. Hope this helps!
All the best,
Lili
Thanks so much Lili!
Hi Lili,
I purchased this and the yarn to go with it. I’m just doing the tension squares now. For the stockinette I achieved tension with the suggested needle size.
However for the half twisted rib it suggests 36 stitches for 4 inches and when I used the suggested needle size I only got 26 stitches.
I wonder is there an error in the suggested needle size or the stitch count. I normally have to go down a needle size to achieve gauge in rib??
Thanks
Hi Ciara,
When you’re measuring your swatch, are you stretching the ribbing out at all? We measure all our ribbing swatches in the unstretched position, so the stitch gauge can vary quite significantly from the stitch gauge when stretched! But it also looks like you can definitely try going down a needle size as well–that may help get your ribbing gauge closer to 36 stitches as well.
All the best,
Lili
Thank you Lili. I think my tension with my purls is too loose, which might be the problem. I’ll try the smaller needle. Thanks!
Hello – I am about to start the set up rows for the final wrap and turn and took the time to count my stitches. I have been working on this project for awhile, many plane rides, a few rip outs, etc. and am now at only 162 stitches. Where should I add the extra stitch to take me to 163 for the odd count since the original cast on was 169?
Thank you!!
Hi Melissa,
Thanks for reaching out. I’d recommend adding the extra stitch as the second to last stitch in the Set-Up Row! You can work a make-one increase (either right or left), and this stitch will appear as a knit stitch. Hope this helps!
All the best,
Lili
Hi – I’m towards the beginning & I’ve just started to shape the right ribbing. I’ve done short row 1 & 2 and am now on short row 3. However, I’m having a little trouble working out exactly where “the 2 stitches before the previous wrap” is? I can see the wrap stitch, and then if I count 2 more stitches, technically I will be 4 stitches from the marker before I do my next wrp-t? Hope you can please clarify – thanks!
Hi Annette,
Thanks for reaching out. It sounds like you’re already correct! But here’s how you can identify “2 stitches before previous wrap”: Find the wrapped stitch (this stitch hasn’t been knit or purled yet, it just has the wrap wrapped around it), then count two stitches to the right. These are the “2 stitches before,” so you would just knit up to them and then work the next wrap + turn. You will indeed end up 4 stitches before the marker, since the first wrap was placed 2 stitches before the marker, and then you’re placing the next wrap 2 stitches before that one! I hope this helps clarify things.
All the best,
Lili
Thanks Lili – I’ve not finished the right ribbing and am on the last row – what does purl wrap stitches “with their wraps” mean? Is it something other than a regular purl stitch?
Hi Annette,
Thank you for your question! Purling a stitch with its wrap means picking up the wrap around the stitch you are about to purl and working it together with the wrapped stitch. We have a video tutorial for Short Rows, and purling a stitch with its wrap begins at: 3:31. I hope this helps you visualize what this looks like!
Kindly,
Margaret
Hi – I’m at the end of the “shape right ribbing” – when it says “work in established pattern” – should I be knitting through the back loop as per previous right side, or regular knit stitches? thx
Hi Annette,
Thanks for reaching out. Yes, in this pattern, “work in established pattern” does mean knitting through the back loop on right side rows and purling through the back loop on wrong side rows! Hope this helps!
All the best,
Lili
Hello!
I’m just starting the Shape Right Ribbing, 84 stitches before the place marker. I’ve worked Short Row 1 (right side) and am at the 2 stitches before Center marker. I’ve watched the tutorial and read the special instructions but when I wrp-t the first stitch in Short Row 2 (wrong side) is a knit stitch and I can’t P1 tbl.
Any help would be appreciated.
Kind regards,
Jodie
Hi Jodie,
Thanks for reaching out! It sounds like you’re wrapping and turning on the incorrect stitch. After you work in pattern to 2 stitches before the Center marker, you’ll have just knit a k1 tbl stitch. Then, you wrap and turn on the following stitch. When you turn your work after this, the very first stitch in Short Row 2 is the same as that final k1 tbl stitch on Short Row 1. Since you’re on the wrong side of your work though, this k1 tbl stitch is now a purl stitch!
Hope this helps clarify things!
All the best,
Lili
I’m just starting the bias knitting part & I’m confused by the instruction of s2kp 2 stitches before marker. The written special instruction S2kp is to slip 2 knitwise and knit one.. the video instruction differs in slipping only 1 stitch before. Which is correct process?
Also – the instructions don’t show how to reduce the stitches left of centre..
Please clarify
Hi Ampy,
Thanks for writing in! The technique is actually the same but for the pattern we have changed exactly where the S2KP is placed to align with the ribbed fabric. So in this case you will want to follow the instruction of the pattern. The S2KP is a center decrease so you won’t need to worry about a left-side decrease here as you are decreasing 3 into 1. I hope this helps but please let me know if you have any other questions.
Happy knitting,
Gavriella