Verse + Reverse Scarf
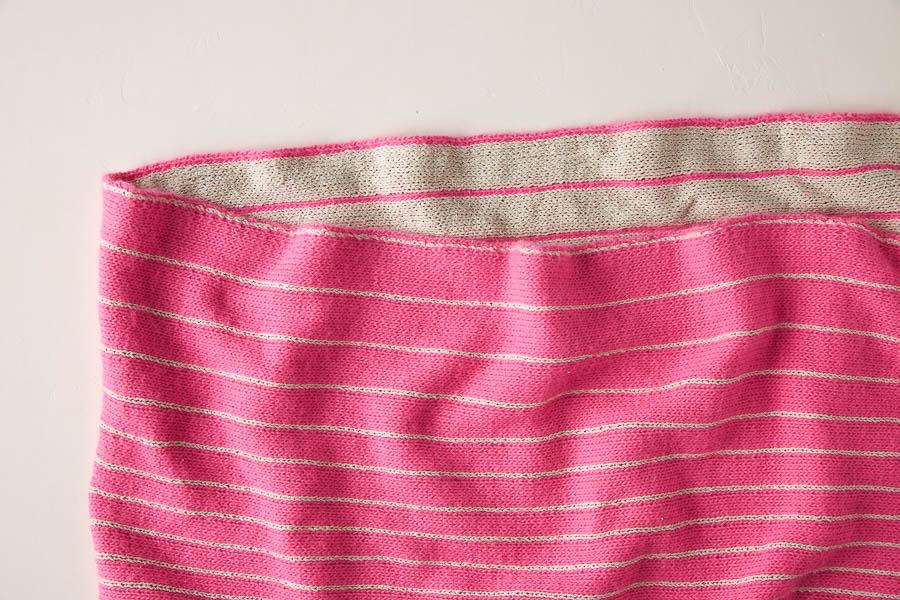
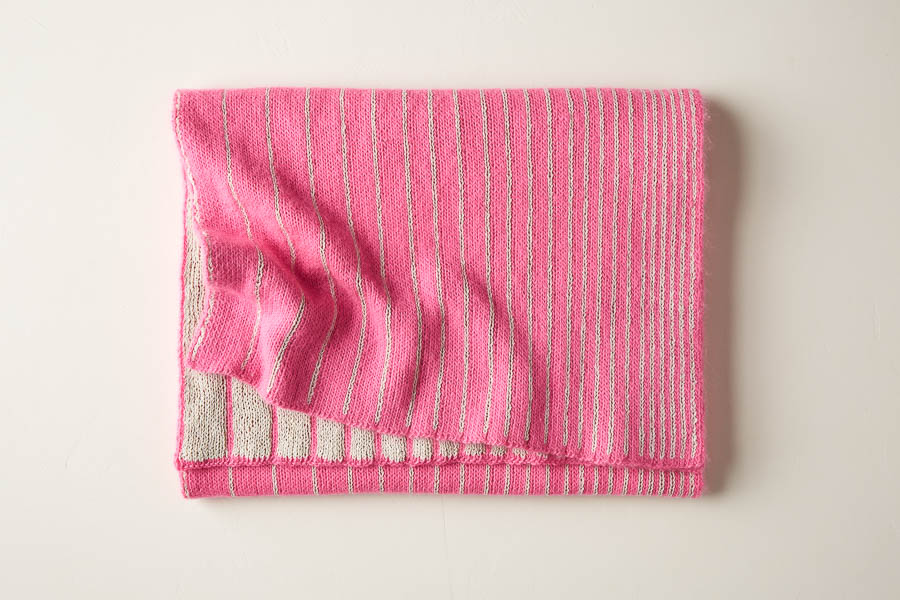
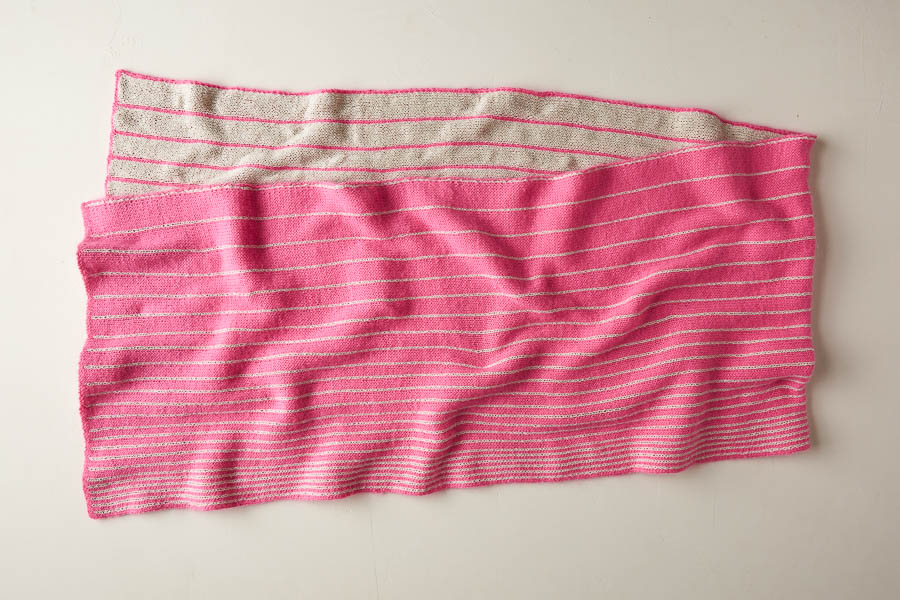
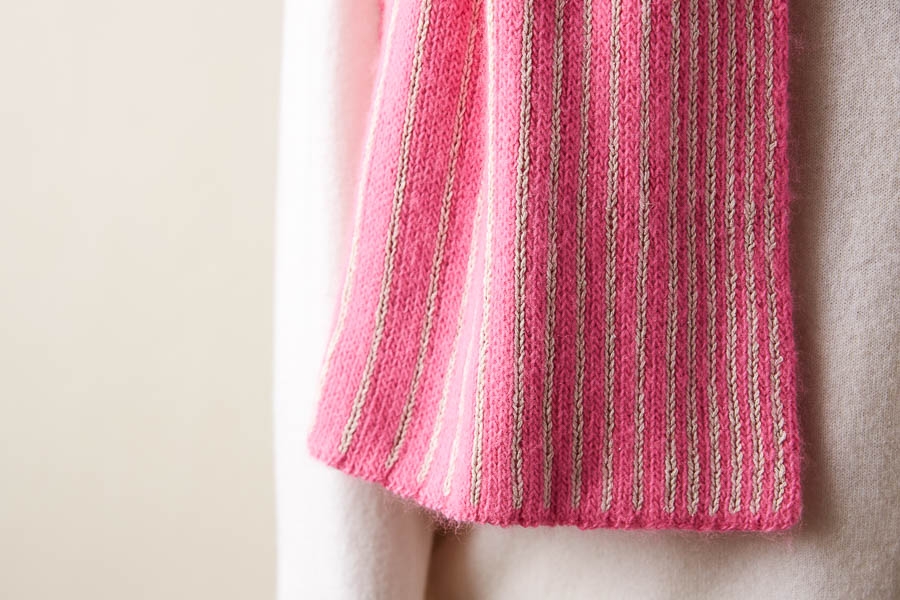
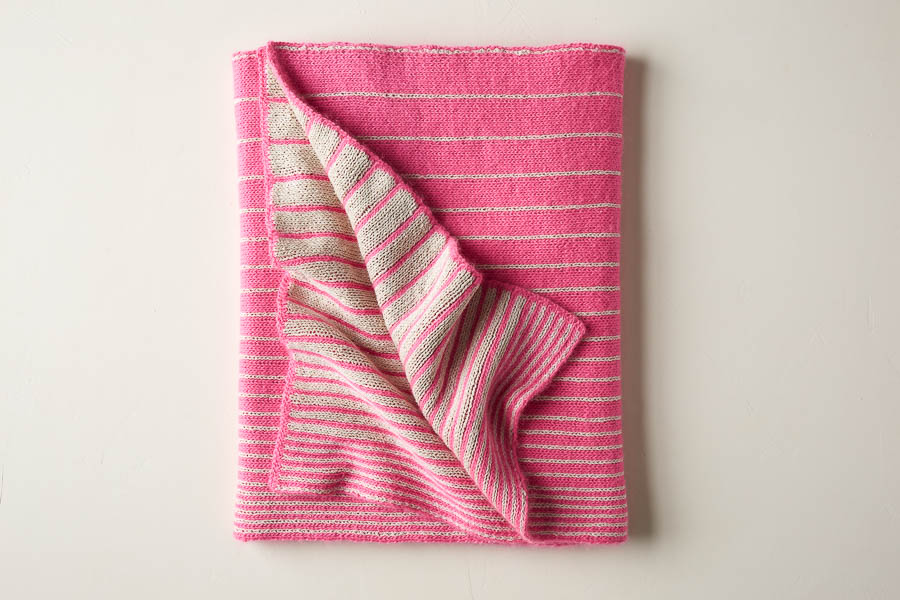
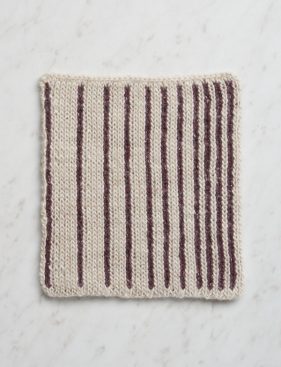
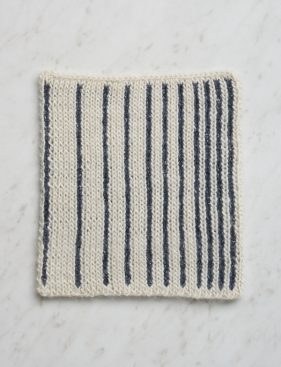
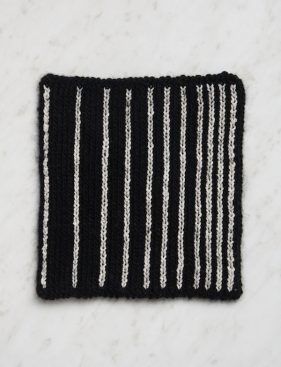
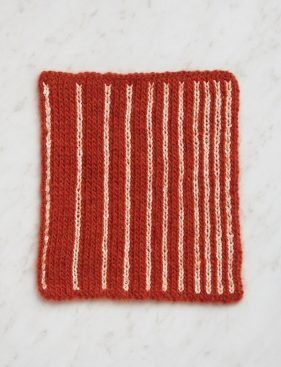
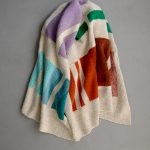
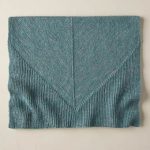
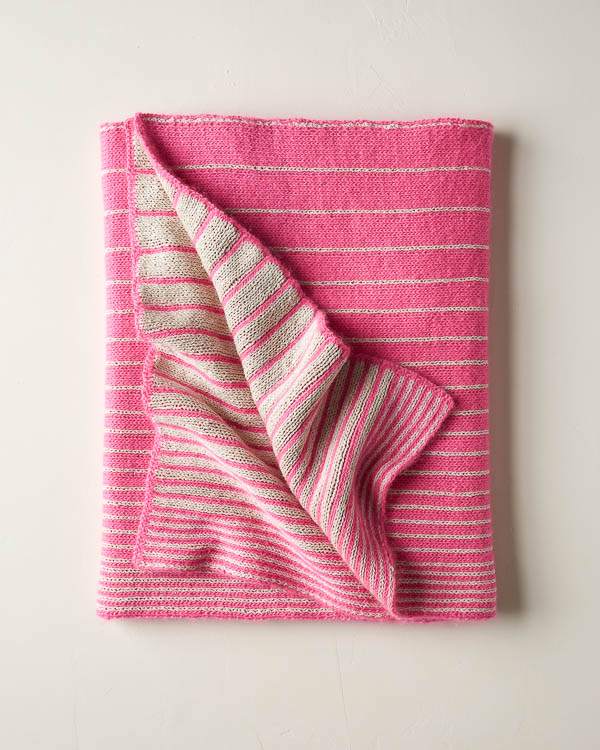
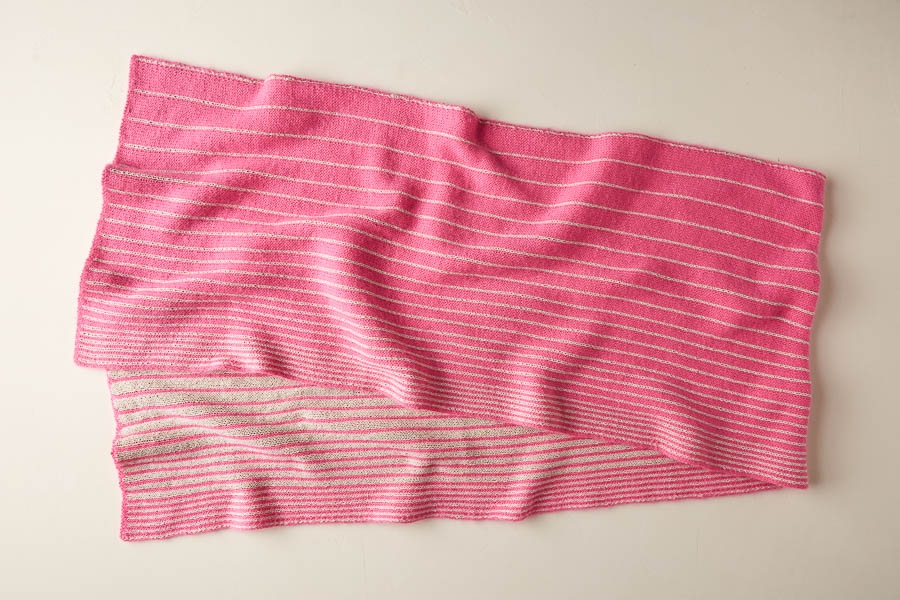
Our Verse + Reverse Scarf promises two plots in one, a seamless dual narrative from two colors at once. This double-knit endeavor is a gloriously uncomplicated process that feels (and looks!) like magic spinning from your needles.
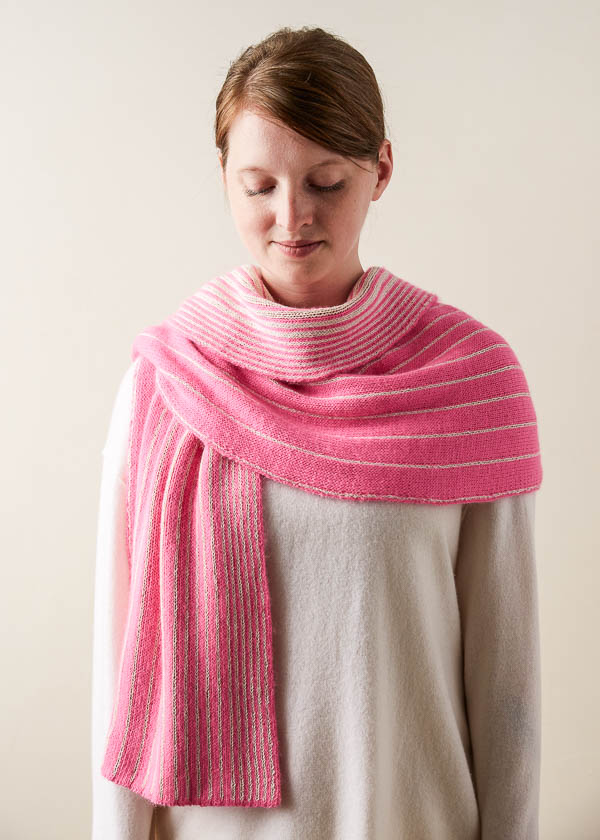
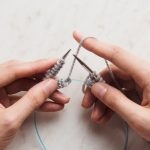
Casting on the short side, row after row of vertical lines emerge thanks to the simple technique of double knitting. Quell your concerns by watching our new Double Knitting video tutorial, which shows how this slip stitch technique is easy enough to be a challenge for advanced beginners and, for the experienced, a project to sink your teeth into.
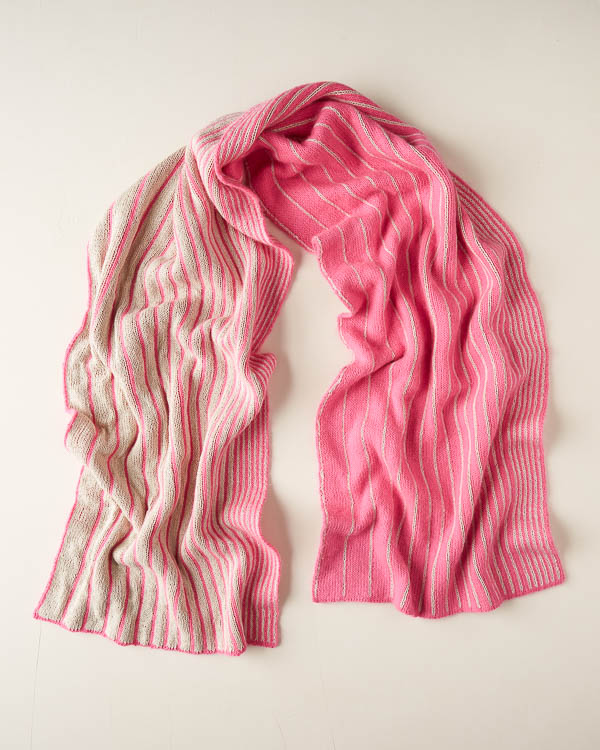
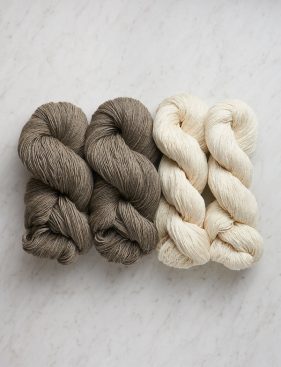
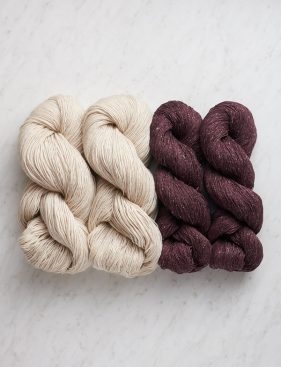
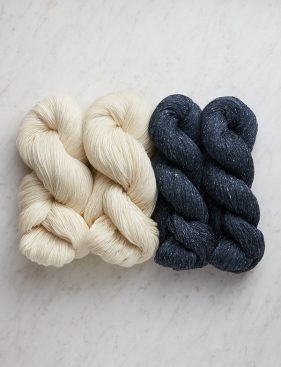
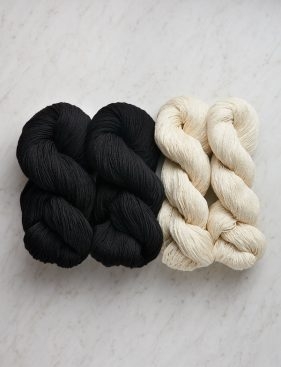
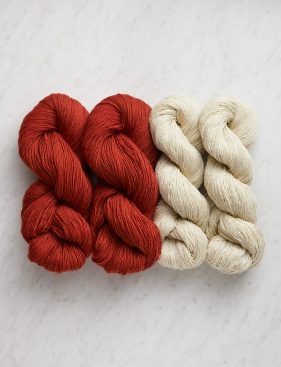
We used two yarns from different ends of the fiber world: our Cattail Silk with its raw elegance and our Line Weight merino with its cloud-like downy softness. These two voices seem to completely understand each other while respecting their differences. You’ll only need two skeins of each, and to help you choose colors, we’ve put them together in seven palettes!
If you love the yarn used in this project, you’ll love all of our other yarn, too! Explore our 35+ lovingly created yarn collections, in nearly every natural fiber and spectacular color you can imagine… Only available here at Purl Soho’s online yarn shop!
Designed by Purl Soho designer, Jake Canton. Click here to see even more of Jake’s designs!
Share your progress and connect with the community by tagging your pics with #PurlSoho, #PurlSohoBusyHands, #PurlSohoVerseReverseScarf, #PurlSohoLineWeight, and #PurlSohoCattailSilk. We can’t wait to see what you make!
Materials
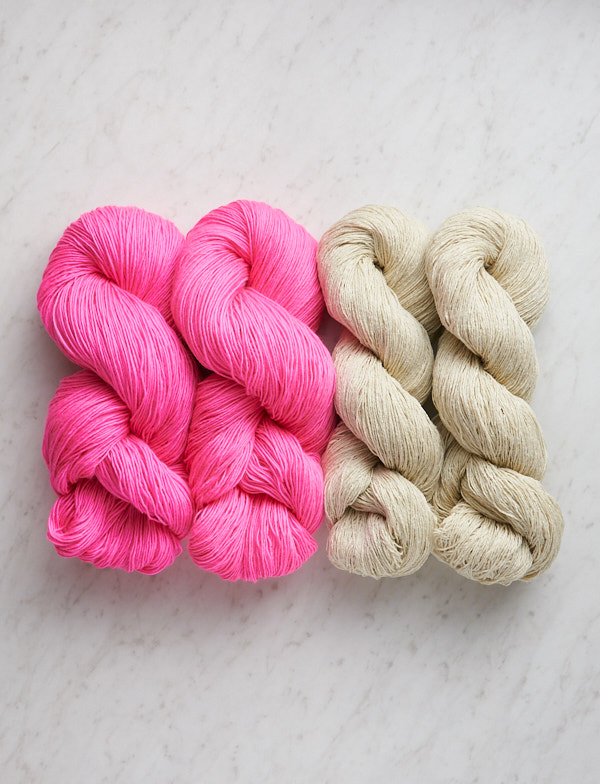
To knit your own Verse + Reverse Scarf, you will need…
- Yarn A: 2 skeins of Purl Soho’s Line Weight, 100% merino wool yarn. Each skein of this fingering weight yarn is 494 yards/ 100 grams; approximately 988 yards required.
- Yarn B: 2 skeins of Purl Soho’s Cattail Silk, 100% silk. Each skein is 618 yards/ 100 grams; approximately 1128 yards required.
We used the palette Wild Begonia…
Yarn A: Line Weight in Super Pink + Yarn B: Cattail Silk in Porcelain White
Choose from six inspiring palettes, shown below (NOTE: some colors are no longer available)…
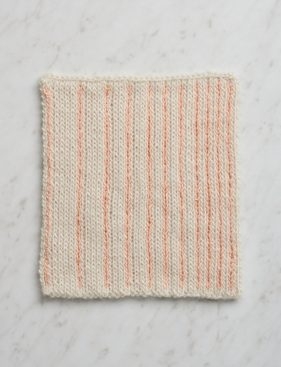
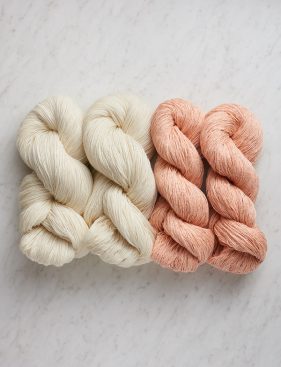
TEA CUP
Yarn A: Line Weight in Heirloom White + Yarn B: Cattail Silk in Rabbit Ear Pink
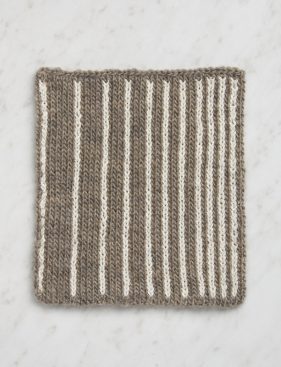
TOADSTOOL
Yarn A: Line Weight in Tabby Gray + Yarn B: Cattail Silk in Moon White
PURPLE TUBER
Yarn A: Line Weight in Wheat Flour + Yarn B: Cattail Silk in Wild Mulberry
RIVER BLUE
Yarn A: Line Weight in Heirloom White + Yarn B: Cattail Silk in Deep Indigo
WOODPECKER
Yarn A: Line Weight in Soft Black + Yarn B: Cattail Silk in Moon White
CHIMNEY
Yarn A: Line Weight in Kiln Red + Yarn B: Cattail Silk in Porcelain White
You will also need…
- US 4 (3.5 mm), 24- or 32-inch circular needles
- A spare US 4 or smaller, 24- or 32-inch circular needles
Gauge
26 stitches = 4 inches in double knit stockinette stitch
Size
Finished Dimensions: 16 inches wide x 68 inches long
Notes
Slip Stitches
Slip all slipped stitches purlwise unless indicated in the pattern.
Turn + Slide
Each row in this pattern starts with the instructions to either “Turn” or “Slide” the work:
“Turning the work” means to do what you would normally do when knitting rows with circular needles: Transfer the needle from your left hand into your right and the needle from your right hand into your left, and flip the work around so the opposite side is facing you.
“Sliding the work” means to keep the same side of the work facing you and to push all the stitches to the right end of the circular needles. Without turning the work, start the new row as you normally would.
You will know that you’re doing this right if the yarn you need to work the next row is magically there waiting for you!
Double Knitting
This wrap uses a technique called Double Knitting. You can follow the pattern as written, but if you need extra help, our step-by-step video tutorial shows you exactly how to do it!
Pattern
With Yarn A, use a Long Tail Cast On to cast on 210 stitches.
Set-Up Row 1 (wrong side): With Yarn A, k1, p1, slip 1 with yarn in back (wyib), [k1, slip 1 with yarn in front (wyif)] 9 times, p1, slip 1 wyib, [k1, slip 1 wyif] 8 times, p1, slip 1 wyib, [k1, slip 1 wyif] 7 times, p1, slip 1 wyib, [k1, slip 1 wyif] 6 times, [p1, slip 1 wyib, (k1, slip 1 wyif) 5 times] 2 times, [p1, slip 1 wyib, (k1, slip 1 wyif) 4 times] 3 times, [p1, slip 1 wyib, (k1, slip 1 wyif) 3 times] 4 times, [p1, slip 1 wyib, (k1, slip 1 wyif) 2 times] 5 times, [p1, slip 1 wyib, k1, slip 1 wyif] 6 times, k1.
Set-Up Row 2 (right side): Turn the work and with Yarn A, p1, [k1, slip 1 wyif, p1, slip 1 wyib] 6 times, [(k1, slip 1 wyif) 2 times, p1, slip 1 wyib] 5 times, [(k1, slip 1 wyif) 3 times, p1, slip 1 wyib] 4 times, [(k1, slip 1 wyif) 4 times, p1, slip 1 wyib] 3 times, [(k1, slip 1 wyif) 5 times, p1, slip 1 wyib] 2 times, [k1, slip 1 wyif] 6 times, p1, slip 1 wyib, [k1, slip 1 wyif] 7 times, p1, slip 1 wyib, [k1, slip 1 wyif] 8 times, p1, slip 1 wyib, [k1, slip 1 wyif] 9 times, p1, slip 1 wyib, p1.
Row 1 (wrong side): Turn the work and with Yarn B, slip 1 wyib, p1, slip 1 wyib, [k1, slip 1 wyif] 9 times, p1, slip 1 wyib, [k1, slip 1 wyif] 8 times, p1, slip 1 wyib, [k1, slip 1 wyif] 7 times, p1, slip 1 wyib, [k1, slip 1 wyif] 6 times, [p1, slip 1 wyib, (k1, slip 1 wyif) 5 times] 2 times, [p1, slip 1 wyib, (k1, slip 1 wyif) 4 times] 3 times, [p1, slip 1 wyib, (k1, slip 1 wyif) 3 times] 4 times, [p1, slip 1 wyib, (k1, slip 1 wyif) 2 times] 5 times, [p1, slip 1 wyib, k1, slip 1 wyif] 6 times, slip 1 wyib.
NOTE: When changing yarns at the beginning of Row 1, carry the new yarn in front of the old yarn.
Row 2 (wrong side): Slide the work and with Yarn A, k1, slip 1 wyif, k1, [slip 1 wyib, p1] 9 times, slip 1 wyif, k1, [slip 1 wyib, p1] 8 times, slip 1 wyif, k1, [slip 1 wyib, p1] 7 times, slip 1 wyif, k1, [slip 1 wyib, p1] 6 times, [slip 1 wyif, k1, (slip 1 wyib, p1) 5 times] 2 times, [slip 1 wyif, k1, (slip 1 wyib, p1) 4 times] 3 times, [slip 1 wyif, k1, (slip 1 wyib, p1) 3 times] 4 times, [slip 1 wyif, k1, (slip 1 wyib, p1) 2 times] 5 times, [slip 1 wyif, k1, slip 1 wyib, p1] 6 times, k1.
Row 3 (right side): Turn the work and with Yarn B, slip 1 wyif, [slip 1 wyib, p1, slip 1 wyif, k1] 6 times, [(slip 1 wyib, p1) 2 times, slip 1 wyif, k1] 5 times, [(slip 1 wyib, p1) 3 times, slip 1 wyif, k1] 4 times, [(slip 1 wyib, p1) 4 times, slip 1 wyif, k1] 3 times, [(slip 1 wyib, p1) 5 times, slip 1 wyif, k1] 2 times, [slip 1 wyib, p1] 6 times, slip 1 wyif, k1, [slip 1 wyib, p1] 7 times, slip 1 wyif, k1, [slip 1 wyib, p1] 8 times, slip 1 wyif, k1, [slip 1 wyib, p1] 9 times, slip 1 wyif, k1, slip 1 wyif.
NOTE: When changing yarns at the beginning of Row 3, carry the new yarn behind the old yarn.
Row 4 (right side): Slide the work and with Yarn A, p1, [k1, slip 1 wyif, p1, slip 1 wyib] 6 times, [(k1, slip 1 wyif) 2 times, p1, slip 1 wyib] 5 times, [(k1, slip 1 wyif) 3 times, p1, slip 1 wyib] 4 times, [(k1, slip 1 wyif) 4 times, p1, slip 1 wyib] 3 times, [(k1, slip 1 wyif) 5 times, p1, slip 1 wyib] 2 times, [k1, slip 1 wyif] 6 times, p1, slip 1 wyib, [k1, slip 1 wyif] 7 times, p1, slip 1 wyib, [k1, slip 1 wyif] 8 times, p1, slip 1 wyib, [k1, slip 1 wyif] 9 times, p1, slip 1 wyib, p1.
Repeat Rows 1-4 until piece measures 68 inches from cast-on edge, ending with Row 4.
Cut Yarn B.
Next Row (wrong side): Turn the work and with Yarn A, repeat Set-Up Row 1.
Next Row (right side): Turn the work and with Yarn A, repeat Set-Up Row 2.
Next Row (wrong side): Turn the work and with Yarn A, repeat Set-Up Row 1.
Bind Off
Alternating between needles, slip all the knit stitches onto the working circular needles and all the purl stitches onto the spare circular needles.
FOR A BASIC LONG TAIL CAST ON…
Slide the work and with the right side facing you, use Yarn A to bind off using a 3-Needle Bind Off.
IF YOU DID A LONG TAIL TUBULAR CAST ON…
Slide the work and with the right side facing you, use Yarn A to bind off in Kitchener Stitch.
Weave in the ends and block as desired!
This scarf is gorgeous and the pattern looks straightforward. I tried double knitting a scarf a couple of times before but always ended up with two scarves instead of one. Reading this pattern has given me confidence to give double knitting another try. I can’t wait to get knitting!
Love the double knit look, and your video shows how simple the technique is to knit. If I wanted the scarf half as wide, but about 10 inches longer, would 1 skein in each color suffice?
Hi Theresia,
Thanks for writing in and for the kind words! While you may be able to get away with just one skein of Cattail Silk for your narrower, longer scarf, you will probably still need two skeins of Line Weight since it has less yardage. As long as you purchase the yarns individually rather than as part of a bundle, you can return any unused, unwound yarns for store credit!
Best of luck and happy knitting!
Julianna
I’m so pumped to try this! I’m not adept at joining new yarn, but I think that to start color B I would keep about a 6″ tail of B in front of A and just start knitting it in. Is that right?
Hi Jennifer,
Thanks for writing in! For this pattern, I do not think I would recommend knitting in your tail as you go unless you are already quite experienced with double knitting! Since both sides of the work are right sides, you would have to move your tail back and forth with your working yarn while knitting it in to avoid accidentally knitting it in on the right side, which could be quite tricky to keep track of. I would suggest simply joining your yarn at the edge of your work using the same method we show in our Adding a Ball of Yarn tutorial and weaving in your end later using duplicate stitch, which we also demonstrate in our Weaving in Ends tutorial.
I hope that helps!
Julianna
Yes, it helps! Thanks!
If I want to make a sampler to see if I can do this project, how many stitches should I cast on?
Hi Rita,
Thanks for reaching out! I would suggest trying out a swatch of plain double knitting by following the instructions in our Double Knitting video. To begin you can cast on any even number of stitches with your Yarn A, then work the following pattern:
Set-Up Row 1 (wrong side): Turn work (see Notes) and with Yarn A,*k1, slip 1 with yarn in front (wyif), repeat from * to end of row.
Set-Up Row 2 (right side): Turn work and with Yarn B, *k1, slip 1 wyif, repeat from * to end of row.
Row 1 (right side): Slide work (see Notes) and with Yarn A, *slip 1 with yarn in back (wyib), p1, repeat from * to end of row.
Row 2 (wrong side): Turn work and with Yarn B, *slip 1 wyib, p1, repeat from * to end of row.
Row 3 (wrong side): Slide work and with Yarn A, *k1, slip 1 wyif, repeat from * to end of row.
Row 4 (right side): Turn work and with Yarn B, *k1, slip 1 wyif, repeat from * to end of row.
You will then repeat rows 1 through 4 for your swatch. I hope that helps!
Best,
Julianna
Please slso give needle sizes in millimeters.
Hi Susan,
Thanks for writing in! We totally hear you regarding metric sizes and measurements. This is something that is currently under consideration, so we really appreciate your input! For this pattern, a US 4 needle is equivalent to a 3.5 mm needle.
Best,
Julianna
I’ve been wanting to try this technique and this scarf seems toe perfect place to begin! Your instructions and tutorials are excellent help. I have a question. Could you advise me on how to make this scarf with Cotton Pure? Same dimensions and about how many skeins of each color would I need? Thank you!
Julie
Hi Julie,
Thanks so much for the kind words! Unfortunately due to the nature of this pattern, changing the gauge while maintaining the same dimensions would not be possible without completely rewriting the pattern, which we are unable to do in the comments. However, if you don’t mind a wider scarf, you could certainly knit it in Cotton Pure on US 6 needles! You would need 4 skeins of each color of Cotton Pure.
Best of luck and happy knitting!
Julianna
Is this the same as brioche?
Hello Mary,
This is a great question! This is not Brioche, though it does have a similar look to Brioche. This scarf is utilizing double knitting rather than Brioche to create a two color reversible stripe.
Happy knitting!
-Marilla
I’m obsessed with this and you’re patterns are amazing. Is there an easy way to print?
Hello Susan,
Thank you for these kind words! If you’re on a desktop version of the site, you will find a “print” icon in the right column just below the date and tags. If you’re on a mobile version of the site, you will find a “print” icon below the pattern and above the comments.
Follow the easy on-screen instructions to delete whichever parts of the pattern you don’t want to print or save. For example, you may decide to shorten the pattern by omitting certain images or the list of materials. To remove images, click the drop down next to the image icon and change from 100% to 0%.
Happy knitting,
Marilla
Hi,
The color bundles you have available are stunning. Is it possible to change the colors to other combinations though? I need to knit something up that is more subdued (can we say masculine) and matches a fav jacket.
Many thanks!
Hello Jodi,
Thank you for your generous feedback! You can certainly chose your own colors. Any two skeins of Cattail Silk plus two skeins of Line Weight will work!
Happy knitting,
Marilla
This pattern and yarn are stunning! Your expert support and tutorials are superb. I have knitted several double knit patterns – including names, and images I have designed – but Purl SoHo has delivered an exceptional pattern. I love the pink!!
I’m a relatively new knitter who enjoys challenges and this one seems perfect. Question: can I use two yarns that are the same weight? I have Vista by MountainTop, 50% superfine alpaca and 50% wool. Would I use the same needle size for this weight?
Hello Maxine,
Thank you for reaching out! It looks like the yarn that you are interested in using is a worsted weight? This means that it is much thick than the yarn we used and would not be the best fit for this pattern. This pattern can be used with any fingering weight yarn or any yarn with a gauge of 26 stitches per 4 inches in double knit stockinette stitch.
I hope this helps and happy knitting!
-Marilla
When instructions read slip stitch Purl wise, does this mean move yarn to front and then slip stitch as if to Purl or does it mean leave yarn in back and slip stitch?
Hello Dominica,
Thank you for reaching out! The pattern will tell you if you need to slip your yarn with yarn in front (wyif) or with yarn in back (wyib).
I hope this helps and happy knitting!
-Marilla
I love the Cattail Silk in Flower Field Gray. Can you recommend a Line Weight color that would pair nicely with it? I’m not a “pink” person, but don’t see another Line Weight color that would be just right combined with the FFG. Would one of the whites be enough of a contrast? OR is there another yarn line that I could substitute for the Line Weight?
Hi Norma,
Thanks for reaching out! I think that Flower Field Gray would be beautiful paired with Line Weight in Tabby Gray – I am knitting a top out of Flower Field Gray and the now discontinued Willow Gray, which is very similar to Tabby Gray, and I just love them together! Linen Quill would be a great substitute for Line Weight and it comes in many colors that would coordinate well with Flower Field Gray.
Happy knitting!
Julianna
Hello,
This pattern looks like a great way to learn double knitting! I am a huge fan of the beautiful soft line weight and have knitted a few things in it. How soft is the cattail silk in comparison? Is it possible to knit this using all line weight?
Thanks again for another awesome pattern!
Hi Sarah,
Thanks for writing in! You absolutely could use two colors of Line Weight if you prefer, but Cattail Silk is one of my favorite yarns! Cattail Silk has a wonderfully earthy texture, but since it is 100% silk, has a very soft surface that is pleasant to wear next to skin. It also has fantastic drape, especially after blocking. It doesn’t quite have the same fluffy softness as Line Weight, but it adds an interesting texture and is still lovely to work with and wear! No matter whether you choose to use all Line Weight or our combination of Line Weight and Cattail Silk, you will end up with a beautiful scarf!
Best of luck and happy knitting!
Julianna
I usually double knit the front and back at the same time, is there a chart for the color change pattern that you could send me? Thanks!
Hi Robin,
Thanks for reaching out! Unfortunately we do not have a chart for this pattern – I will pass that suggestion along to our design team! However, I do think if you follow our instructions for one full repeat, you will then be able to easily transition to your usual method of double knitting and follow the established color stripe pattern since the color pattern is the same throughout the scarf.
Best,
Julianna
The note that comes at the end of rows 1 and 3 instructions (carrying the yarn in front/back of old yarn). . . does that only apply to the rows 1 and 3 that follow the initial rows 1-4 or does it apply to those first two as well?
Hi Kate,
Thanks for reaching out! These steps do only apply to rows 1 and 3 as you will have both ends of yarn available at the beginning of these rows. On rows 2 and 4, you will only have one end of yarn available to knit with, so you don’t have to worry about where to hold it in relation to the other yarn!
Happy knitting!
Julianna
Hi i really really love this scarf thank you so much for all your hard work! I would love to be able to do this but no matter how many times i have tried it my stitch count does not add up and im really struggling to read the set up rows is there any way possible you could please email a version with how many stitches each part uses like where it says 5 times and then 2 times help im so confused 🙁
Hi Laura,
I’m sorry to hear you’re having trouble establishing the stripe pattern! This can be a very tricky few rows to follow, but it should get better once you make it through a few pattern repeats and can see where your stripes are forming on the scarf. I would suggest placing markers after each repeat – for instance, when working Set-Up Row 1, after working k1, p1, slip 1 with yarn in back (wyib), place a marker, then after working [k1, slip 1 with yarn in front (wyif)] 9 times, place another marker, then after working p1, slip 1 wyib, place another marker, and so on. This should make it easier to check your work as you go and count each repeat to make sure you have worked the bracketed stitches enough times.
I hope that helps!
Julianna
I like the idea of this pattern but I’m not in love with the Cattail Silk and would probably substitute another fingering-weight yarn to go with the Line Weight. I don’t see an actual yardage estimate anywhere, and, as Cattail Silk has a lot of yardage per skein, “2 skeins” means a lot of uncertainty as to what I would need to buy. I know the patterns are offered in support of that particular yarn, but can you please provide estimated yardage? I’m still planning to buy the yarn from your store!
Hi Sarah,
Thanks for writing in! We used about 1,050 yards of Cattail Silk for our scarf!
Best of luck and happy knitting!
Julianna
And the yardage for the line weight?
Thank you!
Hi Tara,
We used about 950 yards of Line Weight in our sample!
Best,
Julianna
Hi,
I was wondering if you could elaborate on the advantages of this technique of double knitting over the other method of double knitting where you knit or purl each stitch of each row.
Thanks!
Hi Sue,
Thanks for reaching out! In most double knitting patterns, you need to carry both yarns throughout the row and move them to the front and back together for each stitch, but then knit or purl with only one strand. In our method, we simplified this so you only have to work with one strand of yarn at a time – this helps prevent some common double knitting mistakes. You will, however, have to work twice as many rows, since you will only be knitting or purling every other stitch with our technique, while the usual method has you work every stitch in the row. Although the two methods are different when knitting them, the finished fabric is exactly the same.
I hope that clears things up!
Julianna
This is gorgeous! I would like to knit this but I would rather make the scarf about 10 inches wide and somewhat longer. How can I make this into a 10 inch wide scarf without terribly messing up the pattern. About how many stitches would I need to cast on and how would I modify the pattern with its repeats.
Hi Alice,
Thanks for reaching out! Unfortunately it is not very easy to modify the width of this scarf and maintain the stripes without rewriting the pattern, which we are unable to do in the comments section. If you would like to take a stab at it yourself, I would suggest planning out your stripe pattern on graph paper first – about 65 stitches for each side of the scarf should result in a 10″ wide scarf, so you should space your stripes out over 65 stitches. You will then cast on 130 stitches, or double what amount you use for your chart, to begin the scarf.
Best of luck and happy knitting!
Julianna
I have the same plan as Alice: to make a 10″ wide scarf. Is there an easy way to visualize the stripe spacing, even on paper? I would think I should eliminate some of the repeats and / or some of the stripes, especially at the wider end of the design. Help, I’m going crazy trying to figure it out! Thanks for the tip to cast on double the number of stitches, I would have missed that!
Hello Ruth,
Thank you for reaching out! I think the best way to figure this out would be to use graph paper. If you were to say that each square is a stitch and graphed your new strip pattern out, I think this would give you a visual of how it will turn out in the end.
I hope this helps and let us know how it goes!
Happy knitting!
-Marilla
Cable cast-on and cast-off are my favorites, and both give a stretchy edge. Is there any reason I shouldn’t use them for this lovely scarf?
Hi Ann,
Thanks for reaching out! Although it should work fine to use a Cable Cast On to begin, I do think you will have to work the 3 Needle Bind Off cast off at the end. Since you have all the stitches for both sides of the scarf on the needle at the same time, working a traditional bind off would result in a too-wide, wavy edge.
Best of luck and happy knitting!
Julianna
Hi! Can you suggest a color of line weight that would go well with cattail silk in willow grey? Perhaps the pink peony? It’s hard to tell from the colors on line… any help would be greatly appreciated!!
Hello Isabel,
Thank you for reaching out! I think you are spot on, Peony Pink would give Willow Grey a beautiful contrast. The only other color I would suggest is Ballet Pink but I think the Peony Pink will give you more balance, because it is a more saturated color.
I hope this helps and happy knitting!
-Marilla
Can you explain the casting on for this scarf? Are you casting on with both yarns? Or are you casting on with A and adding B later? None of your tutorials have this info for double knitting.
Hello M,
Thank you for reaching out! You are correct, after casting on with yarn A your two foundation rows are also knit with yarn A. This means that you don’t add yarn B until Row 1.
I hope this clears things up for you and happy knitting!
-Marilla
Hiya! Just about to start this. Can I ask when you join yarn B? Is it at the start of row 3? Thanks!
Hello Emma,
Thank you for reaching out! You Join yarn B on Row 1, after using yarn a to cast on and knit your two foundation rows.
I hope this clears things up and let us know if you have any other questions!
Happy knitting!
-Marilla
I am currently working on this piece using a bundle but would love to do it again using Posy (the colors are so beautiful!). How many yards of each color Posy would I need, and will a 4 needle still be okay? Thanks a bunch!
Hello Karen,
Thank you for reaching out- I’m so happy to hear that you love these colors as much as we do! To do the whole project in Posey you will need approximately 2,000 yards. Us4 needles should work out, but I would knit up a gauge swatch to make sure before jumping in!
I hope this helps and Happy knitting!
-Marilla
I am a bIt cinvused with the set up row1. I calculate that it covers 190sts but the pattern casts on 210 Sts.
Is that right?
Louise
Hi Louise,
I am happy to help! Set-up row 1 does cover 210 stitches. I find sometimes it is helpful to write out the whole row with stitch counts per section to get a sense of where these stitches are! The other item to note is where there are parentheses inside brackets. For example,the direction “[p1, slip 1 wyib, (k1, slip 1 wyif) 5 times] 2 times”, written out more completely would be “p1, slip 1 wyib, k1, slip 1 wyif, k1, slip 1 wyif, k1, slip 1 wyif, k1, slip 1 wyif, k1, slip 1 wyif,p1, slip 1 wyib, k1, slip 1 wyif, k1, slip 1 wyif, k1, slip 1 wyif, k1, slip 1 wyif, k1, slip 1 wyif.”
With Yarn A, k1, p1, slip 1 with yarn in back (wyib), 3 stitches
[k1, slip 1 with yarn in front (wyif)] 9 times, 18 stitches
p1, slip 1 wyib, 2 stitches
[k1, slip 1 wyif] 8 times, 16 stitches
p1, slip 1 wyib, 2 stitches
[k1, slip 1 wyif] 7 times, 14 stitches
p1, slip 1 wyib, 2 stitches
[k1, slip 1 wyif] 6 times, 12 stitches
[p1, slip 1 wyib, (k1, slip 1 wyif) 5 times] 2 times, 24 stitches
[p1, slip 1 wyib, (k1, slip 1 wyif) 4 times] 3 times, 30 stitches
[p1, slip 1 wyib, (k1, slip 1 wyif) 3 times] 4 times, 32 stitches
[p1, slip 1 wyib, (k1, slip 1 wyif) 2 times] 5 times, 30 stitches
[p1, slip 1 wyib, k1, slip 1 wyif] 6 times, 24 stitches
k1. 1 stitch
I hope that this helps clear things up!
Cassy
This is quite beautiful. I’ve never done double knitting but I’d love to try this pattern. I’ve been trying to use yarn from my stash & have lace weight from some project I’m no longer doing. Do you have an idea how much lace weight yarn it would take to complete this pattern, maybe only 10 inches wide by the same length? (With a smaller needle of course.) If I knit a 4X4 swatch & weighed it, could I estimate from that?
Hello Sue,
Thank you for reaching out! Knitting up a little gauge swatch is certainly a good first step. This will help you determine how much yarn you will need as well as how many stitches you need to cast on to get a width of 10″. Once you know how many stitches per inch you are getting you can multiply that by 10 to figure out your cast on. If your lace weight yarn is also 100% merino you could use the weight of your swatch to get a very rough estimate of how much yarn you need- our Scarf weighs about 352 grams.
I hope this helps and happy knitting!
-Marilla
I am so excited to begin this scarf! The one time before that I tried double-knitting, I ended up with two purl sides, so the tutorials and detailed instructions – while daunting – are helpful, as are the answers to the comments and questions!
I’ve had to switch back to throwing after picking for several years (which I find faster) due to a left hand injury, so this pattern is my attempt to slow down and take my time with the yarn(s) in my right hand.
One question: I’m accustomed to being able to “read” my work (instead of the instructions) to follow a pattern after a few repeats, even with leaves and lace work. Should I be able to do so with this pattern as well? I hope so! Fingers (and needles) crossed!
Hi Cynthia,
Great question! I do think that, once the pattern is established, you will be able to read your work quite easily. By looking at the stitches on the needle, you will be able to tell which ones are attached to the side facing you and which are on the side away from you. Since our method involves only working on one side at a time, and you will be repeating the established color pattern without variation throughout the scarf, the knitting process should become rather intuitive once you are comfortable with the technique.
Best of luck, and I do hope you give double knitting another try!
Julianna
I am anxious to try this pattern but before I invest in the yarn, I want to reasonably sure I have the skills and patience to complete it. I have read the directions several times and it appears that this is in some ways similar to mosaic knitting. Am I off base?
Hi June,
Thanks for reaching out! Although both techniques have slipped stitches both with the yarn in front and the yarn in back in common, mosaic knitting and double knitting are really quite different. In mosaic knitting, the slipped stitches serve to bring certain colors up into the next row to create a color pattern in a single layer fabric, whereas in double knitting, you are creating a double layered fabric and after working the first row with your first color, you then slide the stitches back to begin the row again with your second color and will work all the stitches you previously slipped. Although it feels different when you are knitting the piece, if you are familiar with reading complex mosaic knitting patterns, it should be helpful when reading this pattern!
Best,
Julianna
So this seems really basic but makes no sense to me – step 1 is to catch on 210 stitches with yarn a then do the two set up rows, then yarn b comes in. Am I adding it in at that stage as a new ball? Or do you actually cast one with the two colours at the beginning? Do I cast on with both yarns and one colour on the needle? Or both yarns with alternating colours on the needle? Or just with the one colour?? Thanks, very keen to get started but can’t make sense of this …
Hi Susan,
Thanks for reaching out! Although some double knitting patterns do you have you cast on with two colors, for our pattern, you will simply be casting on with Color A only, and also working the setup rows with Color A only. You will then join Color B at the edge to work Row 1.
I hope that clears things up!
Julianna
Thanks for that – so following on, if I cast on in one colour and do the two set rows in yarn a, then row 1 in yarn b – does that mean the whole of row 1 is knitted in yarn b and then following on through the pattern? So each row is knitted in one colour – not your knit stitches in one colour and your slip stitches in the second colour (like in the double knitting tutorial pattern)?
Thanks
Hi Susan,
You are correct, you will only be using one color per row, and the other color will not be carried along with it. The stitches on the needle are two colors, but you will not be working all of the stitches in each row – for instance, if you are working a row with Color A, you will knit or purl stitches that are Color A as indicated in the pattern, but will slip all stitches that are Color B without working them so they are still Color B on the needle.
Best,
Julianna
I’m having some trouble with the set up rows. When, in row 2, I turn back, should I be knitting the yarn over (resulting from the slipping yarn in front then knitting a stitch) or the knot stitch first? Should I end up slipping the yarn overs?
I’m sorry: disregard my last question! On my fourth time trying it, I realized I was doing the slipping method from the latticework wrap from muscle memory and that’s what was throwing me off 🙂
Hi Sarah,
Thanks for writing in, and I’m so glad you were able to get the stitch working! If you run into any other questions please let us know!
Best,
Julianna
I have just finished knittting this scarf. Im thrilled with the result. I found the pattern difficult to follow . However its all finished now. It took me 6 months to knit – so it will be a one off for me. I do love your patterns – they are always quite unique.
Your double knitting tutorial is so great!! I’m just having a lot of trouble with the cast on and learning how to begin the project altogether. If you have time in the future, a video explaining that would be really helpful!
Thank you 🙂
Hello Angela,
Thank you for this suggestion- I will certainly pass it along! In the mean time, is there a specific question I can help you with?
Happy knitting!
-Marilla
I’m loving this project but wondering how to hide yarn ends when I join the second ball of yarn – where do you suggest?
Hi Bryson,
Great question! If you leave the yarn tails on the wrong side as your normally would, you won’t be able to get to them to weave them in later. I would suggest leaving your yarn tails hanging to the outside or right side of the scarf, and using duplicate stitch from the right side, which is the first method in our Weaving in Ends tutorial, to secure them.
Best of luck and I hope that helps!
Julianna
I was going to post a question about order of cast on colours but found the answer in the other posts! Thanks! However, just wondering if I can use the knitted cast on method instead for this project? I am a new knitter and I find the slingshot cast on methods confusing at this point in my knitting journey.
Hi Kate,
Great question! While I wouldn’t recommend a knit-on cast on, because it doesn’t give the tidiest edge, you could certainly substitute a Cable Cast On. It’s quite similar to a knit-on cast on so it should be very easy for you to learn and it will create a neat and stable edge for the scarf.
Best of luck and happy knitting!
Julianna
Thinking about line weight with linen quill. Thoughts?
Hello Jody,
Thank you for reaching out! This is a great Idea, I say go for it!
Happy knitting,
Marilla
Wow. Started this about a year ago, restarted several months later after I was 12 inches in (I wasn’t happy with the single contrasting stitch on the edge after the wide stripe of color), and finished it last night (picked it up and set it down a few times, of course)! I really like the final product! It was a great learning experience, my first attempt at double-knitting! After I had knitted 6 inches on my second attempt, I knew if I didn’t find a way to speed things up I would never finish. Another commenter here or somewhere else talked about carrying and knitting both yarns on each row. I learned that in one weekend and it improved my experience with this project in numerous ways: it went SO much faster, my tension was more even, and the stitches at the very beginning and end of each row made a lot more sense! I may actually knit one of these again sometime! It made a GREAT travel project!
I’m very excited about this pattern, but I can’t seem to figure out what to do when I reach Row 1. At this point, I’m supposed to add Yarn B. But how exactly am I supposed join it? Am I supposed to follow the Row 1 pattern for both yarns simultaneously? So, for instance, I’d slip yarn B and A, then purl both, etc? Any advice would be appreciated!
Hi Paulina,
Thanks for reaching out! For our double knitting patterns, you will only be using one yarn yarn per row, so for Row 1, you will drop Yarn A, slip the first stitch, join Yarn B by purling the second stitch with Yarn B, and then work the entire row with Yarn B only.
I hope that clears things up!
Julianna
The instructions say to cast on 210 stitches but I’ve cast on that number twice and both times have run out of stitches at the end of set up row 1. I wrote out the pattern section by section and if I’ve read the pattern correctly at the end of the first bracketed section (where it states to repeat the entirety within the brackets “2 TIMES”) I’ve already used up 159 stitches and there aren’t enough stitches left in the 210 to accommodate the remainder of the first set up row. I may be missing something really obvious since no one else seems to have had this problem that I can see.
Hello Colleen,
Thanks for reaching out! I hope I can help, I think you are combining brackets and repeating them creating to many stitches. This cast on can be really confusing because of all the brackets, I wrote it out bracket by bracket which I found very helpful because they all start to blur together when you look at them in the pattern. The first bracket you repeat is [k1, slip 1 with yarn in front (wyif)] 9 times. After you repeat this 9 times you do not return to it and move on to “p1, slip 1 wyib” then onto the next bracket of “[k1, slip 1 wyif] 8 times”. When you get to the bracket that is repeated 2 times “[p1, slip 1 wyib, (k1, slip 1 wyif) 5 times] 2 times” it totals 12 stitches.
I hope this clears things up and let us know if you have any further questions!
Happy knitting,
Marilla
I don’t understand the gauge. If I cast on 210 stitches, divide by 26 (26 stitches to 4”), and times 4”, that comes out to 32”. What am I doing wrong? The measurements are 16 x 62. Also, would just be a good “first” double knitting project. Comments indicate “easy to follow directions’, I just love the look of this scarf/shawl.
Hi Marcia,
Thanks for reaching out! Because double knitting creates two layers of fabric at once, you will need to cast on enough stitches for both layers. It does seem like you will be casting on twice as many stitches than you need, but I assure you that it will turn out the correct width once you get going! Yes, our method for double knitting is very beginner friendly, so I think this is a great project to start with, and we are always here to help if you run into any questions!
Best,
Julianna
Can I use Cascade 220 fingering and Drops Kid Silk or Malabrigo Mora silk?
Hi Sue,
Thanks for reaching out! I’m not familiar with those particular yarns, but any fingering weight yarn should work nicely for this pattern – although you should always knit a gauge swatch to make sure!
Best,
Julianna
I love how pretty this scarf is. Could you please let me know if I could use worsted weight (4) to make this scarf by reducing the number of stitches, or if I kept the same number of stitches could it make a shawl instead? If not could you please explain what might happen? E.g. it would be to heavy.
Thank you very much.
Hi Robyn,
Thanks for writing in! Because each row of this scarf is completely written out, rather than based on a repeat, we don’t have instructions for casting on fewer stitches – I’m so sorry about that! It is certainly possible to use worsted weight yarn for a double knitting project and it isn’t too heavy, but in the case of this scarf, since you can’t reduce the number of stitches to cast on, your scarf will end up much wider than ours, though I can’t say how much wider for sure.
I hope that helps!
Julianna
Oh my! I’ve cast on twice now! So hard to do the first set up row. Think I’m going blind. The math does add up to 210 so I think I’m on the right track. It’s such a gorgeous scarf. I’m using Jaggerspun wool/silk in copper and Malabrigo merino in natural. If I find I have to start over again, I think it will go much easier. Maybe I should wait til next week when my new glasses will be ready! LOL
I’ve been knitting for 60+ years and this is the hardest pattern to follow that I’ve ever attempted! I’ve done Aran knits, mosaic, and just about everything knittable, but these instructions take the cake! Is there a secret to following them in a way that is less confusing? I’ve knit the first 6 rows several times and ripped them out each time, the last time because the colors were getting mixed up. But I’m determined to make this scarf because it’s absolutely beautiful and I’ve always risen to a challenge! Any helpful hints before I give it another try? Please?
Well I’m an idiot. I finally figured out what I was doing wrong. Duh. So I’m starting over with great enthusiasm. I still would like to know if there’s a useful trick to following the pattern!
Hi Sue,
Thanks for reaching out! I am sorry to hear that this pattern has given you some headaches! I am sorry to say that there is not any real trick to this one. For myself, with patterns that have lots of repeats in lines, I like to write out the lines long form and break them up into chunks in a spreadsheet. I know that this sounds like a lot of work but for how my own brain works, I find that this is a big help to allow me to autopilot on patterns that require attention be paid.
Happy knitting!
Cassy
Finally! I “got” it! I’ve got about 5 inches done and it looks great. AND I’ve taught myself to use both strands together, shortening the knitting time by half. Can’t wait to see the finished scarf!
I put the work down for a while, now am back to it and am no longer using 2 strands at a time. Too easy to twist the stitches! But my question regards the beginning stitches of rows 1 and 3. I’ve looked at the tutorial but it’s still unclear. If the working yarn is to be held in back and the first stitch is slip 1 w1if, how is this done? And conversely if the working yarn is to be held in front of the old yarn, how can the first stitch be slip 1 wyib?
Hi Sue,
Thanks for reaching out! Rows 1 and 3 start with the yarn in different positions, so you will have to move the yarn between the needles to get it where it is supposed to be for the next stitch. On Row 1, after slipping the first stitch with the yarn in back, you will bring the yarn forward between the needles to get ready to purl the second stitch, just as you would if you were switching between a knit and a purl. Similarly, on Row 3, after slipping the first stitch with the yarn in front, you will move the yarn to the back of the work between the needles, just as you would between a purl and a knit, to get ready to knit the next stitch.
I hope that clears things up!
Julianna
I love the look of this. Do you have recommendations for how much yarn would be needed to make a small baby blanket with this pattern?
Hi Anna,
Thank you so much for the kind words! The original bundle of two skeins of Line Weight and two skeins of Cattail Silk should actually be enough yarn for a small 32-inch square blanket! I think the easiest way to go about it would be to cast on double the number of stitches and repeat each row for the second half of the stitches. If you’re feeling ambitious, you could reverse the row for the second half of the stitches so the pattern is mirrored on the other half of the blanket!
I hope that helps, and happy knitting!
Julianna
Your comments and responses are absent – where did they go?
I’ve seen them in the past so I know they did exist
So the question is will this even show up ?
I think I should email cs.
Hi Pam,
Thank you so much for getting in touch, and I apologize that our comments aren’t available at the moment! We are experiencing a few technical difficulties with our site right now, but our web team is hard at work to get everything restored as quickly as possible. The comments should be back in the next day or two, but if you have any questions in the meantime, please let us know!
All the best,
Julianna
Hi. How do I gauge in double knit?
Thanks.
Hi Betsy,
Thanks for reaching out! To gauge in double knit, follow the pattern instructions as if you were making the scarf with a smaller cast on! We have a great Double Knitting tutorial that explains exactly how to work this!
All the best,
Gianna
Thanks Gianna. Well, I finally finished the scarf. I love it but wow was that a slow knit! Like many commenters, I set this project aside and picked it up quite a few times and made some mistakes with the side edges. I am having a problem with the last 3 rows and the 3 needle bind off. The finish does not look quite like the cast on side and I have some bulky spots on certain of the color A striped spots. Thanks for any help.
Hi Betsy,
Thanks for checking back in! You may find it helpful to take a look at our 3-Needle Bind Off tutorial. While this bind-off will never look exactly like the cast-on edge created by a basic long tail cast-on, it should come fairly close! Also, if you did a long tail tubular cast-on, then we recommend using kitchener stitch to bind off instead.
It also would be easier for us to give advice on this issue if we could visualize the problem! Feel free to send along photos of your work to [email protected] so we can get a better idea of what might be going wrong with the end of your scarf.
All the best,
Lili
I love this scarf. So much so that I have knit about 14 inches, wasn’t happy with it, frogged it and started over. Now I have about 5 inches done and am going to frog again. (Re-frog?) The problem is the edges. I just can’t get them right. I’m going to try to devise another way of creating a neat edge but thought I’d ask you first if you have any suggestions?
Hi Sue,
Thanks for reaching out! I am so glad to hear that you love this scarf! I am happy to help, please send a photo of your work to our customer service team at [email protected] and they can troubleshoot further what may be happening and help advise a way to keep your edges neat!
Warmly,
Gianna
I will never give up on this scarf although I’ve been working (on and off) on it for almost 2 yrs. I’m still having a problem with the edges although they look better now but I’m not proud of them! The double knitting isn’t a problem at all; I mastered that about 3 frogs ago. I just want you to know that I’m not giving up on it. I’ve requested that it be buried with me after I die so that I can keep working on it. Maybe I’ll finally finish it!
I see above you mention how to cast off but how do you cast on with 2 colors? It looks as though you have done the first couple rows in the primary color but is there a particular way you add the second color?
Hi Jo Ann,
Thank you for writing in! We used a single color for both the cast on and cast off in this pattern. For this pattern specifically, we used color A for both steps. Unfortunately, we do not have a tutorial on casting on with two colors at the moment. I hope this helps clarify the instructions but please let me know if you have any other questions!
Happy knitting,
Gavriella
que veut dire ‘montage a longue queue et aussi EX” (1end+fil devant glisse 1 m 5x)2x le2x cé pourquoi MERCI A L’AVANCE J’espere que vous aller me comprendre J’adore votre patron
Hi Huguette,
Thank you for writing in! Could you copy and paste the section you are having trouble with? This could help me better visualize which section of the pattern you are having trouble with. I will keep an eye out for your reply!
All the best,
Gavriella
parmis vous qui a fait le joli foulard rose et blanc peut me dire pourquoi des fois dans le patron exemple” il marque de faire 5x et tout de suite apres cé marqué 2x J’ai hate de le commencé MERCIE A L’AVANCE un foulard magnifique
, [p1, glisser 1 wyib, (k1, glisser 1 wyif) 5 fois] 2 fois, [p1, slip 1 wyib, (k1, slip 1 wyif) 4 fois] 3 fois, [
Hi Huguette,
For the following section [p1, slip 1 wyib, (k1, slip 1 wyif) 5 times] 2 times the 5 times applies to the segment in parentheses and the 2 times applies to the segment in brackets. The same goes for the next few segments of this row as well. I hope this helps!
Happy knitting,
Gavriella
Rang 1 (envers) : Tourner l’ouvrage et avec le fil B, glisser 1 wyib, p1, glisser 1 wyib, [k1, glisser 1 wyif] 9 fois, p1, glisser 1 wyib, [k1, glisser 1 wyif] 8 fois , p1, glisser 1 wyib, [k1, glisser 1 wyib] 7 fois, p1, glisser 1 wyib, [k1, glisser 1 wyib] 6 fois, [p1, glisser 1 wyib, (k1, glisser 1 wyif) 5 fois] 2 fois, [p1, slip 1 wyib, (k1, slip 1 wyif) 4 fois] 3 fois, [p1, slip 1 wyib, (k1, slip 1 wyif) 3 fois] 4 fois, [p1, slip 1 wyib, (k1, glisser 1 wyif) 2 fois] 5 fois, [p1, glisser 1 wyib, k1, glisser 1 wyif] 6 fois, glisser 1 wyib.
mercie de prendre de votre temps pour me répondre ce foulard est de toute beauté Quand je vais le terminer je vais vous le montré MERCIE
entre cette parentheses ( ) =5x ou 2x Je suis désolé mais je veut etre certaine et je vais savoir pour l’autre MERCIE attend de vos nouvelle
Hi! You are very welcome! that is correct! ( )=5x and [ ]= 2x
Mercie Gavriella je vous adore
You are very welcome! Please let us know if you have any other questions!
salut a toi Quand je calcule mes mailles ,cela me donne 178mailles total Je ne trouve pas mon erreur Vous pouvez m’aidez encore S”V”P”
Hi Huguette,
You will want to have 210 stitches for each row. It sounds like you may be decreasing somewhere along the way so I’d recommend ripping back and casting on again being sure to start with 210. Some knitters find it helpful to place removable markers every 20-50 stitches to ensure the correct amount of stitches have been cast on. It also makes it easier to count them with the extra markers!
All the best,
Gavriella
mercie Gavriella je l’essais et je vous donne des nouvelles