Magic Loop: Two At A Time
For knitters with an aversion to double-pointed needles, Magic Loop is a way of life! Using just one long circular needle, you can even knit projects with tiny circumferences in the round… And once you’ve mastered one sleeve, sock, or hat at a time, why not try two? Here, we’ll show you everything there is to know about knitting two pieces at a time using the Magic Loop technique.
First, brush up on the ins-and-outs of Magic Loop with our video, below.
What You’ll Need For Two At A Time Knitting…
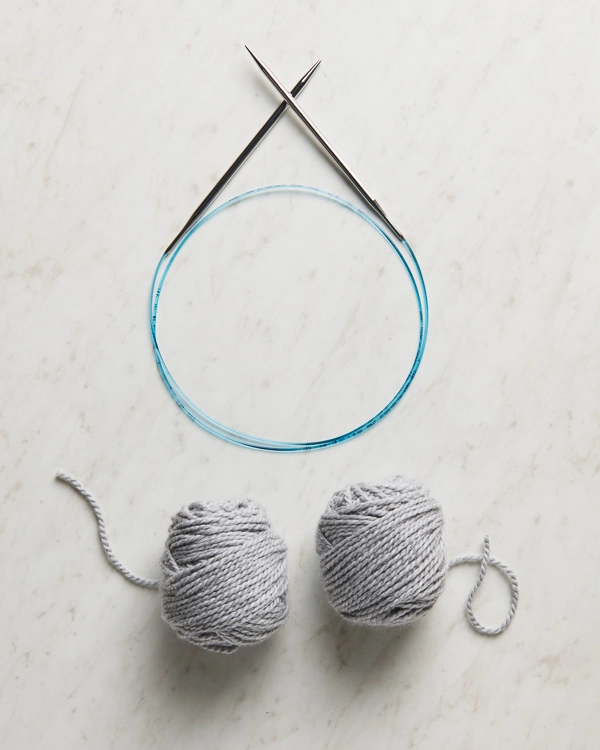
To work two pieces at a time with Magic Loop, you’ll need longer-than-usual circular needles (here we’re using a 40-inch length) and two balls of yarn, one for each piece you’ll be knitting. While it’s possible to work from one center-pull ball of yarn by pulling one strand from the outside and one from the inside, it’s not worth the confusion! Instead, wind one skein into two similarly sized balls or use two entirely separate skeins.
CAST ON
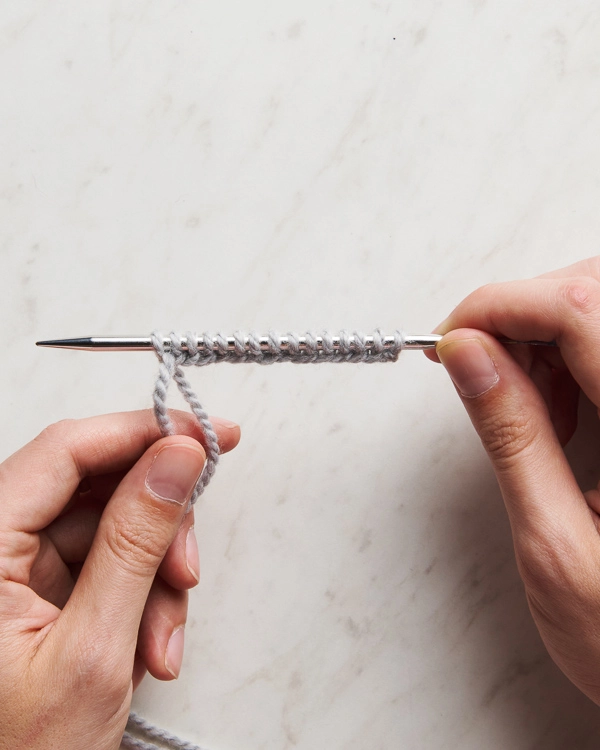
Using one ball of yarn and the circular needles, cast on half the number of stitches required for the first piece of knitting. Our pattern requires 30 stitches per piece, so we cast on 15 stitches here. Drop this yarn; you’ll come back to it later.
With the second ball of yarn, cast on the full number of stitches required for the second piece you are knitting, right next to the previously cast on stitches. Here, we cast on 30 stitches.

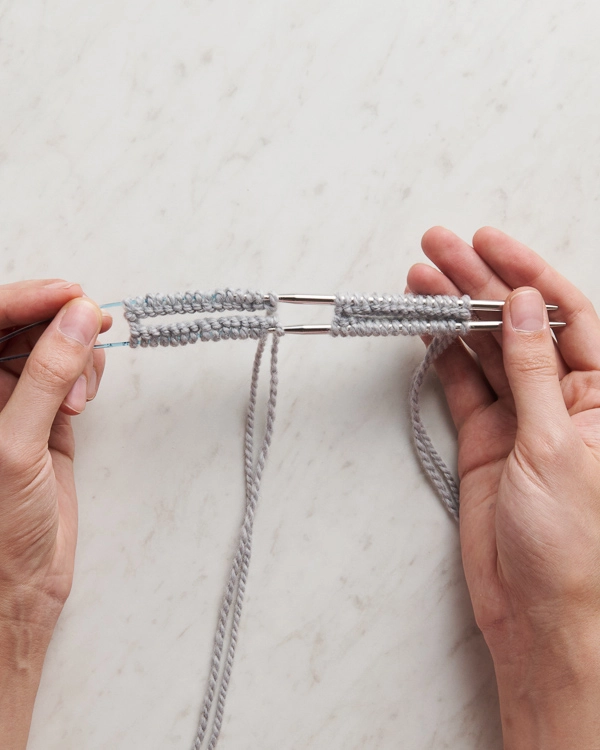
Slide the full set of cast-on stitches to the middle of the needles, with the half-set of stitches just to the right.
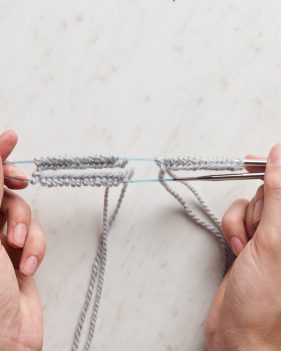
Locating the halfway point of the full set of stitches and making sure the stitches aren’t twisted, fold the cord in half and pull it through so that half the full set of stitches is on the front cord and half is on the back cord. Continue pulling the cord through until the half-set of stitches is on the back needle.
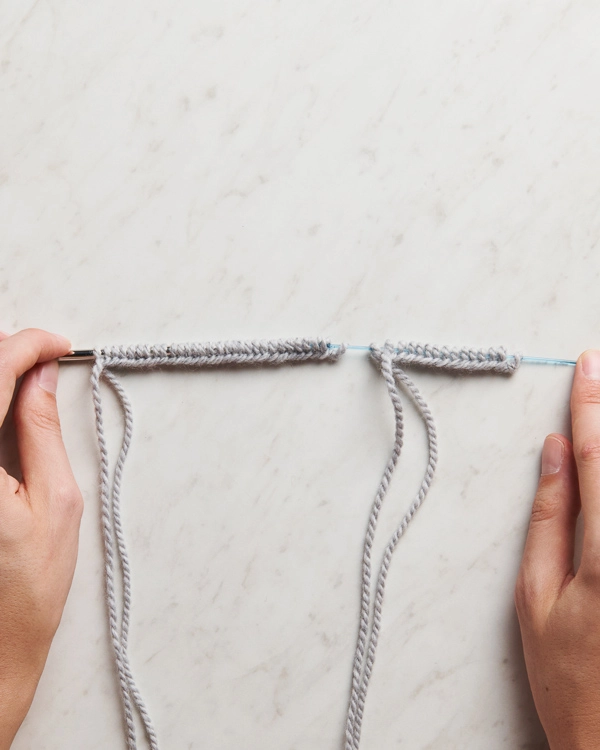
Turn the work so the needles are pointing to the left, with the half-set of stitches on the back needle and the full set of stitches divided equally between the back and front cord at the right.
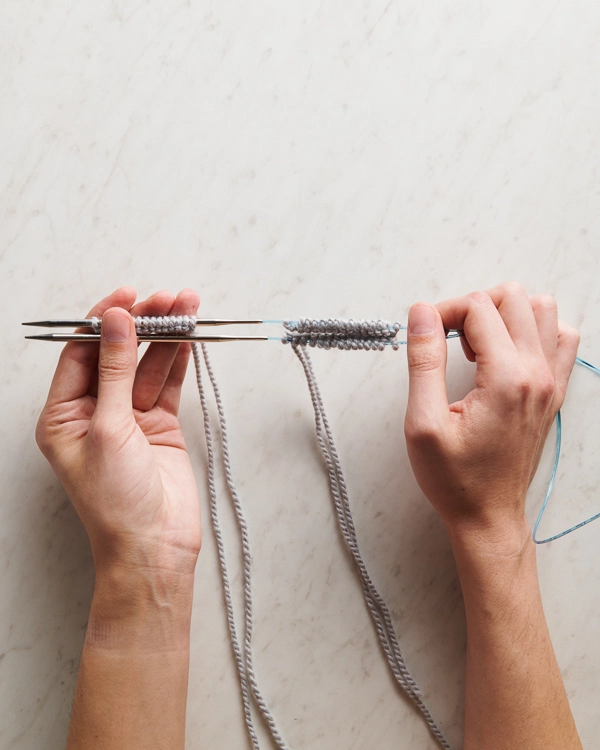
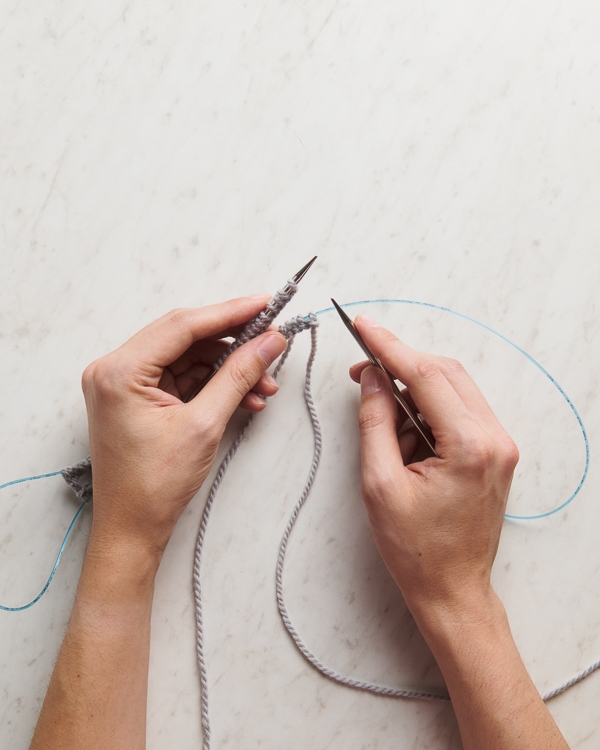
Now, with the working yarn from the original half-set of stitches, continue casting on the remaining stitches for the first piece onto the front needle.
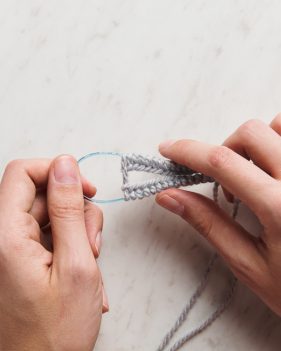
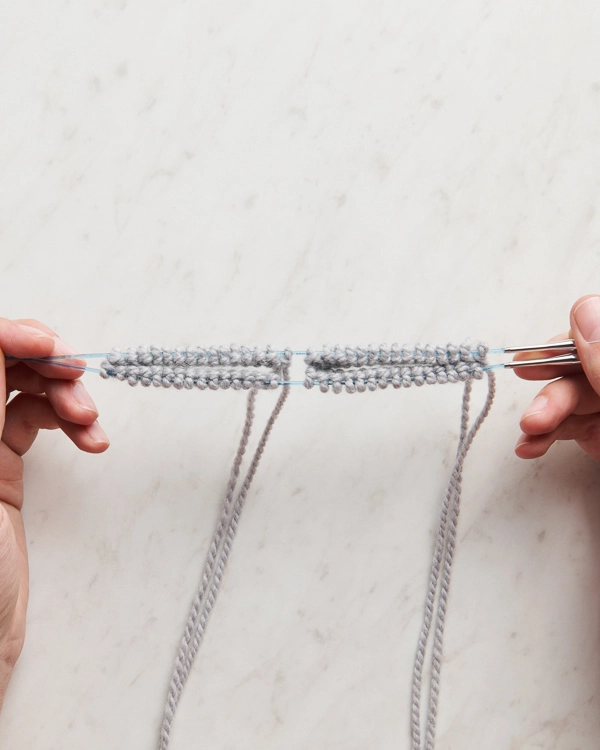
Turn the work so the needles are pointing to the right, and both working yarns are coming from the stitches on the back needle. All the stitches for both pieces are now cast on: half the stitches for each piece on the back needle and half on the front.
JOIN FOR WORKING IN THE ROUND
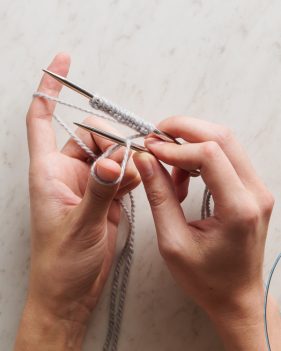
Checking once more that the stitches aren’t twisted, hold onto the back stitches of the first piece and pull the back needle to the right. Continue pulling so that the cord has enough slack for you to turn the needle…
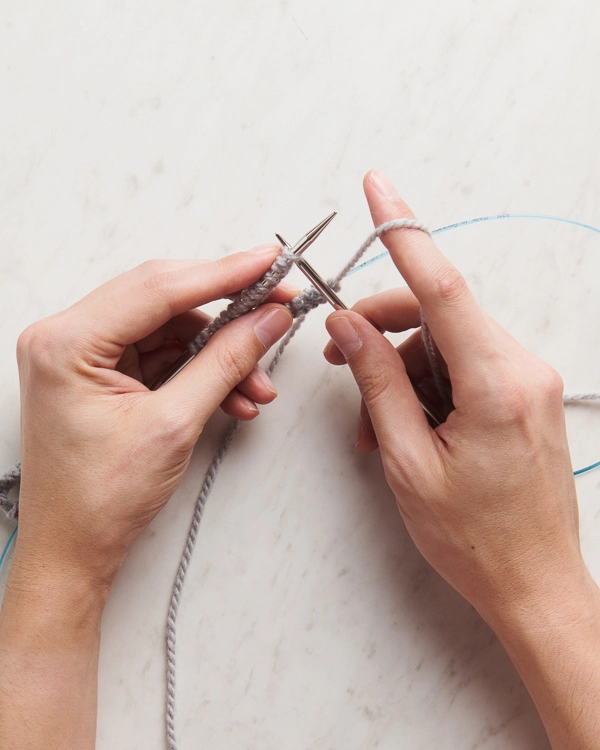
… and knit across the first-piece stitches on the front needle, joining in the round. When you reach the end of these stitches, drop that working yarn.
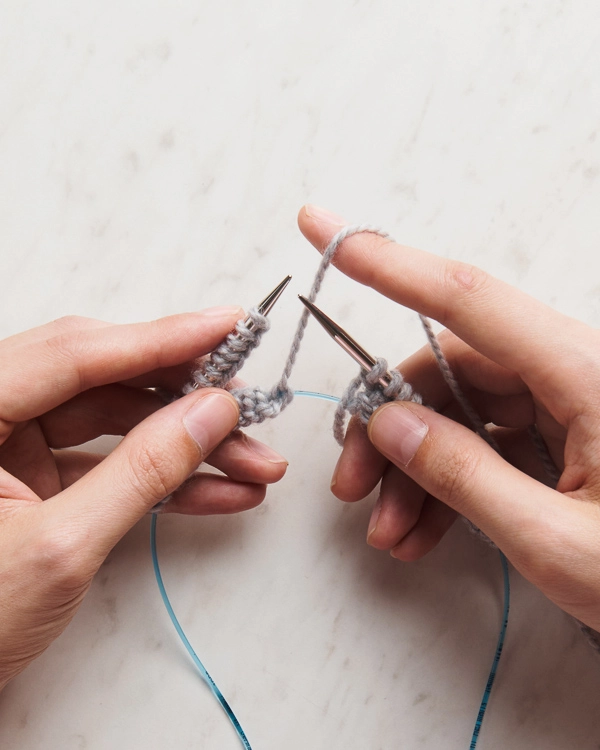
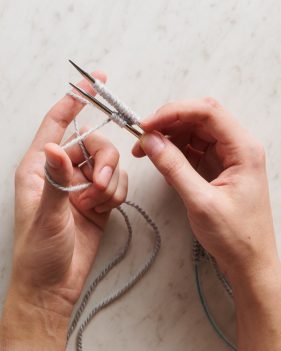
Checking one last time that the stitches aren’t twisted, use the second piece’s working yarn coming from the back needles to knit across the second-piece stitches on the front needle, joining that piece in the round,
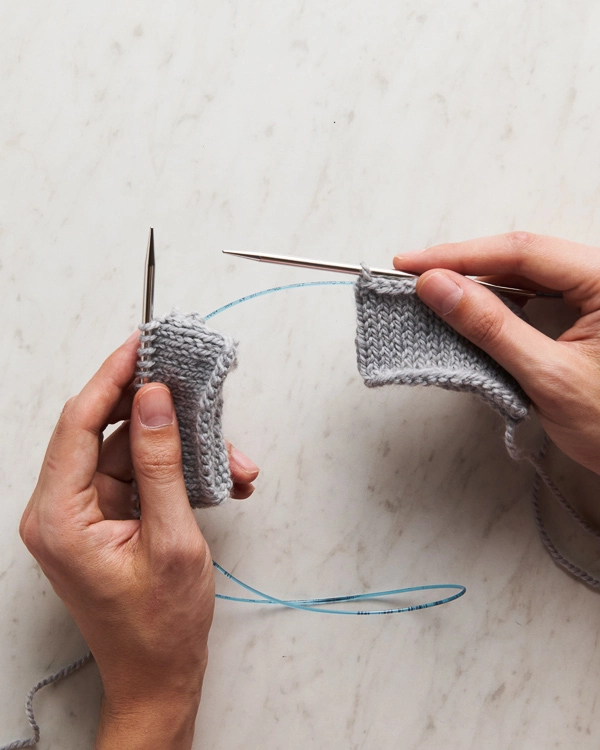
Re-orient the needles just as you would for regular Magic Loop (you can see this maneuver in action at 3:40 in our Magic Loop Tutorial, above): Pull the back cord until the stitches reach the back needle, turn the work so the needles are facing the right, and pull the back needle out so there is enough slack to work the stitches on the front needle.
Knit across the stitches on the front needle, using the working yarn attached to each piece, and re-orient the work to begin the next row. Your work should look like the image above, with one full row complete. Repeat these steps, as for Magic Loop.
BIND OFF
When it comes time to end your knitting, bind off the first piece’s front needle stitches according to the pattern until there is one stitch left on the front needle, and the remaining stitches are still on the back needle (as above). Drop the yarn and set aside.
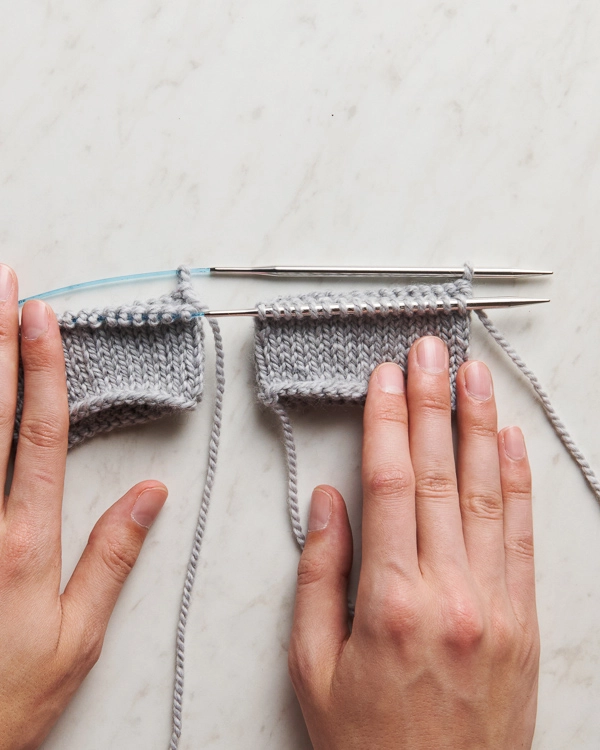
Do the same for the second piece, then re-orient the work so the back needle is ready to continue binding off the remaining stitches (as shown at 6:20 in our Magic Loop Tutorial).
Once you have bound off all the stitches from both pieces, one loop will be left from each piece. Simply cut both working yarns and pull the last loop through.
Got it? Now you’re ready to knit two pieces at a time with Magic Loop!


I’ve been knitting two at a time since my second pair of socks after having to kick myself to start the other sock, and make sure that the number of rows matches the first. Until recently I was using the two dpn method. I switched to the magic loop, and won’t look back. However, I always struggled to cast on, resorting to casting all stitches, moving some to a spare needle until needed.
Wow, your explanation for casting on is a game changer. So simple, and clear. Can’t wait to finish what’s on my needles to start another sock project.
How do you prevent ladders from forming?
Do you pull the first two stitched tight? I more often Lohan not end up with ladders and they are ugly! do you have a video on this?
Hi Mavis,
Thanks for writing in! We do not yet have a video tutorial for preventing ladders from forming while using the Magic Loop method, but I would be happy to send your recommendation along to our team!
My advice would be to make sure the second stitch on each needle is pulled snugly (not too tight and not too loose). This will help keep your tension consistent when moving between needles and redistribute any extra slack on those stitches. It’s easy to overcompensate how tightly you tension your yarn when trying to avoid ladders, but this can actually cause the stitches to become too tight creating the exact problem you were trying to avoid!
I hope this helps!
All the best,
Carly
Hi-
I’m confused. The direction states, “Now, with the working yarn from the original half-set of stitches, continue casting on the remaining stitches for the first piece onto the front needle.” By “working yarn” do you mean the strand coming from the ball or should I have left a longer tail? It’s not clear from the photos. I’ve resorted to the thumb cast-on method; is that okay?
For reference: I’m knitting the Dusk gloves (from Warmth), size: adult medium, CO 48 stitches.
Hi Tracey,
We used a long tail cast-on in this tutorial, which involves two strands of yarn! It looks like we use “working yarn” here to refer to both strands used in this technique, since they’re both actively used during the cast-on. Since you’re using a different method though, this would refer just to the strand you’re actively using to create the stitches (so, not the tail). Hope this helps clarify things!
All the best,
Lili
Hi Lili,
Thank you for the clarification! Maybe there could be a note about the cast on method at the very beginning?
I decided to restart, this time with enough of a tail and I’m on my way to knitting two mittens at once!
Tracey
You’re very welcome, Tracey! While we decided to use a long tail cast-on to demonstrate this technique, any type of cast-on would work as well!
All the best,
Lili
How about a tutorial for two at a time toe-up socks?
Hi Jackie,
Thanks for writing in! Although we don’t currently have one, we love the idea of a toe-up sock tutorial. I will pass your message on to our team for future tutorial ideas!
Happy knitting,
Gavriella