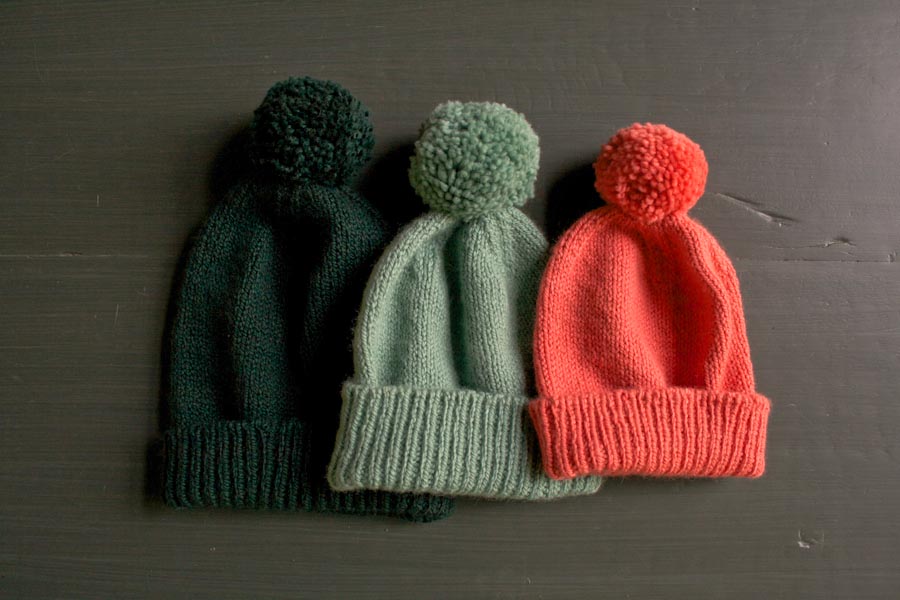


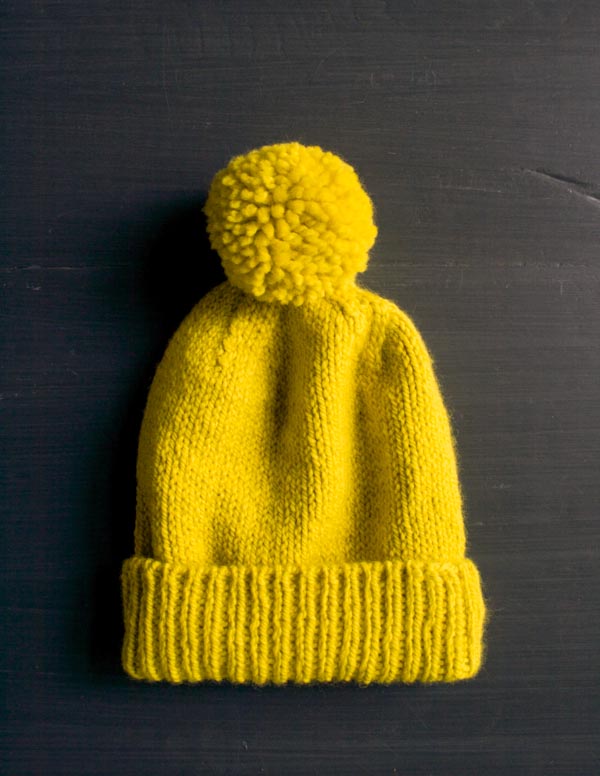
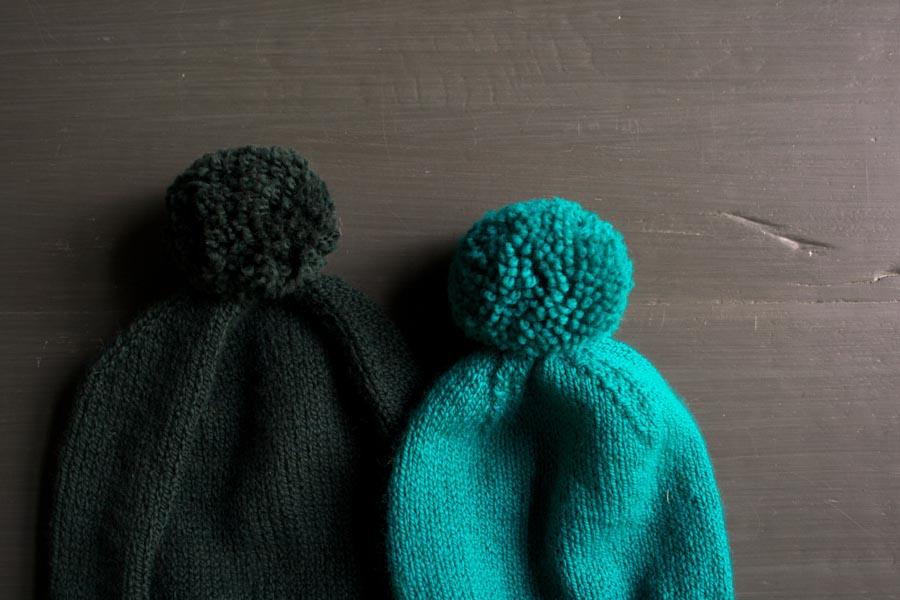
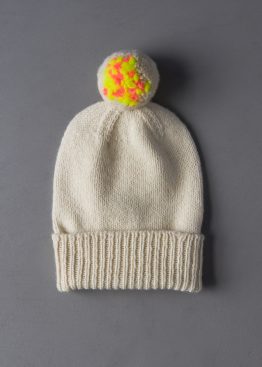
Classic Cuffed Hat
For as long as I can remember, every Sunday my grandmother makes fresh pasta from scratch, and every Sunday she uses the same metal pasta maker she got as a wedding anniversary gift from my grandfather in 1961. When we press her to upgrade to a new machine, she always responds, “It’s hard to improve on a classic!”

I revisited the truth in my grandmother’s words when I set out to make this winter’s hat. How could I improve on a classic winter hat? Very little, and so my pondering ended with these Classic Cuffed Hats, as reliable and perfectly timeless as a 1961 pasta maker!
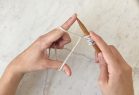
To ensure a design that would last a half a century, I made a couple of important decisions. First, I used a Long Tail Tubular Cast On, a simple technique that makes a magically clean and elastic foundation for the ribbed cuff. My new Long Tail Tubular Cast On Tutorial walks you through this method, step by step.
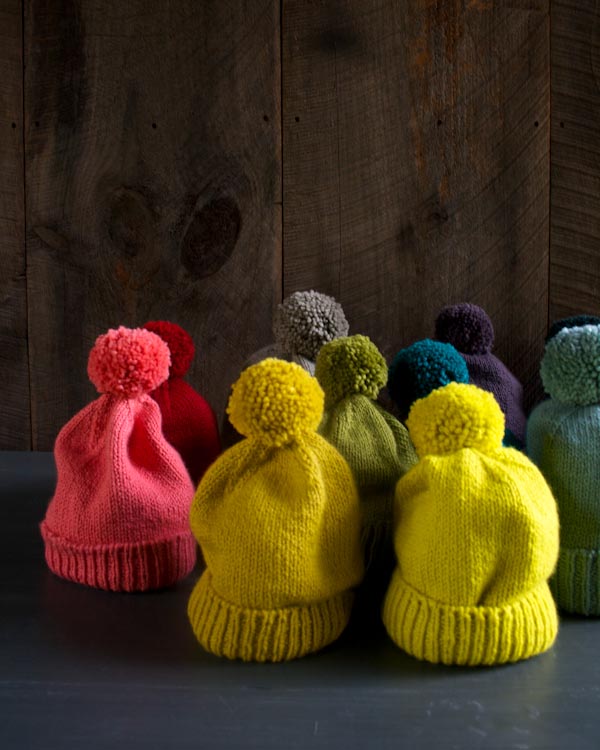
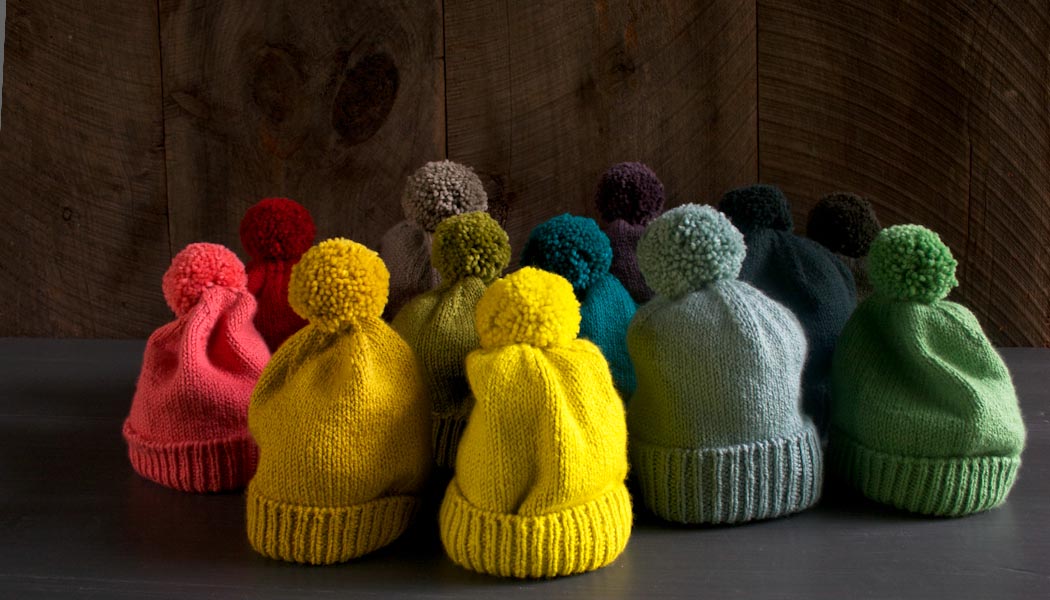
Second, I chose a yarn that I think of as an instant classic, Purl Soho’s 100% merino Worsted Twist. With 12 gorgeous new colors joining our palette, we couldn’t pick just one, so we made a hat in every new color! What color will you choose for your Classic Cuffed Hat? – Gina
Update: October 2014
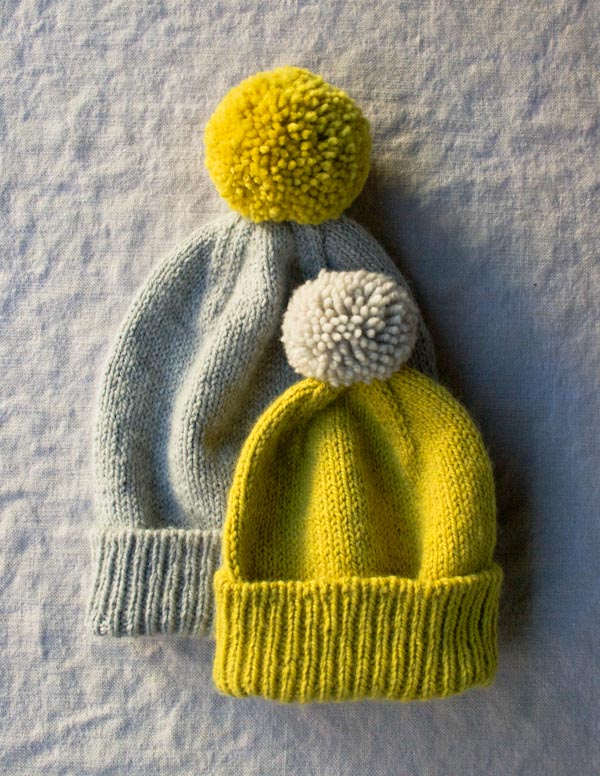
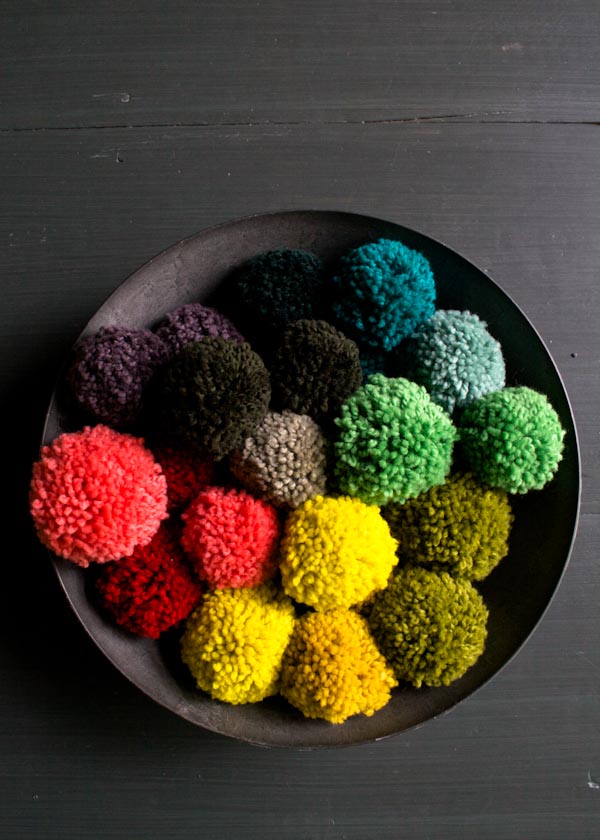
The colors, above, for the adult size are Ash Gray with a Dijon Yellow pom pom; and for the baby size are Dijon Yellow with an Oyster Gray pom pom.
Update: New Pom Poms
November 2019
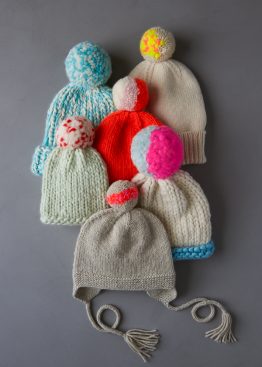
We’re having a party and you’re invited! We’ve topped a few of our favorite hat patterns with festive pom poms including our Classic Cuffed Hat! Using our Pom Pom Maker Set in the Small + Large and Extra Large + Jumbo sizes, adorn your Classic Cuffed Hat and join in on the party here!
Designed by Purl Soho designer, Gina Rockenwagner.
Share your progress and connect with the community by tagging your pics with #PurlSoho, #PurlSohoBusyHands, #PurlSohoClassicCuffedHat, and #PurlSohoWorstedTwist. We can’t wait to see what you make!
Materials

- Hat with Pom Pom: 1 (2, 2) skeins of Purl Soho’s Worsted Twist, 100% merino wool. Each skein is 164 yards/ 100 grams; approximately 164 (246, 328) yards required. We used all of our new colors! Look below for a list of colors. (NOTE: We no longer offer Worsted Twist, but choose from one of our other worsted/aran weight yarns.)
- Hat without Pom Pom: 1 (1, 1) skeins of Worsted Twist, 100% merino wool.
- US 5 (3.75 mm), 16-inch circular needles
- US 7 (4.5 mm), 16-inch circular needles
- A set of US 7 double pointed needles
- Stitch markers, including 1 unique
- Optional: Purl Soho’s Pom Pom Maker in size Small + Large
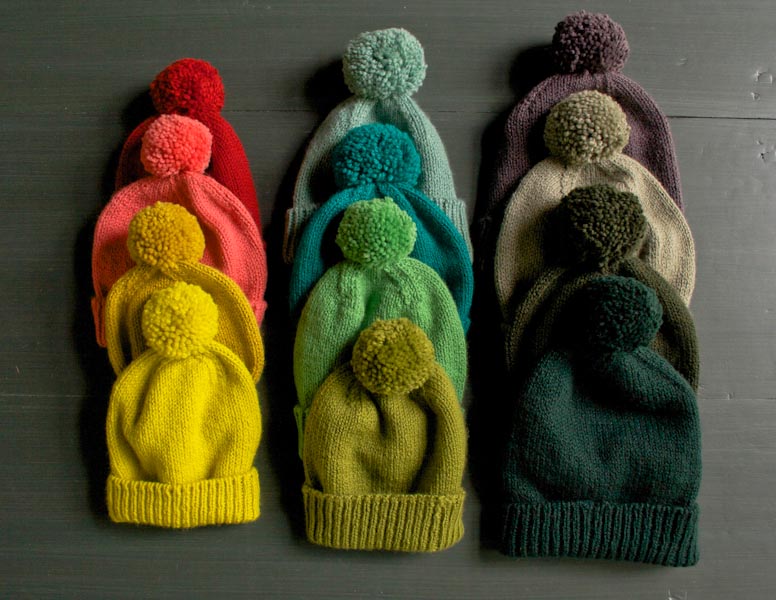
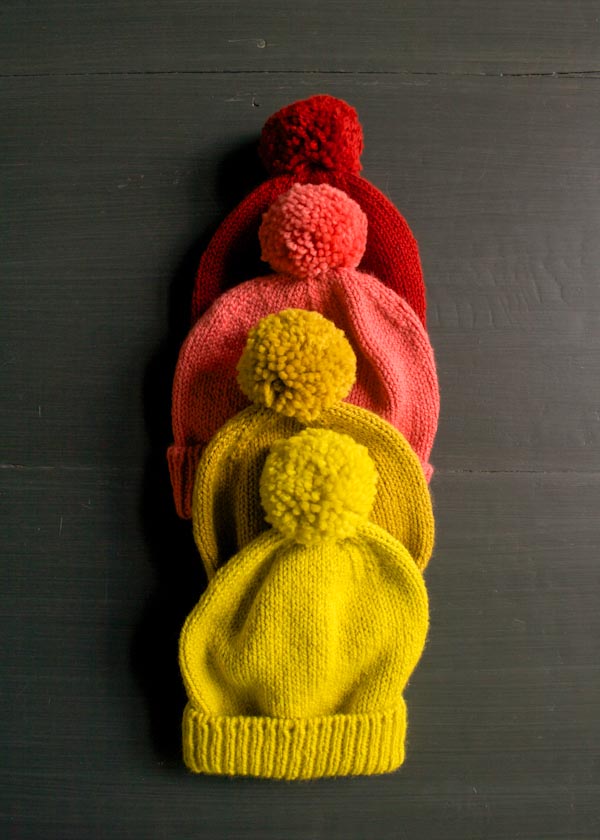
Baby Size, left, from top to bottom: Paprika Red, Pink Grapefruit, Ochre Yellow and Yellow Zest
Kid Size, center, from top to bottom: Lichen Green, Green Turquoise, Pistachio Green, and Cardamom Green
Adult Size, right, from top to bottom: Gray Fig, Green Gray, Moody Green, and Black Green
GAUGE
20 stitches and 28 rounds = 4 inches in stockinette stitch on larger needles
24 stitches and 32 rounds = 4 inches in 1×1 rib, unstretched, on smaller needles
SIZES
Baby (Kid, Adult)
- Finished Body Circumference: 15 (17, 18½) inches
- Finished Ribbing Circumference: 12 (13, 14) inches, unstretched
- Finished Height: 9½ (11, 12¼) inches, excluding pom pom
NOTE
SLIPPED STITCHES
Slip all stitches purlwise.
PATTERN
CAST ON
With smaller circular needles, cast on 72 (80, 88) stitches. We used a Long Tail Tubular Cast On (beginning with a purl cast-on stitch after the slip knot), but a basic Long Tail Cast On would also be beautiful (and less complicated!).
IF YOU USED A LONG TAIL TUBULAR CAST ON…
Foundation Row 1 (wrong side): *K1 through the back loop (tbl), slip 1 (see Note) with yarn in front (wyif), repeat from * to end of row.
Foundation Row 2 (right side): *K1, slip 1 wyif, repeat from * to end of row.
Place unique marker and join for working in the round, being careful not to twist the stitches.
Continue to Cuff.
IF YOU USED A BASIC LONG TAIL CAST ON
Place unique marker and join for working in the round, being careful not to twist the stitches.
Continue to Cuff.
CUFF
Round 1: *K1, p1, repeat from * to end of round.
Repeat Round 1 until piece measures 3 (3½, 4) inches from cast-on edge.
BODY
Switch to larger circular needles.
Work in stockinette stitch, knitting every round, until piece measures 8 (8¾, 9¾) from cast-on edge.
CROWN
NOTE: Change to double pointed needles when necessary.
Round 1: [K1, slip slip knit (ssk), k13 (15, 17), knit two together (k2tog), place marker] 3 times, k1, ssk, k13 (15, 17), k2tog. [64 (72, 80) stitches]
Round 2: Knit to end of round.
Round 3: [K1, ssk, knit to 2 stitches before marker, k2tog, slip marker] 4 times. [8 stitches decreased]
Repeat Rounds 2 and 3 five (6, 7) more times. [16 stitches remain]
Next Round: [K2tog] 8 times. [8 stitches]
FINISHING
Cut the tail and thread it through the remaining stitches. Bring the tail to the inside of the hat. Weave in ends.
POM POM
If you’re using Purl Soho’s Pom Pom Maker Set, use the Medium (Large, Large) Pom Pom Maker and the 2 (2½, 3)-inch Trim Guide to make a pom pom. Follow the instructions for a worsted weight yarn in our Pom Pom Tutorial.
ATTACH POM POM
Thread each pom pom tail separately through the top of the crown to the inside of the hat. Tie the tails into a knot, then thread the tails up through the pom pom itself and trim them flush with the pom pom.
Now enjoy your Classic Cuffed Hat!


Oh, wow I love this, and the new colors too!
Is there a PDF link for this pattern?
Hi Cindy-
There isn’t a PDF for this pattern. To print it or save it as a PDF we recommend that you use printfriendly.com.
Thanks so much for getting in touch!
Molly
help, I’m not computer knowledgeable. I went to the site and what do I do to get to the pattern. Thnaks
Hi Barbara-
We have just put up a free PDF of this pattern. It’s listed under the “Pattern” headline. Just click on the link and you’ll be taken to a printer-friendly PDF of the pattern.
Thanks!
Molly
Hi Cindy-
Just wanted to update you that we now have a free PDF of this pattern linked under the “Pattern” headline! Thanks again!
Molly
Thanks-see you have the PDF link. I will be ordering today if I can only decide on colors!
Instead of having us go to printfriendly.com to make a printed or PDF version, why not have it available as an option here on the blog?
Hi Lizabeth-
We are working on an easy way to print all of our patterns here on the Purl Bee and hope to have a better solution up soon! It’s not as easy as just putting up a quick PDF here because we need to format it so that it’s up to our standards (even if it’s free) which takes a lot of time and effort. I totally understand that it’s annoying to have to go to a third party site and we are working on trying to make printing (and saving as a PDF) easier for all of our readers!
Thanks for getting in touch with this concern and for your understanding.
Best-
Molly
Hi Again Lizabeth-
Just wanted to let you know that we now have a free PDF of this pattern linked under the “Pattern” headline!
Best-
Molly
Thank you for this great pattern! I have a question about knitting this using a long tail cast on instead of the tubular cast on. Do you mean “proceed directly FROM the ribbing section” or “TO the ribbing section”?
Thanks! Cathy
Hi Cathy,
Thank you for writing in with your question!
Yes, after completing the long tail cast on, you’ll skip the “Begin” section, and resume at the beginning of the Ribbing section.
If you have any other questions, please don’t hesitate to ask! – Gina
Is there a way to figure out how to adjust the number of stitches initially cast on when using a bulkier yarn? Would this change the decrease pattern as well?
Hi Jess-
We don’t recommend re-writing patterns in a different gauge unless you have a lot of experience doing that. But you might want to check out our Super Soft Merino Hats for everyone, which uses a bulkier yarn. You could easily knit a longer ribbed cuff and make the head portion a bit taller as well to achieve a similar look.
Thanks!
Molly
I have a Mac and I just right click on my mouse and print the pages that I want
Love the pattern and the colors! These hats will make great Christmas gifts! Thanks for sharing.
What a lovely classic pattern and I am loving the colors! No worries about there not being a PDF version — people shouldn’t complain about a free pattern! 🙂
You can also save it to Pocket and forward it to yourself using your preferred method.
Thank you for another awesome pattern, I love your site and all the magic you share.
hi, nice pattern! (i apologize if this sends more than once, i hit submit and it just took me back to this page, not notifying me if it submitted or not) i am a bit confused for the first round on “shaping the crown” you mention right after “to place a marker…” and then after that you have “three times” i am a bit confused as to what that means. do i k2tog three times? also, at the end it says [64 (72,80) stitches], does that mean i would have 80 stitches to work with if i was working on an adult sized hat?
oh boy i hope my questions make sense, thank you sooo much in advance
Hi Dia,
Thank you so much for your kind words! Yes, your questions make perfect sense!
You are referring to the first round of the crown shaping, which reads:
Round 1: [k1, ssk, k13 (15, 17), k2tog, place a marker that is a different color than the end-of-round marker] three times, k1, ssk, k13 (15, 17), k2tog. [64 (72, 80) stitches]
“Three times” means repeat the instructions between the [] brackets three times.
Don’t just repeat the k2tog three times, repeat the entire contents of the brackets three times.
“[64 (72, 80) stitches]” is the stitch count for the baby, kids, adult hat (respectively) after the first crown shaping round. If you are making the adult size, you will have 80 stitches remaining at the end of this round.
I hope that helps to clarify! Thanks for writing in and please don’t hesitate to ask if you have more questions! – Gina
I’m currently working on the baby size and I’m newly switched from crochet, but is k13 right? Because I’ve not been getting enough stitches for the 4th section. I’m trying to figure out the right number because the math seems right… Or am I missing something
Hi Johanna,
Thanks for writing in with your question! K13 is correct. Before you knit the first decrease round, try placing markers to divide the stitches into 4 quarters. You should have 18 stitches between each marker, 18 x 4 = 72. This might help you to visualize where the decreases will be. I sincerely hope that helps, if not I can help you troubleshoot further. Please let me know if you have any more questions! All my best – Gina
Is there this could be done flat? I’m not a fan of dpns and not sure about only using the circular to finish the hat. I love the pattern and would love to use it to do a set (with a scarf) for my dil.
Hi Lisa-
This pattern is written just for knitting in the round and you will need to transfer to double pointed needles at the top. Maybe our double pointed needle tutorial will inspire you to give DPNs another chance? https://www.purlsoho.com/create/2008/07/25/double-pointed-needles/
If you’d rather avoid DPNs all together we do have one (very cute) hat that is knit flat: https://www.purlsoho.com/create/2013/10/06/new-kit-hat-and-hand-warmers-for-beginners/
Thanks for writing in!
Molly
Would this work in moss stitch instead of stockinette? Desperately looking for a simple pattern like this but with moss stitch. Any suggestions would be so helpful! Thank you!
Hi Zoe-
I don’t think this would work the same way in moss stitch and we don’t actually have any moss stitch hat patterns. Maybe you would have some luck searching Ravelry. Be sure to also search for “seed stitch” hat patterns since that’s another term for the same stitch.
Thank you and sorry we couldn’t be of more help!
Molly
Thank you for the PDF pattern! Just another reason to LOVE Purl Soho and the Purl Bee. XO!
is this a very stretchy hat? adult size seems like what I would normally do for a child.
Hi Judis,
Thank you for your question! Yes, the hat is extremely stretchy and will easily fit a head up to 23 inches (or more) in circumference.
– Gina
Is there another yarn you can recommend for this hat – I want to make it for my 11 mo old grandson but want it to be machine washable – just can’t see them hand washing things for him!
Love the pattern & colors in that yarn. I may do one in the yarn you show also.
Thanks!
Hi Esther-
Sure! This would work great with Anzula’s For Better or Worsted, which is fully machine washable and dryable!
https://www.purlsoho.com/purl/products/item/7913-Anzula-For-Better-or-Worsted
Thanks for your question!
Molly
I just made one for our 8-month-old granddaughter. I am counting on the fact that hats aren’t washed often! (I’ll do the first wash for her.)
This is a very basic question as I’m fairly new to knitting in the round, but how after finishing your second foundation row on the straight needle, how do you transfer your work to the circular needles? The tutorials I’ve found online have you knit your stitches from the straight needles into the circular needles, but that seems like it would screw up the ribbing pattern. Could you please help me? Thank you!
Hi Melissa-
Yes, you knit the from the straight to the circular needles. It won’t mess up the ribbing patten because you should knit it in pattern. Basically, start the “Rib the Cuff” section with the circular needles. Does this make sense?
Please let us know if you have any more questions!
Best-
Molly
That makes perfect sense, thank you so much for responding!
Is this supposed to be a fairly snug fitting hat. I ask because 88 stitches cast on at that gauge seems small for adult size hat? I think I Iwould use that size for a child. Can you comment on the sizing?
Thanks
Hi JMS – Thank you for your question! This hat knit in Worsted Twist is extremely stretchy. The adult size fits up to a 23 and 1/2 inch head size, when measured around the largest part of the head. I hope that answers your question. If you have any more, don’t hesitate to write in! – Gina
thanks so much. with this info in mind would your kids size 17 fit up to a 22 inch head? i’ve just purchase a lot of this wonderful yarn and am planning quite a few gifts with it. I just want to make sure I have my sizing right. thanks again
Hi JMS – For a child with up to a 21 inch head measurement, the kids size would be great. Anything bigger than 21, I would recommend making the adult size. I hope that’s helpful. Thank your for writing in and please do not hesitate to ask anymore questions! – Gina
Hallo Purl-Bee,
i didn’t find the general comment-place…
I just wanted to say: I love all your patterns, the super explanations, the colors, your ideas!
What a pitty I don’t live nearby!
With love, Sabina, Berlin
Thanks Sabina!
Hello Gina,
This may be an extreme request, ( sorry!)I’m pretty new to knitting and I really want to figure out how to make this adorable hat for my new niece and nephew. Would it be possible for you to make a video tutorial for this pattern??
I’m coming to NYC later this month and I plan on stopping in for some beautiful yarn! I will probably have more questions when I come in as well.
Thank you,
Simone
Hi Simone-
Unfortunately we don’t have the time right now to make a video tutorial of this but we are happy to answer any questions as they come up while you’re knitting! And of course we will also be happy to answer them in person if you stop by the store later this month.
Best-
Molly
I love this hat!
I was wondering if it could also be made using the same patter with the MANOS DEL URUGUAY Maxima yarn, and maybe using only one skein?
Thank you!
Becca
Hi Becca, Thanks for your question! Yes, you could absolutely use Manos Del Uruguay Maxima for this hat. I think it would be lovely! And you are right, you will only need one skein. Happy knitting! – Gina
I’m knitting this hat now in the adult size – it’s looking REALLY small (the ribbing part). Does it look very small at first?
Hi Marissa-
The ribbing will look very small but if you are getting the correct gauge your hat will be the correct size. The finished measurements are listed under the “Sizes” headline.
Thank you so much for getting in touch!
Molly
If I understand this correctly we are not joining in the round until the “rib the cuff” section. So I am left with a small section on the edge where the stitches are not joined. Do I just use what’s left of the tail from casting on to stitch that part together or have I done something wrong? Thank you!
Hi Liz – Thank you for your question! Yes, you are exactly correct, when you finish knitting the hat, you will use the tail remaining from the cast on to sew the small unjoined section together. It should only take 2 stitches to sew this together, pretty easy considering you already have to thread that tail into the tapestry needle to weave the end in. Let me know if I can help with any other questions! – Gina
I love this hat, but as I made my first one, I realized that the adult size is a little taller than I’d like it to be for my head. I think the next one I make, I’ll go about 8 or 8.5 inches before I start shaping the crown, instead of the 9 3/4ths suggested for the adult size. Just a thought for others- if you like a tall hat it’s great, but the crown-shaping section added about 3.5 inches for me. Other than that, so cute, warm and cozy!
I love this hat pattern! If I wanted to divide it into 3 even colour blocks (rather than just one solid colour), what would be the best way to do this?
This would make a great hat for football games!
Hi Rachel,
Thanks for writing in! I was thinking the same thing when I was making this hat!
I would divide it up like this:
Use the first color for the entire ribbing and the first round of the body (this avoids a color jog on the purl sections of the rib).
Find the body height by taking the finished height measurement of whatever size you are making and subtracting the ribbing length. Divide this number by two. The number you get will be the length of the second section.
Knit the remainder of the body in the third color.
And here’s another tip: If you make the pom pom with all 3 colors held together, it makes a really cool topper for a hat in team colors.
I hope whatever teams you root for have a great season! All my best, Gina
Love this sweet simple hat. Making one for myself and one for sweetheart. Thank you for the print friendly website. Didn’t know such an option…super easy to add link, delete pics, etc. and print. Thank you. Keep up the great work Purl Bee…you are always an inspiration for myself and friends. Love the things you all create and for free. I’ve never been back East but if I do I will stop in your shop!
I love this adorable hat and can’t wait to make it for my son! The issue I’m having is with the joining to work in the round…i have tried various methods of joining but always end with a large gap. Is there a particular way you suggest to join with this tubular cast on? I would really like to not have to keep starting over!! Thanks!
Hi Sarah! So sorry to hear you’ve been having trouble with joining. The answer is, you are supposed to have a gap when you join, then when you finish the hat, you neatly sew up the gap with 1 or 2 tiny stitches, using your tapestry needle. This cast on just does not take well to being worked in the round, the stitches are bound to end up twisted. So the solution is to work the cast on and the foundation rows flat, then join to work in the round, and stitch up the tiny gap later. I’m really happy you reached out! I hope my feedback prevents further struggling on your part. Please don’t hesitate to write in any time! Enjoy your week. – Gina
Thank you!! Glad to know i wasn’t just messing up over and over. 🙂
quick questions to clarify, when working the body it says 9 and 3/4 inches from the edge, so this would mean from the very bottom of the hat where the ribbing starts?
thanks for the pattern, i’m excited to finish the hat!
Hi Staceyh-
Yes this is correct, you measure from the cast on edge as you describe.
Let us know if you have any more questions!
Best-
Molly
I’m thinking about making an adult sized hat with the suggested yarn, but in two colors (one for the hat, the other for the pompom). Can you please tell me how many skeins I would need? 1 for each part, or 2 in one color for the hat and a third skein for the pompom? Thanks so much!
Hi Nico-
You will need one for the hat and one for the pom pom.
Thank you!
Molly
Thanks so much for this pattern. I cast on 96 stitches and am having trouble figuring the first round of decrease (since I can follow your rounds once I get to 88). Can you help me with the math?
Hi Brecken! Thanks for your question and kind words. If you cast on 96 stitches, your first decrease round will be as follows:
Round 1: [k1, ssk, k19, k2tog, place a marker that is a different color than the end-of-round marker] three times, k1, ssk, k19, k2tog. [(88) stitches]
Please let me know if I can help with any other questions. Enjoy! – Gina
Hi,
Could you give me a rough estimate on ages for the baby and kid? I’d love to make these for a 3 year old and a 5 1/2 year old (both boys).
Thanks!
Eleanor
Hi Eleanor, Thanks for writing in!
Head sizes can vary a lot, even among children the same age. That being said, I would estimate the sizes to be:
Baby – up to 2 years (up to 18 inch head circumference)
Kids – up to 10 years (up to 20 inch head circumference)
The best thing to do would be to measure their heads and decide based on their head size, not age. If you can’t measure their heads, I’d go with the Kids size for both. The hat is very stretchy so it can fit a pretty big range of head sizes. Please let me know if I can help with any other questions! – Gina
Thanks, Gina. That’s really helpful.
Eleanor
How long did it take to make this? Would a beginner be able to do it?
Hi Micaela,
The adult size took me about four hours to knit, although I am a pretty fast knitter. A beginner can definitely do this project, as long as they can knit in the round! Thank you for writing in with your question! – Gina
I would love to make this hat, but prefer a top down as I tend to twist stitches when there are a lot of them. I can’t figure out how to change the pattern. Can you help me?
Hi Patricia,
Thanks for writing in! I would not recommend knitting this hat from the top down. Knitting the hat in this way will dramatically change the look of the decreases (which when knit top down would be increases) at the crown of the hat. It is essential for the cuff of this hat to have a lot of stretch, unfortunately it’s not possible, even for a very experienced knitter, to get a neat bind off edge that is also stretchy enough to not squeeze the head of the person wearing it. If twisting the stitches is a problem for you, I think a better way would be to make the hat flat (i.e. turn your work after every round), and have a seam on the back side of the hat. To change the pattern to make the hat flat is a simple fix – just add 2 stitches to the total number cast on. These two stitches are for seam allowance. Let me know if that’s helpful! -Gina
hello! thank you very much for such a lovely pattern. i was wondering if it would be possible to knit this in all rib? i was hoping to make a k2p2 rib hat with a long cuff for cozyness. what do you think? thank you!
Hi Lori! Thank you so much for your kind compliments.
You can definitely make this in all rib! Just a rule of thumb, for k2 p2 rib, the total number of stitches cast on must be divisible by 4. Luckily, all the hat sizes (in this pattern) have stitch counts divisible by 4! When you get to the decreases, just follow along with the rib pattern you’ve already established, working the decreases, and the purl ribs will miter with the knit ribs (this might be hard to visualize, I think you will understand once you get to that point in the pattern)! I think this is a great idea! Go for it! Let me know how it turns out. All my best! -Gina
Hi, I was wondering if the adult size would fit a head that is 23 inches around, or if I would need to add more stitches to the 88 and how would I make the adjustments to the rest of the pattern. Help a large-headed person out. 🙂
Thanks,
Lauren
Hi Lauren! Thanks for writing in! I think the hat would fit a 23 inch head, it is very stretchy. But fit, as always, is a matter of preference. If you prefer a looser hat, I would cast on 96 stitches. The only part of the pattern that will change is the first decrease round. I have written out that line of the pattern for the commenter named Brecken above – check it out if you decide to go with 96 stitches! Happy knitting! – Gina
Hi, I’m trying to make this hat and I was just wondering how important the needle size was? I have size 6 and size 4. Can I just knit loosely?
Hi Lyra-
Needle size is always just a suggestion. The important thing is that you are getting the correct gauge. So if you can comfortably get the gauges listed under the “Gauge” headline with a 4 and a 6 go for it!
Thank you for your question and please let us know if you have any more!
Best-
Molly
Hi!
In the “Shape the crown” section it sais at Round 3 to ” slip the marker”
What do I do here? Do I slip the stitch?
Thanks in advance!
Jula
Hi Jula-
Just slip the stitch marker (usually a round little piece of plastic) from one needle to another.
I hope this helps. Please let us know if you have any more questions!
Best-
Molly
Hello!
I am making the adult size version of this lovely looking hat, and I decided to cast on 96 stitches (thank you for the recommendation from the comments above). I wondered if there were any other adjustments (other than the first decrease row, which you detailed above) that I should be making to make this hat a little bigger.
I realize I may be too late in asking this question, as I made the brim 4 inches (just like the pattern says) before moving onto the body, but I wanted to ask anyway.
Thank you!
Hi Claire, Thanks for writing in! If you want to make the hat a little bigger, you could also add length to the body. Just knit the section after the ribbing but before the decreases a little longer. Adding about 1/2 inch length should be sufficient. If you don’t have enough yarn to make this modification, I’m sure it will be big enough without the extra length. Please let me know if I can help with any other questions! All my best, Gina
Hello,
I feel pretty dense asking this, but why do I need 5 markers if I have 1 for the row marker and 3 for the decrease rounds? What am I missing? Thanks.
Hi! Thank you for writing in with your question! You are right, you only need 4 markers, one in a different color. Enjoy! -Gina
Is it an equal substitution to use two strands of your PURL SOHO LINE WEIGHT yarn for this pattern?
Thanks!
Hi Suz, You would need to knit with 3 strands of Line Weight to equal the weight of Worsted Twist. Thanks for writing in with your question and please let me know if I can help with any others! – Gina
I am working in this hat now, with a fantastically colorful self-striping yarn I found in the clearance pile at my local yarn shop. Just one question though… I don’t have a pom pom maker and have never made one before. It’s there a way to make a pom pom without investing in a pom pom maker? I don’t see a reason to spend the money on something I will rarely use. Thanks!
Hi Lindsey,
Thank you so much for writing in. I’m glad your enjoying knitting the hat. There are many ways to make a pom pom without the pom pom maker! For example, you can wrap yarn around your hand, as if you are starting to wind a ball of yarn. When you have a good amount of yarn wrapped around your hand, you cut the end and slip off the wrapped yarn. Tightly tie a double knot around the center of the wrapped yarn, then cut the loops. Fluff the ends with your hand and use sharp scissors to trim the pom into a perfect sphere. If my instructions don’t make sense, there are countless tutorials on youtube that are great. Try searching “How to make a pom pom”. You can also wrap yarn around cardboard scraps. Please let me know if I can help with any other questions! – Gina
Can I use double pointed needles instead of circulars?
Hi Beth-
Sure, you can use double pointed needles instead, just make sure to keep the tension even between the needles!
Thanks for getting in touch!
Molly
I just want to say that I for one am sooo pleased that this is NOT PDF. My printer isn’t working and I’ve not figured out a way to copy/paste a PDF. Thank you sooo much. I miss out on a lot of patterns.
Hi
This question may have been asked and answered but please, just to clarify. If I am confused with the LT tubular cast on can I use “regular” long tail cast on with same results?? What would be the problem with this method?
Thank you so much. Had great fun visiting the store in person this past weekend from Boston!
Hi Lisa-
The regular long tail cast on isn’t stretchy but it will work, the edge will just look and feel slightly different. So the results won’t be the same but you’ll still get a beautiful and wearable hat. The intro to the tubular cast on tutorial explains the benefits of this particular cast on a little more:
https://www.purlsoho.com/create/2014/10/21/long-tail-tubular-cast-on-tutorial/
Please let us know if you have any more questions!
Molly
Thank you so much for taking the time and effort to provide a free pattern. It is so kind of you and very much appreciated.
Hello! This pattern is wonderful and is just what I have been looking for. I love the classic look! I am currently making a kid size, but for an adult. The last 3 projects I have knit have come out WAY too big, even with the needle size being correct… so I got paranoid with this one and started to knit the kid size. It’s looking extremely small, though! I measured one of my hats that fits a little loose on me, and it was about 19 inches, so I thought the kid size that would would probably be okay. Now I’m wondering if I made a huge mistake. Am I just scarred from my recent attempts at hats being too big in the end? I didn’t take any chances on this pattern, and am knitting with the exact correct yarn weight and needle sizes. Can you please advise? Looking forward to hearing from yoU!
Hi Heather-
It sounds like you are knitting at a looser gauge than the pattern calls for and you should probably adjust your needles size to get the correct gauge. The gauge for this pattern is as follows (this info is listed under the “Gauge” headline:
Body: 20 stitches x 28 rounds = 4 x 4 inches in stockinette stitch on larger needle
Ribbing: 24 stitches x 32 rounds = 4 x 4 inches in 1 x 1 rib (unstretched) on smaller needle
The needle sizes listed in any pattern are always just a suggestion. In order for the hat to fit correctly the important thing is that you get the same gauge. You can use any size needle that you need in order to do that. If you are getting too few stitches per inch you should switch to a smaller needle size and if you are getting too many you should switch to a larger needle size. I myself am a loose knitter and I often move down two needles sizes to achieve the correct gauge!
Thanks for getting in touch and please let us know if you have any more questions!
Best-
Molly
Thanks so much for sharing this adorable hat pattern – perfect for charity knitting projects!
Just about finished my first hat in this pattern. Thanks for the easy to follow pattern. Love this hat
Hello. Love this hat! Any tips on fixing the gap from where the 2 foundation rows join the rest to knit in the round. There’s a bit of a dip there.
Hi Andrea, Thanks for sending your question! I’m happy to hear you like the hat. When you weave in your ends, I suggest using the tail remaining from the cast on to stitch up the little gap. 1 or 2 stitches should do the trick. Let me know if that helps! All my best, Gina
Hi Purl Bee! Thank you for all of the helpful replies you post! I am planning to order some skeins to start on a couple of these hats. Could you give an estimate of about how many yards of yarn are used to make a pom-pom?
Thank you!
Pam
Hi Pam! Thank you so much for your question and kind words. For these pom poms, I used approximately 15-25 yards of worsted twist, depending on the size of the pom pom. Know that if you choose to use a different weight of yarn, you will not use an equal number of yards to make the same size pom pom. In my experience (and, not to toot my own horn, but I’ve made a lot of pom poms), the smaller poms use around 10 grams of yarn when all is said and done, and the larger ones use 15-20 grams of yarn, regardless of the weight of the yarn. If you’re using the Clover pom pom maker, my best tip is to wrap the yarn loosely at first. If you wrap too tight to begin, the pom comes out too dense and looks like carpet. I bet you didn’t think you’d get a dissertation on pom poms, but there you go! Thanks for reading and happy knitting! -Gina
hi, I’d love to knit this for a newborn but I suspect the baby size will be too big? Do you have any suggestions to downsize to newborn (I think newborn is usually 12-14″)? thanks Kristy
Hi Kristy! The smallest size in this pattern is 15 inches around (finished hat measurement). The pattern can easily be adapted for a smaller size. For a hat 13 inches around, cast on 64 stitches to begin. Follow the pattern until you reach the “Shape the Crown” section. Your first round of decreases will be:
Round 1: [k1, ssk, k11, k2tog, place a marker that is a different color than the end-of-round marker] three times, k1, ssk, k11, k2tog. [56 stitches]
from here, follow the pattern until the end.
Let me know if that makes sense! Thanks so much for writing in and please let me know if I can help with any other questions. -Gina