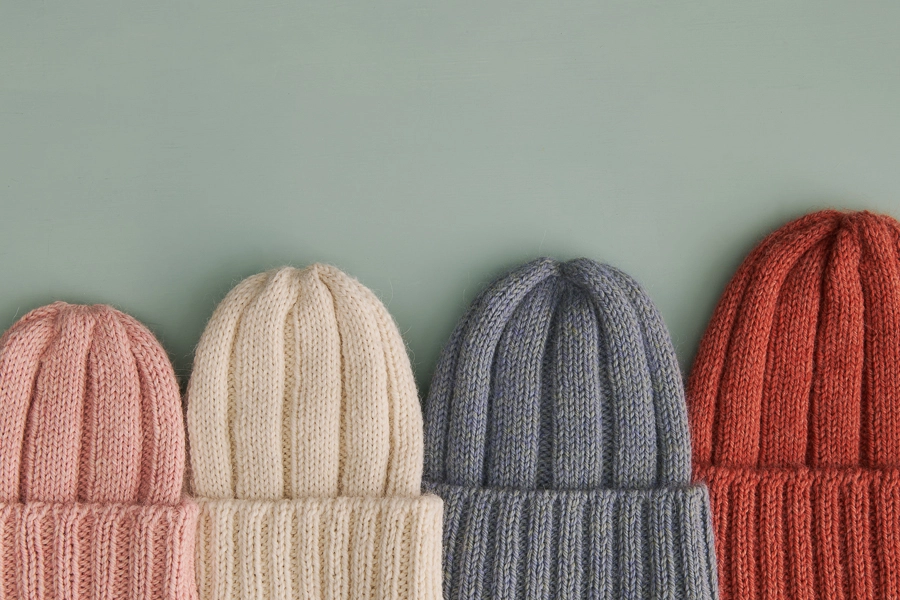
Your basket is empty.
Continue ShoppingMixed Rib Hat
Totally charming, fun to knit, and a fantastic fit, too… Our Mixed Rib Hat pattern in Yonder, designed by Tayler Harris, proves that twice the ribbing is twice as nice!

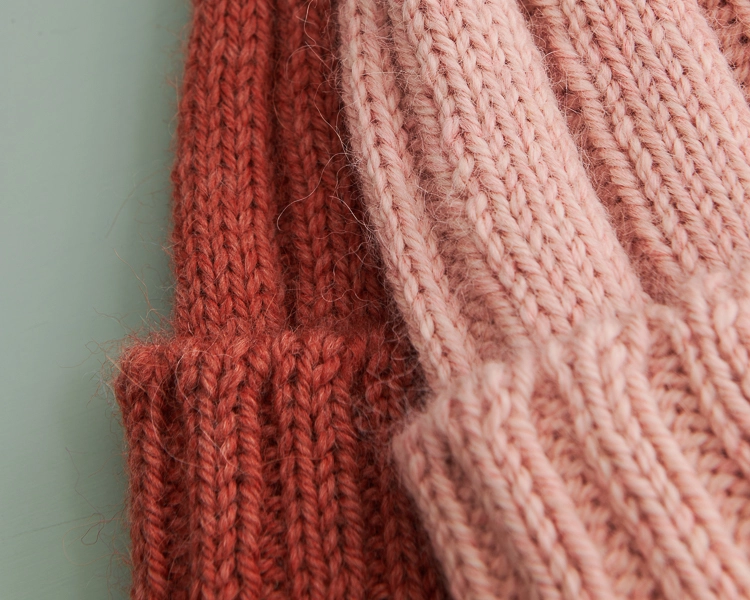
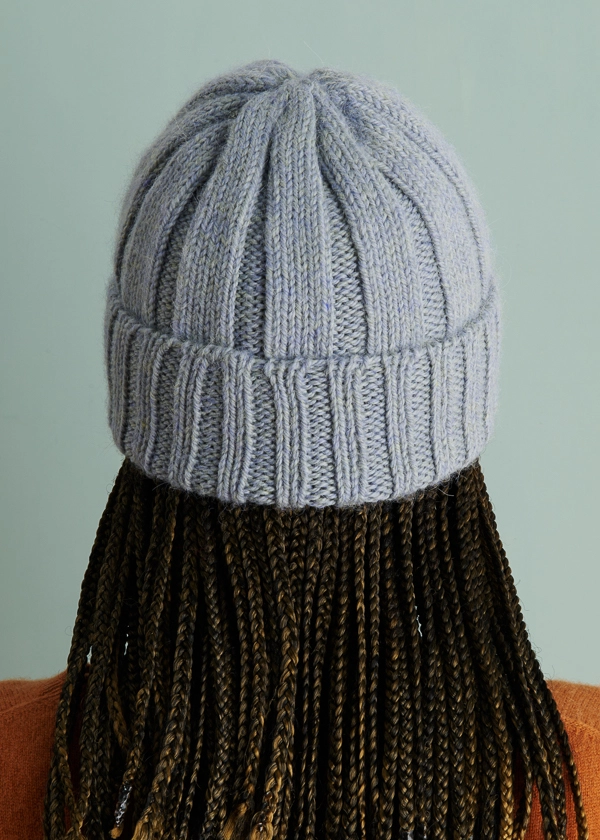
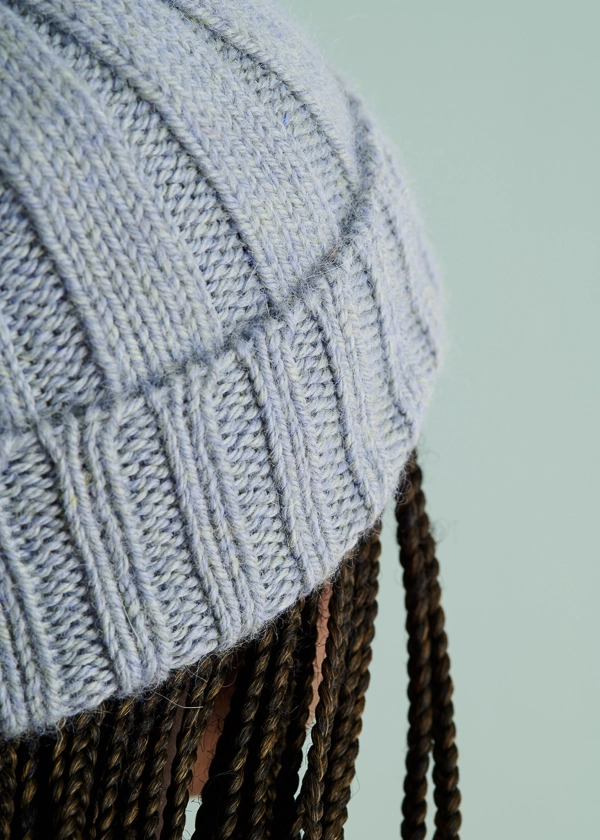
With 2×2 ribbing for the cuff and 5×3 for the body, this hat has the wonderful ability to stretch and bounce back, so whether you’re casting on for a gift or just want your knit to fit really well, you’re going to love what this hat can do!

Part math and part magic, ribbing is incredible. By simply alternating columns of knits with columns of purls, you create a fabric with enormous resilience.

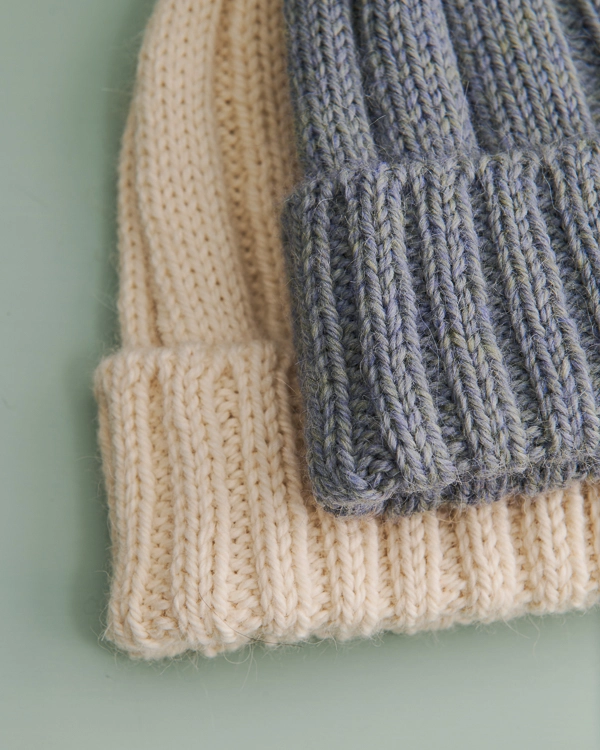
The more compact the ribbing, the more hugging power it has, so the knit 2 x purl 2 for the cuff is just what you need to keep your hat on. The knit 5 x purl 3 ribbing provides, yes, a bit of stretch but, also, a nice visual shift from the cuff to rest of the hat.
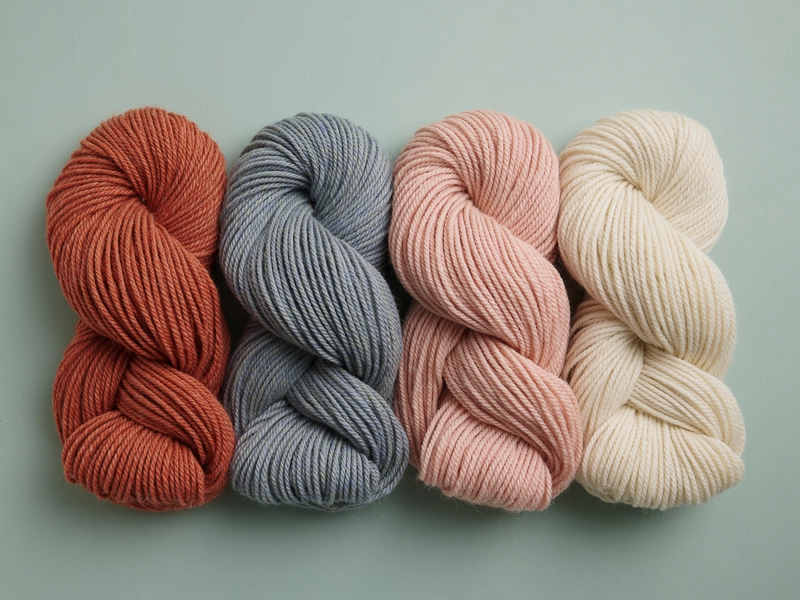
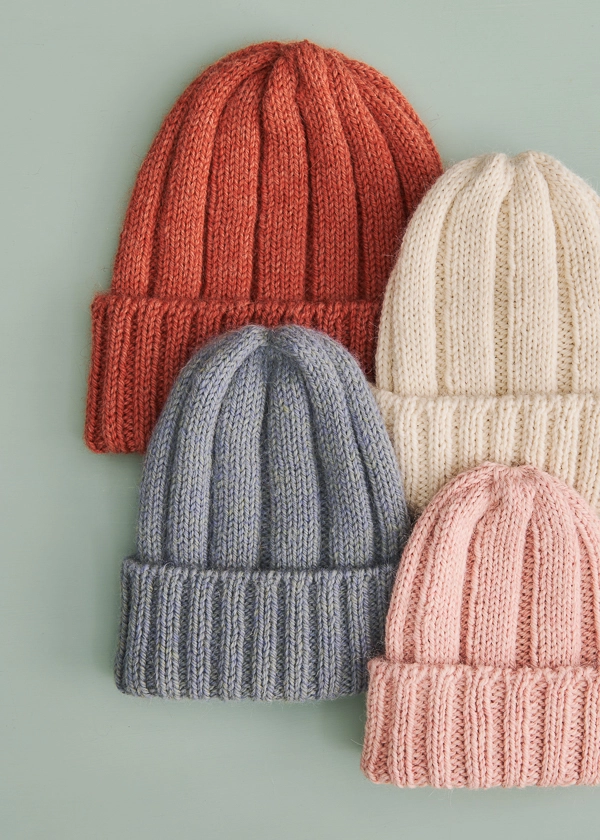
50% highland wool and 50% alpaca in a light and airy spin, our Yonder yarn brings out the beauty of all this ribbing! The wool contributes bounce of its own, and the alpaca adds luster and depth to this lovely knit. Whether you pick from Yonder’s four undyed neutrals or the earthy hues dyed over them, you’ll love how this fiber mix mixes with your Mixed Rib Hat!
Yarn lovers, if you adore the yarn used in this project, you’ll love exploring all of our other yarn collections! Discover over 45 thoughtfully designed yarns in nearly every natural fiber and in every spectacular color you can imagine. Only available here at Purl Soho’s online yarn store, where every skein is created with care and your creativity in mind!

Designed for Purl Soho by Tayler Harris. Based in Utah, Tayler finds inspiration for her designs from the unique landscapes of her home state. From the beautiful mountains and canyons to the national parks and natural landscapes, she loves to incorporate the colors, textures, and shapes of her favorite places. See more from Tayler on her Instagram!
Want to print this pattern? On desktop, find the “print” icon in the right margin, and on mobile, scroll to the end of the pattern for it. Use the on-screen instructions to remove anything you don’t want to print!
Materials

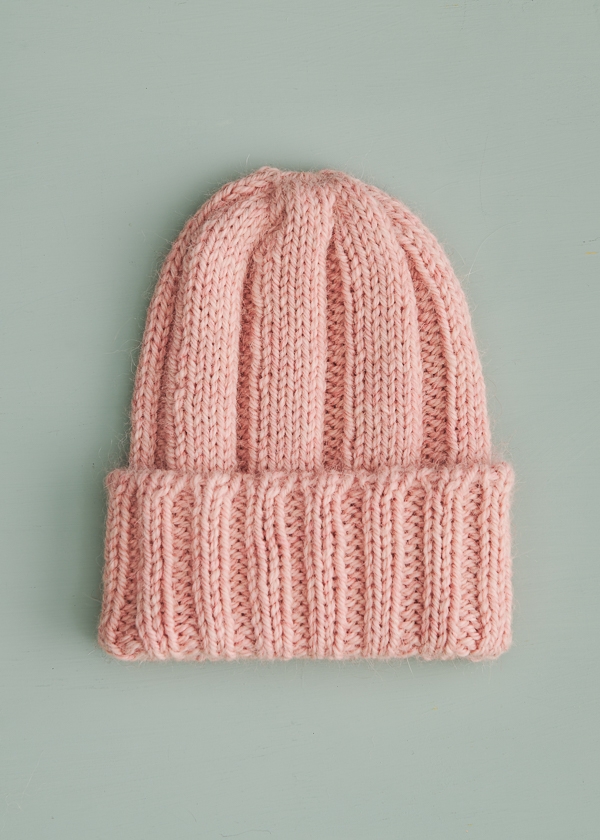
- 1 (1, 2, 2) skein(s) of Purl Soho’s Yonder, 50% alpaca and 50% highland wool. Each skein of this worsted/aran weight yarn is 140 yards/100 grams; approximately 115 (140, 190, 245) total yards required. We used the colors Pink Quartz, Heirloom White, Winter Sage, and Pink Earth.
- If working Tubular Cast On: US 6 (4 mm), 12- or 16-inch circular knitting needles, depending on size you are making
- US 7 (4.5 mm), 12- or 16-inch circular needles, depending on size you are making
- A set of US 7 double pointed needles OR US 7, 32-inch circular needles for Magic Loop
- A stitch marker
- A cable stitch holder
NOTE: We used every last yard for our Kid sized hat! To avoid running short, be sure to check your gauge, reuse your swatch yarn, and keep tails short. Or, consider ordering an extra skein just for swatching. If you don’t end up needing it, you can return unwound yarn for a refund within 30 days of purchase, or within 6 months for store credit. Our Return Policy has all the details!
GAUGE
28 stitches and 27 rounds = 4 inches in 5 x 3 rib on larger needles, unstretched
SIZES
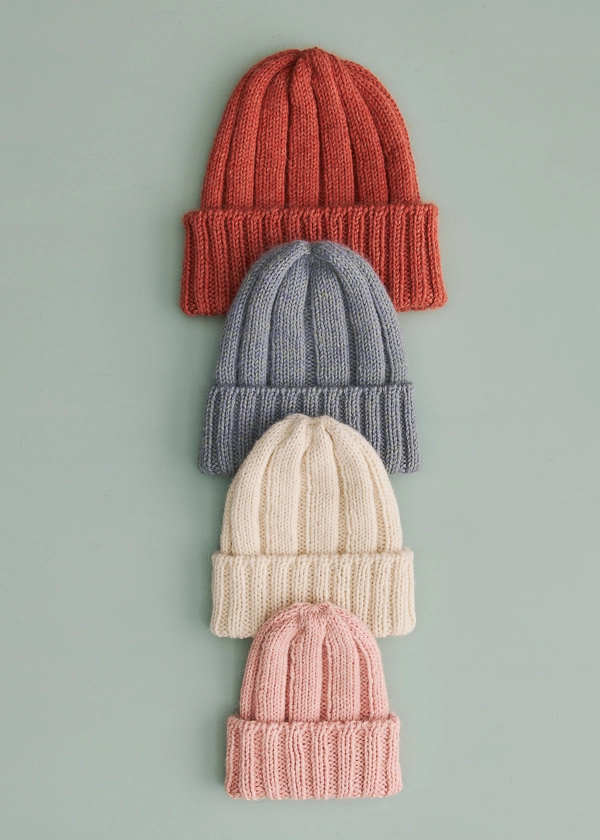
Baby (Kid, Adult Small, Adult Large)
To fit actual head circumference of 13–15 (16–18½, 19½–22, 23–26) inches
- Finished Circumference: 9¼ (11½, 13¾, 16) inches, unstretched
- Finished Height: 10 (11, 12, 13) inches, uncuffed
SAMPLES: The Pink Quartz hat is the Baby size, Heirloom White is the Kid size, Winter Sage is Adult Small, and Pink Earth is Adult Large.
For help choosing a hat size, check out our complete guide on How to Knit the Right Hat Size!
PATTERN
CAST ON
Cast 64 (80, 96, 112) stitches onto either smaller or larger circular needles, depending on cast on technique you use. We used the smaller needles and a Long-Tail Tubular Cast On (beginning with a purl cast-on stitch after the beginning slipknot), but a basic Long-Tail Cast-On with the larger needles would also be beautiful. If you use the Long Tail Tubular Cast On, be sure to work the following Foundation Rows.
IF YOU USED A LONG-TAIL TUBULAR CAST ON…
Foundation Row 1: *Knit 1 through the back loop, slip 1 purlwise with yarn in front (wyif), repeat from * to end of row.
Foundation Row 2: *K1, slip 1 purlwise wyif, repeat from * to end of row.
Place marker and join for working in the round, being careful not to twist the stitches.
Foundation Round 3: *K1, slip 1 to cable stitch holder and hold at back of work, k1, p1 from cable stitch holder, p1, repeat from * to end of round.
Foundation Round 4: *K2, p2, repeat from * to end of round.
Switch to larger circular needles.
Move on to Cuff section.
IF YOU DID A REGULAR LONG-TAIL CAST ON OR SIMILAR…
Place marker and join for working in the round, being careful not to twist the stitches.
Move on to Cuff section.
CUFF
Round 1: *K2, p2, repeat from * to end of round.
Repeat Round 1 until piece measures approximately 4 (4½, 5, 5) inches from cast-on edge.
BODY
Round 1: K4, p3, *k5, p3, repeat from * to last stitch, k1.
Repeat Round 1 until piece measures approximately 8¾ (9¾, 10¾, 11¾) inches from cast-on edge.
CROWN
NOTE: Change to double pointed needles when necessary.
Decrease Round 1: K4, purl two together (p2tog), p1, *k5, p2tog, p1, repeat from * to last stitch, k1. [56 (70, 84, 98) stitches remain]
Next Round: K4, p2, *k5, p2, repeat from * to last stitch, k1.
Decrease Round 2: K4, p2tog, *k5, p2tog, repeat from * to last stitch, k1. [48 (60, 72, 84) stitches remain]
Next Round: K4, p1, *k5, p1, repeat from * to last stitch, k1.
Decrease Round 3: *K4, knit two together (k2tog), repeat from * to end of round. [40, (50, 60, 70) stitches remain]
Next Round: Knit to end of round.
Decrease Round 4: *K3, k2tog, repeat from * to end of round. [32 (40, 48, 56) stitches remain]
Next Round: Knit to end of round.
BABY + ADULT SMALL SIZES ONLY
Decrease Round 5: *Slip 4 stitches to cable stitch holder, hold cable stitch holder parallel to left needle with cable stitch holder in front (do not twist, right sides of fabric should remain facing you), [knit next stitch on cable stitch holder together with next stitch on left needle] 4 times, slip next 4 stitches to cable stitch holder, hold cable stitch holder parallel to left needle with cable stitch holder in back (do not twist, right sides of fabric should remain facing you), [knit next stitch on left needle together with next stitch on the cable stitch holder] 4 times, repeat from * 1 (-, 2, – ) more time(s). [16 (-, 24, -) stitches remain]
KID + ADULT LARGE SIZES ONLY
Decrease Round 5: *Slip 4 stitches to cable stitch holder, hold cable stitch holder parallel to left needle with cable stitch holder in back (do not twist, right sides of fabric should remain facing you), [knit next stitch on left needle together with next stitch on cable stitch holder] 4 times**, slip next 4 stitches to cable stitch holder, hold cable stitch holder parallel to left needle with cable stitch holder in front (do not twist, right sides of fabric should remain facing you), [knit next stitch on left needle together with next stitch on the cable stitch holder] 4 times, repeat from * – (1, -, 2) more time(s), then repeat from * to ** one time. [- (20, -, 28) stitches remain]
ALL SIZES
Cut yarn and thread tail onto a tapestry needle. Draw twice through remaining stitches and pull tightly to secure.
FINISHING
Bring tail to inside of hat and weave in all ends. Gently wet block.
Share your progress and connect with the community by tagging your pics with #PurlSoho. We can’t wait to see what you make!


LEARN ABOUT YONDER + ALL OUR BEAUTIFUL YARNS
Yonder has all the qualities that will touch your knitter’s heart! 50% highland wool and 50% alpaca, this worsted/aran-weight yarn has a robust and earthy feel that breathes and blooms while you knit… Very satisfying! Pick from a palette of earthy, heathered colors dyed over the natural colors grown by the animals themselves and cast on for a project that takes you wherever you want to go.
More Free Knitting Patterns
- Be sure to explore our growing collection of Yonder knitting patterns and cast on!
More Worsted/Aran-Weight Yarns
- Shop our entire collection of worsted/aran-weight yarn (What does worsted-weight yarn mean, really? Our guide to worsted-weight yarn will answer your questions and more!)
- If you want to use a different yarn, be sure to take the time to get the correct gauge. Need help? Check our All About Gauge Tutorial and our Yarn Substitution article for lots of helpful information.
More Yarns With Similar Fibers
- Shop wool yarn
- Shop alpaca yarn
Looking for more inspiration? Explore all of our knitting patterns (including tons of free knitting patterns) and knitting tutorials, buy one of our many knitting kits and yarn bundles, and shop for beautiful yarn. We have over 35 gorgeous natural fiber yarns in 100’s of magnificent colors, designed to bring integrity, beauty, and joy to your next knitting project and only available at Purl Soho!


Would Plenty yarn also work with this pattern? Thank you.
Hi Vivian,
Thank you for writing in! Plenty should work fabulously with this pattern as well! Please let us know if you have any other questions along the way!
Happy knitting,
Gavriella
I would like to make this hat in a cotton-wool mix or in cotton alone (as my hubby is allergic to wool, a little bit anyway). What yarns would you recommend? And can I have the discount if I order tomorrow?!
Hi Nancy,
Thank you for writing in! I’d recommend Sunshower cotton as a great alternative for this hat. The yarn is a bit thinner than Yonder so I’d definitely recommend knitting a gauge swatch before you begin. You might also enjoy Plein Air which is 67% merino wool, 33% organically grown cotton. Both of these yarns could work wonderfully by knitting a bigger size at a smaller gauge so your project isn’t too airy. I hope this helps but please let us know if you have any other questions!
All the best,
Gavriella
I’d like to make this hat, one as a gift and one for myself. The gift hat will be perfect in adult small. I’ve a question regarding hat for myself. My head circumference is 22.75” (kinda big☺️) and I’m not sure whether I should go for adult small or adult large. The large looks pretty big, at 23” to 26” circumference and 13” height. If I worked both hats as adult small, looks like three skeins would be enough for both hats. Though I don’t mind buying additional skein. Size is most important. What say you, should I go for adult large? Thank you so much!
Hi Betsy,
Thanks for writing in! I would recommend going with the Adult Small size. It’s definitely preferable to have a hat that’s a little extra snug rather than a hat that’s too loose! You could also try knitting the Adult Small size at a slightly larger gauge so that it ends up in between that size and the Adult Large. Hope this helps!
All the best,
Lili
Hi, I’m loving this knit. Does the brim fold up on itself or up over the 3 x 5 ribbed body?
Thanks,
Marjorie
Hi Marjorie,
That is a great question! This brim folds onto itself but you can definitely begin the 3×5 ribbing sooner if you’d like!
Happy knitting,
Gavriella
Oils like to use the cashmere Marino wool for this hat. Would this work and do I adjust pattern and how much yarn would I need for a large
Hi Connie,
You can use two strands of Cashmere Merino Bloom for this pattern. Since you will need to hold strands doubled, you will need 490 yards for the size large.
Happy making,
Gavriella
would speckled hen yarn work with this pattern?
Hi Darien,
I’m afraid Speckled Hen is a bit too thin for this pattern but you can use two strands held together to make this hat!
Happy making,
Gavriella
Oh, darn I may thick-headed because I haven’t seen anyone here with this question… I’m confused about which needle size is to be used on the body of the hat? I see that with a tubular cast on, you use the smaller (size 6) or if with a regular long-tail, use the larger size (7). What size needle is used for the body (for either cast-on)?
Hi Barbie,
No worries at all! You will want to knit this hat on the US 7 needles!
All the best,
Gavriella
Thank you! 😊
Hello, any videos on the decrease , round 5? I am struggling with how to do this!!
Thanks!
Hi Lori,
Thank you for writing in although we are sorry to hear you are running into issues here. Could you please send a photo of your project to [email protected] so we can have a deeper look? We’ll be able to better visualize what’s going on that way!
All the best,
Gavriella
Hello!
I’m unsure of the instructions for the Foundation Round 3; “k1, slip 1 to cable…”
So is it k1 and slip 1 to the stitch holder, then k1 (the next st on the needle) then p1(the stitch sitting on the stitch holder?) and then back to the needle’s stitches to p1, repeating the above to the end?
Thanks so much for help with this.
Barbie (Again :/)
Hi Barbie,
Yes, your interpretation is totally correct! 🙂
All the best,
Lili
Thank you Lili!
I was wondering if the Cashmere merino bloom would be ok to use for this hat ?
Thanks
Hi Michelle,
Thanks for writing in! Cashmere Merino Bloom will likely be too thin for this pattern since it’s a DK weight yarn, and this pattern was designed for a heavy worsted/aran weight yarn. You could consider holding Cashmere Merino Bloom doubled though, and you should be able to match the gauge that way!
All the best,
Lili
Hello,
I am not sure where to post this question. I have knit a hat with Yonder yarn, only not this pattern. It is knit in the round, first round Knit, second round K1,P1. Repeat. The finished hat really skews to the left. Do you think it is a result of the yarn? Or the pattern? Or my knitting?
Thank you!
Hi Patty,
Thanks for writing in! Can you please send a photo of your hat to [email protected]? That way, we can better visualize what’s going on!
All the best,
Lili
I bought 3 skeins of hedgerows in different colors assuming I’d find an adult small hat pattern that would use only one skein each. I thought this one would work, but I’m not so sure. Do you think it would, and if not, do you have any suggestions on a different pattern? I prefer solid hats, so the one shown for hedgerow wouldn’t work for me. Thanks for your help!!
Hi Louise,
Thanks for writing in! I would recommend the following hats for Hedgerow:
Rolled Rib Hat
Ear Cozy Hat
Watch Cap
Lovely Ribbed Hat
Just be sure to knit up a gauge swatch beforehand to determine what needles you should use. You may need to size your needles up or down in order to achieve the pattern’s gauge!
All the best,
Lili
I’m stuck on how to do the last decrease using the cable holder. Is there a video tutorial for that technique?
Hi Diane,
While we haven’t made a tutorial specifically for this pattern, we’d recommend signing up for 1-On-1 Help if you’d like to see a demonstration of any technique you have a question about! We’re eager to help you move forward in this pattern!
All the best,
Lili
I am so lost with the decrease rows! I have ripped out stitches twice and the yarn is starting to become compromised. Any help you can provide would be much appreciated. I don’t have a yarn shop in my town or anyone else to ask. Thank you so much!
Hi Susannah,
We’re so sorry you are running into issues here! I would recommend signing up for one of our free 1-on-1 help sessions so that we can go over it together. In the meantime, please let us know if there is anything else we can do for you!
All the best,
Gavriella
I’m knitting this pattern in the Adult Small size.
Would the hat fit properly if I made the 2×2 ribbed cuff as a single layer at 2.5 inches, instead of as a double, folded layer requiring 5 inches of 2×2 ribbing?
From past experience, I lose patience and interest with having to work 5 inches of 2×2 ribbing for cuffs.
Hi Vivian,
Yep, you can totally do that! Let us know how your project turns out!!
All the best,
Lili
Thank you, Lili. I think I’ll make the hat with the simgle-layer cuff for now. Then later on if it looks and feels like the double-layer cuff would be better, I’ll knit one of those. Beautiful pattern!
Hi Lili,
Update on the Mixed Rib Hat. I decided to knit the pattern as written because I began to see that the folded 2X2 ribbing was going to make a lovely 2.5″ cuff. This hat has a stunning classic look. My yarn is pale yellow with gray specks. Tomorrow I start the 5X3 ribbing for the body.
Vivian
Wonderful! So glad your hat is coming along nicely!
All the best,
Lili
Do you have any hat patterns that can be knit with straight needles?
Hi Kathy!
Thank you for asking! Our All Roads Hat or Contrast Cuff Hat would both be great for straight needles!
Happy knitting!
Gavriella
I just finished the wide rib scarf and think this would be a great hat to go with it. I want to use good wool along with tussock, would that work with this hat pattern? Any adjustments?
Thank you
Hi Alma!
Congratulations on finishing your scarf! Yes, Good Wool held together with Tussock would be a lovely choice for this hat pattern. You shouldn’t need to make any adjustments, as those two yarns held together should be right for this pattern’s gauge.
We always recommend a quick gauge swatch just to confirm, and if you need help adjusting needle sizes to get there, we’re happy to assist!
Happy knitting,
Megan
Hi,
Could I make this hat with your cashmere nigh?
Thanks!
Shannon
Hi Shannon!
Thank you for your question! You can absolutely make this hat with Cashmere Nigh Aran — you’ll just need a bit more yarn since Nigh Aran comes in 100-yard skeins, while Yonder has 140 yards. Depending on the size you’re making, I’d recommend 2 (2, 2, 3) skeins of Nigh Aran for the hat.
Warmly,
Megan
Thanks Megan!
Should i make any adjustments to the pattern or change needle sizes?
Hi Shannon!
You should be totally fine keeping the pattern as written, but knitting a quick gauge swatch is always a smart idea when substituting yarns. If anything looks off or you’d like help adjusting after you swatch, we’re here and happy to help!
Happy Knitting,
Megan
I have some Quartz yarn left over from making the beautiful Screen Porch shawl. Is there a yarn that might work to double with the Quartz to make the correct weight for this hat?
Hi Rebecca!
Thank you for your question! Since this hat is designed for Yonder, a worsted-weight yarn, you can absolutely pair your leftover Quartz with another yarn to get the right thickness. I’d suggest holding Quartz together with a DK-weight yarn. That combination usually lands very close to worsted.
As always, a quick gauge swatch will confirm whether you’re right on target or need to adjust needle size, but once the gauge matches, you can follow the pattern exactly as written. Let us know if you need any assistance getting gauge!
Happy knitting!
Megan
I don’t understand a few parts of this.
Adult small:
“Slip 4 stitches to cable stitch holder, hold cable stitch holder parallel to left needle with cable stitch holder in front (do not twist, right sides of fabric should remain facing you), [knit next stitch on cable stitch holder together with next stitch on left needle]”
Does this mean: slip 4 stitches to the holder, then hold it in front? What does knit next stitch on cable holder together with next stitch on left needle mean – is this some form of k2tog, or is it k1 on cable holder then k1 on left needle?
Then do the same thing again but with the cable holder in the back instead of front?
Thank you!!
Hi Traci!
Thank you for your question — this part can definitely feel a little mysterious the first time through! Yes, you’ll start by slipping 4 stitches to the cable needle and holding it in front of your work. Then, when the pattern says: “knit next stitch on cable stitch holder together with next stitch on left needle” it means you’ll insert your right needle through two stitches at once (one from the cable needle and one from the left needle) and knit them together as a single stitch. It’s very similar to a k2tog, but the two stitches are coming from two different needles.
Then you repeat the same idea with the cable needle held in the back for the next set of stitches. If you’d like a visual check, feel free to send a photo to [email protected]. We’re happy to walk through it with you!
Happy knitting,
Megan
Hi! I am wondering how decrease round 5 is supposed to go? I have my four stitches slipped onto my cable stitch holder but I do not know what you mean by next stitch and what to do with left needle. I wish there was a video to explain and emailing seems like a hassle.
Hi Sebastian!
Thank you for your question — and I promise, emailing is never a hassle; we’re always happy to help! This step can definitely feel confusing the first time you encounter it.
After you’ve slipped 4 stitches onto the cable stitch holder and are holding it in front of your work, the phrase “knit next stitch on cable stitch holder together with next stitch on left needle” means this: insert your right needle through both stitches at the same time — one stitch from the cable holder and one stitch from the left needle — and knit them together as a single stitch. It’s very much like a k2tog, except the two stitches are coming from two different needles.
You’ll then repeat this process for the remaining stitches, and later do the same thing again with the cable stitch holder held in the back.
If you’d like a visual check or want to be sure everything looks right, feel free to send us a photo at [email protected] — we’re always happy to walk through it with you!
Warmly,
Megan
I have made this hat before in an adult large (in early spring of 2025) , and love it. At that time, the notoriously difficult “decrease round 5” came easily. However, now that I’m attempting it again in an adult small — I cannot make sense of the same decrease round. I’m using a straight cable holder and don’t know which end of the cable holder I should be pulling my next stitch from.
Hi Jackie!
Thank you for writing in, and I totally understand why this round feels confusing, even if it worked smoothly last time! When you’re using a straight cable holder, always work the stitch that’s closest to the needle tip you’re knitting with. In other words, you’re not choosing a “left” or “right” end of the holder in advance. You’re simply knitting the next available stitch, just as you would on a needle.
So for Decrease Round 5: When the holder is in front, you knit the first stitch on the cable holder together with the next stitch on the left needle, four times.
When the holder is in back, you knit the next stitch on the left needle together with the first stitch on the cable holder, four times.
As long as the holder stays parallel to the needle, the right side stays facing you, and you always take the stitch nearest the tip, you’re doing it correctly. You’ve got this! That round is fiddly, but you’re absolutely on the right track.
Happy Knitting!
Megan
If you are using the long tail cast on do you still use a smaller needle as suggested for the tubular cast on?
Hi Laura!
Great question! If you’re using the Long Tail Cast On, you do not need to switch to a smaller needle. The smaller needle is only recommended when working the Tubular Cast On. You can cast on with your regular needle size and continue from there.
Happy knitting!
Megan