Half + Half Triangles Wrap in New Colors
You knit for the joy of it, for the comfort and the beauty. And for years, so many of you have shared stories about how the Half + Half Triangles Wrap has brought the joy of knitting to your needles and your lives. You’ve delighted in the incredible earthy beauty of Linen Quill and its many glorious colors. And so, for the love of knitting, we are happy to offer a new collection of bundles for this wonderful wrap!

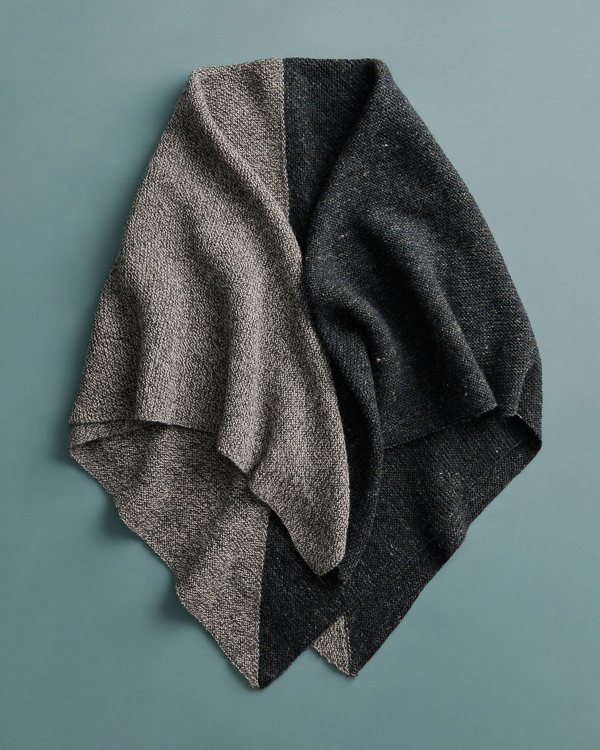
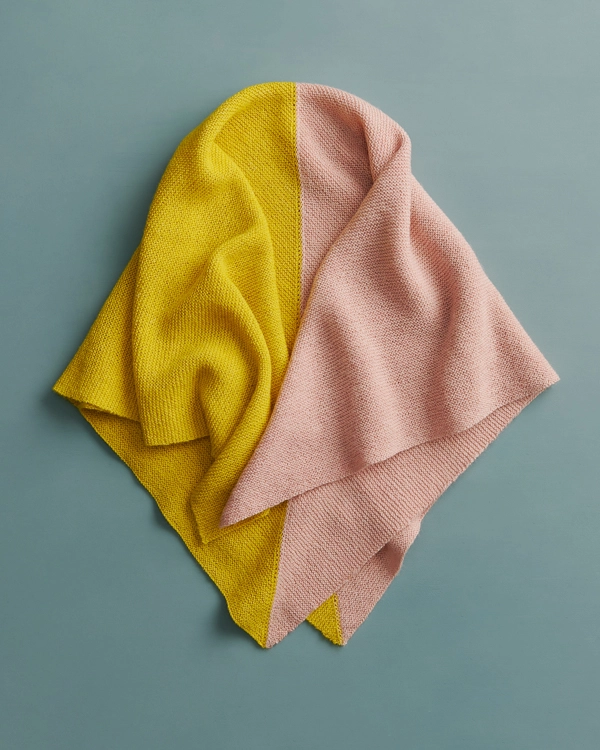
One of the pleasures of knitting a Half + Half Triangles Wrap is the surprise of its construction (all knit stitches plus the opportunity to learn a new technique!). You cast on the full length of the wrap and shape the first triangle with short rows. Once your triangle comes to a point, you knit across the entire diagonal, picking up and knitting each stitch with its wrap.

Then onto your next color and the second triangle, which you also build up with short rows. With that triangle complete, you bind off and snuggle into your gorgeous wrap.

Our Half + Half Triangles Wrap pattern is your ticket to an easy and inventive knit, but the true impact of this project is due to one-of-a-kind Linen Quill!

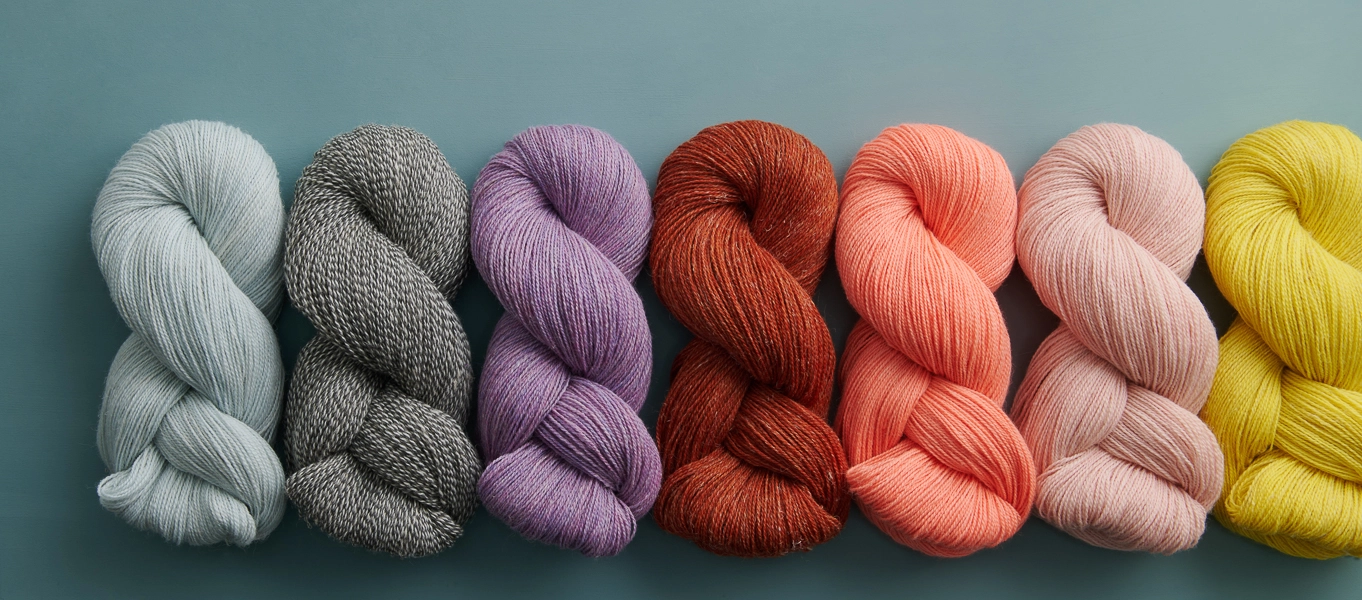
Fifty percent fine highland wool, 35% alpaca, and 15% linen, Linen Quill’s complexity and beauty make it a customer favorite… Maybe it’s already yours!


It has springiness and durability from the wool, softness and drape from the alpaca, and cozy warmth from both.

And the linen… Only 15% of the content but critical to what makes this yarn so special! Its tendency to sprout out of the strand lends a very beautiful earthy feel, while the way linen takes dye differently than animal fibers adds depth to every color.

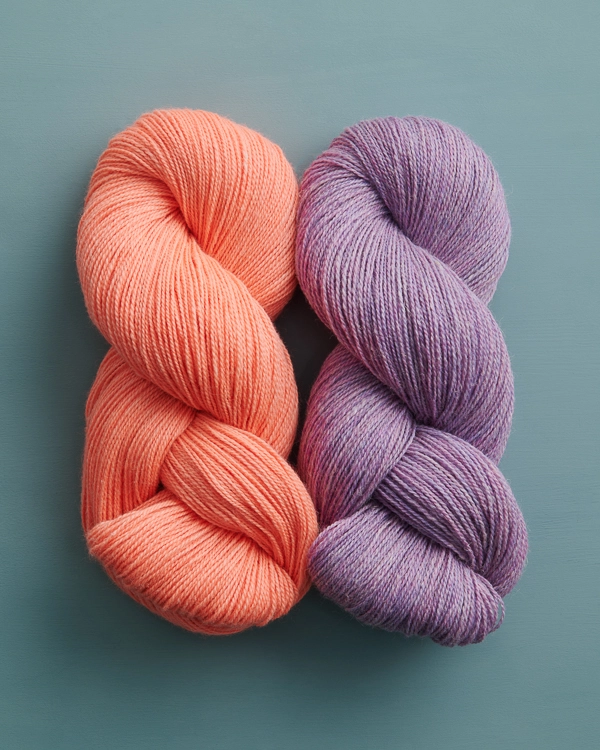
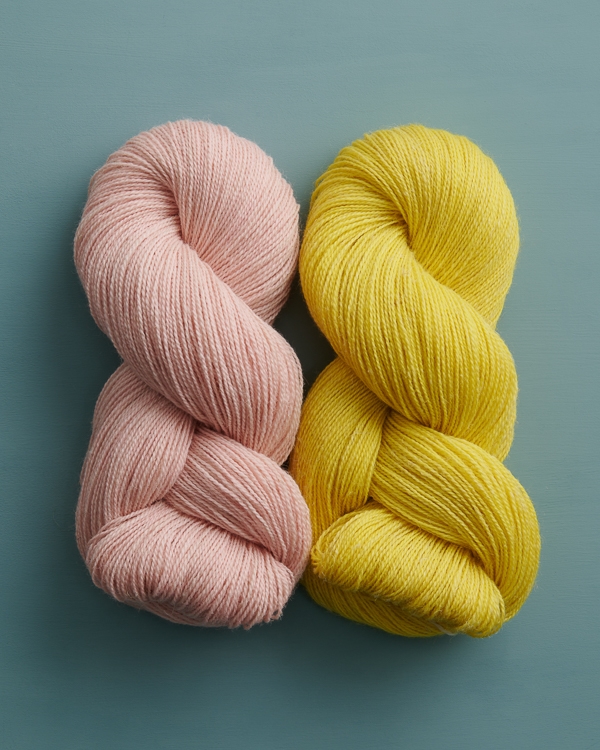
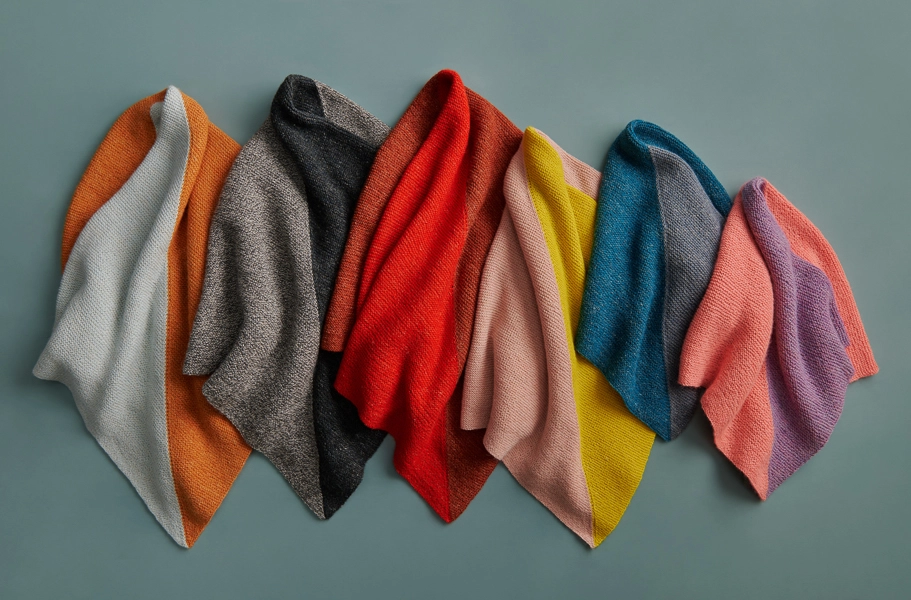
Linen Quill has a humongous palette of over fifty colors, and from such plenty, we had a blast making sixteen new bundles, for a total of nineteen Half + Half Triangles Wrap Bundles!

Pick your favorite (or two or three…We know more than one knitter who has completed 7 Half + Half Triangle Wraps!), and cast on for this beloved knit!
Yarn lovers, if you adore the yarn used in this project, you’ll love exploring all of our other yarn collections! Discover over 45 thoughtfully designed yarns in nearly every natural fiber and in every spectacular color you can imagine. Only available here at Purl Soho’s online yarn store, where every skein is created with care and your creativity in mind!

Originally designed by Jake Canton as a blanket, then updated into a Linen Quill wrap by Whitney Van Nes.
Share your progress and connect with the community by tagging your pics with #PurlSoho, #PurlSohoBusyHands, #PurlSohoHalfAndHalfTrianglesWrap, and #PurlSohoLinenQuill. We can’t wait to see what you make!
Materials

Our Half + Half Triangles Wrap Bundle comes in two sizes and 19 color combos. It includes all the yarn you’ll need to make a Big (Bigger) size wrap…
- Color A: 2 (3) skeins of Purl Soho’s Linen Quill, 50% fine highland wool, 35% alpaca and 15% linen. Each skein of this fingering weight yarn is 439 yards/ 100 grams; approximately 791 (1,087) yards required.
- Color B: 2 (3) skeins of Linen Quill; approximately 845 (1,160) yards required.
You’ll also need…
- US 3 (3.25 mm) 32- or 40-inch circular needles
- A stitch marker
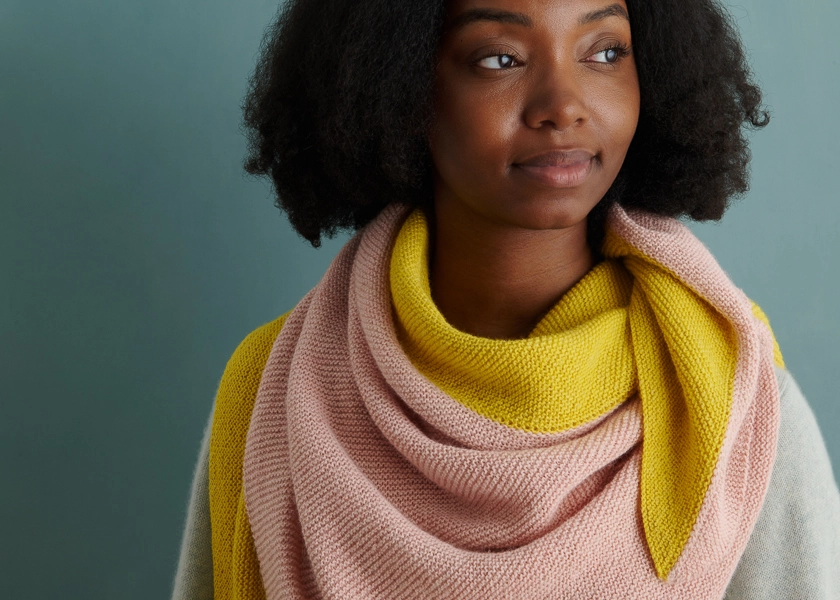
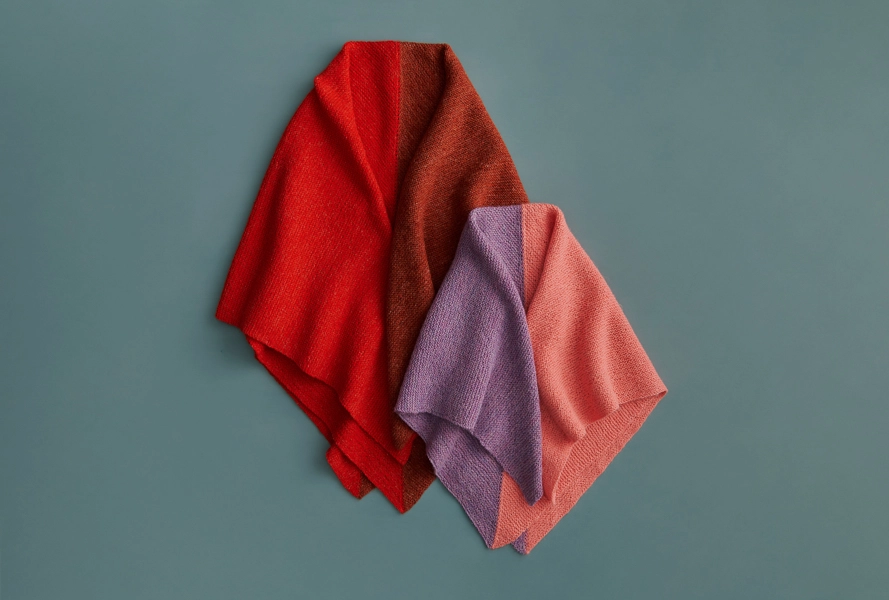
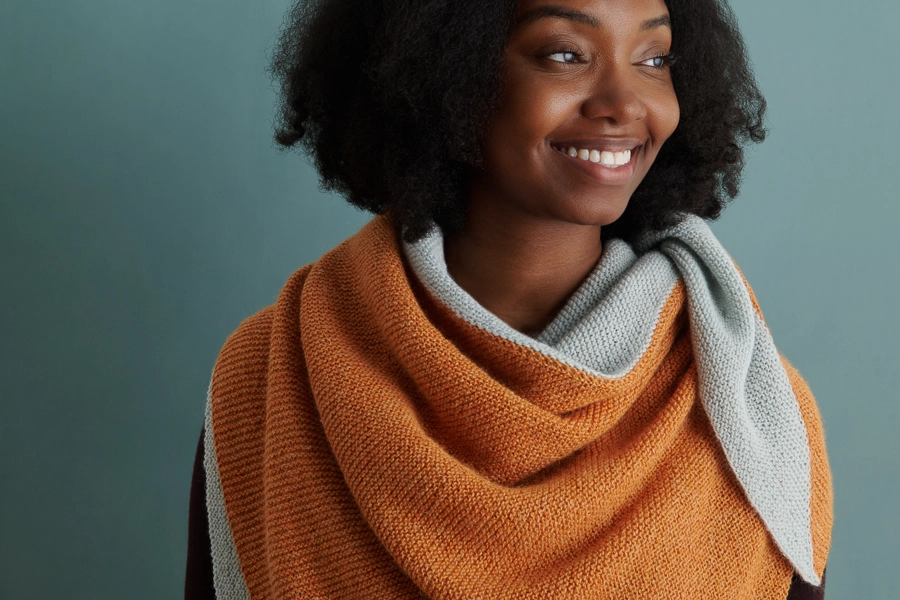
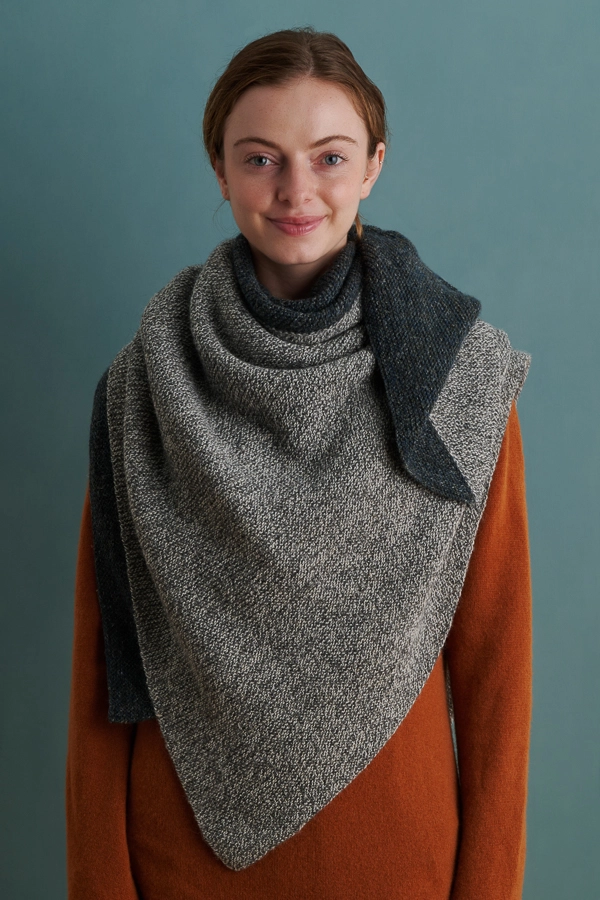
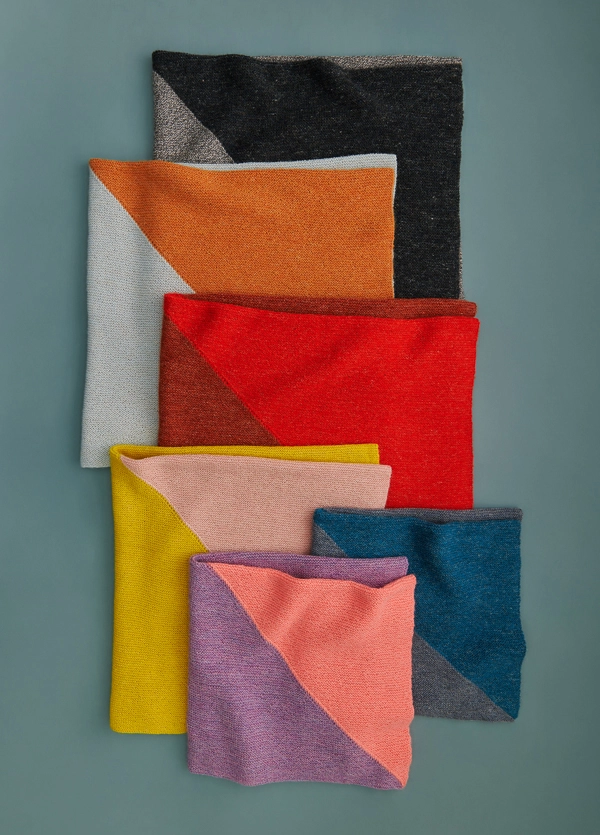
NOTE: Our samples are the color combos Peachy Pink + Crocus Bud, Gray Denim + True Turquoise, Kiln Red + Red Poppy, Birds Egg Blue + Butterscotch Yellow, Peony Pink + Buttercup Yellow, Salt + Pepper + Stillwater Blue.
You can also create your own beautiful color combo by picking up 4 (or 6) individual Linen Quill skeins, 2 (or 3) in each color!

GAUGE
24 stitches and 48 rows = 4 inches in garter stitch
SIZES
Big (Bigger)
Unblocked Dimensions: 27½ inches wide x 32 inches long; approximately 42 inches along the fold (37¾ inches wide x 44 inches long; approximately 58 inches along the fold)
Blocked Dimensions: 31¾ x 31¾ inches; approximately 45 inches along the fold (43 x 43 inches; approximately 61 inches along the fold)
SAMPLE SIZES: The Peachy Pink + Crocus Bud and Gray Denim + True Turquoise samples are the Big size, and the Kiln Red + Red Poppy, Birds Egg Blue + Butterscotch Yellow, Peony Pink + Buttercup Yellow, and Salt + Pepper + Stillwater Blue samples are the Bigger size.
NOTES
CONSTRUCTION
You will knit the one triangle, followed by the other. All the shaping is done with short rows and there is no sewing or assembly.
STITCH MULTIPLE
You can alter the length of the wrap by casting on any number of stitches. The width dimensions will be approximately 90% of the length, and when you’re finished, the piece should block out to an approximate square.
SHORT ROWS: WRP-T (WRAP AND TURN)
Keeping yarn in back, slip next stitch purlwise from left needle to right needle. Bring yarn to front. Return slipped stitch to left needle. Turn work so wrong side is facing you.
To see this technique in action, visit our Short Row Tutorial and follow along with the wrap and turn on the knit side section (at 0:30 seconds), except do not bring the yarn to the back before you turn.
KNIT WRAPPED STITCH WITH WRAP
Keeping yarn in back, pick up the wrap with the right needle from front to back, then insert the needle into the wrapped stitch knitwise. Knit the stitch and wrap together. Find step-by-step photos of this technique under the Picking Up The Wrapped Stitch On The Knit Side section in our Short Row Tutorial!
PATTERN
TRIANGLE 1
With Color A, cast on 190 (260) stitches. We used a basic Long Tail Cast On.
Set-Up Row (right side): Knit to end of row.
Short Row 1 (wrong side): Knit to last 3 stitches, place marker (pm), k1, wrap and turn (wrp-t, see Notes).
Short Row 2 (right side): Knit to end of row.
Short Row 3: Knit to marker, remove marker, wrp-t.
Short Row 4: K1, pm, knit to end of row.
Repeat Short Rows 3 and 4 until you have wrapped every stitch except the last two, ending with Row 4.
Next Short Row (wrong side): K1, remove marker, wrp-t.
Next Short Row (right side): K1.
Next Row: K1, *knit next stitch with its wrap (see Notes), repeat from * to last stitch, k1.
Cut Color A.
TRIANGLE 2
Set-Up Row 1 (right side): With Color B, knit to end of row.
Set-Up Row 2 (wrong side): Knit to end of row.
Short Row 1 (right side): K1, wrp-t.
Short Row 2 (wrong side): K1.
Short Row 3: K1, knit next stitch with its wrap, place marker, wrp- t.
Short Row 4: Slip marker, knit to end of row.
Short Row 5: Knit to marker, remove marker, knit next stitch with its wrap, place marker, wrp-t.
Repeat Rows 4 and 5 until you have completed a wrp-t on the second to last stitch.
Repeat Row 4.
Next Row (right side): Knit to last marker, remove marker, knit next stitch with its wrap, k1.
With the wrong side facing you, bind off knitwise.
Weave in the ends and block!


Learn About Linen Quill + All Our Beautiful Yarns
We designed this project to highlight the uniquely beautiful qualities of our Linen Quill, a wonderful fingering-weight yarn that is a blend of 50% wool, 35% alpaca, and 15% linen. It feels amazing in your hands, and in 70 jaw-droppingly gorgeous colors, Linen Quill is the candy store of yarn! Want to play with lots of those amazing colors? Check out our Linen Quill Minis, available in 40- and 20- color bundles!
More Free Knitting Patterns
- Be sure to explore our vast collection of (mostly free!) Linen Quill knitting patterns and cast on!
More Fingering-Weight Yarns
- Shop our entire collection of fingering-weight yarns
- If you want to use a different yarn, be sure to take the time to get the correct gauge. Need help? Check our All About Gauge Tutorial!
More Yarns With Similar Fibers
- Shop wool yarn
- Shop alpaca yarn
- Shop linen yarn
Looking for more inspiration? Explore all of our free knitting patterns and knitting tutorials, buy one of our many knitting kits and yarn bundles, and shop for beautiful yarn. We have over 35 gorgeous natural fiber yarns in 100’s of magnificent colors, designed to bring integrity, beauty, and joy to your next knitting project and only available at Purl Soho!
Bekomme ich eine Anleitung für die Tücher dazu. In Deutsch
LG Marion
Hi Marion,
Thank you so much for reaching out! I’m afraid we currently are unable to offer our patterns in German, but we would recommend using tools like Google Translate to translate this pattern! There’s an option to translate PDFs as well via Google Translate; if you’re interested in doing that, you can upload the full PDF to Google Translate to be translated.
All the best,
Lili
Das ist nicht schwer zu stricken, vorausgesetzt die short rows sind bekannt
Liebe Purl Soho,
ich interessiere mich für ihren half+half triangle wrap. Kann man die Anleitung auch ohne Wollpaket als download bekommen?
Ich habe jetzt schon so viel recherchiert und nun frage ich direkt bei Ihnen nach.
Lieben Gruß aus Deutschland
Hi Manuela,
Thank you for writing in. We are so happy you are interested in the Half + Half Wrap! This pattern is free and available for anyone to knit! You can download the pattern by clicking the ‘Print’ button on the left hand side when browsing from a computer and it will give you options to delete the parts of the pattern you don’t find necessary to print! Let us know if you have any issues with this process and we would be happy to help you out!
Happy knitting,
Gavriella
Hello,
I have bought the kit for the half and half wrap for my mother to knit. She is having issues with it so I was wondering if we could just make two triangles using 2 skeins of yarn and then have her use the remainder of the yarn for another project. Thank you
Hi Lydia,
We’re so sorry she is running into issues with this pattern. You can definitely do that if you prefer and please let us know if you have any other questions along the way!
All the best,
Gavriella
I want to use this bundle to make a triangle wrap with the Ombré kit that I ordered. What pattern would you recommend?
Hi Kathleen,
The Triangle Garter Wrap would be a wonderful choice! This pattern is very simple, so it will show off the gorgeous color shifts of the Cashmere Ombre Wrap kit.
All the best,
Lili
With Color A, cast on (190) 260 stitches. We used a basic Long Tail Cast On.
Do you mean 190 stitches for small and 260 for bigger?
I am a bit confused by the writing here. Normally you write “small (bigger)”
Thanks.
Hi Suzanne,
Thank you for writing in! That is exactly correct! For this pattern, we have listed the sizes as Big and (Bigger) as the dimensions of both are quite large. The “Big” size will measure around 31¾ x 31¾ inches; approximately 45 inches along the fold while the “Bigger” size will measure 43 x 43 inches; approximately 61 inches along the fold. Instructions for the “Big” size will always appear first, followed by a set of parentheses inside which is instruction for the “Bigger” size. I hope this helps clarify things!
Happy knitting,
Gavriella
Which photo shows a model wearing the smaller(big) size?
Hi Linda,
Thanks for writing in! The Peachy Pink + Crocus Bud and Gray Denim + True Turquoise samples are the Big size, and the Kiln Red + Red Poppy, Birds Egg Blue + Butterscotch Yellow, Peony Pink + Dandelion Yellow, and Salt + Pepper + Stillwater Blue samples are the Bigger size. Hope this helps!
All the best,
Lili
I just received my yarn to use for the half and half. I’ve read the pattern several times but am confused about how to begin with the second color. I think you end up with a large triangle after the first color but can’t figure out what happens next. Can you help me?
Margaret
Hi Margaret,
Thank you for writing in! This wrap is divided along the diagonal into two triangles, one of each color. It is a bit hard to visualize, but each triangle is shaped by the short rows. As you work each short row, you will wrap and turn where indicated and leave the rest of the stitches unworked until later. I would suggest trying it on a small swatch so you can get the hang of the technique if you still aren’t sure – this pattern will work great on a swatch of about 15 stitches and you will be able to explore how the short rows create a triangle!
I hope this helps but please let me know if you have any other questions!
Happy Knitting,
Gavriella
Is there a video for the wrap and turn technique you use?
Hi Doni,
Thank you for asking! You can find the short row video tutorial here.
Happy knitting,
Gavriella
I am thinking of adapting this to use the Good Wool rather than the Linen Quill. Do you have any guidance? Or do you think I should stick with something like the striped triangle wrap?
Hi Rosemary,
You could absolutely make this wrap with Good Wool! All you’ll need to do is adjust your cast-on number to account for the larger gauge you’ll probably get with this yarn.
To figure out your cast-on number, you will want to first knit a gauge swatch in pattern. Once you know how many stitches you are getting per inch, you can multiply that number by the width that you would like and cast on the nearest whole number. Then you can follow the pattern as written!
All the best,
Lili
Hi … I got my linen quill for the Bigger… 2 skeins color Aand B and the 1 skein of 2 coordinating color …. So 6 in total . I just finished my first triangle with color A on the 260 stitches (I had quite a bit left over) and now would like to start with one of my coordinating color and then the other coordinating color before using color B. Will this work? Should my first bigger triangle have used 3 of my 6 skeins?
Hi Corinna,
Thanks for writing in! I’m a bit confused about what yarn/colors you have. Would you mind listing out the colors of each of the 6 skeins so I can get a clearer picture?
Regarding the yardage, Triangle 1 only requires 1,087 yards, which is less than the full 3 skeins!
All the best,
Lili
Hello,
I just started knitting this and I want to be certain that there is only one stitch marker that is on the end of the right side row? It seems like there should be a marker at each end to make it a triangle. Am I not reading this correctly?
Hi Kat,
Thanks for writing in! Yes, there is only one stitch marker on the row at any given time. In this pattern, the triangle shapes are formed using short rows, so you’ll also be moving the stitch marker as you knit to mark where the next wrap-turn should take place. Hope this helps clarify things!
All the best,
Lili
Hi,
I can’t wait to start on this! It looks to me like it can be done on straight needles, is that right?
Thanks for your help,
Maurie
Hi Maurie,
You could certainly try straight needles for this pattern, but we find it easier to use circulars so that you have more room for all your stitches on the cord! Most straight needles are only 12 inches long, and you will have 27+ inches of stitches on your needles at the widest point, so they’ll be at risk of falling off. I hope this helps clarify!
All the best,
Gavriella
Perfect, thanks! I use 20 inch needles, so I should be fine. I even knit blankets on them, I’m just weird that way 🙂
Thanks for your quick reply!
maurie
I am knitting the big size for my mom- will I have enough yarn left over to knit a kids size wrap so my daughter can match her? If so how many stitches do you think I’d cast on?
Hi Robyn,
I’m afraid that you probably won’t have that much yarn left over to make another wrap! I would recommend getting one more skein of each color to make a kids size wrap, and you can use that new yarn along with any leftover yarn.
All the best,
Lili
Ok great! What would you recommend as a cast on? Is there a min number of stitches to make the pattern work?
Hi Robyn,
With your leftover yarn from the Big size wrap, plus an additional skein of each color, the largest possible wrap you could make would measure approximately 24.5 inches on all sides! I think that would be a good size for a child’s wrap, and based on the gauge of the pattern, you would need to cast on 147 stitches.
All the best,
Lili
I am knitting the big size. With wrap and turn, when I knit to the last 3 stitches, then knit 1, wrap and turn, it seems as if there’s 1 final stitch that never is knit. What am I missing? Does this “go away” in Row 3? I did watch the tutorial, which is very helpful. But it’s not at the end of the row, so i was left confused about that last stitch.
Thanks so much.
Hi Barbara,
That is correct! Since you will be working short rows throughout the pattern, you will not work this last stitch until you have worked all your short rows. I hope this helps clarify but please let me know if you have any other questions!
All the best,
Gavriella
If this is done correctly, does this result in decreases? I have no decreases, it looks misshapen. So I hesitate to go any further.
Hi Barbara,
Nope, there are no decreases in this pattern–you should have the same number of stitches on your needles at all times! I’m sorry that your work doesn’t look like you expected though. Would you mind sending a photo of your work to us directly at [email protected]? That way we can better visualize what’s going on!
All the best,
Lili
My 54 yo eyes can’t handle the size 3 needles. Can I use a size 5 needle? How many stitches should I cast on for this size needle? Thank you!
Hi Anna,
Yep, you can totally use larger needles for this project! To determine your new cast-on number, you will want to first knit a gauge swatch in pattern. Once you know how many stitches you are getting per inch, you can multiply that number by the width of the cast-on edge (either 31 3/4 inches or 45 inches, depending on the size you’re making) and cast on the nearest whole number. Then you can follow the pattern as written!
All the best,
Lili
Hi!
Is this knit stitch all through the pattern or knit and purl?
Thank you
Hi Mariana,
Thanks for writing in! This pattern is knit in garter stitch flat, so it’s all knit stitches!
All the best,
Lili
i am confused. every video I watch for the wrap and turn is for projects that are using the garter stich. my yarn is in the wrong place for knitting please help
Hi Lydia,
I’m so sorry that this technique is confusing! This pattern is worked in garter stitch, and all you need to do for the wrap + turn is the following:
Keeping yarn in back, slip next stitch purlwise from left needle to right needle. Bring yarn to front. Return slipped stitch to left needle. Turn work so wrong side is facing you.
This way, your yarn will end up in the back of your work, ready to knit!
I also noticed that you booked a 1-On-1 Help appointment for Tuesday. I hope my reply helps you get back on track sooner rather than later, but I’m also happy to demonstrate this technique over Zoom on Tuesday!
All the best,
Lili