No-Cable Cable Scarf
Cables are definitely classic and beautiful, but truth be told, they have a way of interrupting the knitting flow: Stop, fish out the cable stitch holder, fuss around, breathe, and hope for a stretch of smooth sailing. Not so here!
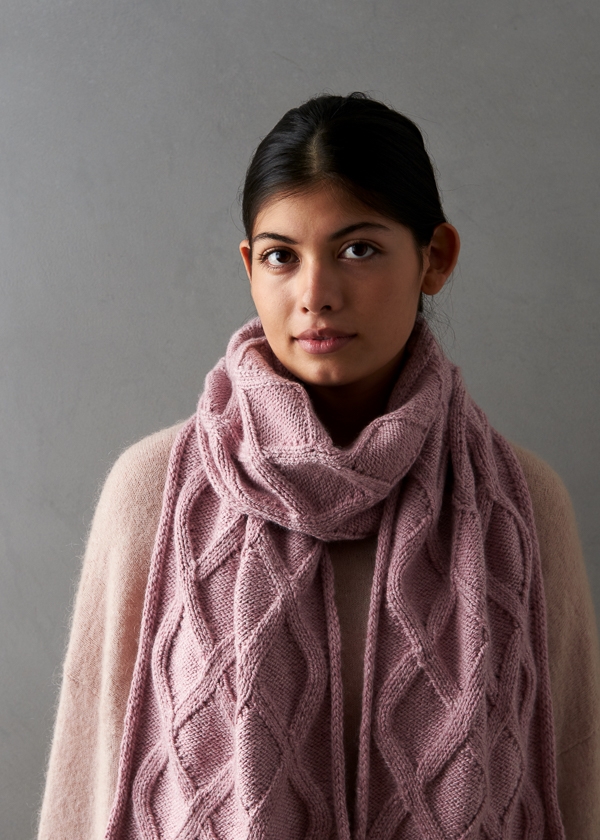
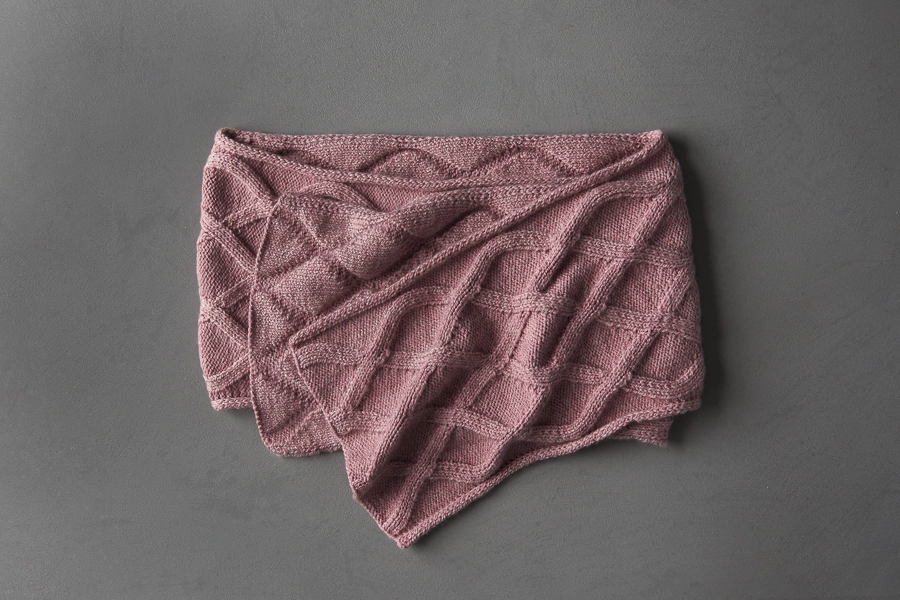
Our No-Cable Cable Scarf allows you to stay in rhythm, employing nothing more serious than some “through the back loops” and simple decreases and increases. No cable stitch holders lost in the couch cushions!
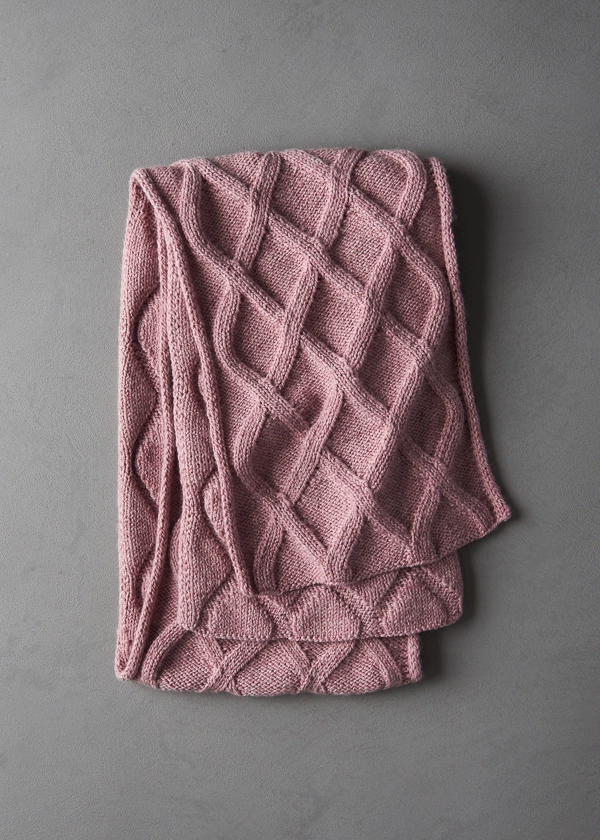
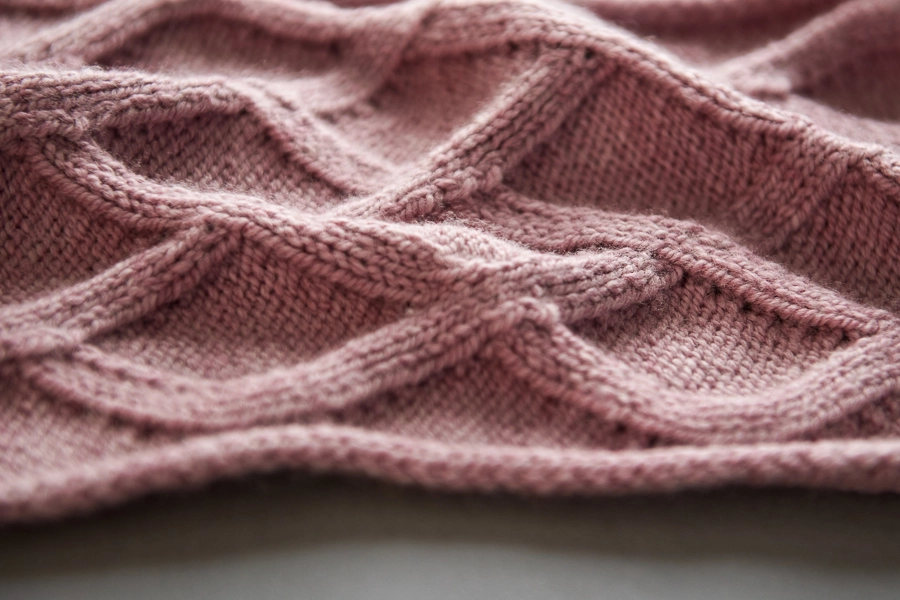
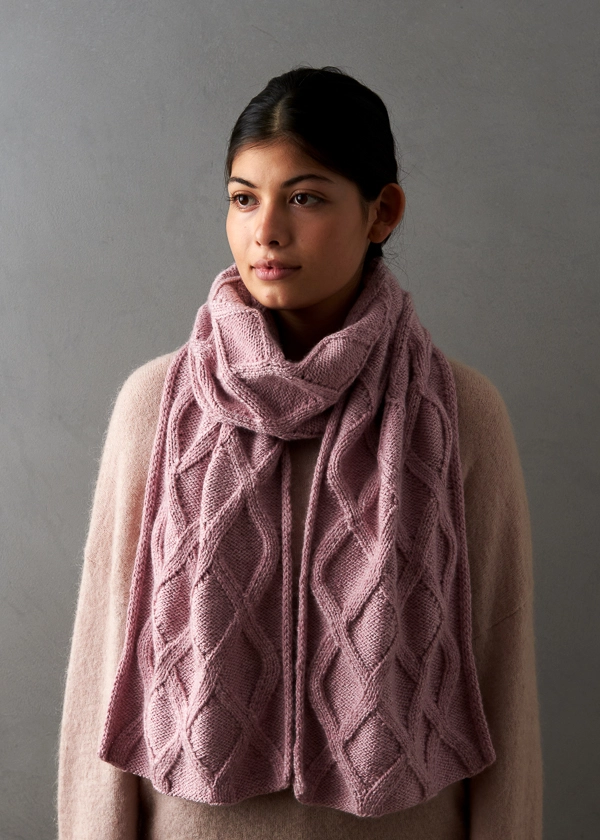
The surprising result is intertwining “cables” that form selvage-to-selvage latticework, perfectly classic and, in our Worsted Twist 100% merino wool, wonderfully soft and cozy.
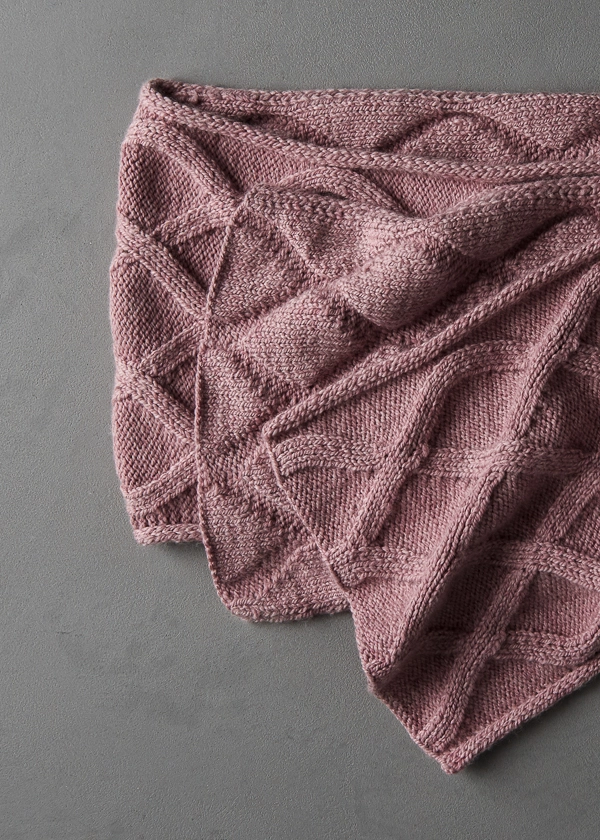
Our Worsted Twist now comes in 11 new colors, including this absolutely lovely Mountain Rose, a soft pink with a little complexity. Whatever color calls your name, pick up 4 skeins and enjoy the flow!
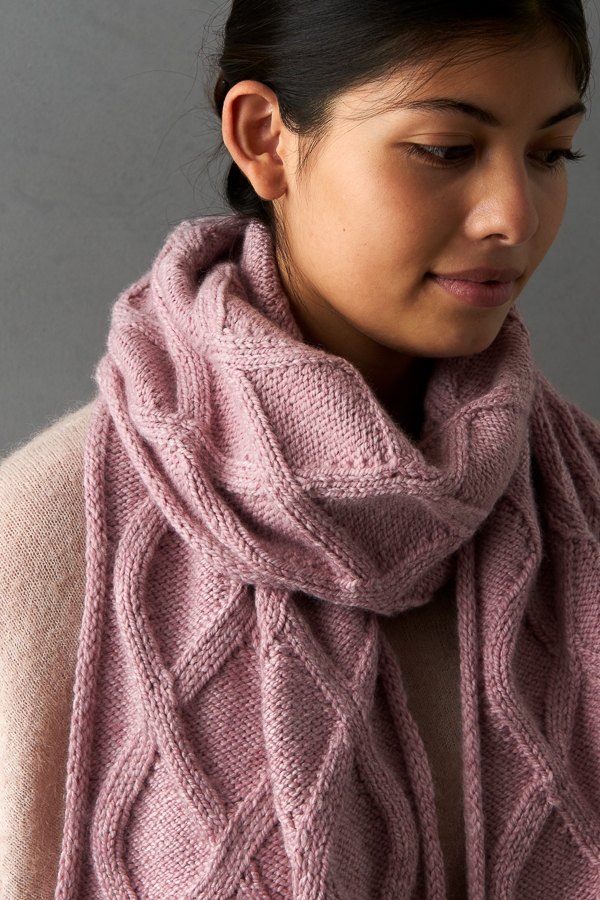
Designed by Purl Soho designer, Jake Canton. Click here to see even more of Jake’s designs!
Share your progress + connect with the community by tagging your pics with #PurlSoho, #PurlSohoBusyHands, #PurlSohoNoCableCableScarf, and #PurlSohoWorstedTwist. We can’t wait to see what you make!
Materials
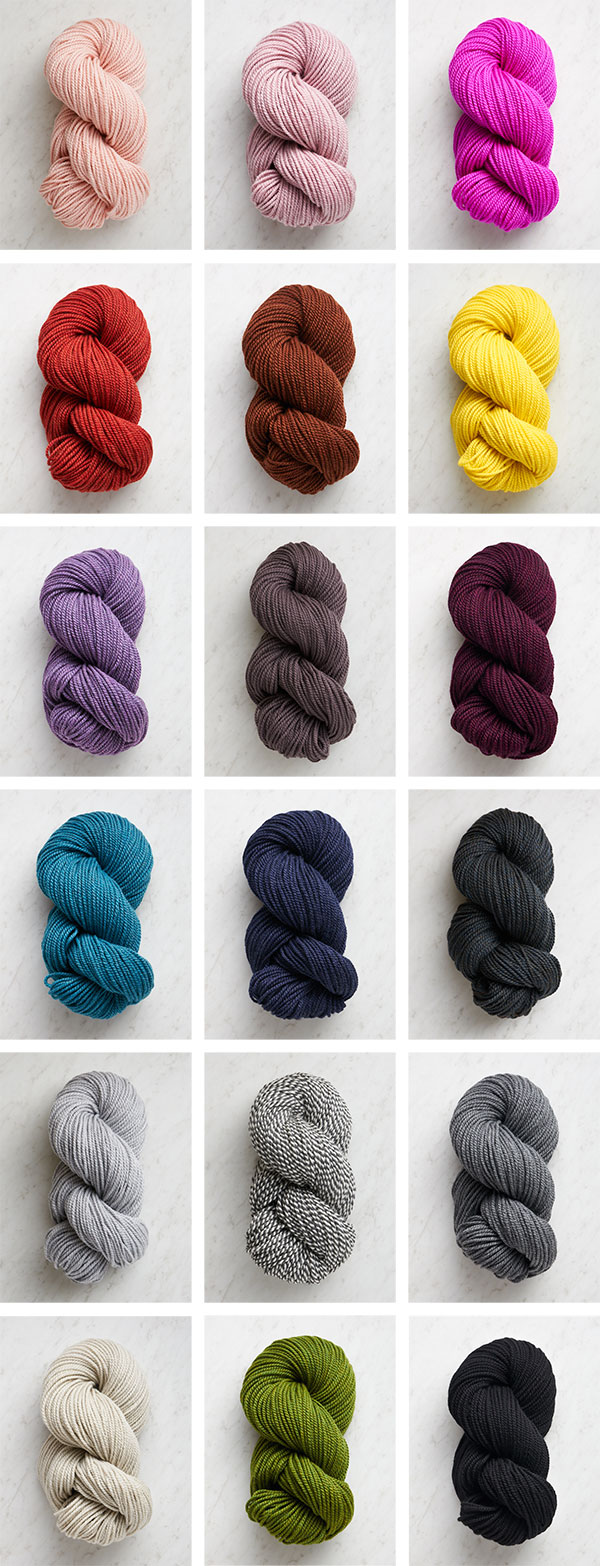
- 4 skeins of Purl Soho’s Worsted Twist, 100% merino wool. Each skein is 164 yards/ 100 grams; approximately 656 yards required. We used the color Mountain Rose. (NOTE: We no longer offer Worsted Twist, but choose from one of our other worsted/aran weight yarns.)
- US 7 (4.5 mm) straight or circular needles
Gauge
20 stitches and 30 rows = 4 inches in stitch pattern
Size
Finished Dimensions: Approximately 10½ inches wide x 73 inches long
Notes
Slipped Stitches
Slip all slipped stitches purlwise, unless pattern indicates otherwise.
Stitch Multiple
This stitch pattern works over a multiple of 16 + 27 stitches, repeating stitches in brackets as many times as necessary.
Increases
RLI (Right Lifted Increase): Lift right leg of stitch below next stitch on left needle onto left needle and knit it. [1 stitch increased]
LLI (Left Lifted Increase): Lift left leg of stitch 2 rows below stitch on right needle onto left needle and knit it through the back loop. [1 stitch increased]
For more information on these techniques, please visit our Lifted Increase Tutorial. Please note that the lifted increase is referring only to the stitch created by the increase, knitting the stitch from which the increase is created is included in the written instructions of the pattern.
Decreases
Slip 1 knitwise, k2tog, pass (Slip 1 Knitwise, Knit 2 Together, Pass): Slip 1 stitch knitwise, knit next 2 stitches together, pass slipped stitch over k2tog and off needle. [2 stitches decreased]
K3tog (Knit 3 Together): Insert right needle into 3 stitches on left needle and knit the 3 stitches together. [2 stitches decreased]
Pattern
Begin
Using a Basic Long Tail Cast-On, cast on 59 stitches.
Set-Up Row 1 (wrong side): Slip 3 (see Notes) with yarn in front (wyif), k2, p3, [k11, p5] 2 times, k11, p3, k2, slip 3 wyif.
Set-Up Row 2 (right side): K3, p2, k3, [p11, k5] 2 times, p11, k3, p2, k3.
Set-Up Row 3 (wrong side): Repeat Row 1.
Body
Row 1 (right side): K3, p2, k3, [p11, knit 2 together (k2tog), k2, yarn over (yo), k1] 2 times, p11, k3, p2, k3.
Row 2 (wrong side): Slip 3 wyif, k2, p3, [k11, p1, p1 through back loop (tbl), p3] 2 times, k11, p3, k2, slip 3 wyif.
Row 3: K3, p2, yo, k2, [slip slip knit (ssk), p9, k2tog, k2, yo, RLI (see Notes), k1] 2 times, ssk, p9, k2tog, k2, yo, p2, k3.
Row 4: Slip 3 wyif, k2, k1tbl, p3, [k9, p3, k1tbl, p3] 2 times, k9, p3, k1tbl, k2, slip 3 wyif.
Row 5: K3, p3, [yo, k2, ssk, p7, k2tog, k2, yo, p1] 3 times, p2, k3.
Row 6: Slip 3 wyif, k3, [k1tbl, p3, k7, p3, k1tbl, k1] 3 times, k2, slip 3 wyif.
Row 7: K3, p4, [yo, k2, ssk, p5, k2tog, k2, yo, p3] 3 times, p1, k3.
Row 8: Slip 3 wyif, k4, [k1tbl, p3, k5, p3, k1tbl, k3] 3 times, k1, slip 3 wyif.
Row 9: K3, p5, [yo, k2, ssk, p3, k2tog, k2, yo, p5] 3 times, k3.
Row 10: Slip 3 wyif, [k5, k1tbl, p3, k3, p3, k1tbl] 3 times k5, slip 3 wyif.
Row 11: K3, p6, [yo, k2, ssk, p1, k2tog, k2, yo, p7] 2 times, yo, k2, ssk, p1, k2tog, k2, yo, p6, k3.
Row 12: Slip 3 wyif, k6, [k1tbl, p3, k1, p3, k1tbl, k7] 2 times, k1tbl, p3, k1, p3, k1tbl, k6, slip 3 wyif.
Row 13: K3, p7, [yo, k2, slip 1 knitwise, k2tog, pass (see Notes), k2, yo, p9] 2 times, yo, k2, slip 1 knitwise, k2tog, pass, k2, yo, p7, k3.
Row 14: Slip 3 wyif, k7, [k1tbl, p5, k1tbl, k9] 2 times, k1tbl, p5, k1tbl, k7, slip 3 wyif.
Row 15: K3, p8, [yo, k2, slip 1 knitwise, k2tog, pass, yo, p11] 2 times, yo, k2, slip 1 knitwise, k2tog, pass, yo, p8, k3.
Row 16: Slip 3 wyif, k8, [p1tbl, p3, p1tbl, k11] 2 times, p1tbl, p3, p1tbl, k8, slip 3 wyif.
Row 17: K3, p8, [k1, yo, k2, ssk, p11] 2times, k1, yo, k2, ssk, p8, k3.
Row 18: Slip 3 wyif, k8, [p3, p1tbl, p1, k11] 2 times, p3, p1tbl, p1, k8, slip 3 wyif.
Row 19: K3, p7, [k2tog, k1, LLI (see Notes), yo, k2, ssk, p9] 2 times, k2tog, k1, LLI, yo, k2, ssk, p7, k3.
Row 20: Slip 3 wyif, [k7, p3, k1tbl, p3, k2] 3 times, k5, slip 3 wyif.
Row 21: K3, [p6, k2tog, k2, yo, p1, yo, k2, ssk, p1] 3 times, p5, k3.
Row 22: Slip 3 wyif, [k6, p3, k1tbl, k1, k1tbl, p3, k1] 3 times, k5, slip 3 wyif.
Row 23: K3, [p5, k2tog, k2, yo, p3, yo, k2, ssk] 3 times, p5, k3.
Row 24: Slip 3 wyif, [k5, p3, k1tbl, k3, k1tbl, p3] 3 times, k5, slip 3 wyif.
Row 25: K3, p4, [k2tog, k2, yo, p5, yo, k2, ssk, p3] 3 times, p1, k3.
Row 26: Slip 3 wyif, k4, [p3, k1tbl, k5, k1tbl, p3, k3] 3 times, k1, slip 3 wyif.
Row 27: K3, p3, [k2tog, k2, yo, p7, yo, k2, ssk, p1] 3 times, p2, k3.
Row 28: Slip 3 wyif, k3, [p3, k1tbl, k7, k1tbl, p3, k1] 3 times, k2, slip 3 wyif.
Row 29: K3, p2, k2tog, [k2, yo, p9, yo, k2, k3tog (see Notes)] 2 times, k2, yo, p9, yo, k2, ssk, p2, k3.
Row 30: Slip 3 wyif, k2, p3, [k1tbl, k9, k1tbl, p5] 2 times, k1tbl, k9, k1tbl, p3, k2, slip 3 wyif.
Row 31: K3, p2, k3, [p11, yo, k3tog, k2, yo] 2 times, p11, k3, p2, k3.
Row 32: Slip 3 wyif, k2, p3, [k11, p1tbl, p3, p1tbl] 2 times, k11, p3, k2, slip 3 wyif.
Repeat Rows 1-32 fifteen more times.
End
Row 1 (right side): K3, p2, k3, [p11, k5] 2 times, p11, k3, p2, k3.
Row 2 (wrong side): Slip 3 wyif, k2, p3, [k11, p5] 2 times, k11, p3, k2, slip 3 wyif.
Bind off with the right side facing you in stitch pattern.
Weave in the ends and block as desired.
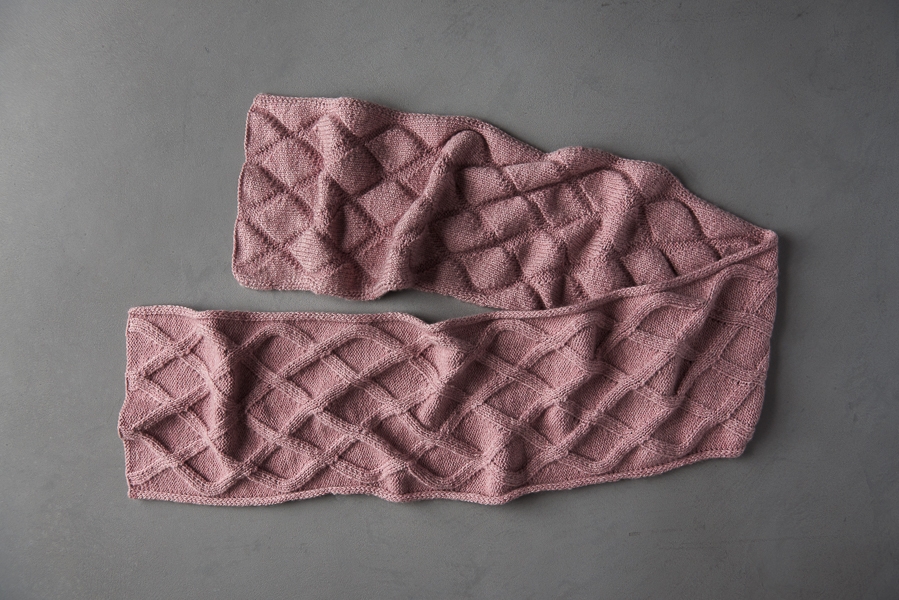





Oh my goodness this no cable cable scarf is gorgeous. I so want to make this as a blanket but I will do a scarf as a ‘sample’ to see if i can pull it off as beautifully as you have.
Would love to do this as a throw. For a queen size bed
any chance there can be an update for a throw pattern?
Hi and thanks for writing in! We don’t currently have plans to release a throw version of this scarf, but you could easily cast on more stitches to create a blanket! This stitch pattern can be worked over any multiple of 16 stitches plus 27, so you will need to cast on 235 stitches for a 47 inch wide throw. If you make your throw 60 inches long, it will take about 15 skeins of Worsted Twist.
I hope that helps, and please do let us know how it turns out!
Julianna
Why no chart?
Hi June,
Thanks for the question! You will see that for most of our cable patterns, we have opted for written out directions rather than charts. Charted or written patterns tend to be a matter of preference with some loving charts and others preferring written directions. For myself, I always find that if a pattern is charted, that I spend the time to write it out as charts don’t work well for me. For some other folks here, they will chart out written patterns as charts work better for them! This is one of the things that I love most about crafting is that we all approach things differently and thus can all learn from each other!
We certainly appreciate the request and will keep it in mind for the future and for future cabled patterns!
Cassy
This is so lovely! How experienced of a knitter do you need to make the no cable cable scarf? I can do the basic knit, purl and yarn overs. But the directions have acronyms I’ve not encountered before. Is there a list for the acronyms on your web site?
Hi Debbie,
Thanks for reaching out! I think that an adventurous beginner could give this pattern a go! My suggestion would be to give it a try with some scarp yarn and needles that you already have. You can cast on 43 stitches and give the pattern a try and see if you find it to be doable for you.
As to the abbreviations, for some of the abbreviations used in this pattern (RLI and LLI), the instructions are explained in the “Notes” section above. For the rest of the abbreviations, we do have an “Abbreviations + Terms” page that outlines what they mean!
Please know that we are always here to help!
Cassy
Is it possible to get this pattern in a pdf format?
Hi Denise,
Great question! You can indeed! If you’re on a desktop version of the site, you will find the Print icon in the right margin just below the Save to Favorites button. If you’re on a mobile version of the site, you will find the Print icon below the pattern and above the comments.
Follow the easy on-screen instructions to delete whichever parts of the pattern you don’t want to print or save. For example, you may decide to shorten the pattern by omitting certain images or the list of materials.
Best,
Cassy
This is gorgeous! Would you possibly have instructions for a throw with this pattern?
Hi Deb,
Thank you so much for the kind words! I agree this would make a lovely throw blanket! This stitch pattern can be worked over any multiple of 16 stitches plus 27, so you could cast on 235 stitches for a 47 inch wide throw. If you make your throw about 60 inches long, it will take about 15 skeins of Worsted Twist.
I hope that helps, and please do let us know how it turns out!
Julianna
This is such a beautiful pattern, but I’m having trouble deciding which color of Worsted Twist to use. How do you think this will work up using Salt + Pepper?
Hi Jo,
Thanks so much for the kind words and for reaching out! Salt + Pepper is one of my favorite colors of Worsted Twist, but a marled yarn will disguise the stitch pattern somewhat. A solid color like Gray Shade will really let the textured surface of the scarf shine!
I hope that helps!
Julianna
I cannot get past row 3 of the body. I have unknit that row at least 5 times. Every time I get to the end of the instructions; I have 57 stitches on my right needle and two stitches remaining on my left needle. The pattern also appears off; although three rows probably doesn’t give me much to go on. I have watched the tutorials and understand the techniques. It seems that if I was making mistakes following the instructions; I would be gaining or losing in my count. But it is still at 59. I don’t want bail on this! Is their a mistake in the pattern or am I just not getting it?
Hi Dawn,
Thank you so much for writing in! We took a look at the pattern and there was k1 missing at the completion of the RLI. That is to say that the RLI is meant to include the stitch being created and the stitch above in the column to make the increase, therefore creating 2 stitches from 1 stitch. We have made the correction to row 3 to make things a bit clearer.
We apologize for any confusion! Happy knitting!
Cassy
Oh, yay! Row 3 complete! Thank you so much.
Hello! I cannot get past row 3 of the body either. Except I end up with too little stitches. Every time I get to the last stitch on my needle, the pattern tells me I should have two more! Can anyone help me with this? I believe I am doing it right. When I count the stitches in the pattern, it adds up to 61 instead of 59.
Hi Sasha,
Thanks for reaching out about this! I just took a look at this row, and I’m counting exactly 59 stitches. 8 before the brackets, 16 within the brackets (so, 32 since the brackets are knit through twice), and 19 after the brackets. If you’re ending up with 61 stitches on your needles at the end of the row, you may have accidentally skipped a few of the decrease stitches on the previous row! Hope this helps you figure out how many stitches you need to continue.
All the best,
Lili
Just checking, but is the same issue with the LL1? I see there is a YO after that, but just don’t want to have the same issue when I get there, if I EVER do…I’m a beginner and keep messing up.
Hi Soozi,
Thanks for writing in! We did also update Row 19 to make everything consistent and as clear as possible, so you shouldn’t have any problems once you reach it. I’m happy to hear that you are still persevering – it can be a bit tricky to keep track of a more intermediate pattern like this one, but I’m sure after a full pattern repeat or two it will get much easier!
Best,
Julianna
how can I purchase this pattern, I don’t have a printer and it’s to much to write
Hello Barbara,
Thank you for reaching out! This is a free pattern so you can either print it out or follow along from your computer screen. You can download this pattern to your computer as a PDF from the same screen that pops up when you press the print button.
I hope this is helpful, but if you have further questions just let us know!
Happy knitting!
-Marilla
If you have a thumb drive, you could download it to that and take it to a print shop – Office Depot, FedEx/Kinkos, UPS Store, or even your local library, and they should be able to help you print it. You’ll just pay a small cost for the # of pages printed.
Love this squishy scarf! I’ve cast on a couple of times now and I’m running into an issue on Row 3: K3, p2, yo, k2, [slip slip knit (ssk), p9, k2tog, k2, yo, RLI (see Notes)] 2 times, ssk, p9, k2tog, k2, yo, p2, k3.
Is the original stitch left on the needle following the RLI meant to be the first stitch slipped as part of the SSK? If I do that the stitches don’t line up the way they should and the stitch count is off. Or when it says knit the increase, am I also meant to knit the original stitch and then SSK. I think it works out if I do it that way, but it’s not exactly the way the pattern is written.
I’ve subbed another yarn and think I will have to go down a needle size so I would like to add a repeat. Would one repeat mean 59+16 for a cast on of 75 stitches?
I so appreciate your help!
Thanks,
Rebecca
Hi Rebecca,
Thank you so much for writing in! We took a look at the pattern and there was k1 missing at the completion of the RLI. That is to say that the RLI is meant to include the stitch being created and the stitch above in the column to make the increase, therefore creating 2 stitches from 1 stitch. We have made the correction to row 3 to make things a bit clearer.
You can absolutely add another repeat! As you note, you will want to add 16 more stitches to your original cast on!
We apologize for any confusion! Happy knitting!
Cassy
Cassy,
I always assume I’m doing something wrong. Thank you for clarifying the pattern for me! Someday I will trust my intuition.
Have a good yarn crawl!
Rebecca
I want to make this but can’t seem to find a video that shows how to slip 3 stitches in a row. After I slip the first stitch purlwise wyif my yarn is no longer in front. How do I get it in front without wrapping it making a new stitch?
Hi Judy,
Thanks for reaching out! Unfortunately we do not have a video for this step, but I hope I can help explain it! When you are slipping the first stitches in a row with the yarn in front, you will need to hold the yarn while slipping the stitches as you normally do when knitting, but make sure the yarn is in front of the right hand needle. As you slip each stitch, just hold your yarn in the front without moving it – as long as you don’t drop your yarn it should stay in the front without wrapping over the needle. After you have slipped all three stitches, simply move your yarn to the back of the work between the needles as you normally would when switching from a purl to a knit stitch, give it a small tug to tighten up the edging, and you should be ready to knit!
I hope that helps, and happy knitting!
Julianna
I love your patterns! I had purchased yarn to do the Ramble Wrap but would now like to try this one. Even though the yarn for the Ramble Scarf is much finer, do you think it would still work if I just cast on more stiches?
Thanks so much!
Hi Jennifer,
Thank you so much for the kind words! I think it would be very interesting to see how this pattern would work out in Sweetgrass – the smaller scale “cables” should be quite lovely and intricate looking! You can indeed cast on more stitches when using a lighter weight yarn, but I would suggest knitting a gauge swatch on US 3 needles first, both to see how the stitch pattern looks in fingering weight and to measure your stitches per inch, and then multiplying your stitches per inch by 10.5 inches and rounding to the nearest multiple of 16 plus 27 to determine how many stitches to cast on.
I hope that helps, and please do let us know how it turns out!
Julianna
Thanks so much for the information. As a relative beginner those calculations are extremely helpful!
Are you sure that row 3 has been corrected? It still looks off to me?
Hi Maria,
Thanks for reaching out! Yes, Row 3 has now been corrected! The k1 at the end of the bracketed repeat was added, so the row will add up to the correct amount of stitches.
Happy knitting!
Julianna
I’m loving this pattern but it looks like I’m getting yarn over holes! Could it be the weight of my yarn? Or am I doing a technique incorrectly possibly?
Hi Emily,
Thanks for writing in! All the yarn overs should be knit or purled through the back loop on the following row, which should close them up. It is also possible that knitting at a loose gauge will still result in visible holes, even if you are knitting and purling through the back loop correctly. We don’t have a tutorial for knitting through the back loop, but our Purl Through the Back Loop tutorial should be helpful!
Best,
Julianna
Re No cowl-cowl
I had emailed you earlier today on a problem I had been having with Row 19. Just figured it out! Yay!!!
Didn’t realize that with each LLI you must first knit a stitch and then do the LIL from that same Same stitch. My problem was that I had been doing my LLI from the last stitch I already had on my right hand needle. So all I see well! Sometimes you just need that light bulb moment!!!
I keep going wrong in row 3 at the p9, k2tog, k2, yo, RLI,
Can’t work out what I’m doing wrong. Something to do with “yo” ?
Hello Imogen,
Thank you for reaching out! What seems to be going wrong? Is there a step that is confusing you? We do have a great tutorial for Yarn Overs (YO) if that helps. If not, let me know and we can further trouble shoot!
Happy knitting,
Marilla
Row 19
I started with 59 stitches ending row 18.
All was well until I got to row 19.
For LLI I knitted a stitch then lifted the leg as indicated and knitted it trough the back loop.
When I got to the end of the row I had 4 purl stitches left ,not 7 . (not included the k3).
R
Hello Ronit,
Thank you for reaching out! This can be a tricky one, but I think I know what could be going wrong. Are you only including the picked up stitch for the LLI instruction in the pattern? The k1 before the LLI is the stitch in the same column (2 rows above) the stitch that is picked up for the LLI. This means that your LLI only counts as one stitch rather than two.
I hope this makes sense and let us know if you have any further questions!
-Marilla
Hi,
I am just getting started on this scarf and when reading the notes it states that all slip stitches are slipped purl wise. Usually when doing a SSK I have always done then knit wise….are we slip the SSK purl wise?
BTW, your store is beautiful….when I am in NYC I could spend a day just in your store.
Mary
Hi Mary,
Thanks so much for the kind words and for reaching out – we love it when our customers can visit us in person! You are correct that a SSK is a special stitch that requires you to slip two stitches knitwise, so the note about slipped stitches doesn’t apply to the SSKs in the pattern – it only applies when you see the directions to slip a stitch without any other information!
I hope that clears things up!
Julianna
Hi there,
I’m a bit perplexed by this myself, as I’ve referenced the Purl Soho SSK tutorial which shows to slip first stitch knitwise and second purlwise. But every other online tutorial shows both to be slipped knitwise, as you said in your reply to Mary.
While your reply helped me with wondering if the SSK here should also be slipped purlwise, I am now unsure if I should use the knitwise/purlwise shown in tutorial or knit-knit wise as stated above… ?
Hi Jennifer,
Thanks for reaching out! For the SSK decrease both stitches should be slipped knitwise, but the other slipped stitches in the pattern should be slipped purlwise unless otherwise stated!
I hope this clears things up!
Gianna
Hi,
I am having trouble with Row 19 especially with the LLI. I have read the instruction and looked at the video. Row 19th ….k1 LLI, YO … Do I start the LLI from the k1 stitch or do k1 and then a go right into the LLI with the k1 , lift the left shoulder 2 rows down ktbl then finish the stitch with a k1 then yo? A close up video would be helpful.
Thank you,
Mary
Hello Mary,
Thanks for reaching out! You knit one, then lift the left shoulder 2 rows down ktbl, yarn over. The knit one is not included in the LLI.
I hope this clears things up, but let us know if you have any further questions!
Happy knitting,
Marilla
Hi. On line 13 the directions say, “pass.”(see notes)
I can not find the note.
Thank you
Hello Michelle,
Thanks for reaching out – this is a great question. This is in “decreases” section under “Notes”. It means Slip 1 stitch knitwise, knit next 2 stitches together, pass slipped stitch over k2tog and off needle. [2 stitches decreased].
I hope this helps and happy knitting!
-Marilla
Hi,
I’m getting snagged on tow 3 also, and after several attempts, am still having the same problem. As I move down the row (I have 139 stitches), I find I have to make a RLI into a purl stitch. This seems all wrong. Should that be happening? Would appreciate any insights.
Thanks much!
Ellen
Hi again. No need to post my notes to you. I wrote yesterday after trying to get past row three with no luck.
I had read the other comments about row three and thought I had the latest version with the correction you mentioned. It has the additional k1 following the RLI. Everything falls into place without that k1. The row worked out perfectly. Onto row 4!
Please update the pattern from your end.
Thanks much.
Ellen
Hi Ellen,
I’m so glad you were able to get this row sorted out! If it helps, we mean for you to think of the RLI only as lifting the stitch from the row below and knitting it – the increase does not include knitting the stitch that is already on the needle. You will then knit that stitch as the following K1. That should keep all the stitch counts constant!
Happy knitting!
Julianna
Oh great! This also explains the problem I’m having with line 19. Thanks much.
Ellen
I would like to also request a chart (June Moore 9/25/19). I knit Russian style and have to convert to R and L leaning increases/decreases. A one section chart showing this would be so helpful. I do not use a cable needle due to having RA/OA and fingers not deft enough. I have found one hat pattern using increase/decrease for cables and love it. I really would like to make this if a one repeat chart was available. I am always on the look out for patterns like this and they are very hard to find.
Hi JuliAnn,
Thanks for writing in! I will certainly add your voice to the requests for a chart for this pattern!
Best,
Julianna
I love this scarf and am definitely an adventurous beginner but have been caught at the very start! What do you mean by:
“This stitch pattern works over a multiple of 16 + 27 stitches, repeating stitches in brackets as many times as necessary”? I’m having a very hard time figuring out the math especially when it comes to the brackets. Any assistance will be appreciated!
Hello Ruth,
Thank you for reaching out! Each row has stitches inside brackets and outside. For example Row 1 is “K3, p2, k3, [p11, knit 2 together (k2tog), k2, yarn over (yo), k1] 2 times, p11, k3, p2, k3.” For this row “[p11, knit 2 together (k2tog), k2, yarn over (yo), k1]” is the part that you would repeat is you wanted to alter the size of the scarf.
If you want to keep the pattern as is, you will repeat the part in the brackets the numbers of time listed in the pattern.
I hope this helps, let us know if you have any further questions!
Happy knitting!
-Marilla
Thanks for the speedy response Marilla. I’ve been able to move on! Row 3 though – oy. On my third try – yikes.
This pattern is so beautiful! I’m starting it today to gift to my Godmother. There isn’t a matching hat pattern that I’m not seeing is there?
Hi Beth,
Thank you so much for the kind words and for writing in! We don’t have a specific hat pattern to match this scarf, but I think our Classic Cuffed Hat, which is also written for Worsted Twist, would coordinate nicely!
Happy knitting!
Julianna
I’ve just started this and wanted you to know how grateful it makes me that someone can create a wonderful pattern for the rest of us to enjoy. What fun I am having seeing this take it’s form!
Hi! I am having a wonderful time with the challenge of this pattern and finally its moving along! I am wondering how I can scale this to be able to knit , with this pattern, a throw pillow for a couch. The width is currently 9 inches wide. Can I just double the cast on to 118? Will it all double well?I would like to knit a 18×18 pillow.
Thanks!
Hi Sue,
Great idea! We are happy to share that this stitch pattern works over a multiple of 16 + 27 stitches, repeating stitches in brackets as many times as necessary. It sounds as though your gauge is a bit tighter than our own. Taking that into account, if you wanted an 18 inch wide pattern repeat for your pillow, you would cast on 123 stitches rather than 118 to have a number of stitches that work with the multiple!
Happy knitting!
Cassy
I have some beautiful aran weight yarn. would it work?
Hi Nancy,
Thanks for writing in! Yes, this pattern is written for aran weight yarn! I would still recommend knitting a gauge swatch to make sure, but you should be able to knit this pattern without any changes.
Happy knitting!
Julianna
Hi, I was going crazy at row 19, tinked it 3 times, figuring I was doing something very wrong. Got the bright idea to check back here and saw the correction. So happy now !This is a great site !
Thank you !
Pat
I am confused by the directions in row 1, where knit 2 together is followed by (k2tog) and yarn over is followed by (yo). Are the parentheses just shown as information on how the instructions are abbreviated, or does it mean k2tog twice and yo twice? I have never seen it written this way before.
Hi Bonnie,
Thanks for writing in! Yes, the parentheses are showing the abbreviations for the instruction the first time they appear in the pattern to clarify.
I hope this helps, happy knitting!
Gianna
Thank you for your clarifying comments, my issue seems to be when you are doing YO between a knit and then a purl stitch (for example: k2, yo, p1 ). Since the yarn is already in back it seems that you should leave the yarn in back and purl thus adding a stitch. My issue is in the next row, is there a tutorial on how to handle these stitches, usually we are knitting/purling through the back and I’m not able to get it to work out. Apologize if this seems like a silly question.
Hi Debbie,
Thanks for reaching out! Unfortunately we don’t have a tutorial for that (you may be able to find one on youtube though!) But you should be working the yarn overs as if they are a normal stitch, you either knit it or purl it depending on what the pattern says, just treat it like any other stitch!
I hope this clarifies things, happy knitting!
Gianna
Hi! I’m looking forward to trying this out! Do you think it will work to use 3 skeins of this yarn?
https://www.ebay.com/itm/I-Love-This-Yarn-Sport-Weight-Various-Colors-New-Price-Per-Skein/323224339042?hash=item4b41ac0262:g:hSwAAOSwsWFgCb~1
This is the link. Thanks for your help in advance.
Hi Lisa,
Thanks for reaching out! This pattern works with 656 yards of a worsted weight yarn. This yarn appears to be a sport weight yarn which is quite a bit thinner than worsted weight and would require a bit of re-gauging the pattern. If you are up for a bit of work you could use this yarn, and in that case you would need to work a gauge swatch with an appropriate sized needle (typically a US 3 – 5) and calculate your cast on amount from there. I would recommend checking out our All About Gauge tutorial, it is an excellent resource to use!
If you want to work from the pattern as written, then I would suggest looking for a yarn labeled “worsted weight” instead!
I hope this helps, and please feel free to reach out with any more questions!
Warmly,
Gianna
Hi Gianna!
Thanks for the response. I prefer to re-guage the pattern b/c I already bought 1 skein and I was planning on buying two more. I don’t really know how to re-guage the pattern and I was wondering if you could do it for me or tell me how.
Thanks a lot for your help!
Hi Lisa,
In that case you need to work a gauge swatch with an appropriate sized needle (typically a US 3 – 5 for sport weight yarn) in order to calculate your cast on amount. I wont be able to get an exact gauge for you since it completely depend on the yarn and needle size you are using, so you will need to make a swatch in order to get the correct calculations. Keep in mind that this stitch pattern works over a multiple of 16 + 27 stitches. Your gauge swatch should come out to around 5.75-6.5 stitches per inch depending on the needle size you use. So for example, the scarf is 10.5″ wide so you would multiply 10.5 x 5.75 (or whatever your swatch is measuring in at for stitches per inch) this would equal approximately 60, so to maintain the stitch pattern you would cast on 59 stitches (16 x 2 + 27 = 59)
I recommend checking out our tutorial All About Gauge it is an excellent resource to use and will walk through this process in more depth.
And yes, I am sure that this pattern requires a worsted weight yarn, as we designed this scarf using our Purl Soho Worsted Twist which is a standard worsted weight!
I hope this clears things up!
Warmly,
Gianna
Hi Gianna!
This is Lisa again. I read this quote in the all about gauge tutorial:
“Gauge is most commonly given for stockinette stitch, but many designers also provide gauge for the stitch patterns used in the piece. You may balk at the thought of working a cabled or colorwork swatch, but don’t, especially if it’s the primary stitch pattern in your project. ”
Do you provide gauge for the stitch patterns used in the scarf? I am thinking about making a gauge swatch in my yarn and then just not binding off and just reusing the yarn for the scarf. Is that a bad idea?
Sincerely,
Lisa
Hi Lisa,
Thanks for reaching out again! The gauge for this pattern is 20 stitches and 30 rows = 4 inches in stitch pattern (the cable pattern) in Worsted Weight yarn! You can certainly work a gauge swatch and not bind off to use the yarn again, just be sure you knit a big enough swatch to get an accurate measurement of your stitches per inch so that you can then calculate your cast on for your particular yarn/needle size you are using.
I hope this helps, happy knitting!
Gianna
Thank you so much for your help and time! I found a different pattern to use so I am not going to use this one. But thank you for all your continued help through my knitting struggle!
Thanks so much!
Lisa
Hi Everyone!
Is there a pattern on this website for a some what fancy scarf that uses weight 3 yarn?
Thanks for your help in advance!
Hi Kaylee,
Thanks for reaching out! I believe you are talking about our Three-Yarn Scarf for Giving!
Warmly,
Gianna
Thanks!
Thanks for your response!
I actually looked at it and it I can’t do it because I only want to use one color. Also, it doesn’t use weight 3 yarn.
Anything else?
Thank you!
Kaylee
Hi Kaylee,
Thanks for your response! I miss-read your first comment and thought you were looking for a scarf using 3 yarns not a weight 3 yarn! My mistake! You can find all of our scarf and wrap patterns for light worsted/dk (weight 3) yarns here! I would recommend our Braided Rib Wrap, Mini Herringbone Scarf in Understory, Delicate Cable Scarf, or our Trellis Wrap In Understory!
I hope this helps and please let me know if you have any more questions!
Warmly,
Gianna
Could I use tussock and an 8 ply yarn for this scarf
Hi Kim,
Thanks for reaching out! You could absolutely use Tussock held with an 8-ply yarn for the No-Cable Cable Scarf! Adding the Tussock in will give the fabric a beautiful halo of softness, which would compliment this scarf so much. I’d just encourage you to check your gauge to make sure that you’re using the appropriate needle size!
Warmly,
Kelsey
Thankyou so much.
Hi! This is a beautiful pattern. Recently I made the Triangular Triangle Scarf using Wigeon. I loved working with this new yarn and was wondering if it could be used for the no-cable cable project? What modifications in needle size and/or cast on stitches would I need to make?
Thank you.
Hi Susan,
I’m so happy to hear that you’ve enjoyed both Wigeon and this pattern! There are two different ways that you could modify this pattern in order to use Wigeon.
First, you could simply hold the yarn double, in order to bring the weight up. Wigeon is sportweight, so it’s quite a bit thinner than the worsted weight yarn this pattern calls for. But if you knit with two strands at once, you could bring the yarn up to a worsted weight! I’d highly recommend making a gauge swatch for this, to make sure you’re using the correct needles.
Another option is to modify the cast on, so that the pattern will work for just one strand of Wigeon. To figure out your cast-on number, you will want to first knit a gauge swatch in pattern, with your needle of choice (we recommend using size US 5 or 6 for Wigeon). Once you know how many stitches you are getting per inch, you can multiply that number by the width that you would like and cast on the nearest multiple of 16 + 27 stitches. Then, just follow the pattern as written!
All the best,
Lili
This is a gorgeous pattern. Thank you! But I agree with prior comments that it would be a great addition to the pattern to have a chart! Some people prefer written instructions. some prefer a chart. I find charts much easier to navigate. So why not have both? I will definitely make this beautiful scarf.
Hi Deena,
Thanks for writing in with this suggestion! We really appreciate your feedback and will absolutely consider creating a chart to go along with the written pattern for this scarf.
All the best,
Lili
This is a lovely pattern….. my question is on the set up rows when it says slip 3 stitches purlwise wyif, when you move the yarn to the back for the k2 is the yarn laying over the 3 slipped stitches?
Hi Deb,
Thanks for reaching out! By slipping the three stitches with yarn in front you are creating the nice cord edging (as you can see in the photos) but what you need to do in order for the edging to work, is pull the yarn tightly after you slip those three stitches so that the three stitches curl up a bit! That way the yarn won’t be seen laying over the stitch and instead will scrunch them together and create the edge.
I hope this helps clear things up!
Gianna
I’m contemplating making this scarf as a wrap. If I increase the width only, I would cast on 91, making it almost twice as wide. In that regard, would 6 skeins of yarn be enough? Also, to save on cost, I’m looking at Lantern yarn which is on sale at 40% off right now. What are your thoughts on using that yarn? I would choose the color white smoke.
Hi Darlene,
Thanks for writing in! I love your idea of making a No-Cable Wrap using this pattern!
It would be a good idea to knit a swatch before casting on, especially since you are substituting Worsted Twist with Lantern. I would recommend doubling the amount of yarn required for the pattern if you wanted to double the width. 8 Skeins of Lantern should be enough for a wrap!
I hope this helps!
All the best,
Carly
I see only one other person commented that she was having a problem with yarn over holes in her work. I too am having that problem. No matter how much I tighten up either the k1tbl or the p1tbl on the following row, it seems that the hole gets created by the stitch that comes after these “through the back loop” stitches, and I try to tighten up those stitches as well. Do you have any helpful advice on how to stop this from happening?
Hi Darlene,
Thank you for your question! When knitting backwards yarn-overs through the back loops, the intention is to cross the two bottom legs of the yarn over, therefore creating a sealed V-shaped stitch instead of a hole as a result of the yarn-over. When it comes time to knit or purl one of these stitches, I suggest double-checking that the bottom legs of the stitches are crossed into a V after knitting or purling the stitch. Another suggestion would be to experiment with this on a smaller swatch, to have a little “case study” of how these yarn-overs interact with the ktbl and ptbl stitches. As always, we are happy to help over email, too, if you would like to send in a photo of your work to customerservice@purlsoho.com so we can see what is going on more specifically with your scarf!
All the best,
Margaret
Hi!
I started to practice the pattern before committing to the project fully. I would love my scarf to be 16 more stitches wider, so I want to cast on 75 stitches. How do I multiply brackets when the pattern says “repeat 3 times”?
All the best,
Natalia
Hi Natalia!
Thank you for your question. Since this scarf is worked over a multiple of 16, plus 27 stitches, you can cast on any multiple of 16 + 27, and repeat the instructions in brackets as many times as necessary for the amount of stitches you have! At 75 stitches, that should be three multiples of 16 plus 27, so you will work the instructions in brackets one more time than listed in the pattern.
I hope this helps, and happy knitting!
All the best,
Margaret
Hi,
I love this scarf so much.
I have tried knitting this about 5 times or more but no success. As soon as I get to Row 3 and Row 4 in the Body, I end up getting extra stitches and holes. Would it be possible to have a video on a few rows of the Body? It would be a great help.
Thanks,
Kathleen
Hi Kathleen,
Thank you for reaching out. We’re so sorry to hear that you’re running into roadblocks with your project! We unfortunately don’t have a video showing how to knit this pattern, but we would be happy to meet with you over Zoom for one of our 1-On-1 Project Help sessions to demonstrate any techniques and help troubleshoot questions over a call! If you’d like to sign up for a free session, you can do so right here (https://www.purlsoho.com/1-on-1-project-help.html)! In the meantime, feel free to email any further questions or photos of your project to customerservice@purlsoho.com and we’re more than happy to assist further there!
All the best,
Cat
Love this pattern!! It’s the only way to knitt cable that’s the most deficult think for me I’ll give it a try!!!
Help help I can’t past row 3 of body I finished with making the 2 times in [] and ending in k2tog and have 3 switches on keft needle… The pattern says I must knit note yo p2 k3…I understand RLI but still can’t make it right. Pls help me.
Hi Marianna,
I’m sorry to hear that you’re running into trouble with Row 3! It sounds like your stitch count is getting off at some point, so I’d recommend keeping a close eye on that. First, make sure that your total stitch count matches up with the pattern stitch count, which should always be 59. Then, you can also place stitch markers between each pattern repeat (around the sections in brackets) and periodically check to make sure those stitch counts remain stable.
Regarding the RLI, can you let me know what’s causing the difficulties? If you can send a photo of your RLI stitch to customerservice@purlsoho.com, we would be able to better visualize what’s going on!
All the best,
Lili
Thanks for your answer.I’ll make on more try but im sure that i make right the 2 times in brackets and make the RLI right.With my remein stitches in my left needle i have 59 sticthes but chart says i have more to knit thats why i cant understand it If i keep making a mistake i’ll make a video knitting it and sent it to customerservie. Thank you again.