Herringbone Hat
The herringbone pattern is, of course, traditionally woven, yet it routinely “weaves” its way into the knitting world. Here on the Purl Bee, this classic zigzag has inspired chunky cowls, handsome scarves, and now a hat, too!

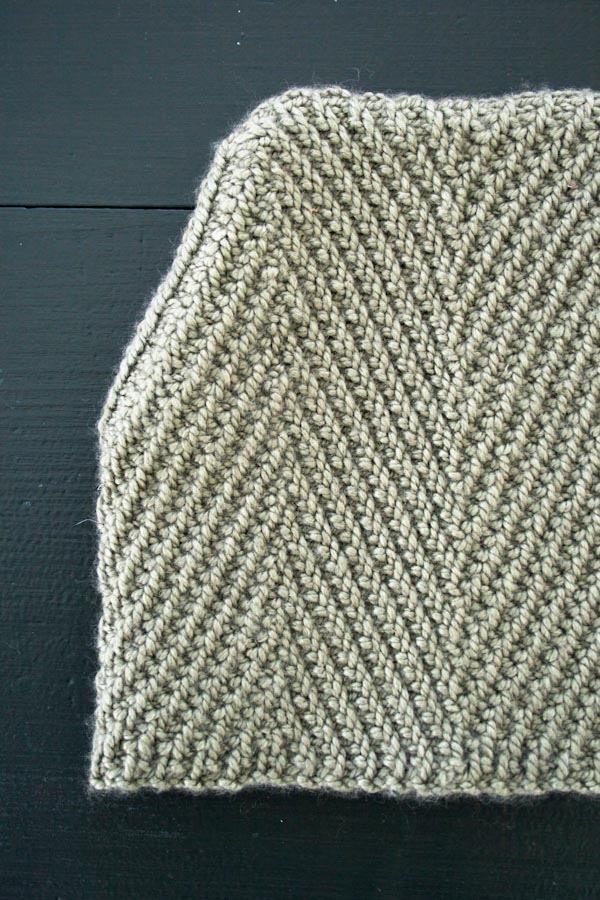
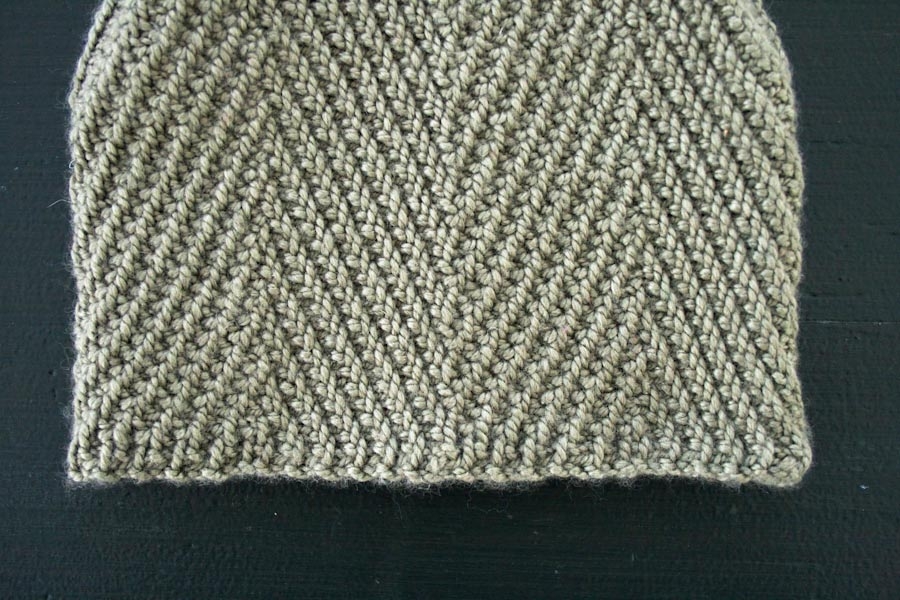
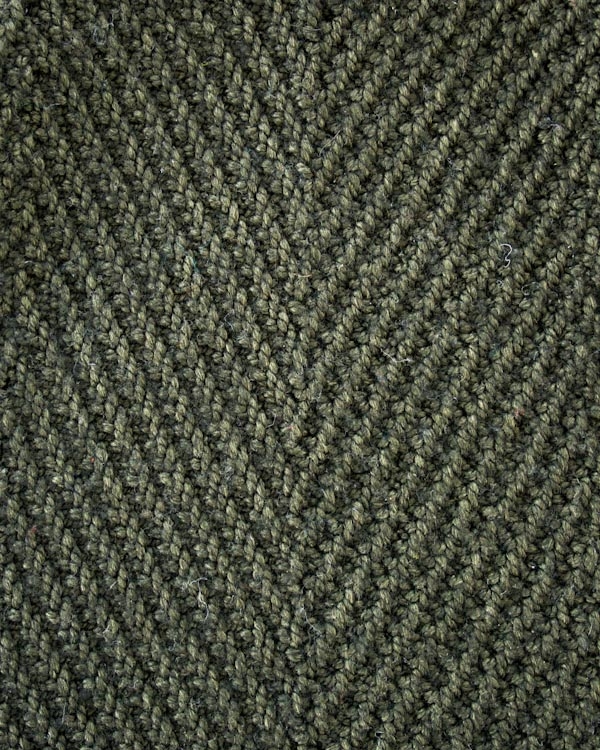
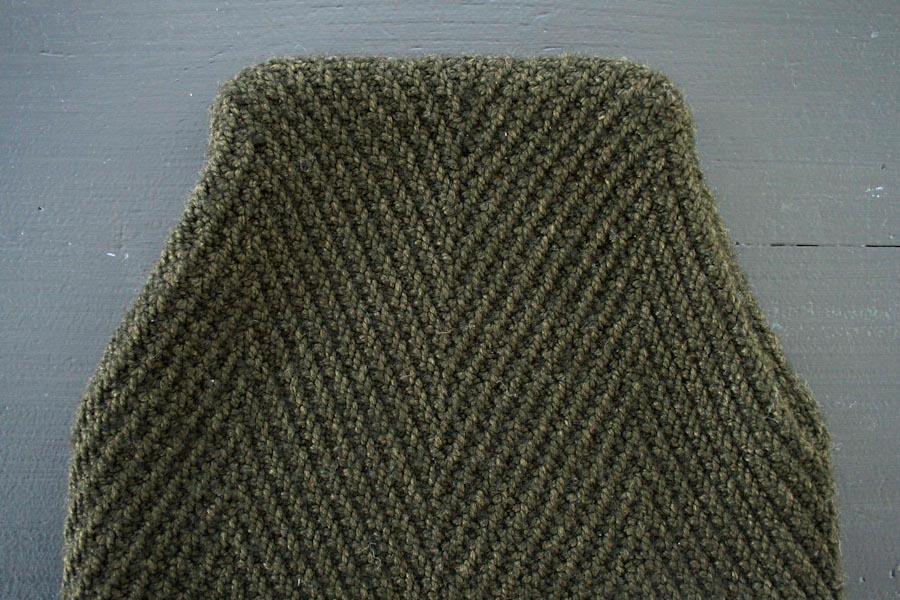
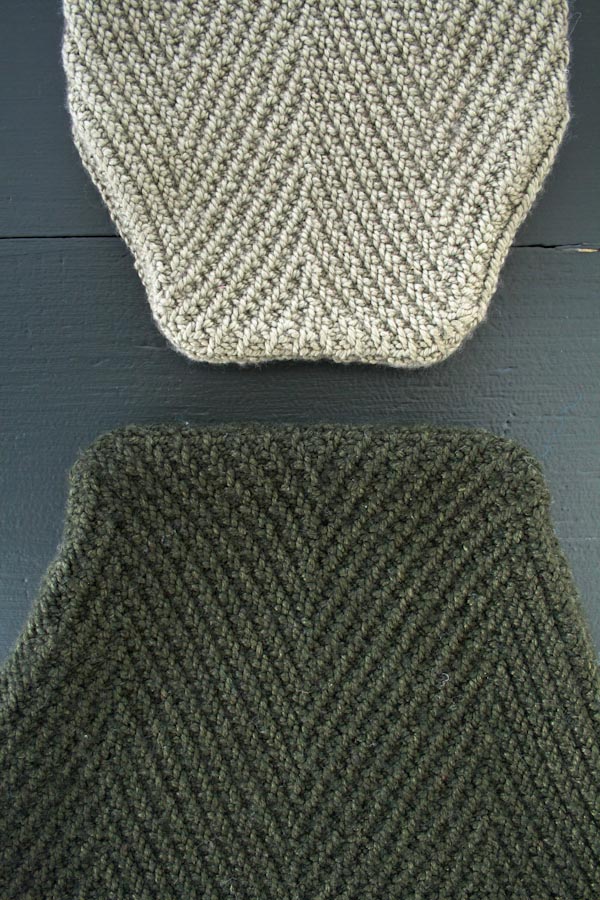
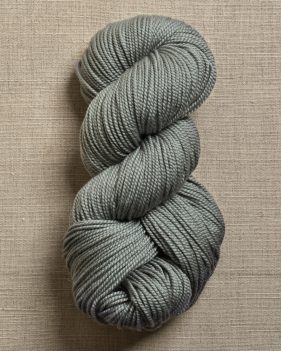
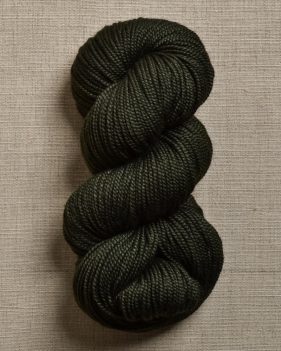
This Herringbone Hat depends on texture for its herringbone-ness and on logical engineering for its structure. To highlight both I knit up my hats in Purl Soho’s gorgeous Mulberry Merino. A delicious blend of silk and merino, the silk reflects the light and draws attention to the riveting texture, while the merino keeps the whole thing shipshape!
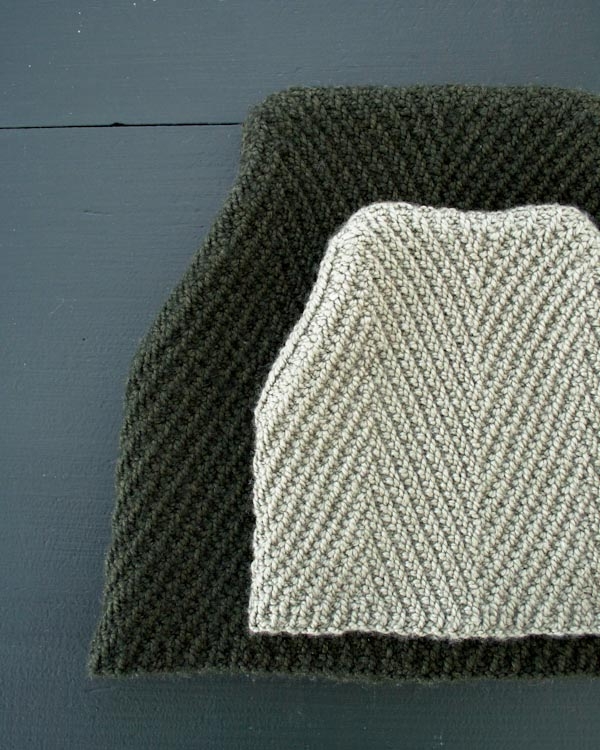
This particular herringbone stitch pattern is created by simple slip stitches, no fancy maneuvers or fussy tricks. And like the herringbone pattern itself, the Herringbone Hat, with its clever construction and compelling details, is sure to become a knit classic! -Laura
PS- To see Instagram photos of this project being worn click here and here!
Designed by Purl Soho designer, Laura Ferguson.
Materials
- 1 skein of Purl Soho’s Mulberry Merino, 80% extra fine merino, 20% mulberry silk. Up to 247 total yards required. (NOTE: We no longer offer Mulberry Merino, but choose from one of our other sport weight yarns.)
- US 6 (4 mm) circular or straight needles
Gauge
28 stitches and 54 rows = 4 inches in stitch pattern
22 stitches and 30 rows = 4 inches in stockinette stitch
Sizes
Newborn (Toddler, Kid, Adult Small, Adult Large)
- Finished Circumference: 11¾ (14¼, 16½, 19, 21¼) inches
- Finished Height: 5¾ (7, 8, 9, 10 ¼) inches
Notes
CONSTRUCTION
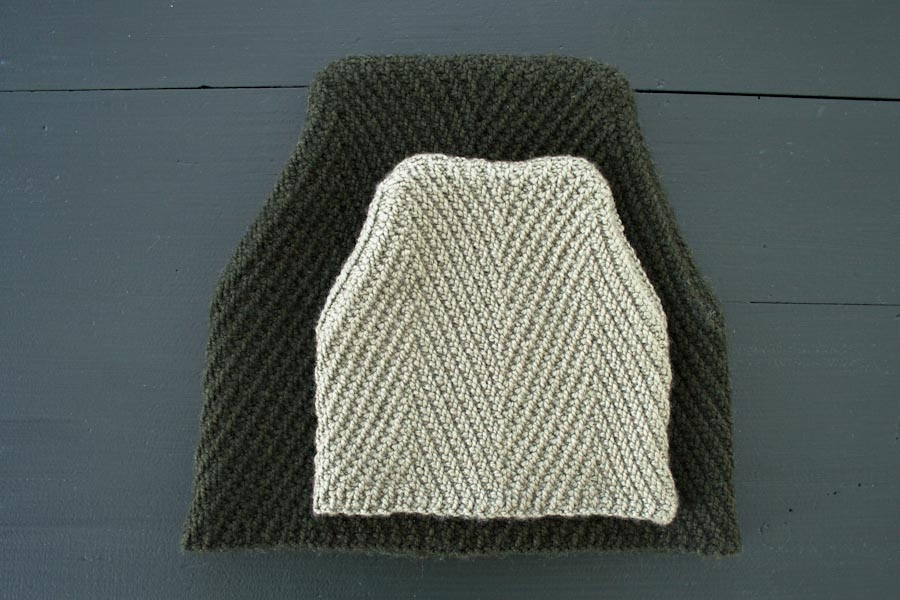
This hat is worked flat and then seamed together.
SLIPPED STITCHES
Slip all slipped stitches purlwise.
Make 1 Left
Make 1 Left (m1L): With the left needle, pick up the bar between the last stitch you knit and the one you’re about to knit, bringing the needle from front to back, then knit through the back loop of the strand.
For help with this stitch, visit our Make 1 Right + Left tutorial.
Make 1 Purlwise
Make 1 Purlwise (m1p): With the left needle, pick up the horizontal strand between the last stitch you knit and the one you’re about to knit, bringing the needle from front to back, then purl through back loop of the strand.
For help with this stitch, visit our Make 1 Purlwise (m1p) tutorial and see the Make 1 Left Purlwise instructions, or watch the stitch in action at 01:42 in our video.
Pattern
Cast on 21 (25, 29, 33, 37) stitches. We used a basic Long Tail Cast On.
Foundation Row (wrong side): Purl to end of row.
Increase (Stitch Pattern Slants Right)
Row 1 (right side): Slip 1 with yarn in back (wyib), k1, make 1 left (m1L; see Notes), *k2, slip 2 with yarn in front (wyif), repeat from * to last three stitches, k3. [1 stitch increased]
Row 2: Slip 1 wyif, p3, *slip 2 wyib, p2, repeat from * to last two stitches, make 1 purlwise (m1p; see Notes), p2. [1 stitch increased]
Row 3: Slip 1 wyib, k1, m1L, *k2, slip 2 wyif, repeat from * to last stitch, k1. [1 stitch increased]
Row 4: Slip 1 wyif, p1, *slip 2 wyib, p2, repeat from * to last two stitches, m1p, p2. [1 stitch increased]
Repeat Rows 1–4 four (5, 6, 7, 8) more times. [41 (49, 57, 65, 73) stitches]
Continue Evenly (Stitch Pattern Slants Left)
Row 1 (right side): Slip 1 wyib, k1, *slip 2 wyif, k2, repeat from * to last three stitches, slip 2 wyif, k1.
Row 2: Slip 1 wyif, p3, *slip 2 wyib, p2, repeat from * to last stitch, p1.
Row 3: Slip 1 wyib, k3, *slip 2 wyif, k2, repeat from * to last stitch, k1.
Row 4: Slip 1 wyif, p1, *slip 2 wyib, p2, repeat from * to last three stitches, p3.
Repeat Rows 1–4 four (5, 6, 7, 8) more times.
Continue Evenly (Stitch Pattern Slants Right)
Row 1 (right side): Slip 1 wyib, k3, *slip 2 wyif, k2, repeat from * to last stitch, k1.
Row 2: Slip 1 wyif, p3, *slip 2 wyib, p2, repeat from * to last stitch, p1.
Row 3: Slip 1 wyib, k1, *slip 2 wyif, k2, repeat from * to last three stitches, slip 2 wyif, k1.
Row 4: Slip 1 wyif, p1, *slip 2 wyib, p2, repeat from * to last three stitches, p3.
Repeat Rows 1–4 four (5, 6, 7, 8) more times.
Decrease (Stitch Pattern Slants Left)
Row 1 (right side): Slip 1 wyib, k1, slip slip knit (ssk), *k2, slip 2 wyif, repeat from * to last stitch, k1. [1 stitch decreased]
Row 2: Slip 1 wyif, p3, *slip 2 wyib, p2, repeat from * to last four stitches, purl 2 together through the back loop (p2tog tbl), p2. [1 stitch decreased]
Row 3: Slip 1 wyib, k1, ssk, *k2, slip 2 wyif, repeat from * to last three stitches, k3. [1 stitch decreased]
Row 4: Slip 1 wyif, p1, *slip 2 wyib, p2, repeat from * to last four stitches, p2tog tbl, p2. [1 stitch decreased]
Repeat Rows 1–4 four (5, 6, 7, 8) more times. [21 (25, 29, 33, 37) stitches]
Work Second Half of Hat
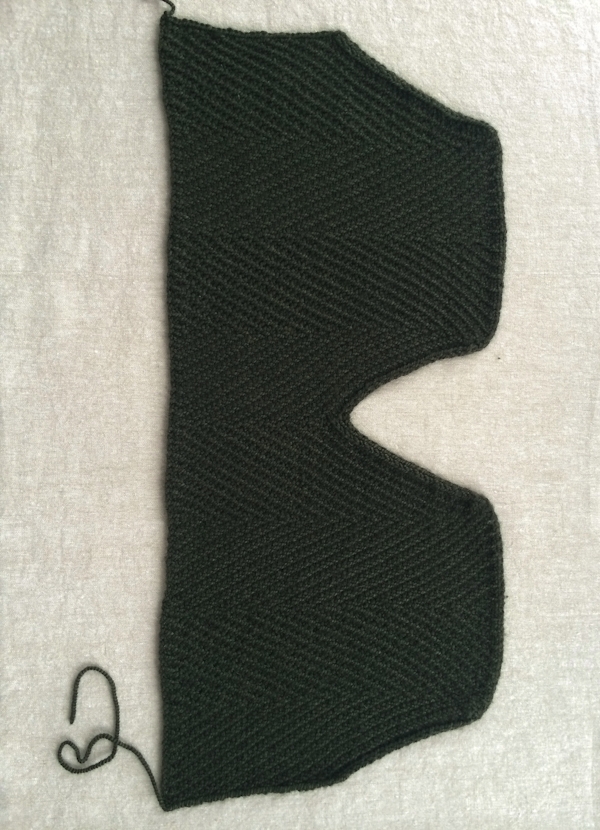
Repeat the entire pattern one more time, starting with the Increase (Stitch Pattern Slants Right) section.
Bind off all stitches knitwise.
Finish
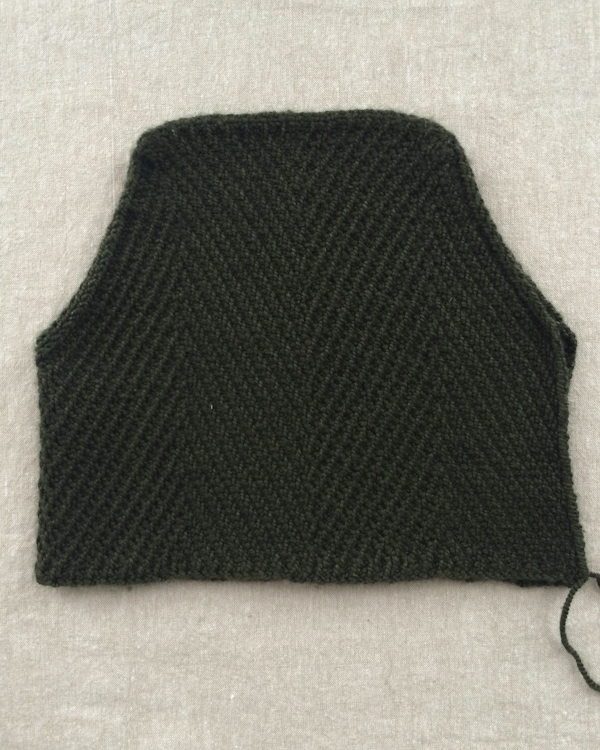
With wrong sides together, fold the piece in half so that you can seam the hat together.
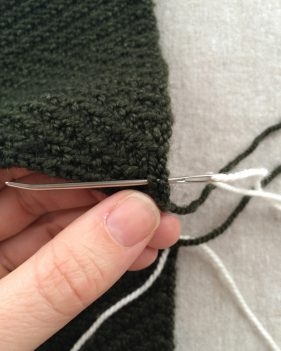
Hold the cast on and bind off edges parallel. Use a tapestry needle threaded with the working yarn to sew the two edges together (NOTE: I used contrast yarn for demonstration purposes). Sew under the knit stitch at the cast on edge and then under the knit stitch directly opposite at the bind off edge.
Continue back and forth for the length of these straight edges.
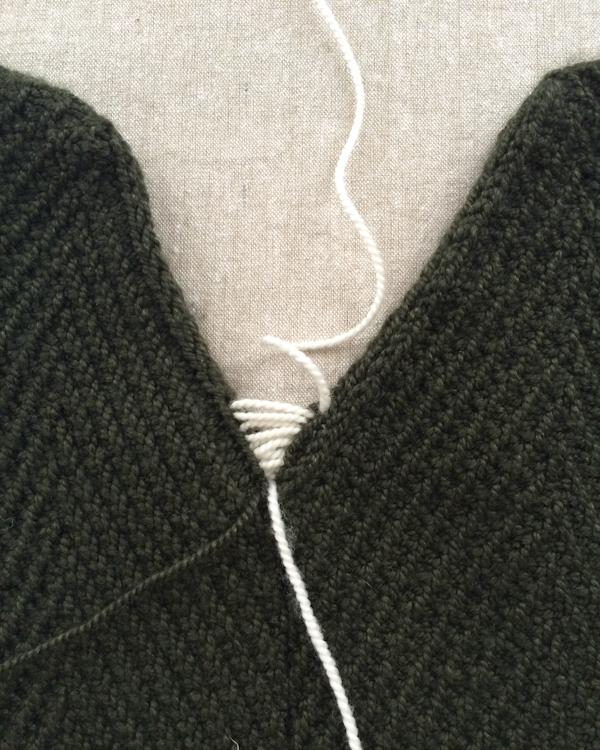
Continue seaming up the slanted edges, now using Mattress Stitch. Continue in Mattress Stitch along the top edge and then down the second slanted side.
Weave in the ends and block as desired.







Ooh! Interesting shape. I would need to see this one on a human!
Hi ALexis-
You can see two pics of this hat being worn on humans here:
http://instagram.com/p/y-YXyDjhWM/?modal=true
http://instagram.com/p/y-YQqPjhWB/?modal=true
Thank you for getting in touch!
Molly
Hi Purl knitters, great pattern! but how does it look like worn?
Gracias!
C
Hi Cayetana-
You can see two photos of this hat being worn here:
http://instagram.com/p/y-YQqPjhWB/?modal=true
http://instagram.com/p/y-YXyDjhWM/?modal=true
Thank you for getting in touch!
Molly
Never underestimate seeing a hat on a head.
Hi Carol-
You can see two photos of this hat being modeled here:
http://instagram.com/p/y-YXyDjhWM/?modal=true
http://instagram.com/p/y-YQqPjhWB/?modal=true
Thanks for getting in touch!
Molly
Thank you for this lovely pattern!
Beautiful hat! Would it be possible for you to post a photo of the hat on a person?
Hi Teri-
Yes! You can see two photos of this hat being worn on Instagram:
http://instagram.com/p/y-YQqPjhWB/?modal=true
http://instagram.com/p/y-YXyDjhWM/?modal=true
Thanks for getting in touch!
Molly
It would be great if the patterns could be to download….. 🙂
This pattern is beautiful.
Love it.
Hi Inge-
You can download all of our patterns to print or save as a PDF!
If you’re on a desktop version of the site, you will find a “print” icon in the right column just below the date and tags. If you’re on a mobile version of the site, you will find a “print” icon below the pattern, after the comment box.
Follow the easy on-screen instructions for customizing what parts of the pattern you want to delete for printing (for example, certain images or the list of materials).
Thank you for getting in touch!
Molly
Thank you Molly! I never noticed that wee button to print patterns! Makes life sooooo much easier now that I know that! THANK YOU for all the lovely patterns, photos, and of course the encouragement to try something new!
This is wonderful – I was just thinking I wanted a “different kind” of hat pattern to try 🙂
…Thank you!
This looks great!
But, regarding the special shape: do you have a picture how it shows on a person?
I want to see this before I start knitting, thanks a lot in advance!
X B
Hi Bernadette-
We have two pictures of this hat being worn that you can see on Instagram:
http://instagram.com/p/y-YXyDjhWM/?modal=true
http://instagram.com/p/y-YQqPjhWB/?modal=true
Thanks!
Molly
Love the pattern! Do you have any pictures of what the hat looks like on?
Thanks
Hi Neex-
Yes we do! You can see them on Instagram here:
http://instagram.com/p/y-YQqPjhWB/?modal=true
http://instagram.com/p/y-YXyDjhWM/?modal=true
Thanks for getting in touch!
Molly
I’d love to see this hat on someone’s head..
Hi Cissie-
We posted two photos of this being worn on Instagram!
http://instagram.com/p/y-YXyDjhWM/?modal=true
http://instagram.com/p/y-YQqPjhWB/?modal=true
Thanks for getting in touch!
Molly
I see the print button but don’t seem to be able to download to my iPad. Suggestions?
Hi Rhonda-
I’m so sorry to hear you’re having problems with this! What happens when you go to the print button? I just downloaded a copy onto my iPhone so I’m fairly confident that it’s working. Here’s what I did….
Go to the print button and from there hit “PDF” then hit the “download pdf” button when prompted and a new window should open with the PDF.
If this didn’t answer your question please email us directly at purlbee@purlsoho.com and we can try to get to the bottom of your issue!
Molly
Molly
I LOVE the pattern on this hat and would really like to use it for an upcoming baby blanket. Would it be easy to modify the pattern to do so?
Hi Robin!
This would make a FANTASTIC baby blanket.
It’s pretty on both sides and lays flat, perfect for a blanket!
Below is a slightly modified version of the evenly worked portions of the pattern…
Cast on a multiple of 4 + 1
Purl one row.
Work Evenly (Stitch Pattern Slants Left)
Row 1 (right side): Slip 1 wyib, K1, *slip 2 wyif, k2, repeat from * to last three stitches, slip 2 wyif, k1.
Row 2: Slip 1 wyif, p3, *slip 2 wyib, p2, repeat from * to last stitch, p1.
Row 3: Slip 1 wyib, k3, *slip 2 wyif, k2, repeat from * to last stitch, k1.
Row 4: Slip 1 wyif, p1, *slip 2 wyib, p2, repeat from * to last three stitches, slip 3 wyib p1.
Repeat Rows 1-4 for as long as you’d like this section.
Work Evenly (Stitch Pattern Slants Right)
Row 1 (right side): Slip 1 wyib, k3, *slip 2 wyif, k2, repeat from * to last stitch, k1.
Row 2: Slip 1 wyif, p3, *slip 2 wyib, p2, repeat from * to last stitch, p1.
Row 3: Slip 1 wyib, K1, *slip 2 wyif, k2, repeat from * to last three stitches, slip 2 wyif, k1.
Row 4: Slip 1 wyif, p1, *slip 2 wyib, p2, repeat from * to last three stitches, slip 2 wyib, p1.
Repeat Rows 1-4 for as long as you’d like this section.
Repeat the previous 2 sections as many times as desired.
Bind off in knit stitch.
Let me know if you have any questions!
Laura
Thanks so much! I can’t wait to get started.
The herringbone pattern is beautiful. The seams frighten me. I am going to try and knit this in the round with decreases. I’ll let you know if it works.
Please tell us how it works! I’d much rather knit the hat in the round too!
would LOVE to know if it works! Please post your pattern if it does 🙂
So, Lynn, did it work? 😀
Thank you ever so much for sharing yiu r free patterens with us, I am a low income family and this allows for me to save money and have something to do in what little spare time I have. You are earthly Angels. God bless you all.
I want to know how to download the pattern ??
Thanks
Hi Nexeida.
You can download all of our patterns to print or save as a PDF!
If you’re on a desktop version of the site, you will find a “print” icon in the right column just below the date and tags. If you’re on a mobile version of the site, you will find a “print” icon below the pattern, just above the comments.
Follow the easy on-screen instructions for customizing what parts of the pattern you want to delete for printing (for example, certain images or the list of materials).
Thanks.
Laura
does this take the full skein? Will I be okay with 225 yds?
Hi Nina.
You should be fine with one skein for every size of this pattern! 225 yards may be a little tight for the largest size, but I think you’ll be fine.
Thanks for writing in.
Laura
How much yarn is needed for adult small?
Hi Elinore.
The Adult Small requires approximately 197 yards.
Thanks for writing in!
Laura
Is there anyway to adapt this pattern for knitting in the round to make a more classic hat shape? Love the pattern-not sure the shape is for me 🙂
Hi Carly-
Unfortunately we don’t have plans to rewrite this patten in the round or in a different shape but you may want to check out all of our other hat patterns for some more inspiration! https://www.purlsoho.com/create/category/knit/projects-knit/accessories-projects-knit/hats-projects-knit/
Thanks for getting in touch!
Molly
I am a fairly new knitter, and so was wondering if all the slipped stitches should be slipped knitwise or perlwise?
Many thanks for all the wonderful free patterns
Hi Tory.
Thanks for writing in and great question. Usually I put a bullet point in the NOTES section addressing this, but I think we forgot on this pattern!
The stitches should be slipped purlwise.
Thanks again!
Laura
S1wyib or S1wyif……..are the stitches slipped purlwise or knitwise or does it not matter?
Many thanks,
E.
Hi Eileen.
Purlwise! Slip them purlwise. Otherwise the dense row gauge of this fabric will be even denser and tighter! Thanks for asking this question. I am going to add a note in the pattern about this.
Laura
I just started knitting this hat, and before I get too far, I am just wondering how much stretch there is in this hat. If my head measures about 21 inches, should I make the adult large, or should I go down to the adult small for a snug fit?
Hi Eleni.
Great question! There should end up being about 2 inches of give. So if you’re head is 21 inches, I recommend you make the 19-inch circumference size! This way the hat with gently hug your head and not easily fall off.
Let us know if you have any questions!
Laura
your pattern is beautiful. I am trying to knit this hat, however : what is m1purlwise, is it the same as m1l ? I would appreciate an answer before I start. Thank you so much for all your lovely things.
Hi Margaret.
Thanks for the kind words about the pattern!
To m1 purlwise (make 1 purlwise)… with the left needle pick up the strand between the previous and next stitch from front to back, purl through the back loop. For quick reference you can find this explanation if you take a look in the NOTES section, under ABBREVIATIONS.
Let us know if you have any questions!
Thanks. -Laura
Laura
hi laura
i’m not sure i understand m1 purlwise correctly in comparison to m1l….is the difference that -once the strand is on the left needle-i pull through the loop from the back/behind and purl ?(while in m1L i would go in from the front…) hope i’m expressing myself clearly.
after knitting the elfin hat i’m looking forward to start this project. thank you so much for your wonderful work! you have the best web site ever! wish you had a store here in zuerich!
Hi Nicoletta.
Great question! They are very similar! The difference between the two is that one is worked as a knit (m1L) and one is worked as a purl (m1 purlwise). For both, you pick up the strand from front to back, but then with m1L you KNIT through the back loop and with m1 purlwise you PURL through the back loop.
I do hope that makes sense! Please let me know if I’m not being clear or if you have any additional questions!
Thanks for writing in.
Laura
Hi Nicoletta,
Thanks for writing in and I will try my best to help! Basically, m1 purlwise, increases one stitch by purling the increase and a standard m1L is a knit increase. While we do not have a tutorial on m1 purlwise, perhaps this tutorial on m1L and m1R will help to clarify things: https://www.purlsoho.com/create/2013/08/13/make-one-right-m1r-make-one-left-m1l/
Thank you again for your kind words!
Cassy
It is so beautiful! I am just starting and i have a question for row 1 : I knit 2 then I slip 2 stitches with yarn in the front then : do I put the yarn in the back then knit 2 again or do I keep knitting the 2 stitches with yarn in the front ? Thanks a lot for your site and patterns. I am a fan!
Hello, Melanie!
Thank you very much for writing in! I am sorry about the delayed response! For Row 1 you will knit 2 then slip 2 wyif. Then you move the yarn to the back to knit the next 2 stitches. If you have further questions, please let us know! Again, thank you for taking time to comment!
Happy knitting,
Kumeko
1. I’m making this hat in the largest size. After knitting several inches I realized it couldn’t possibly stretch to half of the 21.5 required inches. I’m using your yarn and my gauge is correct.
2. The photo under “Work Second Half of Hat” shows the two halves are joined – and the directions do not call for casting on for the second side. I wonder if that second half is continuous with the first and if so how you accomplished it.
Thank you – the Mulberry Marino yarn is so easy to work with and the herringbone pattern knits up nicely.
Hi Eileen,
Thanks for writing in! I think that I can help. This hat is knit from the side seam to side seam in one piece. To get a better sense of this, refer to the picture below “Work Second Half of Hat”. You work from the top to the bottom in this picture. That is to say that you cast on the hat sideways at one of the short side seams, increase for the body of the hat, decrease to the next side seam, increase for the body of the other side of the hat and then decrease to the side seam again. You will not need to cast on more stitches as the hat is knit flat in one piece.
I hope that this helps!
Cassy
I’m just getting started on the herringbone hat and I’m a little confused about the
“make one” increases. It seems like there are three different kinds of increases here: m1L, m1R, and m1purlwise. Please help. Thanks.
Hi Jo,
Thanks for writing in! There are 3 different make one types in this pattern. It is always noted which make one you will be executing and we do have some information in the NOTES section of this pattern. While we do not have a tutorial on m1 purlwise, perhaps this tutorial on m1L and m1R will help to clarify things: https://www.purlsoho.com/create/2013/08/13/make-one-right-m1r-make-one-left-m1l/
I hope that this helps and please let us know if you have any further questions!
Cassy
The pattern is working out great, but I am making the adult large size and one skein is not enough. I am about to start the last panel of the hat and I will need to order another skein.
Hi Jo!
Thank you for writing in! I am sorry to hear that you need to order another skein to finish your hat, I know that can be very frustrating! We haven’t had many folks who have needed to dip into a second skein to make the adult large, but it’s definitely not unheard of. Differences in knitting tension can be a factor in this – someone who is a tight knitter may need a bit more yardage to complete a project, do you happen to know if you’re gauge is right on or is it a bit smaller than 28 stitches and 54 rows = 4 inches in stitch pattern and 22 stitches and 30 rows = 4 inches in stockinette stitch?
Please let us know!
Best wishes,
Kumeko
I love this pattern! The yarn is very silky soft and the woven pattern makes for a great hat. I am excited to finish and see how it fits! Thanks
I’m making this hat with the lovely persimmon color! I lost track of how many times I have repeated the no-increase section. Is there a trick on counting the rows worked?
Thanks and I love it so far!
Hello Midori,
Thank you for reaching out! This first thing I would try and figure out is which of the rows within the 4 row sequence you are on. You will be able to tell this by first checking what the last thing you did on your row was. If you just slip 2 wyif, k1 you just completed row 1. If you just knit 3 stitches you you just finished row 3. If you just Purled 2 stitches you are on either rows 2 or 4. If you are on row 2 or 4 you will need to go back to see what you did at the beginning of your row to identify if you just knit row 2 or 4. As long as you know where you need to be within this 4 row sequence you will not disrupt your established pattern and can measure to try and deduce how many sets of four you have completed.
I hope this helps and good luck!
-Marilla
Hi,
I’m knitting this hat for the first time- for a child. I am casting on for the 19″ circumference, but wondering perhaps if I can make an adjustment so it’s not quite as tall- to make it as tall as the Kid size.
Is it possible to easily make this adjustment, or not?
Just to clarify- the head is 21″ circumference, so thinking the Adult Small would fit better than the Kid size. Now I am seeing how the hat is constructed.
Is there a way to have the circumference of the Adult Small size but the height of the Kid size?
Perhaps I am best off casting on for the Kid size, but following the repeats for the Adult Small size?
Hi Natalie,
Thanks for writing in again. For a 21″ head I would recommend casting on for the Adult Small to make sure that hat is not too tight and fits comfortably. Then in order for it to not be as tall follow the repeats for the sections CONTINUE EVENLY (STITCH PATTERN SLANTS LEFT) and CONTINUE EVENLY (STITCH PATTERN SLANTS RIGHT) follow the repeat number for the Kid size. Once you finish both of these sections then continue to follow the instructions for the Adult Small size to make sure you work the crown shaping accurately for the number of stitches you have.
All the best,
Gianna
Hello!
Do you think I could use a C-aran/worsted yarn which is 65% wool and 35% alpaca for this pattern?
Hi Greca,
Thanks for reaching out! I would hesitate to use an aran/worsted weight yarn for this pattern, since it was originally designed for a sportweight yarn. You would most likely have to do a lot of modifications to make it work with the heavier yarn! Alternatively, you could try using the aran/worsted yarn, and just knit one of the smaller sizes, since it will turn out larger than intended. Hope this helps!
All the best,
Lili
I’m actually knitting that lovely pattern but I don’t see any M1R.
Am I right?
Thank you for answering.
Sylvie
Hi Sylvie,
Thanks for letting us know about this! You’re correct, there is no m1R used in this pattern. We’ll go ahead and update this pattern page to remove that reference!
All the best,
Lili
Thank you so much, Lili, for answering. I’m so glad to hear it! I’m almost done and it looks beautiful. I was afraid, though, I had done something wrong!
Thank’s again!
Sylvie