Pure + Simple Wool Blankets
As much as I’m game for a sewing room challenge, sometimes it’s nice to just keep things easy. For these Pure + Simple Wool Blankets I put the fancy seams and complicated piecing aside and allowed the pure beauty of the materials do all the work!

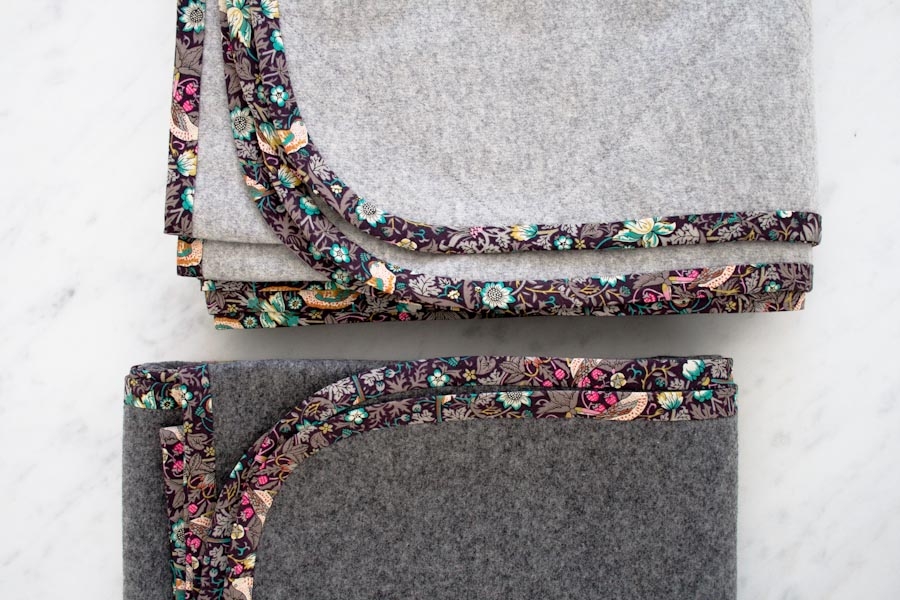
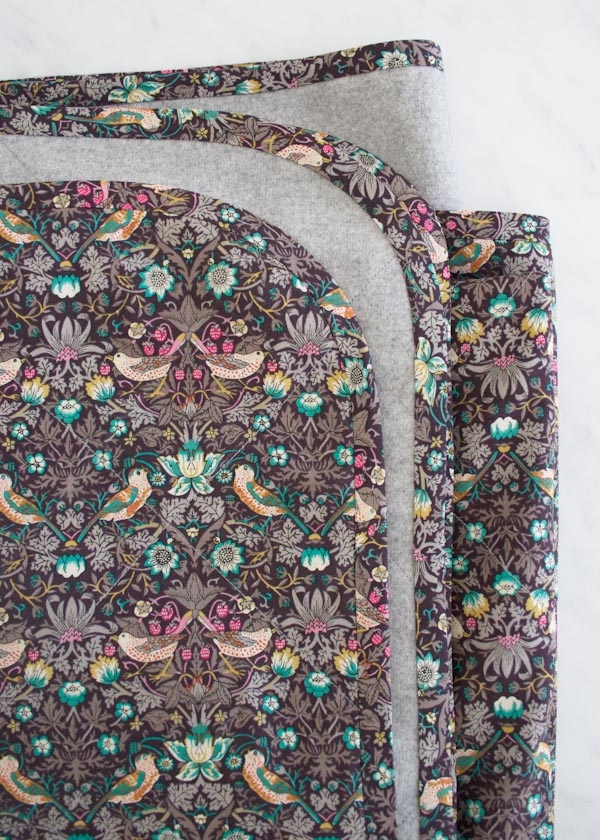
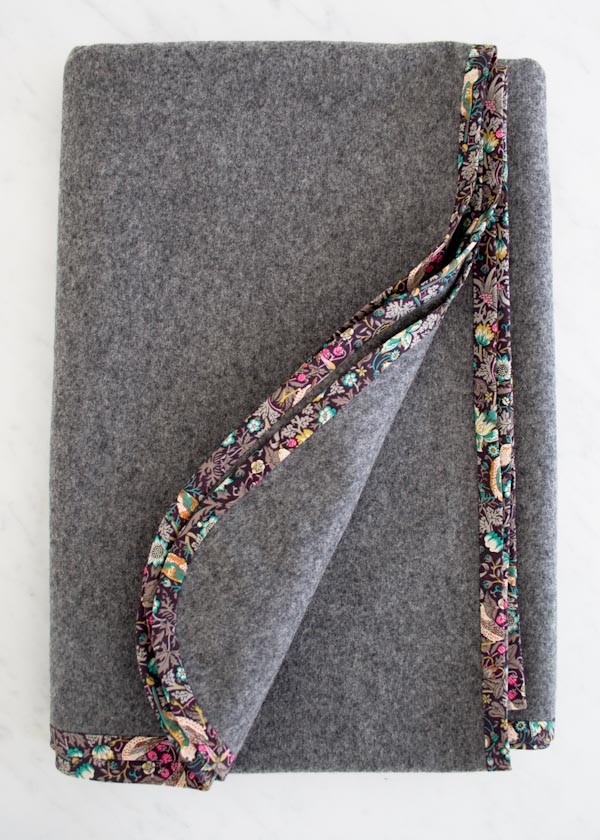
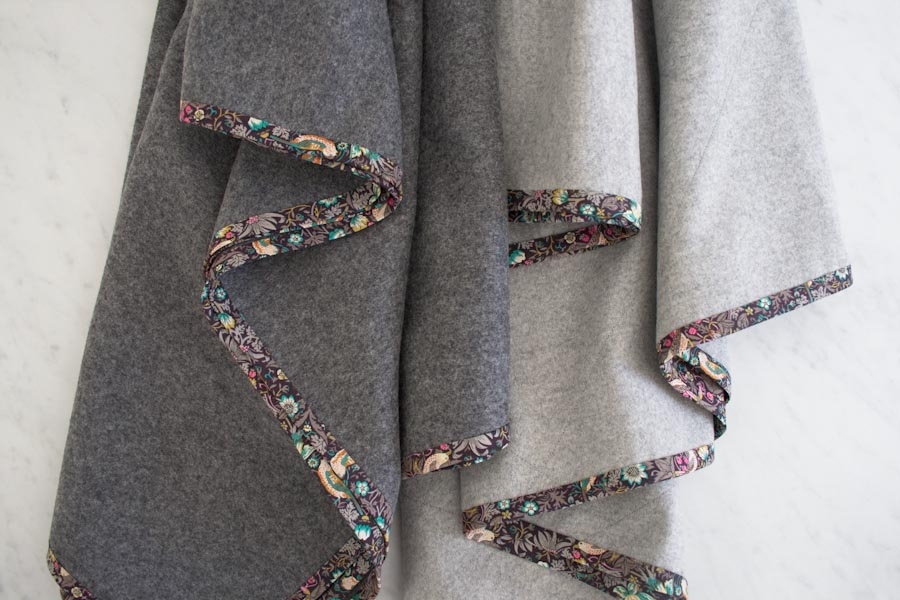
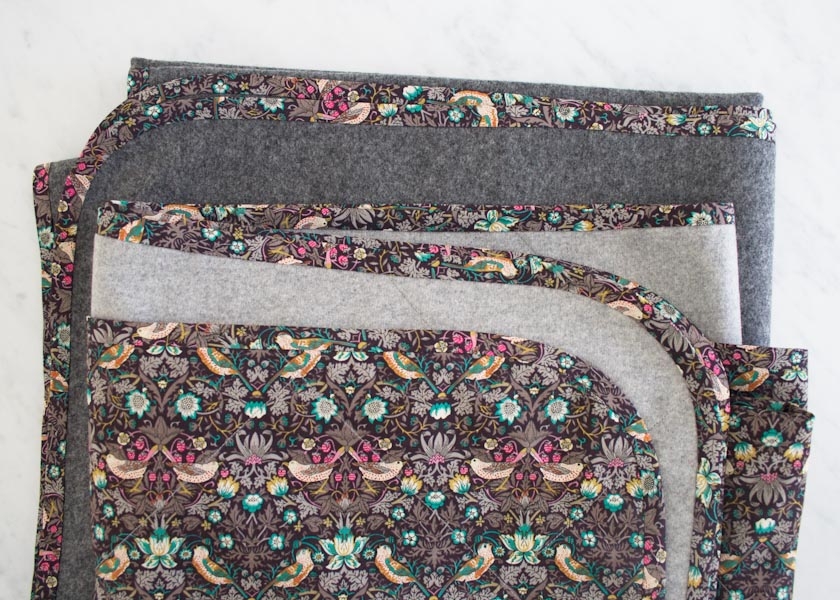
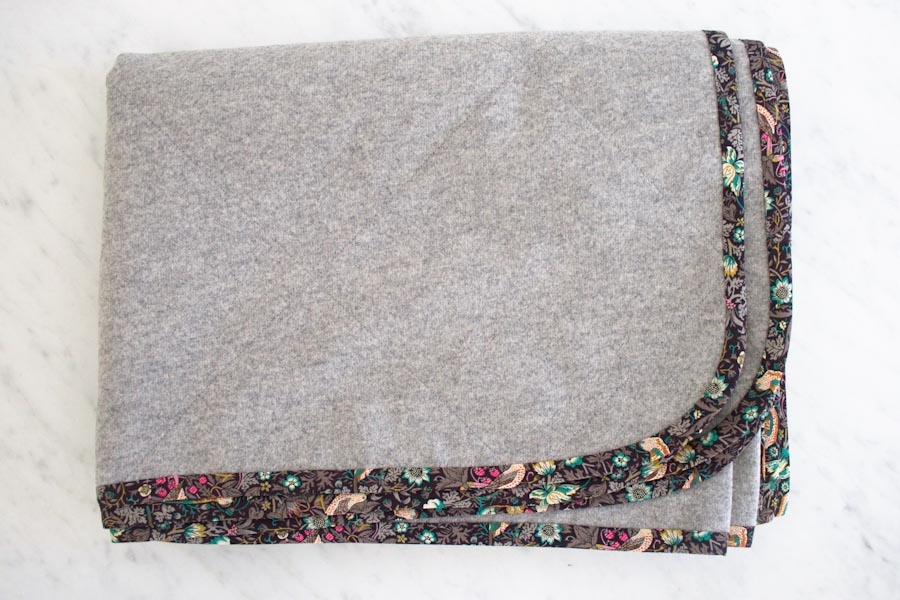
The Single Layer Blanket is one continuous piece of Lanecardate’s sumptuous Lana Cotta Canberra felted wool, while the Double Layer Blanket combines the same gorgeous wool with Liberty of London’s incomparable Tana Lawn in a straightforward stack-and-sew construction. I edged both versions with Purl Soho’s Liberty Bias Tape, a much-welcome recent addition to our company sewing basket!.

Unadulterated and pared-down, both Blankets celebrate the beauty of their fine materials, pure and simple. –Corinne

Materials
Single Layer Blanket

- 1 ¾ yard Lanecardate’s Lana Cotta Canberra. We used Grigio 3 (Medium Gray).
- Two 5-yard packages of Purl Soho’s Liberty Bias Tape. We used Strawberry Thief, Brown.
- A 110-yard spool of Gutermann’s 100% Cotton Thread. We used color 9430.
- A Pure + Simple Blanket Template available as a free PDF download
Double Layer Blanket

- Fabric A: 1 ¾ yard Lanecardate’s Lana Cotta Canberra. We used Grigio 0 (Light Gray).
- Fabric B: 1 ¾ yard Liberty of London’s Tana Lawn. We used Strawberry Thief, Brown.
- Two 5-yard packages of Purl Soho’s Liberty Bias Tape. We used Strawberry Thief, Brown.
- Two 110-yard spools of Gutermann’s 100% cotton thread. We used color 9240.
- A Pure + Simple Wool Blanket Template available as a free PDF download
NOTE: Although you need two bundles of Liberty Bias Tape for one blanket, three bundles are enough for both blankets.
Recommended tools . . .
- A rotary cutter
- A non-slip quilting ruler
- A self-healing cutting mat
- Masking tape
- Your preferred fabric-marking tool. I used Fons and Porter’s Chalk Pencils.
- Curved safety pins
- A walking foot for your sewing machine
Size
Finished Dimensions:
- Single Layer Blanket: 55 by 60 inches
- Double Layer Blanket: 53 by 60 inches
Note
The recommended care of Lanecardate’s Lana Cotta Canberra is dry clean only.
Patterns
Single Layer Blanket
Cut
NOTE: If you’re new to rotary cutting, please check out our Rotary Cutting Tutorial before you start.
Using the rotary cutter with the quilting ruler on a self-healing cutting mat, square up the fabric on both cut sides. The finished piece should measure approximately 55 by 60 inches.
Trim the Corners

Lay one corner of the fabric out flat. Place the Template on top of the fabric piece as close to the corner as you can while keeping the straight edges of the Template flush with the cut sides of the fabric. Cut the fabric around the curve of the Template.
Repeat with the remaining 3 corners.
Prepare the Bias Tape
Each package of Liberty Bias Tape comes with 5 yards of prepared single-fold bias tape. Since you will need approximately 6 ½ yards to go all the way around the Blanket, you must sew the bias tape from the two packages together before you start. To learn how to piece bias tape, please visit our Making Bias Tape Binding Tutorial.
Attach the Bias Tape Binding
Bind the Blanket’s edges with the prepared bias tape.
For detailed instructions on how to bind a blanket with bias tape binding, please refer to our Sewing on Single Fold Binding tutorial. Keep in mind that because this Blanket does not have right corners, you will not need to miter the corners. Instead, simply follow the curve of the corner with the binding, making sure not to stretch the bias tape as you sew.
Double Layer Blanket
Cut Fabric B
NOTE: If you’re new to rotary cutting, please check out our Rotary Cutting Tutorial before you start.
Using the rotary cutter with the quilting ruler on a self-healing cutting mat, square up Fabric B on both cut sides.
Mark
Press the Fabric B piece and then, with the right side facing up, lay it down on a clean, hard surface, like the kitchen floor.
Using masking tape, tape the fabric down to the floor around all four sides, pulling it taut as you tape. First tack down the centers of the opposite sides and then tape along each side from the center out.
You will now mark the fabric piece with a 6-inch grid, oriented on the diagonal. Here’s how . . .

Using a long ruler so that your lines are very straight and starting in one corner, use the fabric marker to mark a short line (shown above in bold) that runs at a 45-degree angle from the straight edges of the fabric piece
Now, mark a line 6 inches above and parallel to that line. Then mark a line 6 inches above and parallel to this line. Repeat until you reach the opposite corner and the diagonal lines run every 6 inches across the entirety of the fabric.

Now, draw a line perpendicular to any previously drawn line.
Draw lines parallel to this line at 6-inch intervals.
The fabric is now marked with a 6-inch grid oriented diagonally on the fabric.
Baste
Remove the tape around the perimeter of Fabric B and carefully set the fabric aside.
Now, press Fabric A, and with the wrong side facing up, lay it down flat and use the masking tape to tape it down as you did with Fabric B, pulling it taut without stretching it.
With wrong sides together, lay Fabric B on top of Fabric A. In this case, the Lana Cotta (Fabric A) is slightly wider than the Liberty (Fabric B), and because you have not yet trimmed Fabric A, it is also slightly longer than Fabric B.
Center Fabric B so that Fabric A sticks out on all sides and the selvages of the two fabrics run parallel to each other.
Pin-baste the two fabrics together with curved arm safety pins. Place the first pin at the center of the Blanket, making sure to pick up both layers. Then, pin outward in concentric circles 3 to 5 inches apart, making sure to avoid pinning on the marked lines. Pin all the way to the corners and edges.
Remove the masking tape from Fabric A.
Quilt
You will now quilt the two pieces together along the marked lines, first sewing all the lines slanting in one direction and then the lines slanting in the other direction. Use your machine’s walking foot to do all of the sewing.

Starting with a line that runs through the center of the blanket (or close to it), sew along this line from one edge of the fabric to the other.
To sew the next line, rotate the Blanket 180 degrees and sew along the line running next to the line you just stitched.
Continue to sew along the remaining parallel lines in this same manner: When you have finished sewing one line, rotate the Blanket and sew along the line next to it.
Sew all of the parallel lines on one side of the center line and then sew all of the lines on the other side of the center line in the same manner.

Next, quilt all of the diagonal lines slanting in the other direction in the same manner: Start sewing with the center line and alternate directions as you sew along all parallel lines running to the right and left of this center line.
Trim off all the threads and remove the safety pins.
Spray water all over the Blanket to erase the marked lines.
Trim Fabric A
Using the cut lines and selvages of Fabric B as a guide, trim Fabric A along all four sides so that it is the same size as Fabric B.
Finish
Repeat the steps for the Single Layer Blanket, from the Trim the Corners section to the end.


absolutely beautiful! I can hardly wait to find the wool and order some of your beautiful bias tape. The colors go with any décor and it is so inviting to wrap up in while you read a good book or enjoy just relaxing.
Beyond beautiful! I’ve got quite a stash of Liberty fat quarters and I’ve been waiting for the right project and this is it. Luxury at its finest and I don’t plan on sharing this quilt with anyone. Thank you for the wonderful pattern. Happy Valentines Day from Nashville!!
I think that this would also make beautiful scarves.
These look beautiful. But I can’t imagine spending over $90 a yard for the wool. Do you have any recommendations for something a little price friendly? I spent enough already on the liberty!
Hi Chelsie –
Thank you for writing in! The Dorr Mill Wool yardage could be a nice alternative. It is a woven wool with thicker fibers so it has a bit more “fluff” to it than the sleek Lana Cotta, but is still soft and cozy. It is available in two colors (Natural and Oatmeal) and you can find it on the Purl Soho site here:
https://www.purlsoho.com/purl/products/item/9278-Dorr-Mill-Wool-Yardage
And, you can see it paired with Liberty on our Liberty and Wool Lap Duvets here:
https://www.purlsoho.com/create/2012/12/13/mollys-sketchbook-liberty-and-wool-lap-duvets/
Another alternative would be Robert Kaufman’s Shetland Flannel. This fabric is thinner than the Lana Cotta, but is incredibly soft and comes in a beautiful range of colors.
https://www.purlsoho.com/purl/products/item/9570-Robert-Kaufman-Shetland-Flannel
With whichever alternative you chose, please note that the finished dimensions of the Blanket will change according to the width of the fabric.
I hope this helps!
-Corinne
Another cheaper alternative is to buy a used wool blanket and re-purpose.
Hello, GoNatural!
Thank yuo so much for your wonderful suggestion! Happy stitching!
Best wishes,
Kumeko
Love the idea of the blanket with cotton on one side and wool on the other. Just wondered about using the walking foot for only two layers. I used this same quilting design to make a table cloth from a quilt top and backing, with no inner layer. In other words, two layers of 100% cotton fabric using the walking foot and ended up with slight gathers along the diagonal seam lines. Since the wool is heavier fabric, does that make a difference? In the first place, the sewing machine is designed to sew two layers together without fabric shifting. The walking foot for me works great when there are three layers or to sew on bindings, with lots of layers. So I wanted to know before I try this, after the last problem I had.
Hi Barbara –
Thank you for writing in! This is a great question.
You are correct, for most projects involving only two fabrics a walking foot would not be necessary. However, because the two fabrics used in this project are of such different weights, I found that the walking foot was a huge help to keep the fabrics running through my machine at an even pace.
I hope this helps!
-Corinne
Thank you, that helps a lot!
I made the double layer version using the Dorr Mill wool yardage. Absolutely gorgeous and my husband loved it (his Christmas gift). Then so sadly, my housekeeper washed it! The wool is a bit shrunken now, so the Liberty is loose between the stitching. Any hope of stretching out the wool somehow? Or should I resign myself to a somewhat ruined blanket?
Ashley –
It sounds like your blanket was beautiful! I have lost so many things to the washing machine too, I know how frustrating it is!
I suggest steaming the blanket with a steamer or the steam setting on your iron. The hot steam will loosen the fibers of both fabrics and will give you some room to manipulate them back into shape. I can’t promise this will work, but it’s worth a try!
Good luck!
-Corinne
Simple and beautiful! Any ideas for a summer version? I was thinking of using a chambray or maybe a linen fabric and thin quilt batting instead of the wool. Would appreciate any suggestions for a specific fabric. Thank you! Christine
Hi Christine,
Great question! I love your idea! You could certainly use a lighter fabric on each side and use the lightest weight batting available. I think that it would be lovely with Liberty of London on one side and Cambridge Lawn on the other. Both are light and smooth and would work great for a summer version of this blanket!
I hope that this helps and happy sewing!
Cassy
I really wanted to make this blanket as a gift and was curious how it would hold up if the person I made it for wound up throwing it in the wash. I purchased two yards of the fabric and machine washed it in cold water on the delicate cycle using Laundress wool soap, then air dried it.
Size before washing: 72” long by 57” wide. Size after washing: 63” long by 53” wide. On the upside it was super soft and smelled so nice!
Curious if it would shrink more, I washed it again (again on cold, delicate cycle, and air dried). Size after second wash: 59” long by 51” wide.
The amount of shrinkage (especially after the second wash) was a little scary, but I bias-bound the edges and it’s beautiful! So beautiful that I’m ordering more fabric and bias-tape to make more of these as gifts. I am also including a note with them suggesting they dry clean them to avoid shrinkage 🙂
Hi Nora,
Thanks for writing in! That is quite a lot of shrinkage! The suggested care directions for the Lana Cotta are Dry Clean only and we have not tested how it holds up under washing. Thank you for sharing your experience! I do think that it will be helpful to others as well as to us!
Best,
Cassy
Thank you for this wonderful idea & tutorial! I have the perfect blanket for this!
Hi,
Since I’m substituting Dorr Mill wool for the Lana Cotta, do I need to felt the Dorr Mill first by washing it in hot and rinsing in cold, like the wool lap duvet’s instructions?
Hi Julie,
Thanks for reaching out! This is an optional step, but it does make the Dorr Mill wool turn out softer and fluffier! If you decide to felt the wool yardage, I would suggest getting an extra 1/4 yard to account for shrinkage.
Best,
Julianna
How wide is the bias tape? It is no longer in stock to check. Can you tell us how much extra yardage of liberty to buy if we need to make the bias tape ourselves? Thanks
Hi Jennifer!
Thank you for your question. The width of the bias tape fabric should be twice as wide as you’d like the finished bias border to be, so the specific width will depend on your desired dimensions and the size needed for your bias tape maker (if you are using one). For most projects, cutting 2″ wide strips is usually a good starting point, for a 1″ wide bias border! For this project, you will need approximately 6.5 yards of bias tape to cover the perimeter of the blanket, so I suggest having an extra half yard for making your own 1″ bias tape (using 2″ strips)!
I hope this helps, and happy sewing!
All the best,
Margaret