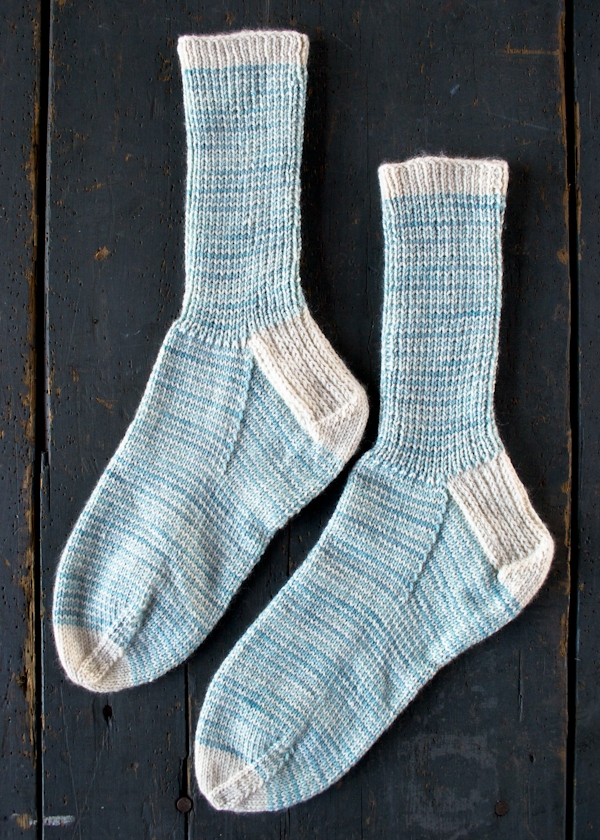

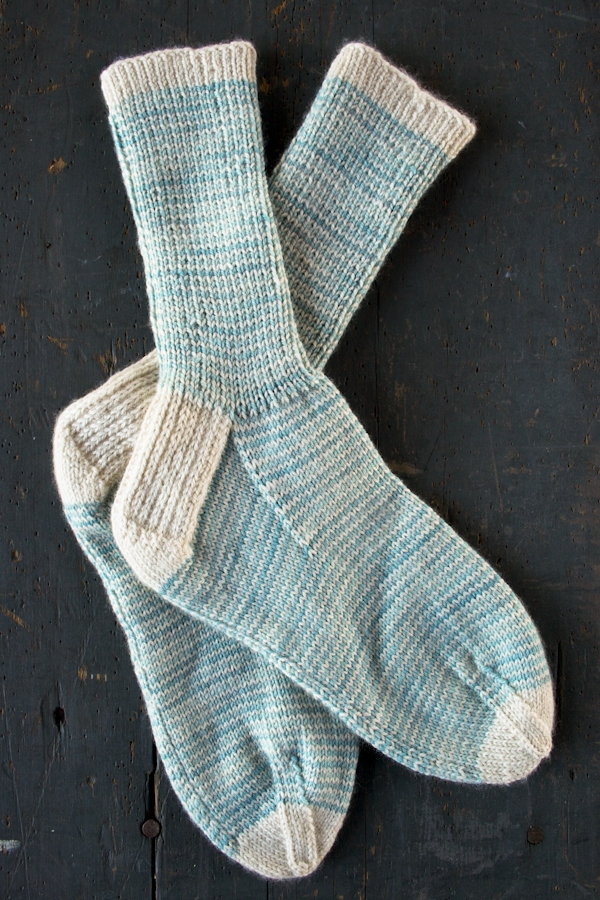
Striped Crew Socks

I live with a five year old boy, and if you know anyone like that, you’ve probably noticed how much he likes to chat about dirty socks (and stinky cheese and slimy worms); and so it comes as a welcome respite for me to knit up something that is on the opposite end of that conversational spectrum. These Striped Crew Socks have such an incredibly nice, fresh feeling that all icky talk seems miles away.
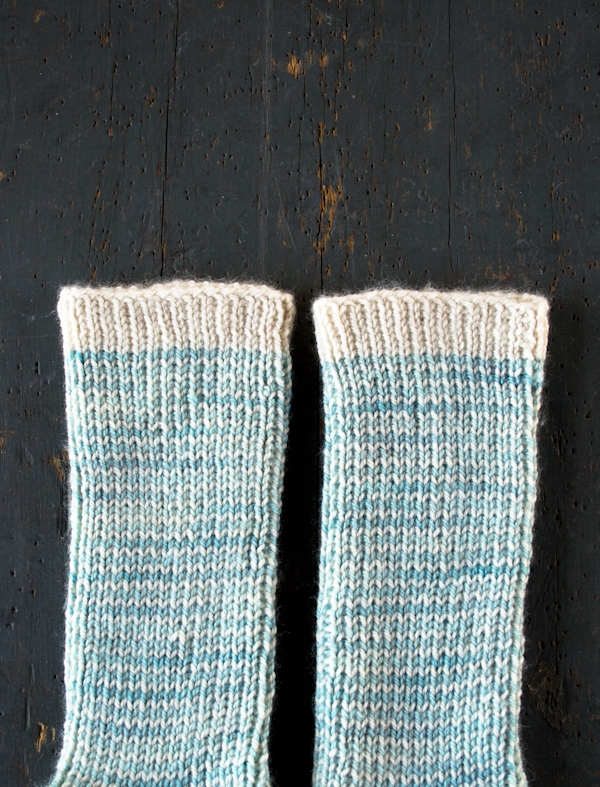
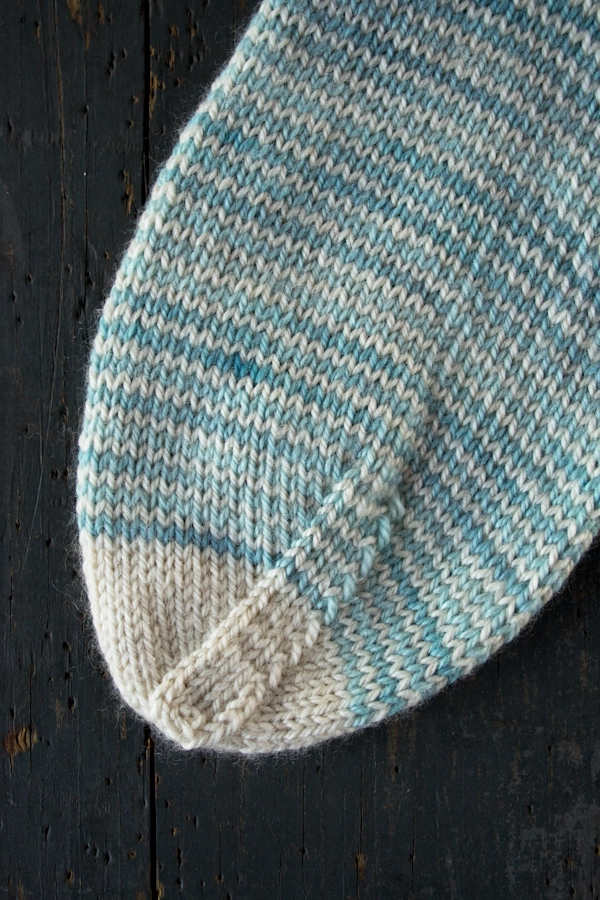
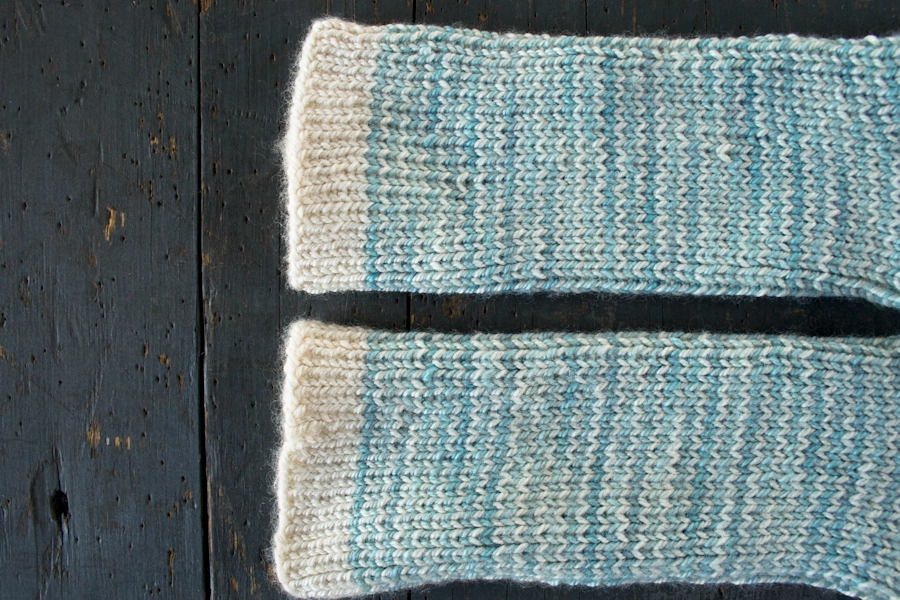
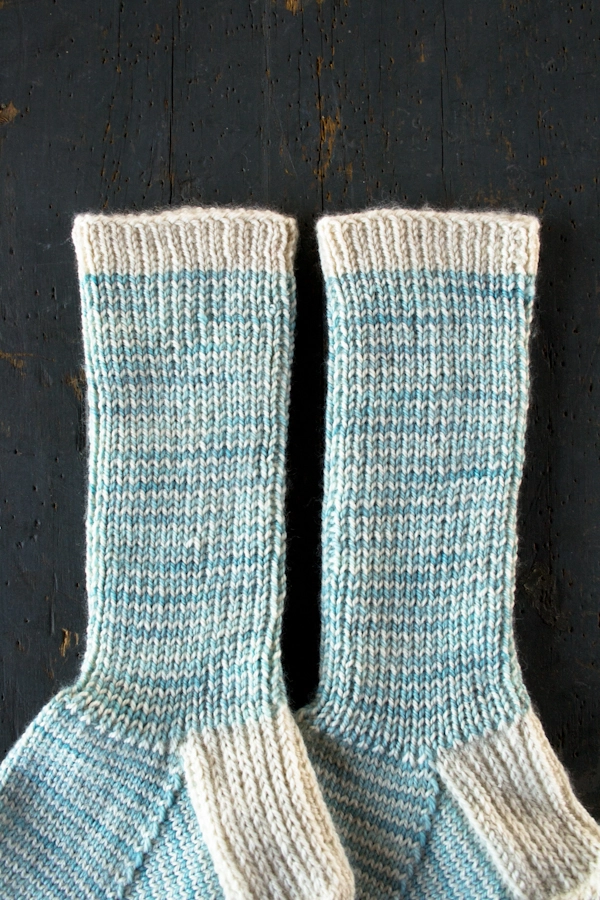
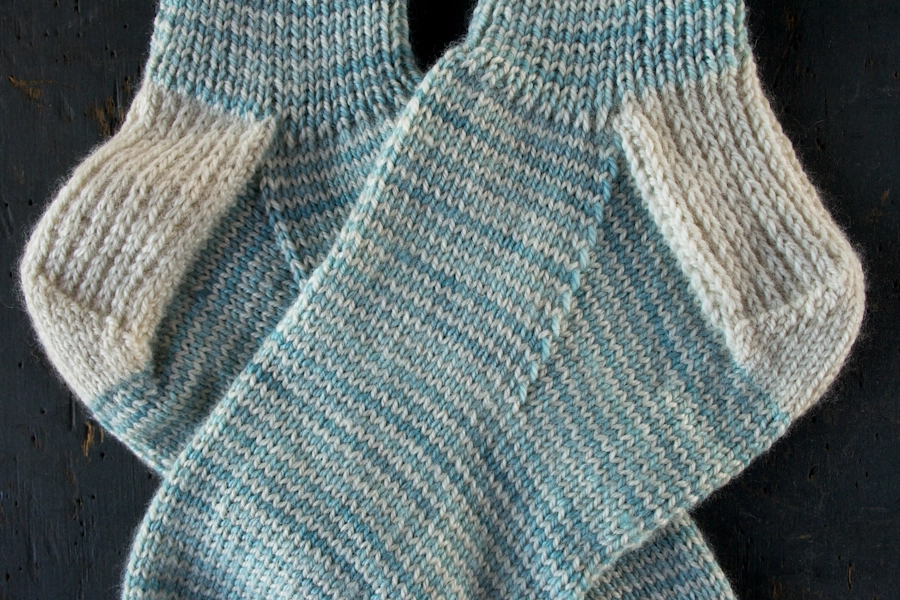
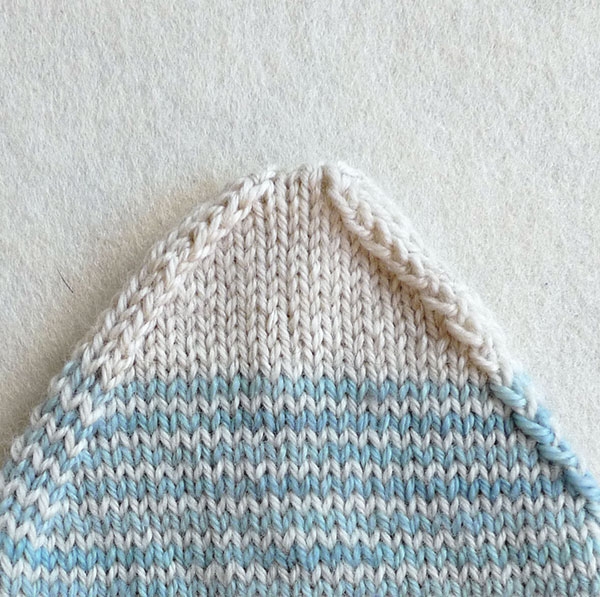
A simple one-round stripe takes on a little complexity when a 1 x 1 rib moves into stockinette stitch. I love how the shift from one to the other feels like an optical illusion and, on top of that, how the different stitch patterns serve a practical function: ribbing for anti-gravitational hold on the leg and stockinette for smooth comfort on the foot.
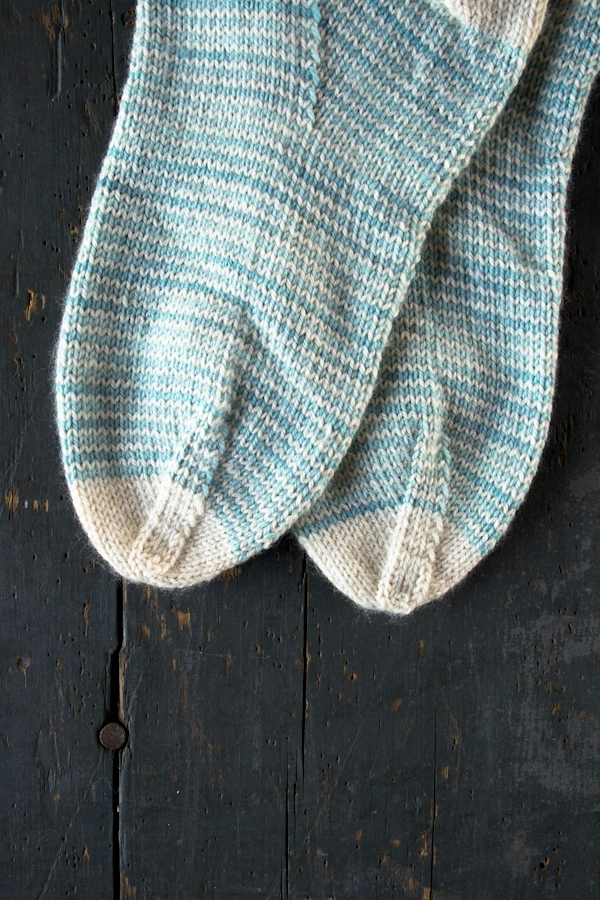
One of our favorite sock yarns at Purl Soho is definitely Anzula’s Squishy. It’s amazingly soft (thank you, cashmere), wonderfully springy (thank you, merino) and totally durable (thank you, nylon). It’s also hand dyed in unbelievably beautiful colors that feel plucked from nature herself. The Nimbus blue I used here (paired with Au Natural ecru) gives the effect of rippling cool water or windswept skies, just right for a brand new pair of spring socks!
I do love my son’s boyish pleasure in the disgusting and the creepy, but I have to admit, I love the quiet elegance of these socks at least as much! – Whitney
Update: New Yarn
November 12, 2018
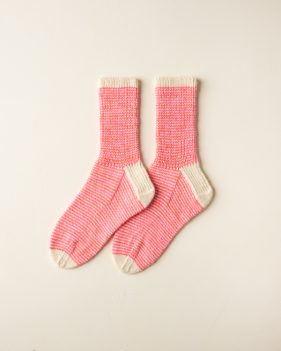
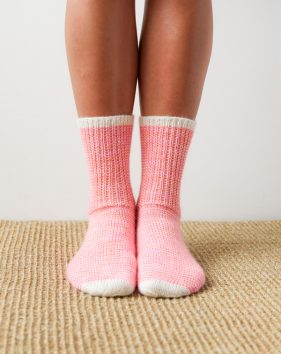
Like a sweet bouquet of colorful flowers, our Striped Crew Socks In Pocket Posy are a lovely pick-me-up during the gray days of winter. To make these beauties, we’ve reprised our classic (and free!) top-down sock pattern, but in Purl Soho’s sweet Pocket Posy, a blend of 75 percent superwash merino, 15 percent cashmere, and 10 percent nylon, which creates a soft, machine washable, and durable fabric. Perfect for socks!
Designed by Purl Soho designer, Whitney Van Nes.
Share your progress and connect with the community by tagging your pics with #PurlSoho, #PurlSohoBusyHands, and #PurlSohoPixleStitchSocks. We can’t wait to see what you make!
Materials
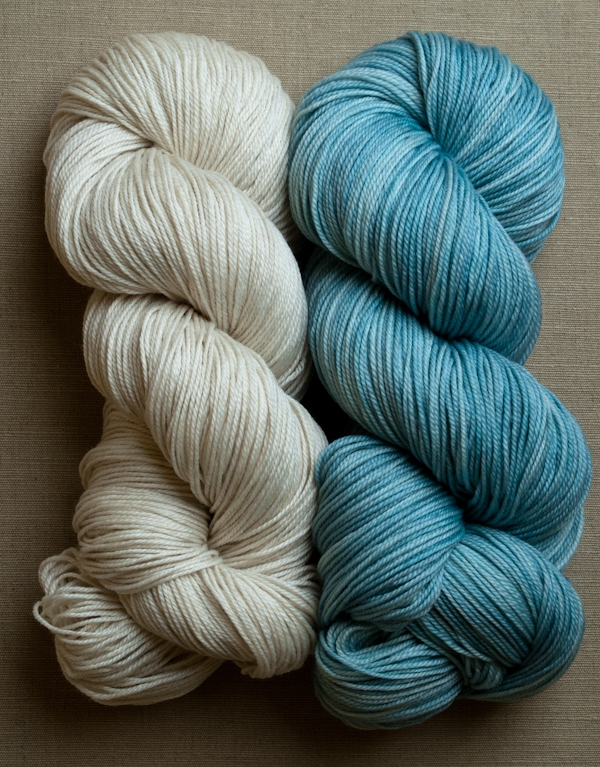
- Contrast Color 1 (CC1): 1 skein of Anzula’s Squishy, 80% superwash merino, 10% cashmere and 10% nylon; approximately 150 yards required. We used the color Au Natural.
- Contrast Color 2 (CC2): 1 skein of Squishy; approximately 138 yards required. We used the color Nimbus. NOTE: This color has been discontinued, but Seabreeze is a very nice alternative!
- A set of US 2 (3 mm) double pointed needles
Gauge
33 stitches = 4 inches in stockinette stitch
Size
To fit most women
Finished Circumference: 7 3/4 inches with adjustable leg height and foot length
Note
For tips on working stripes in the round please visit our Stripes in the Round Tutorial right here.
Pattern
Leg
With Contrast Color 1 (CC1), cast 64 stitches on to three double pointed needles. We used a basic Long Tail Cast On.
Place a marker and join for working in the round, being careful to not twist the stitches.
NOTE: When I work a 1 x1 rib in the round I have a hard time avoiding a loose column of stitches at the end of each needle. If you’re like me, then you might want to rotate the stitches every four or five rounds by slipping two stitches off the end of each needle onto the beginning of the next needle. If you choose to do this, make sure you do use a stitch marker to keep track of the end of the round.
Round 1: *K1, p1, repeat from * to end of round.
Repeat Round 1 six more times.
Next Round: With Contrast Color 2 (CC2), repeat Round 1.
Next Round: With CC1, repeat Round 1.
Repeat last 2 rounds until piece measures 6 1/2 inches from cast on edge, ending with a CC1 round.
NOTE: There is enough leftover yarn to make the Leg at least several inches longer if you’d like.
Cut CC2 and remove the end-of-the-round stitch marker (if you used one).
Heel Flap
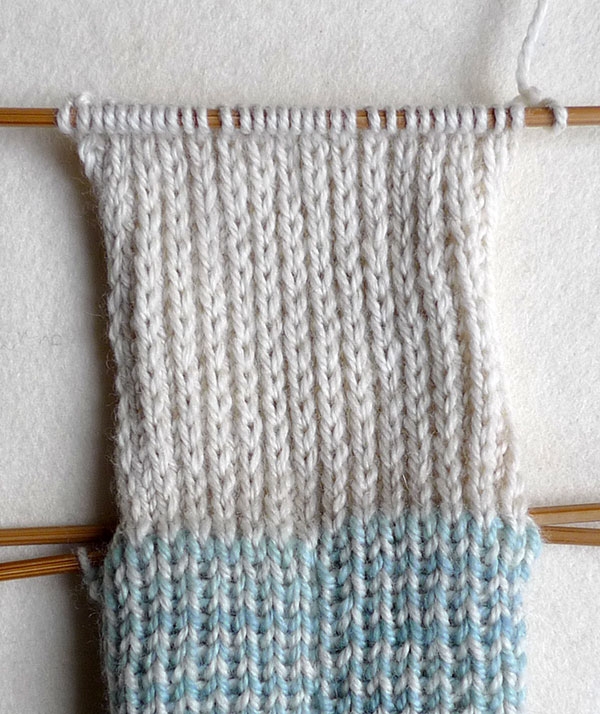
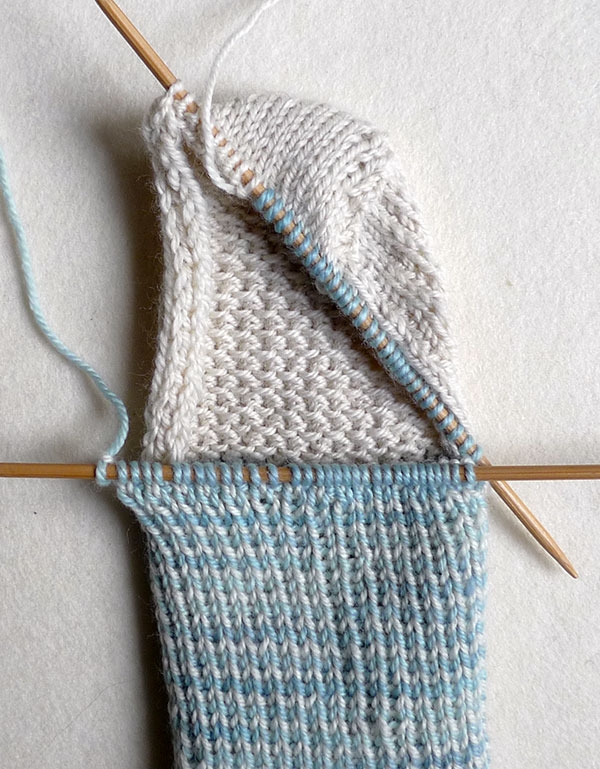
Set-Up Row 1: With CC1, [slip 1 purlwise with yarn in back (wyib), k1] 8 times. Turn the work so the wrong side is facing you.
Set-Up Row 2: Slip 1 purlwise with yarn in front (wyif), p31.
These 32 stitches are the beginning of the Heel Flap. For this section, you will work back and forth on just these 32 stitches. Arrange the stitches so that the 32 Heel Flap stitches are on one needle and the remaining stitches are on hold on two needles [16 stitches each].
(Again, work the following rows back and forth, turning the work between each row.)
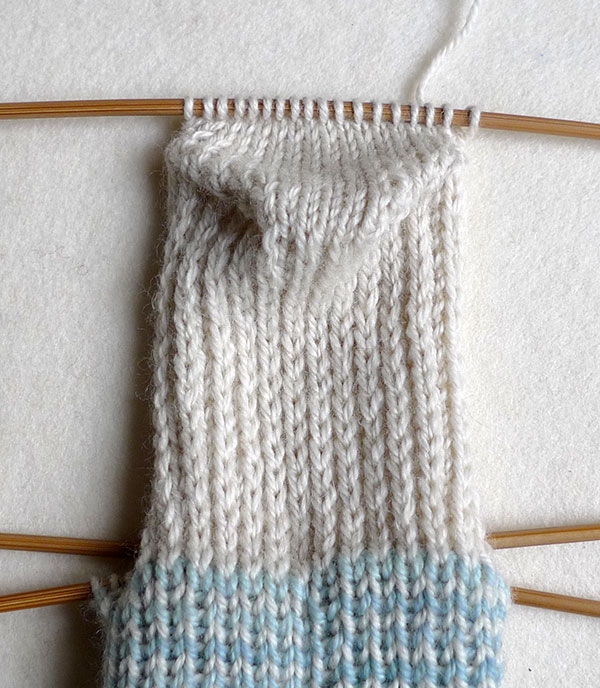
Row 1 (right side): *Slip 1 purlwise wyib, k1, repeat from * to end of 32 stitches.
Row 2 (wrong side): Slip 1 purlwise wyif, p31.
Repeat Rows 1 and 2 sixteen more times.
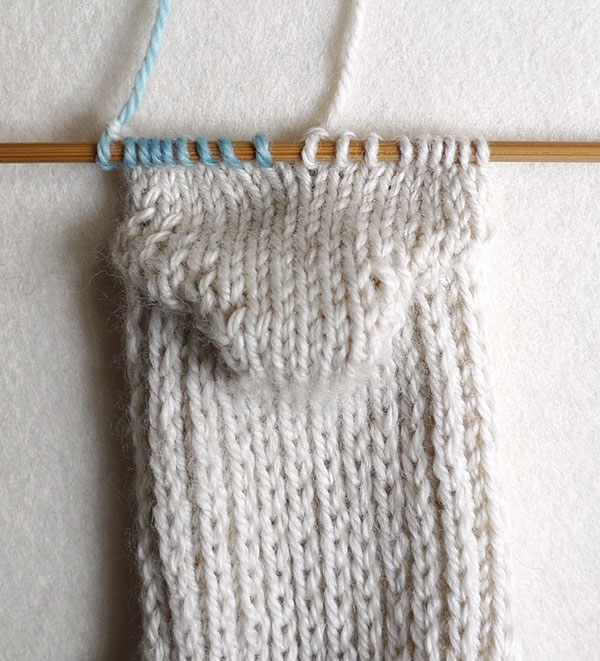
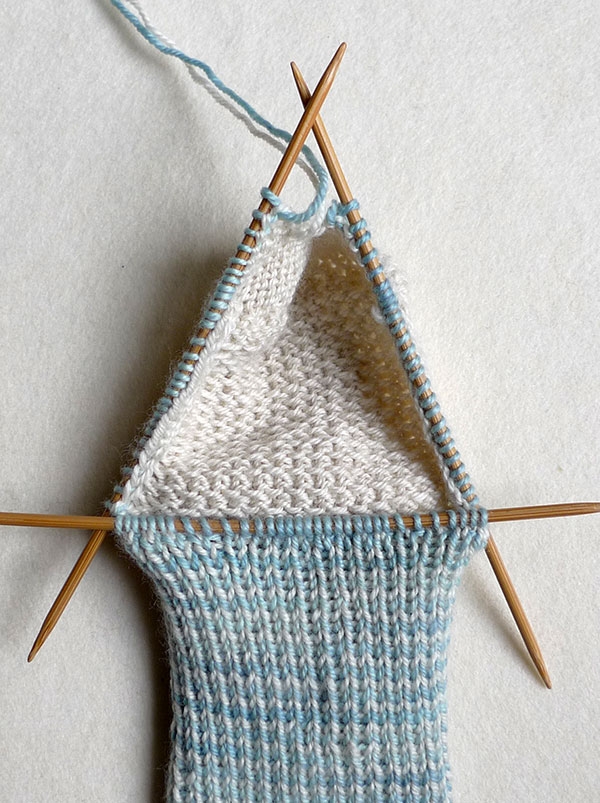
Turn the Heel
Still just working the Heel Flap stitches with CC1…
Row 1 (right side): K18, Slip Slip Knit (ssk), k1, turn the work so the wrong side is facing you and there are 20 stitches on the left needle and 11 stitches on the right needle.
Row 2 (wrong side): Slip 1 purlwise, p5, Purl 2 Together (p2tog), p1, turn the work. [19 stitches on the left needle and 11 stitches on the right needle]
Row 3: Slip 1 purlwise, knit to 1 stitch before the gap, ssk (with the stitch before the gap and the stitch after the gap), k1, turn.
Row 4: Slip 1 purlwise, purl to 1 stitch before the gap, p2tog, p1, turn.
Repeat Rows 3 and 4 until all the heel stitches have been worked. (For the last repeat, you will end Row 3 with ssk and Row 4 with p2tog.) You now have 18 Heel stitches.
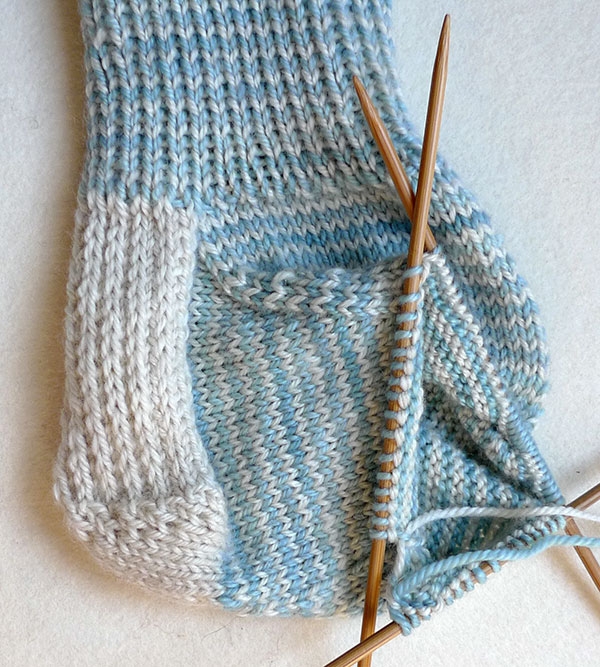
Gusset
With the right side facing you and with CC1, k9 Heel stitches.
Join CC2 and with the same needle (now called “Needle #1”), knit the 9 remaining Heel stitches.
With CC2 and Needle #1, pick up 19 stitches along the Heel Flap. [37 stitches on Needle #1]
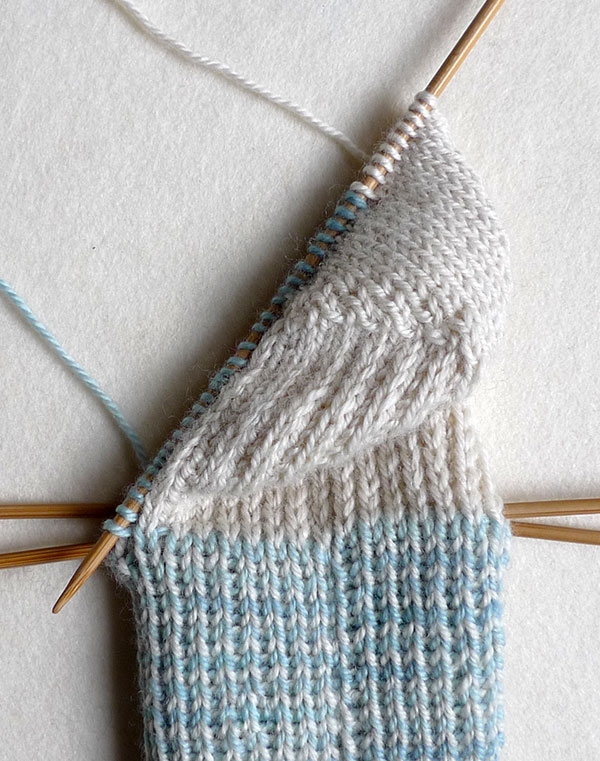
With CC2 and a new needle (Needle #2), knit across the 32 stitches that have been on hold.
With CC2 and a new needle (Needle #3), pick up 19 stitches along the other side of the Heel Flap.
Still with CC2 and Needle #3, knit 9 stitches from Needle #1.
Now there are 88 total stitches [28 stitches on Needle #1, 32 stitches on Needle #2, and 28 stitches on Needle #3]. The beginning of Needle #1 is the beginning of the round (at the middle of the Heel).
From now on, you will again be working in the round with the right side of the work facing you.
Round 1: With CC1, Needle #1: knit to last 3 stitches, k2tog, k1; Needle #2: knit all the stitches; Needle #3: k1, ssk, knit to end. [2 stitches decreased]
Round 2: With CC2, knit.
Repeat Rounds 1 and 2 until 64 total stitches remain [16 stitches on Needle #1, 32 stitches on Needle #2, and 16 stitches on Needle #3].
Foot
NOTE: Throughout this section, maintain the stitch counts on each needle as they were at the end of the Gusset section. This will ensure that the Toe is properly placed.
Knit evenly with alternating rounds of CC1 and CC2 until the piece measures 2 inches less than the desired final length, measuring from the back edge of the Heel. Finish with a CC2 round.
Here’s a guideline for final sock lengths:
US size 6 shoe (European 37) = 9 inches
US size 7 shoe (38) = 9 1/4 inches
US size 8 shoe (39) = 9 5/8 inches
US size 9 shoe (40) = 10 inches
For example, these socks are for a size 7 1/2 shoe, so I knit the foot until it measures 7 1/2 inches (9 1/2 inches minus 2 inches).
Toe
Round 1: With CC1, Needle #1: knit to last 3 stitches, k2tog, k1; Needle #2: K1, ssk, knit to last 3 stitches, k2tog, k1; Needle #3: k1, ssk, knit to end. [4 stitches decreased]
Round 2: With CC2, knit.
Repeat Rounds 1 and 2 until 48 total stitches remain [12 stitches on Needle #1; 24 stitches on Needle #2; 12 stitches on Needle #3].
Cut CC2.
With CC1, repeat Rounds 1 and 2 until 32 total stitches remain [8 stitches on Needle #1; 16 stitches on Needle #2; 8 stitches on Needle #3].
Still with CC1, repeat just Round 1 until 12 total stitches remain [3 stitches on Needle #1; 6 stitches on Needle #2; 3 stitches on Needle #3].
With Needle #3, knit the 3 stitches from Needle #1 so that there are now 6 stitches on each of two needles.
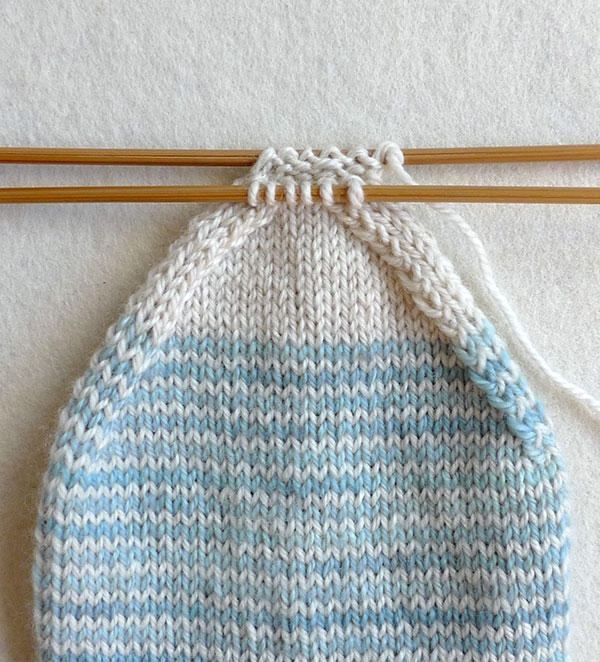
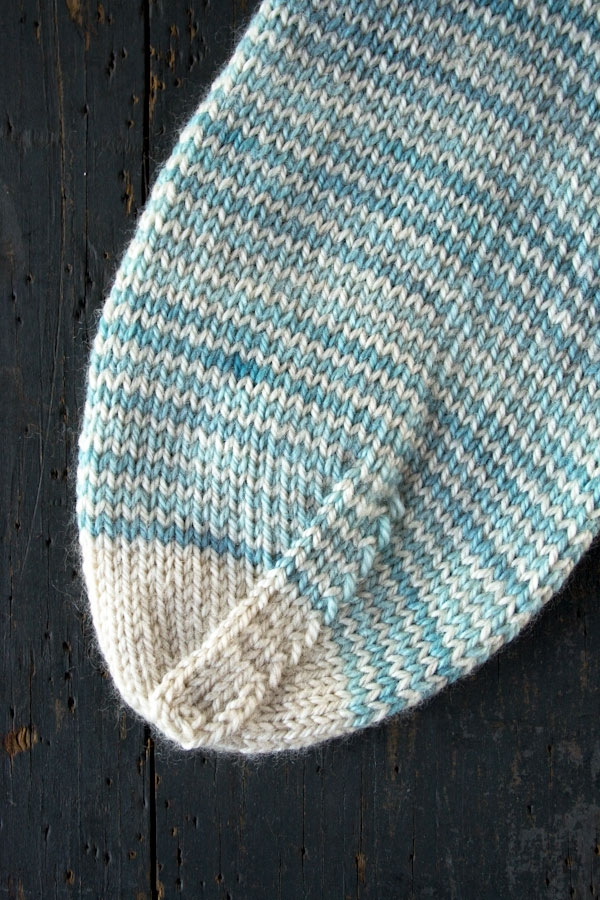
Cut a 16-inch tail and thread it onto a tapestry needle. Use the Kitchener Stitch to close the toe.
Weave in all the ends, then get started on your second sock! Block both socks when you’re finished.


Very pretty socks! I am tempted to end my yarn-buying moratorium to try that yarn…sounds lovely!
For sock-knitting in general, I find that putting a sock on four needles and knitting with a fifth eliminates any looseness or laddering issues.
if I choose to finish with a "star" toe instead, do I still need to stop at two inches before the final foot length, or sooner? Thanks!
Hi Catherine,
This toe is worked over 21 rounds, so if you can count up how many rounds your star toe shaping will require, that would give us a good idea of how soon to stop your foot!
If you need more help figuring this out, please let us know your exact toe plan and we'll work it out for you.
Thanks so much for your question and good luck!
Whitney
Such a nice basic sock pattern… & so well explained.
Really love the detailed description and photos.
Thank you so much for putting in so much time and effort!
ps – would love to see a toe-up sock pattern : )
Yes, toe up on two needles is what I do. No ladders and no confusion.
Love the soft colours used in these socks. I’m using Anzula Squishy for the first time to make a shawl – lovely stuff. I think I will have to add these socks to the “to do” list.
Do you have a toe up pattern for socks.
Thank you
Hi Jill,
Thank you for the comment! Here is a cable sock pattern we have that is toe up. If you don’t like the cable you can very easily opt out of that pattern detail.
Feel free to write back if you have anymore questions!
Happy Knitting!
Jake
My mother always wanted to teach me to do this job but with five needles, I never could learn, it was very hard. Your knitting is very nice.
i have started these socks, i am loveing this anzula squishy! My question is about how to change from color a to color b in the round. (I could not find the stripes in the round tutorial). I am getting a little wrap on the inside and a noticable jog on the back. This is in the foot so not a problem but think i need another technique for when i get to the cuff. Sincerely, kathryn w
Hello Kathryn,
How frustrating! Here is a tutorial on how to carry up the two different colors on the inside of your project: https://www.purlsoho.com/create/2008/03/09/stripes-in-the-round/
A jog is unfortunately a natural outcome of knitting in a spiral, but lots of people have come up with techniques for “jogless stripes” and an Internet search of that term will turn up lots of suggestions! Hope this helps, enjoy! -Alyson
Hello. How many stitches do you recommend beginning with for a men’s pair?
Hello, Rebecca!
Thank you so much for writing in! For a sock that would be roughly a Men’s medium, I recommend a cast of 72 stitches.
Again, thank you for your question and if you need further assistance on this, please let us know! Happy knitting!
Best,
Kumeko
Thank you for this amazing pattern. Just one quick question: when working the heel flap, is it 16 more repeats of each rows 1 and 2 (for a total of 32 rows) or is it a total of 16 rows?
Thanks again!
Hi Emily,
Thank you for writing in! I love these socks so much! Please repeat rows 1 and 2 sixteen times as a group for a total of 32 rows. I hope this helps. Good luck and happy knitting!
Best,
Adam
Hi, You have done a very good job of explaining this pattern! One question though. Does the point where the yarn colors are exchanged create a rib? If it does I would not want that to go down the back of the sock and continue under the foot, so where is the best place in the round to make the exchange? How does one keep the color change column from interfering with the stretchiness of the sock? Thanks!
Hi Colleen,
Thanks for the kind comment! I believe the color change is on the side of the foot and the yarn is so thin that you won’t feel a thing! I wouldn’t worry about carrying the colors up.
Good luck!
Adam
Hi –
The color is so pretty, and the socks look so cozy for a cold New York day!
Would you recommend this pattern for first time sock knitter, or a different free pattern you offer?
Thank you!
Cecilia
Hi Cecilia,
Thanks for writing in! This is a great pattern for a first time sock knitter! It’s really not that difficult and will guide you though the necessary techniques for sock making. Best of luck and feel free to contact us if you have questions.
-Adam
Hello! Thanks so much for the pattern! For the heel flap, slip one purlwise.. is that with yarn in back or in front? I’m not sure what the standard is for this. It looks like it’s slipped with yarn in back, but I want to do it right and make it strong for heel wear–so I’m checking! Thanks for any help.
Liza
Hi Liza,
Thank you for writing us! We have updated the pattern to be more specific. Thank you for pointing this out — we really appreciate it!
All the best,
Adam
You told Rebecca above to cast on 72 for men’s medium, would the rest of the pattern be the same other than adding rows to the leg and feet? Thanks in advance for your help. I made the Boot Socks before and this looks like the same kind of socks.
Hi Angie,
Thanks for the question. If you increase the pattern by 8 stitches you will have to edit the pattern directions a little. In regard to the heel flap and turning the heel you’ll have four more stitches and for the instep you’ll decrease until you have 8 more stitches than the original pattern ends with. When you decrease for the toe you can follow the directions as is. I hope this helps you!
Adam
I can’t thank you enough. All of you at Purl are so generous with your help.
I love this pattern. Unfortunately some of the links seem to be broken – most importantly for me: the one to the Kitchener stich tutorial.
Hello Jay,
Thank you for letting us know! The links should all be working now. Here is the the link to our Kitchener Stitch tutorial.
Enjoy!
-Marilla
I keep running into sock patterns that call for dividing stitches equally onto three needles but the number of stitches is not evenly divisible by three. Is there a reason for designing a pattern this way and, if so, can you explain the rationale?
Hi Celia,
Great question! Generally, when patterns ask you to divide the stitches evenly over 3 needles, you need not divide them exactly evenly. For this pattern, you have a cast on of 64 stitches and you will put 21 stitches on one needle, 21 stitches on the next needle and 22 stitches on the final needle. The main goal is to distribute the stitches as evenly as possible. Most sock patterns will be worked over a number of stitches divisible by 4 to accommodate even decreases at toe.
I hope that this clears things up and happy knitting!
Cassy
Yes, it does, Cassy! Thank you!
This is a great pattern! But, I am actually using different sock yarn than suggested — I am wondering: how many yards of yarn is needed to complete the pattern? It doesn’t seem to specify in the materials section that I can see, besides for the number of skeins. Thanks!
Hi Heather,
Thanks for writing in! For these lovely socks we used approximately 175 yards of the main color and and 155 yards of the contrast color! So with the 2 skeins of yarn that we used here, you could make 2 pairs!
I hope that this helps!
Cassy
Could you please tell me how many stitches to cast on for a men’s L/XL sock, and other adjustments to the pattern? Thanks!
Hi Sue,
Thanks for reaching out! Unfortunately we do not have a men’s version of this pattern and sizing up a sock requires quite a bit of reworking, which we are unable to do in the comments section! However, our Pixel Stitch Socks do come in men’s sizes, and as long as you do a gauge swatch in stockinette stitch, you could easily work the leg in 1×1 ribbing and substitute single row stripes for the Pixel stitch pattern.
I hope that helps!
Julianna
If you knit socks on a 9″ circular needles and use markers there are no ladders and the socks work up much faster. I do all my socks on 9″ circular and love making socks. It’s a great traveling project too.
I’ve been looking for a sock pattern like this! Thanks!
By the way, I would use helix knitting for the single stripes… each stripe is one long spiral, invisible except for at the start and end.
I don’t quite understand set-up row 1 of the heel flap, repeating it 8 times makes 16 stitches right? Do I then work across these stitches for the following 32 set-up stitches? Also, how should I pick up the stitches on the heel flap? Thanks!!
Hello Olivia,
Thank you for reaching out! Your heel flap you will be working these 32 stitches back and forth rather than in the round. This means that after you complete your 16 stitches you will turn your work and knit back across those 16 and onward for a total of 32 stitches. Then you will rearrange your stitches so that the 32 heel flap stitches are on one needle.
I hope this clears things up for you and happy knitting!
-Marilla
Hi there! Quick question about row one of the heel flap. It says that after it, you should have 20 stitches on one needle and 11 on the other. I don’t understand why I should end up with 31 stitches instead of the 32 that I began with, given that we didn’t do a decrease (I don’t we did think anyway). Thanks!
Hello Emma,
Thank you for reaching out! When you begin to turn your heel in row 1 you will begin your decreases. So before row 1 you will have 32 stitches, but after row 1 you will have 31. This is because you do a “ssk” decreasing by one stitch.
I hope this clears things up and happy knitting!
-Marilla
Hi!
Love the look of these socks but after knitting one of them I noticed that they were very big and ”droopy” on my foot (would have added a pic if it would have been possible ?). Not at all nice and snug as new socks should be 🙁 I have a normal US size 8 foot and don’t have a very loose knitting style. So not sure what happened. Did, however, notice that some knitters on Ravelry had the same problem.
Is there anything I can do differently if I give this project another shot? Change the needle size or decrease the amount of stiches or something? Not a super experienced knitter so not sure how a decrease in stiches would impact the trickier parts in the pattern… would be completely lost without clear instructions withe the right numbers of stiches for everything.
Bought the yarn in New York and it traveled with me back to my home in Finland so would love to succeed with this project!
Hi Charlotta,
Thanks for reaching out, and I’m sorry to hear that your socks were not as tidy looking as you expected! It sounds like you might be having a gauge issue. Although you say you aren’t a loose knitter, socks are knit at a very tight gauge to create a sturdy fabric that both wears well and has a firm, snug fit. We knit our socks at a gauge of 33 stitches to 4 inches in stockinette stitch, so I would first recommend measuring your gauge on your completed socks to see how it compares. If your gauge is looser than ours, it is best to go down in needle size until you are able to match our gauge. You could choose a smaller sized sock instead, but knitting at a looser gauge will result in socks that wear out and develop holes more easily.
I hope that helps!
Julianna
Can I knit these using the magic loop technique vs 3 double points??? Any suggestions or advice on how to do that would be most appreciated.
Hi Maria,
Thanks for reaching out, and yes, you can absolutely use magic loop for these socks! You can follow the instructions as written, but for the gusset, I’d recommend placing stitch markers at the points where the gaps between DPNs would have been. That way, you’ll know exactly where to place the decrease stitches!
All the best,
Lili