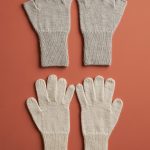
Darling Hat + Hand Warmers
Our Darling Hat + Hand Warmers celebrate the arrival of our new 100% cashmere… Welcome to Nigh DK, the most special and deeply satisfying yarn we can imagine!

Nigh DK’s cashmere fiber comes from Mongolia, the source of much of the world’s finest cashmere. From the downy winter undercoat of the goats who live in the extreme temperatures of this region, cashmere is designed by nature to be lightweight and super toasty.

Once our cashmere has been gathered, spun, and dyed, we take the extra step of washing the finished yarn several times. This means Nigh DK is unbelievably soft as you’re knitting, not just after you block it. This is because we want the making to feel as good as the wearing!

For our Darling Hat + Hand Warmers, you’ll cast on with Nigh DK and follow an easy four-stitch repeat with rounds of knitting in between. A splendid combination of a relaxing and engaging knit that puts you in the perfect mindset to enjoy what’s in your hands!

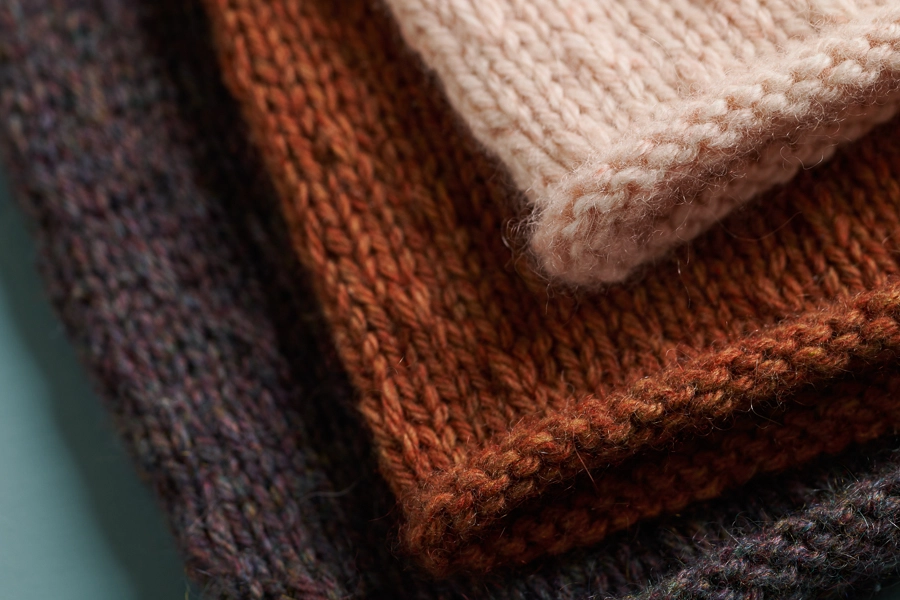
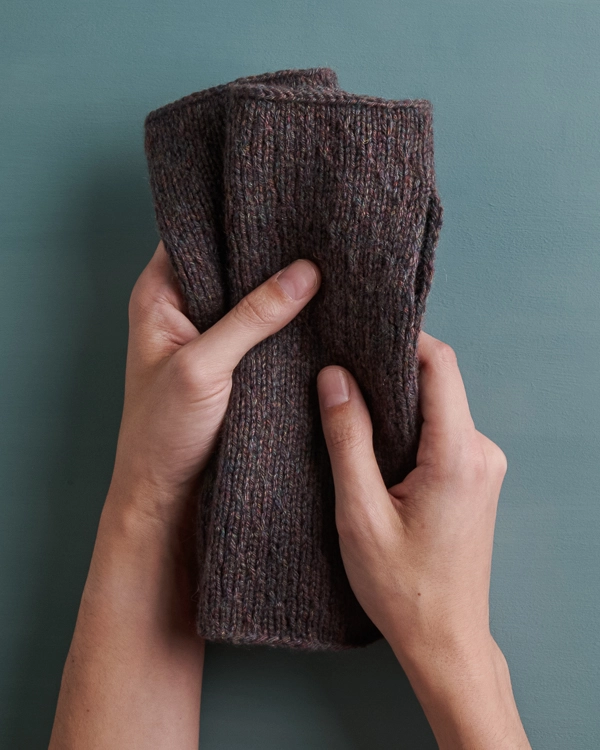
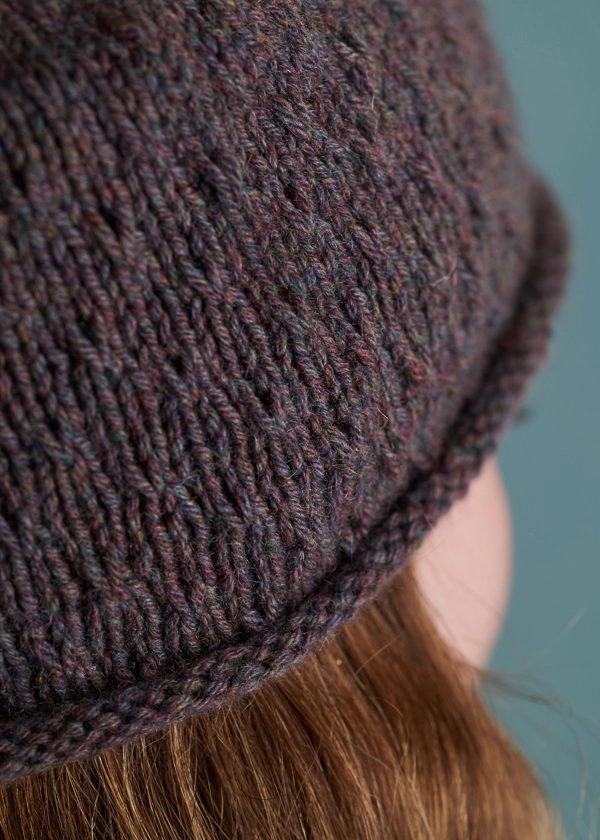
Nigh DK’s exquisite quality is apparent in the soft halo that floats above the fabric’s surface, giving this understated stitch pattern a depth of beauty, while the yarn’s four even plies add distinction to subtle textures and shaping.

A light worsted weight, we love the sumptuous beauty of Nigh DK for these accessories, and for scarves, wraps, sweaters, socks, and special baby items, too. It’s thin enough to feel streamlined and elegant and thick enough to feel substantial.

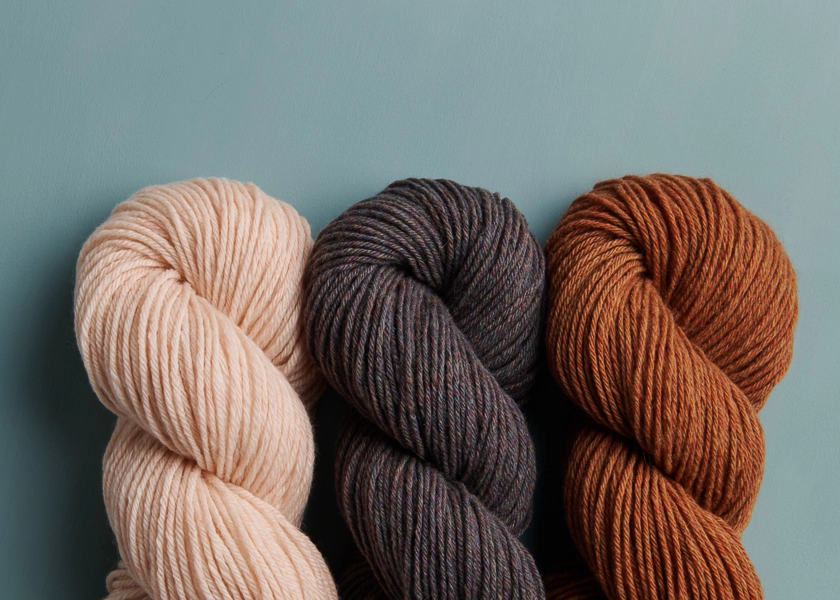
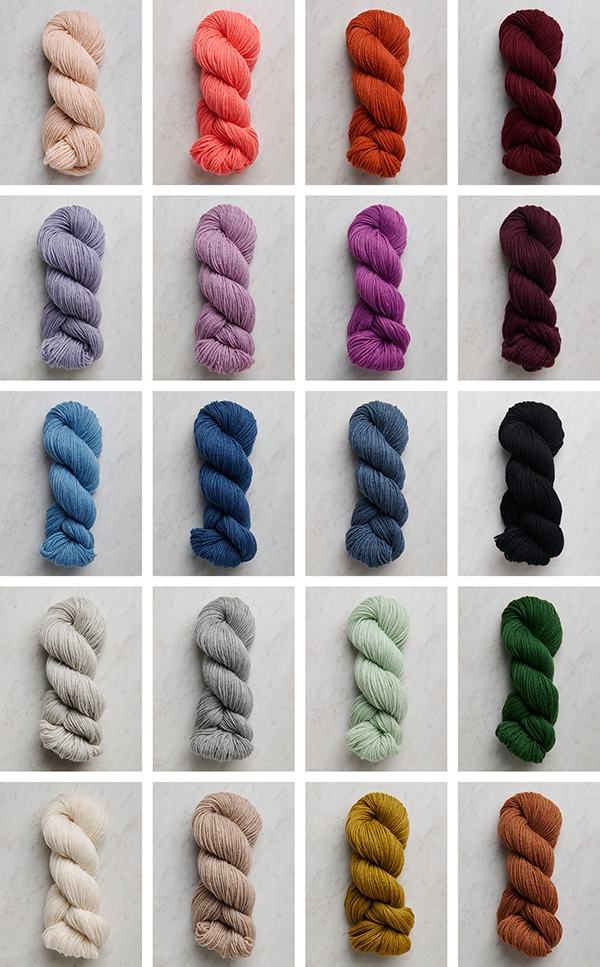
Nigh DK comes in 21 lovely colors, some solid, some heathered, each glowing with its own gentle beauty.
We are thrilled to bring you Nigh DK, an amazing yarn that makes every stitch a true pleasure. Cast on for this charming set, and experience the joy for yourself!

Designed for Purl Soho by Lili Tobias. Lili spends most of her time knitting, listening to music, or doing both at the same time. She also happens to be a member of Purl Soho’s very wonderful customer service team! Thank you for helping us introduce our beautiful Nigh DK with this darling design, Lili!
Share your progress and connect with the community by tagging your pics with #PurlSoho, #PurlSohoBusyHands, #PurlSohoDarlingHatAndHandWarmers, and #PurlSohoNigh. We can’t wait to see what you make!
Materials
HAT
- 1 skein of Purl Soho’s Nigh DK, 100% cashmere. Each skein is approximately 199 yards/ 55 grams; approximately 60 (85, 110, 125, 150, 185) yards required. We used the colors Pink Pearl, Petrified Wood, and Warm Cognac.
- US 4 (3.5 mm) 16-inch circular needles, for Kid and Adult sizes
- A set of US 4 double pointed needles (or longer circulars for Magic Loop)
- Removable stitch markers, including one unique
HAND WARMERS
- 1 skein of Purl Soho’s Nigh DK, 100% cashmere. Each skein is approximately 199 yards/ 55 grams; approximately 55 (75, 120, 150, 170, 195) yards required. We used the colors Pink Pearl, Petrified Wood, and Warm Cognac.
- A set of US 4 (3.5 mm) double pointed needles (or longer circulars for Magic Loop)
- Stitch markers, including one unique
NOTE: To make both the hat and hand warmers, you’ll need 1 (1, 2, 2, 2, 2) skein(s) of Nigh DK; approximately 115 (160, 230, 275, 380) yards required. For an Adult Large set, you may need an additional skein. If you don’t end up needing it, you can return unwound yarn for a refund within 30 days of purchase, or within 6 months, for store credit. Our Return Policy has all the details!
GAUGE
24 stitches and 34 rounds = 4 inches in Diamond Slip Stitch pattern (see Notes)
SIZES
NOTE: Cashmere tends to stretch, so this pattern is designed with negative ease. This means to choose a size with a finished circumference that is smaller than the wearer’s head or hands. (The ease on the hand warmers is slightly less because it’s less fabric.) For more information about negative ease and help picking a size, please check out our Understanding Ease + Selecting Size Tutorial!
HAT
Baby (Toddler, Kid, Adult Small, Adult Medium, Adult Large)
- Finished Circumference: 12 (14, 16, 18, 20, 22) inches, comfortably stretching to approximately 14–16 (16–18, 18–20, 20–22, 22–24, 24–26) inches
- Finished Height: 6¾ (7¾, 8¼, 8½, 9½, 9¾) inches with brim rolled
HAND WARMERS
Baby (Toddler/Kid, Adult Extra Small, Adult Small, Adult Medium, Adult Large)
- Finished Circumference: 4½ (5¼, 6½, 7¼, 8, 8¾) inches, comfortably stretching up to 2 inches
- Finished Length: 6 (7½, 9¼, 10¾, 11, 11¾) inches
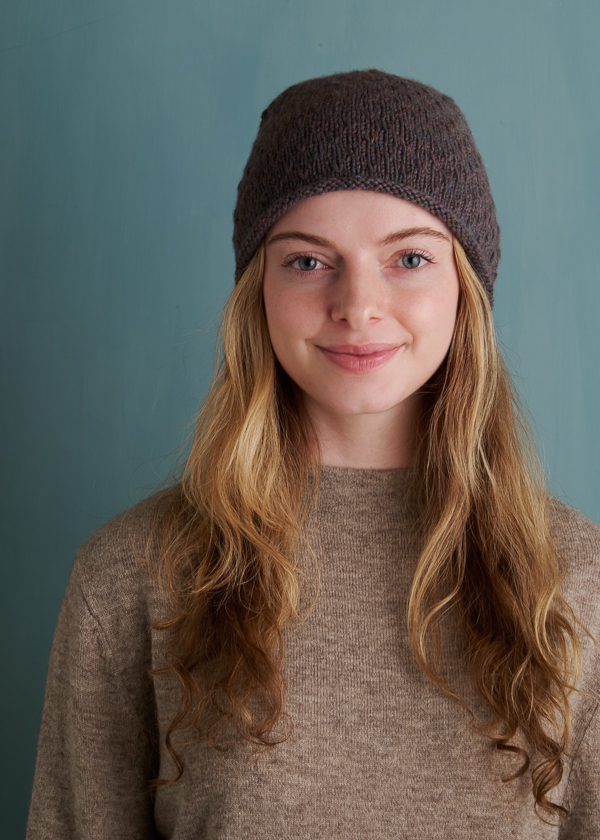
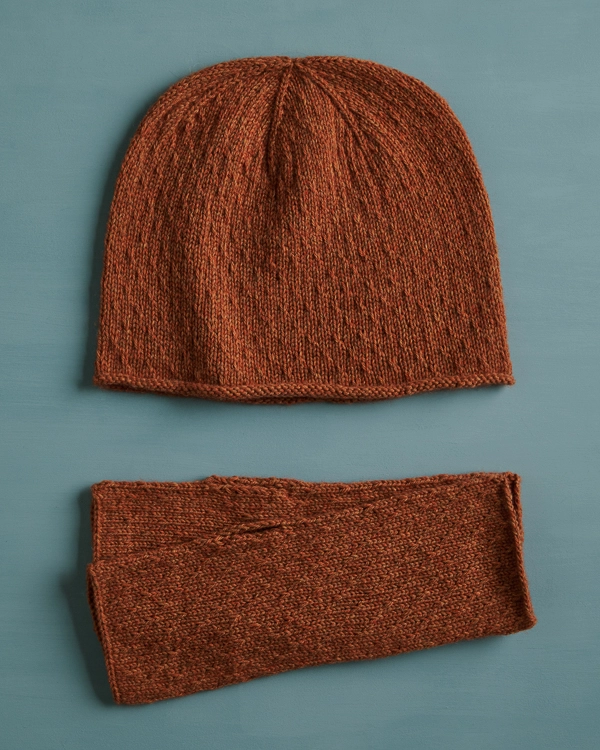
SAMPLES: The Pink Pearl hat is the Kid size and the hand warmers are Adult Extra Small; the Petrified Wood set is the Adult Small size; and the Warm Cognac set is the Adult Large size.
NOTES
STITCH MULTIPLE
Stitch pattern works over a multiple of 4 stitches in the round.
SLIP STITCHES
All slip stitches are slipped purlwise with yarn in back, unless otherwise instructed.
S2KP (Slip 2, Knit 1, PSSO)
Slip 2 stitches together knitwise with yarn in back, knit 1, pass slipped stitches over knit stitch and off right needle. [2 stitches decreased]
To see a video tutorial of this technique, please visit our S2KP Tutorial.
Diamond Slip Stitch Pattern
Cast on a multiple of 4 stitches.
Rounds 1 and 2: *K3, slip 1 with yarn in back (wyib; see Notes), repeat from * to end of round.
Rounds 3 and 4: Knit to end of round.
Rounds 5 and 6: *K1, slip 1 wyib, k2, repeat from * to end of round.
Rounds 7 and 8: Knit to end of round.
Repeat Rounds 1–8 for pattern.
HAT PATTERN
BRIM + BODY
Cast on 72 (84, 96, 108, 120, 132) stitches. We used a basic Long Tail Cast On.
Place marker and join for working in the round, being careful not to twist the stitches.
Knit 6 rounds even.
Work Rounds 1–8 of Diamond Slip Stitch pattern (see Notes) 5 (6, 6, 6, 7, 7) times, then repeat Rounds 1 and 2 one more time.
CROWN
NOTE: If using circular needles, change to double pointed needles when necessary.
Set-Up Round (decrease round): Remove end-of-round marker, s2kp (see Notes), place unique marker (pm) on just worked stitch for new end-of-round, k9 (11, 13, 15, 17, 19), [s2kp, pm on just worked stitch, k9 (11, 13, 15, 17, 19)] 5 times. [60 (72, 84, 96, 108, 120) stitches remain; 6 stitch markers placed]
BABY, KID, + ADULT MEDIUM ONLY
Round 1 (partial round): Knit to 1 stitch before end of round.
Round 2 (decrease round): [Remove marker, s2kp, pm on just worked stitch, k1, *slip 1 (see Notes), k3, repeat from * to 3 stitches before next marked stitch, slip 1, k1] 5 times, remove marker, s2kp, pm on just worked stitch, k1, **slip 1, k3, repeat from ** to 2 stitches before next marked stitch, slip 1, k1. [12 stitches decreased]
Round 3 (partial round): K2, *slip 1, k3, repeat from * to 2 stitches before end of round, slip 1. [1 stitch remains before end of round]
Round 4 (decrease round): [Remove marker, s2kp, pm on just worked stitch, knit to 1 stitch before next marked stitch] 6 times, k1. [12 stitches decreased]
Repeat Rounds 1–4 zero ( – , 1 , – , 2 , – ) more time(s). [36 stitches remain]
Next Round (partial round): Repeat Round 1.
Next Round (decrease round): [Remove marker, s2kp, pm on just worked stitch, k1, slip 1, k1] 6 times. [24 stitches remain]
Next Round (partial round): Repeat Round 3.
Next Round (decrease round): [S2kp, k1] 6 times. [12 stitches remain]
TODDLER, ADULT SMALL, + ADULT LARGE ONLY
Round 1 (partial round): Knit to 1 stitch before end of round.
Round 2 (decrease round): [Remove marker, s2kp, pm on just worked stitch, k1, *slip 1 (see Notes), k3, repeat from * to 1 stitch before next marked stitch, remove marker, s2kp, pm on just worked stitch, **k3, slip 1, repeat from ** to 2 stitches before next marked stitch, k1, (1 stitch remains before marked stitch)] 2 times, remove marker, s2kp, pm on just worked stitch, k1, ***slip 1, k3, repeat from *** to 1 stitch before next marked stitch, remove marker, s2kp, pm on just worked stitch, ****k3, slip 1, repeat from **** to 1 stitch before next marked stitch, k1. [12 stitches decreased]
Round 3 (partial round): K2, [*slip 1, k3, repeat from * to 4 stitches before next marked stitch, slip 1, k7, **slip 1, k3, repeat from ** to 2 stitches before next marked stitch, slip 1, k3] 2 times, ***slip 1, k3, repeat from *** to 4 stitches before next marked stitch, slip 1, k7, ****slip 1, k3, repeat from **** to 2 stitches before next marked stitch, slip 1. [1 stitch remains before end of round]
Round 4 (decrease round): [Remove marker, s2kp, pm on just worked stitch, knit to 1 stitch before next marked stitch] 6 times, k1. [12 stitches decreased]
Repeat Rounds 1–4 – (0, – , 1, – , 2) more time(s), and then repeat Rounds 1 and 2 one more time. [36 stitches remain]
Next Round (partial round): K2, [slip 1, k7, slip 1, k3] 2 times, slip 1, k7, slip 1.
Decrease Round: Repeat Round 4. [24 stitches remain]
Next Round: Repeat Round 1.
Decrease round: [S2kp, k1] 6 times. [12 stitches remain]
ALL SIZES
Cut yarn and thread tail onto a tapestry needle. Sew tail through remaining stitches.
Pull taut and bring tail to inside of hat to weave in.
FINISHING
Weave in any remaining ends and gently block as desired.
HAND WARMERS PATTERN
Cast on 28 (32, 40, 44, 48, 52) stitches and distribute as evenly as possible on three double pointed needles (or circular needles if using Magic Loop). We used a basic Long Tail Cast On.
Join for working in the round, being careful not to twist the stitches and place marker (pm) for end of round.
Knit 2 rounds even.
Work Rounds 1–8 of Diamond Slip Stitch pattern (see Notes) 3 (4, 5, 6, 6, 6) times, then repeat Rounds 1–6 one more time.
THUMB HOLE
RIGHT HAND WARMER ONLY
Set-Up Round 1: Knit to last stitch, make 1 right (m1R), k1. [1 stitch increased]
Set-Up Round 2: K1, make 1 left (m1L), knit to end of round, remove marker. [1 stitch increased]
NOTE: You will now begin working back and forth in rows.
Row 1 (right side): Slip 1 with yarn in back (wyib, see Notes), *k3, slip 1 wyib, repeat from * to last 5 stitches, k5.
Row 2 (wrong side): Slip 1 with yarn in front (wyif), p4, *slip 1 wyif, p3, repeat from * to last stitch, p1.
Row 3: Slip 1 wyib, knit to end of row.
Row 4: Slip 1 wyif, purl to end of row.
Row 5: Slip 1 wyib, *k1, slip 1 wyib, k2, repeat from * to last stitch, k1.
Row 6: Slip 1 wyif, *p2, slip 1 wyif, p1, repeat from * to last stitch, p1.
Row 7: Repeat Row 3.
Row 8: Repeat Row 4.
Work 0 (0, 2, 4, 6, 8) more rows of Rows 1–8.
NOTE: You will now return to working in the round.
BABY, TODDLER/KID AND ADULT LARGE ONLY
Next Round: Slip 1 wyib, *k3, slip 1 wyib, repeat from * to last 5 stitches, k3, knit 2 together (k2tog), pm. [1 stitch decreased]
Next Round: Slip slip knit (ssk), *k2, slip 1 wyib, k1, repeat from * to last 3 stitches, k3. [1 stitch decreased]
ADULT EXTRA SMALL AND ADULT MEDIUM ONLY
Next Round: Slip 1 wyib, knit to last 2 stitches, knit 2 together (k2tog), pm. [1 stitch decreased]
Next Round: Slip slip knit (ssk), knit to end of round. [1 stitch decreased]
ADULT SMALL ONLY
Next Round: Slip 1 wyib, *k1, slip 1 wyib, k2, repeat from * to last 2 stitches, knit 2 together (k2tog), pm. [1 stitch decreased]
Next Round: Slip slip knit (ssk), *slip 1 wyib, k3, repeat from * to last 3 stitches, sl 1 wyib, k2. [1 stitch decreased]
ALL SIZES
Go on to Palm section, below.
LEFT HAND WARMER ONLY
Set-Up Round 1: Remove marker, knit to last 2 stitches, m1R, k1, pm for new end of round. [1 stitch increased]
Set-Up Round 2: K1, m1L, knit to end of round, remove marker. [1 stitch increased]
NOTE: You will now begin working back and forth in rows.
Row 1 (right side): Slip 1 wyib, k4, *slip 1 wyib, k3, repeat from * to last stitch, k1.
Row 2 (wrong side): Slip 1 wyif, *p3, slip 1 wyif, repeat from * to last 5 stitches, p5.
Row 3: Slip 1 wyib, knit to end of row.
Row 4: Slip 1 wyif, purl to end of row.
Row 5: Slip 1 wyib, *k2, slip 1 wyib, k1, repeat from * to last stitch, k1.
Row 6: Slip 1 wyif, *p1, slip 1 wyif, p2, repeat from * to last stitch, p1.
Row 7: Repeat Row 3.
Row 8: Repeat Row 4.
Work 0 (0, 2, 4, 6, 8) more rows of Rows 1–8.
NOTE: You will now return to working in the round.
BABY, TODDLER/KID AND ADULT LARGE ONLY
Next Round: Slip 1 wyib, k4, *slip 1 wyib, k3, repeat from * to last 5 stitches, slip 1 wyib, k2, k2tog, pm. [1 stitch decreased]
Next Round: Ssk, *k3, slip 1 wyib, repeat from * to last 3 stitches, k3, remove marker, k1. [1 stitch decreased]
ADULT EXTRA SMALL AND ADULT MEDIUM SIZES ONLY
Next Round: Slip 1 wyib, knit to last 2 stitches, k2tog, pm. [1 stitch decreased]
Next Round: Ssk, knit to end of round, remove marker, k1. [1 stitch decreased]
ADULT SMALL SIZE ONLY
Next Round: Slip 1 wyib, *k2, slip 1 wyib, k1, repeat from * to last 5 stitches, k2, slip 1 wyib, k2tog, pm. [1 stitch decreased]
Next Round: Ssk, k1, *slip 1 wyib, k3, repeat from * to last 2 stitches, slip 1 wyib, k1, remove marker, k1. [1 stitch decreased]
PALM
Beginning with Round 3 (3, 5, 7, 1, 3), continue in Diamond Slip Stitch pattern until piece measures approximately 6 (7½, 9¼, 10¾, 11, 11¾) inches from cast-on edge, ending with Round 4 or 8.
Bind off knitwise.
FINISHING
Weave in all ends and gently block as desired.







I was just asked to knit a hat for a gift with DK 100% alpaca yarn. I love this pattern (and nigh yarn for another hat gift) but was wondering if the alpaca would stretch similar to the beautiful cashmere you used. Should I cast on a different size? It knits up as the same gauge.
Hi Kim,
Thanks for writing in! As long as you’re getting the same gauge as the pattern, then you can follow it as written. Both cashmere and alpaca are pretty inelastic fibers, so they have a very similar amount of stretch!
All the best,
Lili
My gauge doesn’t look anything like the pattern so can I trust the measurement of it? It seems to be the right amount of stitches per inch but looks very different. Is that because the gauge isn’t knit in the round? Thank you for clarifying this for me.
Hi Dawn,
Would you. be able to send a photo of your gauge swatch to customerservice@purlsoho.com? That way, we can better visualize what’s going on!
All the best,
Lili
Yes I can do that. Thank you!
Hi,
Both the pattern and the yarn are beautiful! I don’t enjoy the feel of a rolled brim. Would a 1/2″ ribbed edge work or do you suggest something else? If so, would the # of cast on stitches be the same?
Thanks for all the great patterns!
Hi Marissa,
Thanks for reaching out, and thank you for the kind words! I would recommend working 3 x 1 ribbing at the brim. If you work the following round for about a 1/2 inch, it will blend very nicely into the beginning of the stitch pattern:
Round of Ribbing: *k1, p1, k2, repeat from * to end of round
The stitch count and everything else will remain the same. Hope this helps!
All the best,
Lili
Knitting the hand warmers and where it says to begin working back and forth in rows for the thumb hole, the first row says “right side” but one would have to start with wrong side unless you are actually knitting one more round before beginning flat- am I reading that correctly? Knit one more round then wrong side back?
Hello,
Thanks for reaching out, and that’s a great question! When switching between working in the round and working flat, like at this point in the hand warmers, the distinction between “round” and “row” gets ambiguous. We decided to go with “row” to describe Row 1 for two different reasons:
1. You’ll be on the first row of the repeated stitch pattern, so calling this Row 1 keeps that consistent. If we had called Row 2 Row 1 instead, that would probably get more confusing than necessary!
2. We’re defining a “round” as when you continue in the same direction after finishing it, rather than turning your work to move in the opposite direction. On Row 1, you turn your work, so that you can begin purling on Row 2!
As with many things in knitting, there are multiple ways of conceptualizing of them! I could totally see calling Row 1 a round and the pattern still making sense, but we decided to choose a different, but still valid, option. Hope this helps clarify things!
All the best,
Lili
Currently working on the hat and am to the crown. I’m confused on the setup round. I am familiar with the stitches but have a question concerning marker placement. When it says PM on just worked stitch, does that mean after the worked stitch or do I place a removable marker directly on the stitch.
Hi Debra,
Thanks for reaching out! You will place the removable marker on the just worked stitch right after you knit it. So right after you work the s2kp, the just worked stitch will be the very first stitch on your right needle. Just place the marker directly on that stitch, and you’ll be all set!
All the best,
Lili
This is THE OTHER BEST PATTERN EVER .. meaning most useful, classic. I will use it many times. Thank you!!
I am working on the crown of the hat and am confused. Round 1 is a “ “partial round”. I am to knit to 1 stitch before the end. What do I do with the last stitch if I don’t work it? Also on round 2, I am to knit to 3 stitches before the next marker, then slip 1 and knit 1. What happens to the remaining stitches before the markers.
Maybe I am missing something here?
Hi Georgia,
Thanks for reaching out! The final stitch of Round 1 is worked as part of the first s2kp in Round 2. This is the same thing that happens to the third stitch after the slip 1 and knit 1! It’s incorporated in the following s2kp. Hope this helps clarify things!
All the best,
Lili
I am also confused about the crown. On the adult medium, I get to three stitches before next stitch and then the instructions say slip one/knit one 5 times (over 10 stitches). That goes over the next marked stitch, correct? So I just incorporate that stitch in the slip one/knit one sequence? But that gets me nowhere close to the next stitch marker which I am now supposed to remove and then work. Please explain what I’m missing. Thanks
Hi Jessica,
Thanks for reaching out! The “5 times” actually refers to the entire set of instructions enclosed in square brackets, not just “slip 1, k1”. That means that you’ll need to repeat the entire “Remove marker, s2kp, pm on just worked stitch, k1, *slip 1 (see Notes), k3, repeat from * to 3 stitches before next marked stitch, slip 1, k1” sequence a total of 5 times. Hope this helps clarify things!
All the best,
Lili
I love this yarn and would like to knit a long scarf, as I am a beginner I’m seeking advice whether, could I adapt this pattern to straight knitting rather than on circular needles.
Hi Dani,
Thanks for reaching out! I’m afraid that this pattern is not the best choice for flat knitting, since it’s primarily stockinette. Stockinette fabric will always roll up at the edges due to the nature of how the stitches interlock with each other, and that’s not very desirable for a scarf.
If you still want to pursue your idea of using this stitch pattern for a scarf, then I’d recommend adding more of a border! You can include a symmetrical stitch (like garter stitch, ribbing, seed stitch, etc.) on all the edges, and this will help prevent them from curling at all. Hope this helps!
All the best,
Lili
Thank you Lili.
I’m working on the gauge, and I might be overthinking this, but I started with 3.5 mm and that was too small, then I used 4.0 mm and that was too small, but once I start using the larger needles the pattern just doesn’t look the same cause the stitches are so much bigger. I think I’m just trying to understand why and make sure I’m doing this right! I’m using 52% Acrylic, 40% Wool, 8% Nylon, it says it’s Light/ DK. Should i use a different yarn? Thanks
Hi Olivia,
I’m sorry to hear that you’re having trouble matching the gauge for this pattern! Would you be able to send us a photo of your work at customerservice@purlsoho.com? That way, we’ll be able to better visualize what’s going on!
All the best,
Lili
I’m working on the hand warmers and have gotten to where the pattern says “you are now working back and forth in rows”. I am using the magic loop method instead of dpns. Is it possible to go to flat knitting while using magic loop? I’m a mid-level beginner and can’t figure out how to turn the work to knit flat. Help! Thanks so much.
Hi Dawn,
That’s a great question! It is definitely possible to switch between working in the round and working flat while doing magic loop–that’s actually exactly what we did to knit these samples. I find that it’s pretty tricky to conceptualize, but if you break it down into its components, it should be easy to get the hang of!
At all times, you’ll have 2 “loops” in your needles: One loop will occur at the thumb hole itself, and the other will occur directly opposite that, on the other side of the hand warmer. When you reach the end of each row of the thumb hole, you will have reached one of these loops. At this point, you turn your work so that the other side is facing you, just like you would working flat with normal needles! When you reach the other loop of the needles, the one that isn’t at the thumb hole (this will occur in the middle of each thumb hole row), you will treat that loop like you would when working normal magic loop. Then, just continue to the end of the row!
Overall, working magic loop flat entails the combination of two different treatments of the two different loops. One consistent with normal flat knitting, and the other like normal magic loop! I hope that this gives you some tools to help you move forward in your project.
All the best,
Lili
Thank you Lili for your reply. You helped immensely and I now have the concept and even have completed the hand warmers.
Purl Soho has been a great help in my knitting journey. I really appreciate you and the web site.
Thanks again,
Dawn Woosley
Oh you’re so welcome, Dawn! Glad to hear that you’ve finished the hand warmers. Wear them well!
All the best,
Lili
Hi, I am making the handwarmers essentially using this pattern but using a stockinette stitch (I matched my gauge to what is listed here). I am basically following the pattern by number of rows and ignoring all the diamond pattern instructions.
I am about to get to the thumbhole section and just wondering if after doing the increases when it says ” You will now begin working back and forth in rows” should I ignore the slip 1 part there in the beginning of the rows too and just do my stockinette stitching or should I slip stitches? Are the slipped stitches related to creating the thumbhole or just part of the diamond pattern?
I hope my question makes sense! Thanks for you help and your beautiful patterns and yarns!
Hi Kiran,
Great question! Actually, I’d recommend slipping the stitches at the very edge on the thumbhole. This will make sure that the thumbhole edge is nice and even! You can ignore all the other slipped stitches though, since those are for the textured stitch pattern.
All the best,
Lili
Hello! I am I’m the crown of adult small. I am so confused about round 3. Can you please explain? There are 6 markers yet only 3 are referenced.
Hi Kristin,
Absolutely! Within the square brackets, you’ll reach 2 marked stitches. You repeat the instructions within the square brackets twice, so that accounts for 4 marked stitches. Then, the remaining 2 marked stitches are reached in the portion after you finish the repeats of the bracketed instructions! Here’s Round 3 with the marked stitches highlighted:
Round 3 (partial round): K2, [*slip 1, k3, repeat from * to 4 stitches before next marked stitch, slip 1, k7, **slip 1, k3, repeat from ** to 2 stitches before next marked stitch, slip 1, k3] 2 times, ***slip 1, k3, repeat from *** to 4 stitches before next marked stitch, slip 1, k7, ****slip 1, k3, repeat from **** to 2 stitches before next marked stitch, slip 1. [1 stitch remains before end of round]
Hope this helps make things clearer!
All the best,
Lili
I have some extra Wigeon yarn. Do you think it would work for the hand warmers or does it not have enough stretch to it?
Hi Kathleen,
Thanks for writing in! You could definitely use Wigeon for this project! We always recommend doing a gauge swatch just to make sure you are happy with the fabric created and to make sure you are able to get the same sizing we have written into the pattern. Please let me know if you have any other questions!
Happy knitting,
Gavriella
Hi again
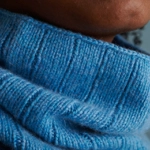
Do you think this pattern would look nice in a cowl basically following the hat pattern but without the decreases? Would a rolled edge be okay or should I do some garter stitches?
Hi Kiran,
That sounds like a wonderful idea! I would recommend some sort of edging on a cowl version to keep the top and bottom from rolling in on each other. Garter stitch or some 2×2 ribbing should do the trick! I hope this helps!
Happy knitting,
Gavriella
would season Alpaca work for this hat?
I have a skein left over from another project; it seems similar in wieght to the Nigh
thank you as always
patty
Hi Patty,
Thank you for writing in! Season Alpaca should work wonderfully for this pattern! Please let us know if you have any other questions!
Happy knitting,
Gavriella