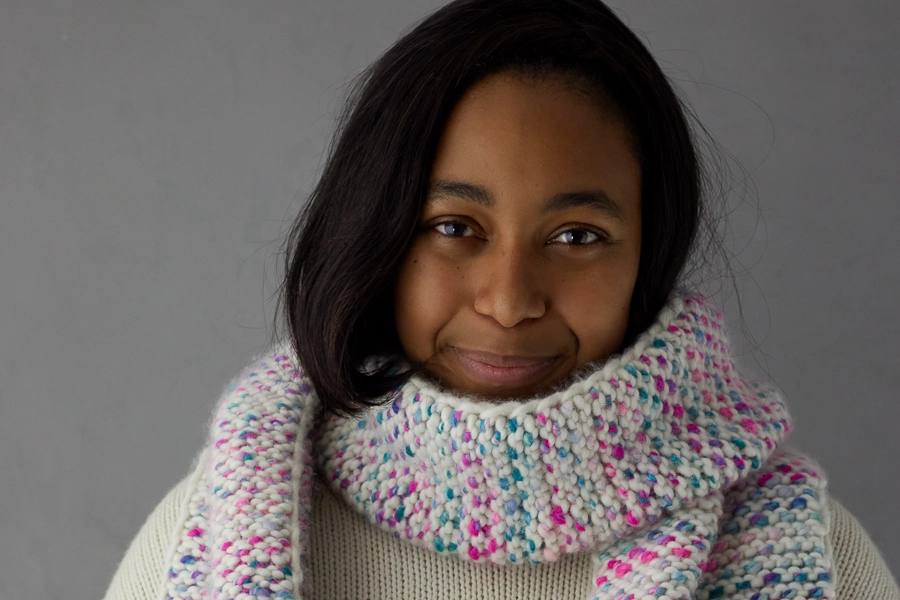

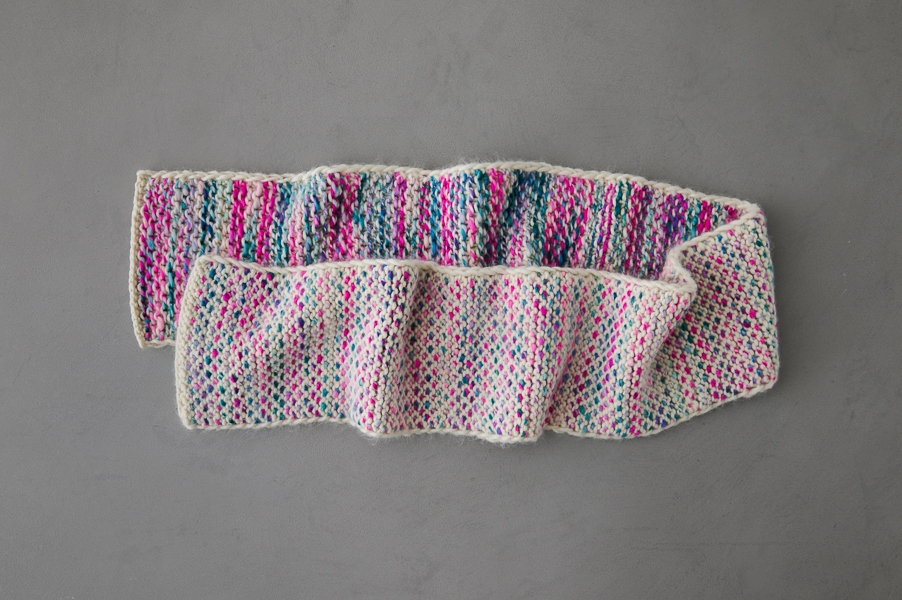
Brindle Scarf In Lovebird + Super Soft Merino
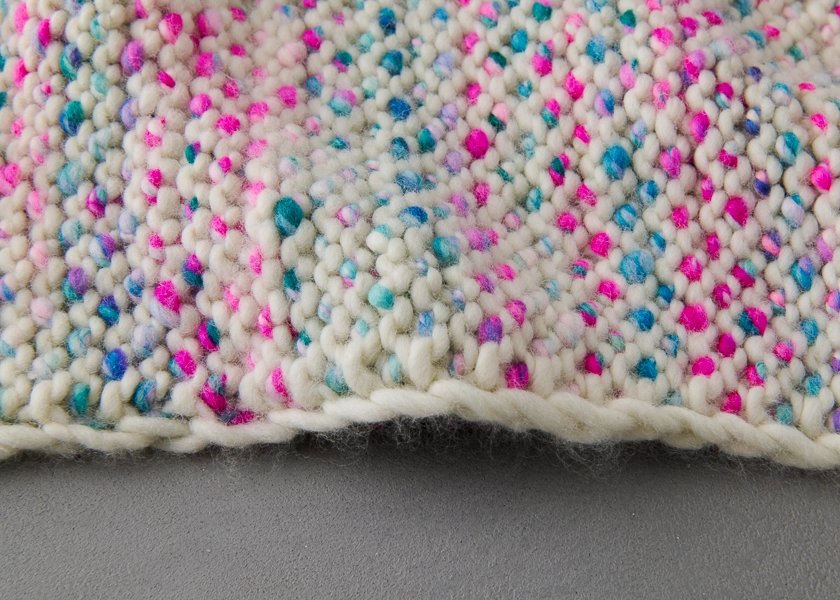
When a stitch pattern collides with a colorful yarn, get ready for a knitting party! Our Brindle Scarf has a surprise in every stitch and a joy to its beauty.
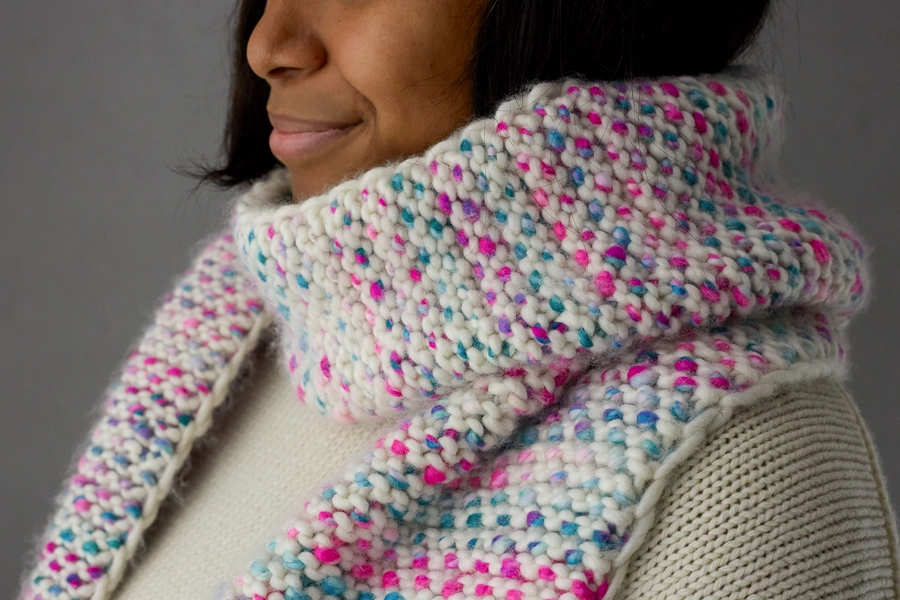
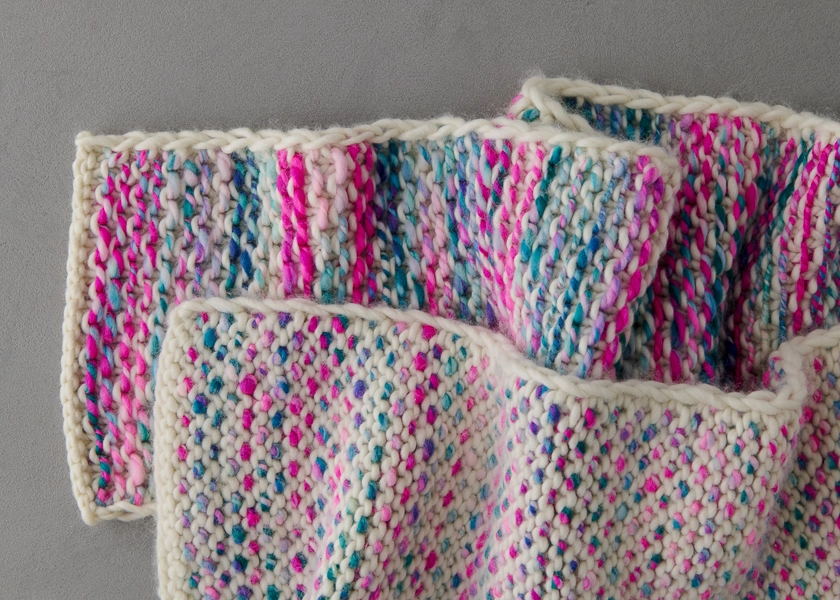
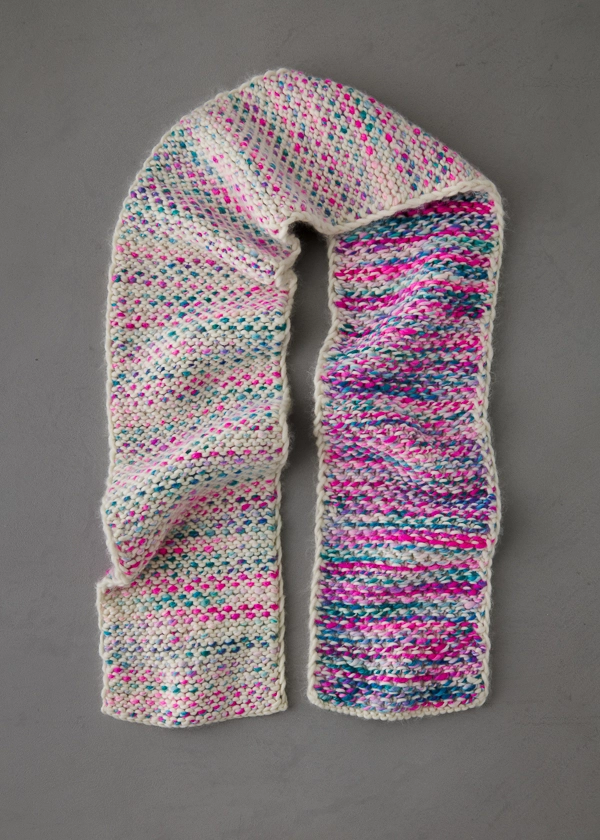
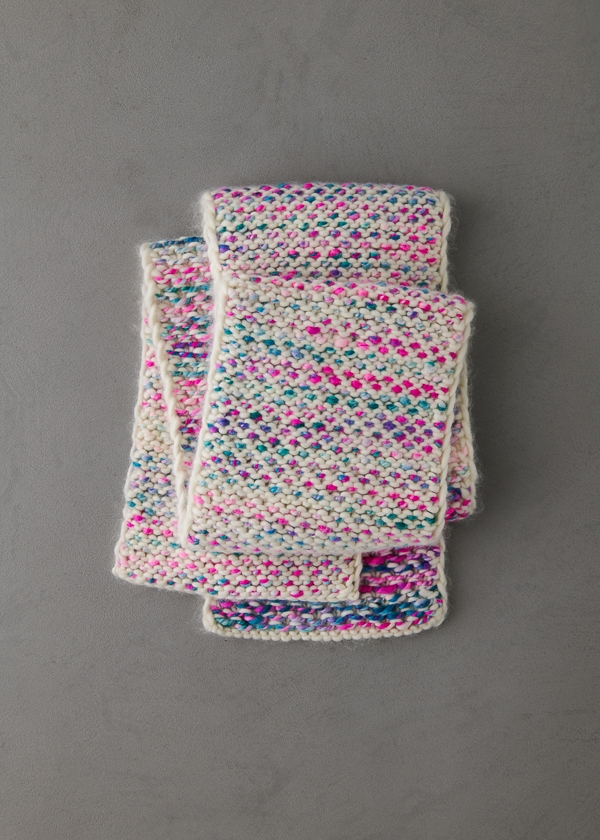
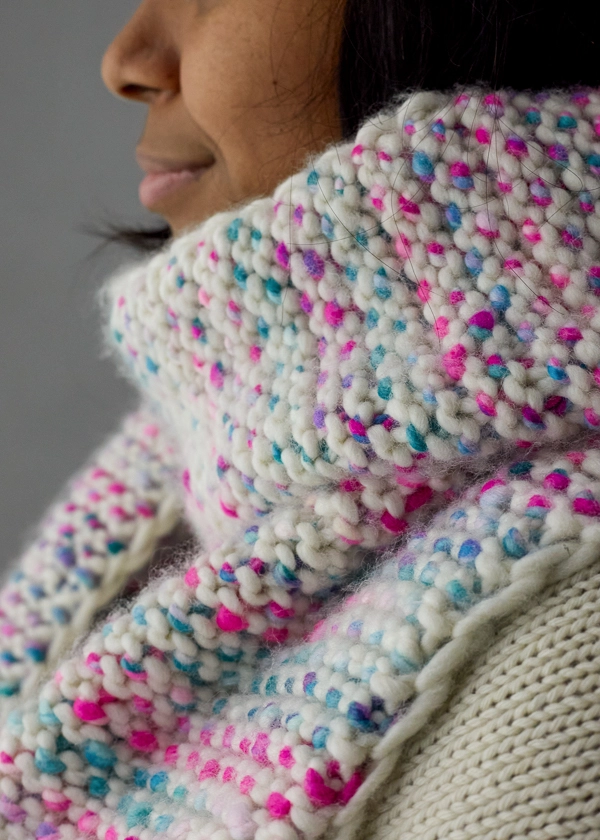
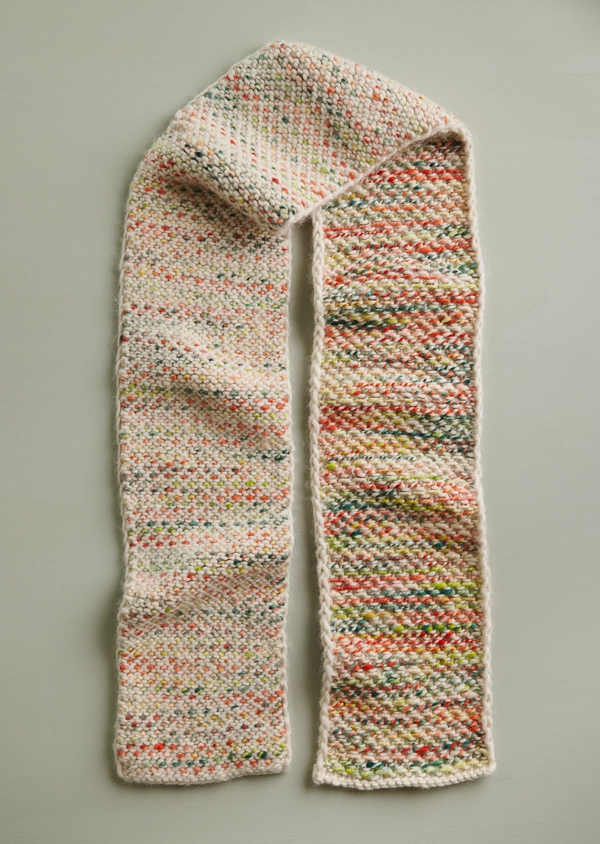
It uses a very simple slip stitch pattern and two of our cuddliest merinos: multi-colored, hand-dyed Lovebird and one-color Super Soft Merino. Put together, you get a woven field of pebble-y soft stitches where one yarn takes the spotlight on one side of the scarf, and the roles reverse on the other side.
The fun (and beauty!) is in watching as the gorgeous colors of Lovebird unfurl row by row, creating flickers of light and moments of shadow. It’s what we call edge-of-your-seat knitting!
To get started, choose from over a dozen palettes of our Brindle Scarf Bundle. It includes all the Lovebird and Super Soft Merino you’ll need for your next knitting shindig!
UPDATE: NEW COLORS OF LOVEBIRD!
NOVEMBER 2022
Still in our lovely Lovebird and dreamy Super Soft Merino, we’ve used our newest Lovebird colors to add more gorgeous Brindle Scarf Bundles to the collection. So, plump up your yarn and pump up the beauty, and cast on for this happy, chunky knit!
Designed by Purl Soho designer, Jake Canton. Click here to see even more of Jake’s designs!
Materials
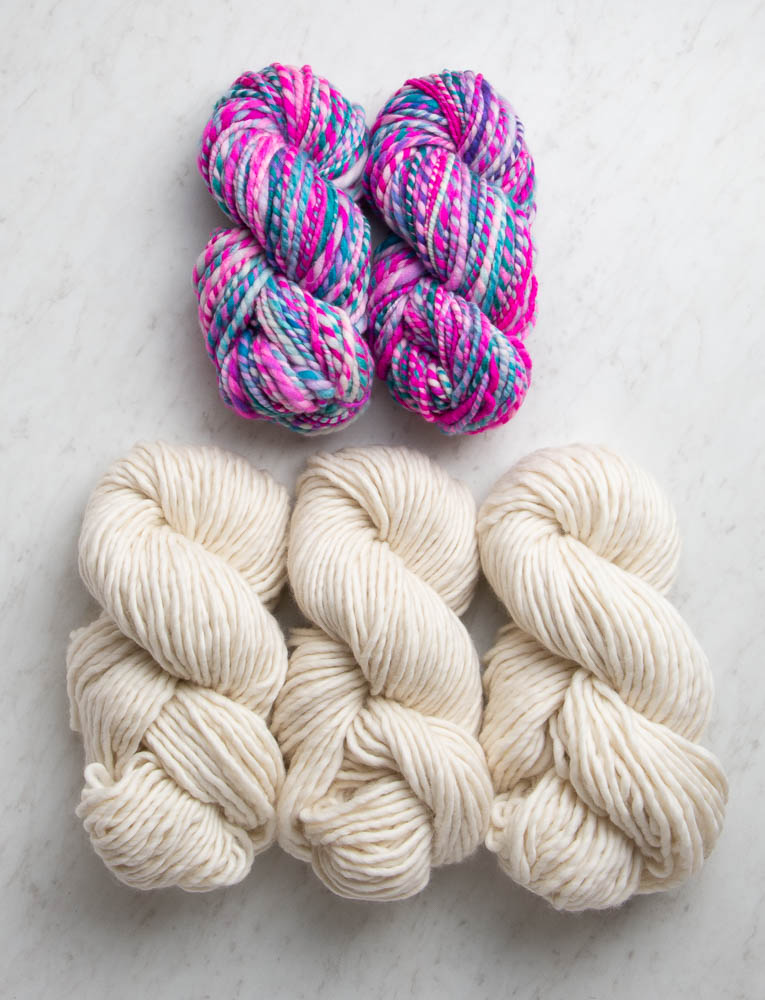
Our Brindle Scarf Bundle includes…
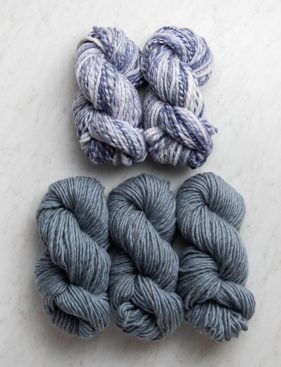
- Yarn A: 3 skeins of Purl Soho’s Super Soft Merino, 100% merino wool. Each skein is 87 yards/ 100 grams; approximately 240 yards required. We used Heirloom White.
- Yarn B: 2 skeins of Purl Soho + Manos del Uruguay’s Lovebird, 100% superwash merino wool. Each skein is approximately 75-85 yards/ 100-110 grams; approximately 108-123 yards required. We used the color Point Break.
- NOTE: Because this yarn is hand spun in small batches, yardages may vary between skeins. You will probably get away with two skeins, but buying three skeins would assure you definitely have enough yarn. If you don’t end up needing it, you can return unwound yarn for a refund within 30 days of purchase, or within 6 months, for store credit. Our Return Policy has all the details!
You’ll also need…
- US 13 (9 mm), 24-inch circular needles (Note that you will be working flat but that circular needles are required in order to “turn and slide” work.)
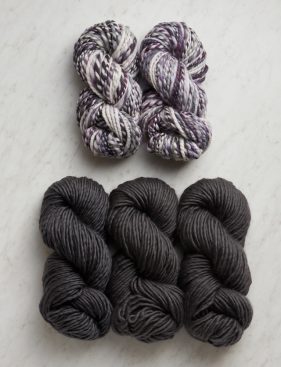
Here are some more color ideas, also available as Brindle Scarf Bundles (NOTE: some palettes are no longer available) …
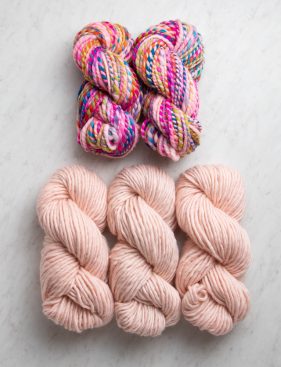
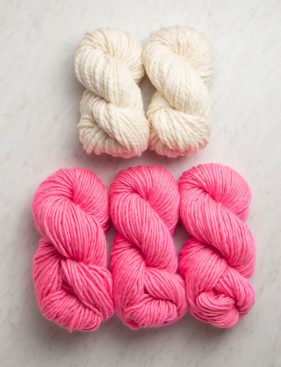
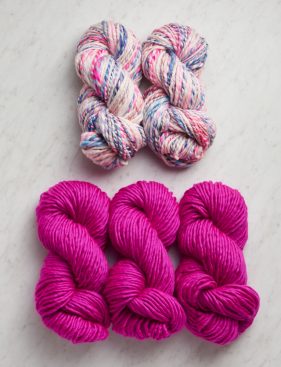
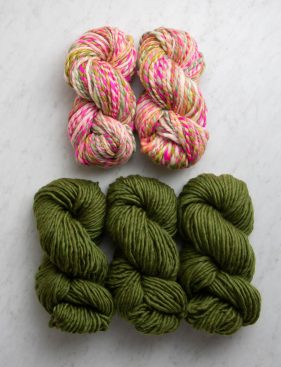

Top Row: Ballet Pink + Candy Shop; Super Pink + Heirloom White; Bougainvillea Pink + Agate (Dye Lot 4)
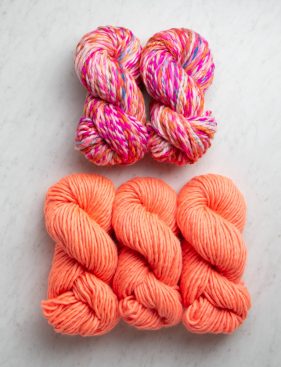
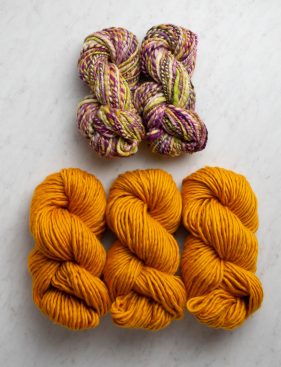
Second Row: Peachy Pink + Firecracker; Turmeric Yellow + Pansy; Fresh Pickle + Geranium
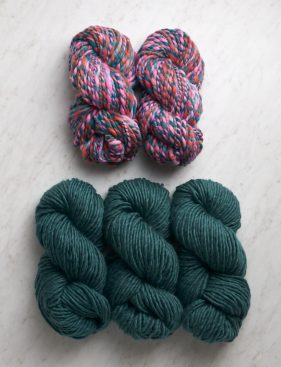
Third Row: Clover Green + Inchworm; Reef Green + Hibiscus; Toasted Charcoal + Licorice
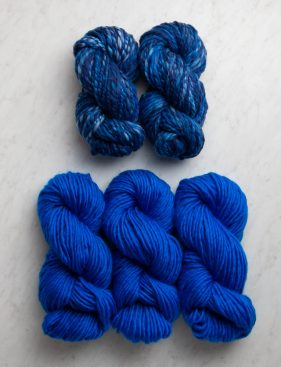
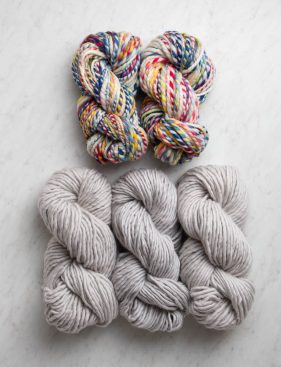
Bottom Row: Oyster Gray + Meadow; Gray Denim + Paper and Ink; Cobalt Blue + Rivulet
Gauge
12 stitches and 26 rows = 4 inches in stitch pattern
12 stitches and 18 rows = 4 inches in stockinette stitch
Size
Finished Dimensions: 8 inches wide x 70 inches long
Notes
Slip Stitches
Slip all stitches purlwise unless otherwise indictated.
Turn + Slide
Each row in this pattern ends with the instructions to either “turn” or “slide” the work:
To “turn the work” means to do what you would normally do when knitting rows with a circular needle. That is to say, put the needle that is in your left hand into your right and the needle that is in your right hand into your left, then flip the work around so the opposite side is facing you.
To “slide the work” means to keep the same side of the work facing you and to push all the stitches to the right end of the circular needles. Without turning the work, start the new row as you normally would.
You will know that you’re doing this right if the yarn you need to complete the next row is magically there waiting for you!
Pattern
With Yarn A, cast on 25 stitches. We used a basic Long Tail Cast On.
Row 1 (wrong side): Slip 1 (see Notes) with yarn in front (wyif), then with Yarn A, knit to end of row, turn work (see Notes).
Row 2 (right side): Slip 1 knitwise wyif, then with Yarn B, *k1, slip 1 with yarn in back (wyib), repeat from * to last 2 stitches, k1, slip 1 wyif, slide work (see Notes).
Row 3 (right side): Slip 1 wyif, then with Yarn A, purl to last stitch, k1, turn work.
Row 4 (wrong side): Slip 1 wyib, then with Yarn B, *slip 1 wyif, p1, repeat from * to last 2 stitches, slip 1 wyif, slip 1 wyib, slide work.
Repeat Rows 1-4 until piece measures 70 inches from cast-on edge or to desired length.
Cut Yarn B.
Repeat Row 1.
Bind Off (right side): With Yarn A, loosely bind off in knit stitch.
Weave in the ends and gently block.


To make a child length one, would I use one skein less of each?
Hi Alexis,
Thanks for reaching out! I think that should be great for a child-size scarf!
If you make this in a child-size, please let us know how it turns out!
Gianna
I’m confused by the Row 2 instruction to “Slip 1 knitwise wyif..” Does it mean just to slip 1 knitwise and continue on?
Thanks!
Hi Jody,
Thanks for reaching out! “Slip 1 knitwise wyif” means to slip one stitch as if you were going to knit it, while holding your yarn to the front of the work (like you would to purl). Hope this clarifies things!
All the best,
Lili
A video “knit along” would be REALLY helpful with this pattern. Just putting it out there. 🙂
Hi Whitney,
Thanks for reaching out! Thanks for expressing your interest! I will be sure to pass this along to the rest of the team!
Warmly,
Gianna
Thank you!
When it says: Row 2 (right side): Slip 1 knitwise wyif, then with Yarn B, *k1…etc
Does that mean the yarn B yarn should be in front for that first slip and then cross back over to complete knits and slips or that the Yarn A should be in front for that first stitch?
Hi Ktg,
Thanks for reaching out! Yes, that is correct, you will start off row 2 by slipping the first stitch knitwise with the yarn in front, and then with Yarn B you will begin knitting as instructed in the pattern!
I hope this helps, happy knitting!
Gianna
Second Whitney’s suggestion for a work along video…
Row 1 – I’m just using YARN A & k
Row 2 – the first SL 1 knit wise wyif is still YARN A on the needle (??) then with the 1st knit in the repeat I start using YARN B for the rest of the row
Row 3 – again the 1st SL 1 wyif is referring to the st on the needle then purling with YARN A
Row 4 – (really confusing me) if the yarn is moved (or in place) before the SL how do I get the yarn in the right position before going in to the repeat with YARN B…also before doing the rows last two SL sts should the 3rd from last st have been a Purl???
Hi Torrens,
We hear you all on how a video would be helpful for this pattern but sadly we’re still stretched a little thin and don’t have the means to create one yet. We do however offer a free new service called 1-On-1 Project Help where you can schedule a Zoom meeting to meet with someone on the team who can demonstrate tricky sections for you!
In the meantime, I’m hoping I can help clear up some of the confusion now.
Row 1 – I’m just using YARN A & k
Yes, but I also want to be sure you’re still slipping the first stitch purlwise with yarn in front, as if you were purling
Row 2 – the first SL 1 knit wise wyif is still YARN A on the needle (??) then with the 1st knit in the repeat I start using YARN B for the rest of the row
Yes, after slipping this first stitch knitwise wyif it will be on your right hand needle and the working yarn for color A can just hang there in front until you return to it at the beginning of Row 3. You will use color B for the second stitch to the end of the row and all stitches should be on your right hand needle by the end of this row.
Row 3 – again the 1st SL 1 wyif is referring to the st on the needle then purling with YARN A
This is where the slide becomes really important. Instead of turning your work and starting with color b, you’ll slide your stitches so the slip stitch with color A is at the front and the beginning of the row again. You’ll slip this stitch purlwise wyif, purl with yarn A which should be the working yarn closest to you (yarn b will be at the opposite end of the row), k1, turn work.
Row 4 – (really confusing me) if the yarn is moved (or in place) before the SL how do I get the yarn in the right position before going in to the repeat with YARN B…also before doing the rows last two SL sts should the 3rd from last st have been a Purl???
At this point in the pattern, if done correctly, both yarn A and yarn B should be at the same end/ the start of row 4. It should settle the confusion once the yarn is in place like that but just to confirm you’ll work with Yarn B throughout this entire row, leaving yarn A at the opposite end so you can start with that once you “slide” again.
Please let us know if that helps or not and feel free to sign up for a video call if you’d prefer to visualize it!
All the best,
Zha Zha
Hi!
I finished the Brindle Scar and have extra (almost a full skein for solid and about half of the Lovebird). I’m wondering if there is a hat pattern that you might recommend so that I can use the extra. I did see the Happy Hat that was just sent in my email. Would that work with this yarn? Other ideas? Many thanks!
Hi Marianne,
Thanks for writing in! We’re so excited that you finished the Brindle Scarf, and it sounds like in no time you’ll have a matching hat! I would suggest any of our super bulky weight hat patterns for the Super Soft Merino and Lovebird that you have left. A few that jumped out to me are the Merry Earflap Hat (how cute would it be if the earflaps were Lovebird?) as well as the Super Soft Merino Hats for Everyone, which has lots of different styles to peruse. I hope this was helpful!
All the best,
Cat
Hi! On row 2, when knitting and slipping the repeat section with Yarn B, are we slipping knitwise or purlwise?
Hi Christina,
Thanks for writing in. On Row 2, you’ll be slipping those stitches purlwise! A good rule of thumb for most patterns (including this one) is that all stitches should be slipped purlwise unless otherwise noted. Hope this helps!
All the best,
Lili
Question – in “Row 3 (right side): Slip 1 wyif, then with Yarn A, purl to last stitch, k1, turn work.” When I am about to knit the last stitch, my yarn B is in the front. Am I supposed to keep it there in the front? (Which means it’s on the “right side” when I need to purl it).
Hi Mia,
Thanks for reaching out. You are meant to keep Yarn B in front at that point in the pattern, and when you need to purl it, you can bring it to the front of the work! The reason that it’s kept in the back at that point is so that it can interlock with Yarn A, which is crucial for the colors in the scarf to remain joined at the edges. Hope this helps clarify things!
All the best,
Lili
What is the right multiple for this pattern if I want to make it wider?
Hi Dawn,
Thanks for writing in. This pattern works over an odd number of stitches!
All the best,
Lili
I just finished this scarf in Gray Denim + Paper and Ink and it turned out absolutely beautifully! I’d love to make this for some kiddos – do you have any suggestions for how to make this pattern thinner and shorter to be appropriate for a grade school kid? Thank you!
Hi Keri!
Thank you for your question! We love your idea, as this is such a fun and playful scarf! To make this narrower, I suggest casting on any multiple of 2 + 1 stitches. To make a scarf half the width of the full scarf, cast on 13 stitches. Or, for a ¾ width, cast on 19 stitches. Then, repeat the four-row repeat until you are satisfied with the length of the scarf. The pattern calls for working until the piece measures 70”, but I think a 50”-60” scarf would be a good fit for a child’s size!
Hope this helps!
All the best,
Margaret
Do you think this pattern would work as a baby blanket? If it were wider and shorter, of course. Or would it be too stiff?
Kitty Martin
Hi Kitty,
I think that’s a wonderful idea to adapt this stitch pattern for a baby blanket! You’re right though, the knit fabric is a bit dense and can be stiff, but there’s a way around that. If you knit at a larger gauge, with larger needles, there will automatically be more space between stitches, giving the fabric much more drape!
All the best,
Lili
Hi, would it be possible to swap out the lovebird for posy if I used two (or three?) strands together?
With thanks, Michelle
Hi Michelle,
Thanks for reaching out. I think that you could get pretty close to the weight of Lovebird by holding 3 strands of Posy together! If you try this, I’d definitely recommend knitting a gauge swatch before casting on the scarf, to be sure you choose the right needles for the project. You may need to size up or down your needles in order to get the correct gauge! If you would like to learn more about this, we have a handy tutorial called All About Gauge. Hope this helps!
All the best,
Lili
Hi! I am currently knitting the Brindle Scarf in Heirloom White and Point Break (just like the first photo). It is coming along nicely:) I do find I need to be super careful where the two different working strands are, in relation to one another, when I turn my work. If not, one of the edges can be a bit untidy.
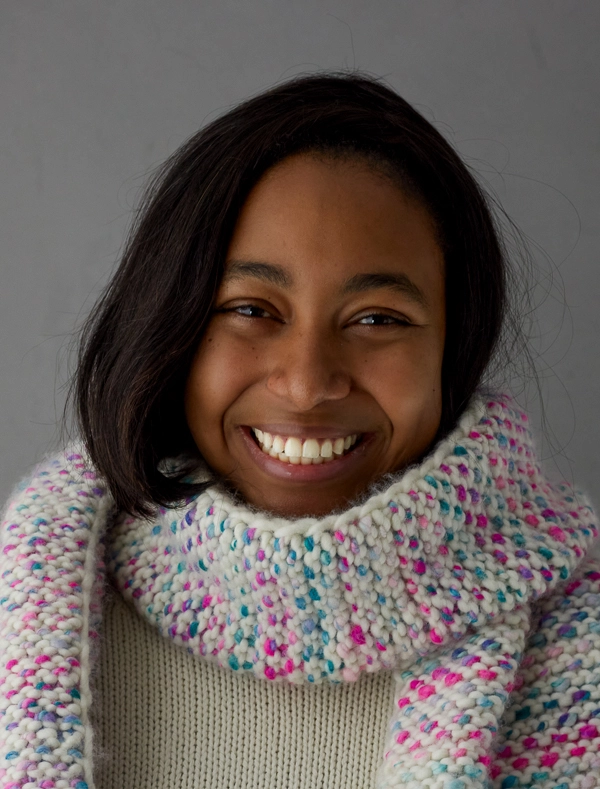
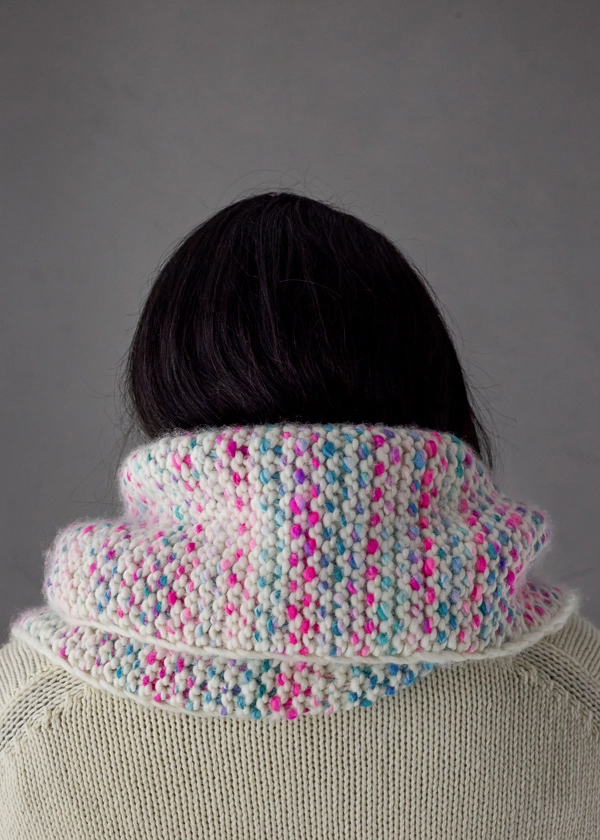
Here’s what I think: It is such a pretty pattern that I think would be wonderful to adapt to working in the round and making a cowl instead. This would show off the right side only, the edges wouldn’t be an issue, and it would be a beautiful quick project using less yarn! Are you able to tell me how to adapt to working in the round? Thanks for the great patten and beautiful wool!
Hi Andrea,
Thanks for reaching out, and you can definitely find a way to work this stitch pattern in the round! Here’s a way I thought of to modify it:
Round 1: With Yarn A, purl to end of round.
Round 2: With Yarn B, *k1, slip 1 wyib, repeat from * to end of round.
Round 3: With Yarn A, purl to end of round.
Round 4: With Yarn B, *slip 1 wyib, k1, repeat from * to end of round.
This pattern will now work over an even number of stitches (not odd, as in the original pattern), so be sure to take that into account when you cast on!
I hope this helps, and please let me know if you have any other questions!
All the best,
Lili
Thank you so much! I look forward to trying this.