
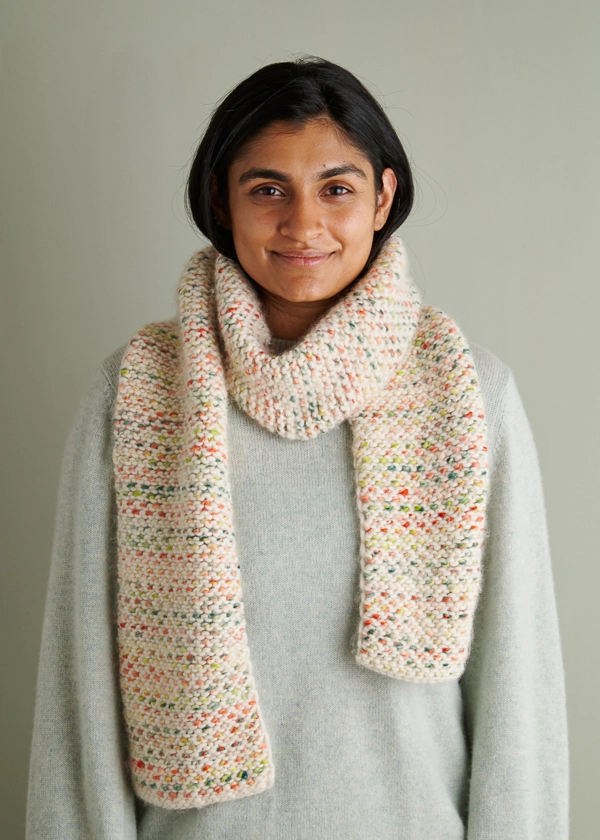
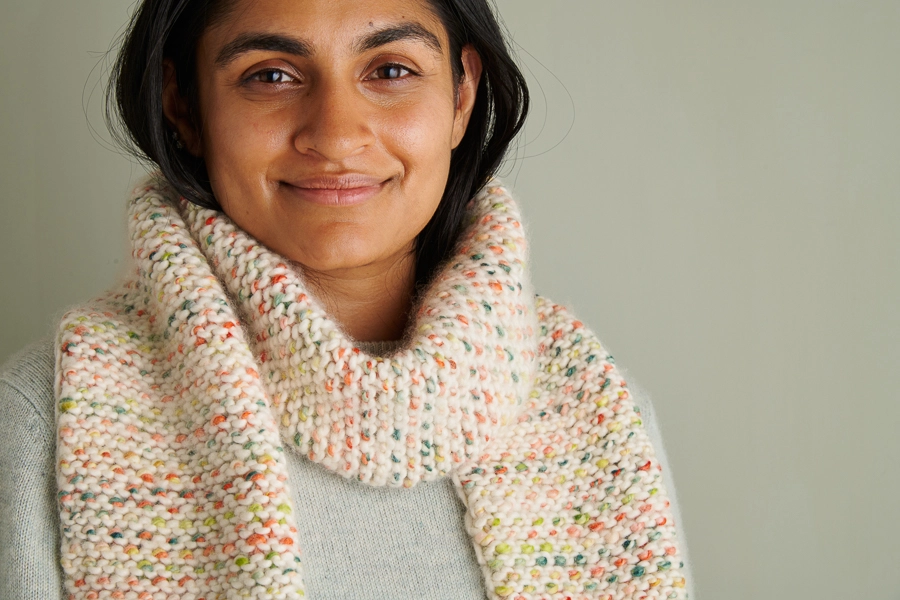
Brindle Scarf In New Colors
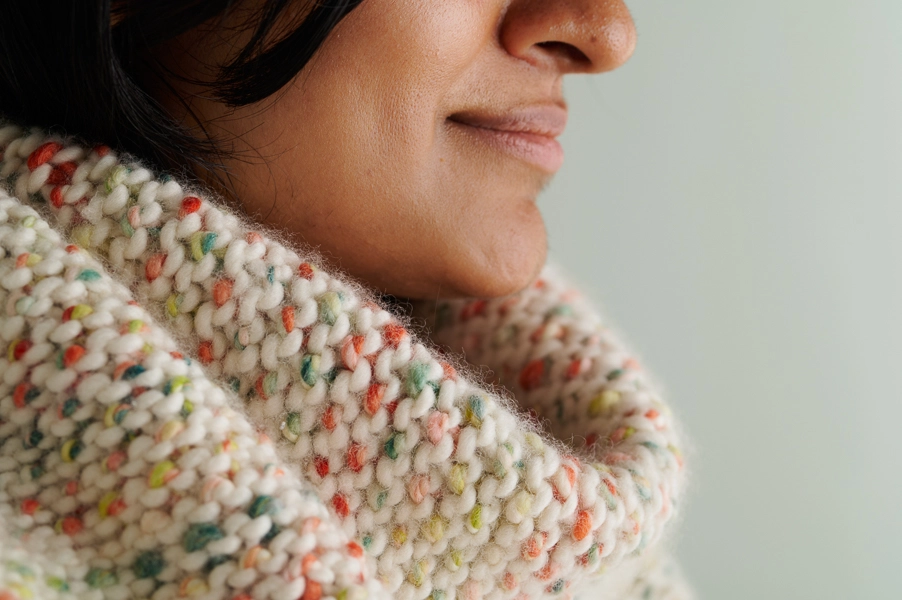
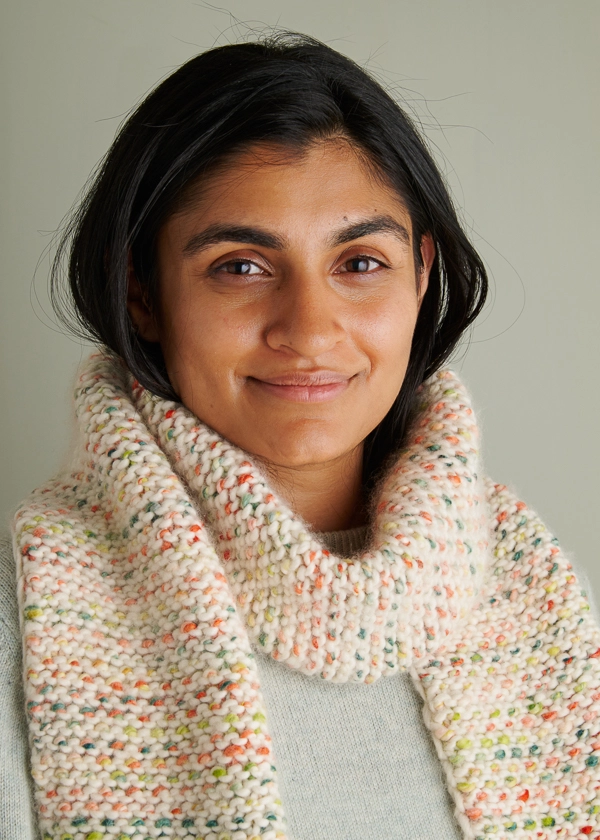
We love delicate knits with intricate designs, but sometimes we want to fling ourselves into something chunky and fast. Our exuberantly colored Lovebird provides the interest and beauty, while our Brindle Scarf brings super-duper-simple colorwork knitting. Hooray!
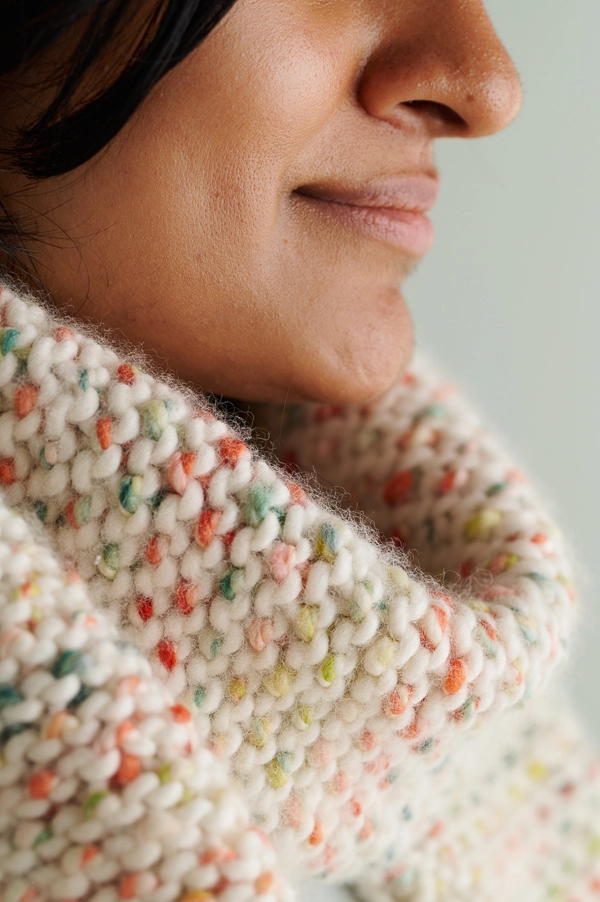
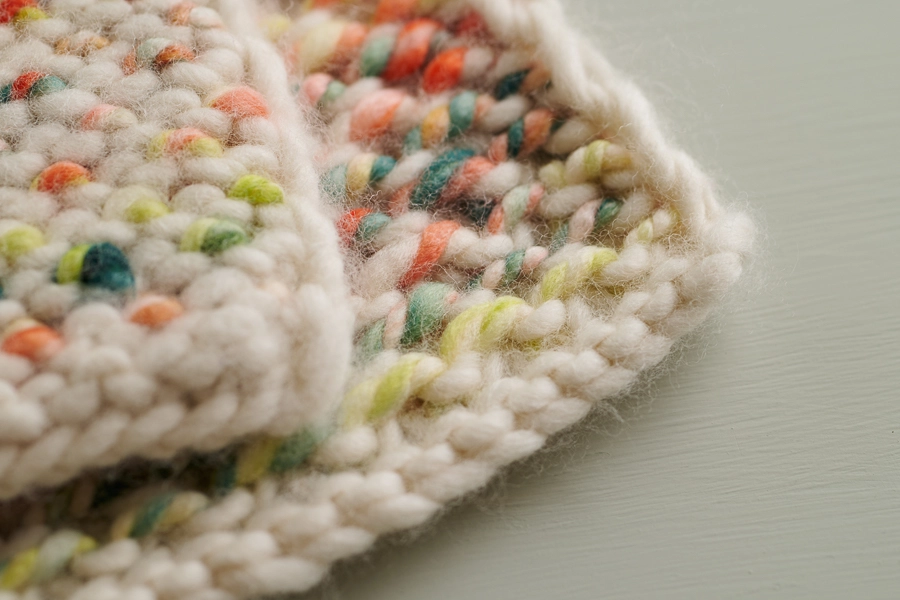
Colorwork is always engaging but sometimes slow and complicated… Not so with the Brindle Scarf!
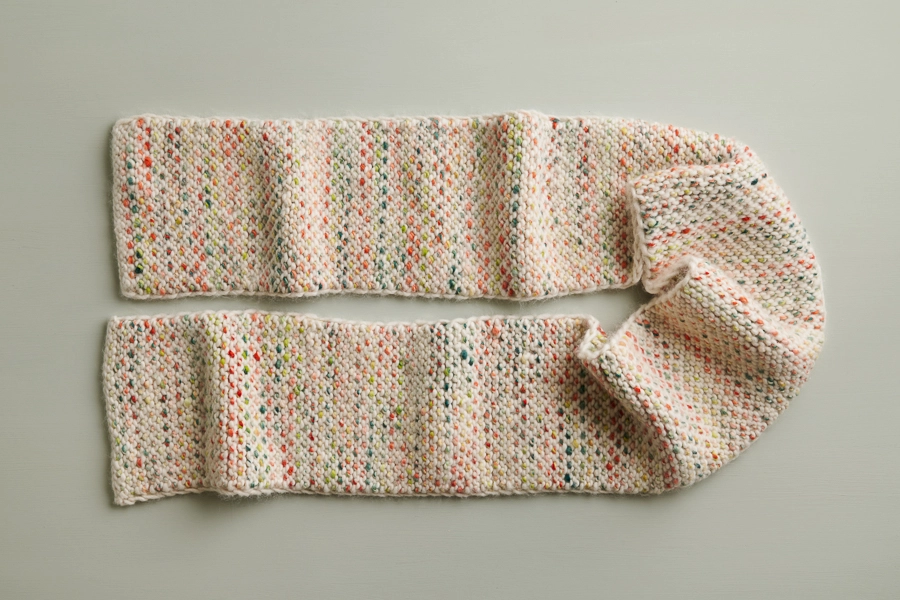
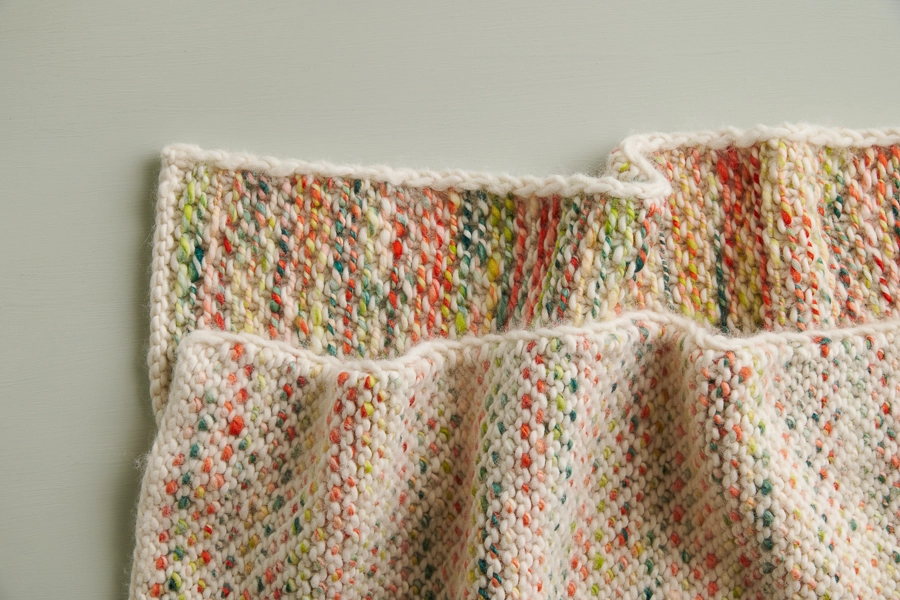
This pattern is a no-sweat 4-row repeat that alternates slip-stitch rows with lines of straight knitting and purling.
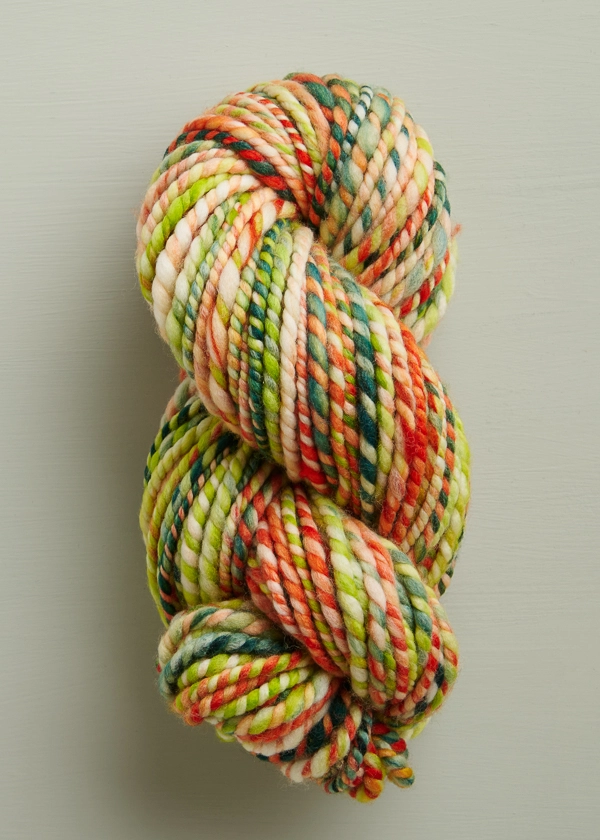
The perfect festival of color for this knit? Our lovely Lovebird, a 100% superwash merino, developed in partnership with Manos Del Uruguay. We pair it here with our dreamy Super Soft Merino, which is a squishy single ply of 100%… You guessed it, merino!

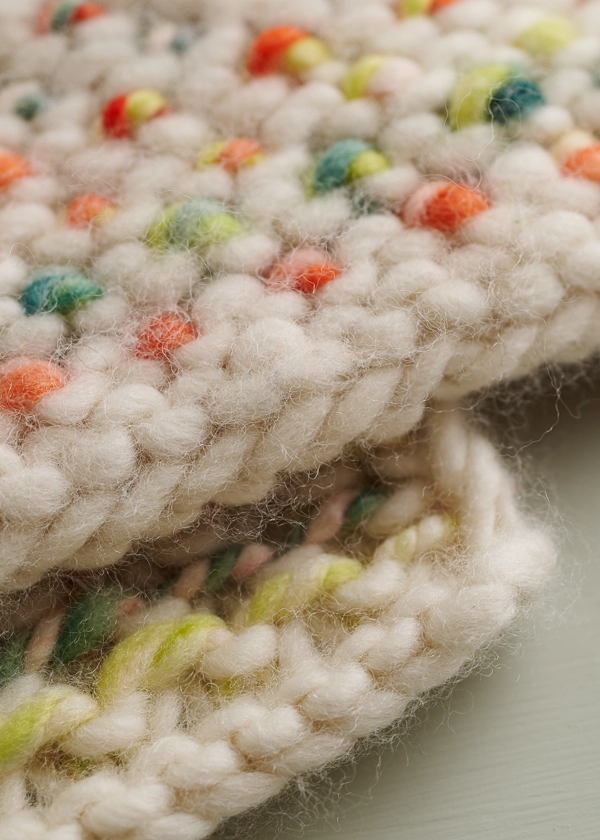
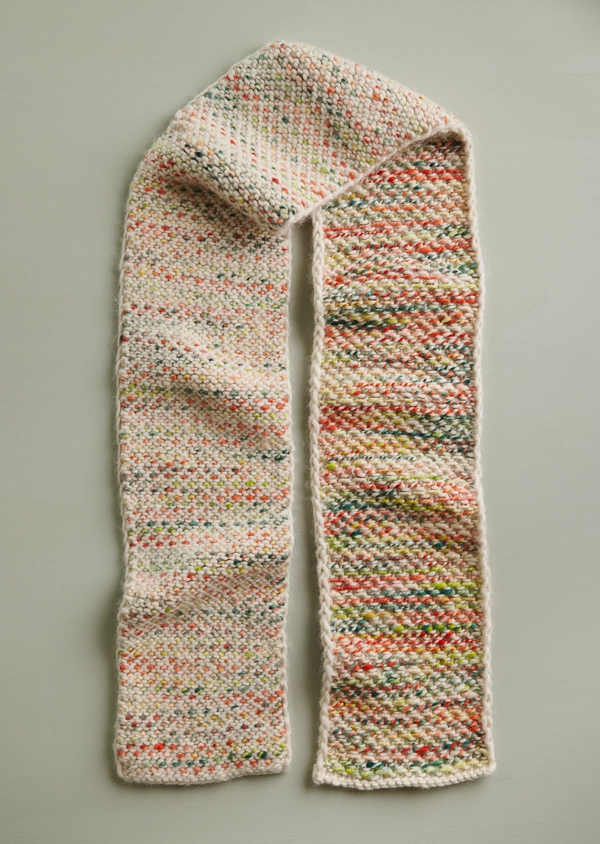
Both yarns are plump and buttery soft, and each one gets a chance to star in the show with one side of the pattern showcasing Lovebird and the other side Super Soft Merino.

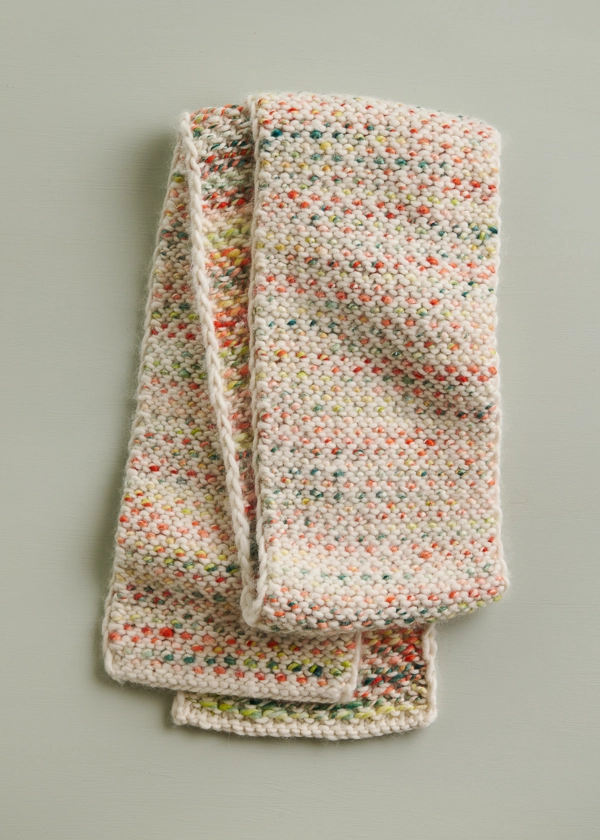
Our Brindle Scarf Bundles include three skeins of Super Soft Merino and two skeins of Lovebird, a lot to love and tons of palettes to choose from. So, plump up your yarn and pump up the beauty, and cast on for a happy, chunky knit!
Originally designed by Purl Soho designer, Jake Canton. Click here to see even more of Jake’s designs!
Share your progress and connect with the community by tagging your pics with #PurlSoho, #PurlSohoBusyHands, #PurlSohoBrindleScarf, #PurlSohoLovebird and #PurlSohoSuperSoftMerino. We can’t wait to see what you make!
Materials
Our Brindle Scarf Bundle includes…
- Yarn A: 3 skeins of Purl Soho’s Super Soft Merino, 100% merino wool. Each skein is 87 yards/ 100 grams; approximately 240 yards required. We used Heirloom White.
- Yarn B: 2 skeins of Purl Soho + Manos del Uruguay’s Lovebird, 100% superwash merino wool. Each skein is approximately 75-85 yards/ 100-110 grams; approximately 118 yards required. We used the color Caprese.
NOTE: Because this yarn is hand spun in small batches, yardages may vary between skeins. You will probably get away with the recommended skein counts, but buying an extra skein would assure you definitely have enough yarn. If you don’t end up needing it, you can return unwound yarn for a refund within 30 days of purchase, or within 6 months, for store credit. Our Return Policy has all the details!
You’ll also need…
- US 13 (9 mm), 24-inch circular needles (Note that you will be working flat but that circular needles are required in order to “turn and slide” work.)
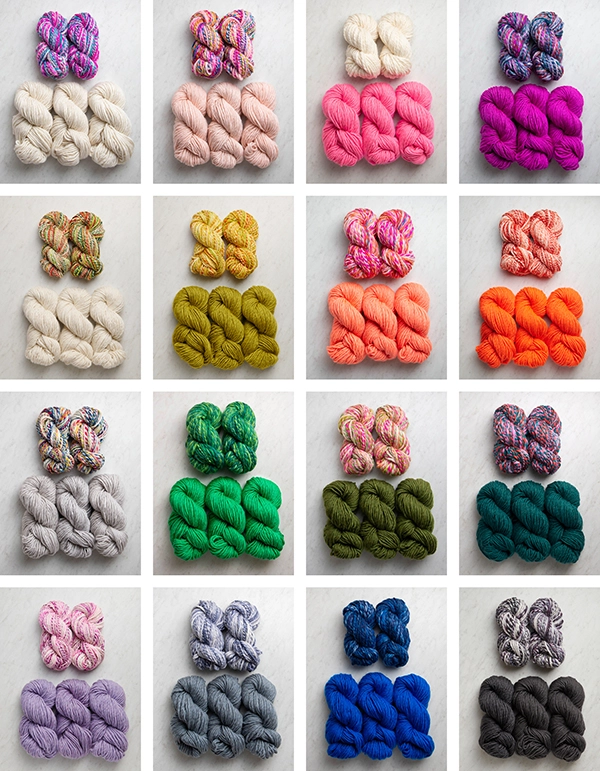
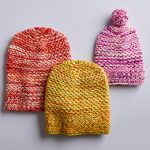
Choose from sixteen bundles (NOTE: some palettes are no longer available)…
Top Row: Heirloom White + Point Break; Ballet Pink + Candy Shop; Super Pink + Heirloom White; Bougainvillea Pink + Agate
Second Row: Heirloom White + Caprese (we used this one for our sample); Golden Green + Papaya; Peachy Pink + Firecracker; Super Orange + Strawberry Shortcake
Third Row: Oyster Gray + Meadow; Clover Green + Inchworm; Fresh Pickle + Geranium; Reef Green + Hibiscus
Bottom Row: Crocus Bud + Thistle; Gray Denim + Paper and Ink; Cobalt Blue + Rivulet; Toasted Charcoal + Licorice
GAUGE
12 stitches and 26 rows = 4 inches in stitch pattern
12 stitches and 18 rows = 4 inches in stockinette stitch
SIZE
Finished Dimensions: 8 inches wide x 70 inches long
NOTES
SLIP STITCHES
Slip all stitches purlwise unless otherwise indicated.
TURN + SLIDE
Each row in this pattern ends with the instructions to either “turn” or “slide” the work:
To “turn the work” means to do what you would normally do when knitting rows with a circular needle. That is to say, put the needle that is in your left hand into your right and the needle that is in your right hand into your left, then flip the work around so the opposite side is facing you.
To “slide the work” means to keep the same side of the work facing you and to push all the stitches to the right end of the circular needles. Without turning the work, start the new row as you normally would.
You will know that you’re doing this right if the yarn you need to complete the next row is magically there waiting for you!
PATTERN
With Yarn A, cast on 25 stitches. We used a basic Long Tail Cast On.
Row 1 (wrong side): Slip 1 (see Notes) with yarn in front (wyif), then with Yarn A, knit to end of row, turn work (see Notes).
Row 2 (right side): Slip 1 knitwise wyif, then with Yarn B, *k1, slip 1 with yarn in back (wyib), repeat from * to last 2 stitches, k1, slip 1 wyif, slide work (see Notes).
Row 3 (right side): Slip 1 wyif, then with Yarn A, purl to last stitch, k1, turn work.
Row 4 (wrong side): Slip 1 wyib, then with Yarn B, *slip 1 wyif, p1, repeat from * to last 2 stitches, slip 1 wyif, slip 1 wyib, slide work.
Repeat Rows 1–4 until piece measures 70 inches from cast-on edge or to desired length.
Cut Yarn B.
Repeat Row 1.
Bind Off (right side): With Yarn A, loosely bind off in knit stitch.
Weave in the ends and gently block.


Can this be knitted with straight needles?
Hi Laura,
Thanks for reaching out! This pattern works best on circular needles, since you’ll need to slide your work on a few rows, instead of turning it. Since straight needles have a stopped on one end, you wouldn’t be able to slide the work. However, if you have a pair of extra-long DPNs on hand (longer than 8 inches each), then you could absolutely use those, since they would allow you to slide the work!
All the best,
Lili
Hi there, I love this pattern but am having trouble keeping the selvage edge tight. Are there any tips to help me with this using this pattern?
Thanks a lot.
Hi Laura,
Thanks for reaching out! This pattern has a pretty tricky edge treatment, which can definitely mess with the tension. If things are just seeming too loose, then what will probably fix that is just making sure to pull your working yarn tighter every time you begin a row.
But in case there’s a deeper issue here, I wanted to take the chance to write out a more in-depth explanation for how to work the edges in this pattern! It may be useful for you to pinpoint if there are any slight errors in what you’re doing, and I’m sure it will be very beneficial for others making this pattern as well! Here are the detailed instructions:
On Row 1 (wrong side):
– Yarns A and B are at opposite ends of work
– Slip first stitch (always a Yarn A stitch) purlwise with yarn in front
– Bring yarn between needles to the back of work (like you mentioned!)
– Start knitting!
On Row 2 (right side):
– Yarns A and B are on the same end of work
– Slip first stitch (always a Yarn A stitch) knitwise with both yarns in front
– Bring Yarn B only between needles to the back of work
– Start the *k1, slip 1 wyib, etc. stitch pattern (don’t forget to slip the final stitch wyif!)
On Row 3 (right side):
– Yarns A and B are at opposite ends of work
– Slip first stitch (always a Yarn A stitch) purlwise with yarn in front
– Keep Yarn A at the front of work
– Start purling (don’t forget to knit the final stitch!)
On Row 4 (wrong side):
– Yarns A and B are on the same end of work
– Slip first stitch (always a Yarn A stitch) purlwise with both yarns in back
– Bring Yarn B only between needles to the front of work
– Start the *slip 1 wyif, p1, etc. stitch pattern (don’t forget to slip the final stitch wyib!)
I hope this helps, but if you’re still running into trouble, feel free to send a photo of your work to customerservice@purlsoho.com so we can take a closer look!
All the best,
Lili
Hi Lili,
Will the selvedge look the same on both sides? I’m pretty sure I’m doing something not quite right – I have been looping the CC around the outside every third row.
Thanks!
Hi Katie,
Thanks for checking in about this! The selvedge does indeed look the same on both sides. And you’re already pinpointed the problem! The CC should never be looped around the outside–on each row (where applicable) you’ll bring the new yarn between the needles to either the front or the back of the work. Hope this helps clarify things!
All the best,
Lili
Thank you so much for the extra detailed instruction! I’m anxious to get started again! This will be very helpful 🙂
Is your sample knitted with Lovebird or Caprese? Is the descriptions of the different color options, it says Caprese was used for your sample. Thanks!
Hi Ann,
Thanks for reaching out. Caprese is one of the colors of Lovebird yarn! Our sample was knit up with Lovebird in the color called Caprese. Hope this helps clarify things!
All the best,
Lili
I’m absolutely loving working on this pattern! I’m using the Lovebird and Super Soft Merino and it’s so fun to work with and has such a lovely hand to it. A couple questions. How would adding fringe work for this piece? Would you recommend it and is there a specific length or type that might work well? Is there enough yarn leftover to make it work? Also, do you have a recommendation for blocking?
Hi Hannah,
A fringe would be a very fun addition to this scarf! I would recommend cutting short lengths of yarn (double the length you want the fringe to be) and using a tapestry needle to thread them through each stitch on the cast-on and bind-off edges. The length of the fringe is completely up to personal preference, but I tend to prefer anywhere from 1 to 3 inches long. And there will definitely be enough yarn left over!
As for blocking, we recommend wet blocking this scarf and laying it flat to dry. Hope this helps!
All the best,
Lili
I have a couple of extra skeins of pale pink Partridge left over from making your Lark wrap (which is lovely). Wondering what you’d think about making a Brindle scarf using Partridge and Lovebird. They’re different weights — Partridge is a worsted. I went ahead and bought the Lovebird and have tried swatching on size 13s and size 11s. 13 swatch looks loose and sloppy. 11 is better, but maybe a tad too dense/tight? It’s 7 inches wide, instead of 8. I’m trying to decide whether I’d be happier with the final product if the yarns were more similar in weight. Any advice?
Hi Anne,
Thanks for writing in! It sounds like you’re already doing what I’d suggest in this situation–swatching! To determine the best needle size to use with these two yarns, swatching is the best way to do it, since you can test out the quality of the knit fabric in person. Once you’ve decided which needle size you prefer, then you can adjust your cast-on based on the gauge that that needle size creates. This way, you can make a scarf that comes to exactly the dimensions you’re looking for!
To figure out your cast-on number, you will want to first knit a gauge swatch in pattern with your chosen needles. Once you know how many stitches you are getting per inch, you can multiply that number by the width that you would like and cast on the nearest odd number. Then you can follow the pattern as written!
All the best,
Lili
Hello!
I love this stitch pattern and yarn so much I bought the kit and it’s up next on my list for B- day cast on next week. I just know I would wear it more as a cowl though. (If I could only knit one thing for the rest of my life it would be cowls). Can you give me any tips for converting a flat pattern to a work in the round pattern (a la the beauty berry blanket turned cowl)? Thanks for any tips!
Hi Brittany,
Thanks for your comment! We’re so grateful that you’re a fan of this yarn and stitch pattern. It truly makes us so happy to hear it! I’m afraid at this moment, though, we have not developed this pattern to be knit in the round as a cowl so I’m unfortunately unable to convert the pattern for this different construction at this time. However, we will be sure to keep this suggestion in mind! One idea I had is that you could potentially knit this flat in your preferred cowl dimensions and seam the sides together to create the tube for the cowl! The gauge for this pattern is 3 stitches per inch, so you would just need to multiply your preferred cowl circumference by 3 stitches to find your cast-on number of stitches. I hope this helps! Thank you again for your kind comment!
All the best,
Cat
I want to use a different yarn weight for this scarf, and can I just double the 25 or does it need to be an odd number of stitches ? Thanks
Hi Alice,
Thanks for reaching out. This pattern works over an odd number of stitches, and here’s how you can adjust the cast-on for a different weight yarn!
To figure out your cast-on number, you will want to first knit a gauge swatch in pattern. Once you know how many stitches you are getting per inch, you can multiply that number by the width (8 inches) and cast on the nearest odd number. Then you can follow the pattern as written!
All the best,
Lili
can this pattern be adapted for a baby blanket. How much yarn would be needed and how many stitches to cast on.
Thanks for your help
Hi Lisa,
Thanks for reaching out! you could absolutely use this stitch pattern for a baby blanket. However, the amount of yarn you’d need will depend on how large you want the blanket to be. We typically design our baby blankets. to be approximately 28 by 32 inches. If that sounds like the size you’re aiming for, then you would need 5 skeins of Super Soft Merino and 3 skeins of Lovebird. Based on the gauge, you would need to cast on either 83 or 85 stitches for a 28-inch width. Hope this helps!
All the best,
Lili
How many skeins of each would I need if I wanted to knit a throw for a den? Thx!
Hi Stacy,
Thanks for reaching out! To make a throw size blanket measuring about 38 inches x 54 inches based on this pattern, you would need 11 skeins of Super Soft Merino and 6 skeins of Lovebird. Please feel free to email us at customerservice@purlsoho.com if you had different blanket dimensions in mind, though, or would like to discuss your project further! We are always happy to help!
All the best,
Cat
For these dimensions, how many stitches would you recommend I cast on?
Hi Stacy,
Thank you for your question! To modify this pattern you will want to start with a gauge swatch. You will then measure your stitches per inch and multiply that number by the desired width of your blanket and that will give you your cast on number. One thing to keep in mind is you will want to start with an odd number of stitches, this way you can adjust your stitch count accordingly. I hope this helps but please let us know if you have any other questions!
Happy knitting,
Gavriella
Hello! Is it possible to knit this in one color (and not do Yarn A + Yarn B, just one yarn all the way through)
Hi Eileen,
Thanks for your question! You can definitely make this using one color. One thing to note is that you will still want to work with two separate balls of yarn so that you can follow the pattern instructions. I hope this helps!
Happy knitting,
Gavriella
Ahh I understand! Because there needs to be yarn waiting on either end for the slide rows. Thank you for the clarification!
You are very welcome Eileen! If you have any more questions along the way, we are happy to help!