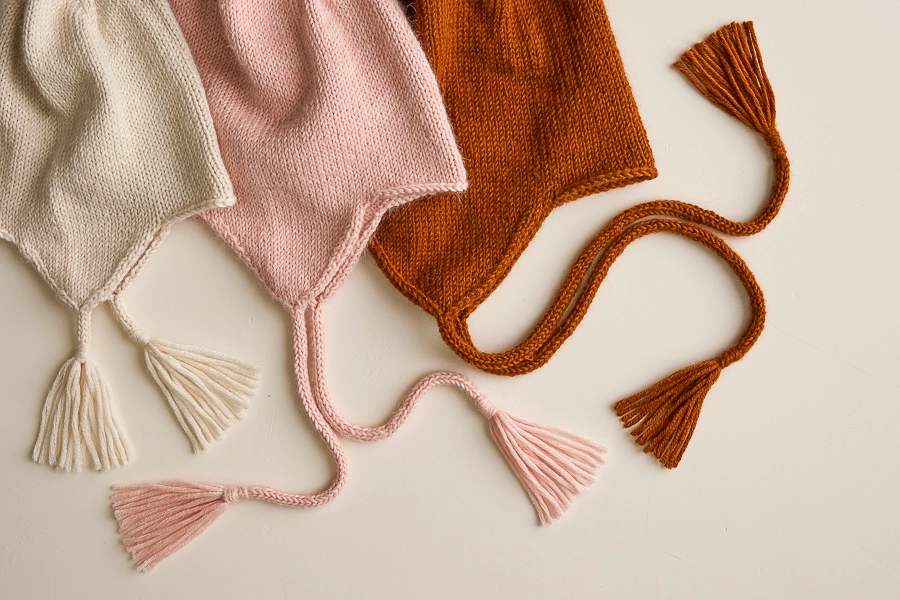

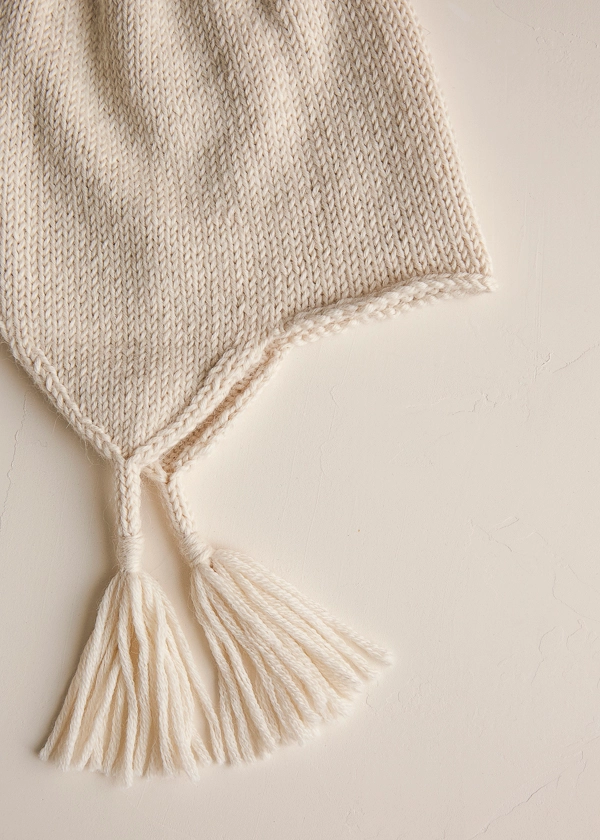
Top-Down Ear Flap Hat
What winter demands is a hat that does the job of keeping your head and ears warm, and does it without making you look like a Smurf. Our Top-Down Ear Flap Hat is such a hat… the good kind, that is!

Basic, yes, but beautiful, and in Season Alpaca, our Top-Down Ear Flap Hat is as soft as it gets. Warm? Check. Cozy? Check. There’s not much more to ask of a winter hat, except…
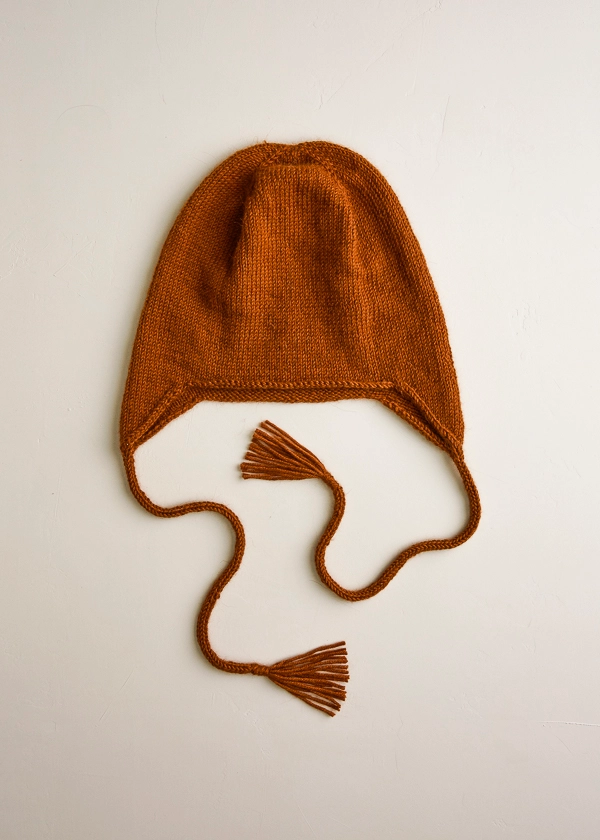
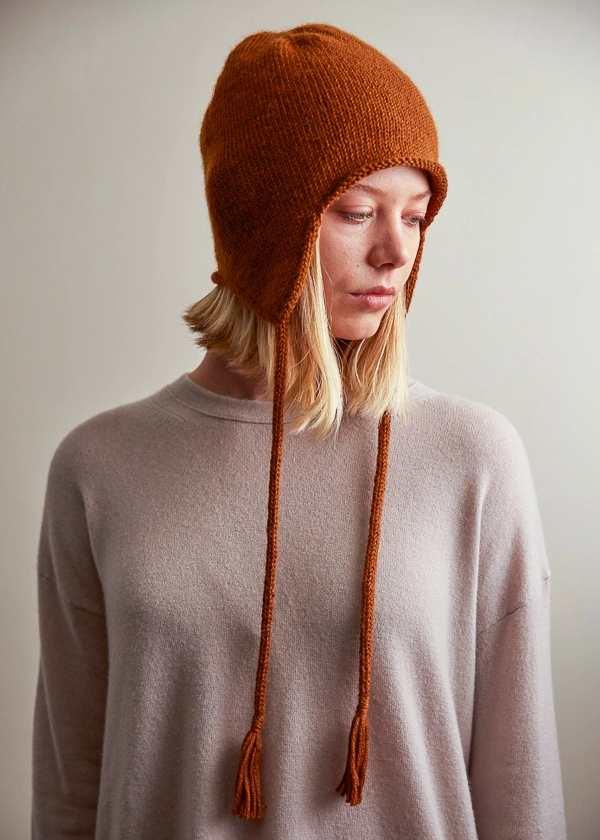
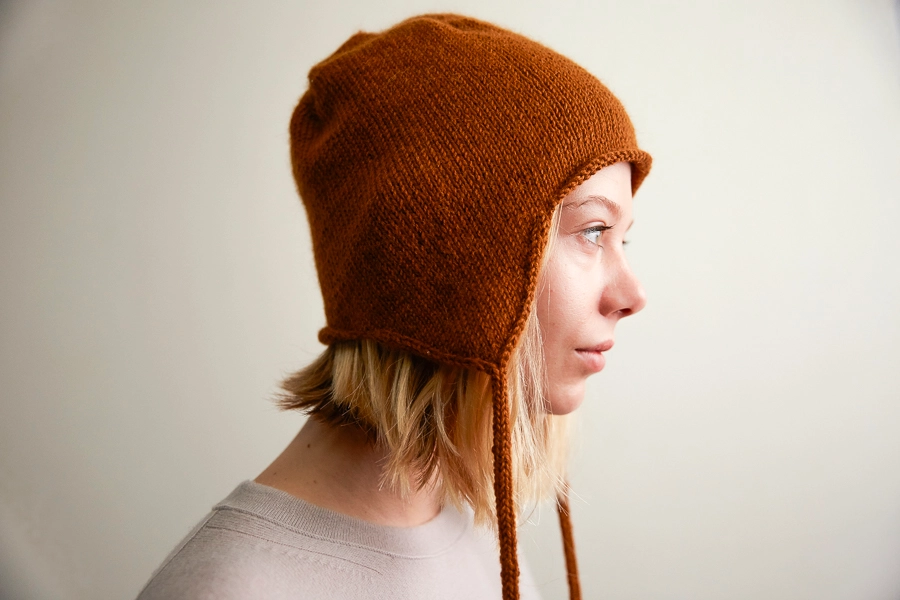
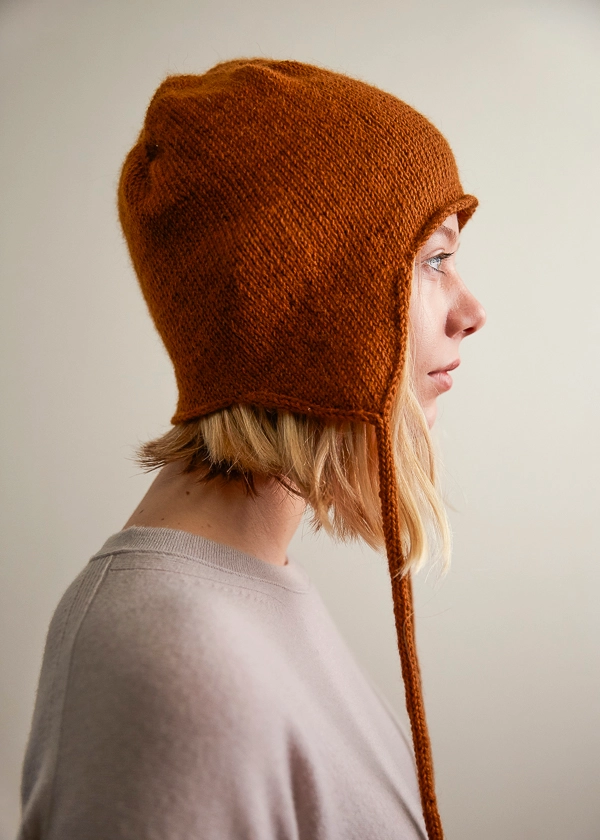
Except that it have ear flaps and adorable I-cords and tassels! And how about constructing it from the top down, so you can determine exactly when the rim falls just to your eyebrows, the flaps hit the bottom of your lobes, and the back perfectly covers the nape of your neck.

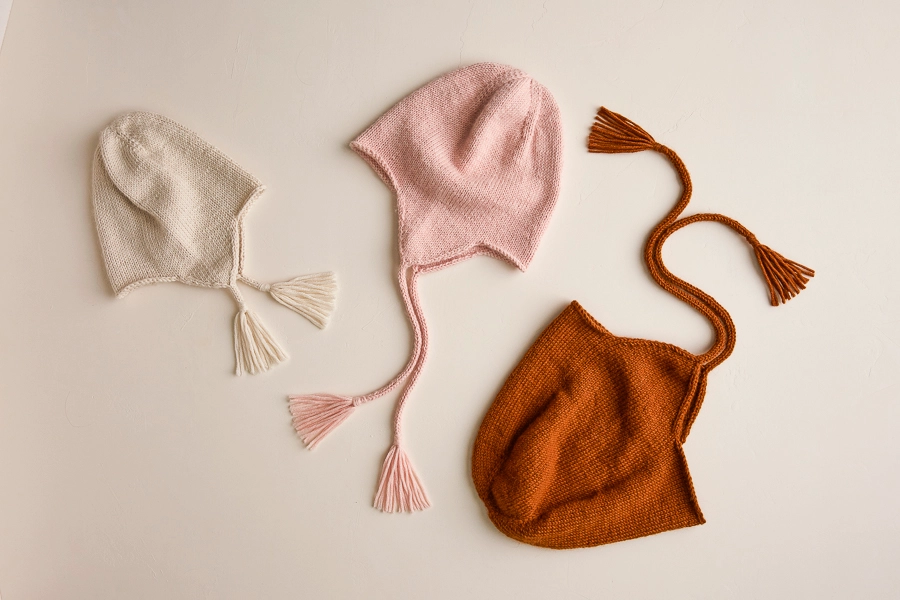
Sized from babies to adults, you’ll need just one skein of Season Alpaca to make one adult hat, two kid hats, or three or four baby ones. Choose from 14 straight-from-nature colors and cast on for this wear-everywhere topper!
Designed by Purl Soho designer, Laura Ferguson.
Share your progress and connect with the community by tagging your pics with #PurlSoho, #PurlSohoBusyHands, #PurlSohoTopDownEarFlapHat, and #PurlSohoSeasonAlpaca. We can’t wait to see what you make!
Materials
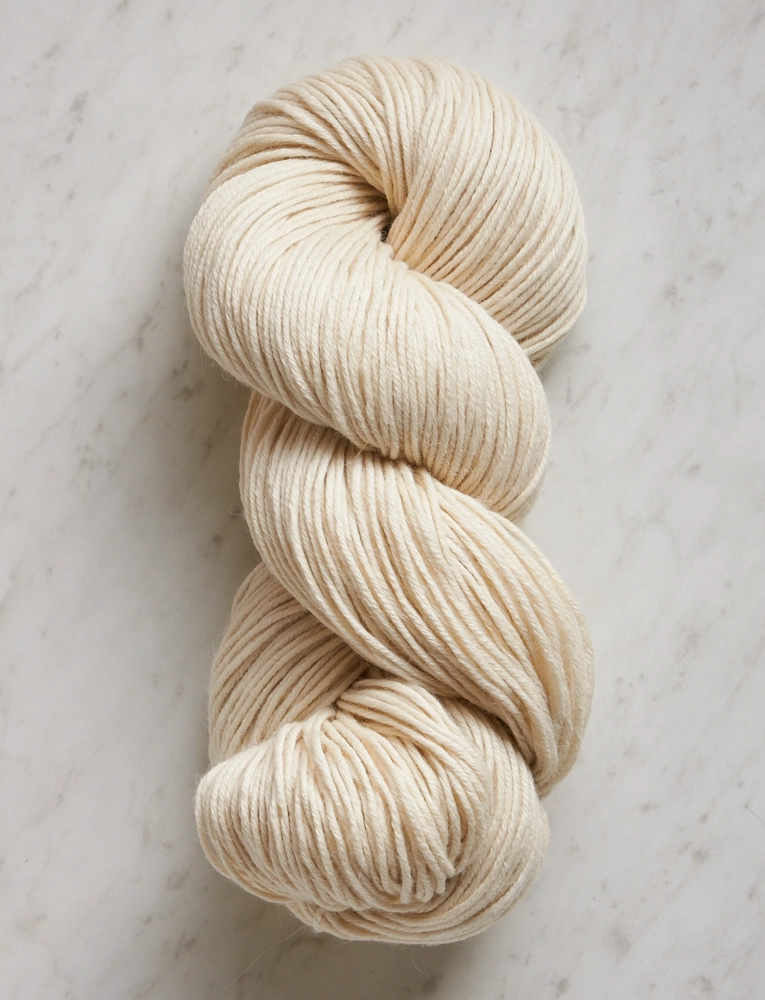
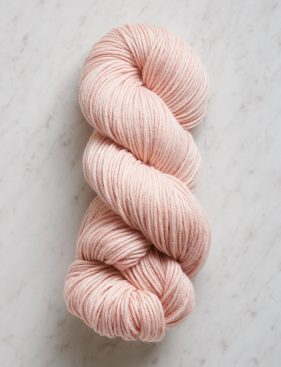
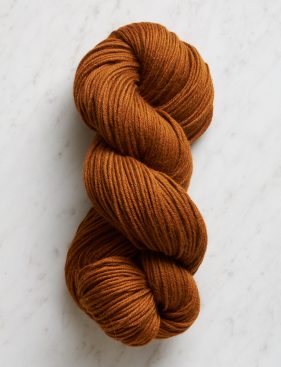
- 1 skein of Purl Soho’s Season Alpaca, 100% baby alpaca. Each skein is 218 yards/ 100 grams; approximately 40 (50, 70, 85, 115, 145, 170) yards required. We used Heirloom White, Peony Pink, and Raw Sienna.
- US 3 (3.25mm), 16-inch circular needles (for Kid and Adult sizes only)
- Set of US 3 double pointed needles
- Stitch markers, including one unique
NOTE: One skein is enough to make 1 Adult hat, 2 Kid Small hats, or 3-4 baby ones.
Gauge
25 stitches and 32 rows = 4 inches in stockinette stitch
Sizes
Newborn-3 months (3-6 months, 6-12 months, Kid Small, Kid Large/Adult Small, Adult Medium, Adult Large)
- Finished Circumference: 14 (15¼, 16¾, 18, 19¼, 20½, 21¾) inches
- Finished Height (from crown to center front): 6 (7, 7½, 8, 8¾, 9½, 10) inches
SAMPLES: We knit size 3-6 months, Kid Small, and Adult Medium.
Notes
Lifted Increases
LLI (Left Lifted Increase): Lift the left leg of the stitch 2 rows below the stitch on right-hand needle onto left-hand needle and knit it through the back loop. [1 stitch increased]
RLI (Right Lifted Increase): Lift right leg of the stitch below the next stitch on the left-hand needle onto the left-hand needle and knit it. [1 stitch increased]
To see both techniques in action, visit our Lifted Increase Tutorial!
SSP
ssp (slip slip purl): Slip one purlwise, slip one knitwise, replace slipped stitches back onto left-hand needle, p2tog through the back loop. [1 stitch decreased]
CSD
csd (centered single decrease): The centered single decrease is worked over three stitches and is essentially an ssk followed by a k2tog. Here’s how to do it…
Slip 2 stitches knitwise, one at a time. Insert left-hand needle into front of the two slipped stitches, knit together. Now, insert tip of left-hand needle into the second of the two just-worked slipped stitches, k2tog (the next stitch on the left-hand needle and the slipped stitch you just picked up). [1 stitch decreased]
Confused? Watch our Centered Single Decrease Tutorial for all the step-by-steps!
Pattern
Shape Crown
Using Long Tail Cast On, cast 8 stitches onto a double pointed needle.
Distribute stitches evenly on 4 double pointed needles.
Join for working in the round, being careful to not twist the stitches.
Round 1: [Knit into front and back (kfb)] eight times. [16 stitches]
Row 2: For needle 1- K2, place unique marker to indicate first needle, k2; For needles 2, 3, and 4- K2, place marker, k2.
Round 3: For each needle- Knit to next marker, LLI (see Notes), slip marker (sm), k1, RLI (see Notes), knit to end of needle. [8 stitches increased]
Round 4: Knit.
Repeat Rounds 3 and 4 eight (9, 9, 9, 9, 9, 9) more times. [88 (96, 96, 96, 96, 96, 96) stitches]
Sizes Newborn-3 months and 3-6 months only
Go to Continue Even section.
Sizes 6-12 months, kid small, kid large/adult small, adult medium, and adult large only
Round 1: [Knit to next marker, LLI, sm, k1, RLI] four times, knit to end of round. [8 stitches increased]
Round 2: Knit.
Repeat Rounds 1 and 2 – (–, 0, 1, 2, 3, 4) more time(s). [– (–, 104, 112, 120, 128, 136) stitches]
Continue Even
Change to circular needles and on the next round, replace the unique marker with a regular marker, and when you reach the end of the round, place the unique marker for end of round.
Continue in stockinette stitch, knitting each round, until piece measures 6 (7, 7½, 8, 8¾, 9½, 10) inches from cast on, ending the last round 10 (10, 11, 12, 12, 13, 13) stitches before end of round.
Shape Ear Flaps
Set-Up Round: Bind off 20 (20, 22, 24, 24, 26, 26) stitches for Back, removing end-of-round marker when you come to it; k20 (22, 24, 26, 28, 30, 32), place previous 21 (23, 25, 27, 29, 31, 33) stitches on stitch holder for Right Ear Flap; bind off 26 (30, 32, 34, 38, 40, 44) stitches for Front, knit remaining stitches. [21 (23, 25, 27, 29, 31, 33) stitches remain for Left Ear Flap]
Left Ear Flap
Note: Work back and forth in rows on two double pointed needles.
Row 1 (wrong side): Purl.
Row 2 (right side): Knit.
Row 3: Repeat Row 1.
Row 4: K2, ssk, knit to last 4 stitches, k2tog, k2. [2 stitches decreased]
Repeat Rows 3 and 4 three (4, 5, 6, 5, 6, 7) more times. [13 (13, 13, 13, 17, 17, 17) stitches remain]
Next Row (wrong side): P2, p2tog, purl to last 4 stitches, ssp (see Notes), p2. [2 stitches decreased]
Next Row (right side): Repeat Row 4. [2 stitches decreased]
Repeat last two rows 0 (0, 0, 0, 1, 1, 1) more time. [9 stitches]
Next Row: P2, p2tog, purl to last 4 stitches, ssp, p2. [7 stitches]
Next Row: K2tog, csd (see Notes), ssk. [4 stitches]
Work i-cord
*Without turning the work, slide stitches to right-hand end of needle, pull yarn from left-most stitch behind back of work to right-most stitch, k4, repeat from * until I-cord measures 1 (1, 1, 8, 10, 12, 12) inch(es), or desired length.
Next Row (wrong side): P2tog, ssp, bind off first stitch by passing it over second stitch and off the needle, cut yarn leaving an 8-inch tail and pull tail through remaining stitch.
Right Ear Flap
Transfer 21 (23, 25, 27, 29, 31 33) on-hold stitches to a double pointed needle.
Join yarn to wrong side and work as for Left Ear Flap.
Finish
Add a Tassel
Cut eight 7-inch lengths of yarn. Using a tapestry needle, thread each length halfway through the tip of I-cord at bottom of Ear Flap to make 16 strands of fringe. Wrap the I-cord tail several times around the base of the fringe where it joins the I-cord. Thread the tail down through the wraps and trim the fringe and tail to desired length.
Repeat for other Ear Flap, weave in remaining ends, and block as desired!


DPNs make me so anxious, since I’m a beginning knitter—could you do the crown using magic loop instead?
Hi Stevie,
Thanks for reaching out! I think Magic Loop should be fine for the crown!
I hope this helps and please let us know how it goes, happy knitting!
Gianna
I did this with magic loop, it worked wonderfully! I’m quite used to DPNs, but with only 2 stitches on each needle in the beginning, they kept sliding off, so I did magic loop instead.
yes i love
I’d like to to make this in Posy + Tussock held together, and I knit a swatch for gauge. Confusingly, my gauge is about 20% larger than yours, even though Posy + Tussock are much lighter weight yarn.
Do you think making a 20% smaller size would work?
Hi Liza,
Thanks for reaching out. There are a few options you can pursue to make this pattern work with the yarn you want to use! First, have you tried using smaller needles yet? That will help make your gauge smaller, and you may even be able to hit the correct gauge this way.
But if you’re finding that smaller needles don’t quite get you there, then you can absolutely knit a smaller size to balance out the gauge! In order to select the size that will work, first measure how many stitches you’re getting in one inch. Then, multiply this number by the finished circumference of the hat size you were originally planning on making. Finally, compare this number to the number of stitches around the body of the hat for each size (for reference, these are 88 (96, 104, 112, 120, 128, 136) stitches), and choose the size that comes closest to this number! Then you can follow the pattern as written for that new size.
I hope this helps!
All the best,
Lili
I am knitting this hat for a 3 month baby. However I want to knit for Christmas 2022. So I wandered the finished size for small is it for a 1 yr old? Do these finished sizes include negative ease for the crown? I can’t predict the baby boy’s head size other than using measurement charts. Any advice as to which size hat in this pattern I should choose? Thank you in advance.
Hi Jayne,
Thanks for reaching out, and that’s a great question! I’d recommend knitting the Kid Small size. This size will fit children 1 year and older, so it should be perfect and have a little room to grow! In answer to your question about ease, this hat is designed to fit with about an inch or two of negative ease. Hope this helps!
All the best,
Lili
Oh thank you ! I really appreciate your swift response and valuable information.
Love the pattern, thanks so much for sharing it. Any particular binding off technique you recommend?
Hi Tracy!
Thank you for your question, and we are so glad you love this pattern! We recommend doing a basic knit bind off so that the stitches lay nicely around the perimeter of the hat. If you would like to see a tutorial for this, you can find it here!
I hope this helps, and happy knitting!
All the best,
Margaret
Hello, I know nothing about knitting but I was wondering if I can commission one of these hats. Job is open please and obviously I’ll pay for the product. Specifications can be talked once contact is reached. thank you!!!!
Hi Sam,
Thanks for reaching out to us. I’m sorry to say that we aren’t taking any commissions for projects, but we do have all of the materials and instructions for you, or perhaps a knitting friend, to make one of your own! For this project, we used Season Alpaca, but you can search our selection of sport weight yarn here!
We would also be happy to answer any of your questions about knitting this project if you would like to knit your hat! You can reach out to us any time at customerservice@purlsoho.com.
I hope this helps, and please let us know if you have any questions!
All the best,
Carly
Hello! I am a very inexperienced knitter, and this hat is my first real project. I just started to continue even, did like three or four rounds. Is the crown supposed to lay flat at this point, or could I have made a mistake at some earlier point? I love this design so much, really want it to work out.
Hi Anna!
Thank you for your question, and congratulations on casting on your first project! After shaping the crown of this hat, the quickly-increased crown will have a slight concave curve to it, since so many stitches were added so quickly, thus creating the perfect fit to the top of your head! Once you are knitting even, however, the crown will grow longer to look more and more like a hat. Since this yarn has some lovely drape to it, the fabric of the crown shaping itself could lay flat, but not without a few puckered sections around the increased stitches by design.
I hope this helps, and please feel free to let us know if you have any other questions!
All the best,
Margaret
Hi — my question is on this step
“Change to circular needles and on the next round, replace the unique marker with a regular marker, and when you reach the end of the round, place the unique marker for end of round.”
How do we know what the end of the round is?
Thanks!
Hi Sinduja,
That’s a great question! The end of the round is the gap between Needle 4 and Needle 1. When you knit the first round with circular needles, you can knit straight from the DPNs to the circulars. That way, once you knit the last stitch from Needle 4, you know that that’s exactly where to place the unique marker for the end of round!
I hope this helps clarify things!
All the best,
Lili
Thanks!
Hey! How do I join the yarn for the left ear flap? Since I think they’re just unknit stitches on hold with no nearby yarn to connect to
Hi Katie,
Thanks for reaching out! To begin knitting the Left Ear Flap stitches, you can just take a new strand of yarn and begin knitting them. You don’t need to do anything extra to “join” the yarn, but you will weave this yarn end in after you’re finished with the project, which will secure it completely. Hope this helps!
All the best,
Lili
Can you tell me the head circumference of the woman wearing the hat in this pattern? I assume she is wearing the adult medium and I am wondering how much negative ease there is.
Hi Tammy,
Thanks for writing in! I’m afraid that we don’t have a record of this model’s head circumference, but based on the photo, it looks like she’s wearing the hat with about an inch or two of negative ease. Hope this helps!
All the best,
Lili
Thank you, Lili!
Hey Lili,
My question is similar to Sandujah’s.
Hi — my question is on this step
“Change to circular needles and on the next round, replace the unique marker with a regular marker, and when you reach the end of the round, place the unique marker for end of round.”
I had already switched to circular needles and am not sure how to interpret this step.
Will I still have 4 markers? And since I’m already using circular, how should I move the unique marker?
Thanks
Erik
Hi Erik,
Thanks for writing in! This step is important because it adds the fifth stitch marker, which is the end-of-round marker. On DPNs you marked the first needle with a unique marker, indicating that the beginning/end of the round fell at the gap between the fourth and first DPN. Once you switch to circular needles though, you won’t have the gap as a physical marker of where the beginning/end of round is.
At this point, I’d recommend placing the fifth stitch marker so that you know where the end-of-round is! It should fall directly in between the fourth marker and the first marker. Hope this helps clarify things!
All the best,
Lili
That makes sense and my hat turned out great! Thanks
Hi thank you for the pattern!
I’m stuck on row 3 where it says knit to marker, LLI, slip marker, Knit 1, RLI, knit to end of needle.
For row 3, which has 4 stitches on each needle at that point. Do we knit 2, then LLI, and slip the marker after the fourth stitch? I feel like it doesn’t add up to the total number of stitches.
Hi Bing,
Thanks for reaching out, and I’m happy to help answer your questions on Round 3! The lifted increases definitely make things confusing, but I want to let you know that the stitch count does work out in the end. There are currently 4 stitches on each needle, with a stitch marker dividing them into 2 groups of 2 stitches.
You start by knitting the first 2 stitches so that the stitch marker is the next thing on your left needle. Then, you work the LLI stitch into the stitch below the next stitch (which is the one after the marker!), but don’t slip the marker yet. Once you’ve completed that increase stitch, you’ll have 3 stitches before the marker, and you can now slip the marker. Then, k1 and work the RLI into the stitch below the final stitch on the left needle. You’ll now have 2 stitches after the marker. Finally, knit the last stitch for a total of 6 stitches on the needle, 3 on either side of the marker!
I hope this helps clarify things, and please let me know if you have any other questions!
All the best,
Lili
I am shaping the ear flaps for the 6-12 months.
I bound off 22 stitches, removing the end of round marker.
Then I knit the next 24 stitches as instructed.
Here’s where I don’t understand: place previous 25 stitches on stitch holder for Right Ear Flap. Does « previous » mean the stitches before the 22 bind off?
Thank you!
Hi Christina,
Thanks for writing in! The “previous” stitches are the ones you just knit. After binding off those stitches, you’ll have 1 stitch left on your right needle. Then, you knit 24 stitches, which means you’ll have 25 stitches on your right needle. Those are the 25 previous stitches you need to put on hold!
All the best,
Lili
Hello! I am interested in knitting this earflap hat, but I would like to substitute the yarn, Speckle, because it has two colors in it that I think would go well with a coat I have. Do you think there would be any major difference if I used the Speckle instead of the Season Alpaca? Thank you so much!
Susan
Hi Susan,
Thanks for writing in! Speckled Hen would be a wonderful choice for this hat. Since it’s also a sportweight yarn, it should be very easy to match the gauge of the pattern. Just be sure to knit up a gauge swatch before beginning so that you can determine the best needle size to use!
All the best,
Lili
Thank you!
Hi, I can’t understand what I need to do between ending the last row 12 stitches from the end, and binding off 20 in the next step. Does the bind off begin 12 stitches from the end of the row? What do I need to do with the remaining 12 stitches on that row?
Hi Sarah,
Thanks for writing in! In this step are you beginning to shape your ear flaps. So you will bind off the 20 stitches in between and then place the remaining stitches on a holder or length of scrap yarn as you work the first ear flap. I hope this helps!
Happy knitting,
Gavriella
I see, thank you. I started binding off at the 12 stitches left mark, and the math worked out for the rest of the row. Just finished the first flap. Thank you again for the help.
No problem at all! Let us know if you have any other questions. We are always here to help!
Good morning! I would like to put a contrasting i-cord edge around the entire hat. Can you give me some suggestions? Thank you.
Susan
Hi Susan,
That sounds like a fun idea! We actually have a full tutorial on how you can attach an applied i-cord to your work and you can check that out here! I hope this helps!
Happy knitting,
Gavriella
Thank you–would you do the ear flaps edges in this pattern any differently if you were going to apply the i-cord edging after knitting them?
I would recommend finishing the whole hat including the earflaps before the i-cord attachment. That way you won’t have to worry about grafting anything except the end of the i-cord once you are done.
Hey so im knitting one for my newborn cousin, to which size of circular needles should I change to after knitting with DPNs? Thanks!
Hi Farrah,
Thank you for your question! We recommend knitting the newborn size with DPNs all the way through rather than switching to a circular needle due to the small circumference. If you’d prefer, you can also try 12″ circulars for working the stitches after the crown section as well! I hope this helps!
Happy knitting,
Gavriella