
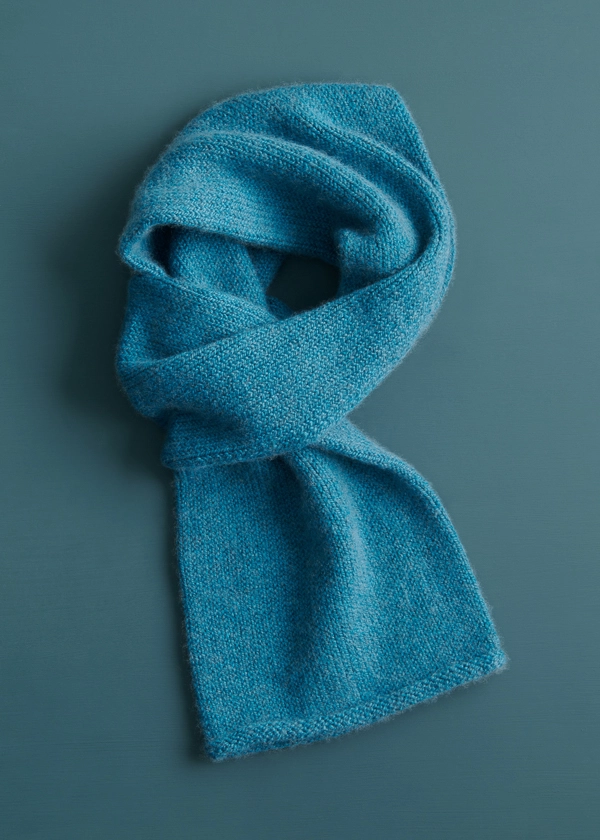

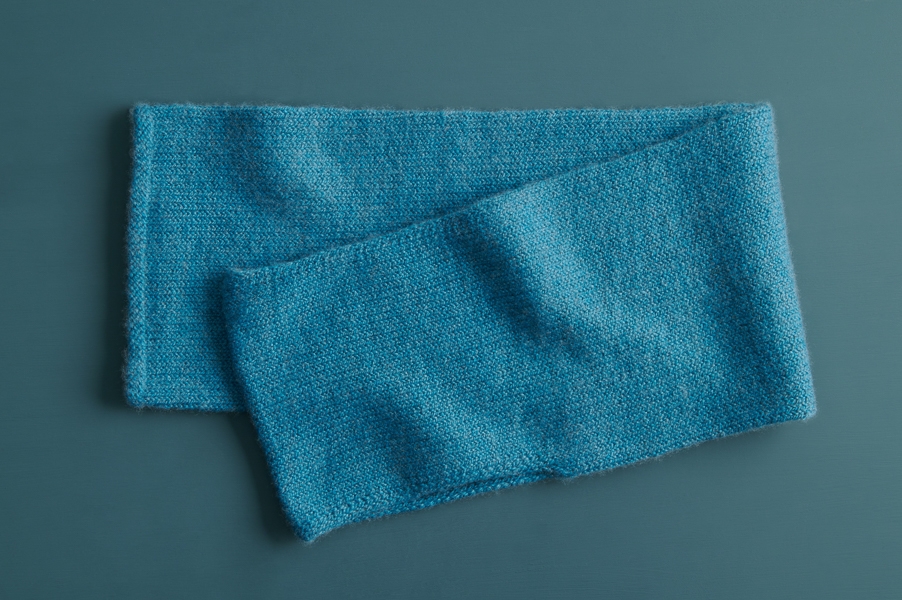
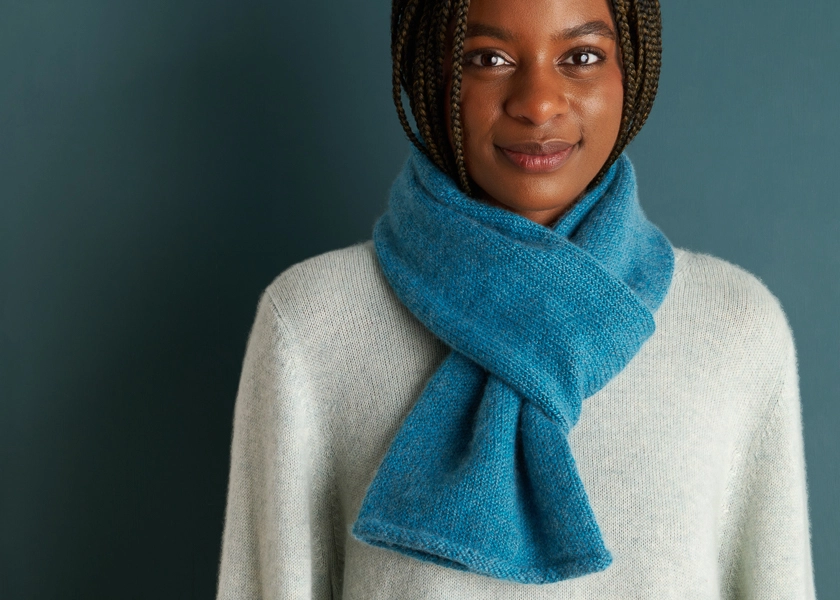
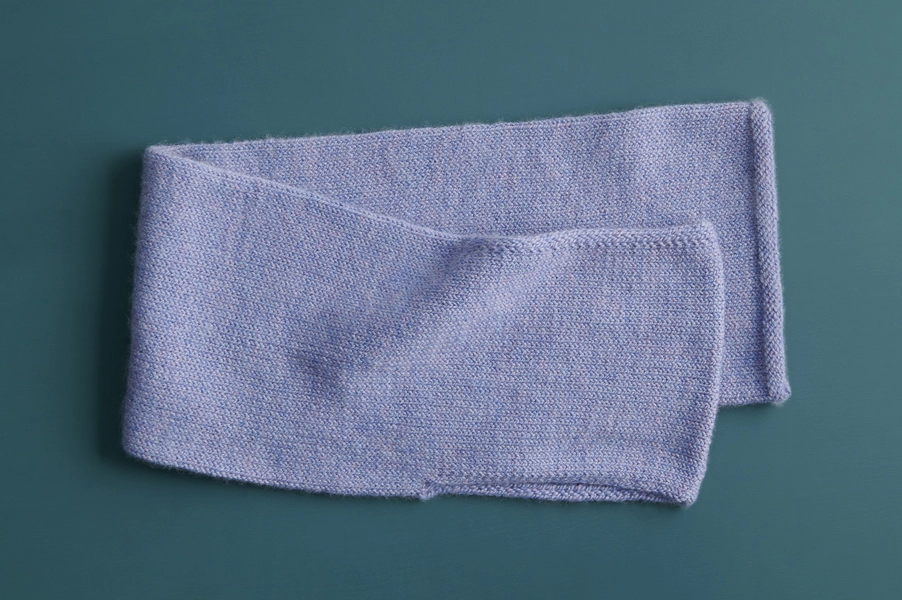
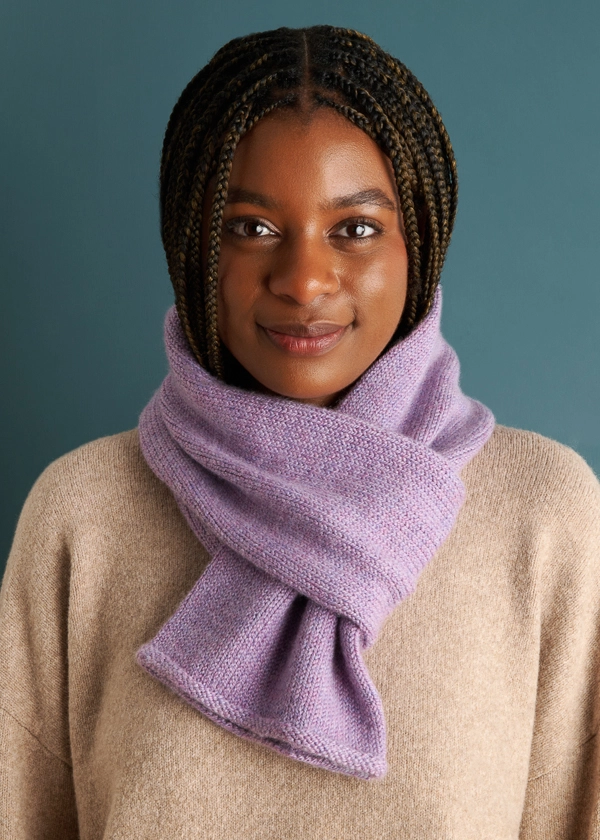
Keyhole Scarf
You’ll unlock the joy of knitting with Cashmere Merino Bloom when you cast on for our quick and easy Keyhole Scarf!
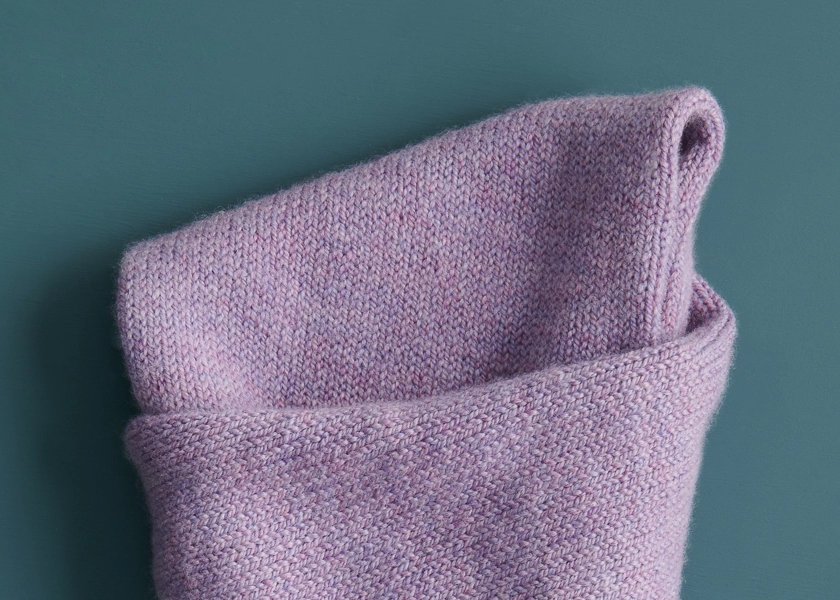
The key to reveling in the beauty of Cashmere Merino Bloom is super simple knitting that lets you focus on the fiber. All you do is knit a stockinette tube (with a little reverse stockinette edging), then onto the keyhole!

For the loop that holds your tuck, you put half your stitches on hold, knit one panel flat, then go back and knit the other. You seam them together with a simple 3-Needle-Bind Off, and open sesame, you did it!

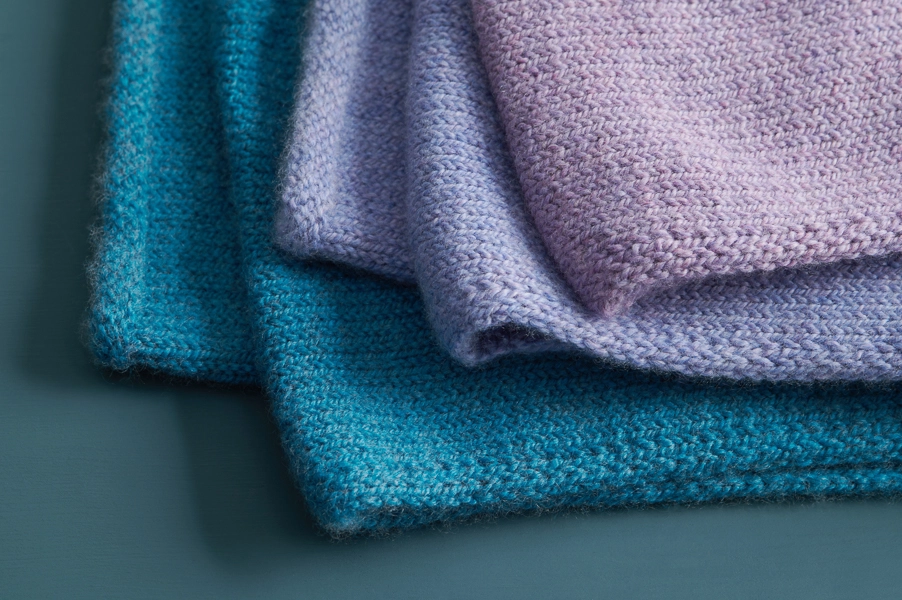
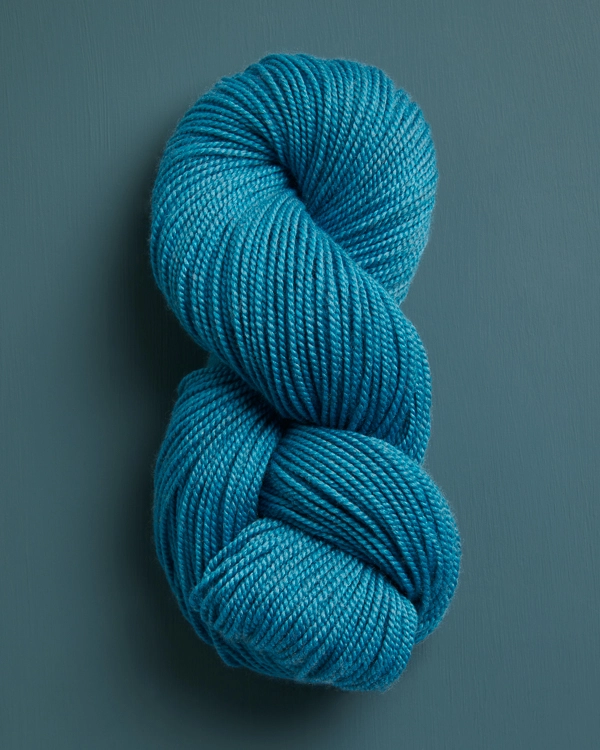
Short, simple knits like this let you try a truly special yarn and find out if it’s as good as it sounds… And Cashmere Merino Bloom really is! With 25% cashmere, this yarn is exquisitely soft. You will stop and savor it so much while you’re knitting, you will forget the finish line and actually love the process.

One characteristic that will make you linger is cashmere’s gentle halo that surrounds the fabric. It comes from tiny fibers that bloom out of the yarn, reflecting light in a soft glow and capturing warmth.
But it’s not just about the cashmere. Cashmere Merino Bloom is also 75% of the softest merino wool in the world. It mingles with the wonderful softness of the cashmere but also adds all the structure and bounce that makes wool such a pleasure to knit.

Wool fibers have the ability to stretch and contract, which is why knitting with wool is so beloved. This elasticity is what makes wool fun and feel good in our hands. It also means that whatever you’re making will keep its shape over time.

Cashmere Merino Bloom is spun in two plies at a light worsted weight, so it’s substantial enough to have a real presence on your needles but fine enough that your Keyhole Scarf won’t feel bulky.

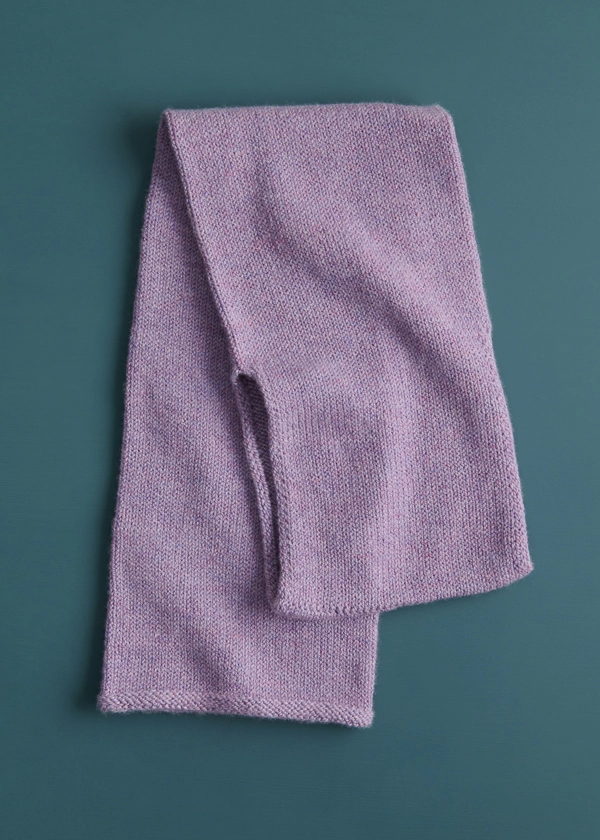
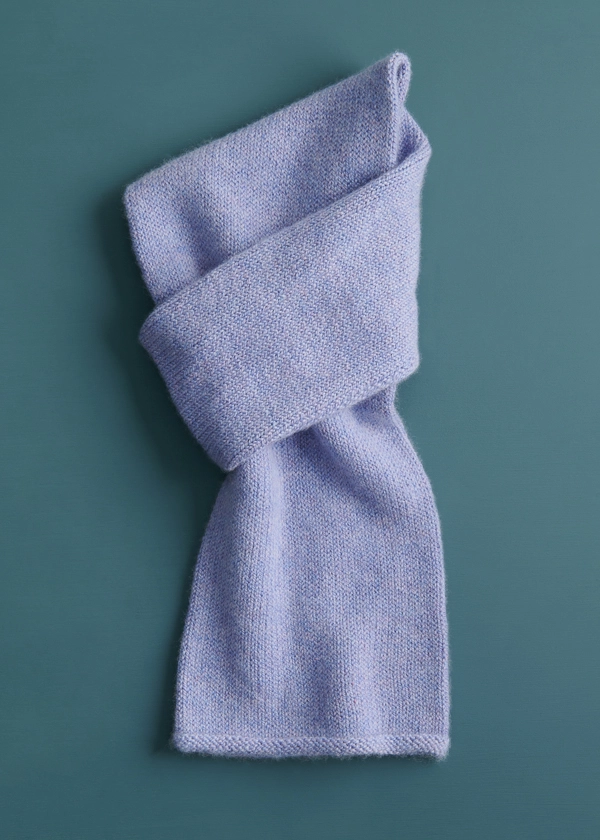
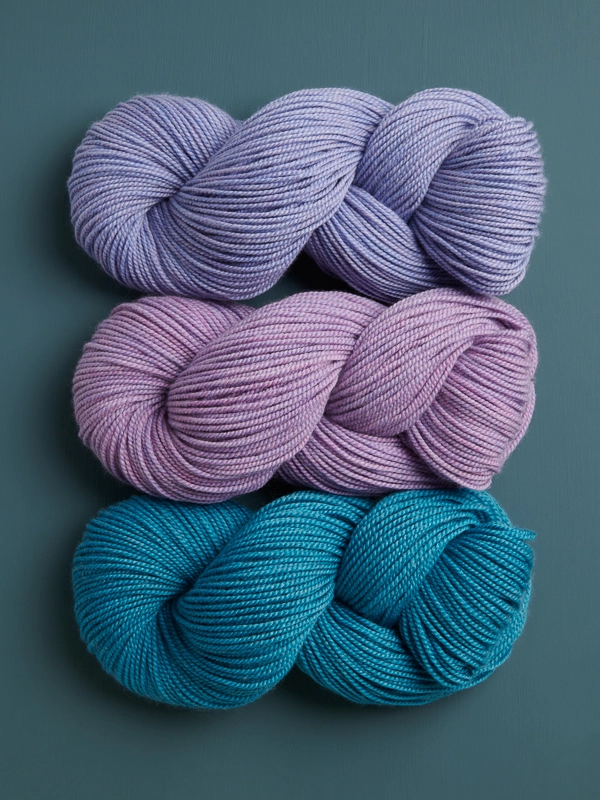
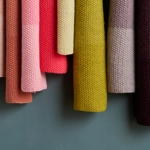
We’ve knit up a skating party palette with Crocus Bud, Hydrangea Blossom (below), and True Turquoise (above), but Cashmere Merino Bloom has over twenty colors to choose from, so lock in on your favorite and cast on… You only need two skeins!

Designed by Purl Soho designer, Gianna Mueller. Click here to see even more of Gianna’s designs!
Share your progress and connect with the community by tagging your pics with #PurlSoho, #PurlSohoBusyHands, #PurlSohoKeyholeScarf, and #PurlSohoCashmereMerinoBloom. We can’t wait to see what you make!
Materials

- 2 skeins of Purl Soho’s Cashmere Merino Bloom, 75% extra fine merino and 25% cashmere. Each skein is 218 yards/ 100 grams; approximately 436 yards required. We used the colors Crocus Bud, Hydrangea Blossom, and True Turquoise.
- US 5 (3.75 mm), 16-inch circular needles
- Spare US 5 needle, for 3-Needle Bind Off
- A stitch marker
- Stitch holders or scrap yarn
GAUGE
21 stitches and 31 rounds = 4 inches in stockinette stitch
SIZE
Finished Dimensions: 16 inches in circumference x 33 inches long
NOTE
Slip Stitches
Slip all slip stitches purlwise with yarn in front.
PATTERN
Cast on 84 stitches. We used a basic Long Tail Cast On.
Place marker and join for working in the round, being careful not to twist the stitches.
Purl 4 rounds.
Knit every round until piece measures approximately 25 inches from cast-on edge.
CREATE LOOP
Set-Up Round: K42 and then place these stitches onto stitch holder or scrap yarn for Back, knit to end of round and remove end-of-round marker. [42 stitches remain on needles]
NOTE: You will now work back and forth in rows, knitting one side of the Loop at a time.
FRONT
Row 1 (wrong side): Slip 1 (see Note), k1, slip 1, purl to last 3 stitches, slip 1, k1, slip 1.
Row 2 (right side): K1, slip 1, knit to last 2 stitches, slip 1, k1.
Repeat Rows 1 and 2 thirty more times or until Front measures 8 inches.
Cut yarn, and place stitches onto stitch holder or scrap yarn.
BACK
Return 42 on-hold stitches to needles and join yarn ready to work a wrong-side row.
Work as for Front, but leave stitches on needles and do not cut yarn.
JOIN FRONT + BACK
Carefully turn work inside out and slip on-hold Front stitches onto opposite end of needles. Hold needles parallel so half of the stitches are on either end and working yarn is at needle tips.
With spare needle, bind off all stitches using a 3-Needle Bind Off.
FINISHING
Weave in all ends, turn right side out, and gently wet block!


will you have a tutorial on this pattern with holding 42 stitches, then adding the rest onto the needle. I don’t fully understand and would like some sore of demo. ( a three needle bind off)
Key hole scarf.
Hi Dee,
Thanks for reaching out! I’m afraid that we do not have a tutorial for this pattern specifically, but I’m happy to help clarify as much as I can in writing. To put the 42 stitches on hold, you’ll either use a stitch holder or thread scrap yarn through all the stitches using a tapestry needle. Once these 42 stitches are on hold, you’ll knit only the remaining stitches flat, so that there’s a flat piece of knit fabric extending from one side of the initial tube. Then, you’ll put the first 42 stitches you put on hold back onto your needles and do the same so that you have two flat pieces of knit fabric each extending from opposite sides of the tube! Finally, you’ll use the 3-needle bind-off technique to join the ends of these two flat pieces together to form the loop. And we have a great tutorial for this bind-off method, which you can find right here!
Please let me know if any other questions come up as you knit, and I’m happy to answer them!
All the best,
Lili
Is there some easy way to reduce the dimensions of this scarf to make it child-size? Reducing the number of cast on stitches, and then the length of the knitting? I want to make mother-daughter versions.
Thank you very much!
Hi Susan,
Thanks for writing in, and yes, you have exactly the right idea for how to make this scarf smaller! The only other thing I’d recommend keeping in mind is to cast on an even number of stitches. That’ll make sure you can evenly divide the stitches in half for each side of the loop. Hope this helps, and let us know how your project goes!
All the best,
Lili
Hi I’m wondering do you have to put stitches on a holder or can you just knit it all in one piece?? Thanks, Dawn
Hi Dawn,
Thanks for reaching out! I’m afraid that you will need to put some stitches on hold to make this pattern work. That’s because you need to divide the initial tube of the scarf in half in order to knit each side of the loop before joining them together. If you’re having any trouble putting stitches on hold, or if you have any questions on how to do that, please let us know, and we’d love to help out!
All the best,
Lili
Dawn, try this: Cast on 42 to your circular using a provisional cast on and knit the loop instructions for 16 inches. Keeping the stitches on your needle, fold the loop wrong sides together. Undo the provisional cast on and add those stitches to your needle next to the existing ones, for a total of 84. Knit in the round for approximately 25 inches. End up with four rows of purl and bind off.
Can this be knit with Kid Seta?
Hi Debbie,
Thanks for reaching out! I just looked up that yarn, and I’m seeing that it’s lace weight. Since that’s a lot thinner than the yarn that was used to design this pattern, I wouldn’t recommend using it on its own. However, you could absolutely hold a strand of it with another yarn! That would create a lovely and soft texture!
All the best,
Lili
or a double strand of Kid Seta
Hi, I am wondering if there is enough of the yarn leftover to increase length? Also, in order to I crease length is it better to do so when knitting while 84 stitches are in the round and increase perhaps to 27 inches, or increase length when you split the stitches? Would increasing length destroy the integrity of the finished look?
Thanks in advance for your suggestions.
Hi TJ,
This pattern uses every last yard of the recommended yardage, so you’ll need a third skein of Cashmere Merino Bloom in order to add length! You’ll want to increase the length of the main scarf, not the loop, so you would just knit in the round until the scarf is as long as you’d like, and then divide the stitches and work the loop as written. I think lengthening the scarf will make it extra cozy and provide even more warmth for your body, and not just around your neck!
All the best,
Lili
I’m knitting this for an XS, petite lady who is about 5’4″. Would decreasing cast on to 70 work? If I understand this, I can make it longer based on how much yarn I have.
Would the keyhole work still begin at 25 inches? Since I’m casting on 70, then I remove 35 stitches (1/2 of the cast on number?) Is this right?
Thank you,
Donna
Hi Donna,
Yes, you can definitely make this scarf narrower by casting on only 70 stitches! And you will have a little more leeway in how long you choose to knit it and can definitely extend it past 25 inches before dividing the stitches for the loop. And yes, each side of the loop uses exactly half the cast-on stitches, which would be 35 stitches for you! Hope this helps!
All the best,
Lili
Hello, I’m just about to start my set up row to begin creating a loop. The instructions are a little confusing to me. After K42 do I cut the yarn before putting stitches on hold?
Hi Cristina,
No, you will not need to cut the yarn yet! Just keep working back and forth in rows using the existing working yarn. You will only cut the yarn at the very end of the FRONT section, before rejoining the yarn for the BACK section of the loop.
All the best,
Lili
I’m thinking of knitting the loop section to double the pattern length and kitchner stitching it to the held stitches. I recently made the dumpling bag and love how clean and neat it is without ‘seams’.
This sounds like a lovely idea! We’re eager to hear how it turns out, and in the meantime, happy knitting!
Hi, I am nearly done with this project and looking forward to give it to my daughter as a Christmas gift.
I just wonder why you chose the three-needle-bind-off instead of the Kitchener stitch. Is there a special reason to this, perhaps because of the „end“ sections with the slip stitches? Or would Kitchener Stitch work just as well?
Thank you!
Hi Vanessa,
I believe we chose the 3-needle bind-off for this pattern because many knitters find it a bit easier than Kitchener stitch. But Kitchener stitch would definitely work just as well here, if you prefer that method!
All the best,
Lili
Hello!
I have a thinner yarn. It’s 85% Superwash Merino Wool, 100 grams, 384 yards, two skeins. Should I increase the number of stitches to 100? What else can I do? Would one skein be enough if I keep the 84 stitches?
Thank you!
Hi Mabel,
Thanks for writing in! One skein might be enough with the current cast-on number, but I wouldn’t recommend doing that since the scarf itself would come out really small. To figure out the best cast-on number to use, you will want to first knit a gauge swatch in pattern (if this is daunting, we have a wonderful tutorial called All About Gauge). Once you know how many stitches you are getting per inch, you can multiply that number by the circumference of the scarf (16 inches) and cast on the nearest even number. Then you can follow the pattern essentially as written, making sure to consider the new stitch count when dividing the front and back!
All the best,
Lili
Hello! I would just like to thank you for this beautiful pattern. I am about half way through and I would have to say that Cashmere Merino Bloom is the most beautiful yarn I have used. It is soft and springy and looks absolutely divine. It is just perfect for this beautiful scarf. Thank you again.
Hello – I wanted to confirm how increases of cast on stitches relates to dimensions of the finished piece . If I increase the cast on 100 will that increase the width of the scarf or the length? I am having trouble visualizing this pattern based on just the written pattern any chance you can provide a drawing that shows dimensions?
Hi Alison,
Thank you for writing in! You are correct that you will add stitches to the cast on number to widen this scarf. I like to think of this design as a long tube scarf with a hole in the middle. So if you would like a wider ‘tube’, you can add stitches at the beginning of the pattern. I’m afraid we don’t have a drawing of this but if you would like one, you can always write in at customerservice@purlsoho.com and we would be happy to sketch one up!
Happy knitting,
Gavriella
I’d love to make this scarf but was looking for a yarn that is a bit more reasonable in price. Can you recommend another of your yarns that would give similar results. Thank you.
Hi Lynn,
Thanks for writing in! Our Knitting Yarn or Good Wool could make a great alternative for this pattern! I would also like to mention that by signing up for our newsletter, you will be among the first to know about sales we have year-round including our Cashmere Merino Bloom! You can do this by visiting the link in the top left corner of our website.
Happy knitting,
Gavriella
Thank you. Just ordered the knitting yarn to make it👍😊
Hello!
I’ve placed 35 stiches (I cast on 70) on a piece of yarn and I’m now here with the 35 stitches remaining:
“FRONT
Row 1 (wrong side): Slip 1 (see Note), k1, slip 1, purl to last 3 stitches, slip 1, k1, slip 1.”
Could you please explain where the yarn should be for each of the steps (front or back)?
I know this is to make a neat edge on the keyhole, but I’m very confused about how to do it! Help!
Oh, the yarn is wonderfully soft!
Thanks very much!
Joelle
Row 2 (right side): K1, slip 1, knit to last 2 stitches, slip 1, k1.
Hi Joelle,
Thanks for writing in, and I’m happy to explain where the yarn should be in more detail!
For Row 1:
Slip 1: yarn in front
k1: yarn in back
slip 1: yarn in front
purl to last 3 stitches: yarn in front
slip 1: yarn in front
k1: yarn in back
slip 1: yarn in front
For Row 2:
K1: yarn in back
slip 1: yarn in front
knit to last 2 stitches: yarn in back
slip 1: yarn in front
k1: yarn in back
Basically, all slipped stitches are slipped purlwise with yarn in front, and then you just keep the yarn in the normal position for the other stitches (in the back for knitting, and in the front for purling)!
All the best,
Lili
Thanks, Lili! This was very helpful.
I’m glad I can resume knitting the keyhole scarf!
ciao,
per favore potrei avere dei dettagli sul seguente passaggio della lavorazione della sciarpa:
‘Ferro 2 (diritto): 1 maglia diritto, 1 maglia bassissima, lavora a diritto fino alle ultime 2 maglie, passa 1 maglia bassissima, 1 maglia diritto.
cosa significa maglia bassissima? sia lavorata sia passata?
grazie se potrai rispondermi
Stefania
Hi Stefania,
Thank you for writing in! For row 2 of the FRONT section, you will first make sure that the right side is facing you. You will also now be working in rows rather than rounds to work flat. So you will knit the first stitch, slip 1, and then knit until only 2 stitches remain. At this point, you will slip 1 stitch, and knit the last. I hope this helps!
Happy knitting,
Gavriella