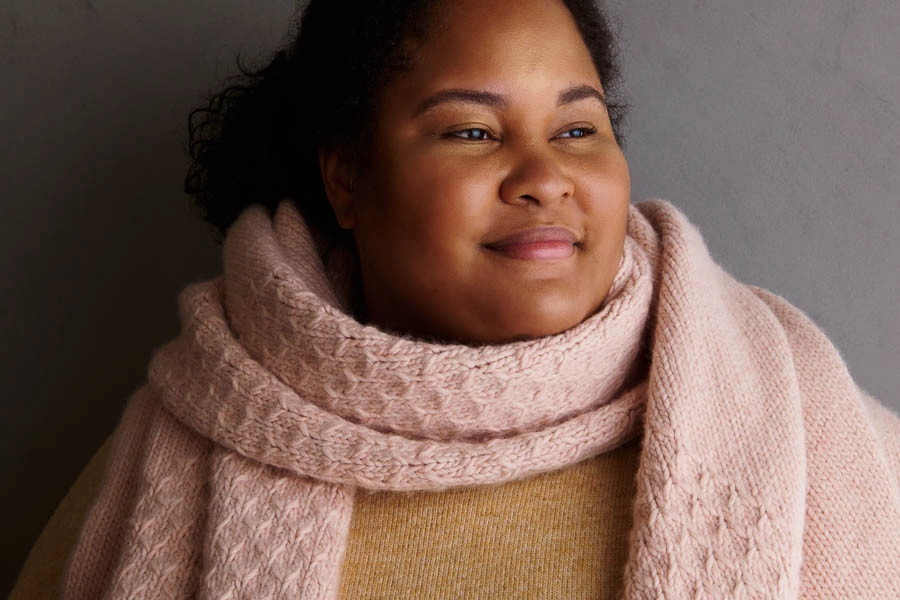


Lark Wrap
Feeling as happy as a lark isn’t just for the three seasons that aren’t winter! If cold is the problem, only wear what’s warm and cozy, and if it’s grayness that’s dispiriting, only choose uplifting colors. Our Lark Wrap obeys both rules and even adds beauty into the wintery mix!
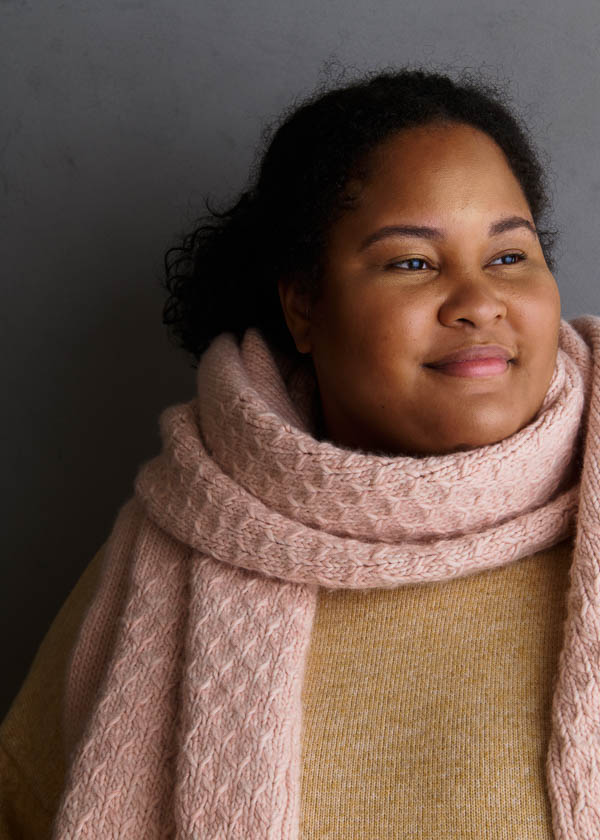
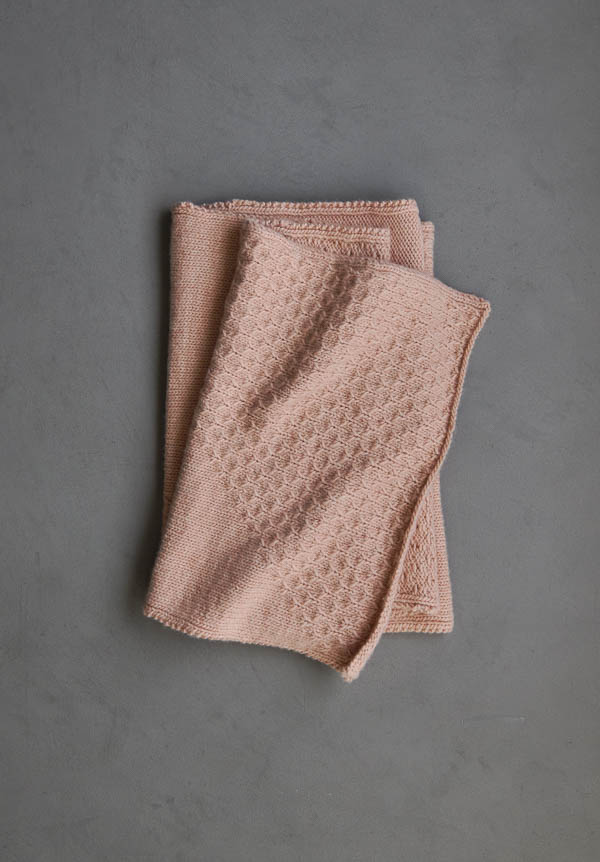
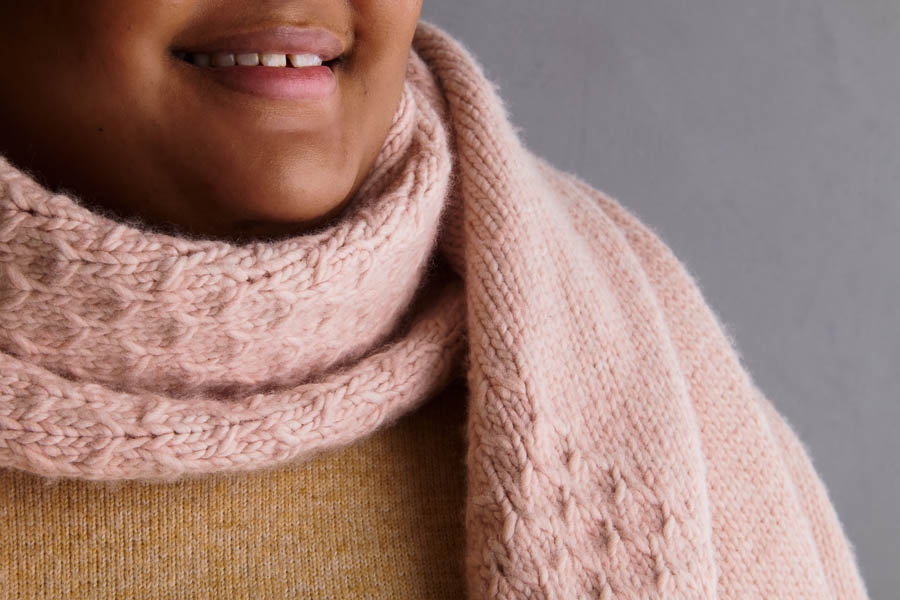
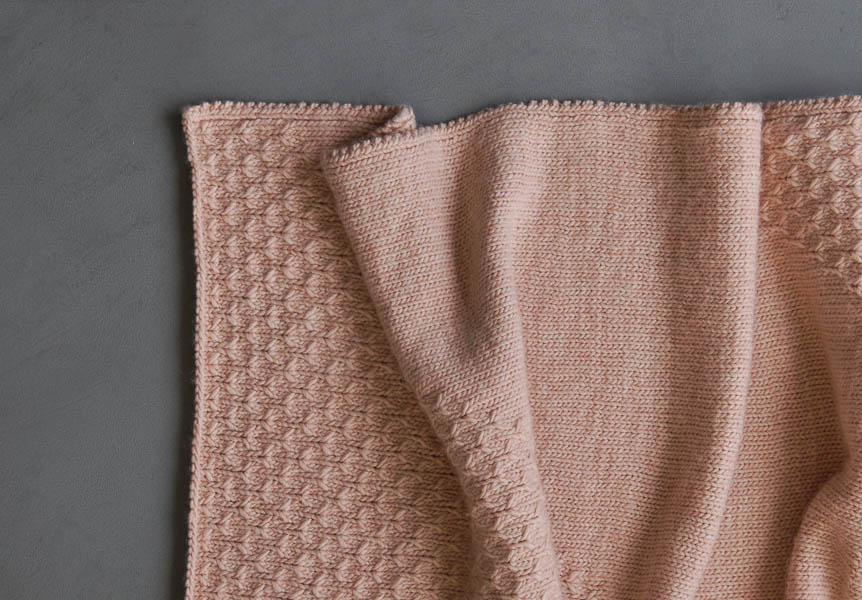
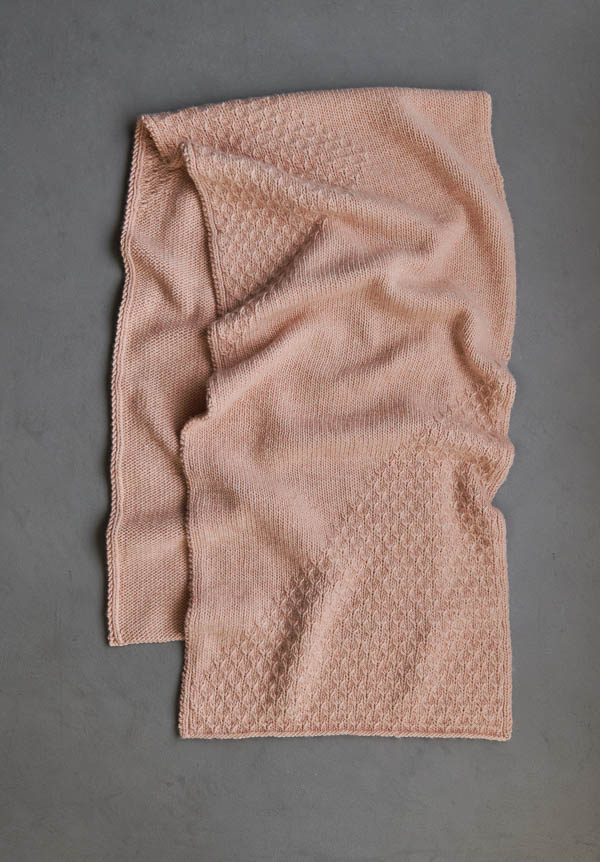
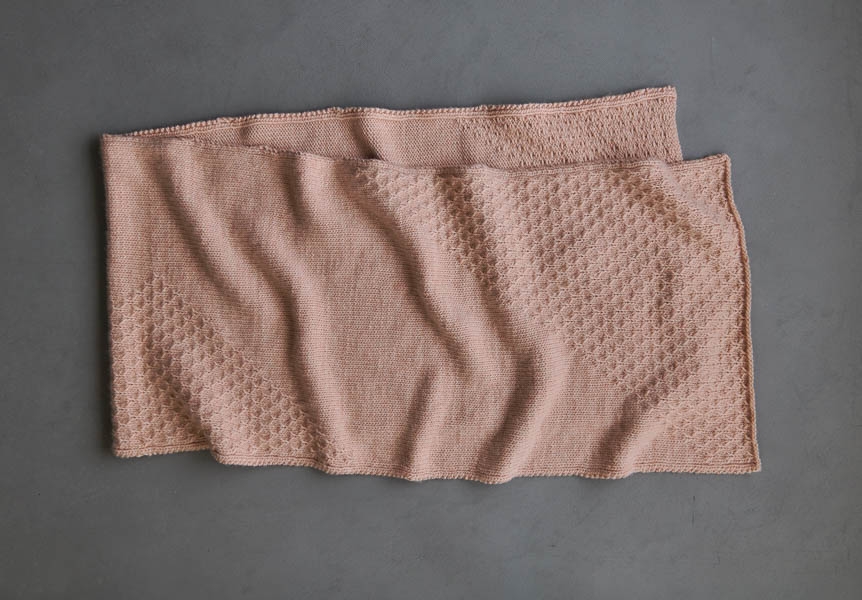
The Lark Wrap uses stockinette stitch as a backdrop to angular sections of Thorn Stitch, a lovely stitch with the feathery texture of a lark’s wing.
And it’s all very plush and cushy in our brand new Partridge. As plump as a partridge, as soft as its downy under-feathers, and as cozy as a covey, Partridge is a single ply of incredibly wonderful merino wool.

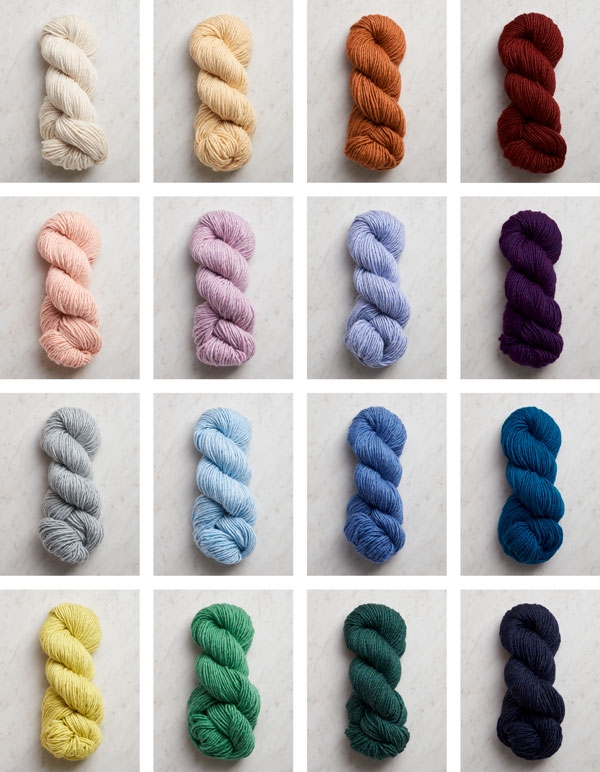
A worsted weight with a very satisfying density, Partridge is a true joy to knit. It comes in lots of inspiring colors, from fresh Spring Pea to deep Purple Night, and for a lark, also this sweet Coquina Pink!
Designed by Purl Soho designer, Jake Canton. Click here to see even more of Jake’s designs!
Share your progress and connect with the community by tagging your pics with #PurlSoho, #PurlSohoBusyHands, #PurlSohoLarkWrap and #PurlSohoPartridge. We can’t wait to see what you make!
Materials
- 5 (9) skeins of Purl Soho’s Partridge, 100% merino wool. Each skein is 131 yards/ 100 grams; approximately 560 (1075) yards required. We used the color Coquina Pink.
- US 8 (5 mm), 24-inch circular or straight needles
- A removable stitch marker
Gauge
16 stitches and 26 rows = 4 inches in stockinette stitch (see Notes, below)
16 stitches and 26 rows = 4 inches in Thorn Stitch (see Notes, below)
Size
Scarf (Wrap)
Finished Dimensions: 10¼ (19¼) inches wide x 73 inches long
Sample: We knit the Wrap size.
Notes
SLIP STITCHES
Slip all slipped stitches purlwise.
STITCH PATTERNS
STOCKINETTE STITCH PATTERN
Row 1 (right side): K2, p1, knit to last 3 stitches, p1, k2.
Row 2 (wrong side): K1, p1, k1, purl to last 3 stitches, k1, p1, k1.
Repeat Rows 1 and 2.
THORN STITCH PATTERN
NOTE: Thorn Stitch has a tendency to work up on the tight side. Be sure to knit this stitch pattern loosely so it will easily block to the same gauge as your stockinette swatch.
Cast on a multiple of 4 + 1 stitches.
Set-Up Row (wrong side): K1, p1, k1, purl to last 3 stitches, k1, p1, k1.
Row 1 (right side): K2, p1, k1, *into next stitch [k1, yarn over (yo), k1], k3, repeat from * to last 5 stitches, into next stitch [k1, yo, k1], k1, p1, k2.
Row 2 (wrong side): [K1, p1] 2 times, *slip 3 (see Note, above) with yarn in front (wyif), p3, repeat from * to last 7 stitches, slip 3 wyif, [p1, k1] 2 times.
Row 3: K2, p1, *knit 2 together (k2tog), slip 1 with yarn in back (wyib), slip slip knit (ssk), k1, repeat from * to last 8 stitches, k2tog, slip 1 wyib, ssk, p1, k2.
Row 4: K1, p1, k1, *p3, slip 1 wyif, repeat from * to last 6 stitches, p3, k1, p1, k1.
Row 5: K2, p1, *k3, into next stitch [k1, yo, k1], repeat from * to last 6 stitches, k3, p1, k2.
Row 6: K1, p1, k1, *p3, slip 3 wyif, repeat from * to last 6 stitches, p3, k1, p1, k1.
Row 7: K2, p1, k2, *k2tog, slip 1 wyib, ssk, k1, repeat from * to last 4 stitches, k1, p1, k2.
Row 8: [K1, p1] 2 times, *slip 1 wyif, p3, repeat from * to last 5 stitches, slip 1 wyif, [p1, k1] 2 times.
Repeat Rows 1–8.
PATTERN
BEGIN
Cast on 41 (77) stitches. We used a basic Long Tail Cast On.
Set-Up Row 1 (wrong side): K1, p1, k1, purl to last 3 stitches, k1, p1, k1.
BEGIN THORN STITCH
NOTE: The stitch count in this pattern changes from row to row. It increases in Rows 1 and 5, then decreases back to the original number in Rows 3 and 7. To verify that your stitch count is correct, count at the end of Rows 3, 4, 7 or 8.
Work Rows 1–8 of Thorn Stitch Pattern (see Notes) 2 times, then repeat Rows 1–7 one more time.
Next Row (wrong side): K1, p1, k1, p3, place marker (pm), p2, *slip 1 wyif, p3, repeat from * to last 5 stitches, slip 1 wyif, [p1, k1] 2 times. [41 (77) stitches]
STAGGERED SECTION 1
Row 1 (right side): K2, p1, k1, *into next stitch [k1, yo, k1], k3, repeat from * to 3 stitches before marker, into next stitch [k1, yo, k1], k2, slip marker (sm), knit to last 3 stitches, p1, k2.
Row 2 (wrong side): K1, p1, k1, purl to marker, sm, p2, *slip 3 wyif, p3, repeat from * to last 7 stitches, slip 3 wyif, [p1, k1] 2 times.
Row 3: K2, p1, *k2tog, slip 1 wyib, ssk, k1, repeat from * to marker, sm, knit to last 3 stitches, p1, k2.
Row 4: K1, p1, k1, purl to marker, remove marker (rm), p2, pm, p2, *slip 1 wyif, p3, repeat from * to last 3 stitches, k1, p1, k1.
Row 5: K2, p1, *k3, into next stitch [k1, yo, k1], repeat from * to 2 stitches before marker, k2, sm, knit to last 3 stitches, p1, k2.
Row 6: K1, p1, k1, purl to marker, sm, p2, *slip 3 wyif, p3, repeat from * to last 3 stitches, k1, p1, k1.
Row 7: K2, p1, k2, *k2tog, slip 1 wyib, ssk, k1, repeat from * to marker, sm, knit to last 3 stitches, p1, k2.
Row 8: K1, p1, k1, purl to marker, rm, p2, pm, p2, *slip 1 wyif, p3, repeat from * to last 5 stitches, slip 1 wyif, [p1, k1] 2 times.
Repeat Rows 1–8 six (15) more times, then repeat Rows 1–4 one more time, removing stitch marker after final repeat.
SCARF SIZE ONLY
Work Rows 1 and 2 of Stockinette Stitch Pattern (see Notes) 56 times or for about 17¼ inches.
STAGGERED SECTION 2
Row 1 (right side): K2, p1, knit to last 5 stitches, into next stitch [k1, yo, k1], k1, p1, k2.
Row 2 (wrong side): [K1, p1] 2 times, slip 3 wyif, purl to last 3 stitches, k1, p1, k1.
Row 3: K2, p1, knit to last 8 stitches, k2tog, slip 1 wyib, ssk, p1, k2.
Row 4: K1, p1, k1, p3, slip 1 wyif, purl to last 3 stitches, k1, p1, k1.
Row 5: K2, p1, knit to last 7 stitches, into next stitch [k1, yo, k1], k3, p1, k2.
Row 6: K1, p1, k1, p3, slip 3 wyif, purl to last 3 stitches, k1, p1, k1.
Row 7: K2, p1, knit to last 10 stitches, k2tog, slip 1 wyib, ssk, k2, p1, k2.
Row 8: [K1, p1] 2 times, [slip 1 wyif, p3] 2 times, pm, purl to last 3 stitches, k1, p1, k1.
Row 9: K2, p1, knit to marker, sm, *k3, into next stitch [k1, yo, k1], repeat from * to last 4 stitches, k1, p1, k2.
Row 10: [K1, p1] 2 times, *slip 3 wyif, p3, repeat from * to marker, sm, purl to last 3 stitches, k1, p1, k1.
Row 11: K2, p1, knit to marker, sm, k2, k2tog, slip 1 wyib, ssk, k1, k2tog, slip 1 wyib, ssk, p1, k2.
Row 12: K1, p1, k1, *p3, slip 1 wyif, repeat from * to 1 stitch before marker, p1, sm, purl to last 3 stitches, k1, p1, k1.
Row 13: K2, p1, knit to marker, sm, k1, *into next stitch [k1, yo, k1] k3, repeat from * to last 3 stitches, p1, k2.
Row 14: K1, p1, k1, *p3, slip 3 wyif, repeat from * to 1 stitch before marker, p1, sm, purl to last 3 stitches, k1, p1, k1.
Row 15: K2, p1, knit to marker, sm, *k2tog, slip 1 wyib, ssk, k1, repeat from * to last 4 stitches, k1, p1, k2.
Row 16: [K1, p1] 2 times, *slip 1 wyif, p3, repeat from * to marker, rm, slip 1 wyif, p3, pm, purl to last 3 stitches, k1, p1, k1.
Row 17: K2, p1, knit to marker, sm, *k3, into next stitch [k1, yo, k1], repeat from * to last 4 stitches, k1, p1, k2.
Row 18: [K1, p1] 2 times, *slip 3 wyif, p3, repeat from * to marker, sm, purl to last 3 stitches, k1, p1, k1.
Row 19: K2, p1, knit to marker, sm, k2, *k2tog, slip 1 wyib, ssk, k1, repeat from * to last 8 stitches, k2tog, slip 1 wyib, ssk, p1, k2.
Row 20: K1, p1, k1, *p3, slip 1 wyif, repeat from * to 1 stitch before marker, p1, sm, purl to last 3 stitches, k1, p1, k1.
Repeat Rows 13–20 two (7) more times, then repeat rows 13–18 one more time.
Next Row (right side): K2, p1, knit to marker, rm, k2, k2tog, slip 1 wyib, pm, ssk, k1, *k2tog, slip 1 wyib, ssk, k1, repeat from * to last 8 stitches, k2tog, slip 1 wyib, ssk, p1, k2.
Next Row (wrong side): Repeat Row 12.
STAGGERED SECTION 3
Row 1 (right side): K2, p1, knit to marker, sm, k1, *into next stitch [k1, yo, k1], k3, repeat from * to last 3 stitches, p1, k2.
Row 2 (wrong side): K1, p1, k1, *p3, slip 3 wyif, repeat from * to one stitch before marker, p1, sm, purl to last 3 stitches, k1, p1, k1.
Row 3: K2, p1, knit to marker, sm, *k2tog, slip 1 wyib, ssk, k1, repeat from * to last 4 stitches, k1, p1, k2.
Row 4: [K1, p1] 2 times, *slip 1 wyif, p3, repeat from * to marker, sm, purl to last 3 stitches, k1, p1, k1.
Row 5: K2, p1, knit to marker, sm, *k3, into next stitch [k1, yo, k1], repeat from * to last 4 stitches, k1, p1, k2.
Row 6: [K1, p1] 2 times, *slip 3 wyif, p3, repeat from * to marker, sm, purl to last 3 stitches, k1, p1, k1.
Row 7: K2, p1, knit to marker, rm, k2, k2tog, slip 1 wyib, pm, ssk, *k1, k2tog, slip 1 wyib, ssk, repeat from * to last 3 stitches, p1, k2.
Row 8: K1, p1, k1, *p3, slip 1 wyif, repeat from * to 1 stitch before marker, p1, sm, purl to last 3 stitches, k1, p1, k1.
Rows 9–32 (9–72): Repeat Rows 1–8 three (8) more times.
Row 33 (73): K2, p1, knit to marker, sm, k1, into next stitch [k1, yo, k1], k3, p1, k2.
Row 34 (74): K1, p1, k1, p3, slip 3 wyif, p1, sm, purl to last 3 stitches, k1, p1, k1.
Row 35 (75): K2, p1, knit to marker, sm, k2tog, slip 1 wyib, ssk, k2, p1, k2.
Row 36 (76): [K1, p1] 2 times, slip 1 wyif, p3, sm, purl to last 3 stitches, k1, p1, k1.
Row 37 (77): K2, p1, knit to marker, sm, k3, into next stitch [k1, yo, k1], k1, p1, k2.
Row 38 (78): [K1, p1] 2 times, slip 3 wyif, p3, sm, purl to last 3 stitches, k1, p1, k1.
Row 39 (79): K2, p1, knit to marker, rm, k2, k2tog, slip 1 wyib, ssk, p1, k2.
Beginning with Row 2, repeat Rows 1 and 2 of Stockinette Stitch Pattern 79 (35) times, or for 24¼ (10¾) inches, then repeat Row 2 one more time.
STAGGERED SECTION 4
Row 1 (right side): K2, p1, k1, into next stitch [k1, yo, k1], knit to last 3 stitches, p1, k2.
Row 2 (wrong side): K1, p1, k1, purl to last 6 stitches, slip 3 wyif, k1, p1, k1.
Row 3: K2, p1, k2tog, slip 1 wyib, ssk, k3, pm, knit to last 3 stitches, p1, k2.
Row 4: K1, p1, k1, purl to marker, sm, p2, slip 1 wyif, p3, k1, p1, k1.
Row 5: K2, p1, k3, into next stitch [k1, yo, k1], k2, sm, knit to last 3 stitches, p1, k2.
Row 6: K1, p1, k1, purl to marker, sm, p2, slip 3 wyif, p3, k1, p1, k1.
Row 7: K2, p1, k2, k2tog, slip 1 wyib, ssk, k1, rm, k3, pm, knit to last 3 stitches, p1, k2.
Row 8: K1, p1, k1, purl to marker, sm, *p3, slip 1 wyif, repeat from * to last 4 stitches, [p1, k1] 2 times.
Row 9: K2, p1, k1, *into next stitch [k1, yo, k1], k3, repeat from * to marker, sm, knit to last 3 stitches, p1, k2.
Row 10: K1, p1, k1, purl to marker, sm, *p3, slip 3 wyif, repeat from * to last 4 stitches, [p1, k1] 2 times.
Row 11: K2, p1, *k2tog, slip 1 wyib, ssk, k1, repeat from * to 1 stitch before marker, k1, rm, k2, pm, knit to last 3 stitches, p1, k2.
Row 12: K1, p1, k1, purl to marker, sm, *p3, slip 1 wyif, p3, repeat from * to last 6 stitches, p3, k1, p1, k1.
Row 13: K2, p1, *k3, into next stitch [k1, yo, k1], repeat from * to 3 stitches before marker, k3, sm, knit to last 3 stitches, p1, k2.
Row 14: K1, p1, k1, purl to marker, sm, *p3, slip 3 wyif, repeat from * to last 6 stitches, p3, k1, p1, k1.
Row 15: K2, p1, k2, *k2tog, slip 1 wyib, ssk, k1, repeat from * to 1 stitch before marker, k1, rm, k2, pm, knit to last 3 stitches, p1, k2.
Repeat Rows 8–15 two (8) more times, then repeat Rows 8–11 one more time.
Next Row (wrong side): K1, p1, k1, purl to last 3 stitches, k1, p1, k1.
Bind off in pattern, knitting the knits and purling the purls.
FINISHING
Weave in the ends and wet block to finished dimensions.


Could this be adapted for a throw blanket? If so, any guidance would be greatly appreciated.
Hi Stephanie,
Thanks for writing in! You can certainly adapt this pattern for a throw blanket! The thorn stitch pattern works over a multiple of 4 + 1 stitches and the stockinette portion doesn’t have a stitch multiple but there is a 3 stitch selvage edge portion on either end of the blanket so you will need an extra 6 stitches to account for that. For a typical throw size (approximately 40 inches wide) I would recommend casting on 167 stitches (4 x 40 = 160 + 1 + 6 = 167) from there you can follow the pattern as written until you reach your desired length!
I hope this helps!
Gianna
Thank you! Could you also recommend alternate blanket patterns for this new yarn? I can’t decide between two colors so need two patterns!
Hi Stephanie,
I think that the Up + Down Cables Blanket would be perfect for Partridge! It’s already written for a different aran weight yarn, so you wouldn’t need to make any adjustments to the pattern at all.
All the best,
Lili
What does it mean “ into next stitch” I am not brand new to knitting, but I have not seen this term. I am familiar with knit, purl, yarn over and knit into back and fronts. Is this something other than simply what it says? I want to do this scarf and get it right. Thank you.
Hi Darrene,
Thanks for reaching out. The instructions “into next stitch,” means to work the following three stiches (enclosed by the square brackets) all in one stitch. So you’ll knit 1 stitch without letting the stitch fall off your left needle, do a yarn over, and then knit into the stitch that’s still on your left needle once more. Then, you can let it fall off the left needle as normal, and continue on in the row. Hope this helps clarify things!
All the best,
Lili
Wow! Thanks…….. I can do that!
Beautiful wrap but wondering if there is a chart for this pattern?
Hi Melissa,
Thanks for writing in! We don’t have a chart for this pattern, just the written instructions!
Warmly,
Gianna
Hi, beautiful!
Would it be possible to add a chart for the thorn stitch 😉
Thank you!
Hi Dagmar,
Thanks for writing in! We only offer this pattern with written instructions, but thank you for expressing your interest! I will be sure to pass this along to the rest of the team!
Happy knitting!
Gianna
I wonder how this yarn would look for the Jasmine scarf! I would have to adjust the cast-on, but I bet it’s a dream to knit with.
Flax down is lovely, but it has its challenges!
And this pattern looks lovely as well.
It is a wonderful scarf/wrap. Is it possible to knit it with yarn of light worsted weight like 100g/200 meters ? How can I adjust it? Thanks a lot! Geneviève
Hi Geneviève,
Thanks for reaching out. You can certainly adapt this pattern for a lighter yarn! All you’ll need to do is adjust the number of stitches you cast on. To figure out your cast-on number, you will want to first knit a gauge swatch in pattern. Once you know how many stitches you are getting per inch, you can multiply that number by the width that you would like and cast on the nearest multiple of 4 + 1. You may also want to extend the Staggered Sections of thorn stitch, so that the triangles they create extend further across the width of the wrap. Hope this helps!
All the best,
Lili
Hi. This might be a newbie question: I don’t understand why the instructions list 41 (77) stitches. Does this mean you can make it 2 different sizes?
Hi Gail,
Thanks for writing in. You’re absolutely correct–this design comes in two different sizes! If you want to make the scarf size, you’ll need to cast on 41 stitches, but for the wrap size, you’ll need 77. Hope this helps clarify things!
All the best,
Lili
This wrap is glorious! But what’s really pushing me over the edge is the beautiful pink color paired with the camel/caramel sweater your stunning model is wearing. Is that sweater a hand knit by any chance? If so, is there any information on the pattern and/or the yarn used? I would love to recreate this entire ensemble. Thank you!
Hi Tammy,
Thanks for reaching out! I totally know what you mean, the combination of pink and camel is quite beautiful! The sweater that the model is wearing is not handmade, I believe it is actually from Everlane. However, if you would like to make your own version of the sweater I would suggest following our Lightweight Raglan Pullover free pattern and using our lovely yarn Simply Camel! As always, I also suggest working a gauge swatch prior to beginning to ensure you are consistent with the pattern.
If you try this out please let us know how it goes! Happy knitting!
Gianna
What does “into next stitch” mean?
Hi Lauren,
Thanks for reaching out. The instructions “into next stitch,” means to work the following three stiches (enclosed by the square brackets) all in one stitch. So you’ll knit 1 stitch without letting the stitch fall off your left needle, do a yarn over, and then knit into the stitch that’s still on your left needle once more. Then, you can let it fall off the left needle as normal, and continue on in the row. Hope this helps clarify things!
All the best,
Lili
What are the finished measurements of both projects, please.
Hi Chris,
Thanks for reaching out. The finished dimensions are 10¼ (19¼) inches wide x 73 inches long. Hope this helps!
All the best,
Lili
Do you have a video of this “stitch”?
[k1, yarn over (yo), k1]
Is this the same as KYOK ?
Hi Betsey,
Thanks for writing in. I’m sorry to say that we do not have a video for this part of the thorn stitch, but you’re absolutely correct–it is the same as the abbreviation KYOK! Hope this helps!
All the best,
Lili
I don’t understand this part:
SCARF SIZE ONLY
Work Rows 1 and 2 of Stockinette Stitch Pattern (see Notes) 56 times or for about 17¼ inches.
Does this mean for the wrap this part is left out and the scarf is longer than the wrap?
Hi Krista,
Thanks for writing in! The scarf and wrap come out to the same length, but they have slightly different pattern instructions to achieve the stitch pattern. So, for the scarf (since it is more narrow) there is a section of just stockinette, while for the wrap you are working the staggered sections with the stockinette and thorn stitch simultaneously. To keep the dimension, you can see in the staggered sections that you will be working different lengths depending on the size you are making. For example, in STAGGERED SECTION 2, you will Repeat Rows 13–20 two (7) more times, so the scarf size you will only work 2 more repeats, and the wrap size you will work 7 more repeats.
I hope this clears things up!
Gianna
Question:
Am I correct that to knit the scarf after the staggered section 1, knit stockinette stitch only for 17+Inches?
Hi Sally,
Thanks for reaching out! For the scarf, after working the 1st staggered section, you will work the SCARF SIZE ONLY section working for 17¼ inches, then you will continue on to STAGGERED SECTION 2 and so forth!
I hope this clears things up!
Gianna
Maybe a silly question but is there something special that needs to be done between staggered sections other than what is listed? Do you just keep going from one section to the next ? Thanks!
Hi Tara,
Thanks for writing in! No, nothing needs to be done between staggered sections, you can simply work from one to the next as written!
I hope this helps!
Gianna
Hi! I have been meaning to try the thorn stitch since you published a large cowl that I thought was rather unwieldy for me to cast on, so was thrilled to see the lark pattern. I knit up about 30 inches and discovered that it was curling up around the edges. I didn’t know if blocking will help this! Is there a way to knit something on the sides to insure or maybe I am a worry wort?! Thanks so much for your help and looking forward to trying again
Hi Sue,
Thanks for writing in. I think that blocking will definitely minimize a lot of the curling, but you can also add an extra border after you’re finished knitting the scarf! To do this, you can pick up the stitches on each edge and knit for a few rows in a non-curling stitch such as garter, ribbing, or seed stitch. A crochet border would also look beautiful!
All the best,
Lili
I am going through the Lark Wrap written pattern line by line. After reading the comments/ questions and your explanations, I feel more confident about this project.
Thank you!
Thanks for this lovely pattern! I love the partridge yarn ,too. I happen to have about 6 hanks of flax down and was considering it for this scarf instead. Is flax down similar to partridge?
Hi Karen,
Thanks for reaching out! Partridge is a pretty thick worsted weight yarn (3.75-4 stitches per 1 inch) while Flax Down is a light worsted/dk weight (5 – 5.5 stitches per 1 inch) so Flax Down is considerably thinner than Partridge. That being said, you could still use Flax Down for this pattern, but you will need to make a few adjustments. I would recommend starting off by working a gauge swatch on an appropriately sized needle (for Flax Down with this pattern I would suggest a US 6 or 7) from there you can calculate your stitches per inch and determine your cast on! Just be sure to keep in mind that the stitch pattern works over a multiple of 4 + 1 stitches. For more information on gauge, I would also suggest checking out our wonderful tutorial, All About Gauge!
I hope this helps and please feel free to reach out with any more questions!
Gianna
Good Morning: I am making the wrap. I’m stuck on Staggered section 4, Row 2. I purl to the last 7 stitches, and the pattern states slip 3wyif, k1 p1, k1. The wyif and k1, p1, k1 account for 6 stitches, and there is 1 stitch left over. Is this an error in the pattern?
Hi Debra,
Thanks for reaching out and bringing this to our attention! You are correct, that is a typo and should say Row 2 (wrong side): K1, p1, k1, purl to last 6 stitches, slip 3 wyif, k1, p1, k1.
I have updated the pattern to reflect this change!
Happy knitting!
Gianna
I order 4 skeins of this yarn in Canopy Green and now realize that I needed 5 for the scarf. I’m now thinking I want to make the wrap instead, which would need to order 5 more. Is there a dye lot in this yarn? I have just noticed there is the color is 7855 lot PS001. do you have 5 more skeins in this lot. Even one more would be okay and I would just do the scarf.
Thank you
Renée
Hi Renée,
Thanks for reaching out. When you place an order for the 5 extra skeins, you can write into the Special Instructions section on the checkout page “Please send dye lot PS001.” That way, we’ll make sure to send you yarn that will work for your project!
All the best,
Lili
Thank you for your help
A friend gifted me with yarn & copy of this pattern as a thank you gift. I’ve made a practice piece with scrap yarn & feel comfortable with lark stitch; however, I wanted to make sure that I understood the sequence correctly. Start with Begin Thorn Stitch and continue with Staggered Section 1-4, including stockinette section between Staggered sections 3-4 (for wrap). I’m having difficulty visualizing the total pattern appearance & don’t want to make errors as this yarn does not appear to be good for taking stitches out & re-knitting. A rough diagram would be helpful or perhaps a picture of the entire length with a better contrast backgound. Thanks
Hi Karen,
Thanks for reaching out. I completely understand how important it is to get a full understanding of a pattern before beginning! I’m going to send along by email a few photos that should help with this, so keep an eye on your inbox!
All the best,
Lili
Hi! I am knitting the wrap size and am finishing the staggered section 3. Am I correct in following the pattern after row 39 for the 101/2 “ of stockinette stitch? It seems as it the wrap will appear off centered. Thanks!
Hi Michelle,
Thanks for reaching out. You’re correct that you’ll need to knit 10 3/4 inches of stockinette stitch at this point! The sections of thorn stitch in this pattern actually are off-center–it’s part of the charm of the design! I hope this helps clear things up so you can continue on.
All the best,
Lili
Hi! Michelle again😊staggered section 4, row 2 – I read the above comment but the revision to the pattern doesn’t make sense to me as the 3 stitches(k1,yo,k1) would not be slipped together as written – should it be , purl to last seven stitches- slip 3, purl 1, k1,purl1,k1?
Thanks Again!
Hi Michelle,
Thank you for your comment! I have verified that these instructions are correct for the fourth Staggered Section, Row 2. The pattern was revised to account for the 6 stitches left at the end of the row, which should be worked as follows: slip 3wyif, k1, p1, k1. (Note that there isn’t one more purl stitch at the end of this row!)
I hope this helps!
All the best,
Margaret
Thanks so much for double checking ! I must be doing something wrong on my end 🙃
I am making the scarf version and want to make sure of the rest of the pattern.
Staggered Section 1 completed
Stockinette Stitch Pattern 17.5 inches working here
Staggered Section 2
Staggered Section 3
Staggered Section 4
Bind off
Hi Laraine,
Thanks for reaching out with your question! I can confirm that everything you’ve written is correct for the scarf size of the Lark Wrap! There is just one section at the end of Staggered Section 3 where I would take care not to skip the stockinette section, which reads as follows:
Beginning with Row 2, repeat Rows 1 and 2 of Stockinette Stitch Pattern 79 times, or for 24¼ inches, then repeat Row 2 one more time.
I hope this helps! Please feel free to write in again with any questions!
All the best,
Carly
Hi! I’m knitting the scarf size and have a question. In Staggered Section 2, Row 4, is slip 1 wyib correct? Seems like the slip should be in front – it’s on a purl row.
Thanks for verifying!
Hello!
Thank you for commenting, and thank you so much for catching this! You are correct, the slipped stitch in this row should read, “slip 1 wyif,” and not “wyib.” We have made an edit to the pattern to reflect this change, too!
I hope this helps, and happy knitting!
All the best,
Margaret
HI. I’m knitting the wrap size for this pattern, but am confused about instructions after staggered section 1. I repeated the rows 1-8 for 15 times. Then it says to repeat rows 1-4 once more. If I do so then according to the photo of the wrap I’m looking at that instruction would create a “pattern” instead of just stockinette to the end of the row and THEN start the 2nd staggered section of the “pattern”? Or am I looking at a different part of the wrap? After reading the previous comments is how I found out this pattern is off-centered. Which I think should have been stated in the NOTES section so as to avoid the confusion. Love love Purl Soho. Have made several of your patterns all with your lovely yarn.
Hi Donna,
Thank you for writing in, though we are very sorry for any trouble our pattern caused! The repeat of rows 1-4 in Staggered Section 1 function as a way to continue decreasing Thorn Stitch pattern for a few more rows before moving on to the second staggered section, where stockinette stitch and the thorn stitch section switch places to create the triangle of thorn stitch in the middle of the wrap. This wrap has a large V shaped stockinette design surrounded by three thorn stitch triangles on the ends and in the middle of the wrap, which is why the pattern is broken up into four staggered sections to create the central thorn stitch triangle.
I hope this helps clarify things, and please feel free to let us know if you have any other questions!
All the best,
Margaret
Enjoying this pattern.
Doing the wrap size.
Interesting enough to make me wanna keep going but simple enough I can watch tv or listen to a podcast.
Only change I’ve made is modding it to have a 3 stitch I-cord edge.
Hi Margaret,
I’m about to switch into the first staggered section and I have two questions: (1) the initial thorn section it is curling up hugely like stockinette — will this come out with blocking? Stockinette doesn’t stop curling even with blocking; (2) I used 57 stitches (56 plus 1) so I’m doing something in between the wrap and the scarf — I can’t decide if I should do the wrap design or the scarf design with the solo stockinette section. I’d rather do the wrap triangles but wasn’t sure it would work with 56 instead of 77.
Any advice would be appreciated. Thanks
Hi Margaret,
I think I figured it out. I’m planning to do the repeats until it is a complete row of stockinette. then I will measure each set of 8 rows that goes beyond the 7 rows. Then I will subtract that from the 17-1/4 inches and will then knit stockinette for that number of inches before starting staggered set 2. Does that make sense?
Thanks!!
Jane
Hi Jane,
Yes, that makes sense and sounds like a great plan! In answer to your question about the thorn stitch curling, we found that it blocked out much flatter. I’d also recommend double checking your gauge in this section to make sure it’s not too tight (and therefore contributing to the curling). Thorn stitch has a tendency to knit up on the tighter side!
All the best,
Lili
Thanks Lili.
I used a size 10 needle because I knit tightly and I ended up with 4.5 inches for 16 stitches and 5.25 inches for 26 rows.
It is curling a lot on both ends. Even more than at the bottom. Can I wet block the partigridge? Might that help? Also, what do you do when your row gauge is bigger than your stitch. They are supposed to be even according to this pattern. It doesn’t matter here because it is a scarf and gauge for this is not relevant to me but I am curious because I do have trouble matching row and stitch gauge regularly.
Thanks again.
I meant both sides more than the end. Sorry.
Hi Jane,
Those are very good questions! In most stitch patterns, including this one, the row gauge is tighter than the stitch gauge (i.e. there are more rows per 4 inches than there are stitches per 4 inches). But it’s definitely tricky to match both of these perfectly–I run into the same problem myself all the time! What I like to do is find a “medium” gauge where, for instance, my stitch gauge is slightly too loose and my row gauge is slightly too tight, or vice versa. Then, when I block the finished object, I gently stretch it so that both gauges are accurate, balancing out the two slightly incorrect gauges! Blocking should also help minimize the curling you’re experiencing.
All the best,
Lili
Hi,
Also in Row 8 of staggered section 3 there is no slip marker. I assume you slip it after the purl. Maybe I’m misunderstanding.
Thanks,
Jane
Hi Jane,
Thanks for pointing that out! I believe that you’re correct–you should slip the marker after working the purl stitch. I’ve passed along your message to our design team, who will look into updating the pattern instructions here!
All the best,
Lili
Hi Lili,
Sorry to bother you again. I finished my lark scarf/wrap (ended up about 13.5 inches) and it worked as described above with the in between stitch count. It is quite lovely. BUT after a full wet blocking and drying for 48 hours, it is still gently curling along the long ends. Do you ever block something a second time?
Thanks!
Hi Jane,
You could definitely try blocking it again! You may want to try another method of blocking, like steam blocking, which is a bit more intense than wet blocking (since you’re using heat). It’s a very effective blocking method though, if you want to give it a shot!
All the best,
Lili
Hi. I love the pattern, have just finished my first staggered section. The bottom edge is curling so badly as are the sides. Can you recommend something I can do, perhaps knit in an edge? I think a fringe or tassels would not look nice. Anything? As it’s driving me nuts. Thank you so much.
Hi Sarah,
Thank you for writing in! I would recommend going up a needle size to allow your stitches to have more room to lay flat. Once you are finished knitting your project, you could block your scarf slightly more aggressively than you normally would while pinning the corners to help your scarf lay flat. I hope this helps but please let me know if you have any additional questions!
Happy knitting,
Gavriella
I am making the scarf. The comments and responses have been so helpful. Another knitter appeared to be starting at staggered section 1 rather than under Begin Thorn Stitch. Did I misunderstand?
Hi Carol,
We are so happy to hear you will be making this scarf! To start, work set up row 1 and then work rows 1-8 of the thorn stitch pattern twice, and then “next row” before starting the staggered section 1! I hope this helps!
Happy knitting,
Gavriella