Learn-to-Love-Steeks Blanket
The term “steeks” may be a mystery to you or just a thing to fear, but it needn’t be either… Truly!

“Steeking” is the multistep process of cutting something you have knit in the round in order to create an opening in the fabric (for the front of a cardigan or an armhole, for example). Steeks make it possible to work Fair Isle in the round (much easier than flat!) and to then transform the tube into a vest or cardigan. And even if you’re not working elaborate color work but love to avoid purling, steeks may be your new best friend!
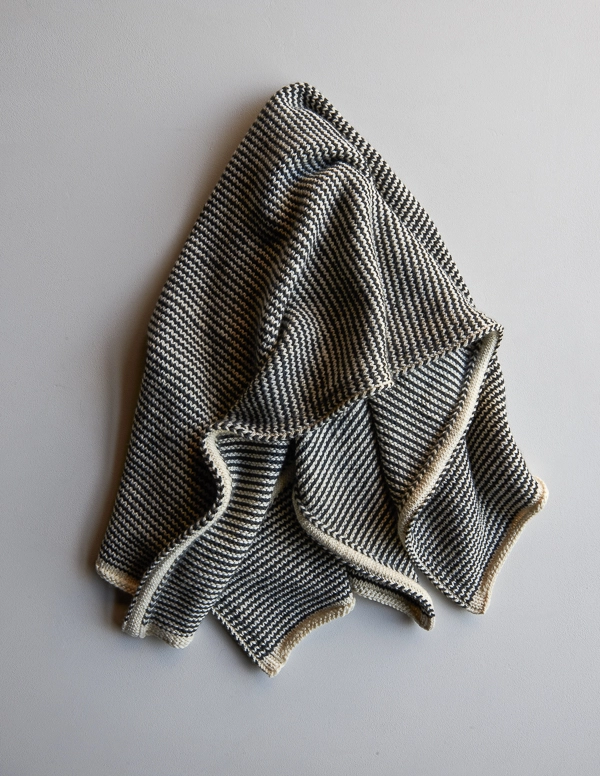
I designed our Learn-to-Love Steeks Blanket for just that: loving steeks! Taking full advantage of the tubular construction, I worked single-row stripes, much more fun to do in the round than flat. And knowing the end game, I knew the striping would doubly serve me: technically and aesthetically.
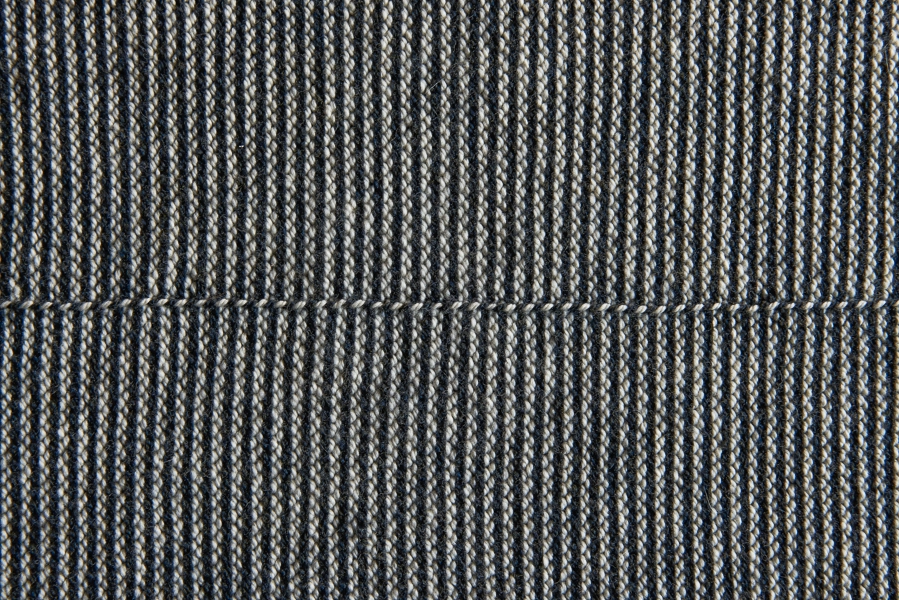
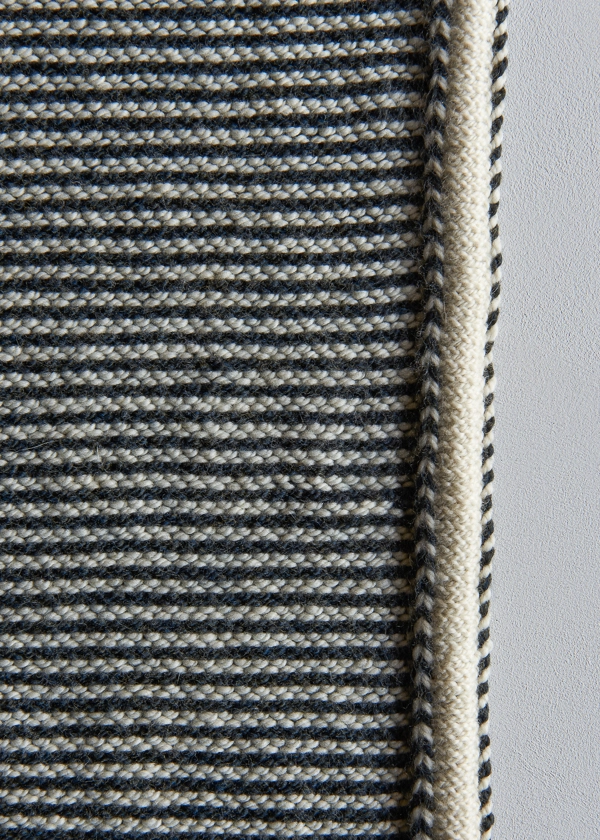
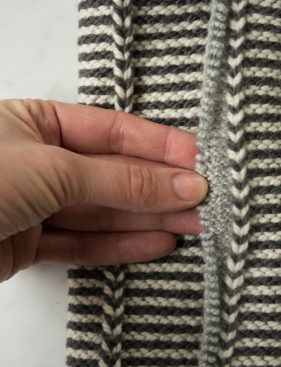
Technically, alternating rows of stripes act as a guide for two different steps of the steek process. And aesthetically, their graphic nature also adds beautiful detailing to the steeks’ finishing. Plus, instead of hiding the process of carrying up alternating yarns, I celebrate it by placing the pretty twist right at the center of the blanket. A rare opportunity I couldn’t ignore.
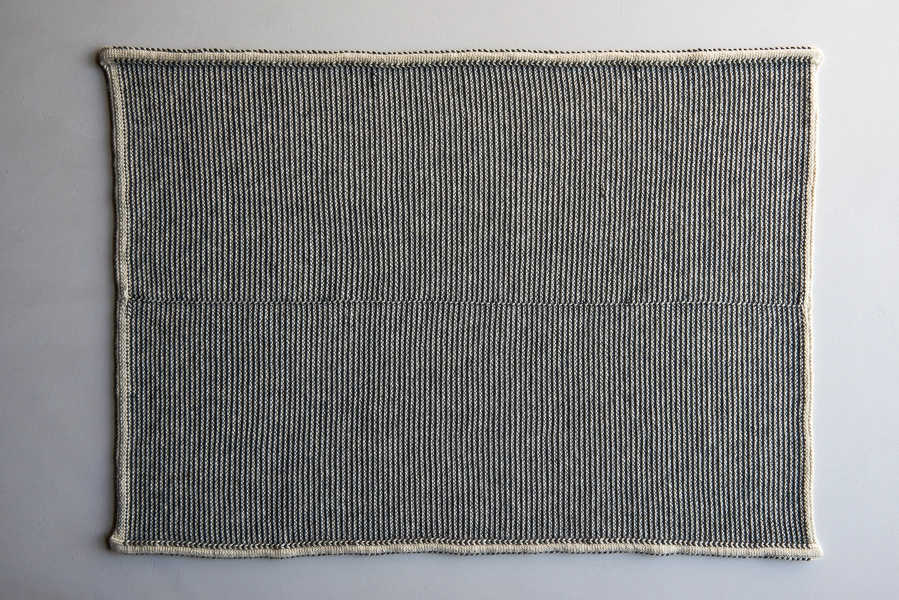
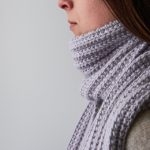
We knit our Learn-to-Love Steeks Blanket in contrasting colors of Worsted Twist, the softest 100% merino wool you can imagine. We then finished it with Cashmere Merino Bloom, an incredible blend of cashmere and merino. In such gorgeous yarns, this blanket will be as incredible to use as it is to create.
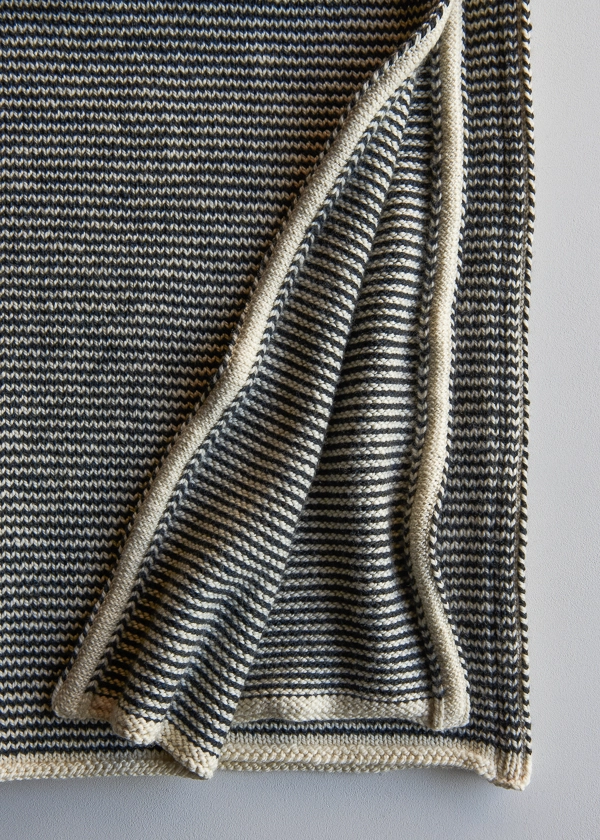
Along with this step-by-step pattern, we have also created a comprehensive new Steek Tutorial, both as a video and a still-photo how-to, all aimed at demystifying knitting’s biggest bogeyman. And so, I dare you… I double dog dare you to not learn to love steeks! -Laura
Update: Same Skill, New Project
February 2017
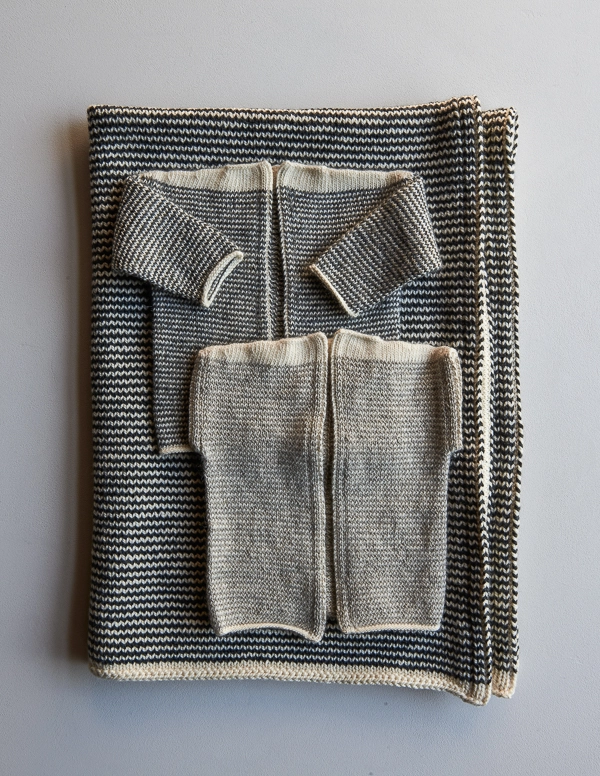
Have you learned to love steeks? Put your new skill to the test with our Tiny Stripes Cardigan +Vest!
Designed by Purl Soho designer, Laura Ferguson.
Share your progress and connect with the community by tagging your pics with #PurlSoho, #PurlSohoBusyHands, #PurlSohoLearnToLoveSteaksBlanket, #PurlSohoWorstedTwist, and #PurlSohoCashmereMerinoBloom. We can’t wait to see what you make!
Materials
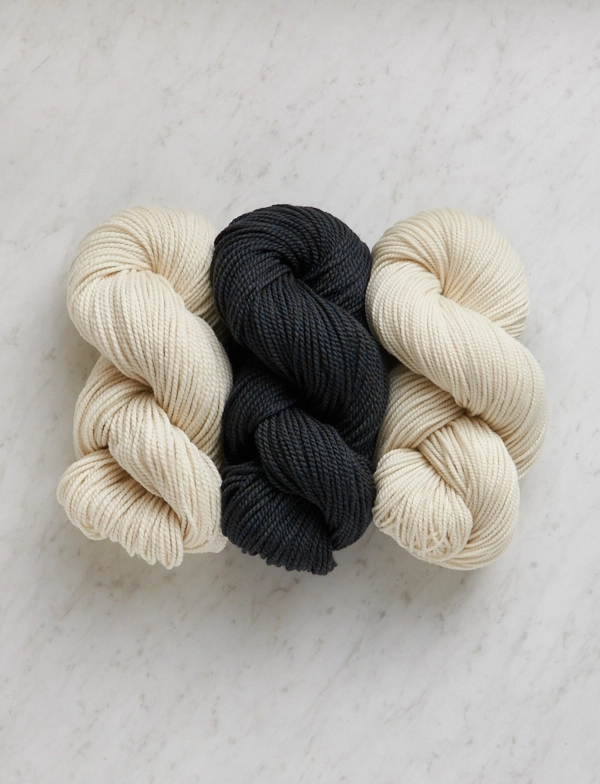
- Yarn A: 2 (4, 5) skeins of Purl Soho’s Worsted Twist, 100% merino wool. Each skein is 164 yards/ 100 grams; approximately 280 (630, 770) yards required. We used Heirloom White. (NOTE: We no longer offer Worsted Twist, but choose from one of our other worsted/aran weight yarns.)
- Yarn B: 2 (4, 5) skeins of Worsted Twist; approximately 280 (630, 770) yards required. We used Stillwater Blue.
- Yarn C: 1 skein of Purl Soho’s Cashmere Merino Bloom, 70% extra fine merino and 25% cashmere. Each skein is 218 yards/ 100 grams; approximately 35 (55, 75) yards required. We used Heirloom White.
- US 8 (5 mm), 24- (32-, 40-) inch circular needles
- Two US 4 (3.5 mm), 32- (40-, 60-) inch circular needles
- Spare Needle: One US 4 knitting needle (double pointed, straight, or circular)
- Two stitch markers, different colors
- One removable stitch marker or scrap yarn
Gauge
IMPORTANT: Make sure that whatever yarn you use the stitch gauge of Yarn C equals the row gauge of Yarns A and B.
- Yarn A and Yarn B: 17 stitches and 24 rows = 4 inches in stockinette stitch on larger needles
- Yarn C: 24 stitches and 32 rows = 4 inches in stockinette stitch on smaller needles
Sizes
Baby (Crib, Throw)
- Finished Dimension: 24 (32, 40) inches wide x 32 (42½, 53¼) inches long
SAMPLE: We show the Crib size here.
Notes
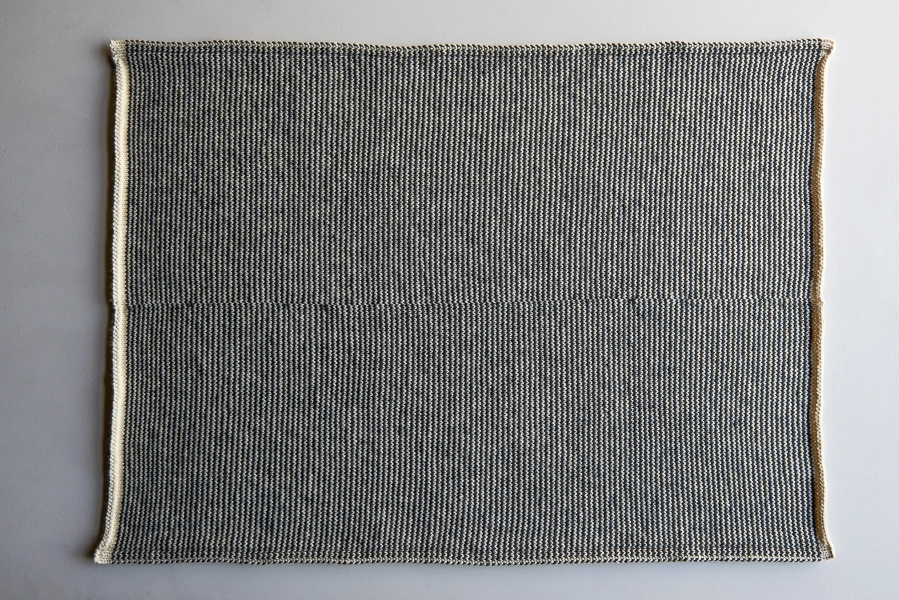
CONSTRUCTION: You knit this blanket in the round, then cut up the middle to create a flat fabric.
STRIPES: For tips on carrying the yarn when working stripes in the round, check out our Stripes in the Round Tutorial.
PHOTOS: In the instructional photos we use a contrasting color for Yarn C. This is just to clearly show the step, but of course, could be used as a design element as well!
VIDEO TUTORIAL: For a video tutorial on the entire steeking process, please visit our Steek with Knit Facing Tutorial.
Pattern
Knit a Tube
Cast On + Work Bottom Edge
With Yarn A and larger needles, cast on 47 (64, 81) stitches, place marker, cast on 59 (76, 93) more stitches. [106 (140, 174) stitches.] We used a basic Long Tail Cast On.
Place a different color marker and join for working in the round, being careful to not twist the stitches.
Round 1: Purl to one stitch before next marker, k1, slip marker (sm), p1, k10, p1, k1, purl to end of round.
Round 2: Knit to next marker, sm, p1, k10, p1, knit to end of round.
Repeat Round 2 two more times.
Continue, Striping
Join Yarn B…
Round 1: With Yarn B, knit to next marker, sm, p1, k10, p1, knit to end of round.
Round 2: With Yarn A, knit to next marker, sm, p1, k10, p1, knit to end of round.
Repeat Rounds 1 and 2 until piece measures 31 ½ (42, 52 ¾) inches from cast-on edge, ending with Round 2.
Cut Yarn B.
Repeat Round 2 two more times.
Work Top Edge + Bind Off
Next Round: Purl to one stitch before next marker, k1, sm, p1, k10, p1, k1, purl to end of round.
Bind off knitwise.
Weave in the ends.
Steek
NOTE: Place a removable stitch marker or piece of scrap yarn on the bind-off edge to help you keep track of which end is which.
Prepare First Facing
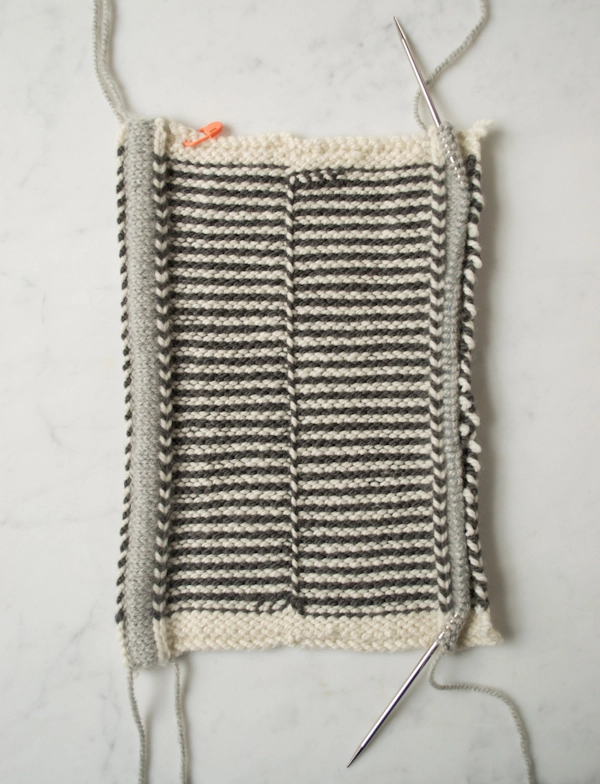
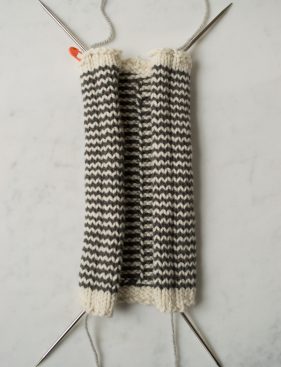
Turn tube inside out, and orient it so the cast-on edge is closer to you. You will see two pronounced columns of knit stitches.
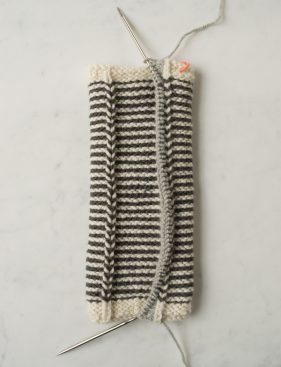
With one of the smaller circular needles and Yarn C, start at the cast-on edge and work towards the bind-off edge, picking up under both legs of each stitch of the knit-stitch column on the right.
Working these picked up stitches…
Row 1: Knit.
Row 2: Purl.
Repeat Rows 1 and 2 one more time.
Cut yarn and leave the stitches on the needles.
Prepare Second Facing
Orient the piece so the bind-off edge is closer to you.
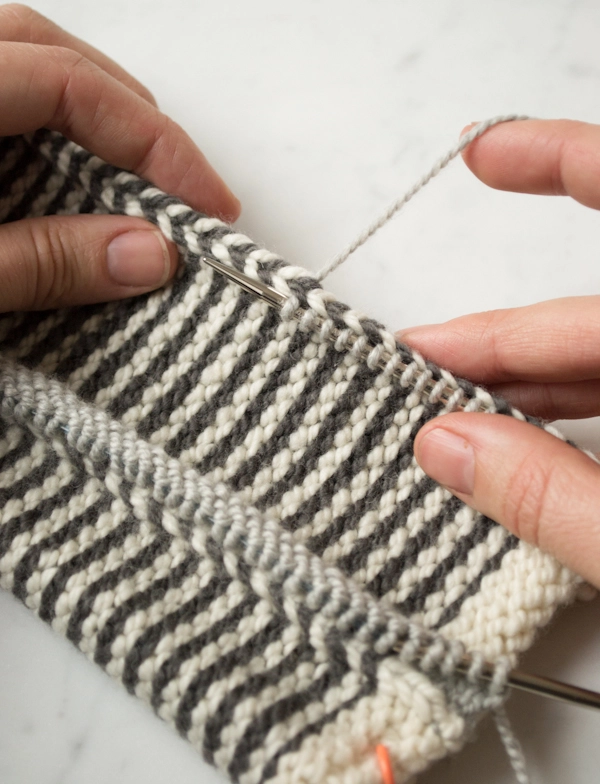
With the second smaller circular needles and Yarn C, start at the bind-off edge and work towards the cast-on edge, picking up under both legs of each stitch of the knit-stitch column now on the right.
Working these picked up stitches…
Row 1: Knit.
Row 2: Purl.
Repeat Rows 1 and 2 one more time.
Cut yarn and leave the stitches on the needles.
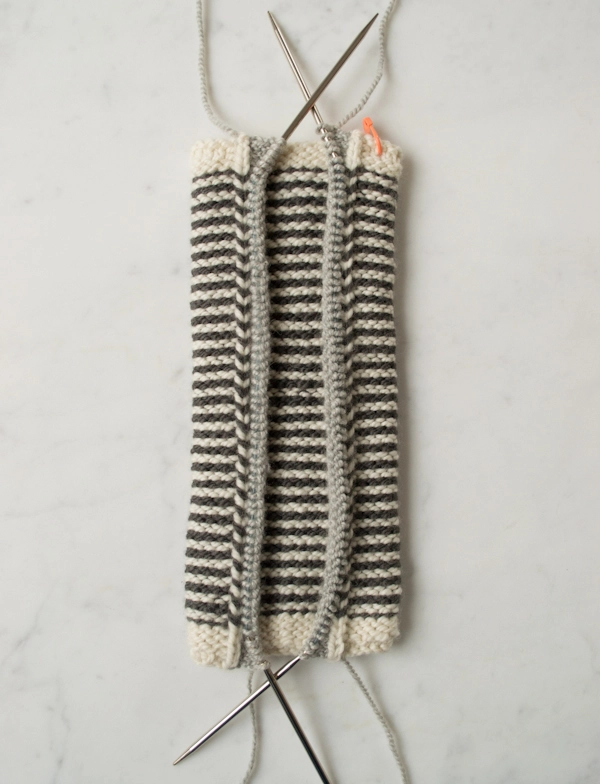
Cut!
Turn the piece right side out.
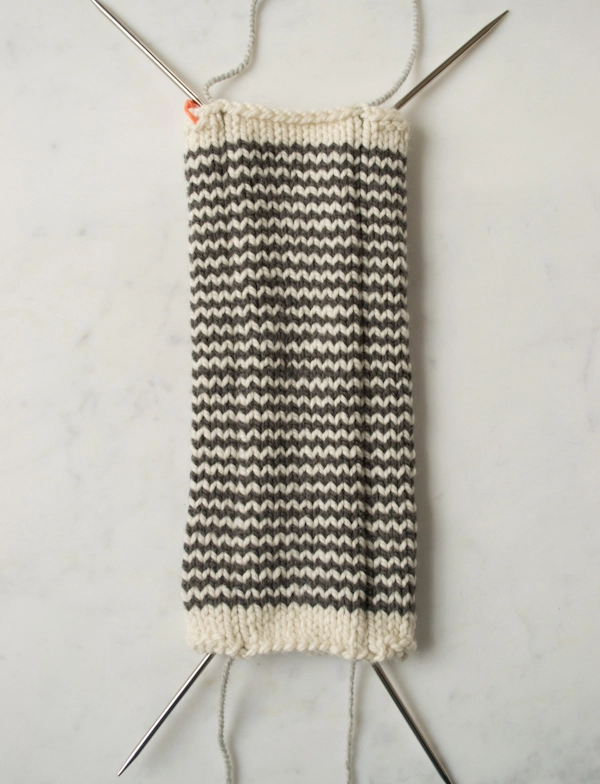
NOTE: If the yarn you used is very slippery, or if you are worried that the stitches will unravel after you cut them, secure each side of the steek with thread before cutting. Sew one or two lines of stitches down each side of the center of the steek (on stitches 5 and 6 of 10), either by hand with a needle and thread or with a sewing machine. This step was not necessary for the sample because the yarn is sticky enough that it would not unravel easily in the time it takes to secure the facings.
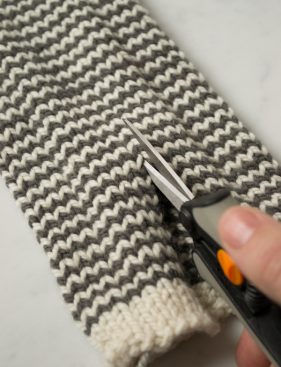
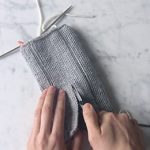
Between the two purl columns there is a column of 10 knit stitches. Beginning at the cast-on edge and working towards the bind-off edge, carefully cut up the exact middle of these 10 knit stitches for the entire length of the tube. As you cut the fabric, the two new edges are going to curl under. That’s okay, let them.
There are now 5 knit stitches at each newly-cut edge.
Fold + Secure First Edge
Orient the piece so the cast-on edge is closer to you.
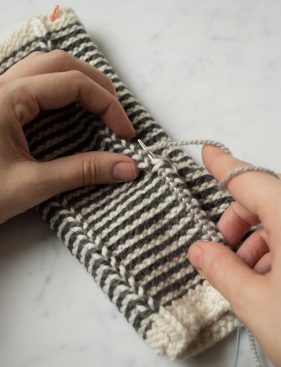
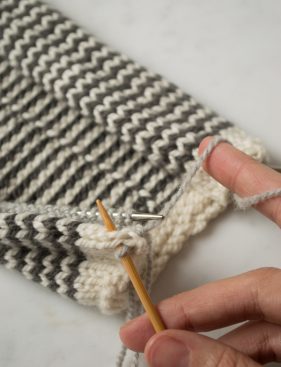
Identify the column of stitches in the middle of the left-hand edge, the third stitch of the five. In the following section you will work along this center column, picking up into each row and knitting the picked-up stitch together with a stitch from the corresponding Facing, working from the cast-on edge towards the bind-off edge and binding off as you go. Here’s how…
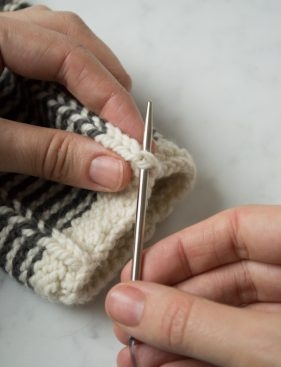
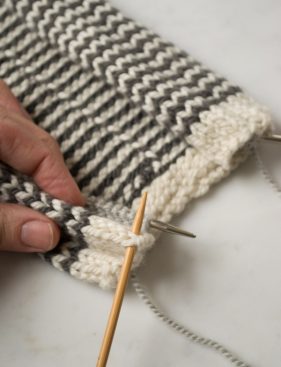
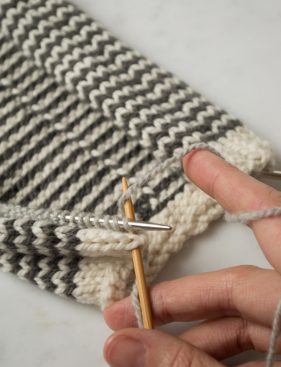
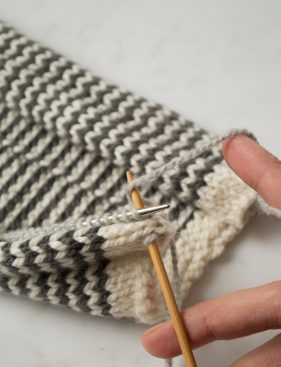
Beginning at the cast-on edge, insert the spare needle under both legs of the first stitch in the center column, then insert the spare needle into the first stitch on the circular needles, and with Yarn C, knit these two together…
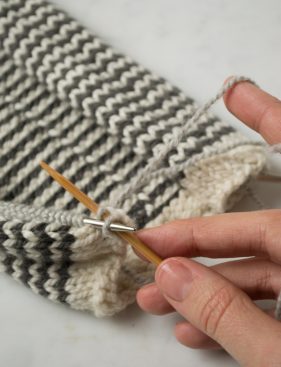
…*insert the spare needle under both legs of the next stitch in the center column and the next stitch on the circular needles, k2tog…
…pass second stitch on spare needle over stitch just worked to bind off 1 stitch, repeat from * to end of column/last stitch on circular needles.
You now have a precise fold with the raw edge sandwiched and secured between the facing and the striped fabric.
Fold + Secure Second Edge
Orient the piece so the bind-off edge is closer to you.
Once again, identify the center (third) column of stitches between the purl column and the now-left-hand edge. You will work along this center column similarly to how you did in the previous section, but remember, you’re now looking at the fabric upside down, so you’ll insert the spare needle under both legs of an upside-down V rather than a right-side-up V.
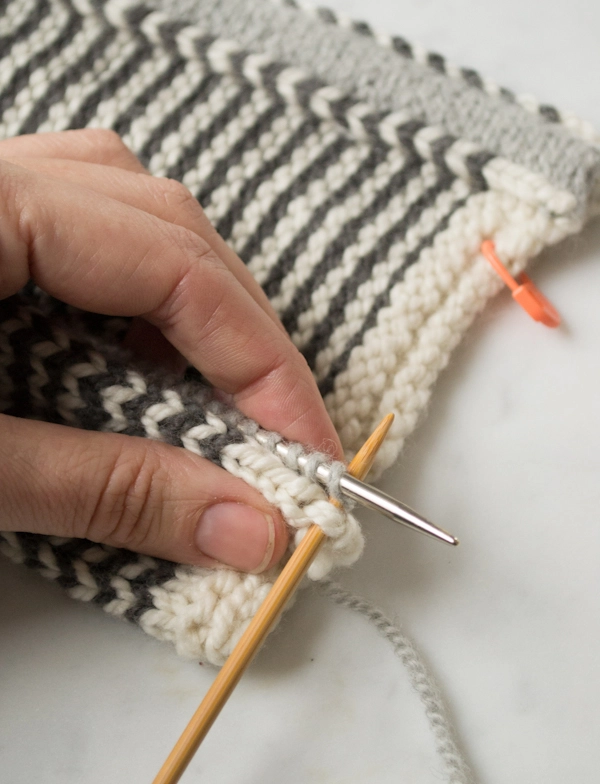
Beginning at the bind-off edge, insert one of the spare needle under both legs of the first stitch in the center column, then insert the spare needle into the first stitch on the circular needles, and with Yarn C, knit these two together, *insert the spare needle under both legs of the next stitch in the center column and the next stitch on the circular needles, k2tog, pass second stitch on spare needle over stitch just worked to bind off 1 stitch, repeat from * to end of column/last stitch on circular needles.
Finish
Use a tapestry needle and a length of Yarn A to sew closed the top and bottom of the channel created from securing the striped fabric to the facing.
Weave in remaining ends.




Love learning new ways of doing things Can’t wait to start this new prodject !
Ohhhhhhhhhh…I see a new winter throw in my future!
How many skeins would be required to make this into an adult size?
Hi Sarah,
Thanks for the question. We have included a throw size. Is this what you mean? If so, check out the “sizes” section and you’ll see the option for the throw size. Thanks!
-Adam
Can you recommend a washable yarn for a baby friendly blanket?
Debbi
Hi Debbi,
Thanks for the question. I recommend Anzula For Better or Worsted for the body of the blanket and Anzula Cricket for the facings. I hope you like the suggestion!
Best,
Adam
Who would have thought of making the yarn carries when changing colors a design element? Great idea, which I am definitely stealing!
Although I have been knitting since I was 6, I have only recently ventured into the “advanced” techniques…I confess, I did not even KNOW the term “steeks”…now, I eagerly anticipate conquering this giant 🙂
Perfect idea. Thank you very much for the instructions. I love knitting in the round and will definitely try this.
I made a steeked sweater once (well, technically, I made it three times, to get it to fit perfectly) and every time I cut it, it was TERRIFYING. But it was fun to knit and beautiful when it was done! I am looking forward to trying it with something a little less risky, like this blanket.
I’m gonna try it… I love how it looks!
If I didn’t want the design feature of the carried yarn, would it work to make the yarn carries within one of the 2 5-row steeks that way it would be hidden inside the facing? Or would that be too close to the cutting? Thanks!
Hi Rebekah,
Thanks for your question. You can put the jog anywhere in the pattern you’d like! This doesn’t affect the steek if your change in color is close to it. Best of luck!
-Adam
Hi, my yarn weight is a bit lighter than the ones used. Can you give me the cast on ratio/proportions between the stitch markers so I can get the same measurements for my finished work?
Hi Serena,
Thanks for the question. You’ll want to do a gauge swatch in the round and count your stitches per inch. You’ll multiply this number by the width of the blanket and this will give you a rough cast on number. It’s better to do it this way instead of giving you an arbitrary number. Best of luck and let me know if you have any other questions.
-Adam
For a long time now, I’ve wanted to make a blanket with a steek, so I could make it in stockinette stitch without purling. But I was afraid!
So I’m going to try this.
One of my goals for the year: to make items with steeks, because I really hate long bouts of purling!
Thanks for the tutorial and pattern!
Now i know the name for what my Mom and I did many many years ago with in the round sweaters. We thought we were so brave, but just didn’t know “the word”.
Now i know the name for what i have always done to avoid ” back and forth” colour changes.
This SO very helpful! And extremely well presented! Thank you very much for this fabulous tutorial!
The steek is BRILLIANT, ABSOLUTELY BRILLIANT! LOVE the steek finishing, too… very well tailored.
Prepping to do some more colorwork and going to use your awesome steek.
Thank you so very much for sharing this design. I think you may have finally outdone yourselves… if that is possible.
Have a great day… KNITTING!
I learned to steek at Wool Week on Shetland. The class offered several ways to do the deed and this blanket is genius! One aspect of the successful steek in fair isle work is the capacity for the traditional wool to felt. The steek on this blanket is a bit more elegant in design and execution given the yarn doesn’t look particularly “wooly”. It would be so lovely in cotton too!
Do the facing edges lay flat, or at least curl less than stockinette naturally does?
Hi Madeleine,
Thanks for writing in! The faced edges do lie flat. The extra weight of the faced edges helps to keep them laying flat while being a beautiful accent!
I hope that this helps!
Cassy
I am planning on making this blanket. If I am understanding the pattern correctly, Yarn C gets entirely enclosed in the blanket edges, correct? If so, is there any reason why I couldn’t use some scrap yarn of suitable gauge for Yarn C? Why would I need an entirely separate skein?
Hi Julie,
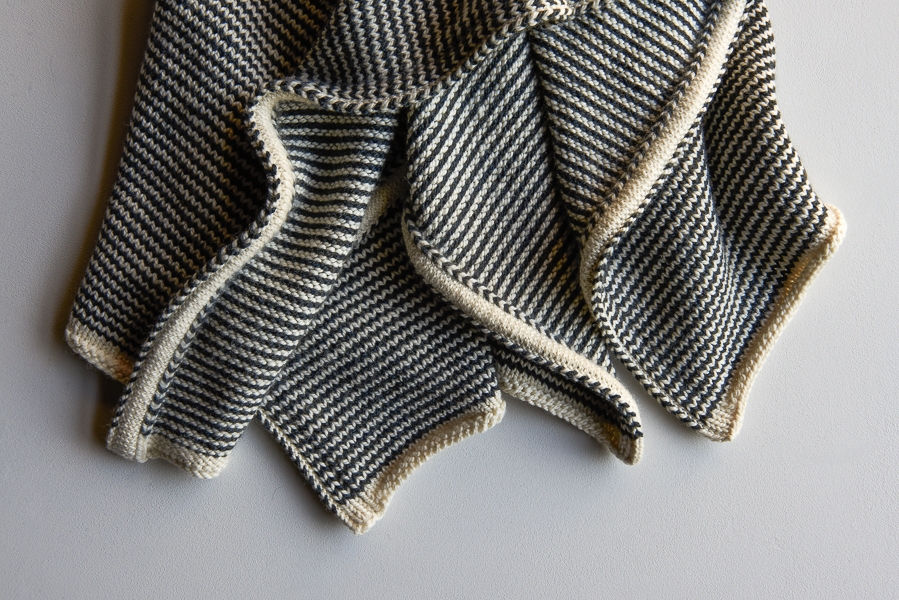
Great question! Yarn C actually creates an exposed facing – if you look at the picture above that shows the folded blanket with the finished steeked edge flipped up to the wrong side, Yarn C is used to knit the rolled edging that runs perpendicular to the rest of the blanket. However, you do only need about 75 yards of Color C, so you could certainly use leftover DK weight if you prefer!
Happy knitting!
Julianna
Just a question. In the middle of the finished blanket is a line where the stripes don’t match up due to the circular knitting. Why wouldn’t the steek stitches be around these jogs instead of at the edges?
Hi Judy,
This is a design detail actually. If you’d like to put the jog in the steek section, you can!
Thanks,
Adam
I have just attempted to make sense of this knitting and failed. Anyone who can understand and attempt this has my admiration. Just one question, why would you want to do something which seems do difficult and for me prone to disaster. Perhaps being British makes me want easier knits.
Hi Jay,
Thanks for writing in! In knitting, “steek” is an old Scottish word that refers to a specific group of extra stitches that are for future cutting. A steek is often used to create an opening (like the front of a cardigan or an armhole) or a place to attach another piece (such as a sleeve). Steeks are primarily used in circularly knit garments and are closely associated with stranded colorwork, like Fair Isle. Steeking makes it possible to create the colorwork in the round (much easier than flat!) and to then transform the tube into a vest, cardigan or Henley. And even if you’re not working elaborate color work but love to avoid purling. That is to say, steeks, generally make the knitting easier and can create a neat and clean opening while not disturbing the lovely color work. Here was are doing quite simple color work but it allows us to create quite thin stripes and for Fair Isle work, you can create quite complicated patterns that would be challenging or impossible without the steek.
I hope that this clears things up!
Cassy
Why do you switch yarn/needle size for the facings? Can I do them with the yarn/needle size I used for the rest of the blanket?
Thanks!
Hi Chrissie,
Thanks for writing in! We use a smaller yarn and needles for the facing to cut down on bulk. If you were to use the same yarn, the facings could get quite bulky and be more evident. Our goal was to make the facings as clean and understated as possible. You can certainly give it a go and see how it turns out!
Best,
Cassy
The facings look slightly rounded, as in not laying flat? Or, am I seeing something that is not there?
Hello Beverly,
Thank you for reaching out! The seam around the edge on this blanket is slightly raised, but the blanket lays very flat.
Happy knitting,
Marilla
I’m knitting this in a slightly heavier yarn but the bottom is curling up a lot as I knit. Is there any way to fix this?
Thanks 🙂
Hi Vivian,
Once the blanket is blocked, it should not curl up so much.
I hope this helps,
Melisaa
I love the tutorial but I’m having trouble figuring out how this would work with stranded colorwork. Won’t the strands on the backside cover the stockinette ridge making it difficult to pick up te stitches?
Hi Katrijn,
Thanks for reaching out! This technique certainly can get a bit more complicated with stranded color work as you point out here! To use these knit facings with stranded color work, you will need to lift past the floats to pick up stitches but it should still work!
Best,
Cassy
I am confused after you cut the object you indicated that you pick up and knit stitches, knit them together and bind off. But your pictures show the picked up stitches on the needle first then the part when you knit the object along with the picked up stitch. The wording does not coincide with the picture. Can you please explain this so new knitters can try this procedure.
Hi Karen,
Thanks for writing in! I think that I see where the confusion may be occurring. For this lovely blanket, you will be picking up and knitting stitches both before and after the cutting the steek! You will be picking up and knitting facings before cutting the steek, leaving the stitches live on the needles. After cutting the steek, you will pick up stitches along the folded edge of the steek and binding off those stitches together with the facing stitches. Our steek tutorial and video may also help with this technique and can be found here: https://www.purlsoho.com/create/steek-with-knit-facing/
I hope that this clears things up!
Cassy
If I were going to put the jog in the steeking area when do I add in the first row of yarn B after I complete the bottom edge?
Hello Camille,
Thank you for reaching out! To place the jog within the steak portion of the blanket you can put it anywhere between your purl stitches.
I hope this helps and happy knitting!
-Marilla
I am now at the point of cutting the blanket. I am really nervous about it since this is my first time steeking and I have only been knitting for 9 months! I used your pattern and your yarn. Do I need to secure the stitches or is this yarn sticky enough to hold together on its own? I made the baby blanket size with is smaller but there are a lot of stitches to bind off and I am worried the yarn will unravel. If I need to secure can you give me some tips on the best way to do it. Thank you in advance for your response. BTW the blanket looks awesome and if I don’t ruin it in the steeking process I will send a photo. Your instructions on the steeking video are great.
Hello Camille,
Thank you for reaching out- I’m very impressed by your knitting bravery! This yarn is sticking enough that it shouldn’t unravel in the process, however if you are nervous (You’re right, there are a lot of stitches to bind off) you can always sew one or two lines of stitches down each side of the center of the steek (on stitches 5 and 6 of 10), either by hand with a needle and thread or with a sewing machine.
I hope this helps and happy steeking!
-Marilla
When you are working on the steek, I am a little confused on why the gage is necessary. While using the smaller needles and yarn, you are knitting one stitch into each of the purled stitches of the piece. Does gage really matter?
Thank you for any help you can provide.
Hi Amanda,
Thanks for writing in! When you are picking up and knitting the steek facing with the smaller needles and yarn, you will be knitting perpendicularly to the direction the rest of the blanket was knitted and picking up one stitch in every row. Knitting stitches are rectangular, not square, which is why there are usually more rows than stitches in a 4″ gauge swatch. If you do not check both your stitch and row gauge and make sure that the stitch gauge of Yarn C matches the row gauge of Yarns A and B, after picking up one stitch in every row, you may end up with a steek facing that is either wider or narrower than the edge of the blanket, which would result in either a puckered or wavy edge, which would be less than ideal!
I hope that clears things up!
Best,
Julianna
I’m (finally) ready to start the facings, but my blanket is longer than the longest circular needles. Knitting the facing onto the blanket means there will be come “crunching” of the fabric, and won’t lie flat for the cut (like in the video). I am afraid that it will cause the steek cut to unravel before I can close the facings. Do you have any advice?
Hi Cecily,
Thanks for writing in! Although the concept is a bit frightening, a cut steek is actually much more stable than you would think! You will probably have an easier time cutting if you flatten small sections as you go, but scrunching the fabric won’t damage or unravel the steek while you are finishing the facing.
Best of luck and happy knitting!
Julianna
This is very cool. I don’t understand why the row of stitching down the center of the blanket. Don’t see anything like it in the pattern.
Hi Mary,
Thanks for reaching out and for the kind words! That twisted column in the middle of the blanket is actually the beginning and end of each row where the two colors are twisted together as you switch from one to the other. Although most striped patterns place this color change area on an edge or in another unobtrusive spot, we thought it created a really neat design element to place it in the center of the blanket.
Happy knitting!
Julianna
I’m going to attempt this pattern for my first “tricky” blanket. Do you have a suggestion for casting on? Would this work with a cable cast on?
Hello Margrethe,
It is always so exciting to add a new knitting skill to your repertoire. Any cast on method will work for this blanket, I prefer using a long tail cast on.
I hope this helps and let us know how it goes!
-Marilla
Hi there, my most earnest compliments for this lovely design, I can’t wait to make this piece but I’d like to make a much larger sized blanket.
As I’m not very familiar with sizing, from what I can see is that you have provided the following information on size:
Finished Dimension: 24 x 32 (32 x 42 ½, 40 x 53 ¼) inches
Then you mention the following
With Yarn A and larger needles, cast on 47 (64, 81) stitches, place marker, cast on 59 (76, 93) more stitches. [106 (140, 174) stitches]
My question is, are these the only sizes you give information for and if so, how might the best way to calculate how many stitches we will need to make a blanket of a much larger size that will still work out to match the stitches and rows match for the stitching of the edges at the end?
I hope I have been clear about what I am asking, many thanks
M
Hi Memme,
Thanks for writing in! You can actually knit this blanket to any size you wish by casting on as many stitches as you need to and knitting for as long as you want the blanket. When you are picking up stitches for the facings at the end, you will be picking up one stitch for every row no matter the size of the blanket.
I hope that clears things up!
Julianna
Hi!! I’m only a few rows in, but just realized I twisted my work. 🙁 I’m wondering if the cutting of the steek will allow me to untwist before finishing? Or should I just pull it out and start over? Thanks!!
Hello Shelly,
Thank you for reaching out! Unfortunately, I would reccomend starting over. The twist will still be an issue even after steeking.
I hope this helps and happy knitting!
-Marilla
Hi can i know how many yards needed
Hi and thanks for reaching out! We use 630 yards of each color for the main blanket, and 53 yards of the contrast color for the steek facing.
Happy knitting!
Julianna
What type of cast on did you use for the blanket? It makes a very nice design with the purl round.
Hi Kathleen,
Great question! We used a Long Tail Cast On for this blanket, and for most of our other projects!
Best,
Julianna
Hi! I’m looking forward to trying this, but on a reverse Stockinette pattern, so I would be knitting in the round, on the wrong side. How would I adjust this technique? Thank you!
Hi Bear,
Thanks for reaching out! The only think you would have to modify is to make sure the knit side of the steek preparation area is facing what will be the right side of your work. If you look at the pictures demonstrating how to cut the steek, you will see that the steek preparation area consists of 10 stockinette stitches with a single purl stitch column on either side. If you are knitting a piece that will be turned inside out when it is done, just make sure that you purl the steek preparation area so that your steek facings roll to the wrong side of the work!
I hope that helps!
Julianna
I am about to start this project, but as I have never steeked before I wanted to make up a little sample like your pictures show. How many should I be casting on to do this? Thank you 🙂
Hi Emma,
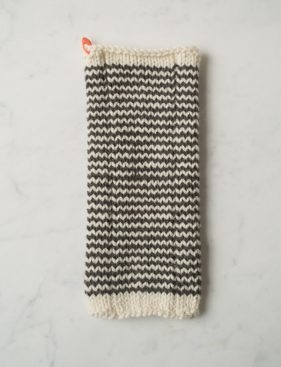
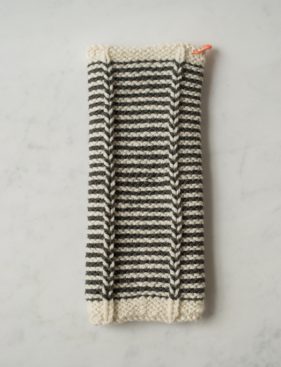
What a great idea! Steeks are a lot less scary than they seem to be, but there’s nothing like actually trying it out! I would cast on 20 stitches to knit a sample swatch, and repeat the following two rows until your swatch is about 4 or 5 inches long:
Row 1: K4, p1, k10, p1, k4
Row 2: p4, k1, p10, k1, p4
I hope that helps, and happy knitting!
Julianna
Thank you so much for the help Julianna! Can’t wait to cast on 🙂
Hi, this blanket is so lovely. How to knit it in flat instead of in round?
Is it possibile without seeking?
Hi Chiara,
Thanks for reaching out! Yes, you can knit this pattern flat, but in order to knit single row stripes flat, you will still have to use a circular needle so you can work from either end of the blanket. The pattern would be:
Row 1: (RS) Knit with Color A, turn your work
Row 2: (WS) Purl with Color B, slide your work
Row 3: (WS) Purl with Color A, turn your work
Row 4: (RS) Knit with Color B, slide your work
Once you get started, it should actually become quite intuitive, as you will always be able to tell whether you need to turn or slide your work depending on where the tail of the next color is located. I highly recommend trying this out on a swatch before you cast on the full blanket! You may also want to add an attached i-cord when you are done to mimic the look of the finished steek facing on the sides of the blanket.
I hope that helps, and happy knitting!
Julianna
I was hoping to order the yarn in the colors pictured. Unfortunately they are out of stock. Can you recommend another yarn that has similar colors and would work for this patter (and not more expensive please)
Thanks so much,
Roz
Hi Roz
Thanks for the question! I think the Linen Quill Worsted would be a nice substitute in the color Pale Oats and Stillwater Blue. I hope this helps!
Happy knitting
Jessica
Hello! I am a few rows into the striping and the bind-on edge is curling quite a bit. Will blocking the finished product solve the curling? Thank you!!
Hi Jocelyn,
Thanks for reaching out! Yes blocking the final project will help with the curling quite a bit, I recommend checking out our Blocking tutorial for some helpful tips!
Warmly,
Gianna
Hello! I want to add an i-cord edge to prevent the curling on the cast on and bind off edges. Does it matter if I add it before or after steeking? I want to add it via a provisional cast on and i-cord bind off. Thank you!
Hi Heather,
Thanks for reaching out! That will look great with this blanket! I would suggest adding the i-cord edge after seeking.
Happy knitting!
Gianna
Hi! Do you think Campo could be substituted here? And if so, how many skeins would you recommend for the baby size? And could it be used for the facing as well? Would love for the whole thing to be machine washable. Thank you!
Hi Natasha,
Thanks for reaching out! I think you could certainly use Campo for this blanket! It is a bit heavier than Worsted Twist so I suggest starting off by working a gauge swatch to make sure you are consistent with the pattern! The only thing is that for the facing we used Cashmere Merino Bloom which is a dk weight and is lighter than Worsted Twist (a worsted weight) so in place of that I would suggest using Morning! It is a similar yarn to Campo, it is a blend of 75% organically grown cotton and 25% yak and is machine washable as well!
I hope this helps, happy knitting!
Gianna
Thanks for this great blanket pattern.
I have knitted a very small trial blanket (50 stitches). My SO thinks it looks like a mouse blanket. I have used the helix knitting technique with the colour changes in the middle of the 10 stitches to be steeked. It looks great in my mini version. I now have to decide on colours for my throw size. I am thinking of white, grey, black and yellow.
Hi Ellen,
Thanks for writing in! That is such a great way to practice! I think a combination of white, grey, black and yellow would be so fun!
Please let us know how this turns out, happy knitting!
Gianna
This looks absolutely terrifying. It reminds me of trying to learn to bike with shoe clips — the only way I could talk myself into it was to remind myself over and over, “look at all those riders! If they can learn it, so can you.”
Is the main goal of this to learn steeking, for other projects? That is, if one doesn’t mind purling, would it be just as easy to make this flat?
My other question is, does the facing secure the cut edges enough so that the blanket (or garment) is machine washable?
Lastly, for the throw size, do you recommend sewing the steek to anchor it before cutting? Or will it hold together even though there are two much longer edges to bind off? Do you recommend doing the whole binding with the blanket on a table (for stability), as shown in the video tutorial? I normally knit on the couch, where things can get pulled around a bit more…
Thanks for this terrific tutorial and blanket pattern! My son will love it for a Christmas present!
Hi Kyrie,
Thanks for writing in! Yes, the main goal of this blanket is so that you can become more comfortable steeking and eventually feel confident incorporating the technique into other projects. But you could absolutely make a version of the same design where you knit it flat and purl the wrong side rows.
The facing does indeed secure the cut edges enough to wash the blanket in a machine, but if you’re using extra slippery yarn, you may want to secure each side of the steek with thread before cutting. Sew one or two lines of stitches down each side of the center of the steek (on stitches 5 and 6 of 10), either by hand with a needle and thread or with a sewing machine. It wouldn’t hurt to do this step regardless of the yarn you’re using though!
All the best,
Lili
Hi there! Would this blanket work with a lighter yarn, like a dk or even fingering weight? Thanks!!
Hi Alison,
You could absolutely use a lighter yarn for this blanket! All you would need to do is adjust your cast-on number so that the blanket comes out to the correct width.
To figure out your cast-on number, you will want to first knit a gauge swatch in pattern. Once you know how many stitches you are getting per inch, you can multiply that number by the width that you would like and cast on the nearest even number. When casting on, just make sure to place your stitch marker so that there are 12 more stitches on the second side than there are on the first. Then you can follow the pattern as written!
All the best,
Lili