Tunisian Crochet Pointy Pom Pom Hat
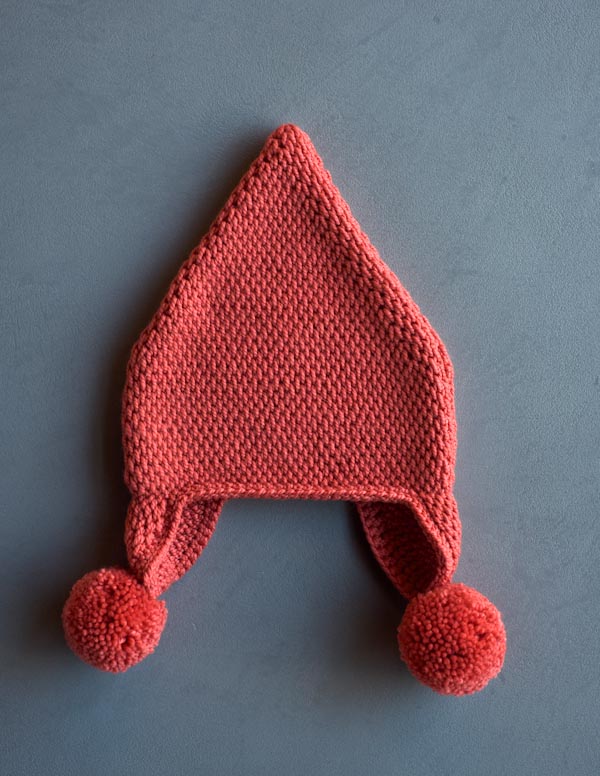
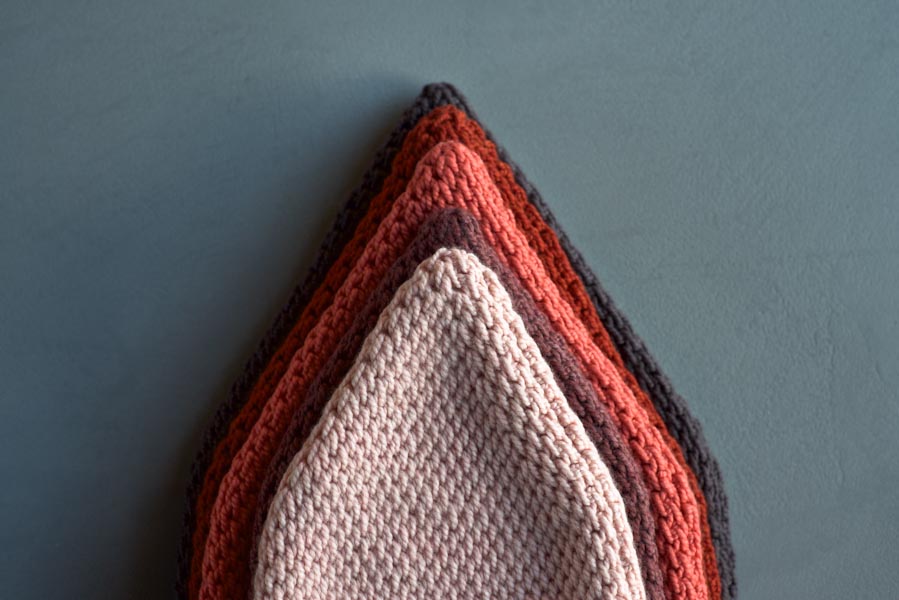
These adorable Pointy Pom Pom Hats use the same intriguing stitch as our Tunisian Crochet Scarf. When I made that scarf, I loved the smooth texture and unusual look of the Gobelin Stitch and grew curious how to shape it. I soon found out that decreasing was simply a matter of working through three stitches instead of two. So easy and so perfect for a gently sloping elf-inspired head topper!
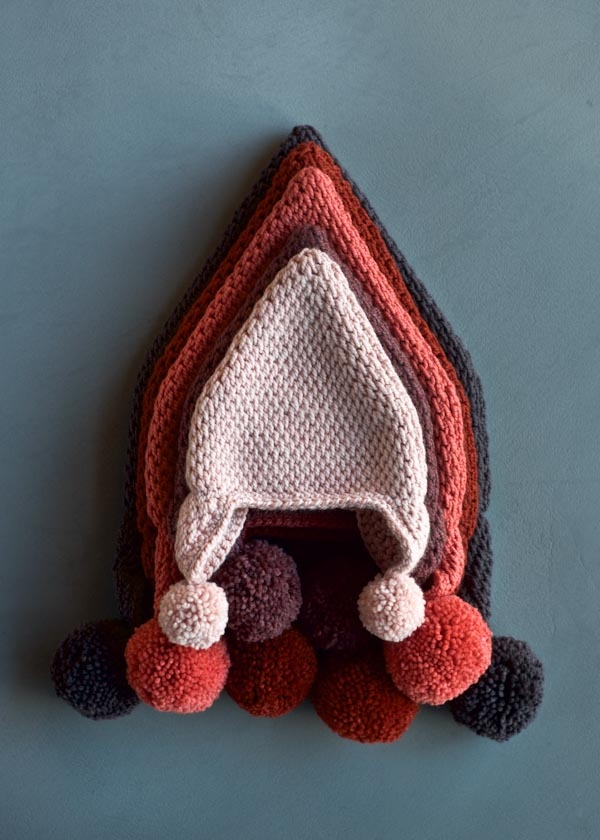
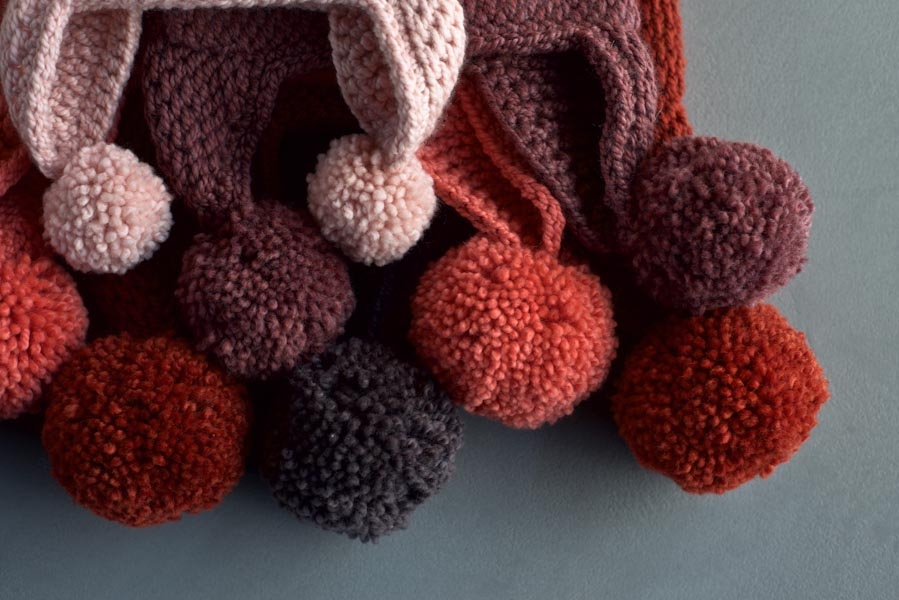
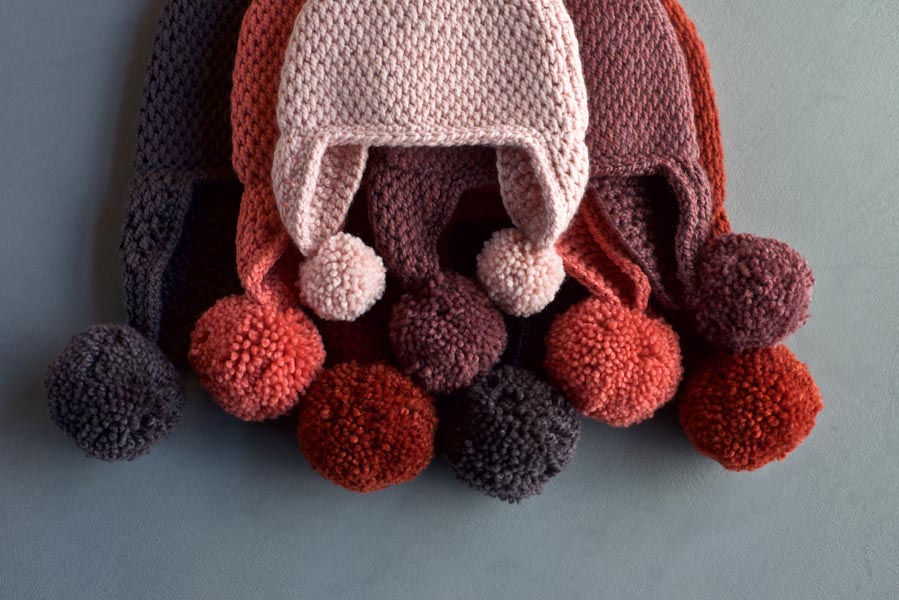
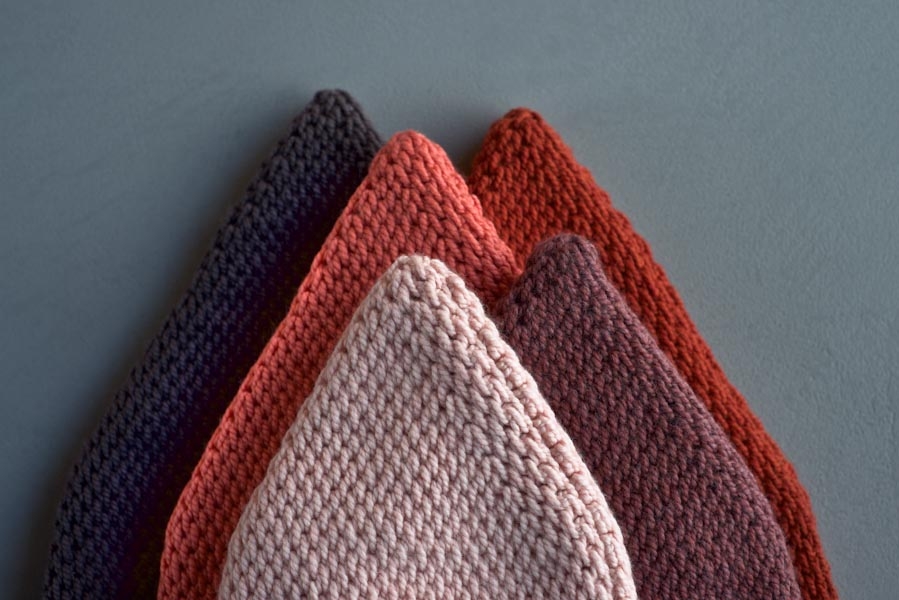
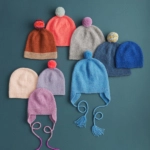
Crocheted in our soft and cozy Worsted Twist and Worsted Twist Heather, this rich and woodsy color palette makes it very tempting to create more than just one, while ear flaps and pom poms add whimsy and cheer to combat any dreary and cold days ahead!

I hope you find making them as much fun as I did! – Kristy
Materials

- 1 (2, 2, 2, 2) skein(s) of Purl Soho’s Worsted Twist, 100% merino wool. Each skein is 164 yards/ 100 grams; approximately 150 (170, 250, 300, 330) yards required. (NOTE: We no longer offer Worsted Twist, but choose from one of our other worsted/aran weight yarns.) We used…
- Pink Peony for the Baby size
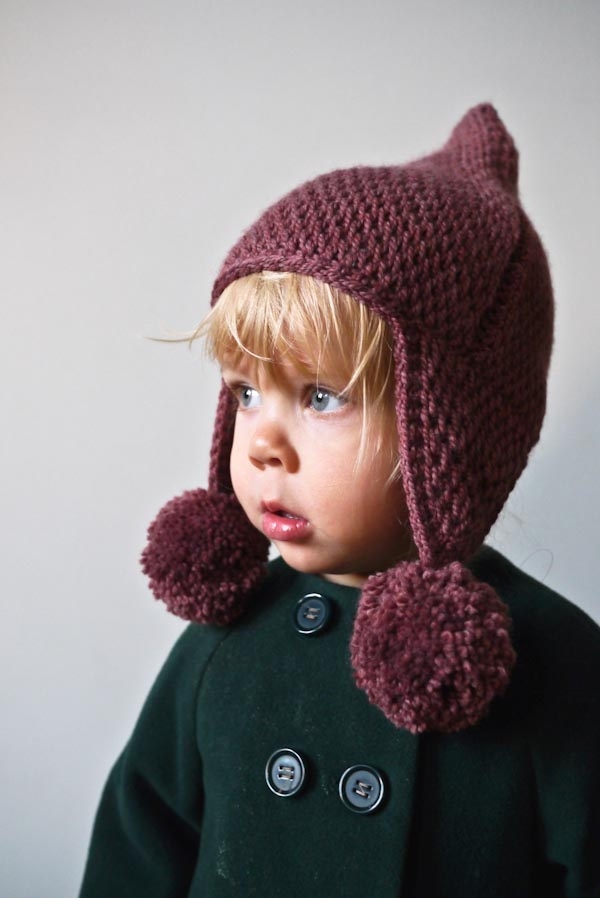
- Mixed Berry for the Kid size
- Pink Grapefruit for the Teen size
- Paprika Red for the Adult Small size
- Gray Fig for the Adult Large size
Note: If you are making the Kid size, you might not want to wind your second skein in case you end up not needing it. You can exchange any unwound yarn for up to six months of purchase (click here to read our full Return Policy).
- A size J (6 mm) afghan crochet hook
- Optional: A size J (6 mm) crochet hook
- Purl Soho’s Pom Pom Maker Set in Small + Large
Gauge
14 stitches and 8 repeats of Forward Rows 1 and 2 = 4 inches in Tunisian Crochet Gobelin Stitch
Sizes
Baby (Kid, Teen, Adult Small, Adult Large)
- Finished Circumference: 14¼ (15½, 19, 20¼, 22¼) inches
- Finished Height: 10 (10½, 11, 11½, 12½) inches
Pattern
Begin
NOTE: If you’re unfamiliar with the techniques of Tunisian Crochet, please check out our Tunisian Crochet Basics Tutorial.
Foundation Row: Chain 26 (28, 34, 36, 40).
Starting with the second chain from the hook, work a Preparation Row.
Work one Return Row.
Work Gobelin Stitch

Forward Row 1: Insert hook through space number 1 (between the vertical strands), yarn over (yo), pull loop through onto hook.
*Insert hook in next space, yo, pull loop through onto hook, repeat from * to last space.

Skip the last space.

Insert the hook into the chain stitch at the edge and pull loop through onto hook. [26 (28, 34, 36, 40) stitches]
Note: Remember that when you start the next row, you don’t turn the work; you just keep the same side facing you.
Return Row 1: Chain 1, *yo, pull loop through next 2 stitches on hook, repeat from * to end of row, ending with one loop on hook.

Forward Row 2: Insert hook into space number 2, yo, pull loop through onto hook, *insert hook in next space, yo, pull loop through onto hook, repeat from * to end of row, including the last space.

Insert the hook into the chain stitch at the edge and pull loop through onto hook.
Return Row 2: Repeat Return Row 1.
Repeat these 4 Rows until piece measures 2 ½ (3, 3 ½, 4, 5) inches, ending with Forward Row 2.
Decrease Row [NOTE: Decrease Rows will always be on a Return Row 2]: Chain 1, [yo, pull loop through next 2 stitches on hook] two times, yo, pull loop through next 3 stitches on hook, *yo, pull loop through next 2 stitches on hook, repeat from * until 5 stitches remain on hook, yo, pull loop through next 3 stitches on hook, [yo, pull loop through next 2 stitches on hook] two times, ending with one loop on hook. [2 stitches decreased].
Starting with Forward Row 1, repeat the 4 rows of Gobelin Stitch, substituting a Decrease Row for every Return Row 2, until you have 8 stitches remaining on your hook and have just finished a Forward Row 2.

Point
Return Row 2: Chain 1, [yo, pull loop through next 2 stitches on hook] two times, yo, pull loop through next 3 stitches on hook, [yo, pull loop through next 2 stitches on hook] three times, ending with one loop on hook.
Forward Row 3: Insert hook through space number 1, yo, pull loop through onto hook, *insert hook in next space, yo, pull loop through onto hook, repeat from * to last space, skip the last space, insert the hook into the chain stitch at the edge and pull loop through onto hook. [7 stitches]

Return Row 4: Chain 1, [yo, pull loop through next 2 stitches on hook] two times, yo, pull loop through next 3 stitches on hook, [yo, pull loop through next two on hook] two times, ending with one loop on hook.
Forward Row 5: Insert hook through space number 2, yo, pull loop through onto hook, *insert hook in next space, yo, pull loop through onto hook, repeat from * to end of row, including the last space, insert the hook into the chain stitch at the edge and pull loop through onto hook. [6 stitches]

Return Row 6: Chain 1, yo, pull loop through next 2 stitches on hook, yo, pull loop through next 3 stitches on hook, [yo, pull loop through next 2 stitches on hook] two times, ending with one loop on hook.
Forward Row 7: Repeat Forward Row 3. [5 stitches]

Return Row 8: Chain 1, [yo, pull loop through the next 3 stitches] two times, ending with one loop on hook. Slip stitch into first stitch of last row.

Cut yarn and pull through remaining loop.

Make another piece identical to this one, starting with the Begin section.
Now, is a good time to wet block both pieces. This will decrease curling and make the next step (seaming) easier. To wet block, soak the pieces in warm, soapy water for about 15 minutes. Rinse out the soap and squeeze out the excess water (do not twist or wring!). Roll the pieces in a dry towel and squeeze the roll, then lay the pieces flat on another dry towel, allowing them to air dry.
Finish
Seam
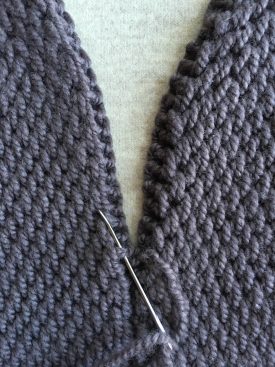
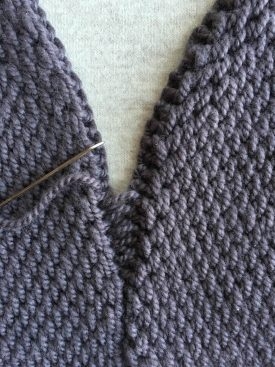
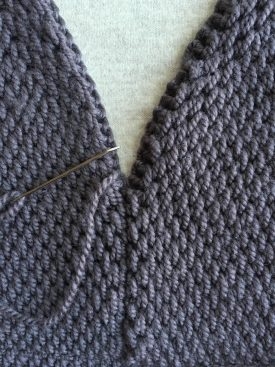
With right sides facing you, seam around the sides and points of the hat pieces, using the same concept as the Mattress Stitch.
Ear Flaps

Holding the hat upside down, at the bottom edge pick up 6 (7, 9, 11, 13) stitches on the right side of the seam and 4 (5, 5, 5, 5) stitches on the left side of the seam. [10 (12, 14, 16, 18) stitches]
NOTE: You can customize the placement and width of the flaps by trying the hat on and placing stitch markers on either side of where you want the flaps to go. The number of stitches you cast on simply needs to be an even number.

Starting with Forward Row 1, work Gobelin Stitch for 1 inch, ending on Forward Row 2.
Work a Decrease Row as you did for the two hat pieces. [2 stitches decreased]
Starting with Forward Row 1, repeat the 4 rows of Gobelin Stitch, substituting a Decrease Row for every Return Row 2, until you have 8 stitches remaining on your hook and have just finished a Forward Row 2.
Work Point as you did for the hat.
Repeat for second flap at the other seam, picking up 4 (5, 5, 5, 5) stitches on the right side of the seam and 6 (7, 9, 11, 13) stitches on the left side.
Starting at the top corner of either flap, with the right side facing you, join yarn and work 1 round of single crochet into each stitch along the entire edge of the hat. Work 1 round of slip stitch (optional).
NOTE: You may find it easier to work the edging around the hat with a regular crochet hook instead of an afghan hook.
Cut yarn and pull through remaining loop.
Either wet block or lightly steam the flaps.
Pom Poms
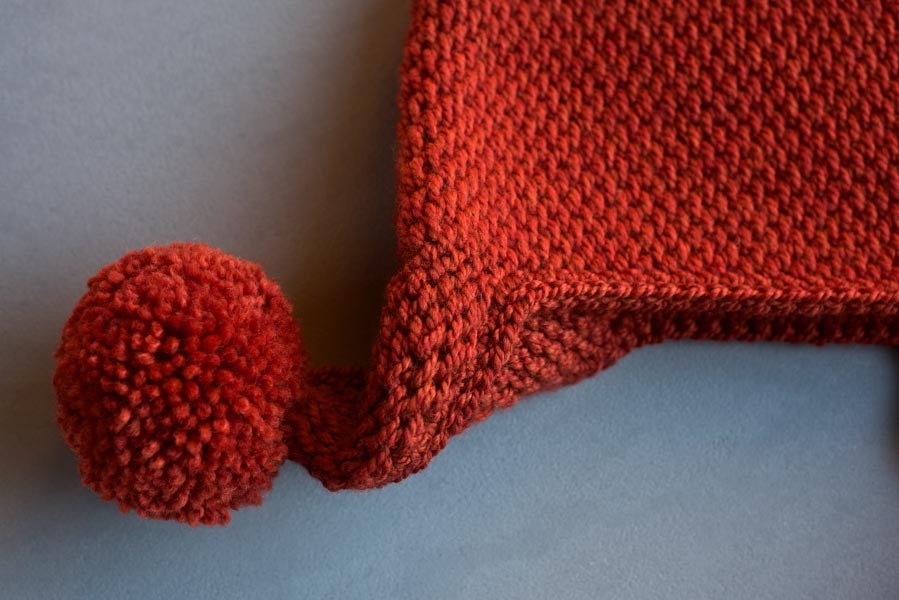
Make two pom poms and use their tails to attach one to the point of each ear flap. (We used the size Small Pom Pom Maker for the Baby size hat and the Large Pom Pom Maker for all the others.)
Weave in all the ends and you’re done!







I’ve been reading the Purl Bee for a long time and, for me, this is the best project I’ve seen on it. I love the stitch, the yarn, the pompoms!
I’ve never been interested in learning Tunisian crochet,–I am now!
Lovely. Thanks.
We’re so glad that you like the hat, Segolene! Thank you so much for your kind comment and for writing in!
Kristy
how can anyone not fall in love with this prize. rats. I don’t crochet, I am busy sitting on your videos trying to learn to knit your GREAT patterns.
my daughter Robyn loves your yarn and is after me to knit more hats, scarves for her. you are making my life interesting since I am no longer in my world of dance. thank you, girls….jo
Jo!
Thank you! We are delighted that you enjoy our patterns so much. And its wonderful that your daughter loves your knits, it is a true joy to knit for someone who appreciates all the love and hard work that you put into each piece.
Should you ever try to give crochet a hand Tunisian crochet is easy-peasy to learn and can sometimes be a welcome break from knitting!
Happy crafting!
Best wishes,
Kumeko
Kumeko, thank you for your encouragement. when you said easy peasy, I got excited. one of these days I will try it. please tell me what yarn and hook to buy, easy peasy on the hands. this is almost like going to the ballet barre for hours every day, but you are moving all the time. I still cannot sit still for too long, hope you are not laughing. my friend was with the NYC ballet and I was with ABT, she doesn’t knit, she has to keep moving…..enough of my chatter. Kumeko, thank you again.
I love, love, love this hat! The problem is arthritic hands won’t let me crochet. Do you have a knit version?
Christine
Hi Christine! We’re so glad that you like the hat! Although we don’t yet have a knit version, we’ll be sure to keep the idea in mind and appreciate the suggestion. Thanks for writing in!
Kristy
Oh how I Love this hat! I hope there is still time for me to make it for christmas for one of the granddaughters.
Hi Elna! The hat does work up quite quickly! Good luck and thanks for writing in!
Kristy
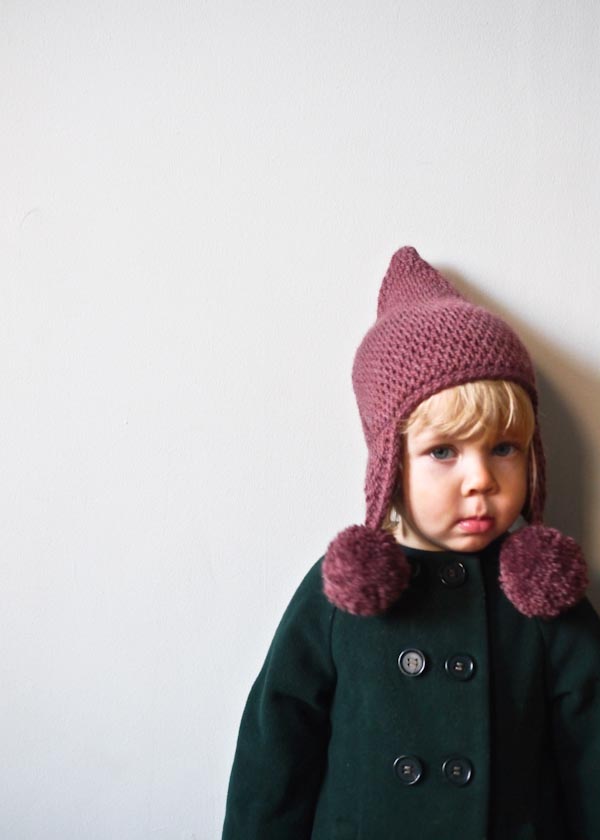
Love the hat(: Really love the jacket on the girl with the mixed berry hate…is there a pattern for it?
Hi Melissa!
Thanks for writing in! The brown jacket is from Makie (https://makieclothier.com/home.php) and the green jacket is from Zara Kids (http://www.zara.com/us/en/kids-c270095.html). However, a wonderful French pattern company, Citronille (http://www.citronille.fr/produit.php?id_produit=3197#pid_3197), makes a jacket pattern that is almost identical to it! We’re hoping this helps! Good luck!
Kristy
I’m doing exactly as tutorial and pattern says…but…the edge is curling! Badly! I am a seasoned knitter and crocheter so I’m not sure what I’m doing wrong. Ripping out now…after several rows. So I will wait for your reply.
Also, the tutorial says to crochet into the BAR between the stitches…the hat pattern says go BETWEEN in the space. I was going between and doing Gobelin Stitch….would that make the edge curl?
HELP! I want to make these as gifts for grandkids!!
Hi Nancy!
Tunisian crochet does have a tendency to curl and though it can be a bit vexing, we’ve found that any curling straightens out considerably after blocking and that if your tension is particularly tight, going up a hook size can also help. On Forward Rows, you’re absolutely right, you will not crochet into the vertical strands (or bars), but instead will pull up loops between them, working Gobelin Stitch as you have been. I hope this helps clarify and please let us know if you’re still getting stuck! We’re here to help!
Kristy
Thank you! I’ll begin again…this helps a lot!
Love, love everything about purl soho.
Thank you for adding the live model to this post.
It makes a real difference.
And I was thinking that you could have used 2 contrasting colors yarns in the first few steps of this tutorial, just to help clarify the demonstration.
Happy Holidays.
Please consider teaching a weekend class for this at your New York store! Looks like fun. I knit, but my crochet skills are weak. 🙂
Hello, Catherine!
Thank you so much for writing in! I think teaching this as a weekend class is a wonderful idea, I’ll pass your suggestion on to our class coordinator.
Best,
Kumeko
I love the Tunisian Crochet hats, but I was wondering if you had other crochet hat patterns. I don’t do much knitting, especially with four needles, and I do a ton of crocheting. I really like all your stuff, but there aren’t that many crochet patterns……
Hi Coletta!
We’re so glad that you like the hats! We’ll definitely keep more crochet projects in mind in the future, and appreciate your writing in!
Kristy
this looks like a fun project for me to learn in the new year! Only thing is..I wish you had a Raverly button available for all the projects I want to do on here!
These are ADORABLE! (both the hats AND the children!) Thank you
OMG love this hat! The only problem is i am a knitter. I would love to make this for my Grandaughter and myself. Is there any way to convert the pattern, or do you have something else almost the same in knitting? Please help, I’m crazy about this hat. Thank you!
Hi Kathleen!
We’re so glad that you like the hat! Although we don’t currently have a knitted version, it’s definitely something for us to consider including in the future. Thanks for writing in!
Kristy
I just got the hook to make this! Can’t wait to try it. They are soooo cute! Got to finish one more project then I can start. I’ll send a picture.
The hat is delightful, but can you tell me about the little girl’s coat? Is that a pattern? Thanks for the intel!
Hi, Tracey!
Thanks for writing in! The brown jacket is from Makie (https://makieclothier.com/home.php) and the green jacket is from Zara Kids (http://www.zara.com/us/en/kids-c270095.html). However, a wonderful French pattern company, Citronille (http://www.citronille.fr/produit.php?id_produit=3197#pid_3197), makes a jacket pattern that is almost identical to it! We’re hoping this helps!
Best,
Kumeko
Does anyone have a remedy to curled edges? I blocked the piece and it minimized the curling by about half. In the pictures, there doesn’t seem to be any curling, is it due to the type of yarn? Or is it because of the type of stitches we are using?
Thank you!!
Hi Casey!
There are a few things to try to help get rid of curling! Going up a hook size can often help loosen your fabric and get it to lay flatter (if your tension is particularly tight, that can contribute to curling with this type of stitch and going up a hook size can help!) We’ve also found that the type of fiber you use does affect the amount of curling and that 100% natural fibers (wool, alpaca, cotton) respond best after wet-blocking and tend to lay the flattest. Also, adding a row or two of single crochet can help add a bit of extra weight and stability to the edges and can help eliminate curling. I hope this helps and please let us know if you have any further questions! Good luck and thanks for writing!
Kristy
I absolutely love this pattern, yarn, model, colors. I need a new project like a hole in the head, but am casting on right now! Thanks for so many unique and free patterns!
Love the hat, but I am having a tough time with it. The problem in picking up that edge chain and making it look neat. I pick up what looks like the chain, but sometimes there is a hole or it’s really the last stitch….so messy. When seaming up, it also looks so messy. I have tried this hat at least 3 different times. I refuse to let it beat me, but I could use a few hints. Could it be the yarn? I used 50% nylon 50% acrylic. Is it too soft? It’s for a baby and it needs to be machine washable. I must conquer this hat!
Thanks so much
Sylvia
Hi Sylvia,
Thanks for writing in and I’m sorry that you’ve been having a tough time getting the chain edge and the seaming on the hats to work! Unlike regular crochet, the edges of Tunisian can definitely be a bit more open and please know that it’s just the nature of the fabric and not anything you might be doing! My best advice and one thing that I found helped as I made the hats (when seaming) is to place the two pieces together and look to see where you have the most consistent line of stitches on each side going up and to seam along those lines on both sides, tightly. Things will seem a bit wonky and you may have occasional holes (only because that is how the edges of this stitch work up), but once you pull the stitches together most of these apparent imperfections should be well hidden and should come together well. Pulling snugly helps! I haven’t tried the pattern in another yarn, but imagine that anything with crisper stitch definition might not be as forgiving than a fluffier wool, but this isn’t to say that you can’t get the yarn you’re using to work! I would just opt for consistency over all else — making sure that you’re seaming the same stitches on either side together throughout. I hope this helps! Please let us know how it goes! I wish you the best of luck!
Kristy
I love this pattern and learning the new stitch but am having trouble with the gauge. I must admit I’m horrible at gauging- and my hat halves seem too small. I am scared it will not fit. I am trying to do the kid size and the half is measuring only 7in. at the base. I have no problem frogging and restarting with a larger hook if that’s what’s needed. But what would you say the halves width should be measured at so I know I’m on the right track?
Thank you!
Hi Rebecca,
Thanks for writing in and I am sorry to hear of your difficulties! The kid size version has a finished circumference of 15 1/2 inches at the bottom. The half measurement is 7 3/4 inches. So it sounds like you are close but a little on the small side. I would suggest going up a hook size!
I hope that this helps!
Cassy
Hi – I am having a lot of trouble not inadvertently increasing/decreasing at the ends of rows. When inserting the needle into the gap between bars, I am finding that whichever gap I choose (the “first” or the “second”) I inadvertently either increase or decrease one stitch. I can’t make that side “straight.” Advice? By the way, I will be at Purl Soho on Monday Nov. 29 if I can stop in and someone can show me where I’m going wrong?
Hi Lee Ann,
Thanks for writing in! Hopefully you were able to pop in the shop and figure out what is going wrong! Sorry for the delay in response for this comment! I think that when you have one less stitch it’s because you aren’t inserting your needle into the chain 1 at the end of the forward row. Please take a look at our Tunisian crochet tutorial as a reference. As for inadvertently increasing, you could possibly be throwing in an extra yarn over or not passing through two stitches on the afghan hook. I’d have to take a look at your technique to get a better idea. Best of luck and let us know if you need more help!
-Adam
Would love to make these for an orphanage in Haiti, but I don’t think the point at the top would go over well. Suggestion for rounding it off? PS.. I won’t be doing the ear flaps as well.. Cathy
Hello Cathy,
Thank you for reaching out! What a wonderful project. To eliminate the point in this hat all you need to do is stop crocheting before the point begins and then seam the the top together. I hope this makes sense! Please let me know if I can clarify anything. It might take a bit of trial and error, but I believe it should be a pretty straight forward adjustment.
Warmly,
Marilla
Hello there,
=I am wanting to make this hat for the coming cooler weather.
=I want to try to make it using the recommended stich (used above) but I would also like to try it using a different stich as well.
=I love how this hat looks with the point and earflaps, and I don’t want to cut this out of the design (if I try to make it using a different stich.)
=Do you have any ideas for improvisations on the design, stich, or shape?
= I was wondering if you have any tips for making the stich that is used above easier to learn for a beginner, can it be made using a sc, dc, or a puff stich?
Thank you so much in advance for your help,
Gracie
Hi Gracie,
Thanks for writing in and for your kind words! I am afraid that when it comes to Tunisian Crochet, I am a bit of a novice. I am not aware of other stitches that you could try here using Tunisian Crochet. You may want to check out our Tunisian Crochet Basics tutorial and perhaps explore the internet for further resources.
I am sorry that I could not be of more help!
Cassy
New to Tunisian crochet but will try this out for my grand daughter who is a freshman in college. Think she’ll love it with long pom pom strings.
Can you help me with the decreasing part? I just can’t get it.
Thanks
Sophea
Hi Sophea,
Thanks for writing in! We’d be happy to try to help with any questions that you may have. Can you let us know what question you have regarding the decreases?
Best,
Cassy
Hi Cassy,
I crocheted the pattern up to the point where I have to decreasing row on. I am lost from that point one. Please help. I’ve tried to read the basic Tunisian section but I still can’t get it.
Thanks
Hi Sophea,
I sometimes find that it is helpful to write out the line in a more expanded fashion. I will then say the stitches as I complete them as it seems to help to say as I do!
The expanded version of the decrease round would read:
Chain 1, [yo, pull loop through next 2 stitches on hook], [yo, pull loop through next 2 stitches on hook], yo, pull loop through next 3 stitches on hook, *yo, pull loop through next 2 stitches on hook, repeat from * until 5 stitches remain on hook, yo, pull loop through next 3 stitches on hook, [yo, pull loop through next 2 stitches on hook], [yo, pull loop through next 2 stitches on hook] ending with one loop on hook.
I hope that this helps!
Cassy
Is there a knit pattern?
Hello Sandy,
Thanks for reaching out. We do not currently have a knit version of this pattern, but I will certainly pass along your request!
Warmly,
Marilla
Hi! I’m on my 4th or 5th try with this hat and so determined! Should the first section of the hat be rectangular? Mine is coming out with even decreases on both sides so it is like the base of a triangle. Any obvious error I’m making??
Hi Georgia,
Thanks for writing in! Until you begin the decrease rows, your first section should have straight rectangular edges. Although it is hard to say exactly what is going wrong without seeing your work, I suspect the problem is that you are either not going all the way to the end or skipping too many spaces at the beginning of one or both of the forward rows. It can be challenging sometimes in Tunisian crochet to see exactly where the last stitch is due to the curling edges! I would suggest counting each forward row as you are picking up the loops to make sure you are picking up loops all the way to the end of the row.
I hope that helps! Best of luck and happy crocheting!
Julianna
Hey I know it’s a bit late and you probably already figured it out but for anyone else having the same problem, I’ll reply to you 🙂
I was having the same issue and I realized (after the 2nd or 3rd time ripping it out and starting over) that I wasn’t repeating all four rows, I was just repeating forward row 2 and return row 2 over and over again. I read the instructions wrong. Not sure if this is what you were doing wrong but yeah. I think it’s important that you start in the second space and go into the last one in one row and then go into the first space and skip the last on the next row. That keeps your ends straight. I sure love the hat though, once I got everything figured out!
I believe there is a big mistake in the pattern.
I now frogged 5 pieces. Problem is on the decrease on right side. You need to go into second “hole” each time and not follow the regular row 1 and row 2 pattern. Otherwise it get very uneven.
Hi Marian,
Thanks for writing in, and I apologize for the delay! I’m not sure what exactly might be going wrong, but the pattern as written should turn out correctly. Always in Tunisian Crochet the left and right edges look different from each other, since one edge starts with chains and the other with a stitch. Also, during these decreases, the edge stitches do look somewhat elongated or distorted, as you can see in our images, which exaggerates the difference between the two edges. Since the selvedge stitches will disappear into the seam, the irregularities you are seeing now will not be visible in the completed hat. However, if you prefer the look of the right edge when working only Forward Row 1 during this section, you certainly could modify the pattern to work your preferred method!
I hope that helps!
Julianna
I am a bit mixed up. Is it Tunisian crochet or gobelin
Hi Gitty,
Thanks for reaching out! Tunisian crochet is a technique as well as a crochet stitch, and Gobelin stitch is a crochet stitch pattern that uses the Tunisian method.
I hope that clears things up!
Julianna
Hi, what a lovely pattern! It’s almost an ‘old’ pattern from 2015 but of all times! Like a few ladies before me said: I wasn’t a fan of tunisian crochet, but now I am. Greetings from the Netherlands.
Hi Aukje,
Thanks for reaching out and for your kind words! I am so glad to hear that you enjoyed this pattern!
All the best,
Gianna
Good morning! Not sure if this page is still monitored for comments but worth a shot! I’ve made 2 of these hats for my boys & love them. I have a question about the ear flaps though – the pattern says to pick up stitches along the base of the hat and then work a Forward Row 1. This doesn’t make sense to me, because when you start a Forward Row you should only have one loop on your hook. So I always work a normal reverse row with the stitches I’ve just picked up then I start a Forward Row 1. However, that creates a line where the ear flap meets the base of the hat. Any tips? Do I just pick up the stitches, add markers for start/finish, slide the loops back off then work Forward Row 1? Thanks in advance 🙂
Hi Jennifer,
Thanks for reaching out! I’m so glad to hear that you have enjoyed this pattern! Basically since you have already picked up the stitches you will move directly on to the return row 1!
I hope this helps!
All the best,
Gianna