Stripes in the Round
Knitting stripes in the round may present two challenges: tons of tails to weave in (yuck!) and a slightly unseemly “jog” (or half-step) at the color change. Our Stripes In The Round Tutorial addresses both issues, first with our Carrying Up The Yarn Tutorial, which explains how to knit stripes without cutting the yarn at the end of each stripe, and second with our Jogless Stripes Tutorial, which shows how to knit stripes with a smooth transition at the color change. Let’s do it!
Carrying Up The Yarn Tutorial
When you’re working fairly thin stripes in the round, you’ll probably want to “carry” the yarns up the wrong side of the work instead of cutting them at the end of each stripe. This avoids a lot of loose ends to weave in! This technique only works if the distance from the new stripe to the last time you used that yarn is relatively short. Keeping floats to less than an inch is a good rule of thumb.
Click To See Video Transcript
Hey, this is Laura from Purl Soho, and today I’m going to talk to you about some tips and tricks for knitting stripes in the round. This swatch is round, knit in the round. It looks kind of flat here, but as you can see, this is single-row stripes. Now, if you’re working in multiple rounds of a single color and then you’re switching to multiple rounds of a single color, you may want to check out our Jogless Stripes Tutorial. But for now, in this video, we’re going to focus on how to carry the yarn up when you get to the end of the round, and how to create this beautiful kind of faux seam.
Okay, so let’s carry some yarn up while we’re knitting in the round with stripes. As you can see, I just finished working in this white color, and I want to knit the next round in this dark color. But the question is, what do you do at this transition point? At the end of the round, I’m going to show you. So what you want to do is take the yarn that you just worked with, the yarn you previously worked with, and cross it over the yarn you’re about to work with. I want the yarn I’m about to work with behind the old yarn because I want to use it to kind of cinch or trap the old yarn between the new round and this fabric. Once you have your two strands of yarn oriented, you can just begin knitting. One tip I will mention is that I want you to fight the urge to knit this first stitch too tightly, just knit as you normally would. I’m going to take a couple stitches here, and then I’m going to show you what this transition does to the fabric on the inside.
So lemme get these strands out of the way here. If you look on the inside of this swatch, you’ll see that if you cross your previously worked yarn and your about-to-work yarn, as I showed you, you have this really beautiful line on the inside of your fabric, and it also keeps that end of round secure, not too tight, not too loose, and there’s no holes or anything. So anyway, those are our tips and tricks for working stripes in the round.
Jogless Stripes Tutorial
Because knitting in the round is essentially a spiral of stitches, changing colors for stripes creates a “jog” or a vertical column of staggered lines. Lots of people accept this as the natural outcome of hand knitting, but if it bothers you, there’s a way around it! Check it out…
Click To See Video Transcript
Hey, this is Laura from Purl Soho and today I’m going to talk to you about jogless stripes. Oftentimes when you knit stripes in the round, this swatch is actually round. Don’t be fold, it’s not flat. The stripes don’t perfectly line up. There’s this jog that occurs and that’s because when you knit in the round, you’re really creating this very subtle spiral. So when you get to the end of the round, it’s slightly higher than the beginning of the round, but there’s a technique that solves this problem and it creates this more fluid or continuous stripe and really minimizes that jog that can happen. So yeah, let’s get into it.
Okay, so I’ve just completed my third round in this contrast color and I’m ready to begin knitting in my main color for this first step, all I’m going to show you is how to carry up your yarn. So what I want to do is take the yarn I just worked with, I previously worked with yarn and cross it in front of the yarn I’m about to work with. This just kind of traps this yarn between the new yarn and the fabric and the rounds we’re about to knit, carrying it up the inside of the swatch and then just knit around normally, and then we’ll move on to the next step.
Alright, so just completed my first round in the main color and now I’m going to show you how to transition to the second round. This is where you accomplish that jogless stripe. So this round, the way you carry up the yarn is slightly different. So first I’m going to take the yarn I just worked with and cross it in front of the contrast color, same as we did last round, but this time I’m going to bring it back around the back. So if you can see there, it’s like a full twist of this full twist happening. Then once I’ve done that, then I’m going to slip the first stitch of the round purlwise. So inserting my needle from back to front as if to purl, slipping it off the left needle onto the right needle. And now I’m going to continue on knitting this round as normally, as I normally would. So just going to knit the whole round.
Alright, so I have just completed my second round in my main color and I’m doing a three-round by three-round stripes. I’m ready to jump into my third round, for a third-round stripe. I would just go straight into it and start knitting. Now if this was a fourth or fifth round, I would double cross my yarn again like I showed you for round two, just to carry that contrast yarn up. But as with everything, with knitting, it’s knitter choice. But for my third row, I’m going to just jump right in and begin knitting and I’ll just knit this round as I normally would. One thing I do want to point out though is just these stripes. Again, the reason we’re able to avoid the jog that’s happening down here is because of this jogless striped technique. And you can see that very first column of stitches, the very first column of the row, because we slipped that second round, it only has two stitches, whereas the column next to it has 1, 2, 3 stitches. So this technique is really great when you’re working it in stripes of three or more rounds. You can use it for a two-by-two round. Just depends on, again, knitters choice, but that’s it. That’s how you do jogless stripes.
Give It A Try
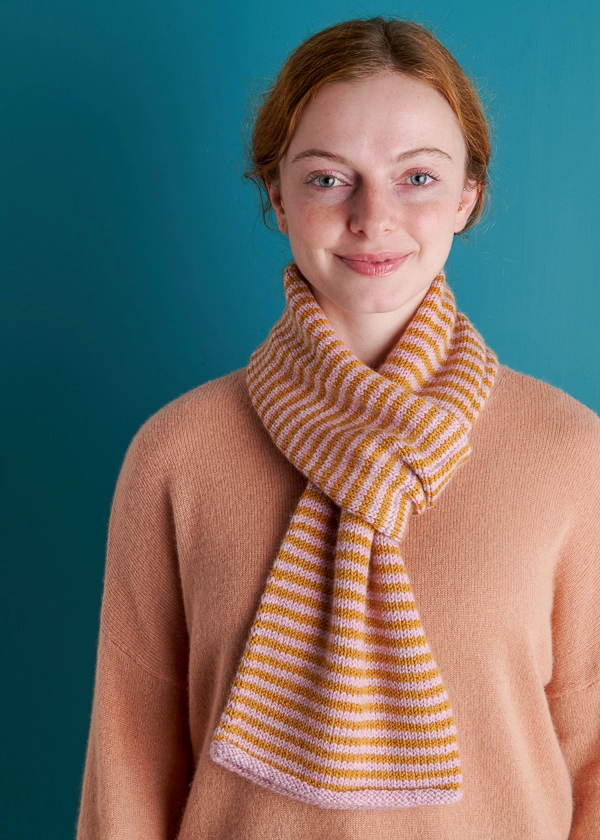
Put your new knowledge to work with our stripey free Keyhole Scarf pattern in Cashmere Merino Bloom, also available as a Keyhole Scarf Kit!

Our free Fun Stripes Socks pattern gives you lots of stripes-in-the-round practice and are a total joy to knit in our super soft Fine Print sock yarn!
Looking for more inspiration? Explore all of our free knitting patterns and knitting tutorials, buy one of our many knitting kits and yarn bundles, and shop for beautiful yarn. We have over 35 gorgeous natural fiber yarns in 100’s of magnificent colors, designed to bring integrity, beauty, and joy to your next knitting project and only available at Purl Soho!


Great tutorial! I'd like to suggest a slight change to the last paragraph. Yes, having a jog in the stripes is normal, but there is definitely a way to fix that when doing stripes of 2 or more rows! Could you perhaps add in a comment directing the reader to look up techniques for "jogless stripes in the round"? I'd hate to think that there are people out there who don't know about this. Thanks!
Hi Kaeleira,
I do mention the Jogless Jog in the introduction of the tutorial; but since I agree with you, the more people who know more about knitting, the better, I added another mention in the last paragraph.
Thanks for the suggestion. Keep them coming!
Whitney
I'm that one who didn't know about jogless jog. Now I do! Thanks a lot )))
When do you pick up.the slack of the yarn wrapped around the non working yarns finger?
Hi Chris,
The slack is for the yarn to travel up the work from that color's previous stripe to its next stripe. If your stripes don't require quite so much slack, then you may want to skip the step of wrapping the yarn around your finger; but, even if you're working a one-round stripe, you will need to allow for some degree of slack between the last stitch of a color's stripe and the first stitch of its following stripe.
I hope this helps you get it just right. Please let us know if you have any more questions and thanks so much for this one!
Whitney
While this is a very effective tutorial and technique, I am a very visual person who has trouble with non-moving instructions–I have trouble visualizing where a stitch came from, etc. (Just talked to a fellow knitter last night who was so thrilled to find out someone else had that problem–LOL!). I would be oh-so-happy if this tutorial included a video!
Donna
Donna, I’m the same way. I have a hard time reading patterns and following written steps if they involve techniques new to me. You are definitely not alone! Good to hear I’m not either.
I absolutely LOVE Purl Soho. I’ve been a customer, reader for years. Your patterns are amazing, customer service excellent and you work hard to keep things fresh! Wishing you all a very happy Christmas!
Me too! Please continue with these visual aids! I have no one close by to teach me. I hesitate taking on projects for fear of not knowing how to correct or even do a stitch or a pattern that I fear. These videos are so very helpful. Now I want to try out what you just showed me! Thank You!!
Is this instead of or as well as the jogless jog? Thanks!
Hi Hannah! This is in addition to a jogless jog. You can choose to use a jogless jog with this technique or not!
Happy Knitting!
Thomas
How many rows of a stripe can you do without breaking the yarn ?
Hello Carolyn,
Floating the contrasting color up while you’re working on stripes is a great way to avoid weaving in tons of extra ends. The rule of thumb usually says that you should only float yarn up for 2-3 rows to avoid a large loopy string on the wrong side of your project. This of course depends on what gauge of yarn you’re working on and what the function of the item is. For example for a knit bag that will be lined I wouldn’t care about floating the yarn for longer, but for a baby hat I wouldn’t want all of those little loops bothering a delicate head!
Hope this helps! Thanks for your question!
I’m currently knitting a hat that has rainbow stripes, only one row thick. So no jog, but a mess of cut strings! Also, since I was changing color each row for 7 rows, it was no longer ‘in the round’. There was no join in those colors. Any suggestions on this?? I knotted the loose yarns for lack of a better plan, but have a few more rows of this rainbow pattern coming up that could use a better way! Thanks 🙂
Hello Kristin,
Great question! Knitting with multiple colors in the round can be tricky. I recommend knitting this how you would a jogless round. Even though you are not having a problem with the jog, following that technique will also get a closed round without having to knot it afterwards. When you complete a round and are about to introduce a new color, use the right needle to pick up the stitch below (the first stitch in that color) and place it on the left needle. Then knit that stitch you picked up with the first stitch in the new round. Then place your marker after that stitch. This will make your round step 1 to the right every row.
For more instruction on knitting a jogless round here is a great tutorial: http://www.craftsy.com/blog/2013/08/knitting-jogless-stripes-in-the-round/
Now that your rows will be joined in the round you can simply carry the yarn up if your rows are thin enough to have a 7 stripe float going up the side diagonally. If the float is too long you can tuck it as you knit as well. For that simply lay the yarn over the stitch on the needle when you get to your knit two together and knit it with those two stitches. You just want to make sure the yarn lays behind the stitches your knitting so that it is not visible on the face. You will want to create a system for tucking the yarns to accommodate all the colors but if you tuck every strand 4 rows from that yarns stripe you should only have floats spanning 3 rows.
If all of this seems too much simply continuing to knit flat and seaming it up with a mattress stitch would work beautifully as well.
I hope this makes sense and helps you with the project. Please feel free to write back or send pictures if you need any more tips!
Happy Knitting,
Jake
When I’m working this I end up with a small hole on the first stitch of the color change. What am I doing wrong? (my tension is norm very even)
Hi Laurie,
Thank you for writing in! You might be holding your yarn too loosely for the color switch. In this part you need to look closely at the first few stitches of the new color after you knit them. Like every new technique, it may take some practice before you perfect it. Good luck and happy knitting!
-Adam
Hello, thanks for the great projects! Can you help provide a little more background? How do you get started with the two colors? Do you just start with one color and then add in the second color when you’re ready to switch? Thanks!
Hi Becky,
Great question! You hit the nail on the head! That is exactly what you do. When you want to begin with the second color, you will just stop knitting with the first and start knitting with the second being sure to leave at least a 6″ tail with the new color.
I hope that this helps!
Cassy
after knitting about 6inches, I realize that it is twisted. Is there anyway to remedy the situation without pulling it all out? help
Hi Maxine,
Thanks for writing in! What a bummer! Sadly there is no way to fix a twist other than to rip the whole thing out! I have found myself in the same situation and while painful to do, it is best to just bite the bullet, rip it out and start again!
Best,
Cassy
Hey, sorry for my english, but I am from Denmark . I have a question to
Optic Blanket.
If I cast up with Yarn A- and join for working ind the round with Yarn A and then Knit round 1 with Yarn A
the edge will be wide – about 1 cm
(O,4 inch) at the photo it not looks so wide?
Vibeke
Hi Vibrke,
I would recommend knitting a gauge swatch or a practice square for this pattern. In this pattern you knit with Yarn A for 2 rounds and then yarn B for 2 rounds alternating knit and purl rounds. The photograph looks correct to me just because each ring looks to be the same width.
Let me know if this helps!
Carly
Hello,
Trying to figure out how to best carry unused yarn when knitting purl in the round. I’ve tried wrapping it in different directions, but the unused colour always seems to be visible on the right side. Any suggestions? Thanks a bunch!
Hi Lauren,
Thanks for writing in! For our Newsprint Cowl, we use the purl side as the front but knit it in the round with the knit side out. To hide the colors being carried up, when we got to the beginning of the round, we brought the two colors to the knit side, twisted them, leaving the yarn that we were not using hanging to the knit side and then carried on knitting.
I hope that this helps!
Cassy
The yarn for this Striped Summer Shirt arrived yesterday. My question is about the stiffness of the linen wrapped silk. Should I wash it before knitting it up? It’s very stiff like paper and am wondering if this will affect the finished project if I don’t. Also, if I wash it, shouldn’t the wool be washed, too?
Hi Denise,
Thanks for writing in! Are you doing the version of the Striped Summer Shirt with the Silk Gima and the Linen Wrapped Silk? It is quite lovely! There is no need to wash the yarn ahead of knitting it. In fact it would be a bit of a challenge to do so given how the yarn arrives from Habu. The yarn will soften as you work with it and blocking in the end will help to soften it even more!
I hope that this helps!
Cassy
I love the Two Color Cotton Cowl look, but am new to stripes in the round. When I’m carrying the unused yarn, do I twist it at every stitch or can I carry for 3 stitches before twisting it? I want to achieve the same look as the cowl pictured. Hope this makes sense!
Hello Karen,
Thank you for reaching out! When doing single row striping, as you do in the Two Color Cotton Cowl, you will twist at the start of each row to carry the yarn color you are not using up for the next row. I hope this makes sense and if It doesn’t let me know and I can clarify!
Happy knitting!
-Marilla
Is it possible to use the Helix knitting technique for the baby sweater? Or when you cut the yarn during the steaking process will it unravel. The helix process involves changing colors 1/2 way into the round and again at the end of the round.
Hi Jenny,
Thanks for writing in and great question! I am not sure how helix knitting would pair with steeking. It is possible that it will unravel but I rather think that it could work! I would suggest knitting a small swatch and give steeking it a try! If it works out in the small scale, it should work out on the larger sweater!
Please do let us know how it turns out!
Cassy
I’m a little unclear on what to do if your knitting 2×2 stripes- do you do the jogless technique or not? And do you carry the yarn up or not?
Any advice would be greatly appreciated x
Hi Amanda,
Thanks for reaching out! For anything more than 1×1 stripes, you will follow the second tutorial on the page labeled JOGLESS STRIPES, not the CARRYING UP THE YARN video.
I hope this helps, happy knitting!
Gianna
Hi Amanda, My stripe pattern ( in the round) is knit one row, purl the next row. Would I slip the first stitch of the purl row the same as if I were knitting the row?
Hi Cheryl,
Thanks for reaching out! Yes, that is correct, you can slip the first stitch just as you do for a knit row, for the purl row!
Happy knitting!
Gianna
Hi there. Wondering if this same technique can be applied to garter stitch (magic loop), using three colors; each color is two rows. I’m trying to avoid the jog, as well as the seam; not sure it’s doable. Many thanks.
Hi Dennis,
Thanks for your comment! I think the jog-less stripe technique can definitely be applied to garter stitch, but its efficacy depends on the distance between the first color and third color in your 3-color stripe sequence and whether you can avoid long floats. As a rule of thumb, we mention keeping floats less than 1 inch; if the yarn you’re working with is fairly thin and the 3-color stripe sequence can be completed in under an inch, then I think this technique is worth a try! If it’s more than 1 inch though, I don’t think it would work as well. I hope this helps! Please let us know if you have any other questions!
All the best,
Cat
To add to this theme, I wish you would add a video of how to add a new color initially. I’ve had problems with ‘holes’ in my work after adding in the new yarn.
Hi Olive,
Thanks for reaching out. The holes when adding a new color are completely normal, and they’re a result of the loose tension caused by the unsecured yarn tail! You can fix these holes when you’re weaving in your ends, since that will tighten them up completely. Hope this helps clarify things!
All the best,
Lili
Could I use seasoned alpaca and mulberry merino for this project? Thanks. Carol
Hi Carol,
It looks like you wrote this comment on one of our tutorials, not on a specific project! Can you let me know what project you’re thinking of?
All the best,
Lili
I wish you showed how the knit side will look after following your instructions to pull the yarn to the knit side and twist. Better yet, a video demonstration of this technique for avoiding the jog for the newsprint cowl. I am having a very difficult time making it look acceptable.
Hi Marilyn,
Thanks for reaching out! You can get a good view of what the knit side of this looks like in the video tutorial. As Laura is demonstrating this technique, the right side of the swatch is facing outwards at the point of the color transition. This occurs from about 0:46 to the end of the video, but you’ll get the best view starting around 2:21, when she flattens out the swatch.
I’m sorry to hear that you’re not pleased with how the color switch in your cowl is coming out though! If you send a photo of your work so far to [email protected], we’ll be able to take a look and give specific advice from there.
All the best,
Lili
Hi
When knitting stripes in the round is the slip stitch at the end of colour 1 before you switch to colour 2 or are you slipping the first stitch in colour 2, I can’t seem to figure it out from the video
Thanks
Hi Darlene,
Thanks for reaching out! In the jobless stripe technique, the slipped stitch actually takes place on the first stitch of the second round of Color 2. Hope this helps clear things up!
All the best,
Lili
Hi, very helpful tutorial. What sort of needles are you using that allows you to do such tiny rounds?
Hi Julia,
Thank you for writing in! You can use both circular needles or double-pointed needles to knit in the round. We used 16″ circular needles for these examples but you can also see our magic-loop tutorial here to see how this can be done with longer cords as well!
Happy knitting,
Gavriella
Thanks for all your great tutorials. I’m a new knitter and am learning so much from your great videos. I’m wondering, on the jogless stripes, does dropping a stitch when you change colors make the round smaller? Thanks again!
Hi Britiney,
You’re very welcome! For the jobless stripes technique, you will not be dropping a stitch. All you do is slip a stitch, which is just transferring the stitch from one needle to the other. This does not change the stitch count!
All the best,
Lili