Rochefort Chapeau

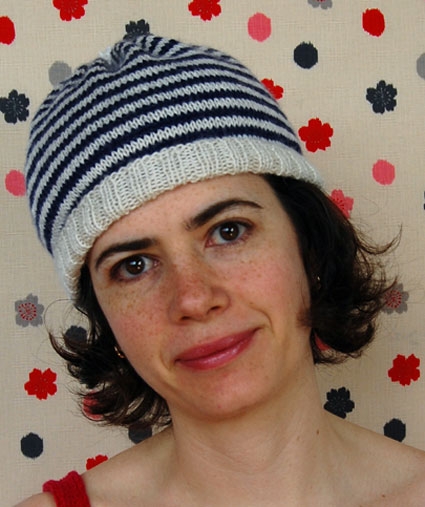
Navy and white stripes are beautifully clean and classic. And for me, they also evoke a sweet nostalgia for some make-believe time of innocence when people spontaneously danced together in the street. Think Gene Kelly in The Young Girls of Rochefort, happy people twirling around a French seaside town looking for love. So flirty and jaunty!

I wanted to bring some of these associations to a cute little hat for spring. It’s time to say adieu bulky winter wool, and bonjour to breezy silk alpaca. Perfect for 48 degrees and a spin in the street! -Whitney
Designed by Purl Soho designer, Whitney Van Nes.
Share your progress and connect with the community by tagging your pics with #PurlSoho, #PurlSohoBusyHands, and #PurlSohoRochefortChapeau. We can’t wait to see what you make!
Materials
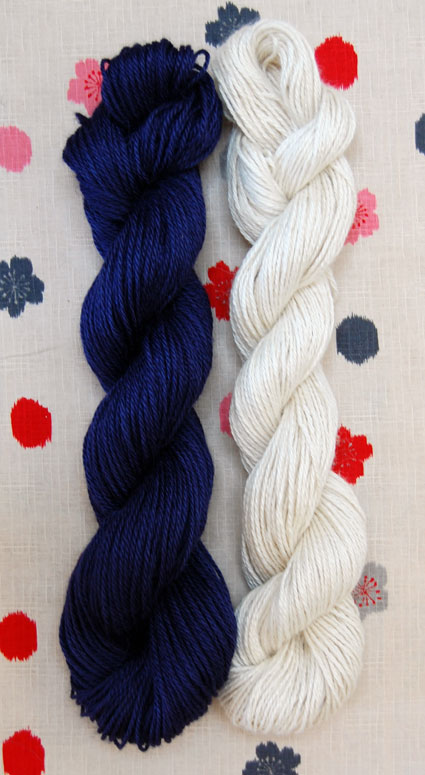
- 2 skeins of Blue Sky Alpacas’ Silk Alpaca (I used Ecru for “Color A” and Blueberry for “Color B”.)
- US 4 (3.5 mm), 16-inch circular needles
- US 5 (3.75 mm), 16-inch circular needle
- A set of US 5 double pointed needles (optional)
- A tapestry needle
(The background fabric is Kokka’s “Ouka” in Natural Cherry Blossom Dots)
Gauge
25 stitches = 4 inches in stockinette stitch with a US 5 needle
Size
Fits medium size woman’s head.
Pattern
With a US 4 needle and Color A, cast on 112 stitches. We used a basic Long Tail Cast On. Join for working in the round, being careful to not twist your stitches.
Round 1: *K2, P2, repeat from * to end of round.
Repeat Round 1 until piece measures 2 inches from the beginning.
Change to US 5 needle and Color B.
Round 1: *K4, m1, repeat from * to end of round. (140 stitches)
Round 2: With Color B, knit to end of round.
Round 3: With Color A, knit to end of round.
Round 4: With Color A, knit to end of round.
Round 5: With Color B, knit to end of round.
Repeat Rounds 2-5 until piece measures 7¼ inches from the beginning (end with the second round of Color B).

Knitting Stripes in the Round
If you have never knit stripes, or have never been satisfied with how you have been knitting them, you might find these basic tips helpful. (By the way, this isn’t a tutorial on the “Jogless Jog”, which is a way of eliminating the imperfect way stripes meet at the end of the round. Maybe another time!)
When switching colors, first make sure that the last stitch knit in that color (2 rounds ago in this case) is not too loose or too tight.
Now bring the old color (blue) over to the left, keeping it above the new color (white). When you knit the first stitch with the new color, the old color will be trapped between the working yarn and the knitting.
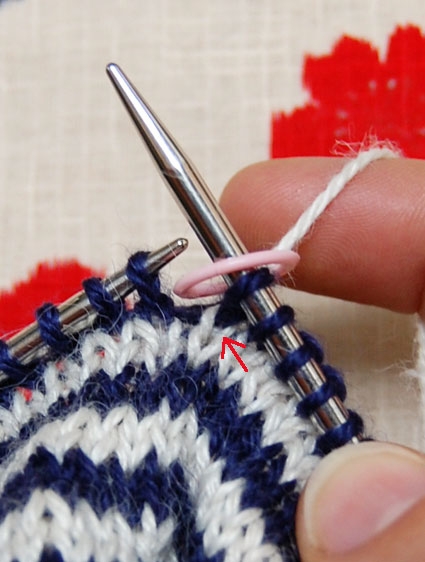
If you’re an English style knitter (you hold the working yarn in your right hand):
When you knit the first stitch of the round, bring the yarn over your left index finger (this creates a little slack in the yarn to prevent puckering).
If you’re a Continental style knitter (you hold the working yarn in your left hand):
When you knit the first stitch of the round, bring the yarn over your right index finger.

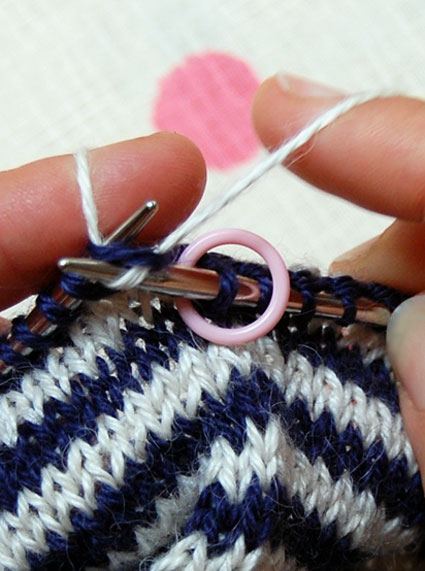
Remove your finger for the next stitch…
If you are using slippery yarn, like this silk alpaca blend, knit the next two stitches normally, but on the third stitch give a gentle extra tug so that the first stitch of the round won’t be loose.
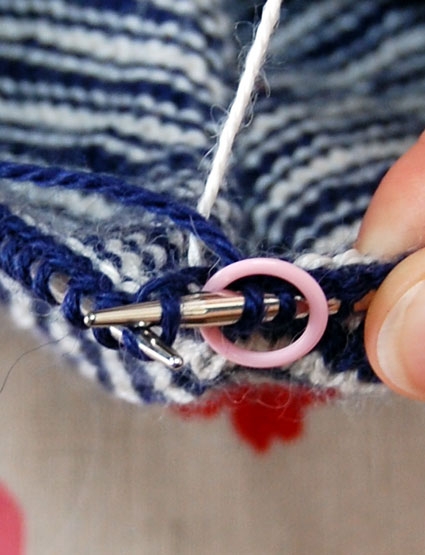
Here’s what carrying the yarns up the back looks like:
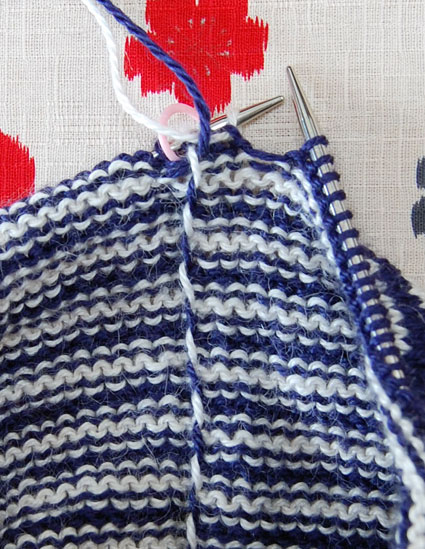
And here’s what it looks like in the front:

Notice how the stripes don’t exactly meet at the end of the round. Don’t worry, that’s normal. It’s because knitting in the round is actually knitting a spiral. So, the end of a round is one row higher than the beginning of the same round! When you block the knitting, sometimes you can kind of tug the stripes into alignment.
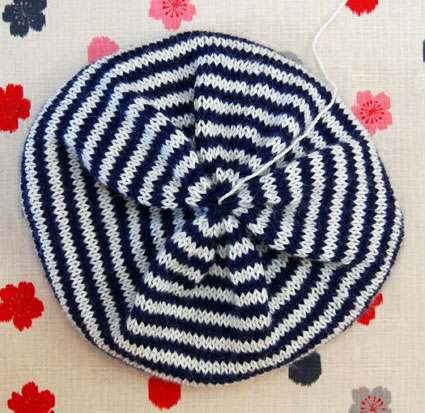
Knitting the Crown
When piece measures 7 1/4 inches from the beginning, decrease for the crown while maintaining the stripe pattern:
Decrease Round: (With Color A) *K3, k2tog, repeat from * to end of round. (112 st)
Knit 1 round.
Decrease Round: *K2, k2tog, repeat from * to end of round. (84 st)
Knit 1 round.
Decrease Round: *K1, k2tog, repeat from * to end of round. (56 st)
Knit 1 round.
Decrease Round: *K2tog, repeat from * to end of round. (28 st) (You can switch to double pointed needles for this round, although I managed to awkwardly knit this round with the 16″ circular.)
Knit 1 round.
Cut Color B’s tail, and thread it through the remaining 28 stitches. Pull tight and bring the tail to the inside and weave it in. Leave Color A coming out the top of the hat.
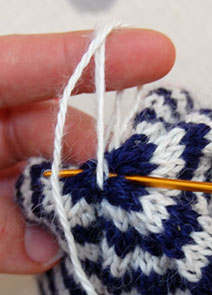
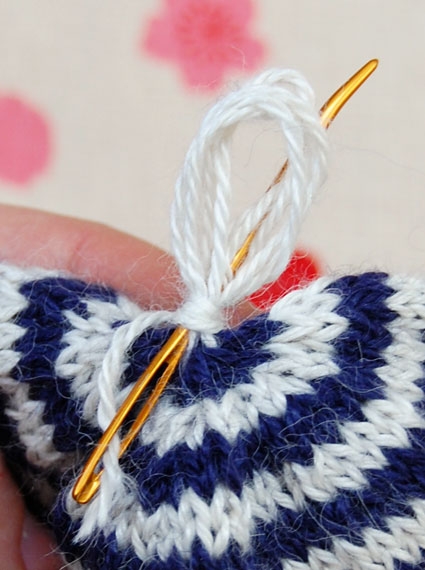
Making the Tassel
Cut Color A’s tail about 2 feet long and thread it onto a tapestry needle.
Bring the yarn back and forth across the top of the hat, forming equal size loops.
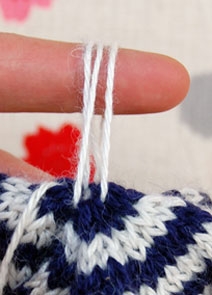
When you have as many loops as you want, tightly wrap the remainder of the tail around the base of the loops a few times.

Bring the needle up through the center of the tassel.
Trim the tassel to whatever length you want.

Et voila!


Wow! Can I say, I love this hat, but then again, I just posted a pattern on my blog of a similar hat in worsted weight. This has been happening to me a lot lately.
Hello, folks, I love your patterns! But what happened to the Purl Beret? I modified it last winter for my two-year-old niece, who looked adorable in it (in jade Tosh Sock), and I'd love to make her another… and one for myself, too, this time. Many thanks!
Hi I'd-
The Purl Beret is no longer on The Purl Bee but it is available for free here: https://www.purlsoho.com/create/the-purl-bee/2008/3/9/whits-knits-rochefort-chapeau.html
Thank you!
Molly
What type of cast on do you recommend for this hat? I figure we need a flexible type, but wasn’t sure which one. I am a fairly new knitter, so could use your advice. Thanks.
Hi Liz-
This was just made with a simple long tail cast on. Just make sure to cast on loosely and you should be fine!
Thanks for your question and please let us know if you need any more help.
Best-
Molly
Thank you for this tutorial! Do you think this method will work with stripes that are four rows wide on a size 4 needle?
Hi Amy!
I think it would work wonderfully! My usual rule of thumb is that I use this kind of method if my stripes are less than 1 inch tall.
Happy Knitting!
Thomas
Hi,
The pattern says to make 1. When I look this up online there is a make 1 left and make 1 right. What do you recommend for this pattern?
Thanks!
Allison
Hello, Allison!
Thank you for writing in! Generally, when a pattern just says M1 you can use either the Make 1 Left or the Make 1 Right. I recommend knitting the Make 1 Left, I think it’s easier than the Make 1 Right. If you have further questions, please let us know!
Best wishes,
Kumeko
I want to make this hat in a solid color. Can it be done with just one skein of the Silk Alpaca? If not, can you suggest a substitute yarn which will work with a single skein?
Thank you!
Hello Norma,
Thank you for reaching out! You can certainly knit this hat up with a single color. I think it would be beautiful in either Season Alpaca or Mulberry Merino.
Happy knitting!
-Marilla
Hello, I would like to make this hat for my 2 year old grandson. What adjustments should I make with cast on, etc?
Thank you.
Cynthia
Hi Cynthia,
Thanks for writing in. To knit this hat for a toddler, all you’ll need to do is adjust your cast-on and also knit the body of the hat for fewer inches! To figure out your cast-on number, you will want to first knit a gauge swatch in pattern. Once you know how many stitches you are getting per inch, you can multiply that number by the width that you would like (hats knit in stockinette fit best with 2 to 3 inches of negative ease) and cast on the nearest multiple of 4. I hope this helps!
All the best,
Lili
Yes, it does help. Thank you very much. I will give it a try.
Cynthia