Your basket is empty.
Continue Shopping
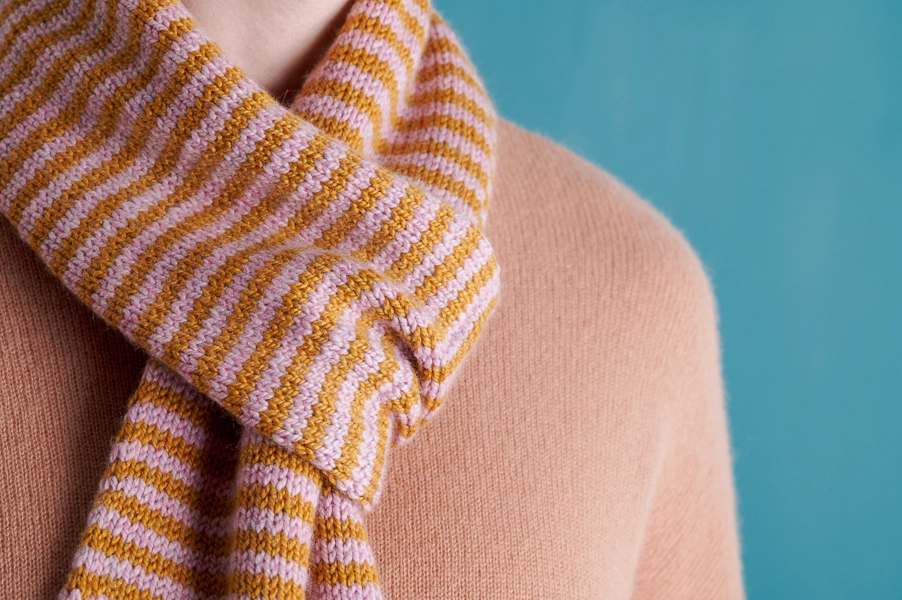
Keyhole Scarf in Stripes + New Colors
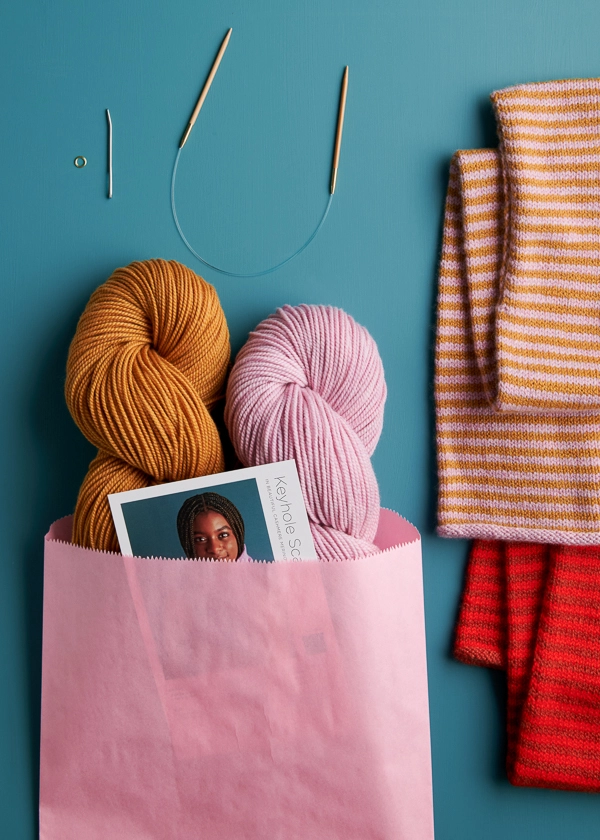
Unlock the joy of knitting with our new Keyhole Scarf Kit! You’ll get 2 skeins of gorgeous Cashmere Merino Bloom, a set of circular knitting needles, and everything else you need to cast on. Give a kit or a finished scarf… Both will be amazing to unwrap this holiday season!

This easy pattern is a great next step for beginning knitters, and the irresistible softness of Cashmere Merino Bloom makes it a delightful knit for everyone! Solid or striped, you’ll simply knit a tube in the round, and when it’s time to create the loop that you’ll tuck your end into, you’ll work half the stitches at a time, then join them with an easy 3 needle bind off (yes, we have a tutorial!).
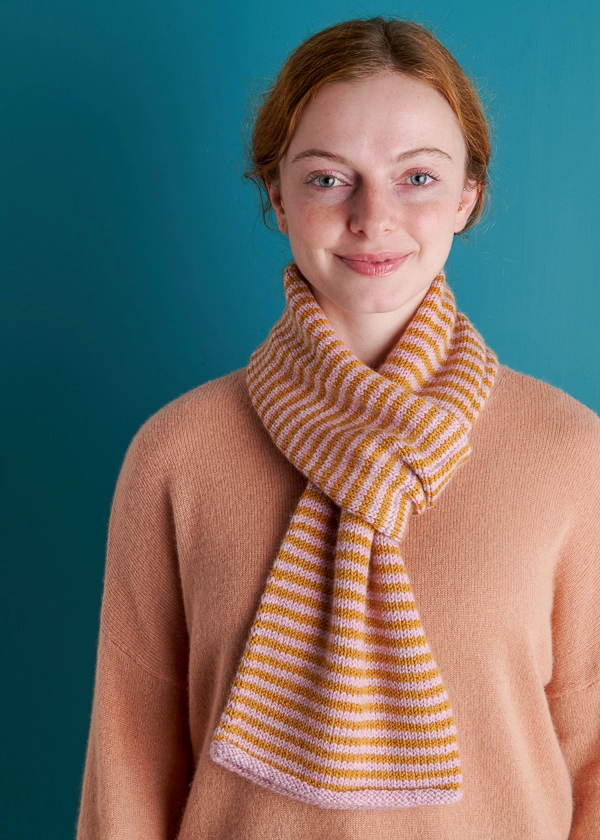
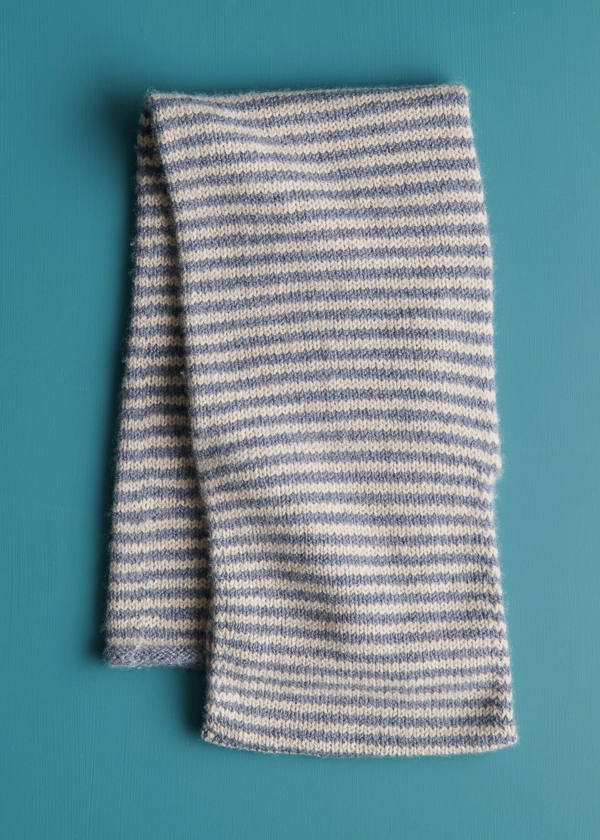
The new striped version of this pattern has all the easy knitting of the solid version but with the addition of two-row stripes. When you tuck the end into the keyhole loop, each end takes its own turn and the stripes seem to go opposite directions… A nifty touch!
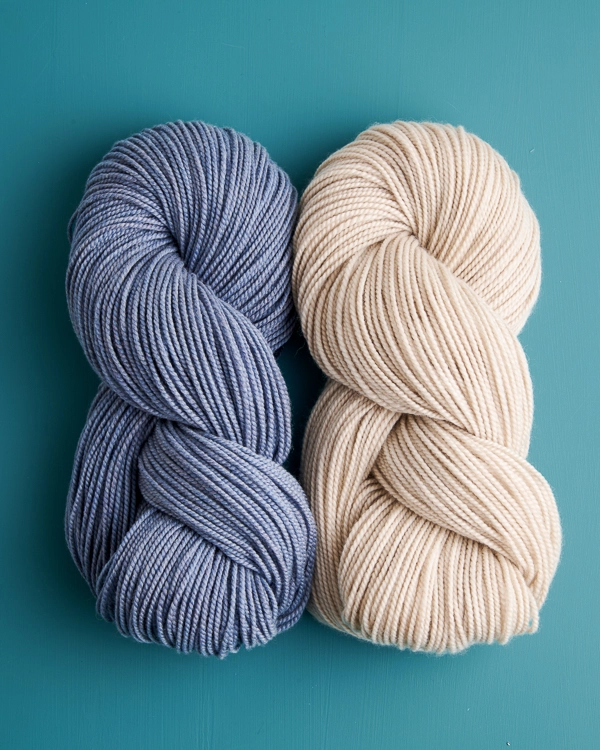
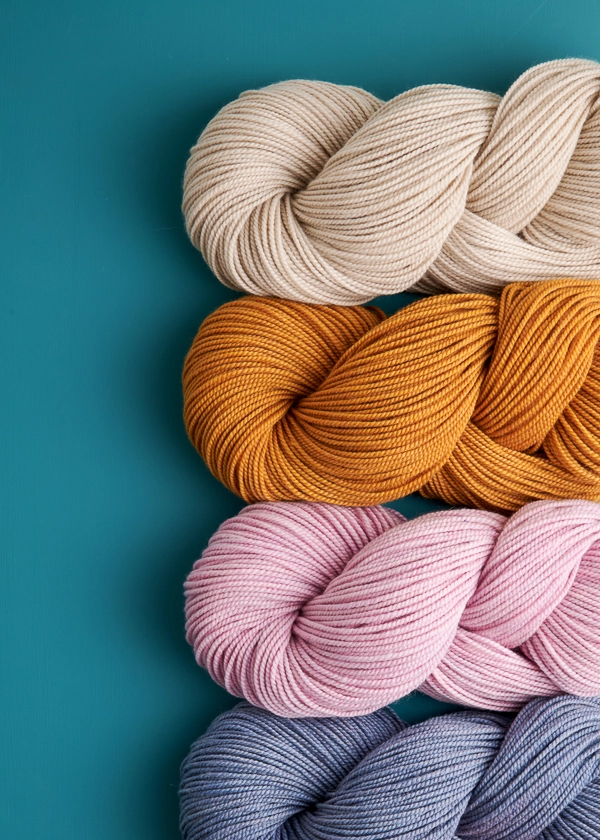
Cashmere Merino Bloom is a classic light worsted/DK-weight knitting yarn with an amazing feel that comes from the finest cashmere available. 25% cashmere and 75% extra fine merino wool, this yarn benefits from both fibers, with enough cashmere for over-the-top softness and a beautiful bloom, plus the world’s softest extra fine merino wool, which also adds resilience and durability.
Our Keyhole Scarf Kit includes everything you need to knit a very charming solid or striped Keyhole Scarf, including 2 skeins of our very special Cashmere Merino Bloom yarn, a set of bamboo circular knitting needles, a tapestry needle, a brass stitch marker, and the printed knitting pattern… All inside a pretty pink package!

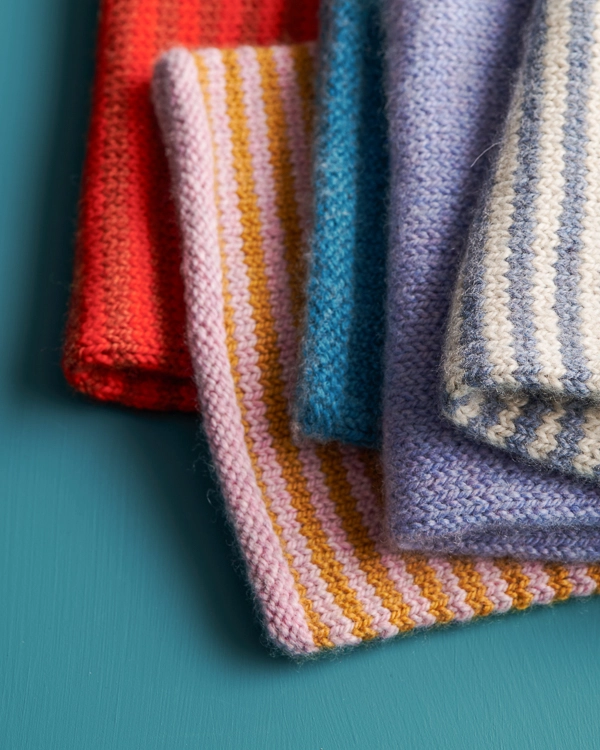
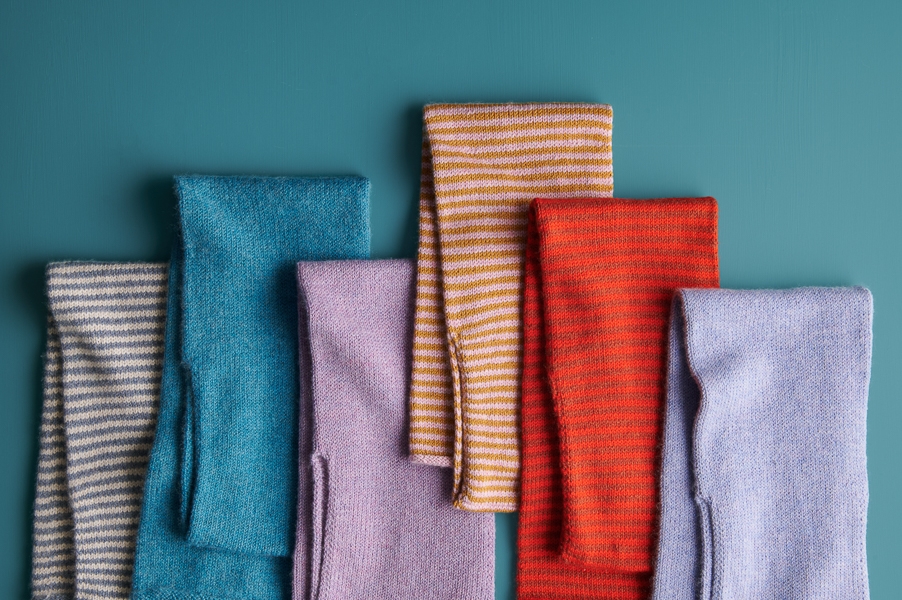
For a solid-color Keyhole Scarf Kit, pick any of Cashmere Merino Bloom’s 28 riveting colors, including 7 very lovely new ones. Or, select from 14 two-color bundles for the striped version. New colors and all-time favorites stripe beautifully together!
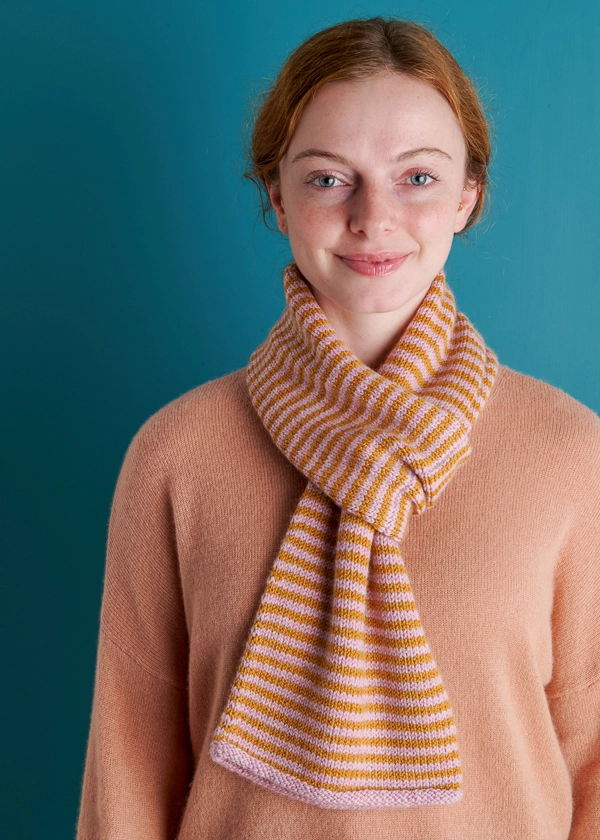
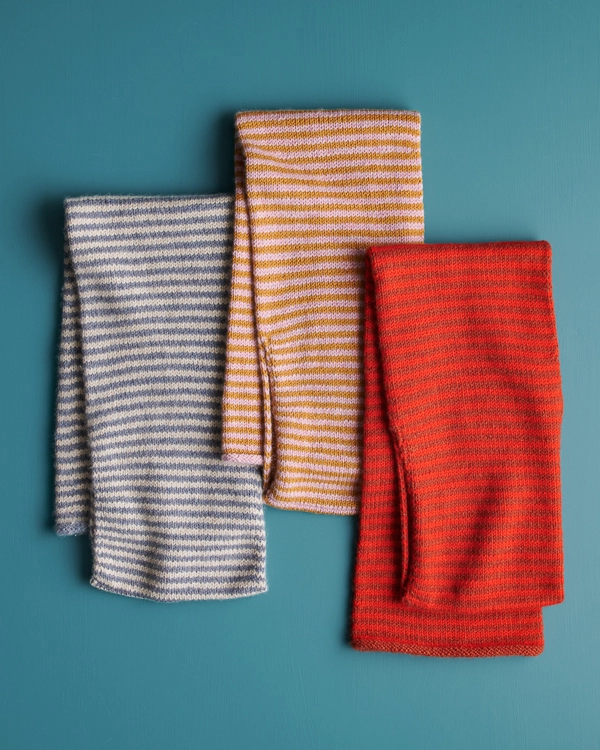
Give the gift of joyful knitting with the Keyhole Scarf Kit or knit one yourself to give to a favorite person… Either way, here is the key to giving with love and purpose this holiday season!
Yarn lovers, if you adore the yarn used in this project, you’ll love exploring all of our other yarn collections! Discover over 55 thoughtfully designed yarns in nearly every natural fiber and in every spectacular color you can imagine. Only available here at Purl Soho’s online yarn store, where every skein is created with care and your creativity in mind!
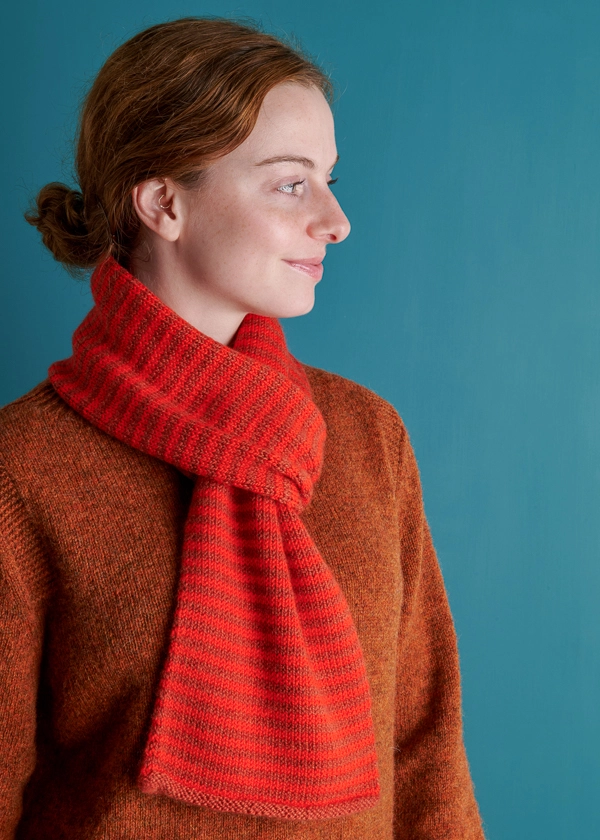
Pattern designed and written by Purl Soho designer, Gianna Mueller. See even more of Gianna’s work on her Instagram!
Story written by Andrea Lotz for Purl Soho.
Want to print this pattern? On desktop, find the “print” icon in the right margin, and on mobile, scroll to the end of the pattern for it. Use the on-screen instructions to remove anything you don’t want to print!
Materials
Our Keyhole Scarf Kit contains everything you’ll need to make a Solid or Striped scarf of your own. It contains…
- 2 skeins of Purl Soho’s Cashmere Merino Bloom, 75% extra fine merino and 25% cashmere. Each skein of this light worsted/DK-weight yarn is 218 yards/ 100 grams.
- Solid Version
- Color A: 2 skeins; approximately 436 yards required
- Striped Version
- Color A: 1 skein; approximately 218 yards required
- Color B: 1 skein; approximately 218 yards required
- Solid Version
- US 5 (3.75 mm), 16-inch circular knitting needles
- A stitch marker
- A tapestry needle
- A printed pattern card
You will also need…
- A spare needle, size US 5 or smaller, for 3-Needle Bind Off
- Stitch holders or scrap yarn
Pick up a Keyhole Scarf Kit in your favorite color of Cashmere Merino Bloom, or choose from 14 pretty striped palettes! We knit our samples in these colors (NOTE: Some colors are no longer available)…
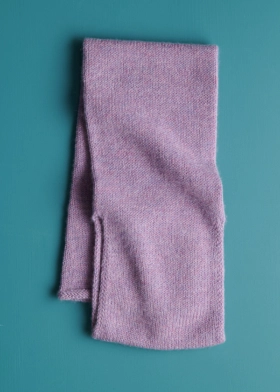
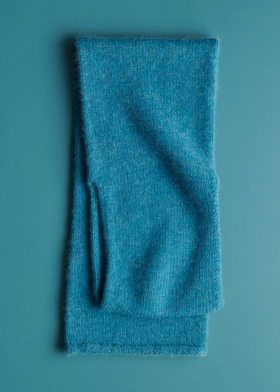
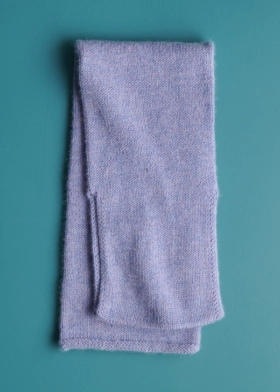
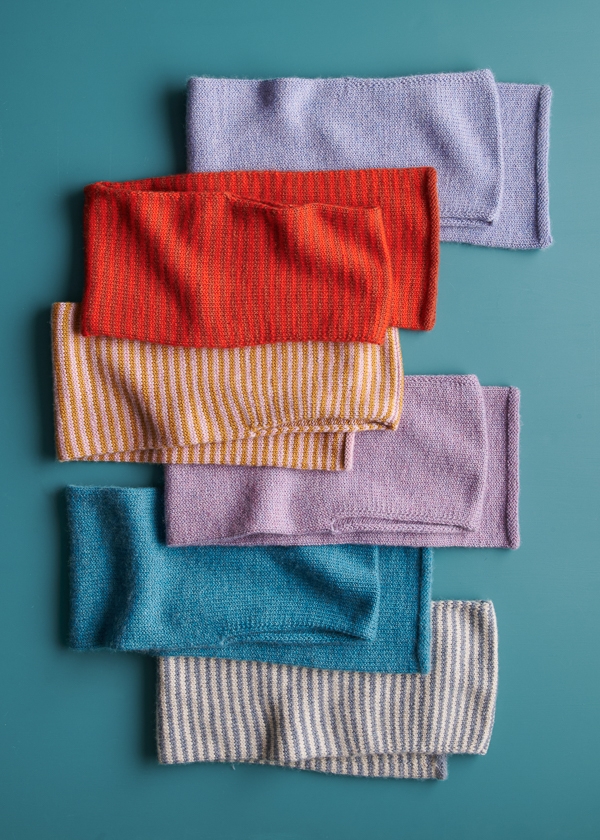
SOLID: Crocus Bud; True Turquoise; Hydrangea Blossom
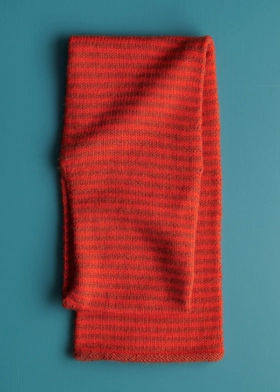
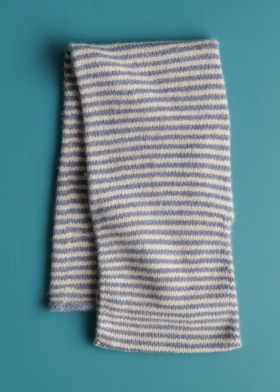
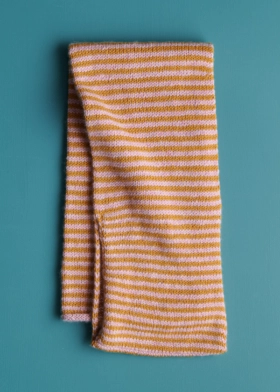
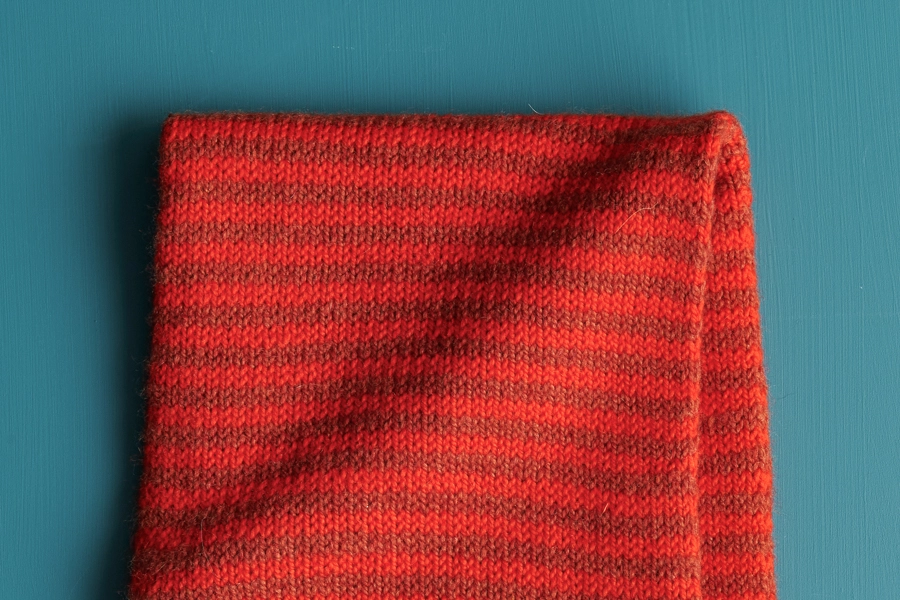
STRIPED: Kiln Red + Red Poppy; Ash Blue + Wheat Flour; Rosewater Pink + Warm Honey
GAUGE
21 stitches and 31 rounds = 4 inches in stockinette stitch
SIZE
Finished Dimensions: 15 ¼ inches circumference x 33 inches long
NOTE
SLIP STITCHES
Slip all slip stitches purlwise with yarn in front.
PATTERN
SCARF SECTION
With Color A, cast on 80 stitches. We used a basic Long Tail Cast On.
Place marker and join for working in the round, being careful not to twist the stitches.
Purl 4 rounds.
SOLID VERSION ONLY
Knit every round until piece measures approximately 25 inches from cast-on edge.
Go on to Loop Section, below.
STRIPED VERSION ONLY
NOTE: Carry non-working yarn up the inside of the tube between stripes. For a few tips, visit our Stripes in the Round Tutorial.
Join Color B.
Rounds 1 and 2: With Color B and carrying Color A up the inside, knit to end of round.
Rounds 3 and 4: With Color A and carrying Color B up the inside, knit to end of round.
Repeat Rounds 1–4 until piece measures approximately 25 inches from cast-on edge, ending with Round 4.
LOOP SECTION
FRONT
NOTE: You will now work back and forth in rows, knitting one side of the Loop at a time. For the Striped Version, maintain the 2-row stripe pattern, as established.
Working the first 40 stitches only and leaving the remaining 40 stitches on needles for Back…
Set-Up Row 1 (right side): K1, slip 1 (see Note), k36, slip 1, k1, turn work.
Set-Up Row 2 (wrong side): Slip 1, k1, slip 1, purl to last 3 stitches, slip 1, k1, slip 1, turn work.
Row 1 (right side): K1, slip 1, knit to last 2 stitches, slip 1, k1, turn work.
Row 2 (wrong side): Slip 1, k1, slip 1, purl to last 3 stitches, slip 1, k1, slip 1, turn work.
Repeat Rows 1 and 2 until Front measures 8 inches, ending with Row 2 (the second row of a Color B stripe, if making the Striped Version).
Repeat Row 1 (with Color A) one more time.
Cut yarn(s), and place stitches onto stitch holder or scrap yarn.
BACK
With remaining 40 stitches on needles, join yarn ready to work a right-side row.
Work as for Front, maintaining stripe pattern if working the Striped Version. When finished, leave stitches on needles and do not cut yarn(s).
JOIN FRONT + BACK
Turn work inside out and slip on-hold Front stitches onto spare needle. Slide Back stitches to one end of circular needles, so working yarn is at the tip. Hold needles with Back and Front stitches parallel, and with other end of circular needles and working yarn, bind off all stitches using a 3-Needle Bind Off.
FINISHING
Weave in all ends, turn right side out, and gently wet block!
Share your progress and connect with the community by tagging your pics with #PurlSoho. We can’t wait to see what you make!
Learn About Cashmere Merino Bloom + All Our Beautiful Yarns
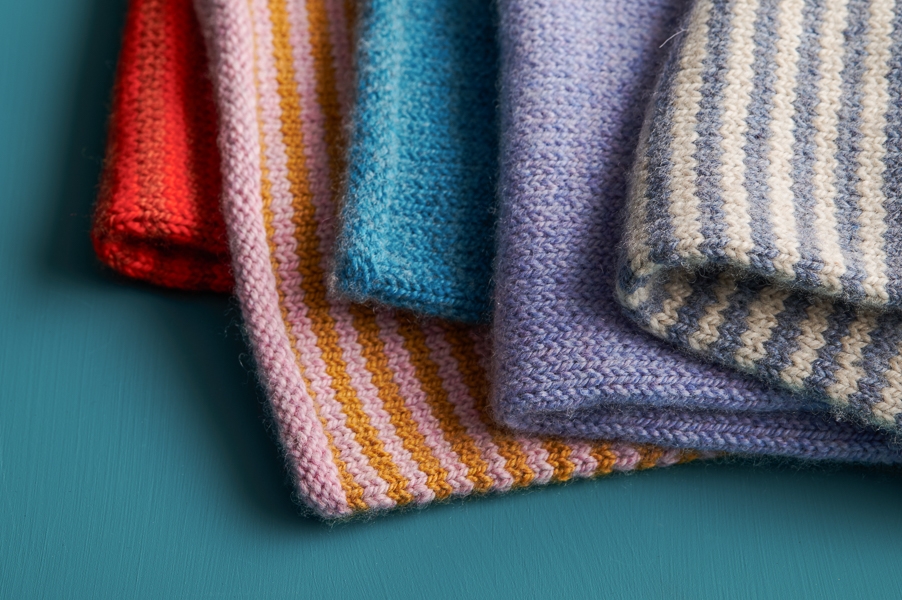
Soft, supple, and toasty warm, Cashmere Merino Bloom is an absolute knitting joy! A light worsted/DK-weight yarn, it is made with 25% of the most exquisite cashmere in the world and 75% extra fine merino wool and benefits from both fibers: cashmere for over-the-top softness and beautiful bloom and merino for resilience, durability, and even more softness. Cashmere Merino Bloom has an incredible hand feel with a gentle halo that illuminates your knitting… A gorgeous choice!
More Knitting Patterns
- Be sure to explore our collection of (mostly free!) Cashmere Merino Bloom patterns and cast on!
More Light Worsted/ DK Weight Yarns
- Shop our entire collection of light worsted/DK-weight yarns (What does DK-weight yarn mean, really? Our guide to DK yarn will answer your questions and demystify.)
- If you want to use a different yarn, be sure to take the time to get the correct gauge. Need help? Check our All About Gauge Tutorial, our Yarn Substitution article, and our Complete Guide To Yarn for lots of helpful information.
More Yarns With Similar Fiber
- Shop cashmere yarn (What makes cashmere so special? Learn all about this amazing fiber in our guide to cashmere yarn!)
- Shop merino wool yarn
Looking for more inspiration? Explore all of our knitting patterns (including tons of free knitting patterns) and knitting tutorials, buy one of our many knitting kits and yarn bundles, and shop for beautiful yarn. We have over 55 gorgeous natural fiber yarns in 1,000s of magnificent colors, designed to bring integrity, beauty, and joy to your next knitting project and only available at Purl Soho!
Similar Posts You Might Enjoy:


Has anyone knit this with Nigh DK? Same weight – I’m assuming it would work?
Hi Kelley,
Thanks for writing in! Nigh DK would be a great choice for this pattern since it’s also a DK weight yarn. Just be sure to knit up a gauge swatch before beginning so that you can determine what needles to knit with. You may need to size up or down your needles in order to achieve the correct gauge!
All the best,
Lili
Hello, I am confused: should I be knitting the scarf in a stockinette stitch (k,p) or just a knit stitch?
thank you!
Mary
Hi Mary,
Thanks for writing in! This pattern is knit in stockinette stitch. When knitting in the round, you just knit every round to create stockinette stitch. When working flat, you alternate knit and purl rows!
All the best,
Lili
Is there a pattern for a regular scarf with these stripes? I tried searching but couldn’t find anything. Thanks!
Hi Jackey,
Thanks for writing in! I would actually just recommend modifying this pattern slightly for a nice and stripy regular scarf! You can knit it as a tube scarf (which is preferable to a flat scarf since stockinette stitch curls when knit flat) by following the instructions in the SCARF SECTION and binding off once it’s the length you want. You’ll need to knit it a lot longer than it’s designed though, since it’ll need to be long enough to wrap around your neck! I’d recommend getting 4 skeins of Cashmere Merino Bloom so you can knit it up to about 66 inches long. Hope this helps!
All the best,
Lili
Thank you so much!!
Hello,
This is Mary again. I am confused about how to knit the loop and am frustrated because I just knit three loop rows wrong and now have to tear them out. Do I put the remaining 40 stitches on a stitch holder then work the one loop back and forth first or do I continue doing as I was which is to work the entire 80 stitches together (front and back). Would you please clarify? Thank you!
Hi Mary,
I’m sorry to hear that you’re confused about the loop, but I’m happy to help clarify! Your first instinct is correct: You will put half the stitches on hold for the Back, work the Front stitches back and forth, and then do the same for the Back stitches. Finally, you’ll use the 3-needle bind-off technique to join the Front + Back in a loop at the top.
All the best,
Lili
Hi Lili,
Thanks so much for your quick reply. I don’t know why I am having a hard time visualizing this process. When I get ready to do the back of the loop and pick up the 40 stitches I have placed on a place holder, when does the yarn to knit come from? The yard I used will be at the bottom of the front loop, yes? I am sure I have a mental block, I just do not want to begin again without a clear vision of what I will be doing. I wish you could draw a picture for me! Thank you, Mary
Hi Mary,
After you finish knitting the Front of the loop, you cut the working yarn(s)! Then, you use that yarn to start knitting the Back.
All the best,
Lili
I have 2 questions about the first set up row for the loop. 1.The directions say K1 slip 1, K38, slip 1, knit 1. That adds up to 42 stitches in my math leaving only 38 stitches for the back. I assume I should only K36 on this row. 2. The side bar directions for slipped stitches say Slip all slip stitches purlwise with yarn in front. That will work on the reverse purled side but does it apply on the knit side also?
Hi Carolyn,
Thanks for writing in! It sounds like you’re following an outdated version of this pattern. A few weeks ago, we caught a typo in that round and fixed the stitch count. It should be k36, not k38, and the pattern now reflects that fix!
In answer to your other question, all slipped stitches–on either the right or wrong side–should be slipped purlwise in this pattern. The edges of the loop are a little bit of double knitting, which is a technique that utilizes stitches that are slipped with yarn in front no matter what!
All the best,
Lili
I just knitted this up for my sister for Christmas and it turned out so well. Thank you for such a great pattern and gorgeous yarn! I’m wondering if this would work in 2×2 ribbing as a variation?
Hi Blair,
You could definitely knit this in 2×2 although you will have to make some slight modifications to the pattern. One thing to keep in mind is your scarf will also be a bit slimmer since the ribbing will pull in the stitches a bit!
All the best,
Gavriella
Can I choose my own colors for stripes or do I have to select one of your bundles? Also, can I join the ends with the Kitchener stitch?
Hi Sue,
Thank you for asking! You can definitely choose your own colors for this project. You will need two skeins of Cashmere Merino Bloom. We haven’t tried the Kitchener stitch on any of our samples for this project but we definitely encourage you to give it a go!
I hope this helps and please let us know if you have any other questions!
All the best,
Gavriella
Is this striped pattern available without purchasing the kit? I have one skier of merino yet to be used, so I don’t need the kit. Just the patterns and another color for my second skein of merino. Thank you!
Hi Renee,
Absolutely! You can find the pattern for free on this very page. And you can totally purchase another skein of Cashmere Merino Bloom separately!
All the best,
Lili
Also looking for recommendations for a second color to match with Night Blue. It is for a man who doesn’t like color! I was thinking Charcoal Onyx or Dove Grey. Thank you, I am so bad with colors. Hardest part for me.
Hi Renee,
I really like both of those options! Pairing Night Blue with Charcoal Onyx will result in a much more subtle contrast than pairing it with Dove Gray. I don’t think you can go wrong either way, but I’d say the decision depends on how much contrast you prefer between colors!
All the best,
Lili
Question: I want to make two adjustments – can I make the stripes wider? How would I do that?
AND if I want the scarf to be longer, like a regular scarf that wraps fully around the next (like 60″?), how much yarn would that be? Or should I just knit it in the round and forget about the cool loops?
Thanks.
Lesley
Hi Lesley,
That sounds like a great idea! To make those adjustments you will just need to buy 2 skeins of each color. That way you can just make the stripes twice as thick and the scarf twice as long!
I hope this helps and happy knitting!
Gavriella
Hi Team PS, quick question. I’m knitting the Keyhole Scarf pattern and I’m doing the front side 40 stitches. For some reason, on the wrong side, the tension on the left (backside) looks great & even. The right backside tension looks like crap! I have pulled it apart & redone it half dozen times, paying very close attention to my yarn tension and the same thing happens over and over. It looks like I’m using the current pattern. Can I send you a photo?
Hi Jaye,
Oh no, we’re so sorry that your project isn’t turning out as expected! Would you mind sharing a photo or two with us by sending an email directly to [email protected]? That way we can better visualize what’s going on!
All the best,
Lili
Hi there. Getting close to the front loop section of the striped version. Do I need an additional needle? Not sure how I start knitting flat from knitting in the round. If using the same needle, can I keep the back 40 stitches on the same circular needle? Thanks for your help.
Hi Renee,
Nope, no extra needle necessary! You’ll work the Front and Back of the Loop separately, and you can just leave the Back stitches on the circular needle while you knit the Front. If that feels uncomfortable though, you can also put these stitches on scrap yarn or a stitch holder instead!
All the best,
Lili
Hi lovelies,
I’m knitting the tuck & loop in Fiddlehead, oh my gosh it’s so squishy & warm! Was looking at this pattern & wondered why you suggest to make the loop last after knitting the length? The look at the beginning was easy, is it due to the type of yarn/neater to split & do last?
Thanks!
Hi Rachel,
We’re so glad you’re having fun knitting your scarf with Fiddlehead! The loop process for both scarves was simply a design choice–both ways work just as nicely! And if you choose to give this pattern a try in the future, it’ll keep it interesting since it’ll be something different!
All the best,
Lili
I am watching the videos for 3 needle bind off. Which version should be used for this pattern? Also, the pattern implies ( at least to me since it says not to cut the yarn) that I use the working yarn. Yet the videos use a new yarn strand. If I use the working yarn, I am making the striped version, what color should I use? Thank you.
Hi Renee,
Great questions! The good news is you can use either version for this scarf. The traditional 3-needle bind off is simpler to work and creates a larger seam (which will be inside the scarf loop), and the modified version has a few more steps but creates a smoother finished seam. The choice is yours!
As for what kind of yarn to use, for this pattern, you’re right that you’ll use the working yarn for the bind off. The seam shouldn’t be visible since it’s inside the scarf, so you can use either color.
Hope that helps!
Allison
Hi … would Knitting Yarn work with this pattern?
Hi Donna,
Great question! You can definitely use Knitting Yarn for this pattern in place of Cashmere Merino Bloom. Please let us know if there is anything else we can answer for you!
All the best,
Gavriella
Hi – my grandson aged 6yrs has requested I knit him a black & pale blue scarf (very specific)! This would be a great pattern but am wondering if it may need scaling down for him. Your advice would be much appreciated. Thank you.
Hi Anne,
That sounds like it will be a beautiful scarf! You can certainly scale down the pattern for your grandson! I would recommend making a scarf about three-quarters the size.
To make a scarf this size, I would cast on 60 stitches, which will give you a scarf circumference of 11.5” (so the scarf will be about 5.75” when laid flat). Then knit to your desired length! For the loop section, you can make it about three-quarters the size of the original, so about 6” long. If you decide to scale down, you’ll want to get shorter circular needles too–12” length should be good! We hope this helps!
All the best,
Allison
I feel a bit silly asking this but what is a printed pattern card?
Hi Sheila,
Not silly at all! What we mean is that the kit includes a card with the pattern printed on the back. The idea is that if you give it as a gift, the recipient will be ready to go with the pattern!
Please always feel free to reach out with whatever questions you have, big and small… And happy knitting!
Best,
Whitney
Thanks 🙂
Hi Sheila,
You’re so welcome, happy to help!
Best,
Whitney
Hi. When I am in the loop section, on the second set-up row and subsequent purl rows, when I do the single knits on either end I am obviously moving the yarn to the back before the knit and to the front after the knit. So when I am slipping a stitch purlwise on the first set-up row and subsequent right-side knit rows, do I move the yarn to the front for the slip stitch and then move to the back for the next knit stitch? Or can I leave it in the back?
Hi Frederika!
Great question! When you slip that stitch purlwise with the yarn in front, you’ll then want to move the yarn back again before your next knit stitch. Leaving the yarn in front would accidentally create a yarn over (an extra stitch), which we definitely don’t want here. So: slip with yarn in front, move yarn to back, continue knitting.
Happy Knitting!
Megan
Hi, It seems like the striped version of this scarf is longer than the solid one you have. Is it, or is it due to the model being smaller? I made the solid version and it said I would need to use almost all of the yarn, so I would think I would need more yarn to make it a little longer. Thank you.
Hi Joan!
Thank you for writing in! The striped and solid versions are designed to be the same length. Any difference you’re seeing is likely due to gauge or how the scarf is styled on the model. If you’d like to make your scarf longer, you will need additional yarn, as the pattern is written to use nearly the full amount provided. I hope this helps!
Warmly,
Megan
I’m just a few notches over beginner level as a knitter and this is the biggest project I’ve done so far. I’m working on the striped version of this and I’m almost in the home stretch–I’m about 2 inches into the back side–and it’s really looking like I”m going to run out of yarn. I’ve checked my gauge and I’m very close to being spot on so I can’t figure out how this has happened! I hate to order extra yarn–it would make this an incredibly expensive scarf. Any thoughts? My ball of primary color measures a 6 inch circumference; secondary color is 7 inches.
Hi Judith,
I’m so sorry to read that you’ve run into trouble here, and I’m happy to help.
I see that you picked up the Keyhole Scarf Kit! I’m curious: did you block your gauge swatch before getting started? Our gauges are listed for blocked swatches, and swatching is a great opportunity to determine whether you need to change needles to reach gauge, as well as whether you like the look and feel of the finished fabric.
Unfortunately, I’m not able to make any yardage estimates from the size of the balls of remaining yarn. You could determine how many yards per inch you’re working with your gauge swatch, though. Please feel free to reach out to us at [email protected] for further troubleshooting! You’re welcome to send us a photo of your swatch (with a ruler in the image, please!).
We’ll keep an eye out for your email!
All the best,
Hills
Hi-
I haven’t done a lot of stripes (weaving in the ends is my least favorite part of knitting!). I see how to carry the yarn up when working in the round… just wondering when I’m working the flat sections for the keyhole is there an easy way to carry the yarn so I don’t have to sew in all those ends! Thank you!
Hi Cab,
Thanks so much for reaching out with your question! I’m happy to help.
When working these smaller stripes flat, you can just switch yarns at the beginning of each right-side row. If the stripes were more than an inch, or more than 4 rows each, you would want to consider passing the new yarn under the old yarn before starting each new color to trap the old yarn (which would also avoid breaking the working yarn, resulting in tails to weave in later).
I hope this helps and you love the project! Feel free to reach out anytime.
All the best,
Hills
Hi, Purl Soho,
I have seen color work cowls elsewhere, but where are they here? I’d love one that uses at least a #9 circular needle.
Hi Judy,
Thanks so much for reaching out! I’m happy to help you find a new project.
You can see all of our cowls on our “All Knitting Patterns” page under “Create” at the top of our site. From there, you can select cowls and chunky weight (for a size 9 needle).
You might like taking a look at the Beautyberry Cowl, worked on a size 11 needle.
I hope you find the perfect next project!
All the best,
Hills