Magic Loop
If you’re not a fan of using double pointed needles, a wonderful alternative is the so-called Magic Loop. Using long circular needles, this technique for working in the round avoids the use of double pointed needles, even for items very small circumferences, like wee little socks, crowns of hats, and cuffs of sleeves… Magic! Our Magic Loop Tutorial explains the steps, but the basic concept is to divide your stitches between the tips of your circular needles, and to work each half of the stitches with the other needle. The trick is in sliding the stitches onto the cord in order to free up the needle so you can knit the stitches that remain on the other needle. Harder to explain than do… Follow along!
Click To See Video Transcript
Hey guys, this is Laura from Purl Soho and I’m going to show you how to work Magic Loop. Magic Loop is a technique for working in the round, and although it is worked on pretty long circular needles, it is especially great for smaller circumferences, and I’m going to show you why. Because of this it’s a great alternative for those of you who just do not like double points.
Alright. So as you can see here, I have a few stitches cast onto this 40-inch circular needle. You could use a 32 inch, you could use a 60 inch. It’s kind of up to you. It has a little bit to do with how big your circumference of your final object is. I find that 40 inches often right in the sweet spot. So let’s get our needles oriented for this technique. So the first thing I’m going to do is I’m going to take these cast on stitches and I’m going to push ’em towards the center of my cord between my two needles. Alright. Now that there’s somewhat at the center of my cord, the next thing I’m going to do is take my cord and fold it in half. When I fold it in half, I’m going to push this end towards my left, and I want to make sure my working yarn is coming off the back, is away from me. The other thing I want to make sure to check for is that no stitches are twisted. We always want to check that before joining in the round. And now that we’ve done all of those checks, I’m ready for my next step.
What I want to do is divide these 30 stitches in half, and so that’s 15. So 2, 4, 6, oop, 2, 4 6, 8, 10, 12, 14, 15. Fifteen. So I’m going to grab the cord right here in the middle of my stitches, and I’m going to hold onto my stitches with my right hand and with my left hand, I’m going to just pull this cord, pull it, pull it, pull it. You’re going to pull the cord until your stitches wind up on your needles. You might have to push a little too. Push and pull. There we go. So now I have half of my stitches on my back needle, half of my stitches on my front needle. They’re not twisted, and my working yarn is coming off of the back needle.
Next step is with my right hand, I’m going to grab the tip of this back needle, and I’m going to pull it towards the, right now I’m pulling it towards the right because I want to create enough slack in my cord here that I can turn the direction of my needle around and work across these stitches on the front needle. So I have enough slack. At this point, I’m going to just hold all of my stitches right here in this hand. I’m going to use the tip of my right needle and knit into the first stitch on my front needle. I have my working yarn coming from the back. There we go. I want to actually be under that working yarn. There we go. And now I’m going to just knit across the stitches on the front needle.
We’ve joined in the round now that we’ve knit that first stitch, and now I’m going to just continue to the end of the needle. All right. I have worked across that first half of the stitches and now it’s time to reorient my needles. So what I want to do at this point is I’m going to pull the cord from the back set of stitches. I’m going to pull this cord until these back stitches are on the needle, I’m going to turn my work. So once again, the tips of my needles are pointed towards the right, and here we are. It looks really similar to not just a couple steps ago where I have my two needles are parallel again. And once again, I’m going to use my right hand to pull the back needle out, create slack, turn my needle around, and then I’m ready to work across the second half of my stitches.
Alright, so I just worked across the second half of my stitches. Once again, I’m going to pull the cord on the back, the back half of the cord until both my sets of stitches are in needles. I’ve officially finished my first round. I joined in the round. I’m ready to continue my work. And you kind of just keep following these steps of getting your stitches oriented on the two needles, pulling the back needle, creating slack, working across half the stitches. And you can do notice here, I didn’t place a stitch marker, but I do have my tail here when I have my tail on the right side. I know that I’m at the beginning of my round.
I have a small swatch here. I knit up using Magic Loop. I just wanted to demonstrate one last thing about Magic Loop and when you are binding off. So I’m going to bind off using a basic bind off just across this first half of the stitches and then just show you one little trick. Okay? Now as I near the end of this first half of my stitches and I bind off the second to last stitch, you can see I’m left with one loop left on my needle. So what I just wanted to point out really quickly was that in order to, bind off across the second set of the stitches as I normally would with Magic Loop. I’m going to get these back stitches on this needle when I turn my work so that my needles are pointing this way. This back needle, you don’t really need to pull the slack. You’re kind of already ready to just continue binding off. So now I’m just going to continue on and bind off the rest of this Magic Loop swatch.
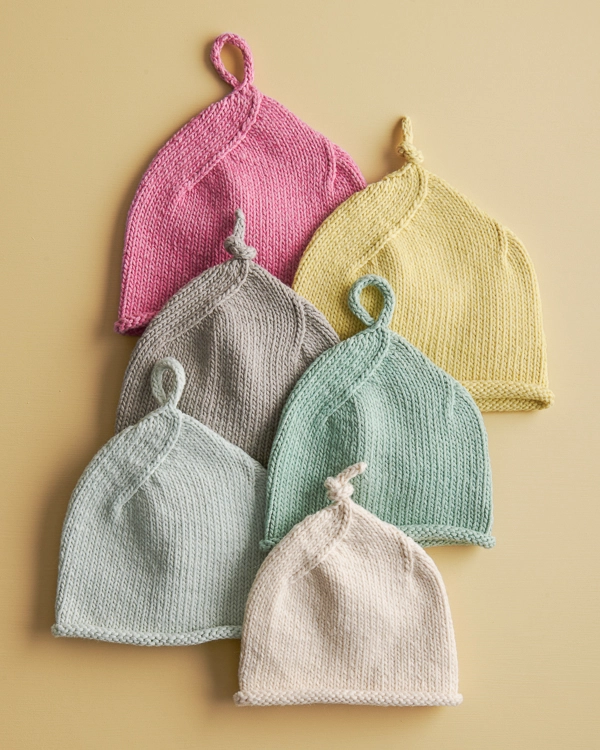
Want to set your double pointed needles aside and try the Magic Loop? Cast on for our free Top Knot Baby Hat pattern in super soft Morning, our cotton-yak yarn, and experience the magic!
And once you’ve mastered one piece on Magic Loop, why not try two? To knit sleeves and socks in double-time, check out our Magic Loop: Two At A Time Tutorial next!
Looking for more inspiration? Explore all of our free knitting patterns and knitting tutorials, buy one of our many knitting kits and yarn bundles, and shop for beautiful yarn. We have over 35 gorgeous natural fiber yarns in 100’s of magnificent colors, designed to bring integrity, beauty, and joy to your next knitting project and only available at Purl Soho!


Thank you, this video demystified the magic loop technique! I’m going to bookmark it for reference.
Excellent video! Made everything so clear! Thank you!
Thank you! No more double points for me!
Thanks for the clear video! I tried it on one of your handwarmer patterns which involved a lot slip stitches with size 7 needles, and found I had so much trouble getting the stitches from the cable back on the needle that I gave up and went back to double-pointed for this pattern. Is magic loop easier with smaller needle sizes or straight stockinette stitch?
Hi Naomi,
Thanks for reaching out! Issues with magic loop are usually caused by the type of needle you are using – if your needle does not have a smooth tapered join between the cord and needle, getting the stitches back on the needle can be quite frustrating indeed. The needle size can play a part, but usually is only an issue with needles that are significantly larger than the cord starting around a US 11 and up, so I wouldn’t think a US 7 would cause any problems due to the size of the needle. Even very small needles that are not significantly different from the cord, such as a US 1 or 2, can be problematic for magic loop if they have a join that catches the yarn. I use Addi Turbo and Addi Rocket needles frequently for magic loop projects in a variety of sizes and find them to be quite easy to work with!
I hope that helps!
Julianna
I have been making a pair of socks and every time o turn the work the stitches tend to get snagged on the needle to cable transition, do the addi turbo or rocket needles prevent this?
Hi Stephanie,
Thanks for reaching out! Are you working with a wood or bamboo needle? If so that could explain the snagging, Addi Turbo or Turbo Rocket needles will help a lot with that, the metal needles are very smooth and easy to work with and shouldn’t cause any snagging!
Warmly,
Gianna
Best explanation of magic loop I have seen. I have watched others and only got confused.
You are an excellent teacher — many thanks!
Thank you for this video it is helpful
I cannot get the free pattern for stripey socks for Cri Du
Awareness. I got the 18 pages of socks. No Pattern
Hi Joan,
Thanks for reaching out! You can get the free pattern by going to our Easy Heel Colorblock Socks Pattern page. The price is automatically discounted to free, no coupon necessary!
Best,
Julianna
Great tutorial. I feel really confident to use this technique now. Thanks!
Thank you! So many videos I watched made this more complicated (especially the joining in the round). What a relief, time to knit now.
Lori
Hi. Please can you offer some help. I have worked as far as the underarm for your Raglan sleeve pullover knitted in the round. I have looked at all the comments relating to this pattern on your website so it seems to me that there is a problem with the wording used in the pattern. My querries are from the point of seperating front and back where I find the instructions very confusing.
1.Round 1 K9 place previous 18 sts on stitch holder – does that include the 9 ?? If so why not put that in the instructions.
2. If so then there are 9 sts equally on front and back from the side i.e. the point from which the hemline curve begins. Is that correct??
Just a suggestion as there seem to be many queries relating to this pattern why not reread it and sort out the issues..
Hi Doreen,
Thanks for writing in! This step might seem a little confusing but I’m happy to help clear it up! This row is written in this manner because the held underarm stitches need to be centered around the side seam marker – in other words, when you knit 9 past the marker and then place the previous 18 stitches on hold, you will be using the 9 stitches on either side of the marker, which does include the 9 stitches you just knitted. This will ensure that, yes, the underarm stitches are centered above the high point of the hem, between the two curved edges, so the curved hems end up on the front and back of the sweater.
I hope that helps!
Julianna
Thank you for your magic loop tutorial. It was very easy to follow.
Thank you very much for the clearest, most
easy to follow explanation of magic loop.
Brilliant.
This was a real eye opener for me! I hope to never see another DPN! Thank you.
I purchased love bird yarn for the Giverny cowl. I didn’t realize the pattern was knitted in the round and was hoping for a pattern worked flat. Anyway, I was advised to look at this video. The pattern calls for 16 inch round needles, but this tutorial says 40. I’m an advanced beginner and intimidated by knitting in the round. Would it be best to use 40 inch? Any other advice? I love this pattern and the yarn and really want to get started.
Hi Michele,
Thanks for reaching out again! As I suggested before, since the Giverny Cowl pattern is a simple rib you could easily work it flat and then stitch it up after! Just keep in mind that the written instructions only include right side rows since it is worked in the round, so you will need to make sure you keep track and work the wrong side rows to maintain the rib pattern. I would not recommend magic loop for the cowl. Magic loop is a method to be used to make smaller circumference items like socks, hand warmers or closing the top of a hat!
I hope this clears things up and please let me know if you have any more questions!
Warmly,
Gianna
I appreciate your time. Thanks so much.
I am using older circular needles and I find the cord is way too tightly coiled to make Magic Loop easy. My rounds keep turning inside out. I’ve tried putting the cord in hot water but overnight it coils up again. Do you have any more tips?
Hi Gillian,
I’m sorry to hear that the cable on your needles has been making the Magic Loop method difficult! I’m not sure why this could be happening, but I’d like to help you get to the bottom of this! The first thing that comes to mind as to why your cord keeps tangling is how your project gets stored between knitting. If you store your project in a bag between knitting, the cord can become twisted, dented, and misshapen. This is usually fixed by dipping the cord in boiling water then leaving them to set for a few hours, but I’m wondering if they’ve been stored in a bag or if you started using the needles too soon after boiling them.
The fabric itself will also sometimes roll up at the edge, so this tension can cause a bit pulling and twisting on your needles. Readjusting the cord frequently can keep your knitting neater. You can readjust your loop by pulling your needles so that the magic loop gets pulled flat, then you can recreate the magic loop again by pinching and pulling out the cable at the middle of your round.
Finally, it can be more difficult to keep your project straight while working the first few rounds, so if you haven’t knit more than an inch yet, this could be why you are experiencing this tangling. It does get easier with time though, and readjusting your work frequently will start to become second nature!
I hope this helps to solve the issue you’ve been having, and please let me know if you have any other questions!
All the best,
Carly
I can’t understand why anybody would do this when DPNs are SO much easier to work with. That looks way too fiddly for me, I don’t see the advantage.
Hi Lisa,
Thanks for sharing your thoughts! Many knitters find DPNs difficult to use, and magic loop provides an alternative. Some advantages to the magic loop technique are: only 2 needle points in total, often faster than DPNs, minimal to no laddering between needles.
Overall though, it’s completely a matter of personal preference as to which method one chooses to use! We think it’s wonderful that there are multiple options for knitting in the round.
All the best,
Lili
Other magic loop videos mention adding an extra cast on stitch to facilitate the connection of the loop. Is it necessary?
Hi Barbara,
Thanks for reaching out! It is not necessary to cast on any additional stitches for the magic loop technique. Once you begin knitting the first round, your working yarn will connect all the stitches and the loop will form naturally!
All the best,
Lili
You have the best tutorials. Thank you!
I just retyped your secret word about six times, and still it pops up witha new word. Maybe consider a different method of proving you’re not a robot? And my vision is fine – imagine those whose vision is poor.
Hi Kathleen,
We’re not quite sure what secret word you’re referring to! Would you be able to reach out to us at [email protected] with some more details about what you’re experiencing on our website? We’ll be able to help out further from there!
All the best,
Lili
Thanks for the video, interesting! But I notice you throw your yarn from your right hand. I hold my yarn in my left hand and pick it up with my right needle (“German” method). I wonder if the yarn would get tangled. Maybe dpn are easier for me. Thanks!
Hi Marcia,
You’re very welcome! I’m pretty sure you will still be able to do the magic loop technique when knitting continental style. But I’d recommend giving it a try if you’re unsure! If you still find DPNs easier, then that’s a great back-up.
All the best,
Lili
Why wouldn’t you just use 2 double pointed needles and knit in the round like you would for socks? Why go through the trouble of the magic loop?
Hi Jenifer,
That’s a great question! We understand that magic loop is definitely a preference! If you were to knit a small circumference project over just two DPN needles, you might notice that you encounter quite a bit of tension in your fabric as you finish stitches on one needle and move to the next. This will also cause a sort of laddering effect at either side which some knitters find disappointing. While you can certainly use DPNs for small circumferences, magic loop can be helpful for knitters who enjoy having less needles to work with or using longer cords they have on hand rather than buying more needles dedicated to small circumferences. I hope this helps!
All the best,
Gavriella