Your basket is empty.
Continue Shopping
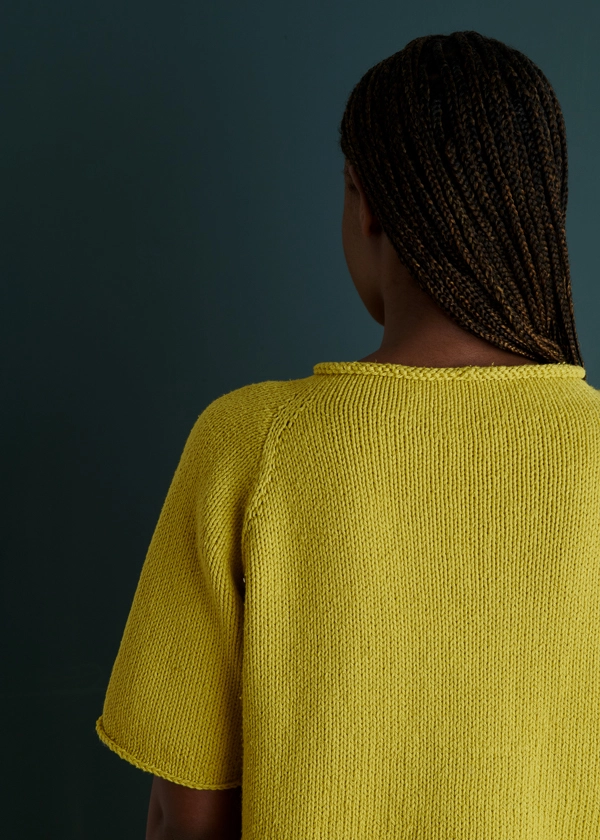
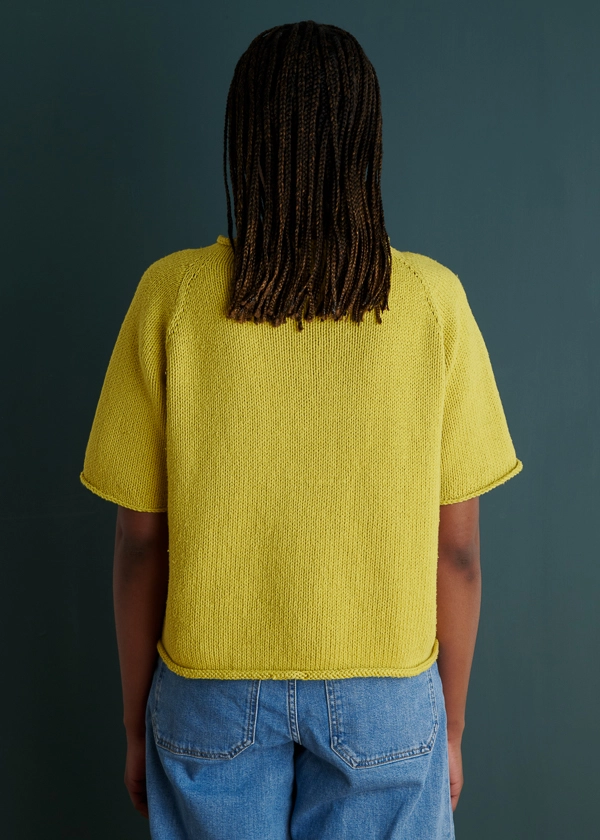
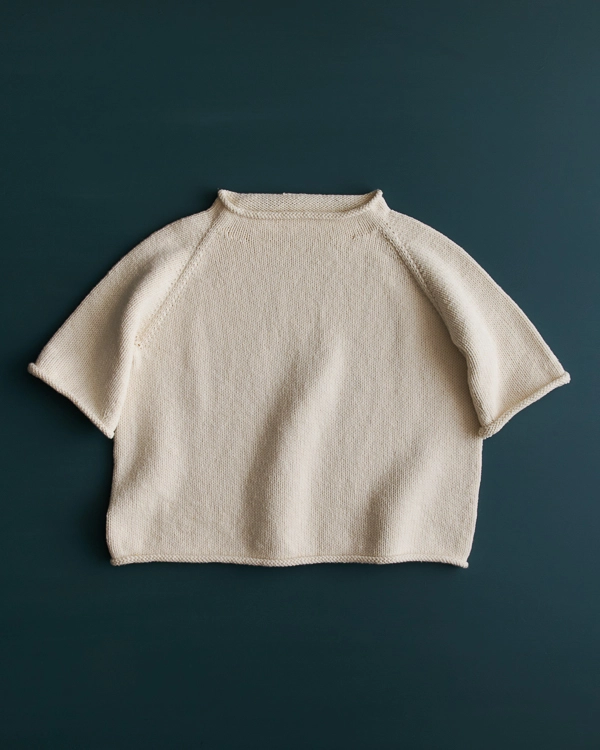
Simple Tee
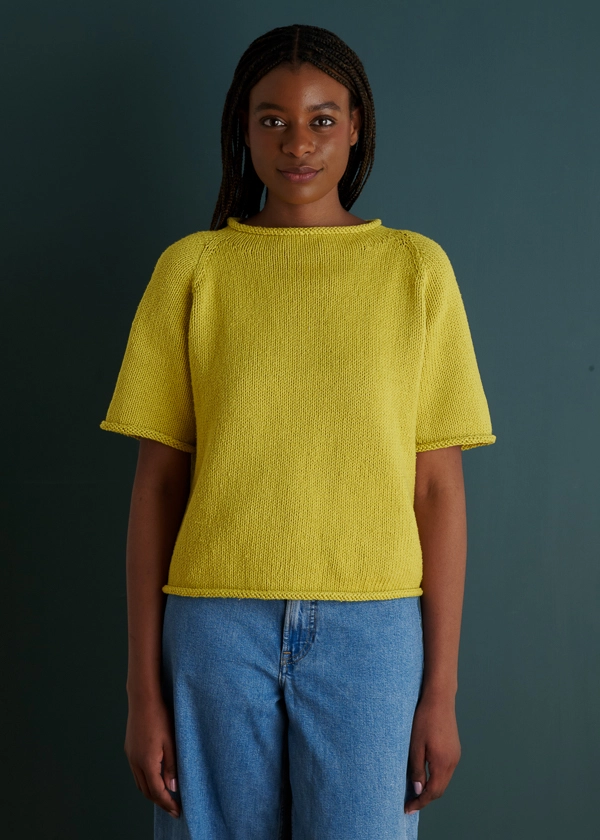
An easy-to-knit cotton and linen tee soft enough for a hammock nap… Our Simple Tee knitting pattern is brimming with laid-back fun! Cast on with our new June Worsted yarn, a summer-ready, plant-based yarn that somehow looks and knits like wool but feels breezy, cool, and light.
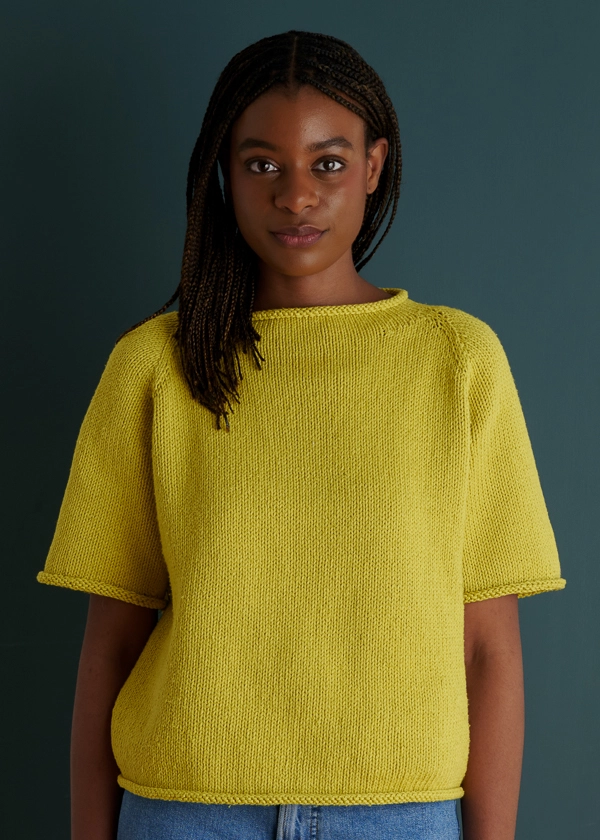
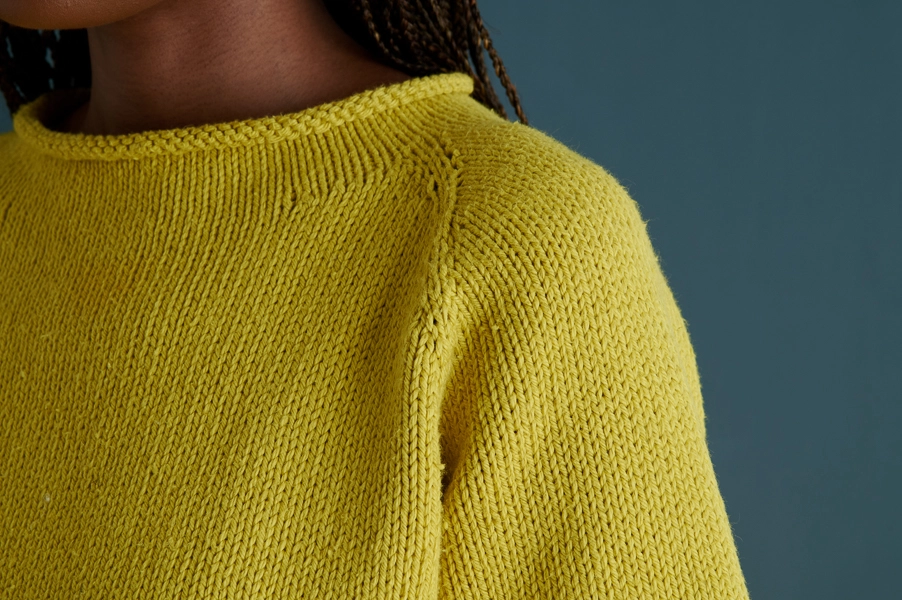
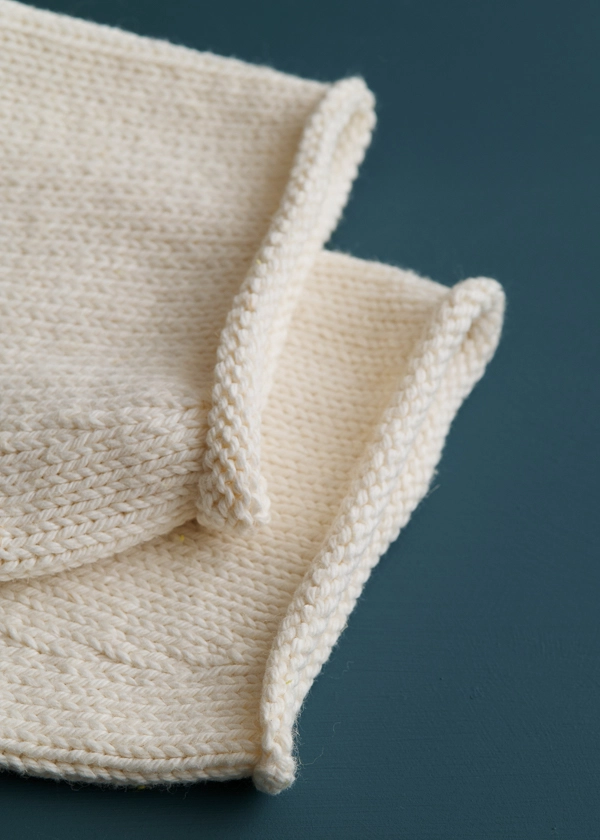
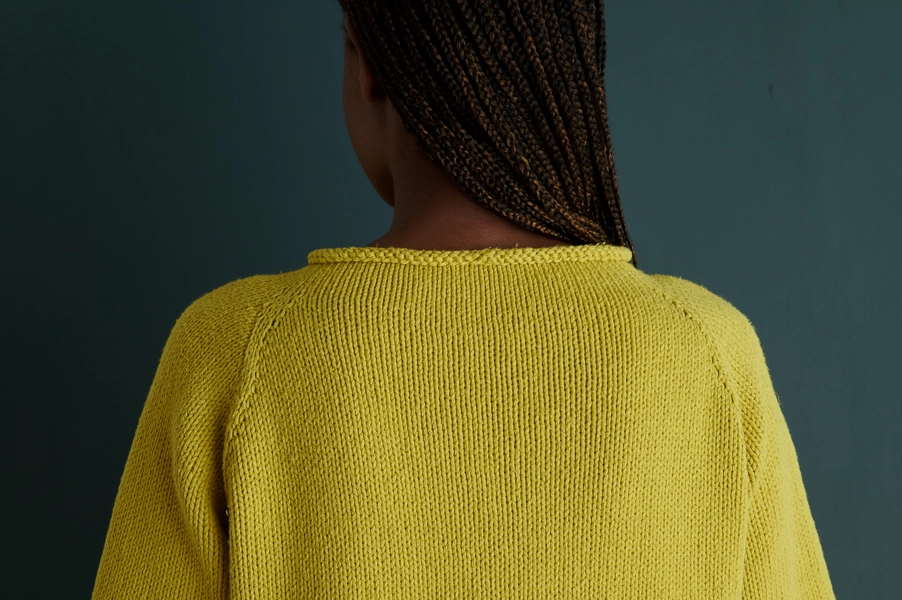
A top-down raglan sweater with just a bit of short-row shaping at the back neck, the Simple Tee is a cinch to knit, all in stockinette stitch and nothing to slow you down. The effortless rolled edges are neat yet unfussy, as if you cut the sleeves, collar, and hem off your favorite oversized sweatshirt and you love it even more than before!
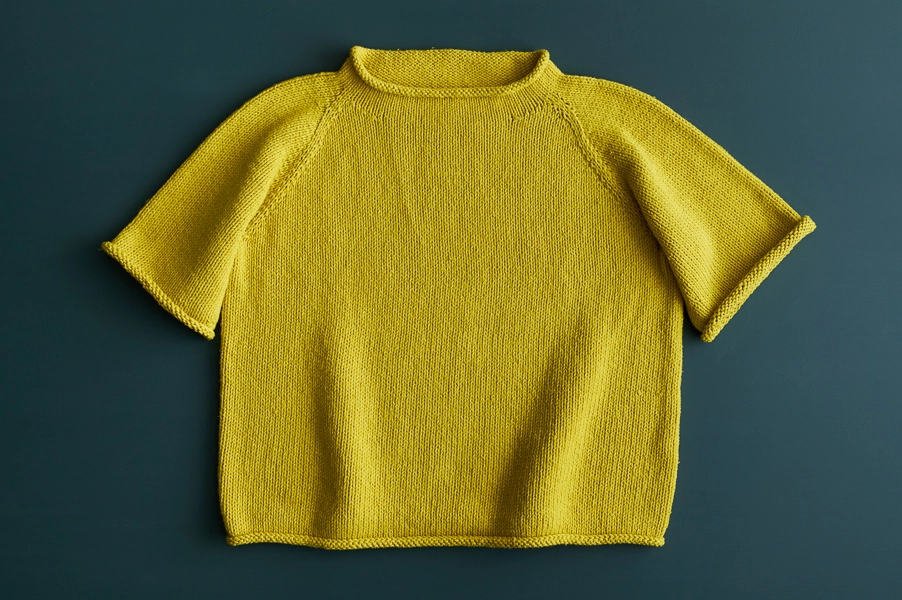
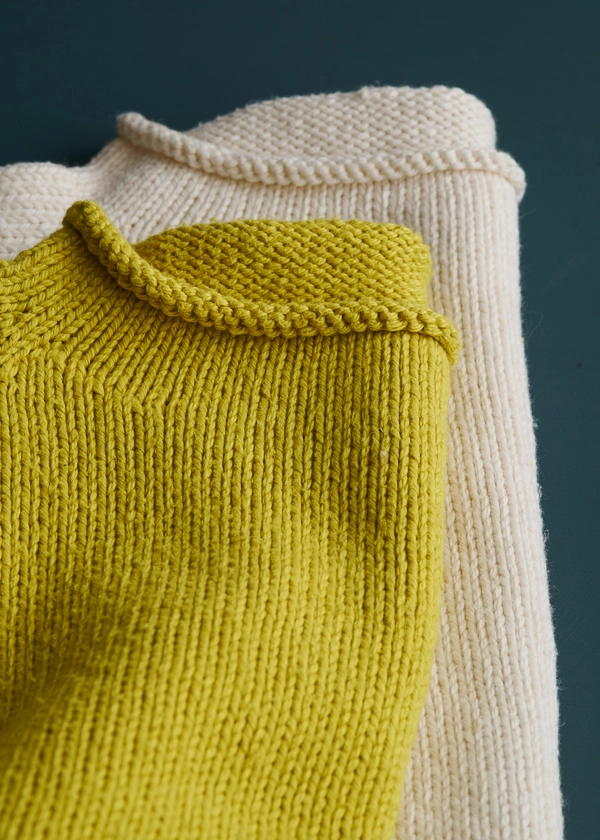
Joyful to knit and a delight to wear, June Worsted is a plush worsted-weight yarn that’s cool enough to keep wearing as the days lengthen. Made with 70% organically grown cotton and 30% Belgian linen, this super endearing yarn has a slightly earthy character, and after a machine wash and dry, the already soft fabric gets even softer, taking on a gently brushed, lived-in look that will get better and better every summer!
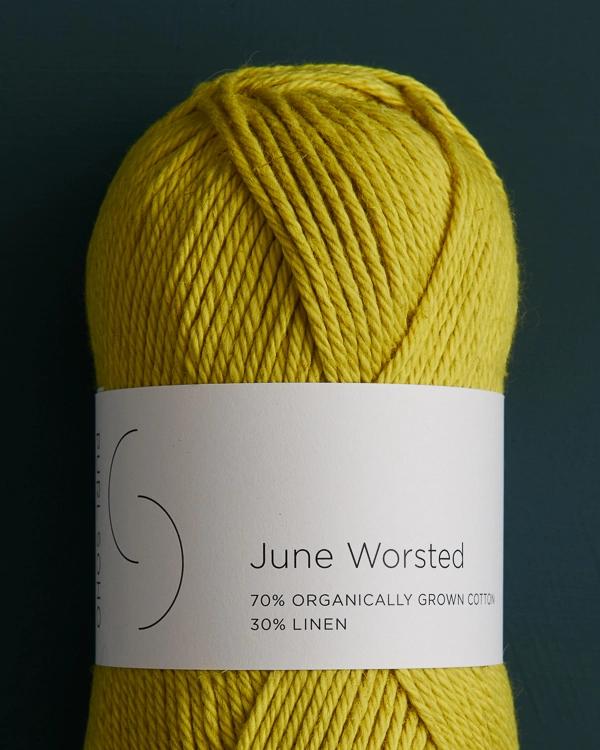
June Worsted comes in generous 100-gram “peanut” balls and a palette inspired by the very best of early summer. Greenfinch Yellow glows like fireflies rising at dusk, while Heirloom White is as fresh as linens drying on the line… And there are 15 more colors to choose from, including rich jewel tones and warm, sun-kissed shades.
The Simple Tee is that rare kind of knit: easy, satisfying, and so cute you’ll wear it straight off the needles and all summer long. With colors this beautiful and a yarn that gets better with every wear, one tee may not be enough… You might find yourself casting on another the moment you bind off!
Yarn lovers, if you adore the yarn used in this project, you’ll love exploring all of our other yarn collections! Discover over 55 thoughtfully designed yarns in nearly every natural fiber and in every spectacular color you can imagine. Only available here at Purl Soho’s online yarn store, where every skein is created with care and your creativity in mind!
Pattern designed and written by Purl Soho designer, Laura Ferguson.
Story written by Andrea Lotz for Purl Soho.
Materials
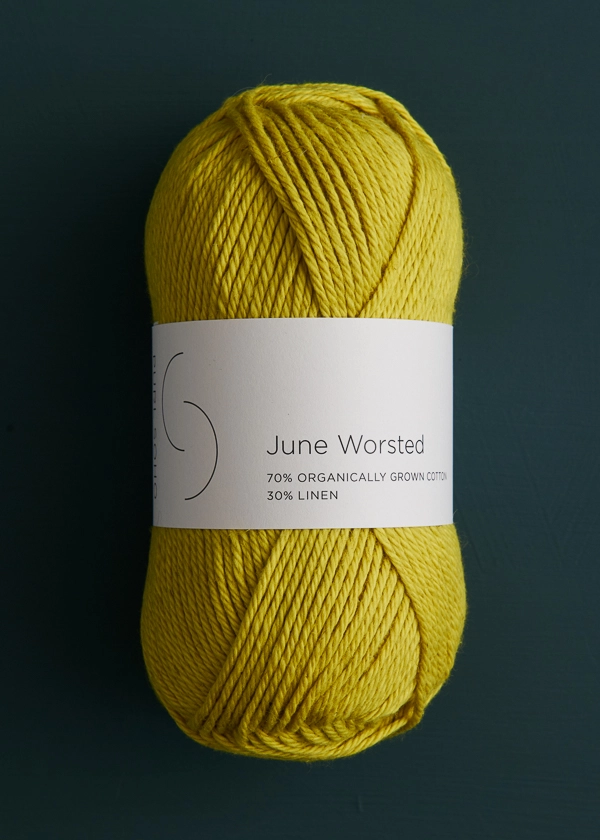
- 5 (6, 7, 7, 8) (9, 9, 10, 11) balls of Purl Soho’s June Worsted, 70% organically grown cotton and 30% linen. Each ball of this worsted/aran-weight yarn is 164 yards/ 100 grams; approximately 820 (930, 1010, 1140, 1250) (1360, 1475, 1610, 1705) yards required. We used the colors Greenfinch Yellow and Heirloom White.
- US 6 (4 mm), 16-inch circular knitting needles
- US 6, 32- or 40-inch circular knitting needles, depending on size you are making
- A set of US 6 double pointed needles
- US 7 (4.5 mm), 16-inch circular knitting needles
- US 7, 32- or 40-inch circular knitting needles, depending on size you are making
- A set of US 7 double pointed needles
- Stitch markers, including one unique
- Stitch holders or scrap yarn
- A Simple Tee Pattern PDF
NOTE If you want to use Magic Loop, you won’t need the 16-inch circular or double pointed needles listed above… Just stick with the 32- or 40-inch ones!
GAUGE
19 stitches and 27 rounds = 4 inches in stockinette stitch, on larger needles
SIZES
NOTE: For help picking a size, please check out our Understanding Ease + Selecting Size Tutorial!
38¾ (43, 47¼, 51¼, 55½) (59¾, 64, 68¼, 72½)
To fit actual chest circumference of 30-34 (34-38, 38-42, 42-46, 46-50) (50-54, 54-58, 58-62, 62-66) inches, with 5–9 inches of ease
- Finished Chest Circumference: 38¾ (43, 47¼, 51¼, 55½) (59¾, 64, 68¼, 72½) inches
- Finished Length from Shoulder to Bottom Edge: 20 (20½, 20¾, 21, 21¼) (21½, 22, 22½, 23) inches
- Finished Length from Underarm to Bottom Edge: 12½ (12, 12, 11½, 11) (10¾, 10½, 10¼, 10¼) inches, unrolled
- Finished Sleeve Length from Underarm to Cuff: 7 (7, 7, 7¾, 8) (8½, 8½, 9, 9) inches
Samples: The Greenfinch Yellow sweater shown here is size 38¾, worn with 5¾ inches of ease, and the Heirloom White sweater is size 43.
PATTERN
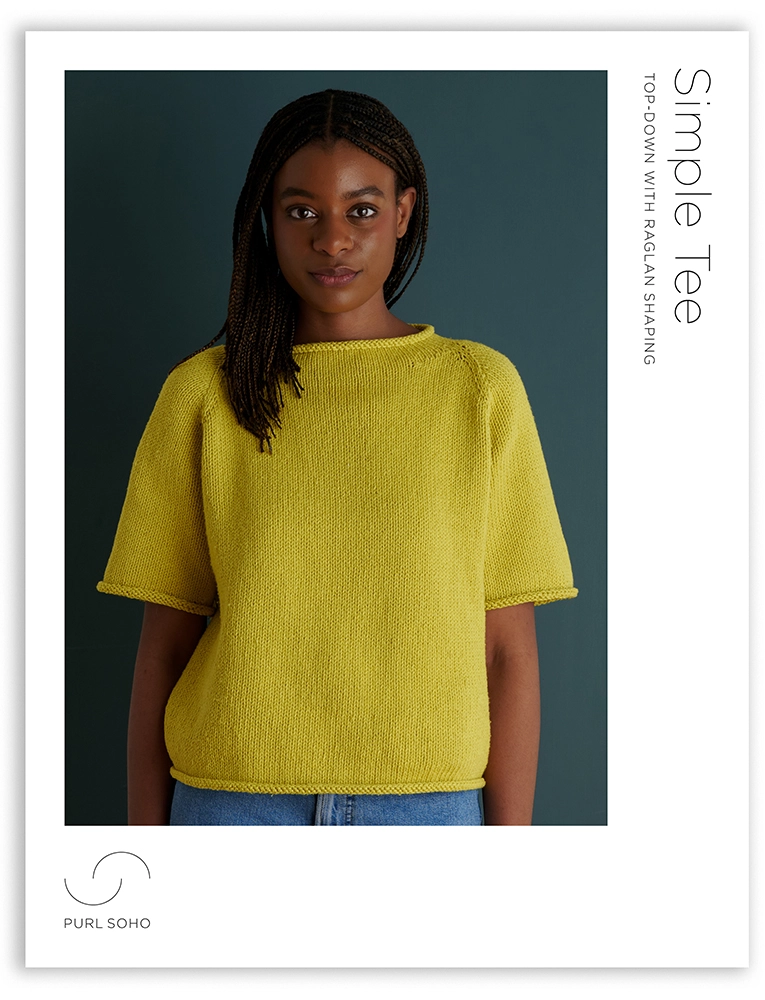
The Simple Tee Pattern is available as a PDF.
Share your progress and connect with the community by tagging your pics with #PurlSoho. We can’t wait to see what you make!
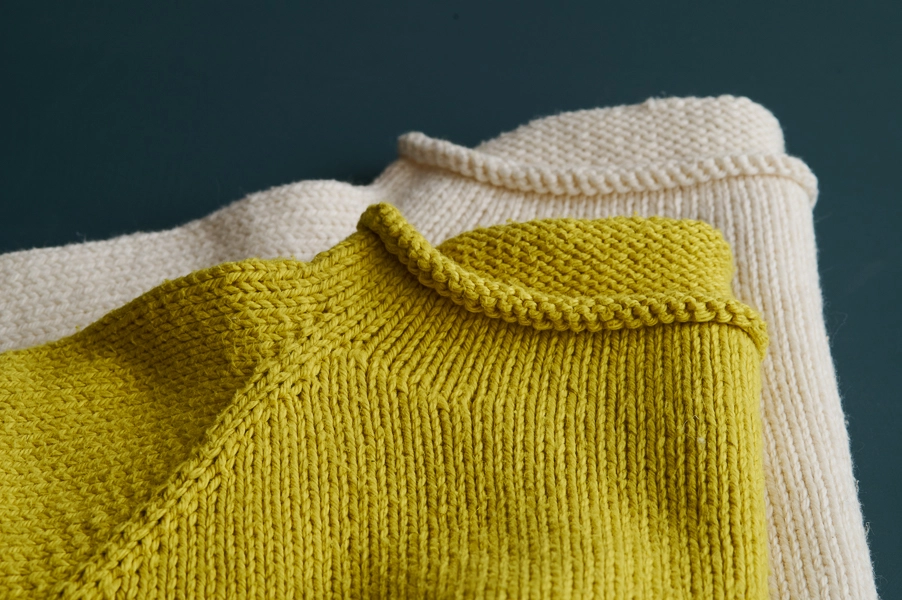
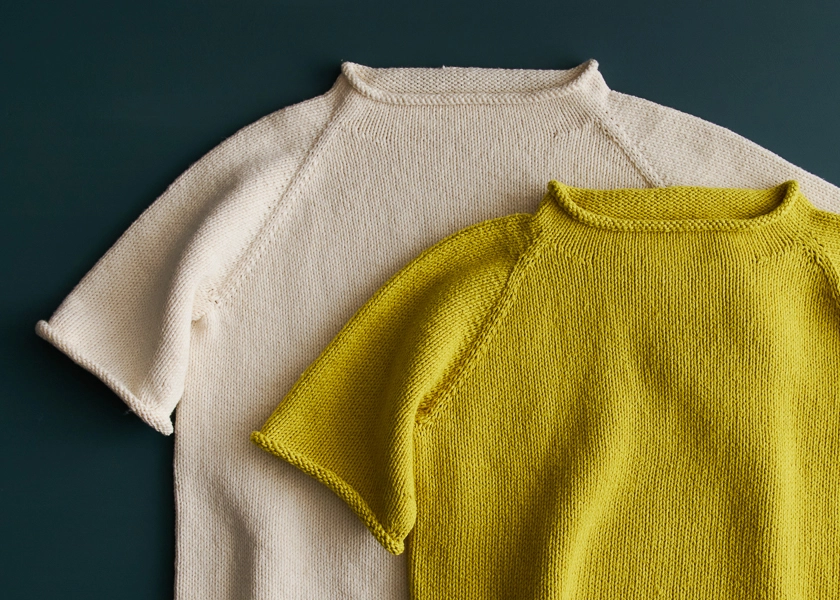
Learn About June Worsted + All Our Beautiful Yarns
This project is the perfect mix of cool, cozy, and soft, thanks to our June Worsted yarn! Made with a mix of organically-grown cotton and Belgian linen, this worsted-weight yarn has the wonderfully soft and knit-able feeling of an animal-fiber yarn, but rest assured, it also has the cooling, vegan, and anti-allergen properties of a plant-based yarn. It’s also super beautiful, incredibly endearing, and machine washable, too… You will love it for everything from towels to garments to blankets!
More Knitting Patterns
- Be sure to explore our collection of (mostly free!) June Worsted knitting patterns and cast on!
More Worsted/Aran-Weight Yarns
- Shop our entire collection of worsted/aran-weight yarn (What does worsted-weight yarn mean, really? Our guide to worsted-weight yarn will answer your questions and more!)
- If you want to use a different yarn, be sure to take the time to get the correct gauge. Need help? Check our All About Gauge Tutorial, our Yarn Substitution article, and our Complete Guide To Yarn for lots of helpful information.
More Yarns With Similar Fiber
- Shop cotton yarn (What helps cotton keep its cool? Learn all about this soft, natural fiber in our guide to cotton yarn!)
- Shop linen yarn
- Shop plant-based yarn
- Shop machine washable yarn
Looking for more inspiration? Explore all of our knitting patterns (including tons of free knitting patterns) and knitting tutorials, buy one of our many knitting kits and yarn bundles, and shop for beautiful yarn. We have over 55 gorgeous natural fiber yarns in 1,000s of magnificent colors, designed to bring integrity, beauty, and joy to your next knitting project and only available at Purl Soho!



Can I make this a long sleeve sweater?
Hi Jane,
Absolutely, that’s a great idea! All you need to do is keep knitting the sleeves until they’re as long as you want. You may also want to add some decrease rows along the way so that the sleeves taper towards the wrists. Hope this helps!
All the best,
Lili
Please send me the download for the simple tee pattern
Thx
Hi Carole-Beth,
We’re glad you’re interested in this pattern! Just follow this link to purchase the Simple Tee pattern!
All the best,
Lili
Can you estimate how much more yarn would be needed for a long sleeved version?
Hi Marjorie,
Thanks for writing in! You’ll likely only need 1 more skein of June Worsted to make longer sleeves, but you may need 2 for the larger sizes!
All the best,
Lili
Can you please confirm that the off white sample shown in the pattern pdf is “Heirloom white” June Worsted? Many thanks
Hi Lisa,
Yes! We used the colors Greenfinch Yellow and Heirloom White for our samples of this pattern!
All the best,
Lili
hi – could you please provide some guidance on making this with the sleeves a bit shorter? is it as simple as just ending the sleeves sooner or are there implications for shaping? thanks!
Hi B,
Thanks for writing in! You already have the right idea–all you need to do is bind off the sleeve earlier. Depending on how short/long you want them to be, that may mean working any shaping that’s already written in the pattern, but just up until you bind off.
All the best,
Lili
I have a question about getting started. Directions indicate one should use 32- or 40-inch circulars “depending on size you are making.” I am making a size 43; which length circular should I use?
Thanks.
Anne
Hi Anne,
Thanks for writing in! Since you’re making size 43, you can use either 32- or 40-inch needles. The finished circumference of your project will be 43 inches, so that’s enough to fit around either needle length, and the stitches won’t be all that cramped on 32-inch needles. The choice is really up to you for that size in particular!
All the best,
Lili
I’m stuck on a gauge problem. I knit a gauge swatch on US #7 needles and have 19 stitches per 4 inches. However, I only get 23 stitches per row/round. How do I compensate for this discrepancy? Thank you for your advice.
Hi Angela,
Could you please let us know if you blocked your swatch as well? This could help us better visualize the needle size adjustment you need to make.
We will keep an eye out for your reply!
All the best,
Gavriella
Would you kindly let me know which techniques will be used? For example, is it a provisional cast on or regular cast one? Same for the bind off? I’m an advanced beginner and want to be ready to prepare for the challenges in advance. Many thanks
Hi Claudia,
Thank you for asking! For this pattern you will use a long tail cast on, a traditional bind off, german short rows and make 1 left and right increases. We’re also always happy to help walk you through any skills you may be unfamiliar with so please don’t hesitate to reach out to us!
All the best,
Gavriella
I am knitting the simple tee in size 43. On page 4 of the directions “size 43 only” there are no directions for body increases. The body stitch increases from 48 to 92 in 21 rounds. The raglan increases from 16 to 60 in 21 rounds. I am having difficulty calculating the number of rounds to reach total stitch count of 304. Than you for your help. Mary Jean
Hi Mary Jean,
Thanks for writing in! The stitch count for the body is increased at the raglan seams, just like for the sleeves! On the Raglan Increase Round, you will be working one increase on either side of each stitch marker, so 8 increases in total. 2 of these will increase the stitch count for the Right Sleeve, 2 will increase the Left Sleeve, 2 will increase the Front Body, and 2 the Back Body.
For size 43, you’ll be beginning with 128 stitches in total. Then you work 22 total Raglan Increase Rounds (the initial one, then 20 more times, and then once more after that), increasing by 176 stitches overall. That will bring your total stitch count to 304!
Hope this helps clarify things!
All the best,
Lili
Thank you so much.
Mary Jean
Hi! I just started the simple T pattern and need clarification on the shaping section and the correct order for the make double stitch. I’ve got the m1r and m1l down, then pattern says “2 times, then make double stitch. Then it gives stitch counts for right and left sleeve.
Do I m1r, stitch 2, m1l, make de and knit to next marker to repeat? Sorry if I’m making it too complicated.
Hi Brenda,
Happy to help clarify! You begin Short Row 1 by knitting to 1 stitch before the first raglan marker, and then you work the increase stitches on either side of that first marker. Then, you do the same thing again by knitting to 1 stitch before the second raglan marker and working the increase stitches on either side of that second marker. After that, you just knit 2 stitches and create the double stitch!
Let me know if that makes more sense now!
All the best,
Lili
Hello Lili,
I’m puzzled by how to complete Short Row 1. I made the double stitch, but there are no instructions about completing the round.
I feel as though I should complete Row 1 before starting Row 2.
Am I supposed to go right into purling Short Row 2?
Hi Meryll,
Short Row 1 ends right after you create the double stitch! After that you’ll be ready to begin working Short Row 2. Each short row is “short,” meaning that it does not extend all the way around to the end-of-round marker!
All the best,
Lili
I’m confused about this section as well. In short row 2 it says Purl to end of round. What is considered the end of the round?
The directions then say to slip the marker and then do the German short rows but the next marker I encounter is the raglan sleeve marker where I would be doing the short rows.
Can you clarify what “end of the round means” in short rows 2?
Hi Dawn,
I’m sorry to read that you’ve run into some trouble here, and I’m happy to help clarify!
You’re starting your first short row at the back, working across the back and front right raglan stitch markers (increasing outside the markers with one stitch buffer), and then creating a double stitch to turn. When you turn and work Short Row 2, you will be working back over the right shoulder again up to the beginning/end of round marker, slipping that marker, and working shaping at the left shoulder.
I hope this helps point you in the right direction. Please feel free to reach back out anytime!
All the best,
Hills
Wow Thank you for your quick response! I’m still a little confused. I have done short rows before so I get the concept.
If the starting marker is considered the back of the sweater, wouldn’t I be working the left shoulder in short row 1, not the right shoulder?
Then when I turn the work to purl after the double stitch, in short row 2, I am encountering those same markers. Do I slip those markers, go on to the beginning marker, slip that as well and then work the short row on the right shoulder?
The instructions only say purl to the end of round, slip marker- which marker? It’s really confusing to understand what “end of row” means in the context of short rows.
Thx for your help!
Hi Dawn,
I’m so sorry to read that you’re still running into a bit of trouble. I think I may see where the hiccup could be, and I’m happy to help!
Since this top is constructed to be knit from the top-down, if you start at the center back, you’ll first come across the Back Right and Front Right raglan markers. The garment will grow with the collar pointed towards the ground… I like to think of it as a reflection; so while it might seem like the left-hand side while working (and it is your left-hand side), it’s actually the right-hand side of the garment.
Please feel free to email us at [email protected] for further troubleshooting. You can also include a photo of your work so we can take a look. We’re eager to get you back on track, and we’ll keep an eye out for your email!
All the best,
Hills
Please disregard. I figured it out. I didn’t realize I was to slip all the markers to go to the end of the row. Thx
Hi Dawn,
I’m really glad to read that you got this sorted and are back on track. Great work!
Please feel free to reach back out anytime.
Kindly,
Hills
Can I knit this without doing the German short rows?
Hi Lindy,
You can definitely use warp and turn short rows instead if you’d like. You can also skip them altogether if you’d prefer but you will want to make sure you work in the increases that are included in the short row sections.
I hope this helps and happy making!
All the best,
Gavriella
Thank you Lili. I was afraid that was a really dumb question, and I was right. I just didn’t want to continue without making sure I was doing the right thing. I’ve ripped out way too many rows.
I appreciate your help!
Meryll
Hello,
Is it possible that on short rows on the wrong side m1R and m1L are exchanged?
Thank you
Hi Ana,
Thank you for writing in! You will always work the M1R before the marker and the M1L after the marker to be sure your increases are all orientated correctly along your raglan. I hope this helps!
Happy knitting,
Gavriella
I too am struggling with short row 1. I don’t repeat; just do twice, right? I have mastered the magic loop but this is my first time with this type of increase and the german short row technique. Maybe it will make more sense when I just do it but when knitting in the round how do I have a wrong side? Sorry to ask dumb questions but I continue to educate myself via Youtube !
Hi Ginny,
No worries, I’m here to help! Yes, on Short Row 1, you just do the bracketed segment ([Knit to 1 stitch before next marker, m1R, k1, slip marker (sm), k1, m1L]) two times before moving onto the next instruction in that row.
In answer to your other question, you’ll briefly be working flat for the short rows, so you will have right and wrong side rows. All the odd short rows are right side rows, and all the even numbered rows are wrong side rows, alternating just like regular flat knitting!
We have a wonderful tutorial on German short rows which should provide a useful demonstration of how they work. I’m also happy to chat more about this technique over Zoom, so if you’re interred in that, feel free to book a 1-On-1 Help appointment!
All the best,
Lili
I just started and finished short rows 1 & 2. My increases are correct for the back & sleeves but not the front. I’m knitting the small. The pattern says I should have 40 stitches front & back but have 40 back & 38 front. 98 total stitches when I should have 100. This is my second try, what am I missing?
Hi Sherry,
Thanks for reaching out about this! It sounds like you may just have missed a few increases along the way, but this should be very easy to fix without having to undo your work. All you need to do is work one more increase round, but only work increases in the front section of stitches. Once you’ve done that, your stitch count will be correct all around!
All the best,
Lili
Why does it seem like I’m only doing half of the raglan with the short rows. I’m working them as the pattern says but the front isn’t increasing, just short rows on the back.
Hi Sherry,
That’s a great observation! You will only increase on one side of the yoke on each short row. On Short Row 1 and all the other odd-numbered rows, you increase only at the first two stitch markers, and on Short Row 2 and the other even rows, you increase only at the other two stitch markers. Over the course of two short rows though, you’ll have completed all 8 raglan increases at every stitch marker!
All the best,
Lili
Thank-you for the help, I have it figured out and am now below the under arms working on the body! It’s looking great!
Thank-you for the help, I have it figured out and am now below the under arms working on the body! It’s looking great!
Is there a way to modify the pattern so that the sweater has a lower neck in the front?
Hi Debby,
Great question! The best way to achieve a lower neckline in this pattern is to work more short rows. I would recommend working the double stitches closer together (specifically, k1 after you resolve the previous double stitch instead of k2) so that you get a deeper slope!
The other thing you’ll need to keep in mind when making this sort of change is your overall stitch count. Since you’ll be working more raglan increases during the additional short rows, you’ll need to work fewer full increase rounds after completing the short rows. I’d recommend just counting your stitches every once in a while to make sure you end up with the correct stitch count for the yoke before moving ahead in the pattern!
All the best,
Lili
Thanks so much, Lili. That sounds a bit complicated – I don’t suppose you could write out the instructions for those of us who prefer a more rounded neckline – I am thinking of something rounded to probably just below the collarbone? I am not sure I understand the construction well enough to be able to calculate the changes myself, but I love all the other aspects of the sweater!
Hi Debby,
I’m afraid that rewriting this pattern is out of our wheelhouse at the moment, but I’m happy to help out if you decide to give this modification a try! I always recommend trying things out on a swatch beforehand, so that could be a good way for you to get started and so that you can better visualize how the constructions/short row shaping works.
All the best,
Lili
I am tall and will want to make the sweater longer. I will be knitting a size 47 1/4. I think I will want to add 2″ to the length. How many more skeins should I buy?
Thank you!
Hi Bonnie,
Thanks for writing in, and I can absolutely help you with that! Size 47 1/4 only requires a small amount of the 7th skein, so you should be able to add 2 inches without buying extra yarn. In case you want to get an 8th skein to be extra safe though, I wanted to let you know that we accept returns so you can send any unused skeins back to us for store credit!
All the best,
Lili
Thanks Lili!
Hi. I’m excited to get started on this sweater. Am I right that I can avoid magic loop and dpns for the sleeves if I use a 10 inch circular? Thanks!
Hi Nancy,
Yep, you can definitely use 10-inch circulars for the sleeves! The smallest circumference of the smallest size sleeve is 12 inches, so the stitches will definitely fit around 10-inch needles. You can even use 16-inch needles for sizes 55 1/2 and up!
All the best,
Lili
Hi. I’m confused about the section on dividing for the sleeves. I’ve only ever done this by casting on for the underarms in the same round as dividing. I’m not sure how to put the first 60 stitches on hold and then keep on knitting in the divide round. Do I just use the working yarn on the right needle that is now to the right of the held stitches and bring it around them to knit the unworked front stitches? thank you.
Hi Nancy,
That is a great question! So in this section, you are knitting as you are putting the sleeve stitches on hold meaning your working yarn is moving along the round with you. So you are first knitting the sleeve stitches and then moving those same just worked stitches onto a holder. That way your working yarn is at the front of your yoke ready to knit forward. You will then repeat the same steps for the other sleeve. I hope this helps but please let us know if you need further explantation and we’d be happy to help get you back on track another way.
All the best,
Gavriella
Hello,
This is where I am also confused. Do I knit until the right raglan marker, put my stitch holder on the 60 stitches for the sleeve and knit with the stitch marker in without dividing and then the same for the left?
I did this and got back to the right sleeve on what would be the back side and did the cast on stitches and got very confused on how I would then divide?
Or do I got all the way back to the beginning of the sleeves and divide right away?
Hi Aaron!
Thanks so much for writing in with your question! Great work so far on your Simple Tee! I can understand separating for sleeves can be a little tricky and I’m happy to help out.
You’ll knit to the marker, remove the marker, knit the sleeve stitches and then put those previous 60 knit stitches on a holder. Your yarn should be ready to knit across to the next marker, remove the marker, knit the sleeve stitches and put those on another holder, and knit again to the beginning of the round.
On your next round, you’ll knit all the way around your live stitches, cast-on for sleeves, and ignore your held stitches. So your separating for sleeves on both sides should be done in one round. Then you cast-on at both sleeves in the next round.
I hope this helps! Please feel free to reach out with any other questions you might have!
Happy knitting!
Hills
Im confused about this step. According to the instructions it says, knit to next marker, slip marker and then knit to next marker and take those previous 60 stitches onto stitch holder. However when i do that then the knitting yarn is on the holder and not on the needles so then what do I do. I think these instructions are con fusing.
Hi Cathy,
Thanks for reaching out about this! It sounds like you’re working this section correctly… You’re right that your working yarn will be attached to the stitches that you put on hold, which can feel a bit awkward, but it’ll resolve as soon as you knit the next stitch. When you place those previous 60 stitches on hold, let the holder rest in front of your needles. Then you’ll simply knit the next stitch on your left needle, and the working yarn will no longer be attached to the stitches on hold.
We hope this helps clarify, but please let us know if you have any other questions!
Kindly,
Allison
I just finished my simple tee, and I LOVE it! Now I’m wondering about making it in a warmer fiber–I also love Note. I know I’d need to do some adjusting for the difference in gauge after swatching, but I’m curious if you think once I adjust for that, it would be a good yarn choice in terms of structure/drape. What do you think? Thanks!
Hi Nancy,
Note would work perfectly for this pattern. Yes, as long as you are able to meet gauge, you will end up with a nice cozy sweater with the perfect drape.
Happy knitting!
Gavriella
Hi
I’m about to start my project and wondering about doing purl stitches- from what I understand if you are knitting the stockinette stitch on circular needles every row will be a knit row – what am I missing here?
Hi Soraya,
Thanks for asking! In order to knit stockinette flat, you must purl on the wrong side of your fabric and knit on the right side. You will need to purl at the beginning of this pattern in order to work the short row shaping but other than that you will be working stockinette in the round (knitting all stitches) for the majority of the project.
Happy knitting,
Gavriella
Happy knitting,
Gavriella
Hi Gabriella.
Thanks for your response. I’m still not clear. You start off the neckband knitting in the round for 2 inches. For this part you would be knitting all the stitches, right? You then continue to the yoke and place all the markers. At what point do you start knitting flat?
No worries at all! You will begin working flat for a short while in the SHAPE NECKLINE + YOKE section. So when the instructions switch from Rounds to Rows, you will be working flat.
Hi I just finished the sleeves and the T fits overall, but I want to make it longer. How do I pick up stitches in the body now that I’ve bound off? Is there a tutorial? I don’t want a midriff T shirt! Thank you
Hi Krista,
Wonderful question! You can pick up and knit into every bound off stitch, then join for working in the round and continue knitting until you’re happy with the length, then bind off again. Our Picking Up Stitches Tutorial shows you right at the top of the page how to pick up into a horizontal edge, which applies here. You should know that this route will leave you with a visible line along the pick-up round, even on the right side of the work. This could read like a hemline and maybe won’t bother you, but if you think it will, another option is to undo your bind-off round and put the live stitches back onto your needles so you can just keep knitting and bind off when you’re ready.
I hope this helps you get your Simple Tee right where you want it. It’s a wonderful sweater (I wear mine all the time!)… Please let us know how it goes!
Best,
Whitney
Hi,
Can I make this using Nigh Aran?
Gaby
Hi Gaby!
Thank you for your question! Yes, you can absolutely make this using Nigh Aran. What a wonderfully cozy version that will be! I’d definitely recommend knitting a quick gauge swatch first to make sure your measurements line up with the pattern and that you love the fabric you’re getting.
Happy knitting!
Megan
Hi! Can you recommend a different yarn with wool or a light-weight blend that may be easier to work with for a beginner-intermediate knitter? I plan to make this but I’ve never worked with cotton. Would love to purchase your yarn right now during your sale! Thanks.
Hi Alex!
Thank you for writing in! If you’d prefer to work with a wool or wool blend instead of cotton, that’s a great idea—those fibers tend to have a bit more elasticity and can feel easier to handle, especially for a beginner-intermediate knitter.
Two lovely options you might consider are Yonder (an alpaca and highland wool blend with a soft, rustic feel) or Daily Wool Worsted, which is smooth, forgiving, and very easy to knit with. Daily Wool is also superwash, so it’s machine washable, which can be a nice bonus!
If you go with a different yarn, just be sure to knit a gauge swatch and adjust your needle size as needed to match the pattern’s gauge. That will help ensure your finished piece comes out the right size.
Happy knitting!
Megan
Hi! Is this pattern only available in inches?
Hi Laman!
Thanks for reaching out! We don’t currently list metric sizes and measurements for any of our patterns, but this is something that is currently under consideration, so we really appreciate you bringing it up! The Simple Tee is, therefore, only available in inches at this time.
For now, it isn’t ideal, but we recommend using your favorite search engine’s conversion tools to convert a pattern from metric to US imperial. We like Google and typically type “convert inches to cm” into Google and a purpose-built calculator will appear. I’m sure you can find something similar if you prefer another search engine!
Apologies for the inconvenience in the meantime. We’re happy to help in other ways if needed!
Happy knitting!
Hills
Hello, I am getting ready to make the Simple Tee and I am a bit confused as to which size needles I will need. Do I need to get both the sz 6 & 7 circular and DP needles? I will be making size 38 3/4. Thank you.
Hi Mandi!
Thanks so much for writing in. I’m so excited you’re looking into the Simple Tee as your next project, and I’m happy to help.
If you want to use Magic Loop, you can stick with the 32″ or 40″ circulars (and skip the 16″ and DPNs). You will need both the size US 6 and the size US 7 for different parts of the pattern. For instance, the neckband is knit on the smaller needles while the yoke is knit on the larger needles.
I hope this helps, and happy knitting!
Hills
Hi,
I’m really struggling with the short rows (my first time doing these). It seems like I’m just going back and forth across one side. I have too many stitches for one sleeve and not enough for the other. Once you do the double stitch you’ve turned the work over and start going back the way you came, correct? Also, should I be ignoring the BOR marker for this part?
Hi Chelsea,
Thanks so much for reaching out. Great work so far! German short rows can be tricky to get the hang of, and I’m happy to help.
I would suggest taking a look at this tutorial on German Short Rows.It sounds like you’re on the right track, you should be turning and going back the way you came. German Short Rows allow you to work a section of your round flat in order to create shaping. It looks like you’re unlikely to encounter the BOR marker for your short rows, but please feel free to send a photo of your work to [email protected] (with a note describing the question) and we’d be happy to take a look. If you’re still running into trouble, please feel free to schedule a 1-on-1 Help session with us and we would be happy to work through it with you!
Happy knitting,
Hills
I live in Italy. I have purchased the pattern. Do you have any suggestions s for yarn available in italy/eu?
Thansk
Hi I,
Thanks so much for reaching out! I’m so happy to hear the Simple Tee sounds like a fun project for you.
I just wanted to let you know that we do ship to Italy and Europe as a whole! You can learn more about it on our FAQ page. If you’re looking for yarn produced in Italy, then I would recommend searching for a “worsted-aran weight, cotton linen blend, made in Italy” in your preferred search engine.
I hope this helps, and happy knitting!
Hills
ciao, ho acquistato il modello simple tee, ma sono in difficoltà nell’esecuzione, sono principiante.
ho iniziato il collo facendo i 5 cm di maglia rasata , ho suddiviso i marcapunti per il dietro, davanti e i raglan, però non riesco a capire come cominciare , sul ferro successivo, dove dovrei iniziare il lavoro , non so che punto devo fare prima della parentesi, devo iniziare il punto per il ferro accorciato? e poi inizio a lavorare a diritto come da spiegazione , faccio l’aumento sposto il marcapunti faccio un diritto e m1a poi si chiude la parentesi ed è scritto 2 volte .. cosa significa 2 volte , poi d2 , e dice creare doppia maglia ..
quindi devo fare un’altra maglia accorciata oltre alla prima ?
scusami ma sono alle prime armi . se tu potessi spiegarmi cosi poi posso partire con sicurezza. inoltre volevo chiederti se si lavora prima da un lato quindi la destra e poi sul lato sinistro?
ti ringrazio
Hi Rosanna,
Thank you so much for your question. I am so glad to hear you’re knitting the Simple Tee, and I’m happy to help.
I’ve rewritten the first row of the section “Shape Neckline + Yoke” for you below (with a bit of additional language to describe the pattern).
Row 1 starts by knitting one stitch before the marker, you will make one right leaning increase, k1, slip the raglan marker, k1, make one left leaning increase. We offer a helpful tutorial on these increases… Make 1 Right (m1R) + Make 1 Left (m1L). Still in Row 1, you will repeat the raglan increase again… knit to one stitch before the marker, make one right leaning increase, k1, slip the marker, k1, make one left leaning increase. Knit 2 stitches, and make a double stitch. The pattern then provides an updated stitch count for every size, yours will align with the size tee you have chosen to knit.
When you start Row 2, you will be purling back the direction you came on the wrong-side. At the end of this row, you will make another double stitch and turn back around again. This provides shaping at the neckline. For this section, you knit a small portion of the round, flat.
I hope this helps, and happy knitting!
Hello!
Is there are way to make the neckline in the front a little bit lower (scoopier?). Maybe by an inch or so? I will be knitting the fourth size 51.25.
Thank you so much!
Hi Keri,
Thanks so much for reaching out. I’m really glad to see you’re interested in working the Simple Tee. This sounds like a really interesting adaptation of the pattern!
Sadly, upon looking at the pattern, I don’t see a clear way to make this modification. I’d suggest researching “neckline modification knit patterns” to look more into this. You might consider the Top-Down Circular Yoke Pullover for a slightly lower neckline, or the Center Point Popover for a v-neck option (also in June Worsted).
I hope this helps, and please feel free to reach out with any other questions you might have!
Happy knitting,
Hills
I have never knitted a sweater or tee before — a lot of socks, scarves and hats — is this a good one to try my first one? Or are there better patterns for a beginner in sweaters? I thought I’d start by making one for me. Thank you!
Hi Patty,
Thanks so much for reaching out. I’m really glad to see the Simple Tee stood out to you…how exciting!
This could be a great project for a first-time garment knitter. It features a Long-Tail Cast on, M1L, M1R, k2tog.and shaping with German Short Rows. Sometimes these can be a little tricky to get the hang of… we offer a handy tutorial and are always available for questions here, through email at [email protected], and for 1-on-1 Help sessions.
We also often recommend the Summer Breeze Tank Top as a first garment project. This pattern features wrap-and-turn short rows, for which we also have a tutorial.
I hope this helps, and please don’t hesitate to reach out with any other questions. I hope you love your first garment!
Happy knitting,
Hills
Hello! When I am counting stitches, do I count a double stitch as two stitches? I am trying to make sure I have done my increases correctly. Thank you.
Hi Mandi,
Thanks so much for reaching out with your question! I’m so glad you’re working on the Simple Tee…and I’m happy to help!
The double stitch in German Short Rows does make an additional stitch which could be counted as its own stitch on that row. However, on the next row, the double stitch is combined with k2tog or p2tog (depending on the right-side or wrong-side row). You might also enjoy our handy tutorial on German Short Rows.
I hope this helps, and please feel free to reach out to us with any other questions you might have.
Happy knitting,
Hills
Sorry, I have another question, still trying to get my increases correct. I keep coming up short. Should I remove the very first place marker (marking the center back) when I knit the set up round? Or do I keep it and do the increases before and after it, like the other markers?
Thank you.
Hi Mandi,
Thanks so much for your reply. I’m sorry to hear you’re still running into trouble with your shaping rounds.
Your unique beginning of round marker should not be moved or treated as you do your raglan markers. The raglan markers create the seems you see on a raglan at the shoulders, 2 on the front and 2 on the back. Short rows aren’t really intended to add to your stitch count the way increases would, so I wonder if maybe I’m misunderstanding which portion of the pattern you are working through.
It can be a little tricky to visualize where the issue may be through words alone. I would recommend scheduling a 1-on-1 Help session…we would be very happy to help you get back on track! You are also welcome to send a photo of your work (with a little note about the concern) to [email protected] for us to take a look!
We’ll keep an eye out for your reply!
Hills
Hello! I tend to be a loose knitter and always have problems attaining gauge. So far, I knit a gauge swatch in June Worsted using size 6 needles (rather than size 7) and have 17 stitches after blocking. Based on experience, I think I will need to go down at least two more sizes (so size 4) to achieve 19 stitches. Two questions: assuming I am able to get the right gauge, do you foresee any problems knitting with such small needles? And, would it be possible to simply change the cast on number of stitches instead of trying to get the right gauge? I need to make the smallest size, so knitting a size or two down isn’t an option. Thank you!
Hi Lilli,
Thanks so much for reaching out! Great work knitting and blocking your gauge swatch!
The tension listed in the pattern is the most essential number to ensure a well fitted garment. So long as you can achieve that gauge, you can make safe estimations for the final size and drape of the resulting fabric. It’s pretty common for some knitters to need to go up or down multiple sizes to achieve the gauge listed in a pattern.
The only complication I could see is that sometimes your hands cramp or get sore more with smaller needles, especially with larger projects. I’d suggest using a pillow to support your project as you work and take frequent hand stretch breaks! I wouldn’t recommend changing the number of stitches as that could have further unforeseen mathematic complications down the line…
If you’re still running into trouble, please feel free to email us a photo of your swatch (with a ruler, please!) and we can take a look. We also offer 1-On-1 Help sessions if you’d like to brainstorm this together in real-time.
I hope this helps, and please feel free to reach out with any other questions you might have!
Happy knitting,
Hills
If i want to make this pattern using cattail silk, chest width 120 cm, how many cast on that i should do? I have bought the pattern
Hi Lily,
Thank you so much for reaching out! I’m really happy to see that the Simple Tee stood out to you.
This pattern is worked in June Worsted, a worsted-weight yarn at 19 stitches per 4 inches, or 4.75 stitches per inch. Cattail Silk is a fingering-weight yarn that knits up to 6-7.5 stitches per inch. Two strands of fingering-weight yarn held together will work up to DK weight. Two strands of DK-weight will work up to worsted-aran weight. In order to achieve the tension listed in the pattern, you may need to hold Cattail Silk quadrupled (4 strands). You can read more about yarn substitution in our article “Yarn Substitution Made Easy.”
I would always recommend knitting a gauge swatch (and blocking it…) to make sure you reach the gauge in the pattern. Otherwise, your finished garment may turn out a different size than our sample. This also helps ensure you love the fabric you’re knitting! Once you’ve knit and blocked your gauge swatch, you can use your stitches per inch to determine how many stitches to cast on when substituting yarns.
Cattail Silk is a beautiful mulberry silk. It works wonderfully in Julie Hoover for Purl Soho’s Arie Top and would also make a lovely Lightweight Raglan Pullover.
Please feel free to reach back out with follow-up questions!
Happy knitting,
Hills
You
Hello. I am knitting on my sweater in size 43. It is very curious to me that the Body is to be knit 11 inches from underarms. As I am working, this seems like it will be too long. Also, how is it that the length to knit from the underarms gets shorter as the sweater gets bigger? Thank you.
Hi Michelle,
Thanks so much for reaching out with this fantastic question!
I’ve taken a look at the pattern and can confirm that knitting 11 inches from the underarm is correct. I’d encourage you to try it on as you knit! You’ll be able to find the perfect length for you most easily this way. A pattern is a lot like a recipe, and we definitely encourage you to be creative!
If you check out the schematic, you’ll see that the armholes are deeper as the sizes get larger. Torsos, and adult bodies in general, don’t tend to grow at the same rate lengthwise as they do widthwise… that means that when grading a pattern, you may find a shorter body length in the larger sizes to allow for the deeper armhole while maintaining the same fit for the garment. This is one of the beauties of grading, and the measurements throughout the garment aren’t always directly proportional in the way you might think upon first glance.
I hope this is helpful! Please feel free to circle back with any follow-up questions!
Happy knitting,
Hills
Hi, I am making size 38-3/4 and finished the three sets of raglan and sleeve increases and am ready to start the 15 raglan increase rounds. The pattern says to increase 8 times and then do a knit round. Does the “knit round” just complete the raglan round or do we finish off the raglan round and then do a second full knit round? Please let me know.
Thank you.
Hi Janice,
Thank you so much for reaching out with your question. Great work so far on your Simple Tee! It can sometimes be a little tricky to read the increase rounds, and I’m happy to help.
You’re headed in the right direction! The instruction for “knit to the end of the round” isn’t indicating to complete the raglan round. Instead, it’s intended for you to work a new round in stockinette. At the point where you are about to repeat the Raglan Increase Round and the Knit Round 14 more times, you will work one full increase round followed by one complete round in knit stitch, fourteen more times. Each row will begin and end at the unique end-of-round marker. You’ll work from marker to marker on each round. You might enjoy our tutorial on Magic Loop!
I hope this is helpful! Please feel free to reach out with any other questions you might have!
Kindly,
Hill
Hello, I have purchased the Simple Tee pattern and am looking to purchase the June Worsted Greenfinch Yellow yarn. If I am a 38″ chest measurement what size would you reccomend and how many skeins would I need to purchase? Thank you Ree
Hi Ree,
Thank you so much for reaching out! I’m really glad to see you’re gearing up for the Simple Tee, and I’m happy to help.
You could make size 2 or 3, depending on how much ease you would like. Size 2 would give you 5 inches of ease, while size 3 would give you about 9.25 inches of ease. To closely mimic the amount of ease in the sample our model is wearing, you would want to choose size 2.
For size 2, you would need 930 yards, or 6 skeins of June Worsted. For size 3, you would need 1,010 yards or 7 skeins of June Worsted. You can typically find these materials at the beginning of the pattern. You might also enjoy reading more about selecting sizes in our article entitled Understanding Ease + Selecting Your Size.
I hope this is helpful! Please feel free to reach out anytime, and I hope you love your Simple Tee project!
Happy knitting,
Hills
Thank you Hills, I have purchased the yarn and can’t wait to start my project!
Hello, I am knitting the Simple Tee, trying to figure out gage. It says 19 stitches and 27 rounds in stockinette = 4 inches. How many stitches per inch should I have?
Thanks
Hi Ree,
Thanks so much for asking about gauge! We’re always glad to hear that knitters are checking their gauge before getting started.
We recommend measuring gauge over four inches to get a more accurate measurement. None of us has perfectly even tension, so taking an average over four inches helps to account for any unevenness. Check out our All About Gauge Tutorial to learn all about best practices for gauge!
In this pattern, the goal is about 4.75 stitches across per inch and 6.75 rows or rounds per inch.
I hope this helps! Please let us know if you have any other questions!
Kindly,
Andrea
This is the first garment I’ve ever knitted, and I’m so excited and proud of how it’s turning out! It has truly been the perfect project—a little challenging at times, but with plenty of simple, enjoyable knitting mixed in.
I’m now at the point where I need to bind off the bottom, and I was hoping for some advice. Would you recommend using a stretchy bind-off, or do you think a basic bind-off would work best?
Thank you so much for your help!
Hi Susan,
We’re so happy to hear that you’re enjoying knitting your first garment; what an accomplishment! The Simple Tee pattern calls for a Basic Bind-off, so there’s nothing fancy to do here. A tip to make sure you’re not binding off too tightly is to use a larger needle to ensure a relaxed bind off edge.
Happy knitting!
Mia
Please help! I finished Short Row 1 (right side) & have the right number of stitches but can’t figure out how to do Short Row 2 (wrong side). If I turn the sweater to the wrong side, I’ll be going back over the right back raglan and will never get to the left sleeve to even out the stitch count. I need a video or step-by-step photos about moving from Short Row 1 to Short Row 2 on this sweater. (There are no 1-on-1 appointments available anytime.)
Hi Laura,
I’m so sorry to read that you’ve run into a bit of trouble with your short rows. Short rows can sometimes be a little tricky, and I’m happy to help!
It looks like, for the set-up row, you’re starting at the center of the back, working across the back, and placing a marker for the right back raglan. You’ll knit across the front, placing the front raglan markers. Then knit to the end of the round (at the center back). Your first short row has you work past the right back and right front raglan markers, then working a double stitch to set up to turn.
Your next short row has you turn and purl back past the right front and back markers until you’re back at the left back raglan marker. You’ll work past the raglan markers again, and p2 before making your next double stitch, to turn back around the other way. It looks like you’re working each shoulder and adding shaping to the front of the garment.
I hope this helps, but if you’re still running into trouble, please feel free to email us at [email protected]. We’d be happy to set up a custom 1-on-1 Help session with you. (They’re currently on hold on the website as we transition part of our web services, and I’m sorry for the inconvenience!)
All the best,
Hills
Like some other folks, I’m having some difficulty with the yoke shaping. In short row four, it says to purl to the end of the round, slip marker and then pearl to one stitch before the next marker, M1 R purl wise, P1, SM, P1, M1 L purl wise two times, and then purl to the double stitch. However, after I complete the sequence once I encounter a double stitch. How do I treat it? Or have I made an error? Thank you for your help.
Hi Rani,
I’m sorry to read that you’re running into a bit of trouble with your Yoke’s short rows. Short rows can be a bit tricky, and I’m happy to help clarify.
You haven’t made an error! Once you reach the double stitches, you should resolve them according to the side you’re working. We list this under special instructions:
You can watch this in action in our super handy German Short Rows tutorial.
I hope this helps, but if you’re still running into trouble, please feel free to email us at [email protected].
All the best,
Hills