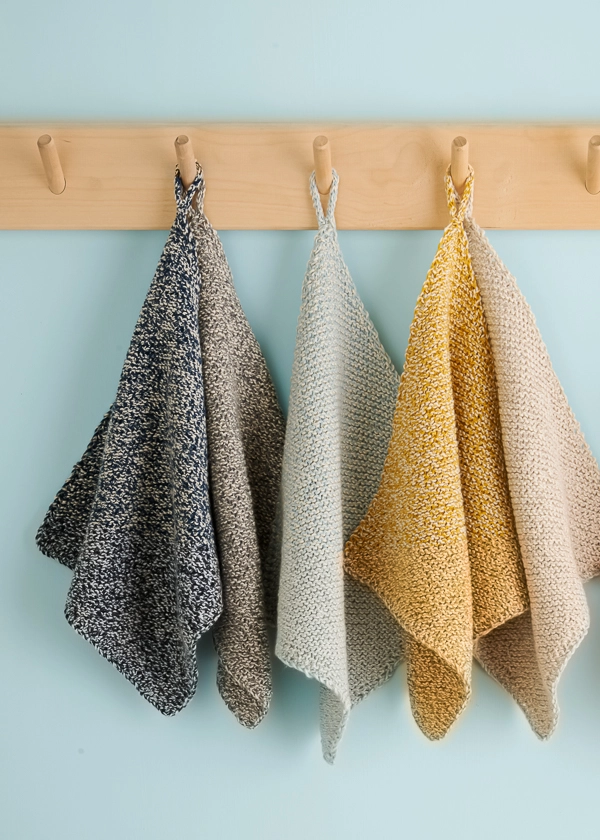
Corner-To-Corner Washcloth
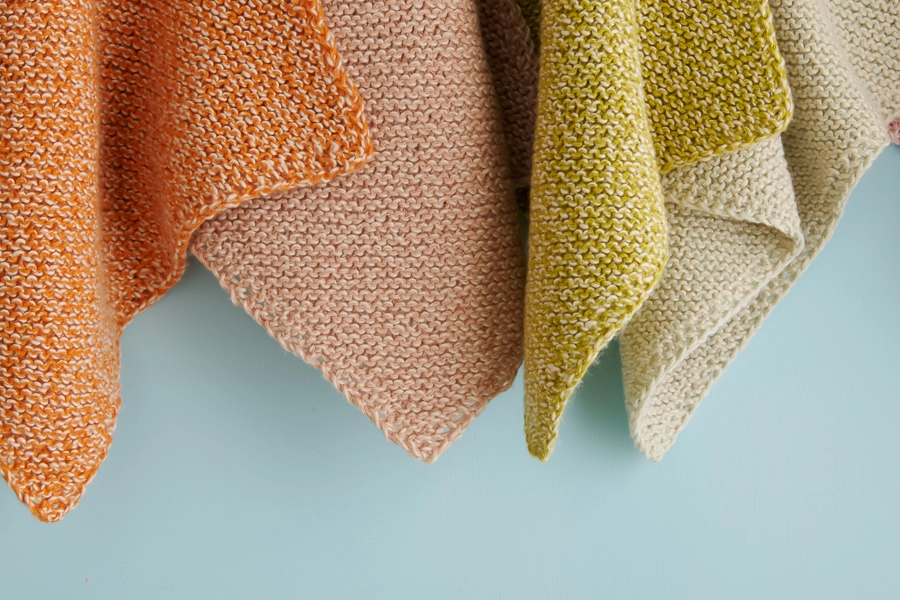
We’re head over (squeaky-clean) heels for our Corner-To-Corner Washcloths! One-of-a-kind and cheerful, yes, but behind the joy of these little beauties is the enduring satisfaction that you made them with your own two hands.
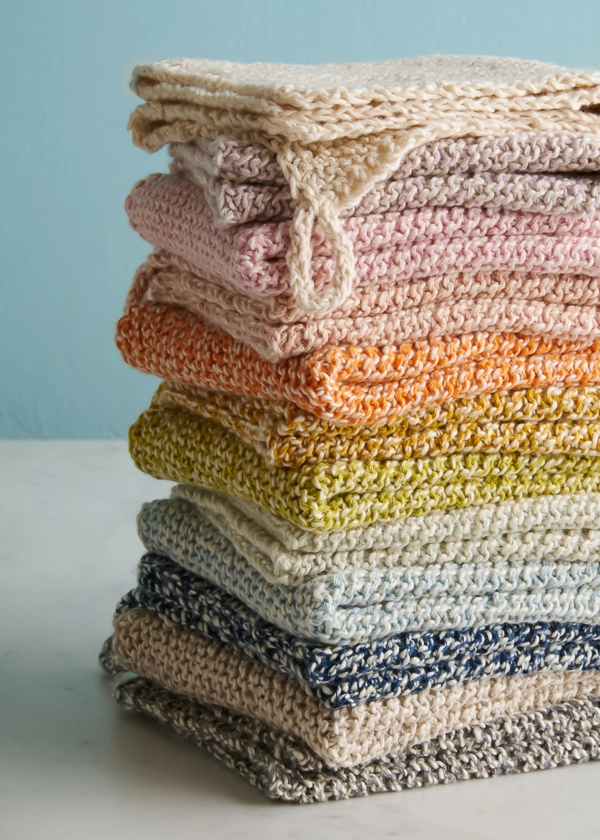
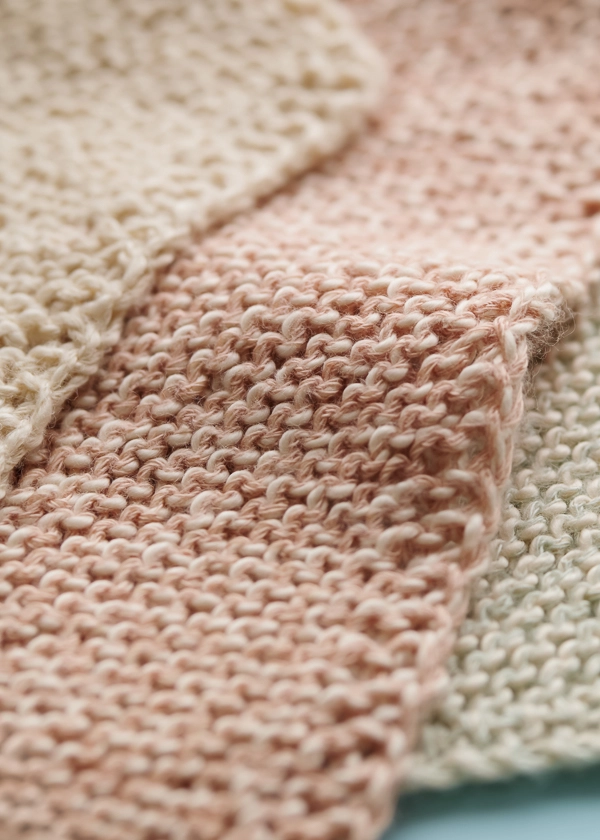
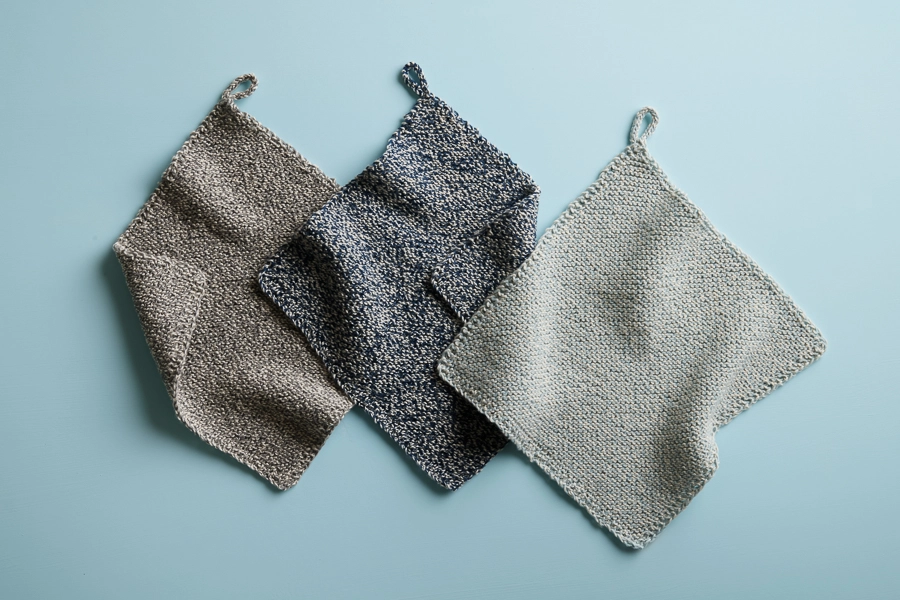
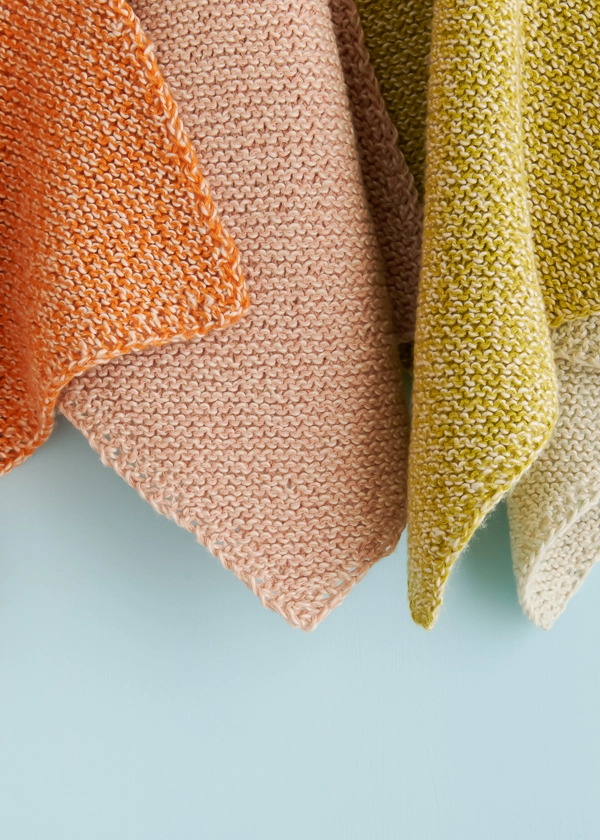
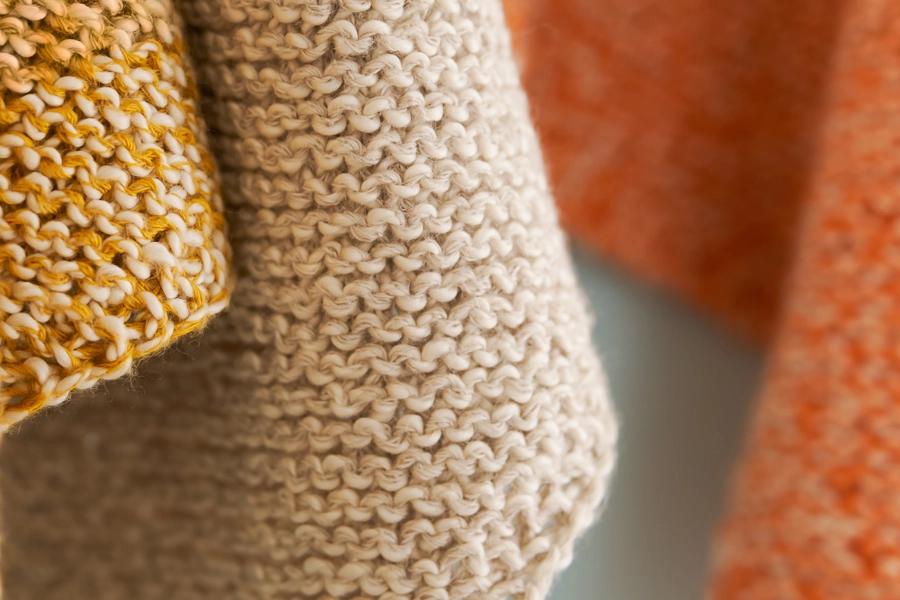
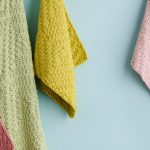
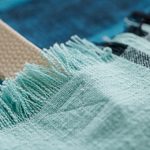
Each simple square is knit on the bias in squishy garter stitch, the perfect texture for all your sudsing and scrubbing.

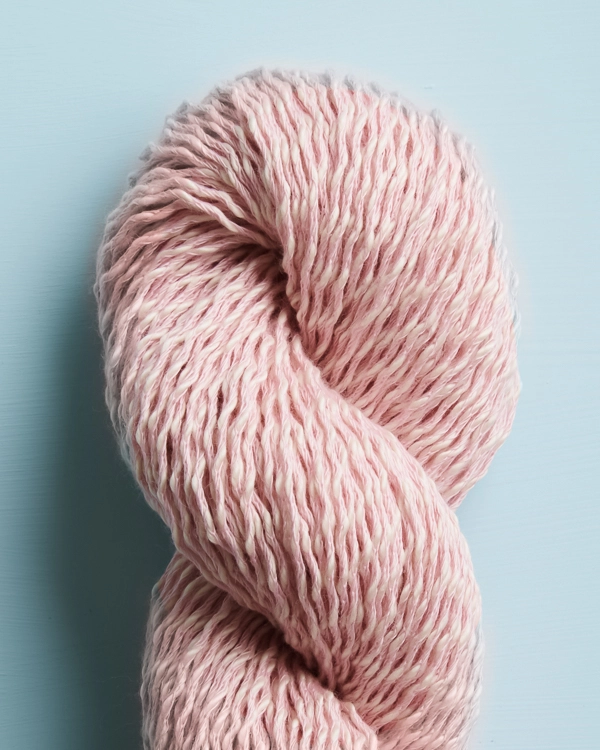
One hundred percent Peruvian Pima cotton, our Picnic Cotton is a light and airy fingering-weight yarn. It knits up into a quick-drying fabric that is so soft, you’ll want to squish it up against your face … Exactly what you want in a washcloth!
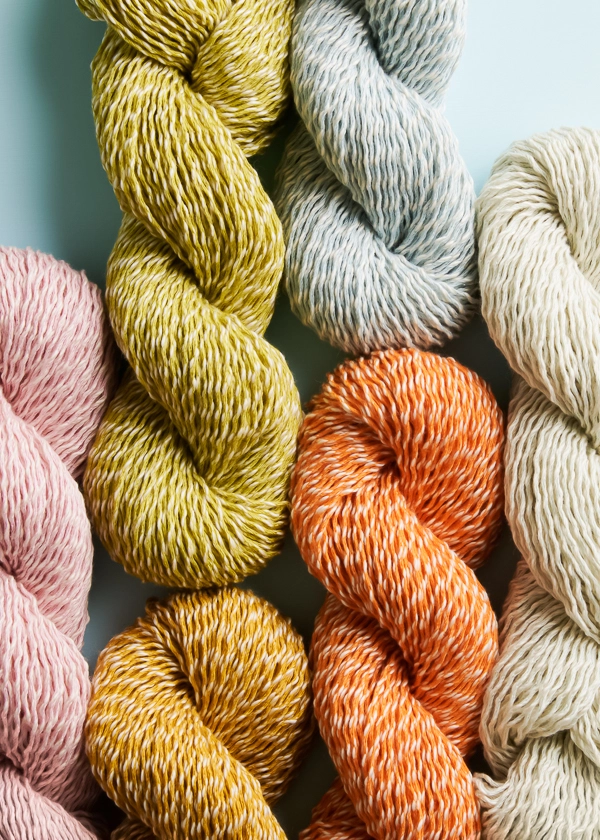
Picnic Cotton’s two-color structure has a fluffy (super-duper-soft) white core wrapped in, colored threads, which creates a distinctive marled fabric and a very un-ho-hum washcloth.
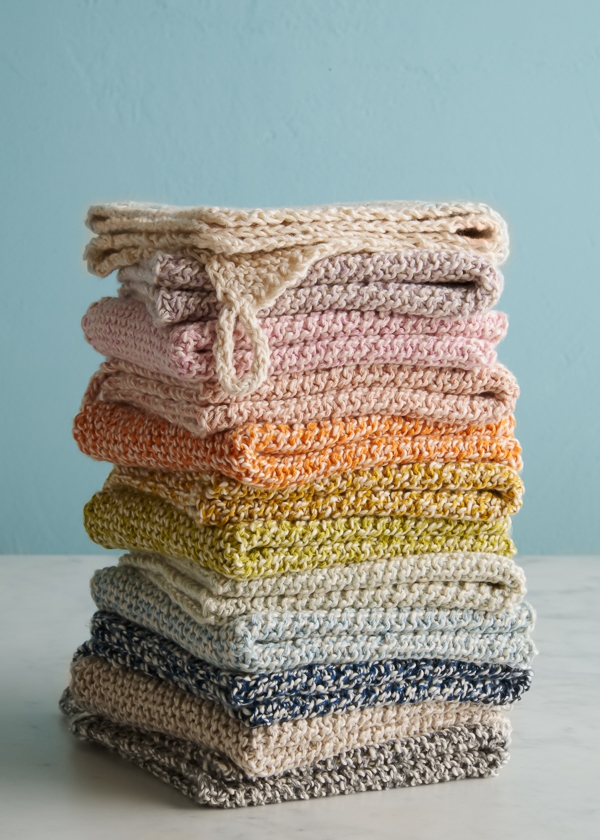
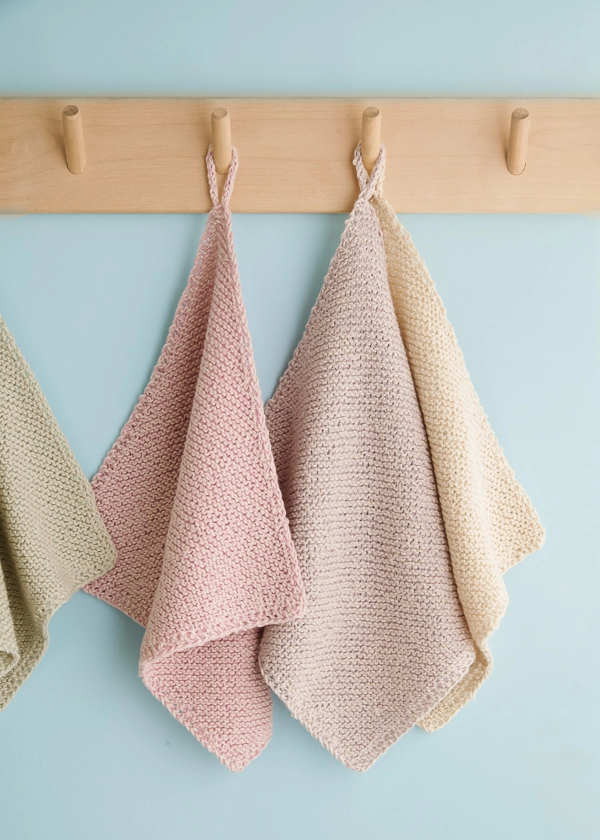
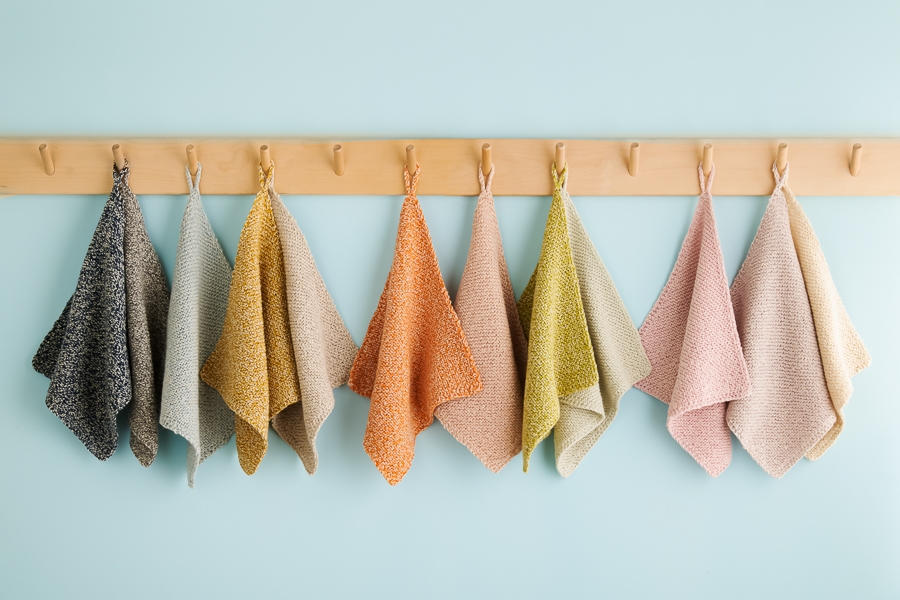
Best of all? It only takes one 50-gram skein of Picnic Cotton to make one! Or knit up a set… We’ve put together a selection of lovely Corner-To-Corner Washcloth Bundles, so you can pick a three-color palette, or really soak in the beauty (like we did!) and make a set of all twelve colors!
Designed for Purl Soho by Jennifer Hoverson Jahnke.
Share your progress and connect with the community by tagging your pics with #PurlSoho, #PurlSohoBusyHands, #PurlSohoCornerToCornerWashcloth, and #PurlSohoPicnicCotton. We can’t wait to see what you make!
Materials

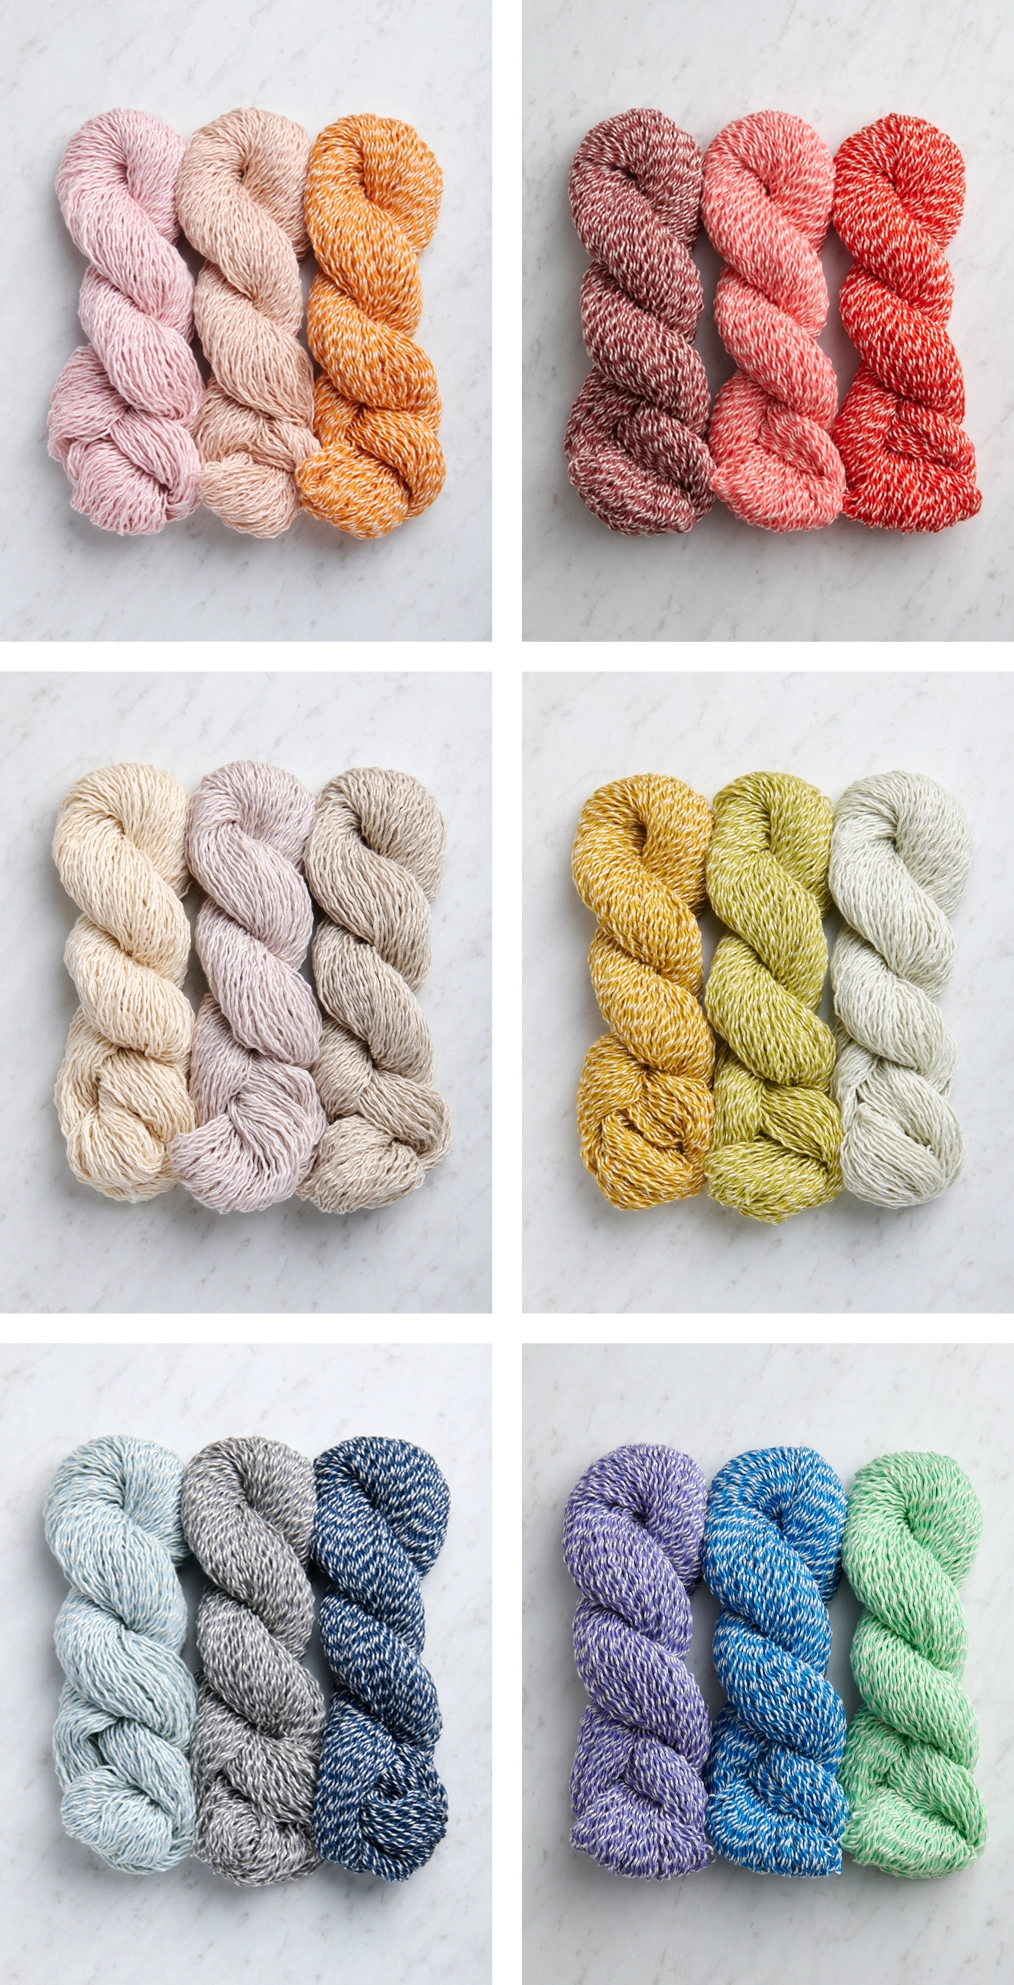
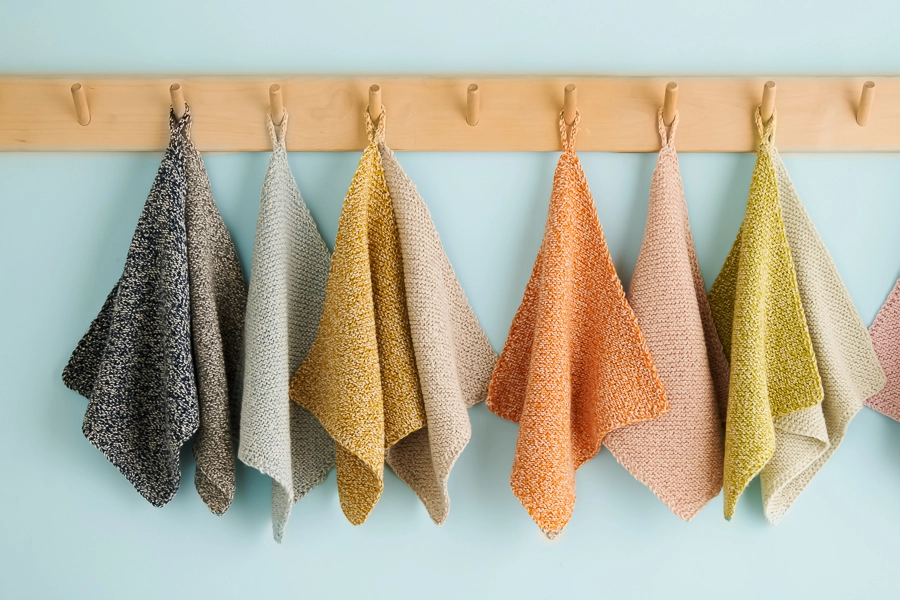
Our Corner-To-Corner Washcloth Bundle comes in a Twelve Colors Bundle, shown up top, which makes a dozen washcloths, or in 3-skein bundles to make a set of three. Choose from six palettes, shown above: Sunrise, Rhubarb, Morning Fog, Field + Sky, Salt Water, and Lakeside.
To make just one Corner-To-Corner Washcloth, you’ll need…
- 1 skein of Purl Soho’s Picnic Cotton, 100% Peruvian Pima cotton. Each skein is 164 yards/ 50 grams; approximately 134 yards required.
No matter how many washcloths you’re making, you’ll also need…
- US 4 (3.5 mm) straight or circular needles
- If using straight needles: Two US 4 double pointed needles, for I-Cord
GAUGE
26 stitches and 52 rows (or 26 “ridges”) = 4 inches in garter stitch
SIZE
Finished Dimensions: Approximately 9½ inches square
NOTE
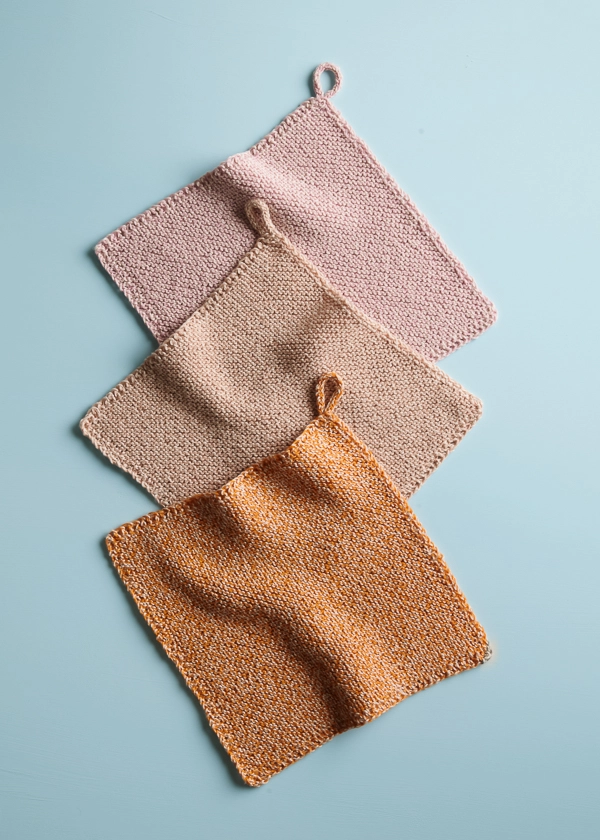
You may find that your washcloth comes out looking a bit more kite-shaped than square. Not to worry, this is normal and a result of the knit 2 together decreases being slightly looser than the knit front and back increases. A good wet-block or steam will do the trick!
PATTERN
Cast on 3 stitches. We used a basic Long Tail Cast On.
INCREASE
Increase Row: Slip 1 purlwise with yarn in front (wyif), knit front and back (kfb), knit to end of row. [1 stitch increased]
Repeat Increase Row until there are 87 stitches.
DECREASE
Decrease Row: Slip 1 purlwise wyif, knit 2 together (k2tog), knit to end of row. [1 stitch decreased]
Repeat Decrease Row until 3 stitches remain.
MAKE I-CORD
With remaining 3 stitches, work an I-Cord for 3 inches, working the last row as follows…
Bind-Off Row: K1, k2tog, pass first stitch over second stitch and off needle.
Cut yarn, leaving an 8-inch tail and pull through remaining stitch.
Thread the tail onto a tapestry needle. Make a loop with the I-cord and weave the tail into the fabric of the washcloth at the base of the I-cord, then weave it through the looped I-cord, and back into the fabric of the washcloth.
Weave in the remaining ends and block as desired.


Hi, What is your easiest, beginner friendly wash cloth pattern? And is the picnic cotton a good yarn choice for a beginner?
Hi Jeanne,
Thank you for reaching out. I’d be happy to recommend a few beginner-friendly washcloth patterns!
The first project that comes to mind is the pattern page you are on now! The Corner-to-Corner Washcloths are constructed by increasing stitches (kfb), then decreasing (k2tog) stitches to knit the cloth on a bias. This project uses our Picnic Cotton yarn, which would be perfect for a beginner.
The next project is our Simple Stripe Washcloths. This project is knit in garter stitch using Field Linen, but Picnic Cotton could absolutely work for this since the yarns are similar in weight.
Finally, I recommend checking out the Close Knit Washcloths. This project features both knit and slipped stitches, that create a ribbed pattern in the fabric. We made these in Cotton Pure, which would also be a lovely yarn to knit with as a beginner!
I hope these recommendations are helpful! Please let us know if you have any other questions.
All the best,
Carly
Hi….I knit one side with a 4 mm needle and the other with a 3.5mm
help’s with the kite shape, make’s it squarer
Hello I hope someone would be able to help me with the pattern. When I slip one purl wyif do I make 1 stitch or 2?
I understand that making the next stitch front and back I increase also. It just I am kind of confuse when I arrive at the end of the row should I stitch both both or not. Am I increasing one stitch per row or two?
Thanks for your help
Isabelle
Hi Isabelle!
Thank you for your question. When you work an increase row, you will be adding one extra stitch per row. This new stitch comes from working into the front and back of the second stich in the row, resulting in two stitches where there used to be one. Then, you will knit to the end of the row as usual, knitting each stitch as you come to it!
I hope this helps!
All the best,
Margaret
Thank you so much for the help I think I over complicated myself with the wyif. I guess I slip purlwise with the yarn I front THEN put it behind, to knit front and back the second stitch.
You are very welcome, Isabelle! That is absolutely correct.
All the best,
Margaret
When I do the slip1 purl on the decreases, it is very loose and sloppy compared the increases. How do I get the edge to look neater?
Hi Mary,
Thanks for reaching out, though I’m sorry to hear that your decrease edge isn’t looking as expected! I’d recommend paying careful attention to your tension as you work the decrease rows. You may have to tug on the yarn more than usual as you work the k2tog after the slip 1 purl wise wyif. If you’re finding that this still leaves a messier edge than normal, feel free to send along a photo of your work to customerservice@purlsoho.com. We’ll be able to troubleshoot further once we can visualize the issue!
All the best,
Lili
These look really nice but a bit small. If I use 1.5 skeins I feel like I’d have the size I want. Can you suggest pattern changes?
Hi Val,
Thanks for writing in! To make the size of these washcloths larger, all you would need to do is continue the INCREASE section until the sides are as long as you’d like. Then, just work the DECREASE section until 3 stitches remain. Hope this helps!
All the best,
Lili
Hi, what a great pattern. I am thinking of doing a rectangle baby blanket using this pattern. Could you let me know how I would knit the straight sides where I would be decreasing and increasing at the same time? Thank you so much for your help. Stefanie
Hi Stefanie,
That’s a great idea! We actually have a pattern that’s essentially what you’re envisioning, so you can get a great sense of how to knit a rectangle on the bias from taking a look at that. I’ve linked it here. Basically, you can follow the instructions in the CONTINUE section until your blanket is as long as you want. In this section, you work an increase at the beginning of each right side row and also a decrease at the end of the same row. Hope this gives you an idea!
All the best,
Lili
Thank you so much!
I love this! I would want to make it 7inch square for a smaller cloth. How would I do that? Smaller dries faster and accommodates my small hand better. Thank you in advance
Hi Claudia,
Thanks for writing in! To make your washcloth a 7 x 7″ square, you would just need to do the increase rows until the edges of your work measure 7″. You would knit until you have around 64 stitches on your needles to get to this point, so I recommend having a tape measure or ruler on hand to keep an eye on how long your edges are getting. I hope this helps!
All the best,
Cat
Hi—
I’m a beginner knitter and just finishing up a Purl Soho beginner baby blanket. I’d like to try this as a new pattern, but am lost with how to approach this one. Can you guide me to resources that illustrate how to:
– Slip 1 purlwise with yarn in front (wyif)
– knit front and back (kfb), knit to end of row.
– knit 2 together (k2tog)
– increase and decrease stitches
Thank you!
Hi Jen,
Thanks for reaching out. I’d be happy to help out with these techniques! You can find our tutorials for the increase and decrease stitches used in this pattern at the links below:
Knit Front and Back (kfb)
Knit 2 Together (k2tog)
We do not have a tutorial for slipped stitches, so I’ll describe how to do that here instead: To slip a stitch, all you do is transfer it from the left needle to the right needle without knitting or purling it. “Purlwise” refers to the style in which you transfer it–you’ll insert your needle into the stitch as if you were going to purl it, but instead of purling it, you’ll just transfer it. “Wyif” refers to the position of the working yarn while you’re slipping the stitch–in this case, you’ll just need to make sure the yarn is in front of your work (like it would be for purling) as you slip the stitch.
I hope this helps clarify things, and please let me know if you have any other questions!
All the best,
Lili
Hello! Do you think knitting 2 through back loops might help straighten out the kite shape on the second half?
Hi Marybeth,
That’s an interesting idea! We haven’t tried it ourselves, but I can see how it definitely might help. If you give this a try, please let us know how it turns out!
All the best,
Lili
It worked! The K2Tog through the back loops were a little tough to finagle but the end product was pretty squared up! I would love to figure out how to put the loop in the middle of a side…I think that would help keep the shape too.
That’s so great to hear!!! I think you could get the loop in the middle of a side by picking up 3 stitches from that spot, knitting the i-cord there, and then attaching it in the same place. There will be some extra ends to weave in, but it’ll work!
All the best,
Lili
Why not change the pattern for the second half to correct the kite shape?
Hi Linda,
Thanks for writing in. Blocking the washcloth after finishing knitting will correct the kite shape!
All the best,
Lili
Will it go back to the right shape after the owner puts it through the wash?
Hi Linda,
If it gets misshapen after washing, we recommend laying it flat to dry in the correct dimensions!
All the best,
Lili
Does the Picnic Cotton shrink if washed in a washing machine and machine dried?
Hi Sherry,
Thanks for reaching out! Picnic Cotton will probably shrink a little bit. I’d recommend washing and drying your gauge swatch to get a very accurate sense of how much shrinkage there will be! Then, you can choose your needle size accordingly. Hope this helps!
All the best,
Lili
Marybeth, are the edges the same on all 4 sides when you knit 2 in back?
What a lovely pattern. Thank you so much! My question is, will this pattern be posted to Ravelry? I would love to add my projects!
P.S. I find that working the k2tog tbl is great advice!
Hi Ellen,
Thanks for your kind words! This pattern is on Ravelry, and you can find the page right here. Hope this helps!
All the best,
Lili
Can I use larger needles with this pattern? I’m a beginner and finding the 3.5mm really difficult with this cotton yarn. There’s no stretch or give to it and I’m struggling to pick up the stitches.
Hi Jessica,
Thanks for writing in! You can absolutely use a larger needle size if that is more comfortable for you. I just want to mention that this could mean you need slightly more yarn so it would be a good idea to pick up an extra skein to ensure you can finish your projects.
One thing to note about working with cotton is that it generally doesn’t have much give or stretch to it as it is a natural plant fiber. These yarns tend to be a little tougher to work with but the results are well worth it in my opinion. I hope this helps but please let me know if you have any more questions!
Happy Knitting,
Gavriella