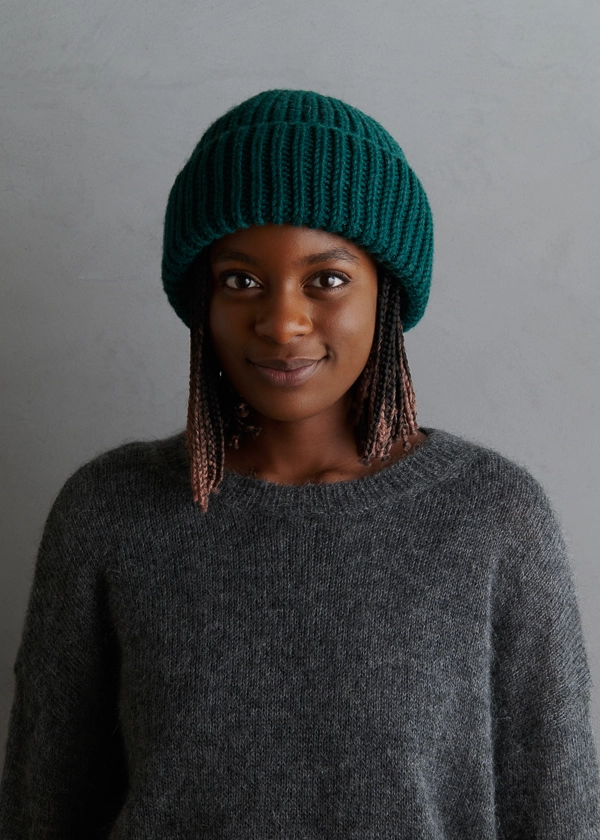
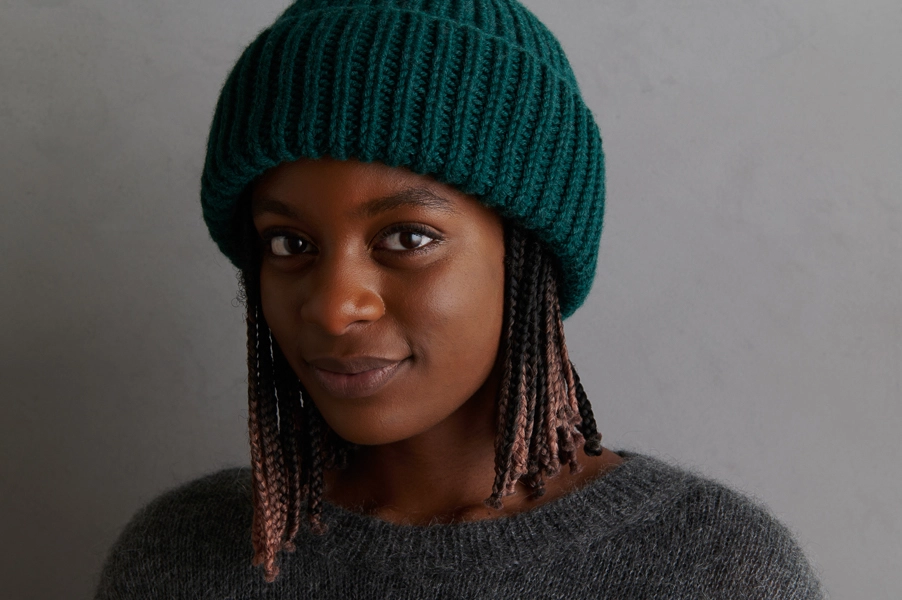
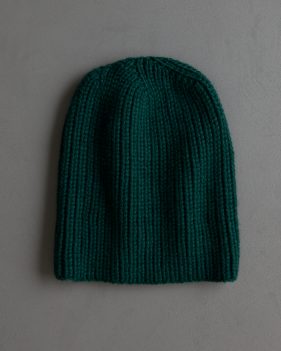
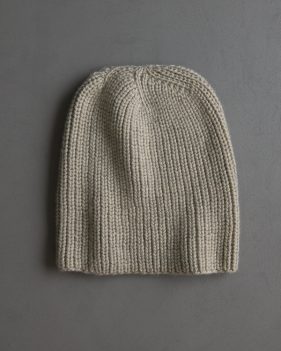
Soft + Cushy Hat
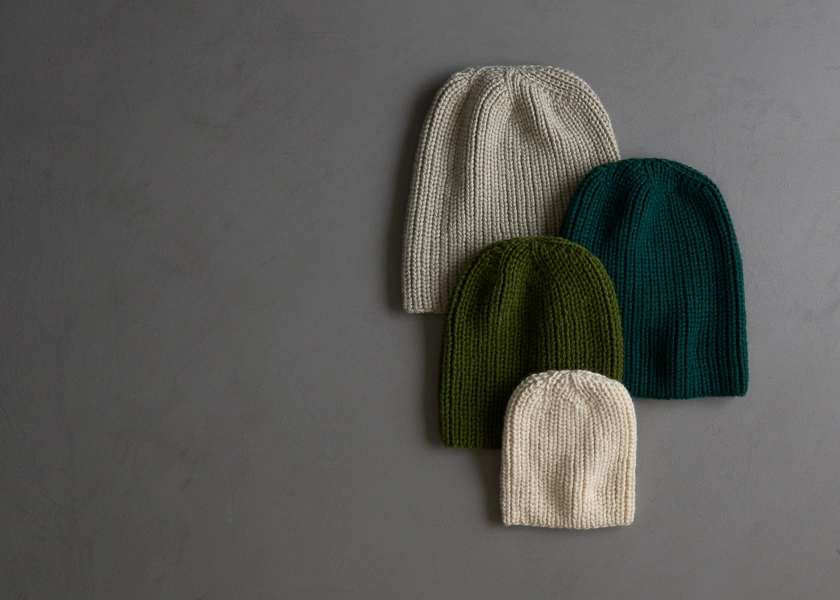
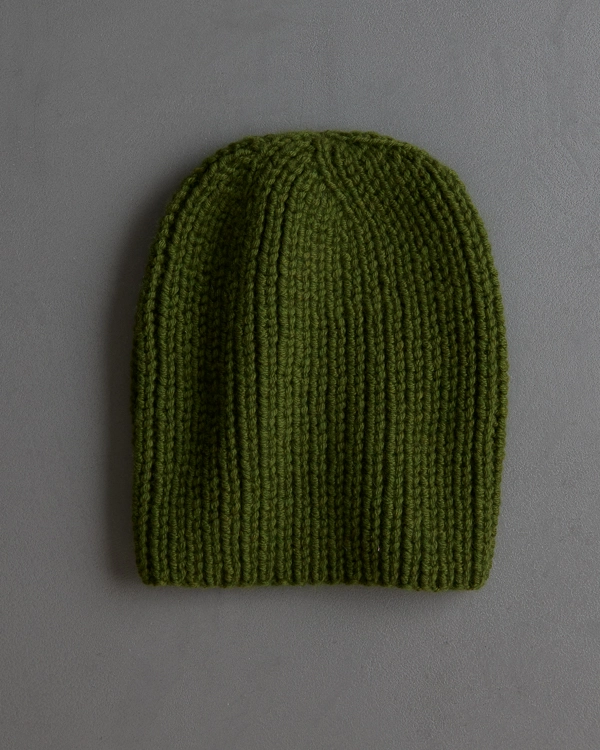
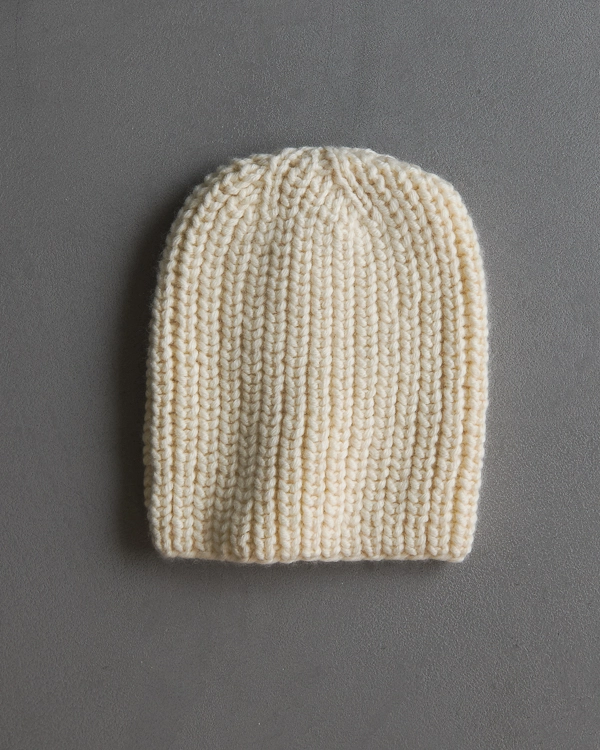
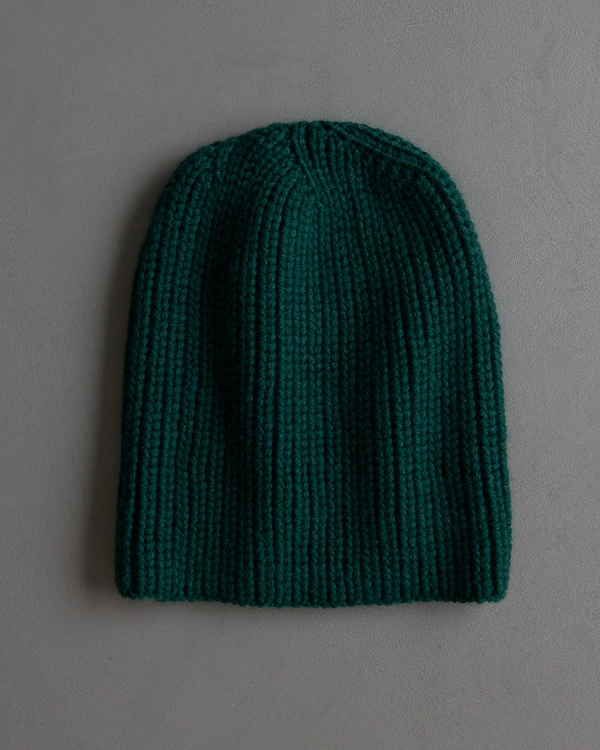
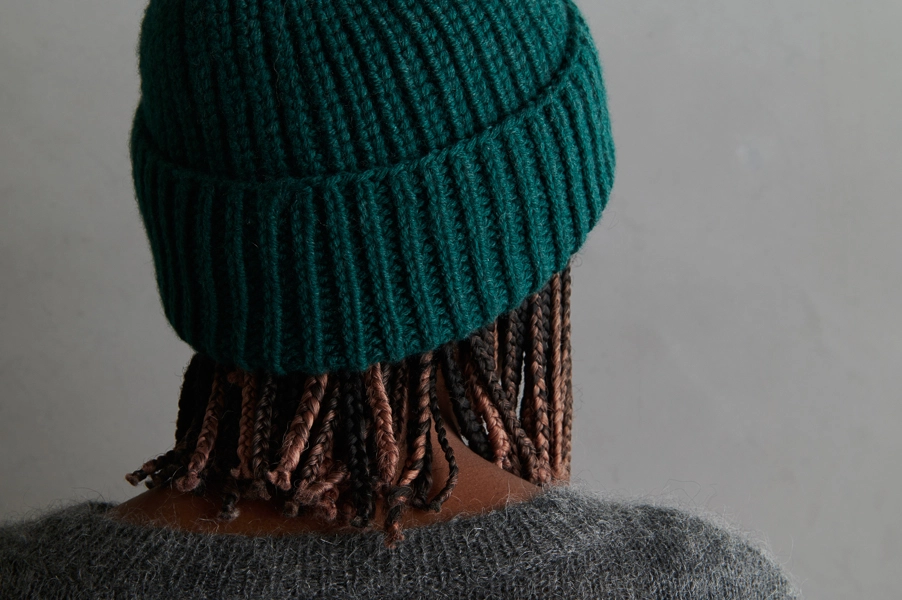
It may look like good ol’ knit one, purl one, but our Soft + Cushy Hat juices up classic 1×1 rib by throwing in a “knit into the row below.” The effect is a loftier, more distinctive rib with a dose of oomph!
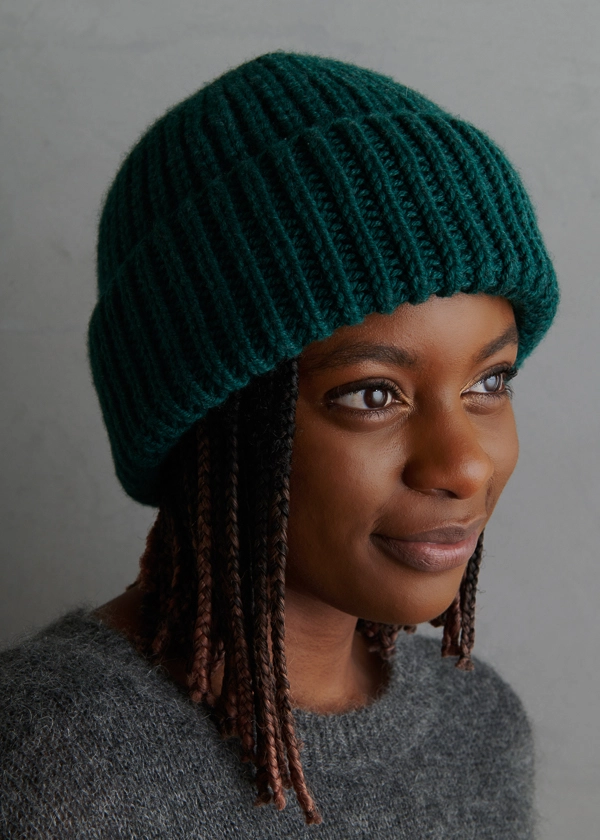
Working into the stitch below is a great shortcut to attaining some of brioche stitch’s deep dimension without the challenge of brioche-specific techniques. It’s easy enough for anyone willing to try something new and satisfying enough to make our Soft + Cushy Hat especially soft and markedly cushy!
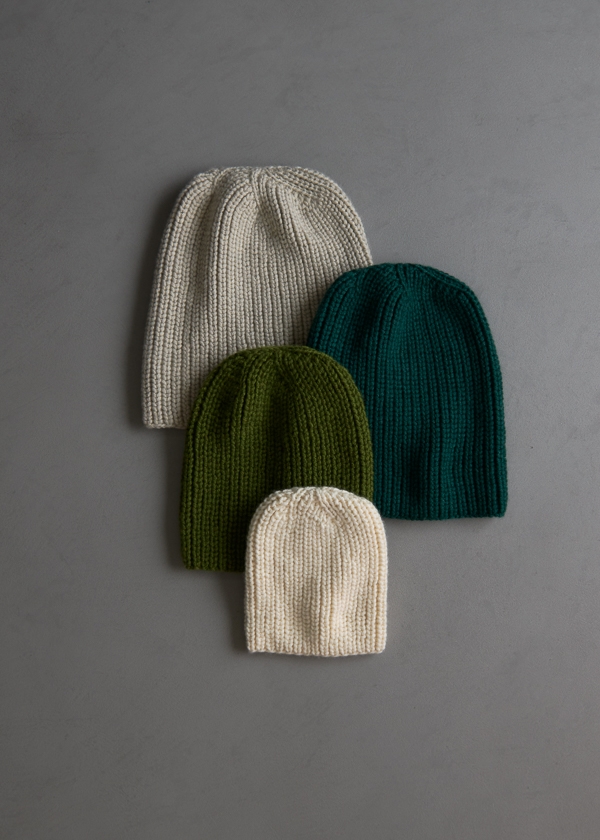
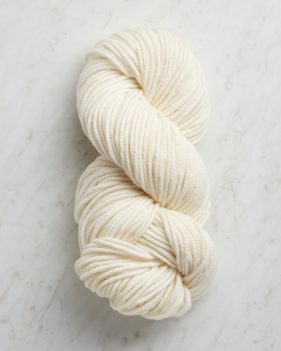
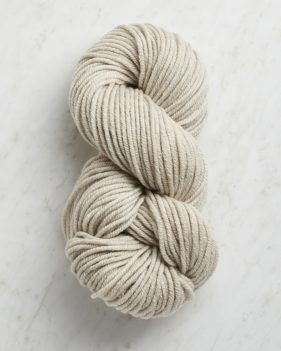
Adding to all this soft cushiness is Plenty, our brand new 100% extra fine merino. As un-scratchy as wool gets, Plenty has a sumptuous spin and very lively bounce. We love its plump and lofty sense of generosity and its overall good feeling!
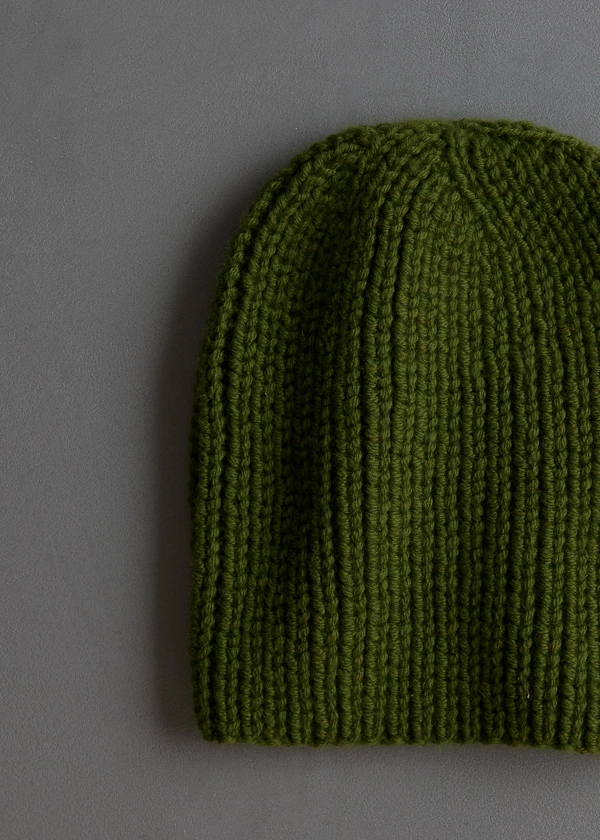
Plenty is a classic worsted weight, knitting up at a quick and toasty 4 or 4.25 stitches to the inch. It is milled in Peru, where its fiber meets the rigorous Responsible Wool Standard and is Fair Trade Certified… yay!
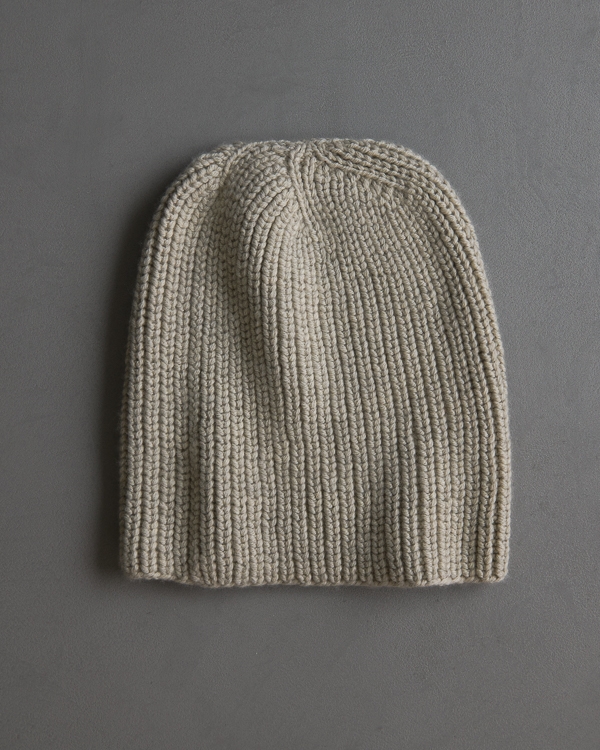
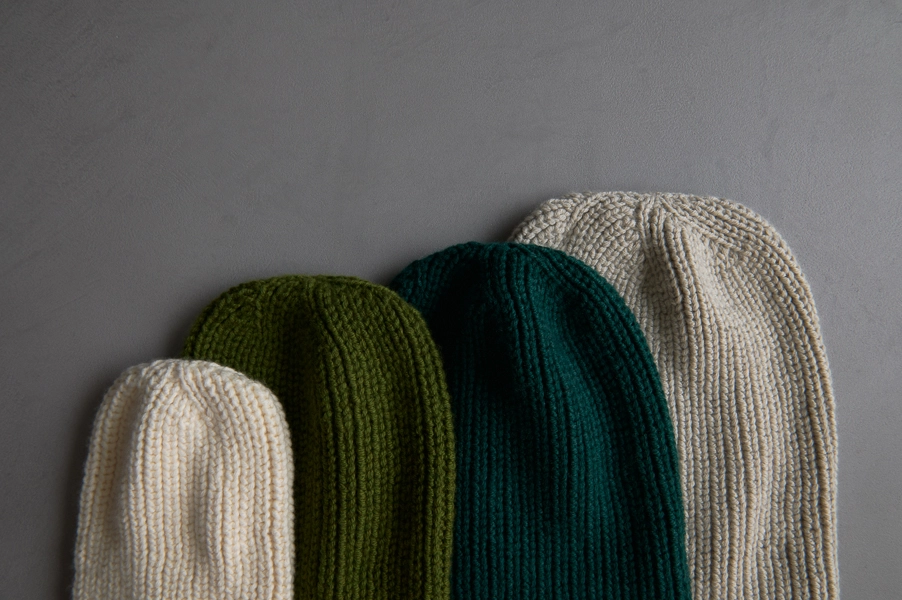
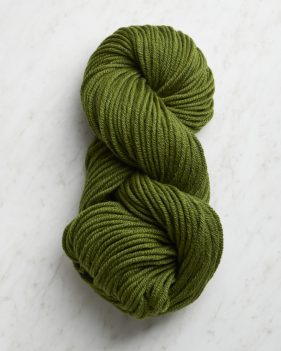
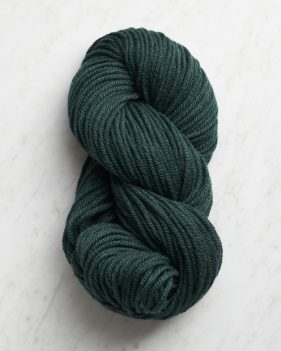
Choose from 18 colors all inspired by nature’s prettiest moments, from soft Reed Gray (above) to deep Laurel Leaf (below)… Plenty of beauty all around!
If you love the yarn used in this project, you’ll love all of our other yarn, too! Explore our 35+ lovingly created yarn collections, in nearly every natural fiber and spectacular color you can imagine… Only available here at Purl Soho’s online yarn shop!
Designed by Purl Soho designer, Jake Canton. Click here to see even more of Jake’s designs!
Share your progress + connect with the community by tagging your pics with #PurlSoho, #PurlSohoBusyHands, #PurlSohoSoftAndCushyHat and #PurlSohoPlenty. We can’t wait to see what you make!
Materials
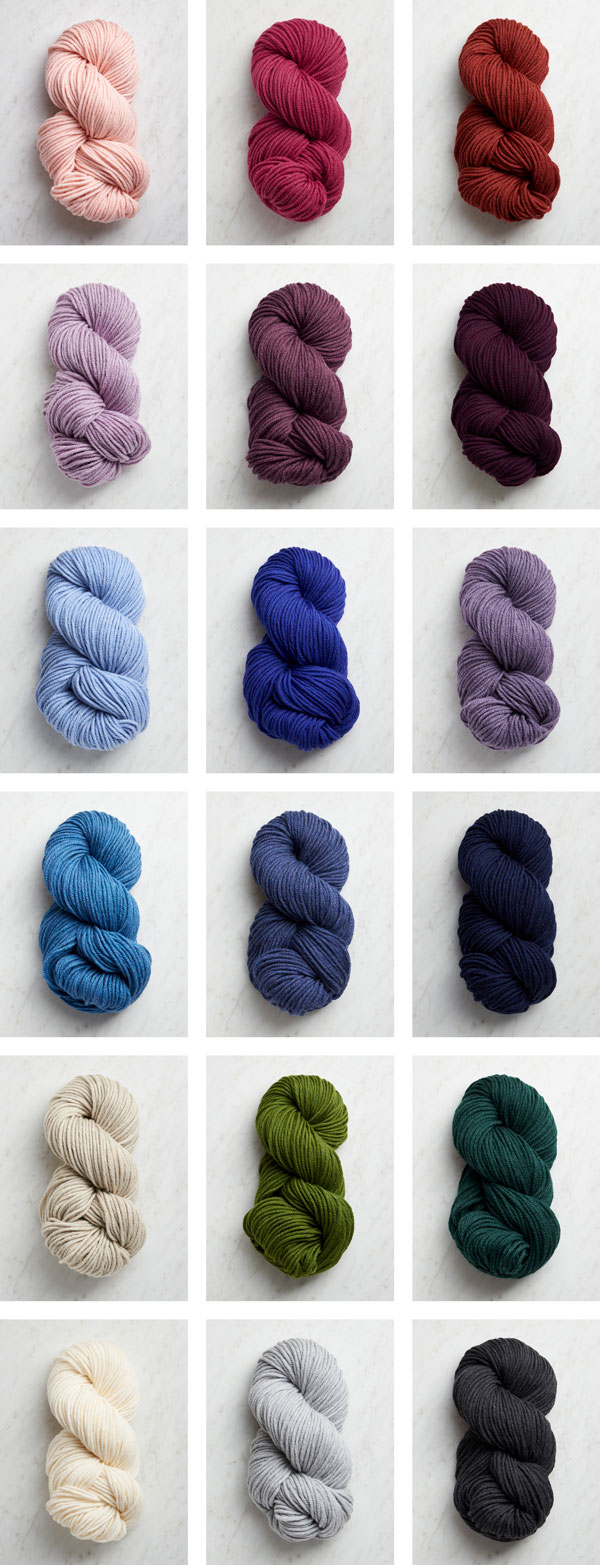
- 1 (2, 2, 2, 3) skein(s) of Purl Soho’s Plenty, 100% extra fine merino wool yarn. Each skein of this worsted/aran weight yarn is 139 yards/ 100 grams; approximately 133 (170, 184, 272, 310) yards required.
- US 8 (5 mm), 16-inch circular needles
- A set of US 8 double pointed needles
- Stitch markers, including one unique
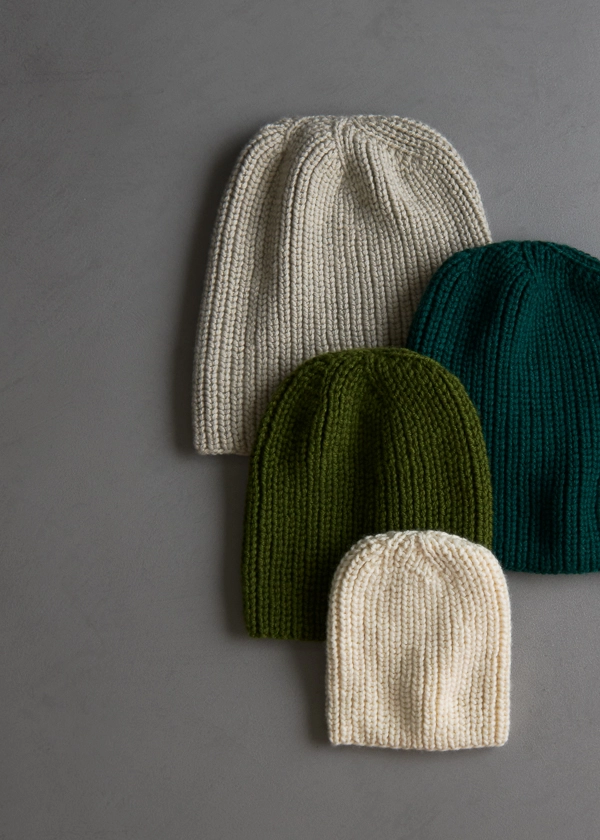
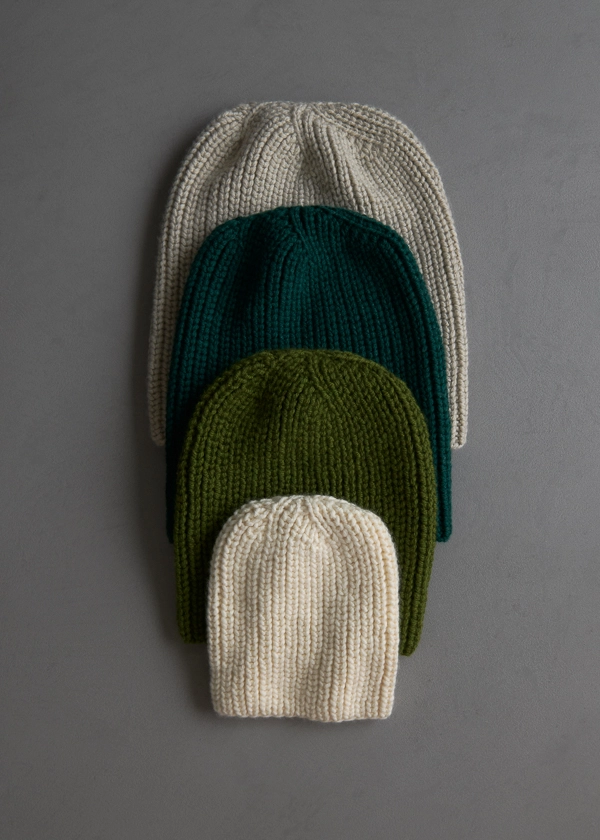
For our samples we knit the following sizes in the following colors…
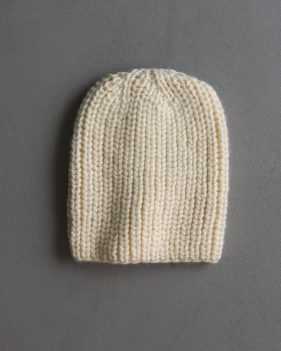
Baby: Heirloom White
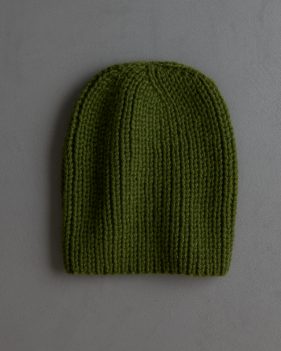
Kid: Fresh Pickle
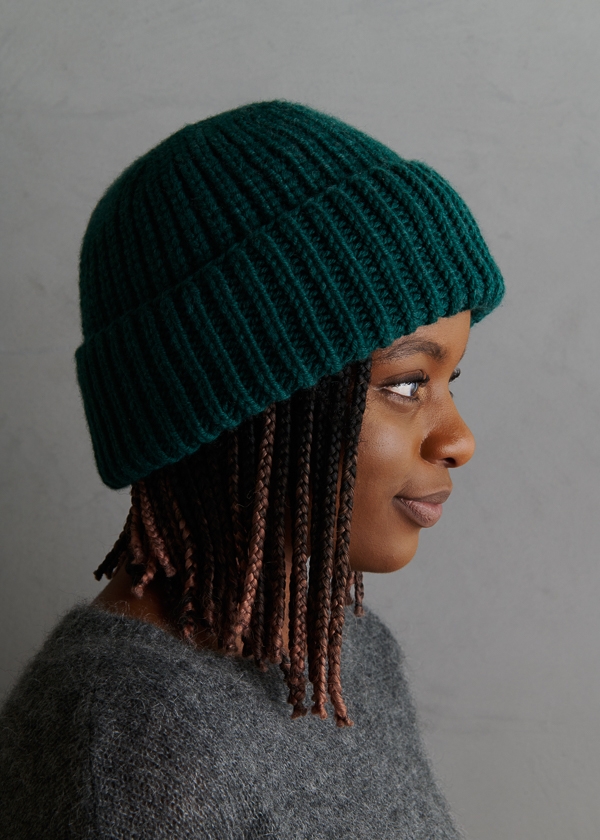
Adult Small: Laurel Leaf
Adult Large: Reed Gray
Gauge
18 stitches and 32 rounds = 4 inches in stitch pattern
Sizes
Baby (Toddler, Kid, Adult Small, Adult Large)
- Finished Circumference: 13¼ (15½, 17¾, 20, 22¼) inches, comfortably stretching 1–2 inches
- Finished Height: 8 (9¼, 10½, 11½, 12½) inches, uncuffed
Notes
Construction
You will knit this hat in the round with the “wrong side” facing you (the less textural side of the stitch pattern), and you’ll turn it right side out before blocking. However, both sides of the fabric are beautiful, and when the hat is cuffed, both sides of the fabric will show!
Knit One Below
k1b [knit one below]: Insert the tip of the right needle into the center of the stitch below the next stitch, knit normally (wrapping the yarn around the needle and pulling it back through the stitch below) and let the stitch above fall from the left needle.
To see a “k1b” in action, check out our Working Into The Stitch Below video tutorial.
Pattern
Begin
Cast 60 (70, 80, 90, 100) stitches onto circular needles. We used a basic Long Tail Cast On.
Place unique marker and join for working in the round, being careful not to twist the stitches.
Round 1: *P1, k1, repeat from * to end of round.
Round 2: *P1, k1b (see Notes), repeat from * to end of round.
Repeat Rounds 1 and 2 until piece measures approximately 7 (8, 9, 9¾, 10½) inches from cast-on edge.
Crown
Set-Up Round: *[P1, k1] 6 (7, 8, 9, 10) times, place marker, repeat from * to end of round. NOTE: The final marker will be the end-of-round marker.
Round 1: [*P1, k1b, repeat from * to 4 stitches before next marker, p1, knit 3 together (k3tog)] 5 times. [10 stitches decreased]
Round 2: *P1, k1, repeat from * to end of round.
Repeat Rounds 1 and 2 three (4, 5, 6, 7) more times. [20 stitches remain]
Next Round: *K1, k3tog, repeat from * to end of round. [10 stitches remain]
Cut yarn and pull tail through remaining stitches.
Finishing
Weave the ends into the side of the hat that won’t be showing, considering that the cuff gets folded up, and wet block.
LEARN ABOUT PLENTY + ALL OUR BEAUTIFUL YARNS
You can’t overstate how amazingly enjoyable it is to knit with Plenty! As un-scratchy as wool gets, Plenty is the softest 100% extra fine merino wool in the world, and, a nice, plump worsted/aran-weight yarn, it also knits up quickly into a toasty fabric, un-prone to pilling… Plenty to love here!
More Free Knitting Patterns
- Be sure to explore our collection of (mostly free!) Plenty knitting patterns and cast on!
More Worsted/Aran-Weight Yarns
- Shop our entire collection of worsted/aran-weight yarn
- If you want to use a different yarn, be sure to take the time to get the correct gauge. Need help? Check our All About Gauge Tutorial!
More Yarns With Similar Fiber
- Shop merino wool yarn
Looking for more inspiration? Explore all of our free knitting patterns and knitting tutorials, buy one of our many knitting kits and yarn bundles, and shop for beautiful yarn. We have over 35 gorgeous natural fiber yarns in 100’s of magnificent colors, designed to bring integrity, beauty, and joy to your next knitting project and only available at Purl Soho!
Looking at the pattern I don’t see where you start using double pointed needles. Can you clarify? Thanks
Hi Cecelia,
Thanks for reaching out! You will switch to your double-pointed needles during the crown shaping section whenever it becomes necessary (when it starts getting too tight to work over the circular needles!)
I hope this clears things up!
Gianna
I do appreciate the lovely rounded crown – just don’t get the pointy heads (unless of course maybe it’s for a second grader’s school play …). Can’t wait to start!
Hi Nancy,
We’re excited that you’re excited! Happy knitting!
Best wishes,
Catherine
I don’t see how many yards of yarn are needed for the hat.
Hi Laura,
You can find the yardage requirements listed just under the MATERIALS section above! Depending on the size you want to knit, you will need 1 (2, 2, 2, 3) skein(s) of Plenty. Each skein is 139 yards/ 100 grams; approximately 133 (170, 184, 272, 310) yards are required!
Warmly,
Kelsey
Could you kindly reformat the Soft Cushy Hat to “Print Pattern Only?” I don’t wish to print 11 pages including pictures. Thank you, Purl Soho!
Hi Diane,
Thanks for reaching out! You can absolutely print just the pattern and not the pictures. If you’re on a desktop version of the site, you will find a “print” icon in the right column just below the “Save To Favorites” button. If you’re on a mobile version of the site, you will find a “print” icon below the pattern and above the comments.
Then, if you hover over each block of text or image, a garbage-can icon will pop up to the left. Just click on this icon, and the text or image will be deleted! You can continue doing this to delete whichever parts of the pattern you don’t want to print or save. Hope this helps!
All the best,
Lili
Wow! That’s so cool. I didn’t know that. You’ve made me smarter!
Thanks for your great patterns and yarns.
I clicked on the print icon and still got 14 pages. :/
Hi Cristine,
Thanks for your response! Were you able to delete the sections of the pattern using the hover tool on the sections you didn’t want to print?
Warmly,
Gianna
What size US circular and double pointed needles? and length of the circulars? Can’t wait to try.
Hi Ada,
Thank you for your interest in the Soft + Cushy Hat! You’ll be needing US 8 (5 mm), 16-inch circular needles as well as a set of US 8 double pointed needles. Have a great day!
Best wishes,
Catherine
Is there a complimentary pattern for a cowl to go with the hat?
Hi Deni,
Thanks for reaching out! Yes, we have a matching cowl pattern for this hat! You can find that pattern here: Soft + Cushy Cowl
Warmly,
Gianna
Can I use a 20” or 24” circular needle? I did a swatch on a 16” using 30 stitches and don’t see how I could get an additional 60 stitches on that circumference.
Hi Laura,
Thanks for writing in! Yes for this pattern, you will need a 16″ circular, not any bigger. This is because, for any hat pattern where you are working in the round, you can’t use a larger circumference because it would overstretch the stitches and it would be hard for them to stretch over a 20 or 24″ circumference, this would result in stitches that are much too tight and very hard to knit across. Even though it seems like you won’t be able to fit that many stitches on a 16″, they will all fit comfortably and it will be very easy to work across!
I hope this clears things up!
Gianna
Thanks a bunch! What you say makes sense. I ordered and just received a new 16” #8 circular needle and am looking forward to beginning this project.
Hi there! I love this pattern. Thank so much for posting it for all of us. I have a couple questions:
1. Set-Up Round: *[P1, k1] 6 (7, 8, 9, 10) times, place marker, repeat from * to end of round. NOTE: The final marker will be the end-of-round marker. – I cast on 90 stitches, so Does this mean you P1/K1 and then counting every “9” stitches place a marker? Or does it P1/K1 9 times and place a marker after each? Then knit in pattern to the end?
2. Round 1: [*P1, k1b, repeat from * to 4 stitches before next marker, p1, knit 3 together (k3tog)] 5 times. [10 stitches decreased] . Does this mean repeat Round One 5 times for 5 complete rounds or do the repeat 5 times on one round?
Hi Kellye,
Thanks for reaching out! I am happy to help! Number 1, you will P1, K1 9 times (18 stitches total) then place the marker, and you will repeat this till you reach the end of the round! So once you P1, K1 9 times, PM, P1, K1 9 times, PM, etc. till you come to the end.
Number 2, for this round you will repeat everything that is in the brackets [*P1, k1b, repeat from * to 4 stitches before next marker, p1, knit 3 together (k3tog)] 5 times total for just this one round, not 5 rounds.
I hope this helps and please let us know if you have any more questions!
Gianna
Hi Gianna, if I cast on 100 stitches, in the set-up round I have 10 sections between markers. If I [*P1, kb1, repeat to 4 stitches before next marker, p1, knit 3 together…] in every section I am repeating 10 times, not 5, decreasing 20 stitches not 10. Where am I misunderstanding? Thank you
Hi Barbara,
If you cast on 100 stitches, you’ll actually have 5 sections in the Set-Up Row! That’s because you’re knitting 20 stitches in between each stitch marker placement. Once you have your stitch markers set up correctly, the rest should be smooth sailing!
All the best,
Lili
Hello! I love this pattern.
I have started and re-started this pattern a couple of times because with the yarn I am using, it is difficult to see the ‘V’ to make the k1b stitch —- or at least, I am not very good at it.
Is it possible to do this is 1X1 rib without one K1b within the same pattern/stitches/rows? Meaning, would it come out the same or need to be modified?
Hi Ann,
Thanks for reaching out! The gauge will be a bit different if you use a 1×1 rib instead of k1b, so I would suggest starting off by working a gauge swatch with the 1×1 rib and seeing how it compares to the gauge of the pattern. From there you can determine if you need to make any adjustments or if you can follow the pattern as written!
I hope this helps!
Gianna
On a stash busting mission and wondering if Plenty is a true worsted weight or more a worsted/ aran weight? Thanks.
Hi Melinda,
Thanks for reaching out! Plenty is a true Worsted/Aran weight getting 4-4.25 stitches per inch on a US 8-9 needle! If you are using another yarn, I suggest starting off by working a gauge swatch to ensure you are consistent with the pattern!
Warmly,
Gianna
Hi Melinda,
Thanks for reaching out! Plenty is a true Worsted/Aran weight getting 4-4.25 stitches per inch on a US 8-9 needle! If you are using another yarn, I suggest starting off by working a gauge swatch to ensure you are consistent with the pattern!
Warmly,
Gianna
Thanks so much Gianna. Oh the dreaded necessity of swatching but swatch I must. Best, Melinda
Hello! I love this hat pattern! But, Plenty doesn’t come in the shade of red I want to use. Would Worsted Twist work well for this pattern? Would I need to change the number of stitches?
Hi Madhu,
Thanks for reaching out! Worsted Twist would be a great option for this hat! It is ever so slightly thinner than Plenty so I recommend starting off by working a gauge swatch prior to beginning to compare to the gauge of the pattern and see if you need to make any adjustments!
I hope this helps, happy knitting!
Gianna
Thank you Gianna!
Warm regards,
Madhu
Hi,
I have difficulty with using circular needles, is it possible to make this using straight needles then crochet seems together to give a rushed effect pattern on the outside?
Hi Mrs Franks,
Thanks for reaching out! We don’t offer a pattern for working this hat in the round, however, you could certainly try working it flat and seaming it up after!
If you do, please let us know how it turns out!
Gianna
Almost finishing the hat. Would like to knit a matching scarf (not the cowl). But, I’m not good with math to figure out how many skeins of Plenty I would need to knit about a 6” by 40” scarf. Can you help? Thanks.
Hi Laura,
Thanks for your question. A matching scarf in Plenty sounds so cozy and wonderful! You would need approximately 3 skeins of Plenty to make a scarf that’s about 6″ x 40″ knit in the same style as the Soft + Cushy Hat.
To figure out your cast-on number, you’ll want to first knit a gauge swatch to make sure you’re consistent with the pattern (if you’d like more information on this step, please visit our tutorial, All About Gauge!). Once you know how many stitches you are getting per inch, you can multiply that number by the width that you would like and round up to the nearest even number. Then, just follow the Begin section of the pattern without joining in the round, knitting Round 1 and 2 until you reach your desired length.
I hope this was helpful! Have a wonderful day!
All the best,
Cat
Thank for the pattern. I have knitted a swatch to see how this «knit below» works , bt I knitted back and forth, so that will make it a bit different I guess.
One side looks good, but will the inside of the hat look as good? When I fold it, the inside will be the outside, and I assume it will different from the inside.
Hi Aseema,
Thanks for reaching out! If the stitch is done correctly, it should actually look the same on both the right and wrong sides of the fabric!
Warmly,
Gianna
Hi!
Beautiful yarn!
I had similar/related questions to Kellye above. I totally misunderstood the decrease and only set one marker, and of course its all messed up and was weird because the decreases were all congested in the back vs spread out equally. My questions:
1. Any tip to try to unwind to just below where I decreased so I don’t have to start from scratch?
2. Now that I see its multiple markers to be placed during the decrease, will that mean we never have to “knit below” into a triple decreased stitch (which is what happened to me with my mistake and it was impossible!).
Thank you, thank you! (Huge Purl fan….)
Hi Lea,
Thanks for writing in! I would recommend going slowly as you unknit each stitch and lifting the working yarn upwards slightly to open the stitch up more! This will make it easier to see where to insert your needle, especially for purl stitches. Un-knitting is definitely not one of the most enjoyable parts of knitting, but it’s definitely the safest way to correct any mistakes and your final hat will look absolutely flawless thanks to your incredible efforts! And yes, exactly, you will never have to knit below into a k3tog during the crown shaping rounds.
Hope this helps! Have a great rest of your day!
All the best,
Cat
Hi there! Is there any easy way to tell based on the stitches when you’re on a k1fb p1 row versus a regular k1p1 row? I lost where I am and I’m feeling paralyzed!
Hi Andie,
Thanks for reaching out. While it is pretty tough to know just at a glance what row you’re on, there is a way! Take a look at the wrong side of the fabric on the most recent stitches you’ve knit. If the round of purl bumps closest to your needles have two strands of yarn in them, then you’re currently working a k1b round. But if they only have one strand, then you’re currently working a regular 1×1 rib round! I hope this helps you find your place and continue on.
All the best,
Lili
The directions say to swatch in pattern. Since it’s a rib pattern should I stretch it to find the gauge. If so, how much? Thanks!
Hi Jen,
Thanks for writing in, and that’s a very good question! I took a look at the finished circumferences versus the cast-on numbers, and I can tell by comparing them to the gauge that the gauge was measured completely unstretched. I hope this helps!
All the best,
Lili
No questions but I love how quickly you respond to any questions. 🤗 Thank you!
Hi Donni,
Thanks for writing in and for your kind words! We are always happy to help with whatever we can as quickly as possible!
Happy knitting!
Gianna
Can you wear this uncuffed, and have it flop back at the top? Thanks.
Hi Ellen,
Thanks for writing in! You could certainly style this hat uncuffed, this would result in a more slouchy/flop in the back!
I hope this helps!
Gianna
Hi,
Could you tell me where I find the size measurements for the hat? I see the materials requirements for the different sizes but can’t find the actual measurements for head size or size of hat. In particular what is the difference in size between the adult large and adult small? And how much ease is there with this yarn if knit to gauge?
Many thanks!
Hi Rebecca,
Thanks for reaching out! I’d be happy to help you with the sizing information for this pattern. If you scroll down past the Materials section of the webpage, you should see a section for GAUGE and just below that a section for SIZES that lists the different sizes and the measurements for each! I’ve included them here as well:
SIZES
Baby (Toddler, Kid, Adult Small, Adult Large)
Finished Circumference: 13¼ (15½, 17¾, 20, 22¼) inches, comfortably stretching 1–2 inches
Finished Height: 8 (9¼, 10½, 11½, 12½) inches, uncuffed
I hope this helps, and please let us know if you have any other questions!
Warmly,
Kelsey
Hi. What is the negative ease on this hat? Thanks!
Hi Donna,
Thanks for reaching out! This hat fits with 1 – 2 inches of negative ease.
All the best,
Lili
Hi I live the pattern. Can I knit this flat on straight needles ??
Thank you
Hi Esther,
Thanks for reaching out! We only offer this pattern to knit in the round, but if you are up for a bit of a challenge, you could certainly modify the pattern and try this out flat. Just be sure to keep in mind the pattern only includes instruction for the right side of the fabric, so you will need to include wrong side rows in your knitting!
I hope this helps, happy knitting!
Gianna
For anyone who has finished the hat – just how soft is it? So soft that someone who is wool-averse on their head will wear it? Thanks so much!
Hi Lisa,
Thanks for writing in. We designed this hat with Plenty, which is a 100% merino wool yarn! Merino is the softest type of wool, and it generally does not bother people who are typically wool-averse. However, you can also absolutely substitute another non-wool yarn if you’d like. Hope this helps!
All the best,
Lili
If using US8 Addi FlexiFlips, instead of double pointed needles, which length would I use, 8” or 10”? Or could I use the magic loop method?
Hi Bernice,
Thanks for reaching out! You can certainly use the FlexiFlips instead of double pointed needles, and the 8″ should work fine! Alternatively, you could also use Magic Loop to close up the top!
I hope this helps!
Gianna
Thank you for this lovely pattern. So, I have knit the fisherman’s knit before and have found fixing errors most challenging. I am an experienced knitter. I treated the errors as though I was fixing an error with Brioche knitting. That worked.
Could you post a video on your interpretation of how to fix errors with fisherman’s knit?
Thank you Purl Soho for all your wonderful patterns and gorgeous yarns.
Hi Marjorie,
Thanks for reaching out and for your suggestions! At this time, we don’t have the resources to create a tutorial for fixing errors in fisherman’s rib, but I will certainly pass this idea along to the rest of the team!
Warmly,
Gianna
Hi,
Could you tell me the size difference between adult small and adult large? Or I guess what I would like to know is what size head does each of them fit?
Thank you!
Hi Rebecca,
Thanks for writing in! The Adult Small Size measures 20 inches in circumference and is 11½ inches tall, uncuffed. The Adult Medium size measures 22¼ inches in circumference and is 12½ inches tall, uncuffed. Both sizes will comfortably stretch 1–2 inches, so the Adult Small is perfect for a head circumference anywhere from 20-22 inches, while the Adult Large is perfect for a circumference of 22-24 inches! You can also find this information in the SIZE section of the pattern!
I hope this helps!
Gianna
Hi team…3 skeins for large adult hat seems a LOT of yarn…ie 300g. That’s one heavy hat…usually I use 100g of worsted weight yarn for beanies like these , can you confirm 3 skeins is correct? Thanks
Hi Margaret,
Thanks for reaching out! The Adult Large does require 3 skeins, however, it doesn’t use the full amount of those 3 skeins. That size requires 310 yards, and each skein of Plenty is 139 yards/ 100 grams, so you will have approximately 107 yards leftover.
I hope this clears things up!
Gianna
Hi,
Instead of starting a row with a purl, I started with a knit… I have reached the crown section of the hat and am starting to decrease my stitches. Should decrease by doing a K1P3tog instead of P1K3tog?
Thanks
Hi Benedicte,
Thanks for reaching out. I would actually recommend simply moving your end of round marker over by one stitch. That way, the beginning of your row will now be on a purl stitch, and you can work the decrease rounds exactly as written! Hope this helps.
All the best,
Lili
I made this hat in the baby size, and when I wet it for blocking it stretched out to at least a child’s size, maybe bigger! And it’s not tightening up as it dries. Would you recommend wetting it again and then putting it in the dryer? I made it for a 1-month-old, and right now it looks as if it would fit her mom…😢
Hi Sarah,
Thanks for reaching out, and I’m so sorry to hear that your hat stretched out a lot during blocking! That can sometimes happen when laying out a knitted item to dry, since the heaviness of the water stretches the fabric. I would definitely not recommend putting it in the dryer (it will felt and shrink a lot), but instead blocking it again. When you block it this second time, make sure to push the stitches together horizontally, so that the hat dries in its unstretched form. I hope this helps! You may also want to check out our How To Hand Wash A Sweater tutorial for some extra tips.
All the best,
Lili
Ps I used the recommended yarn, Plenty, 100% merino wool.
Hi,
I prefer to use a tubular cast on for hats. Is there any particular reason that this pattern uses a long tail cast on?
Thanks!
Hi Betsy,
Thanks for reaching out. You can absolutely do a tubular cast-on for this pattern! I think that would look wonderful.
All the best,
Lili
I love this yarn! I am about to make a third of these hats. I have found that a “child large” fits adult heads (above normal size adult heads). I think I knit a bit loose, but I also find that this pattern is very stretchy. Not sure if others have found the same, but just wanted to share what I’ve learned. A trick I use to keep track of the rows is to use two markers at the join when I’ve finished row two, and then back to one when I’ve finished row one. I tend to jump from project to project so this is a simple way to keep track.
Lisa,
Thank you SO much for the tip about using a second marker at the end of a Round 2, but using only one marker at the end of a Round One. This has been a great help in recognizing what round I’m currently on. If I look back and see only one marker at the end of the previous round, then I know I know I’m currently knitting Round Two.
Not exactly sure how to wet block this. Totally wet? Spray with water? Add soak? I see above you said make sure it dries in it’s I stretched form. Haven’t blocked this yarn before and it’s been a bit since I’ve blocked a hat. It’s a gift so I’d rather not ruin it at this stage!
Hi Sandi,
Thanks for reaching out. We recommend wet blocking this hat and laying it flat to dry, without stretching it. I’m curious where you saw us suggest letting it dry in its stretched form though? You definitely won’t want to do that, since the hat will lose its stretch and won’t fit snugly on the head anymore!
All the best,
Lili
I’m new to knitting, and especially swatching. It looks like I need to do a swatch following the stitches in this pattern. I’m finding it really challenging doing the swatch on circular needles. I’m using a technique where I’m pulling the work to the other end of the tips at each “round” (not sure what it’s called) and it’s not really working for me. Do you suggest any other techniques?
Hi Berry,
Thanks for writing in! I would suggest checking out our tutorial Swatching For Circular Gauge !
I hope this helps, happy knitting!
Gianna
For gauge, do you measure the side you knit or the other side, since we’re knitting it from the “inside out?”
Also, is it double the stitch count since the “knit one below” is like skipping a stictch?
Hi Liz,
Thanks for reaching out, and those are very good questions! You can measure the gauge from either side, and it will be the same. But if you choose to measure it on the wrong side (the side facing you while knitting), you will need to account for these k1b’s! Because you knit into the row below, you’ll only see half as many visible rows. So, for example, if you’re counting 18 rounds in 4 inches, that’s actually 36 rounds. I hope this helps clarify things!
All the best,
Lili
I have a question…..I am on round 3 of the soft and cushy hat. Do I pick up both stitches and treat them as one or separate for the round that follows the P1,k1b?
Thank you.
Hi Mary,
Thanks for reaching out. After you finish Round 2, which alternates between p1 and k1b, you’ll go back to Round 1, which alternates p1 and k1. You don’t need to do anything special on this round! Just work each live stitch on your needles in the 1×1 rib pattern. Hope this clarifies things!
All the best,
Lili
Hello, thank you for this pattern! Can I just check if Round 1 starts with a P1, that means that I should join for working in the round with a purl stitch? Since the placing of marker is after cast-on before joining in the round.
Thank you!
Hi Tabi,
Thanks for reaching out. You’re absolutely correct–the very first stitch after you place the marker is a purl stitch! I hope this helps clarify things.
All the best,
Lili
I’m having trouble with the decrease round. I’m working on the 1st decrease round. I casted on 100 stitches. I placed a marker every ten stitches resulting in ten stitches per marker. If I k3 tog, doesn’t that result in 2 stitches per, or a decrease to 8 stitches decreased or 20 stitches, not ten.
Hi Kathleen,
Thank you for your comment! The set-up round before the crown shaping has you place stitch markers every 20 stitches for the size you are making, which means that when you get to the decrease round, you will be decreasing 10 stitches total (2 stitches decreased at each marker). The stitch markers are placed every 20 stitches because working [P1, K1] ten times results in 20 stitches worked before placing a marker. After moving your stitch markers around a little, I think you will be back on track for the decrease round!
I hope this helps!
All the best,
Margaret
Hello! I’m a beginner and about to start the crown of this hat. I have a set of 5 double pointed needles, but it doesn’t seem to be enough (calculating 18 stitches x 5 = 90 total stitches, leaving no extra needle for knitting onto). How many DPNs do you recommend and how many stitches per needle, before the decreases begin? And I guess the stitch markers won’t be equally distributed among the needles (though they will be equally distributed among the stitches)? Thanks!
Hi Judy!
Thank you for your question! When it comes time to use DPNs for the crown of this hat, I suggest dividing your stitches onto four needles so you can have the fifth needle left to knit with! As you decrease throughout the crown, you may find it more comfortable to move to three needles eventually, too. When it comes time to switch to DPNs (which may be a few rows into the crown shaping!), you can divide the number of stitches you have by 4, and then adjust 1-2 more or less stitches on the last needle if necessary. It’s okay if each needle does not have exactly the same number of stitches on it when dividing among DPNs. With 90 stitches, that would mean three needles have 22 stitches each and the last needle has 24 stitches.
As for the stitch markers, you can let those fall where they fall in the pattern, and if they happen to land between needles, I suggest moving one stitch over to the other needle so that the marker can stay in place between stitches. DPNs are a great way to get comfortable moving your stitches around on your needles, so it is normal to have to frequently revisit your stitch and needle arrangement as the rows get shorter and shorter!
I hope this helps, and please feel free to ask any other questions you may have!
All the best,
Margaret
Thank you so much! I think I need bigger DPNs then. Mine are too small for so many stitches. Otherwise, I can wait until I have fewer stitches, after some decreases, before switching to DPNs.
You are very welcome, Judy! I suggest waiting until you have fewer stitches on your circular needles to switch to DPNs, so that you don’t have to worry about losing any stitches off either end of your needles!
All the best,
Margaret
Hello. Quick question – would Partridge work well with this pattern? Thanks in advance.
Hi Christie,
Partridge would work perfectly for this pattern! It’s very, very similar to Plenty in weight, but I’d still recommend knitting a gauge swatch to figure out which needle will work best for you. Hope this helps!
All the best,
Lili
I’ve enjoyed knitting this wonderfully squishy hat with “plenty”, in laurel leaf. It is a very very thick. I had a lot of gauge problems and eventually got it with addi # 5. So next….
I’d like to knit this cushy hat with your “season alpaca”. how would I adjust for this lighter yarn? I believe it is DK.
I think my gauge is tighter when I knit with bamboo needles. how would I make a little swatch using circulars ? any advice?
Hi Mahra,
Thanks for reaching out. The way to adjust this hat pattern to work with lighter yarn would be to change the number of stitches you cast on so that it still comes to the correct dimensions!
To figure out your cast-on number, you will want to first knit a gauge swatch in pattern (to swatch for circular gauge, I’d recommend following this tutorial). Once you know how many stitches you are getting per inch, you can multiply that number by the finished circumference of the size you’d like to make and cast on the nearest multiple of 10 stitches. Then you can follow the pattern as written, just making sure to place the stitch markers evenly once you reach the CROWN section.
Hope this helps!
All the best,
Lili
Oh, guys. How could I be so far off on this pattern.
You’ve got over 30 rows for 4″ and I come out with half that number.
I’ve restarted twice now. Feel like I will end up with Toddler Size.
Plenty has got to be a serious Aran weight.
There are so many comments I couldn’t wade through them all.
HELP please.
Hi KJ,
Oh no, I’m sorry to hear that you’re having trouble matching the gauge of this pattern. However, it actually sounds like you’re spot on! When you measure gauge for this pattern with the wrong side facing you, each stockinette “V” actually counts as 2 rows! This is because of the k1b’s in the stitch pattern, since you knit them into the row below, effectively stretching the previous row’s “V” to cover the next row as well. Hope this helps clarify things!
All the best,
Lili
I plan to make this hat to go with a Half + Half Triangles Wrap in Linen Quill colors Fresh Pickle + Juniper Green. For the hat, I will be using Plenty in Fresh Pickle and Red Pine. I especially love the thick, turned-up brim of this hat.
The brim will be one color, and the body & crown of the hat will be the other color. I’d love your opinion about which color goes where. Should I make the brim in Red Pine and the rest of the hat in Fresh Pickle, or should I make the brim in Fresh Pickle and the rest of the hat in Red Pine? I want the color arrangement of the hat to be striking with my green wrap. Thank you.
Hi Vivian,
That’s a great idea to knit up a coordinating hat! I would recommend using Red Pine for the cuff and Fresh Pickle for the rest of the hat. That way, when you’re wearing both the wrap and the hat, the red brim will appear in between the green of the wrap and the green of the hat, creating a striking stripe!
All the best,
Lili
This question is in connection with my previous question. I will be making the cuff of the hat in one color (color A) and the rest of the hat in the second color (color B). How wide is the folded cuff of the hat shown in these photos?
So for example, if the folded cuff is 2.5 inches wide, would I have to knit 5 inches in color A for the cuff? Thank you.
Hi Vivian,
I’m afraid that I’m not quite sure how far the brim has been folded for our photoshoot! However, I can absolutely give you some guidance for your own project. If you plan on making a cuff that’s folded to 2.5 inches wide, I’d recommend knitting between 3 and 4.5 inches in your Color A. That way, when you fold it up, you will see Color A only on the brim and Color B only on the rest of the hat, since the “seam” between colors is completely hidden behind the front part of the brim!
All the best,
Lili
Thank you for this help with both questions, Lili. I decided to knit a test Soft + Cushy hat with some yarn in the same gauge as Plenty, acrylic yarn from my stash. I’m so glad I am doing this because it has taken me several messy rounds to get into the groove of the pattern, but I am now confident and right with it.
Just curious why this a P1b to start instead of the typical k1b, p1. If it’s knit inside out I cant wrap my head around why it makes a difference? I’m just about to decrease so no complaints, just curious is all
Hi Tiffanie,
Thanks for reaching out. We actually don’t use any p1b stitches in this pattern–just k1b’s! This makes the fabric a lot denser and squishier, since the stitch pattern ends up becoming similar to fisherman’s ribbing or brioche. Hope this helps clarify things!
All the best,
Lili
What a fun pattern! I’m 4 rows in so far and wonder if there is a name for this stitch? I’ve seen fisherman’s rib mentioned in comments, but would love to make a note of the official name in my notebook. First time K1B-ing. :).
Using Plymouth Galway (worsted)?Dragon Green with #8 US for my adult nephew.
Hi Diane,
Thanks for reaching out! While I’m not sure if it has an official name, I’d say that you could call this stitch a “half fisherman’s rib.” That’s because you’re only doing the k1b on one of the rounds, and not on every single round, like in a true fisherman’s rib!
All the best,
Lili
Hi – loved this pattern except when I got to the crown. I followed the pattern and didn’t like the look of the k1, p1 row btw the k1b, p1, – knit 3 too.
Could you keep in pattern and just do a k1b, p1 btw the decrease row? I know that it would be harder to k1b underneath the knit 3 together stitch.
Just a thought.
Hi Donna,
Thanks for reaching out, although I’m sorry to hear that the crown of your hat isn’t turning out as expected! The pattern instructions here are actually written to keep the stitch pattern consistent (matching the body of the hat), so if it isn’t looking right, then you may be doing something incorrectly. If you send a photo of your work to [email protected], then we’d be happy to take a look and help get you back on the right track!
All the best,
Lili
I absolutely LOVE this hat pattern.
I love the way it takes a skein of worsted weight yarn and turns it into a chunky/bulky weight hat. I think it may become my go-to hat pattern.
The Soft & Cushy hat has now become my go-to hat pattern as well. I can’t believe how comfortable the hat is and how classic and luxurious it looks and feels. It’s designed by Jake Canton, who also designed the iconic Half+Half Triangles Wrap.
The one thing I’m glad I did was to knit my first Soft & Cushy Hat as a “practice” project using an acrylic blend yarn from my stash, instead of diving in with my Plenty skeins. The practice project answered all my questions and built up my confidence with the pattern. Now I’m ready to have fun knitting the Soft & Cushy Hat using my Plenty skeins, of which I have plenty of. 5 colors!
Hello! I started this beautiful project using 5mm needles and as a yarn a mix between wool and alpaca. I casted on 90 stitches and knitted for a while, everything went smoothly but the hat turned out huge / the diameter too big…
I am sure there’s something wrong with my gauge. Can you give me some tips?
Hi Charles,
I’m so sorry to hear that your hat turned out too large! It sounds like your gauge was bigger than the gauge of the pattern. We always recommend making a gauge swatch before starting a project to be sure you’re working with the right needles, especially when substituting yarns. If this is daunting, I’d recommend checking out a tutorial called All About Gauge, which covers some incredibly helpful information. I even learned some interesting, new tidbits myself while looking over it, and you may, too! You can find it right here, and we’re happy to answer any questions that comes up.
All the best,
Lili
Would the High Seas Hat be an alternative to this hat in order for me to use my super bulky yarn?
Hi Somi,
Thank you for writing in! The High Seas Hat would be a great option for your Lion Brand thick and quick! Please let us know if you have any other questions!
Happy knitting,
Gavriella
Hi, I like this hat, but I don’t have circular needles. Can I use two normal needles as well?
Hi Marianne,
Thank you for writing in! Unfortunately, this pattern is written for circular knitting needles but we actually do have some wonderful hats you can knit on straight needles! Our Contrast Cuff Hat and All Roads Hat are both knit flat and then seamed! I hope this helps!
Happy knitting,
Gavriella
Hi, Do you have any suggestions for making this striped? I made the small pocket scarf but had to buy a whole extra skein since the one skein it called for was 3 inches short (argh!). So, I thought I’d buy another skein of the second color in the scarf and make a complementary striped hat.
Hi Amanda,
Thank you for writing in! I would recommend either the Mixed Rib hat or the Lovely Ribbed Hat as great patterns to incorporate stripes! These patterns would be a little easier to disguise the start and finish of each stripe but you could definitely knit a gauge swatch for this pattern in stripes to see if you like the way the fabric works up. You can also see our full worsted/aran weight yarn collection here! I hope this helps but please let me know if you have any other questions!
Happy knitting,
Gavriella
Hi – I’ve made this hat with stripes and love how it looks! I just switched colors for two rows at a time – but I only did this every 9 rows. You can see a photo on Instagram at @_slow_knitter_ Good luck!
Hi i got a few yarn balls of plenty and want to make a hat for my toddler. But I do not want to use the pattern here. Is there any other free pattern I can use to make a hat using plenty? Thanks
Hi Charisma,
Thank you for writing in! That’s a great question! You can see all of the hat patterns that would work wonderfully with Plenty here. I hope this helps!
Happy knitting,
Gavriella
Could I use “Simply Camel” for this hat by using two strands? Alternately, could I do the same using the “Cashmere Merino Bloom”? 😊
Hi Janice,
That’s a great question! Holding Simply Camel double could work really well but Cashmere Merino Bloom held double might be just slightly too thick. I’d recommend making a gauge swatch in whichever yarn you prefer just to check if you can get the same gauge as the pattern and are happy with the fabric. I hope this helps!
Happy knitting,
Gavriella
Just wondering if you’d consider including a photo of this hat from the top? First of all, it’s very pretty from the top. Secondly, it will clarify how many “wings” appear in the decreasing crown section.
A further note about my question: How is the shape of the crown influenced by the number of decrease sections?
I’ve made this hat twice, am on my third version now and each one is different at the crown! Thanks. (See my striped version on Instagram @_slow_knitting_)
Hi Jenny,
That would be such a fun idea! I’ll pass it along to our photography team for future consideration.
In answer to your other question, the number of decrease spokes a hat has affects the slope of the crown. The more spokes, the more sloped the crown will be. The rate of decrease rounds also affects the same thing! Hats with decreases on every round of the crown have more slope than hats that alternate decrease rounds with regular rounds.
All the best,
Lili
Thanks for such perfect explanations!
One more suggestion… Before making hats, I used to think they were easy to make. But it’s actually fairly easy for a hat to turn out “just okay.”
How about a fall hat KAL? Learning more about getting a good fit with stitches and stretch, understanding the mechanics of shaping (as you explained above), and maybe incorporating color patterns would be really fun and useful.
I’m sure you’ve probably already done this! But if so, somehow I missed it. Thanks for everything!
Hi Jenny,
We are so happy you found Lili’s explanations helpful. In the meantime, I will be sure to share your suggestions with the rest of our team!
Happy knitting,
Gavriella