


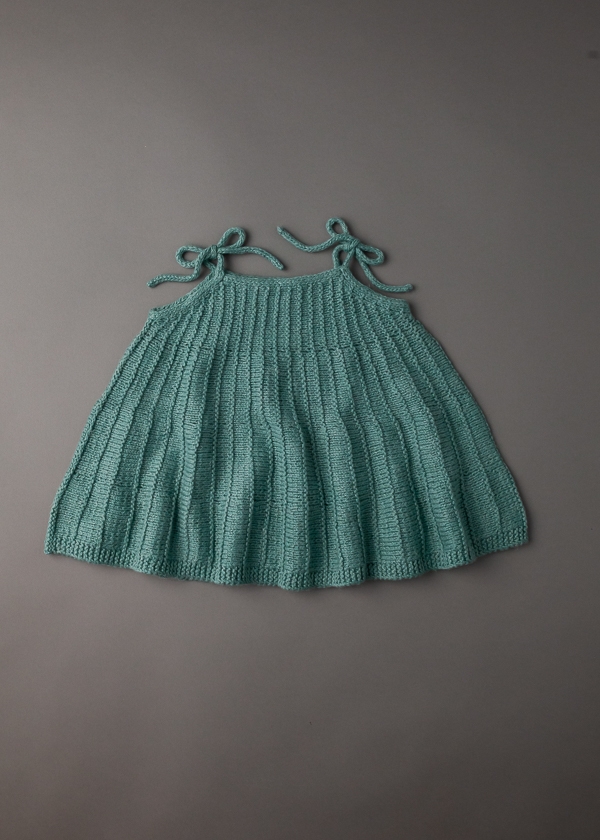
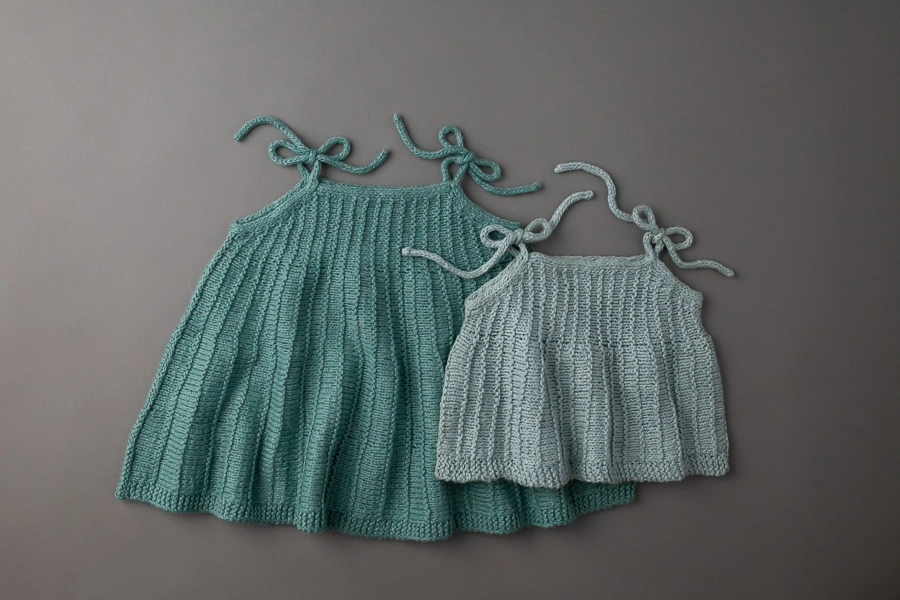
Ainur Berkimbayeva For Purl Soho: Seashell Baby Shirt + Dress
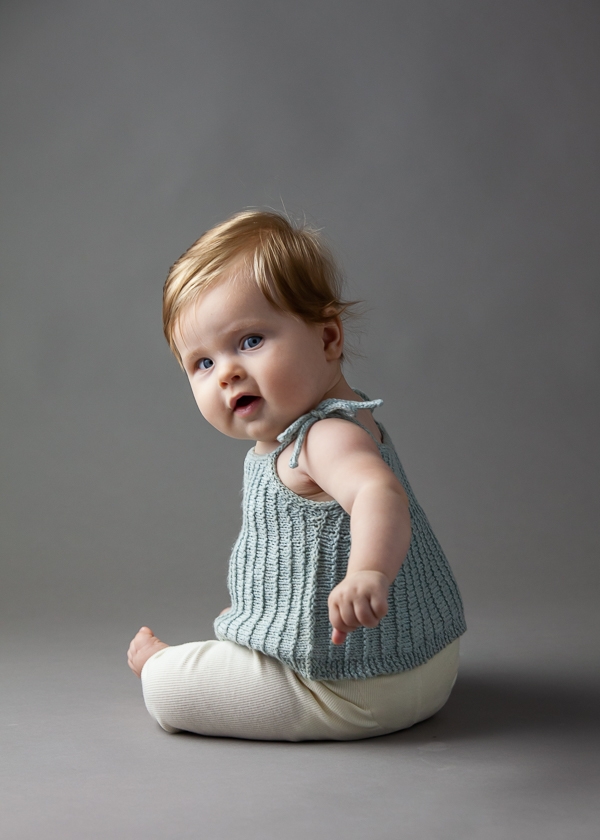
Your little pearl tucked inside our Seashell Baby Shirt + Dress is like a gift from the sea! Designer Ainur Berkimbayeva dreamed up this vision of nature meets nurture, inspired, as always, by a construction idea.

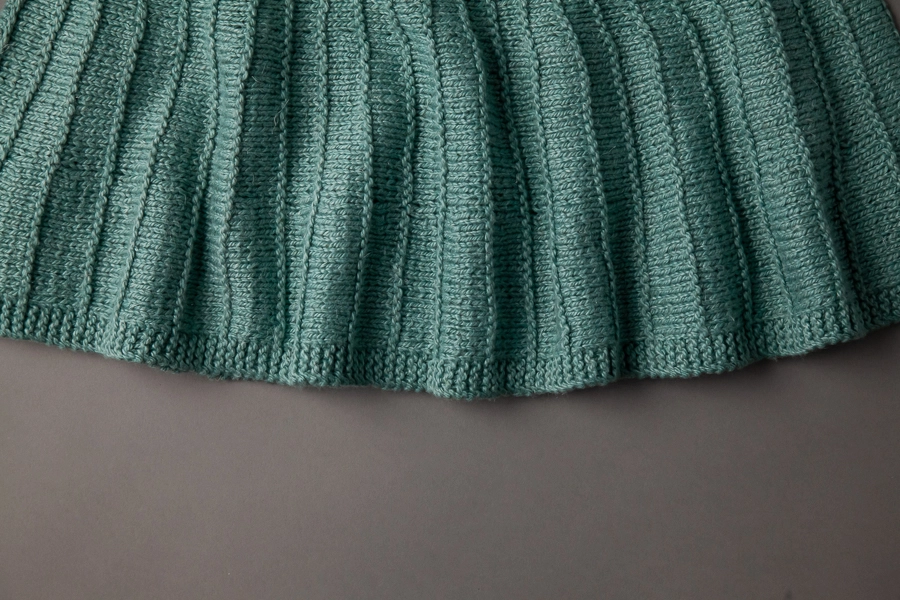
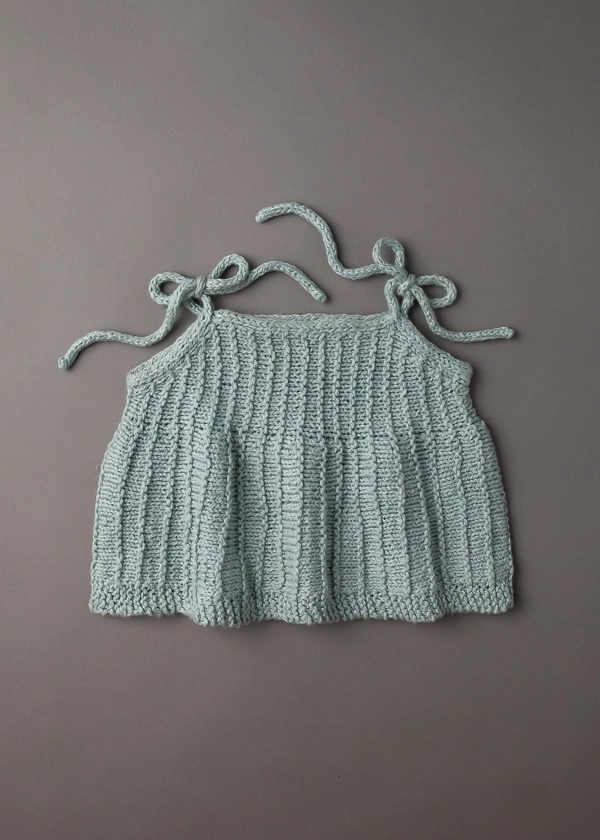
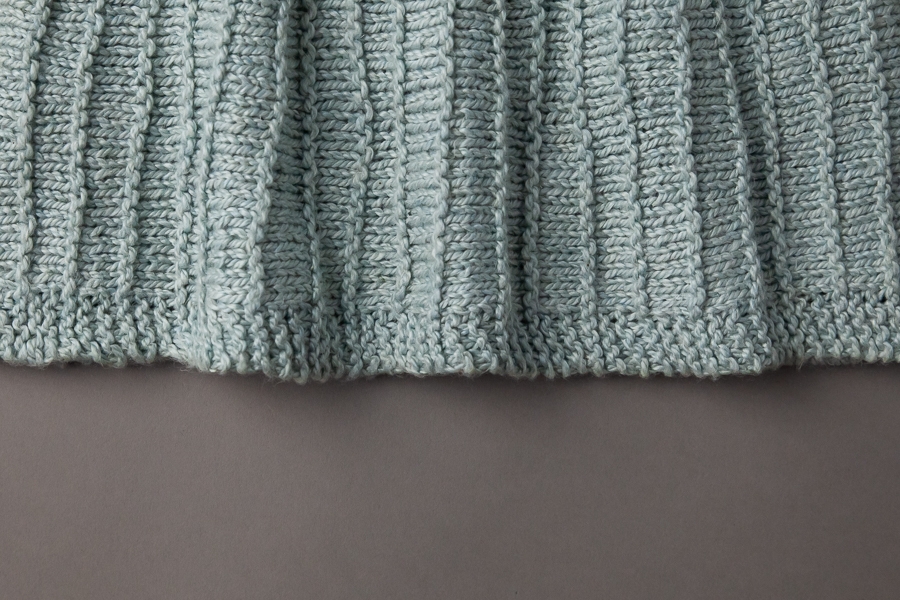
In this case, Ainur wanted to create volume using short rows, and realizing that this would mean knitting her shirt and dress sideways, she added a purl ridge to highlight the form… and to create a perfect little scallop shell!
If this sounds over your head, it’s probably not! You simply cast on along the right seam and work the piece across the front, shaping for underarms along the way, then do the same thing across the back until you return to the right side seam, where you join the end to the beginning. Working short rows as you go creates wedges that are wider at the bottom than the top, which, as Ainur imagined, is a very clever way to shape a flared shirt or dress!
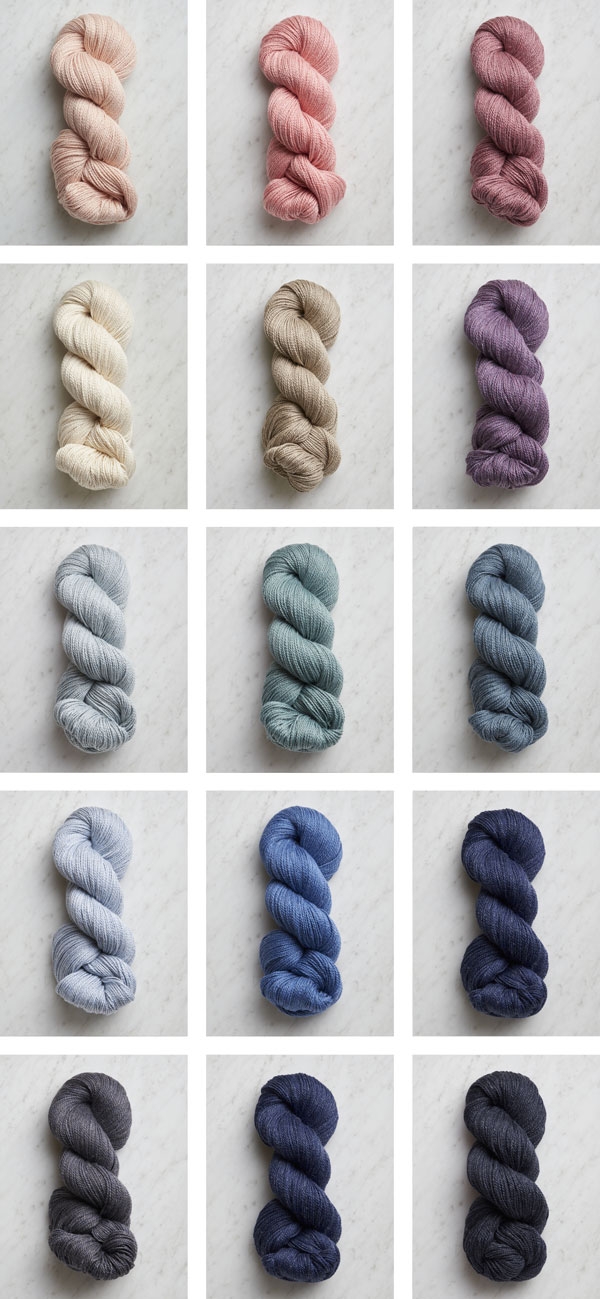
For its beauty and super softness, Ainur chose our Santolina, a blend of 70% organically grown cotton, 20% rayon from bamboo, and 10% hemp. Santolina is a nice, light fingering weight. It is also machine wash- and dry-able and even has a lovely little shine like the sea.
For any size from newborn to 2 years, you’ll need just one skein of Santolina for a Seashell Baby Shirt or two for a Dress. Choose from 16 very gentle colors, each one a perfectly plausible little seashell!
Designed for Purl Soho by Ainur Berkimbayeva.
Share your progress + connect with the community by tagging your pics with #PurlSoho, #PurlSohoBusyHands, #PurlSohoSeashellBabyShirtAndDress, and #PurlSohoSantolina. We can’t wait to see what you make!
Materials
- Purl Soho’s Santolina, 70% organically grown cotton, 20 % bamboo, and 10% hemp. Each skein is 328 yards/ 100 grams.
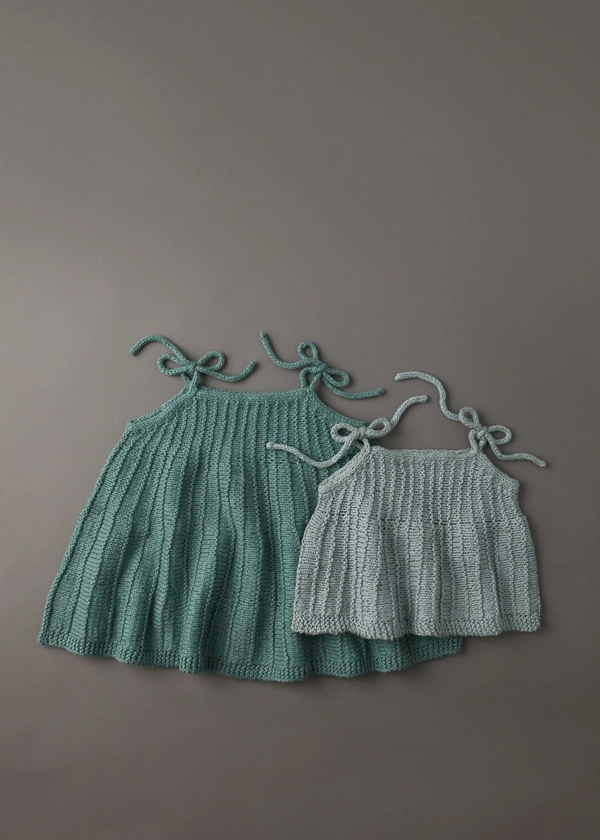
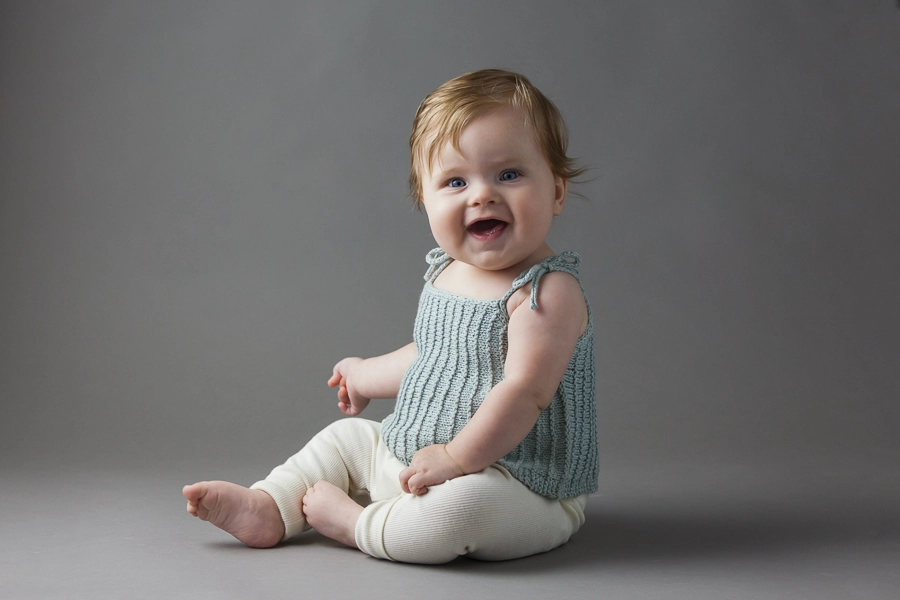
- Shirt: 1 (1, 1, 1) skein. Approximately 185 (215, 245, 285) yards required. We used the color Winter Green.
- Dress: 2 (2, 2, 2) skeins. Approximately 355 (400, 480, 560) yards required. We used the color Green Agave.
- US 3 (3.25mm), 32-inch circular needles
- Spare US 3 circular needles
- Two US 3 double pointed needles
- Crochet hook size D or E (3.25 or 3.5 mm)
- Scrap yarn for provisional cast on
- Stitch markers
- Stitch holders or scrap yarn
- A Seashell Baby Shirt + Dress pattern
Gauge
24 stitches and 38 rows = 4 inches in stockinette stitch
Sizes
0-6 months (6-12 months, 12-18 months, 18-24 months)
To fit actual chest circumference of approximately 16½ (18, 19, 20) inches, with approximately 1-2 inches of ease
- Finished Chest Circumference: 18½ (20½, 21½, 23 ½) inches
- Finished Length From Neck To Hem:
- Shirt: 6½ (7¼, 8, 8¾) inches
- Dress: 10¼ (11, 12¾, 13¾) inches
Sample: The Dress shown here is size 6-12 months, and the Shirt is size 0-6 months worn with 1 inch of ease.
Pattern

The Seashell Baby Shirt + Dress is available for purchase as a PDF download only.


This is a great baby top. I love to see baby clothes that are made to be comfortable instead of to make them look like mini adults. I can picture the baby here being sooo comfy!
Both top and dress look so sweet. I am going to make them both for my youngest Great Granddaughter Ruby. Ordering yarn today. Also, the dark hat is so cute. Must make that too. buying yarn and pattern for all three items. Really like PurlSoho yarn and patterns.
Purl Soho yarn has never disappointed me. I have knit many things in my years of knitting. My Grandmother taught me how to knit when I was 10 years old. Now I am old like she was. I can still her voice telling me what to look for and things that should be a certain way. She was such a wonderful teacher. I shall never be as good as she was. I was truly blessed to have had her for so many years.
Hi! Love this pattern, it’s SO CUTE!! Was wondering what the difficulty level is- or what knitting techniques are used? Thanks!
Hi Kay,
Thanks for reaching out and for your kind words! I would say this is an advanced beginner to intermediate pattern! It is pretty straight forward but there are a few more advanced techniques used like Provisional Cast-on, German Short Rows, and Kitchener Stitch!
I hope this helps, happy knitting!
Gianna
Question. Knitting the shirt. I’m at the Finishing Shirt, work I-cord edging for center front and back. I have cast on 3sts on spare needle and placed them on the beginning of the needle that picked up 27sts. I’m confused about the Next Row (right side). [Bring yarn behind 3 slipped stitches pulling it snug, then k2, ssk….] Wouldn’t I have to turn the work around and work from the wrong side to do this? All the sts are on the right hand needle to start. What am I missing?
Hi Laura,
Thanks for reaching out. The beauty of the i-cord technique is that it’s all worked from one side, so you’ll never need to turn your work! Just push your needle (either a DNP or a circular needle) so that the stitches are at the other end, and this will now function as the left needle. If you’re not yet familiar with i-cords, then our i-cord tutorial would be a great place to get a sense of how they work. Hope this helps!
All the best,
Lili
Hello, thank you for this fun pattern. Getting ready to knit for my granddaughter. Not a very experienced knitter. Wondering if and why we need 32 inch circular needle? Would it be possible to knit on straight needles instead? Thank you for your help,
Renata
Hi Renata,
We’ve already replied over email and seemed to go there but wanted to post our answer here too in case it’s helpful to anyone else.
You can use straight needles for the body itself but will have to transfer to circular needles when you get to the WORK I-CORD ARMHOLE EDGING + STRAPS section towards the end. You’ll need your needles to be flexible as you pick up stitches around this curved edge and work together with double pointed needles for the i-cord.
Again I hoe that helps and please let us know if you have any other questions.
All the best,
Zha Zha
Thank you very much for your quick answer. Got the 32 inch circular.
Started to knit and it is going good.
Very grateful,
Renata
Hi, I’m a bit confused about the instructions for the dress. Under “shape right front armhole”, Row 3, it says “knit to next marker”. Does that mean to knit to the second marker? Or the first? TIA!
Hi Iris!
Thank you for your question! In Row 3 of this section for the dress, you will knit to the first marker in the row, 18 stitches away from the underarm, before working the first double stitch.
I hope this helps!
All the best,
Margaret
I’ve started and ripped out this pattern three times because of the placement of markers and the instructions to make double stitches. The setup row specifies a marker after 4 stitches and the next and only marker is after, in my case, 38 stitches, then to Purl to the end.
I’m now on row 5 and it references a third marker that is the turn for row 6. Plz help! This is so frustrating!
I’m now on
Hi Charlotte!
I’m so sorry to hear you have been having a frustrating time with these markers, and I’m happy to help clarify these initial rows. When making the dress, you will have two stitch markers like you mentioned: one is after purling 4, and one is after purling 38 for the largest size. You should have 24 stitches left after the latter marker as well! Then, once you make the double stitch before the first marker, you will only be working the 24 stitches to the left of the marker for short row 4. In row 5, you will knit across to the marker, slip marker, and then keep working to the second marker, which should be the one placed after the 4 purled stitches in the set up round.
If you would like to see German Short Rows in action, we also have a video tutorial here!
I hope this helps, and please feel free to let us know if you have any other questions as you knit!
All the best,
Margaret
4 (pm) 38 (pm) 24
Hello. I am working on this dress and noticing that the short rows seem to make a decorative hole pattern. Closer to the top, I see that this creates kind of a fake empire waist line, but I’m wondering about row 7. Is there supposed to be a similar “decorative” row of holes in the pattern created by the double stitches? I am having one in my dress (have finished the second repeat of 10 stitches) and not sure if it is supposed to look like this or if I should start over. It doesn’t appear in the pictures.
Hi Sarah,
That’s a great question! The fake empire waistline that you’re noticing is more of a byproduct of German short rows worked on rows that are very close together. Since the double stitch created on Row 7 is farther apart (in terms of rows) from the previous double stitches on these rows, there shouldn’t be as distinctive of a line. I’d recommend keeping a close eye on your tension as you work the German short rows! Since you’re seeing more prominent holes than expected, there’s a chance that your tension is a bit too loose as you’re creating the double stitches.
All the best,
Lili
I am getting ready to start the one step provisional cast on method to make the shirt. I am confused why they cut the yarn in the demonstration video.
Please advise
Hi Nancy,
Thanks for reaching out. In the video, only the scrap yarn is cut! Once you’ve completed the provisional cast-on with the scrap yarn, you’ll being knitting with the actual yarn you’ll be using for your project, which is different from the scrap yarn you use for the cast-on. Because you won’t need to knit with the scrap yarn anymore, you can cut it so it doesn’t get in the way!
All the best,
Lili
Thanks Lilli. I understand that now. But I am making the shirt version . I am confused about row 3 instructions. If I knit to the marker, then I will be knitting 4 stitches. Do i then turn my work around, do the double stitch and knit the remaining couple of stitches. I think it might be easier if you ( or someone) can talk me through these first couple of rows to get me started. Is there a number i can call you?
Hi Nancy,
Glad to hear it! On Short Row 3, your stitch marker should actually be all the way at the other end of your work. When you place your marker on the Set-Up Row, you’re placing it after 4 stitches with the wrong side facing you. But when you turn your work around for any right side row (such as Short Row 3), the marker will be closer to the far end of the live stitches.
I hope this helps clarify things, but if you’d like more assistance getting started with the pattern, I’d recommend signing up for 1-On-1 Project Help over Zoom!
All the best,
Lili
So good to know about your 1-on-1 project help. I got this pattern going for now, but will keep it in mind for the future.
Thanks for your reply.
I am ready to do the Kitchener stitch to graft the sides together.
I have the right sides together. The tail is on the top set of stitches. I’m not sure how to start the Kitchener stitch with the yarn in the front because if i insert my needle as if to knit and drop that first stitch from the front needle, it looks funny. Should i start with a new piece of yarn and do the set up stitches for the Kitchener stitch?
Hi Nancy,
Glad to hear that you’ve made so much progress already! You can still do Kitchener stitch with the yarn attached to the top set of stitches. Just remember to do the set-up stitches first though! You shouldn’t be dropping the very first stitch off the needle yet.
All the best,
Lili
Dear Purl Soho, thank you for your many wonderful patterns. I am hoping to knit this pattern with a local yarn (in the Netherlands), but it turns out to be quite hard to fit any yarn that matches the gauge (24 st, 38 rows). I wanted to ask if the gauge is really 24 stitches and 38 rows for 4×4 inch? And if so, if you would have any recommendations what will be most important to look for in a yarn to make the pattern work (matching rows or rather matching stitches)?
Hi Lotje,
Thanks for reaching out. I can confirm that the gauge of this pattern is 24 stitches and 38 rows over 4 inches! However, I would not recommend selecting a yarn based on its recommended gauge. Those numbers are just estimates, but in reality, you can knit at many different gauges with the same yarn!
Instead, I’d suggest finding a fingering weight yarn, since this pattern was designed for a fingering weight yarn. That will give you approximately the same thickness, meaning that the yarn has the potential to knit up to the same gauge. Then, once you have the yarn, you can knit up a gauge swatch to determine which needles you’ll need to use to match the gauge. You may need to size up or down your needles in order to do so!
All the best,
Lili
I’ll try that, thanks for your help!
I am ready to join the two side seams using the Kitchener stitch. My live edge has 43 stitches. The edge that is was held with the Provisional Cast on has 37 stitches. Don’t the two sides need to have the same number of stitches to make the seam line up? According to the pattern, when you use the one step provisional cast on, you begin with casting on 36 stitches. When ending the Shape Left Armhole, you are to have 36 stitches. Any idea why mine don’t match and what to do about it?
Hi Micki,
Thanks for writing in! When you do a provisional cast-on, you always get a sort of “half stitch” at one end. This is likely what you’re counting as your 37th stitch, but you can just ignore it and count it as just 36 stitches! As for your 43 live stitches, it sounds like you may not have worked all of the decreases in either the LEFT FRONT ARMHOLE or the RIGHT BACK ARMHOLE section. I’d recommend checking to see if the armholes have the correct shaping by laying the shirt out with the front on top and the back underneath. You’ll be able to see any discrepancies in the armhole shaping that way!
All the best,
Lili