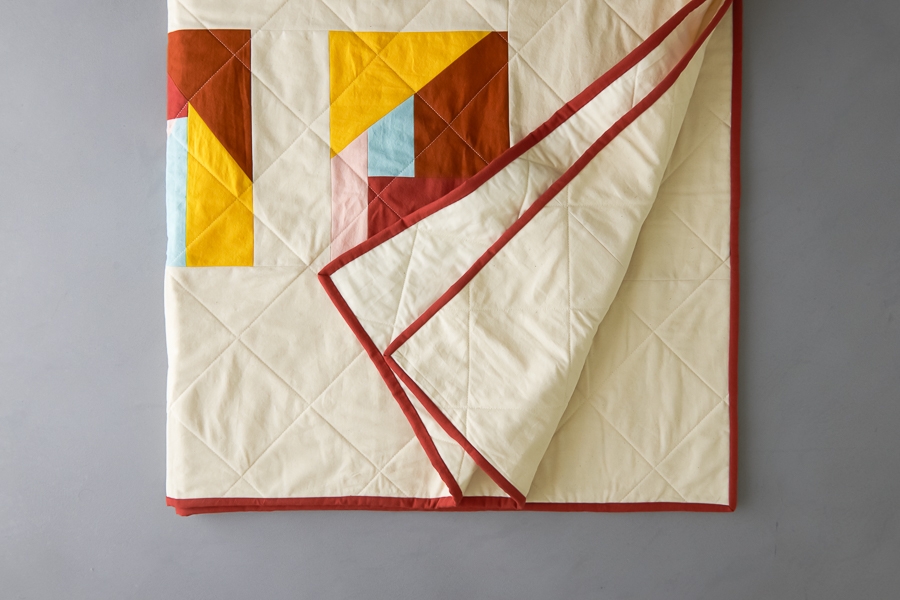
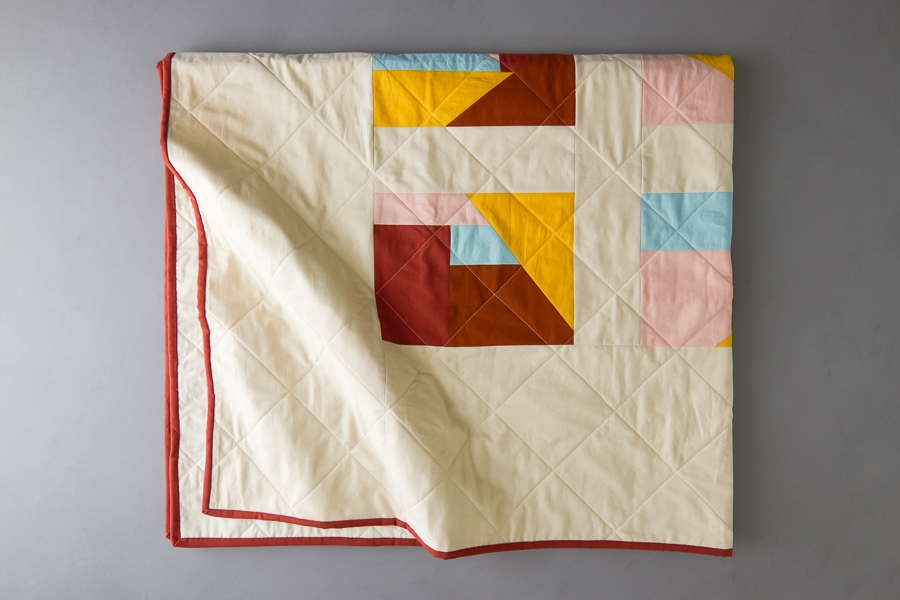
Short Stories Quilt
The Short Stories Quilt is composed of nine patchwork anecdotes, each one telling a tale about color, composition, and pure sewing fun. Created for Purl Soho by Amanda Carye, the New York City-based founding genius behind Broadcloth Studio, this is a quilt for everyone with something to say!

We love that the Short Stories Quilt gives you the tools to be free. It takes the ethos of improvisational quilting, adds some parameters, and makes the whole process approachable. As Amanda says, “It allows you to dip your toes into improv without fear.” What a gift!

Each little story is up to you, but Amanda provides us with the exact knowledge we need to embrace this opportunity. In the end, your beautiful quilt will be tangible evidence of your ability to go out on a limb, to experiment and play, and to create something uniquely yours.
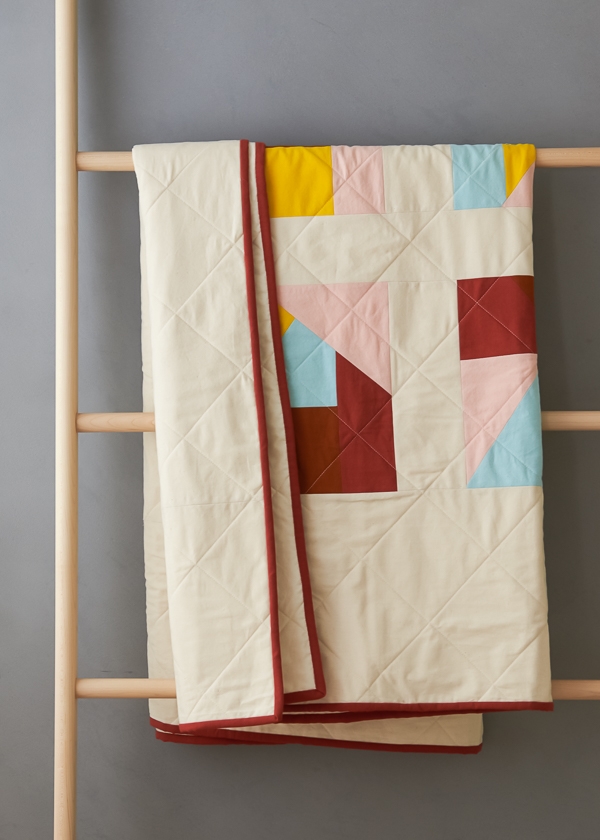
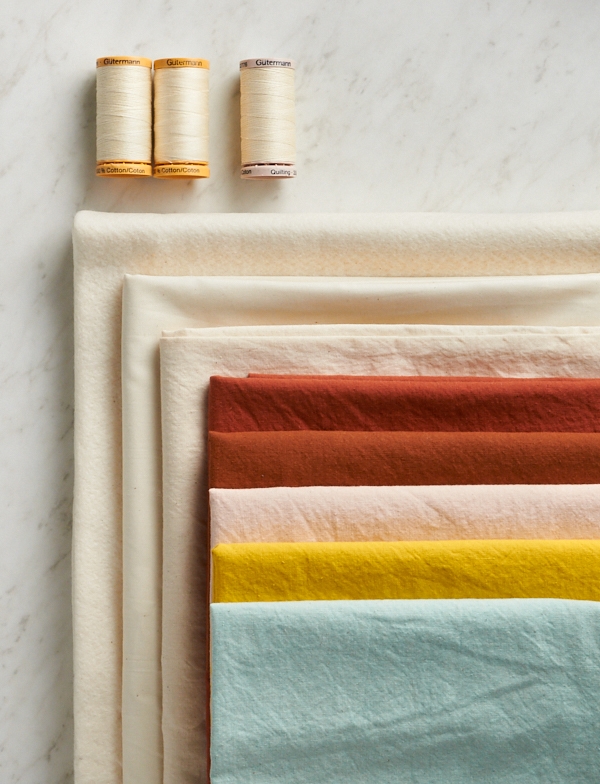
And these amazing colors? They’re supplied by our garment-dyed Spectrum Cotton collection. Get started by picking up a handful of colors like in this wonderfully bold Feedsack palette, or in our equally lovely Shore and Ginger colorways. We can’t wait to see the stories you sew!
Designed for Purl Soho by Amanda Carye of Broadcloth Studio
Materials
To create your own Short Stories Quilt, you will need…
- Background Fabric: 2 yards of Purl Soho’s Spectrum Cotton
- Fabric A + Binding Fabric: ¾ yard of Spectrum Cotton
- Fabrics B-E: ¼ yard of Spectrum Cotton (if you’re assembling your own fabrics, fat quarters work, too!)
- Backing Fabric: 2 yards of Moda’s Muslin, 90-inch, 200 Count in Natural
- Quilters Dream’s Cotton Batting, Twin size, Mid Loft Select thickness
- Two 274-yard spools of Gutermann’s Cotton Sewing Thread in color 1040
- One 220-yard spool of Gutermann’s Hand Quilting Thread in color 919
We’ve created three palettes for inspiration…
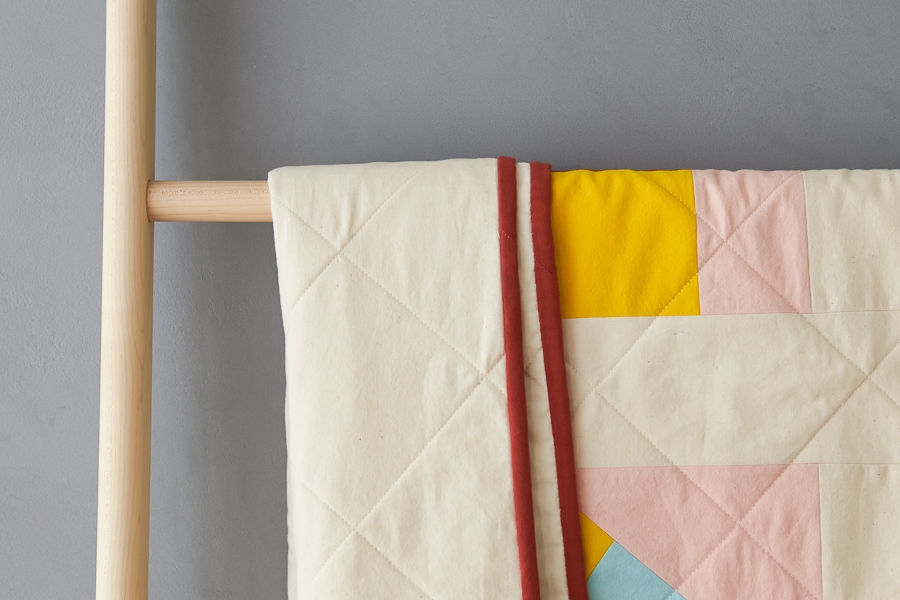
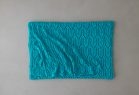
FEEDSACK (shown above, colors listed below)
- Background Fabric: Raw Oats
- Fabric A + Binding Fabric: Terra Cotta
- Fabric B: Whiskey Brown
- Fabric C: Raincoat Yellow
- Fabric D: Duck Egg Blue
- Fabric E: Vintage Pink
NOTE: Please take particular care that the Terra Cotta color is fully fixed before sewing together.
GINGER
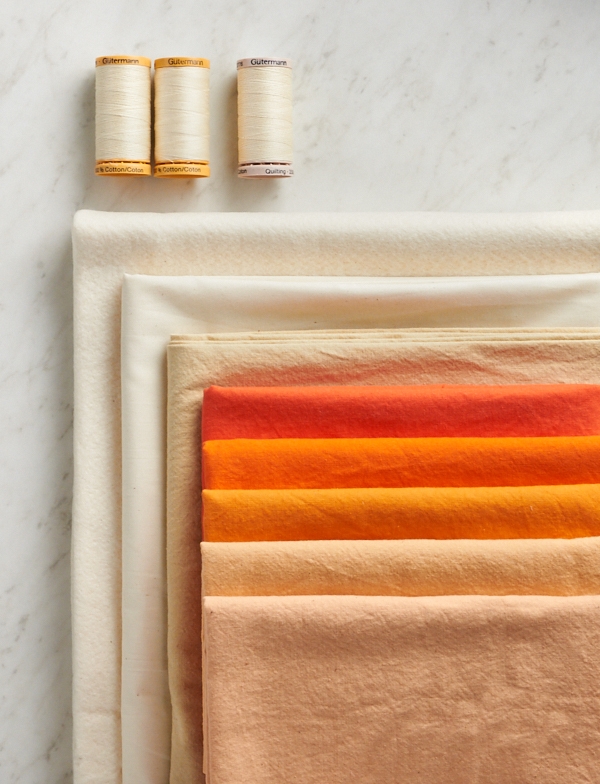
- Background Fabric: Pine Nut
- Fabric A + Binding Fabric: Orange Coral
- Fabric B: Orange Nasturtium
- Fabric C: Orange Gourd
- Fabric D: Pale Melon
- Fabric E: Peach Macaron
SHORE
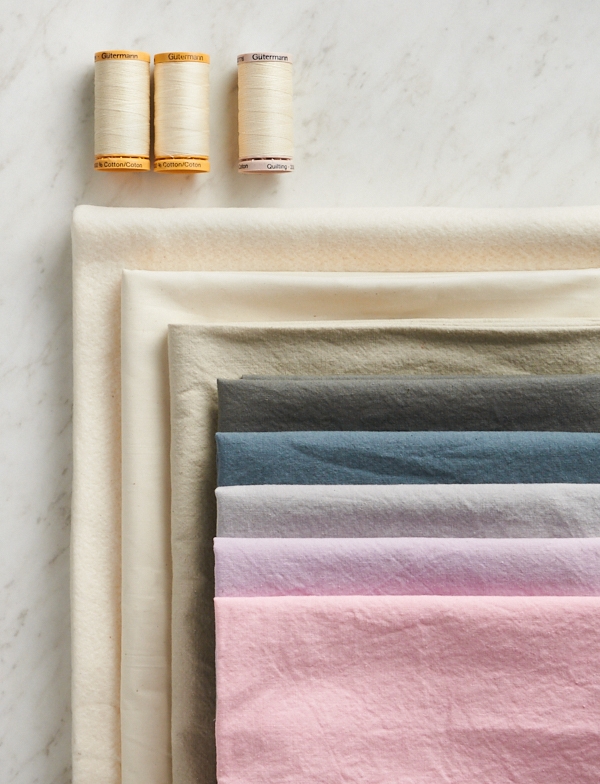
- Background Fabric: Putty Gray
- Fabric A + Binding Fabric: Rock Wall
- Fabric B: Pebble Blue
- Fabric C: Orchid Gray
- Fabric D: Lilac Blossom
- Fabric E: Pink Tulip
You will also need…
- A fabric-marking tool for marking the quilting, like a Hera Marker
- A rotary cutter
- A non-slip quilting ruler
- A self-healing cutting mat (get this, the ruler, and cutter together with out Rotary Cutting Tool Kit)
- An iron
- A couple sheets of printer paper (US letter size)
- Double-sided Scotch tape
SIZE
Finished Dimensions: 53 x 60½ inches
NOTE
Prewash and iron all of the fabrics (but not the batting) before starting.
All seam allowances are 1/4 inch.
Width of Fabric (WOF) is assumed to be 42-45 inches.
PATTERN
CUT
Backing Fabric
From the 90-inch Backing Fabric, cut a rectangle 61 inches wide X 69 inches tall. Put this aside until the Baste section.
Background Fabric
From the 45-inch Background Fabric, first cut two 4-inch x width of fabric (WOF) strips. Trim both strips to measure 4 x 33 inches.
Take the remaining 45 x 64-inch piece, fold in half selvage-to-selvage and make a tiny cut at the top of the fold. Rip (yes, rip!) the fabric down the middle. Fold the halves in half again, this time selvage to ripped edge. Make a tiny cut at the top of the fold and rip in half again. You’ll have four 11¼ x 64-inch strips. Iron out the ripped edges and set aside the two strips with the selvage edges.
From the end of each of the 11¼ x 64-inch strips without selvage edges, cut three 4 x 11-inch strips (six pieces total). This leaves two 11¼ x 52-inch strips. Set aside all the Background Fabric pieces until the Assemble The Quilt Top section.
Fabrics A-E
From Fabric A, cut six 2¼-inch x WOF strips. These are the Binding Strips. Put these aside until the Bind section of the pattern.
Trim the remaining Fabric A piece to measure 9 inches x WOF.
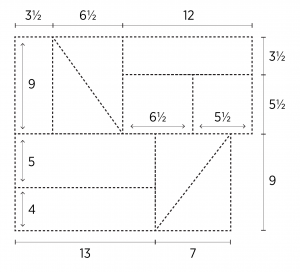
Trim the selvages from the 9-inch x WOF piece of Fabric A and from Fabrics B-E. From each, cut the following pieces (see the diagram below for easy reference)…
- 3½ x 9 inches
- 6½ x 9 inches
- Sub-cut from corner to corner to make two right triangles
- 12 x 9 inches
- Sub-cut into one 3½- x 12-inch piece
- And one 5½ x 12-inch piece
- Sub-cut into one 5½ x 5½-inch piece and one 5½ x 6½-inch piece
- 13 x 9 inches
- Sub-cut into one 4 x 13-inch and one 5 x 13-inch piece
- 7 x 9-inches
- Sub-cut from corner to corner to make two right triangles
¼ Yard Cutting Diagram

Fat Quarter Cutting Diagram
ARRANGE THE BLOCKS
Separate Fabric A-E pieces (not including the Binding Strips) into 10 piles, with five random pieces in each pile. Make sure each pile has one piece of each color and try to have a mix and match of shapes in each pile. Most importantly, don’t overthink it!
For the first block, place a piece of printer paper on your work surface. Grab a piece from your first pile and place it on the piece of paper. Take a second piece from the same pile and overlap it along an edge of the first piece. Continue to “build” the block until the printer paper is covered, rearranging as you go. Aim to have at least an inch of overhang around all sides so you can trim the block down after it’s sewn together (you can keep checking the size by laying another piece of paper over the arrangement).
Don’t know where to start? Here are some tips…
- Look for basic “pairs” to build on
- Make a larger rectangle out of two smaller ones
- Make a stripe set out of three rectangles and/or squares
- Use two triangles to make a rectangle
- Make use of the straight edges. Force yourself to design on a grid to start.
- Overlapping along the pieces’ edges is fine, but try not to allow pieces to divide or cut through other pieces. An exception is triangles, which do well overlapping and dividing other shapes at the blocks’ corners.
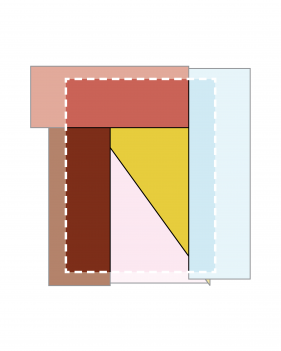
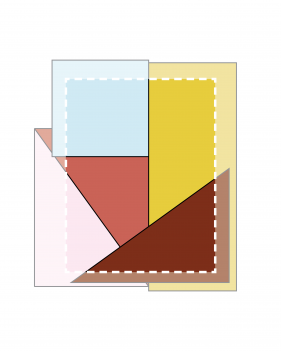
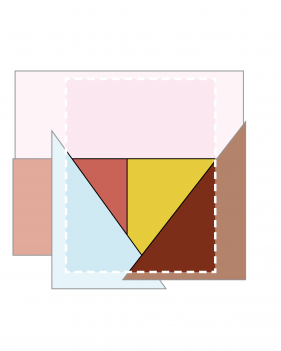
Here are some arrangement examples to help you get your creative juices flowing (the dotted white line is the imaginary edge of the paper so you can get a sense of what the final block might look like)…
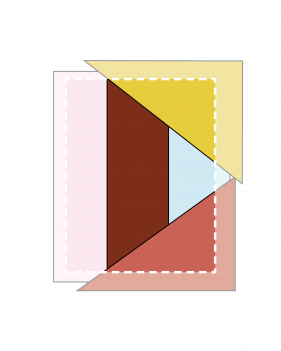
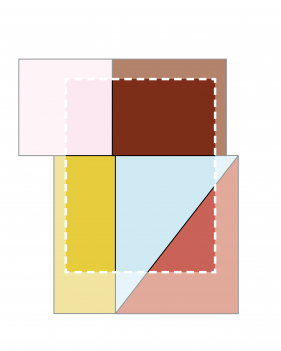
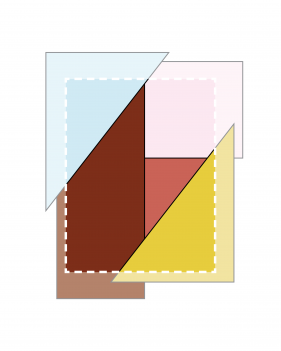
Once you’ve arranged the first block, take a picture on your phone so that, if in your pieces get scrambled, you’ll have a reference.
Set this arrangement aside and repeat with the nine other piles.
PIECE THE BLOCKS
First, determine the best order to build the block. Of course, each block is going to be a little bit different, but once you make a couple of blocks, you’ll start to notice repeating patterns.
A good game plan is to start with the smallest unit of the bottom-most layer: often a triangle set or two smaller rectangles. Then look for the next smallest edge and layer, typically another small rectangle or maybe a vertical rectangle. Keep going, figuring out each layer until you have your completed block (if you’ve made a log cabin block before, this is a similar concept of building smallest to largest, just with funky shapes and seam sizes!)
Once you have a plan and understand the layers, start sewing from the smallest bottom unit to the top-most layer. After sewing each seam, press it open before going on to the next seam. This helps minimize seam bulk as you go!
Here are a couple of examples of how to build a block…
Block Arrangement 1
 Block Arrangement #1
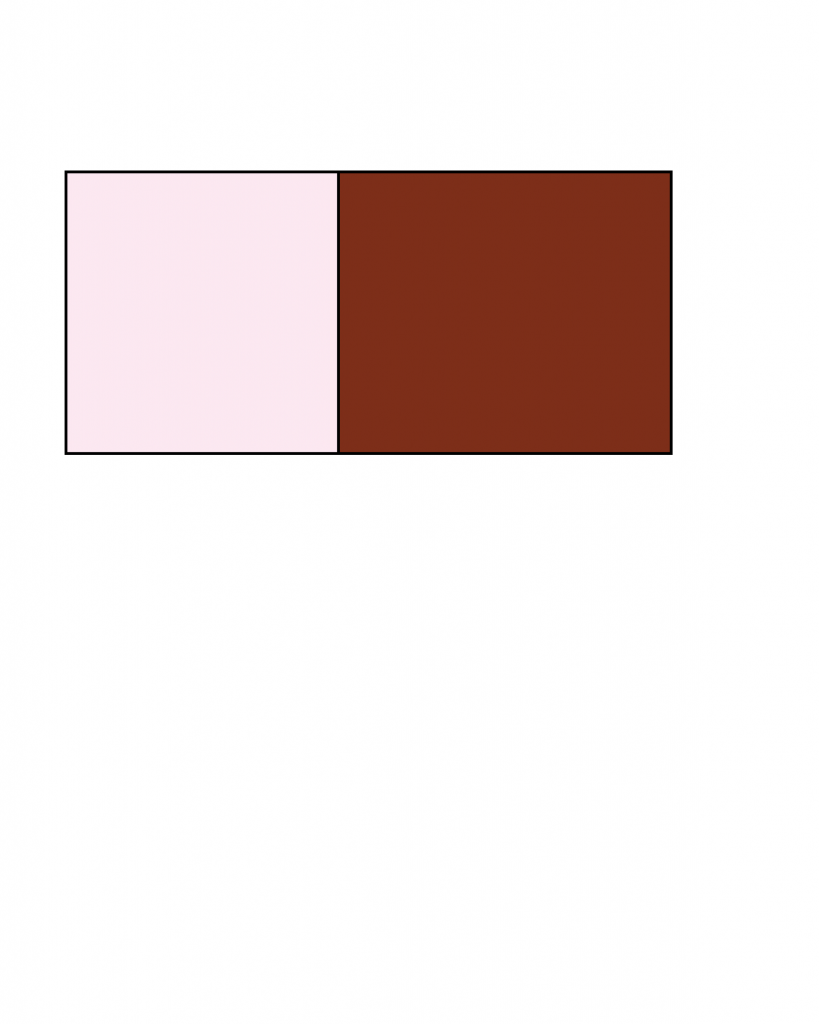 Step 1: Start with the two topmost rectangles.
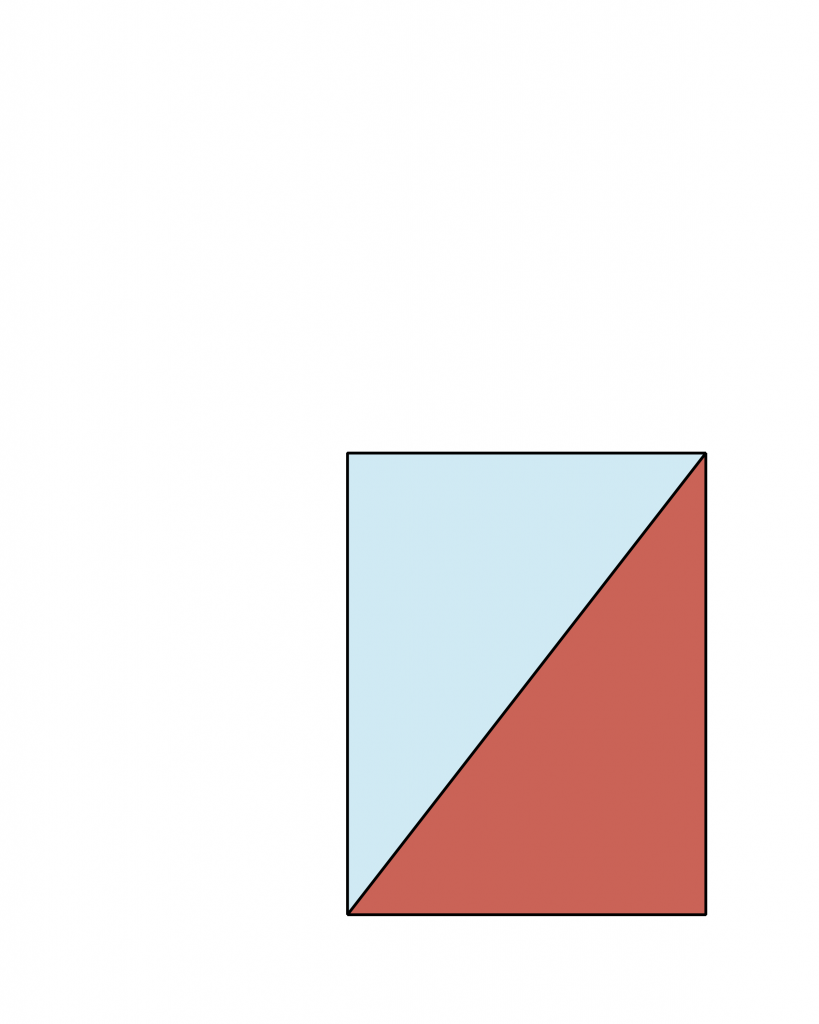 Step 2: Next, sew the triangle unit.
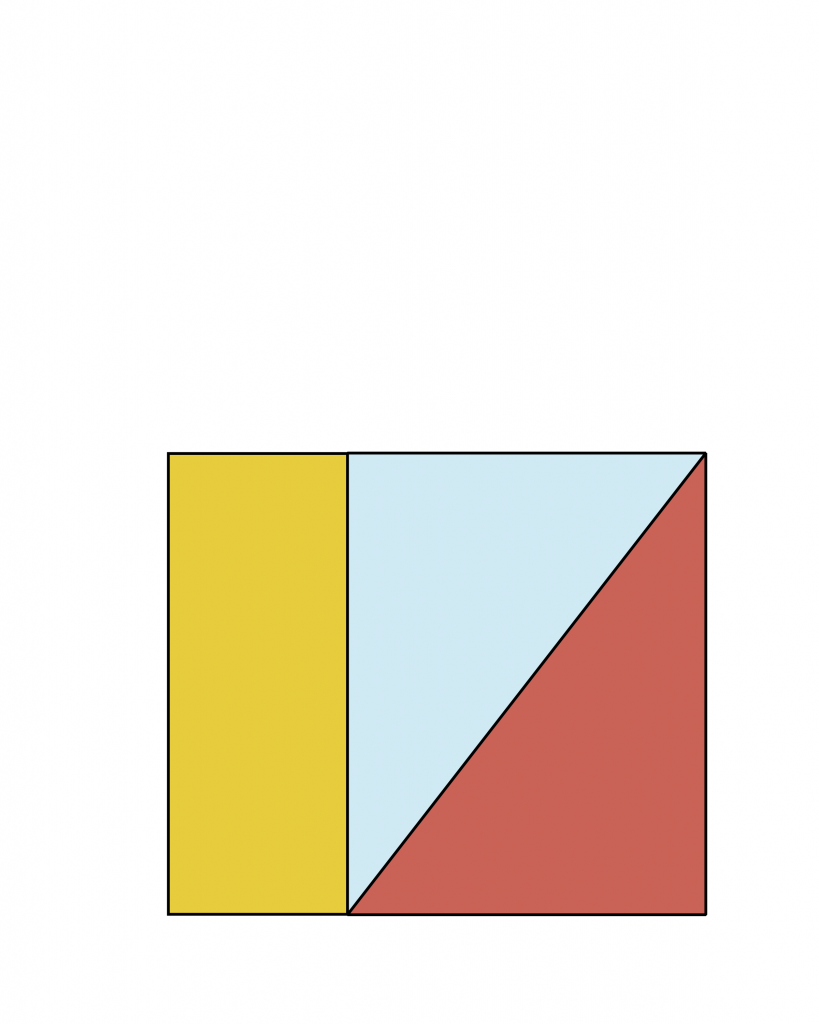 Step 3: Add the skinny rectangle to the triangle unit.
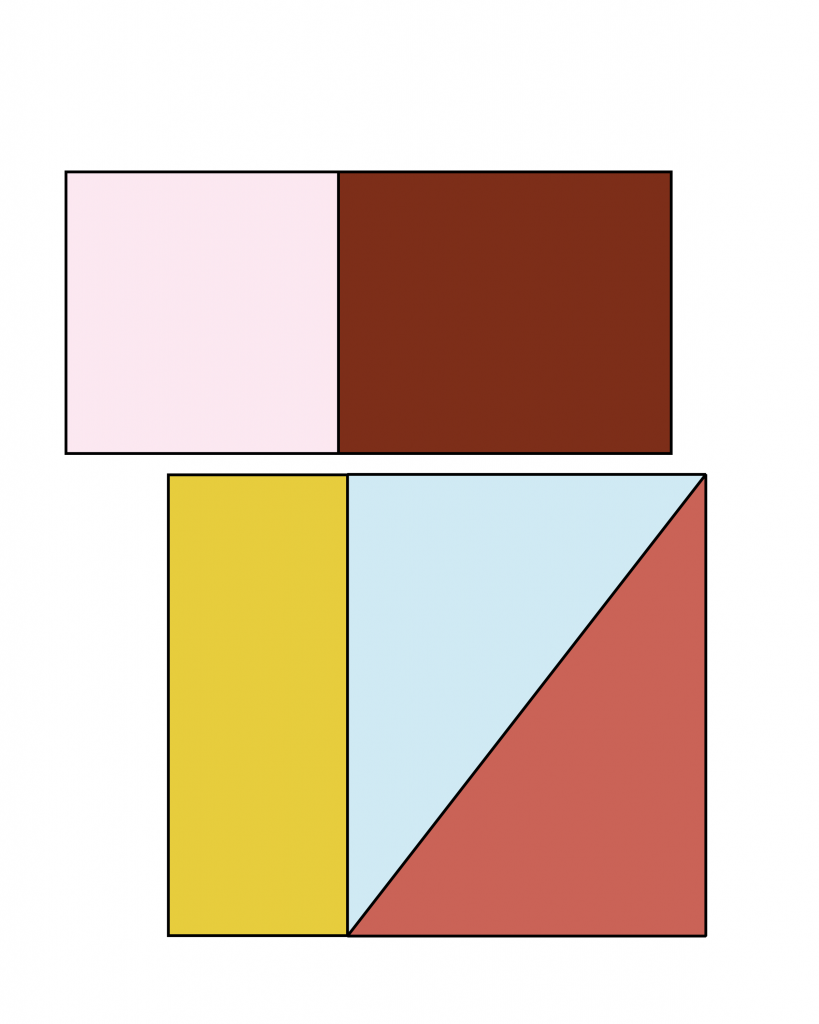 Step 4: Combine the top and bottom halves.
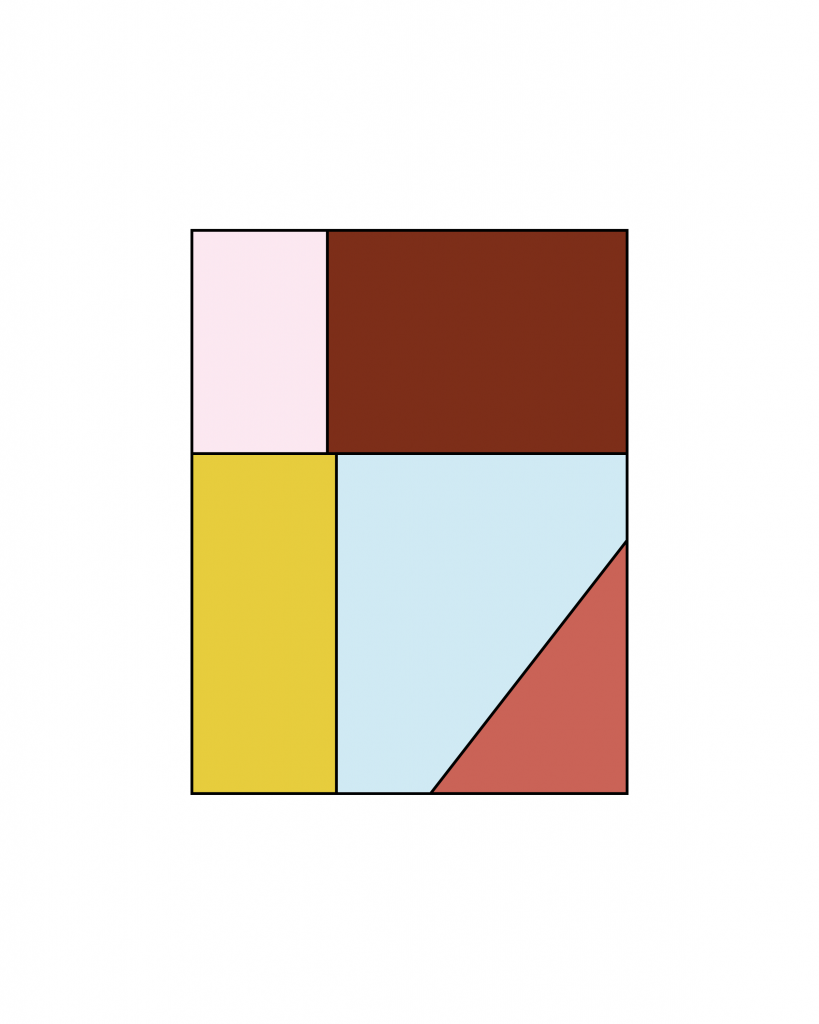 Final Trimmed Block
Block Arrangement 2
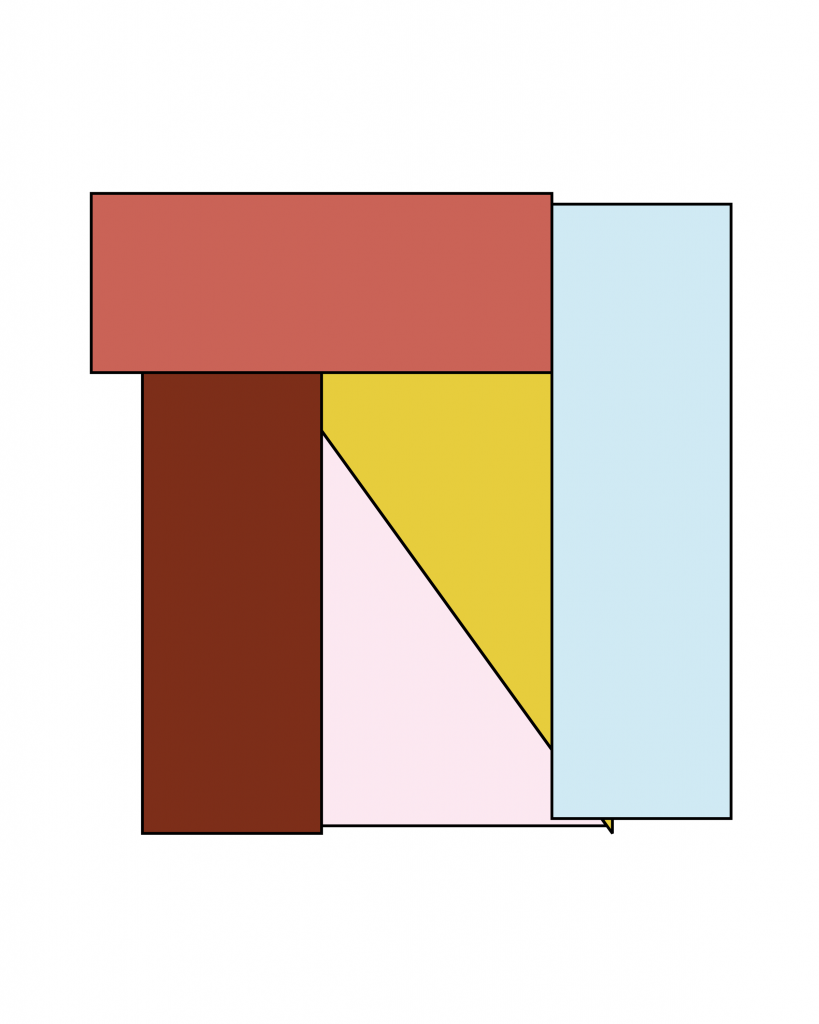 Block Arrangement #2
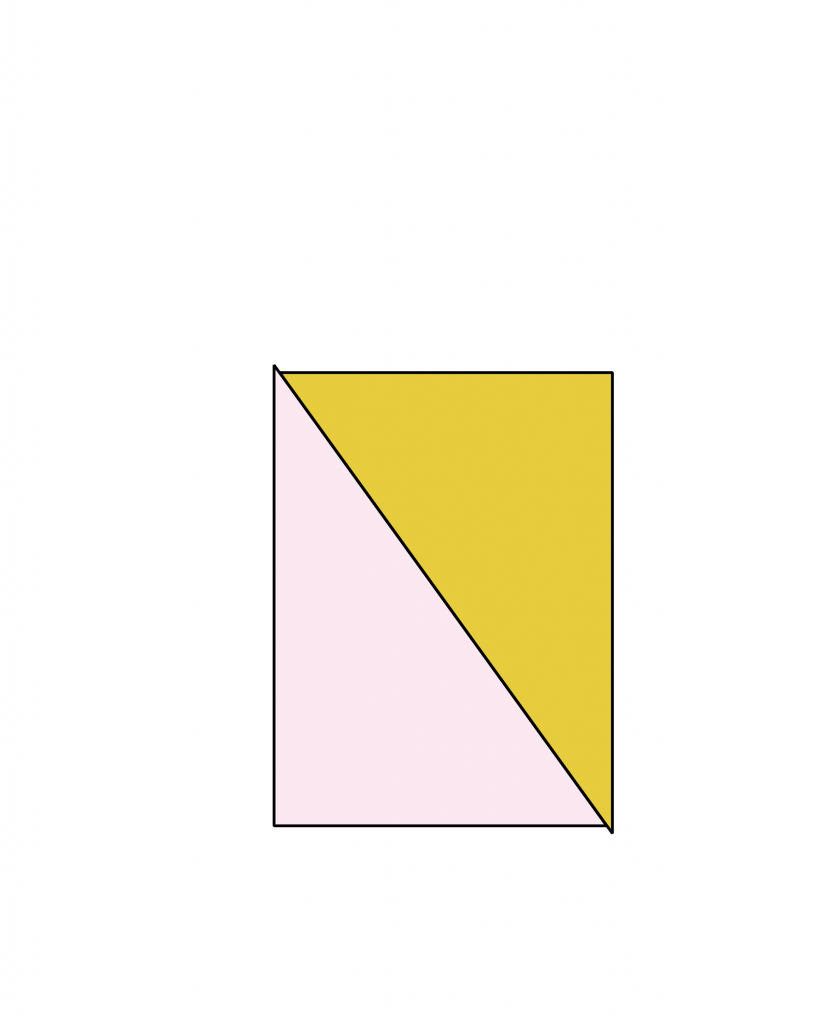 Step 1: Start with the triangle unit (the bottom-most layer).
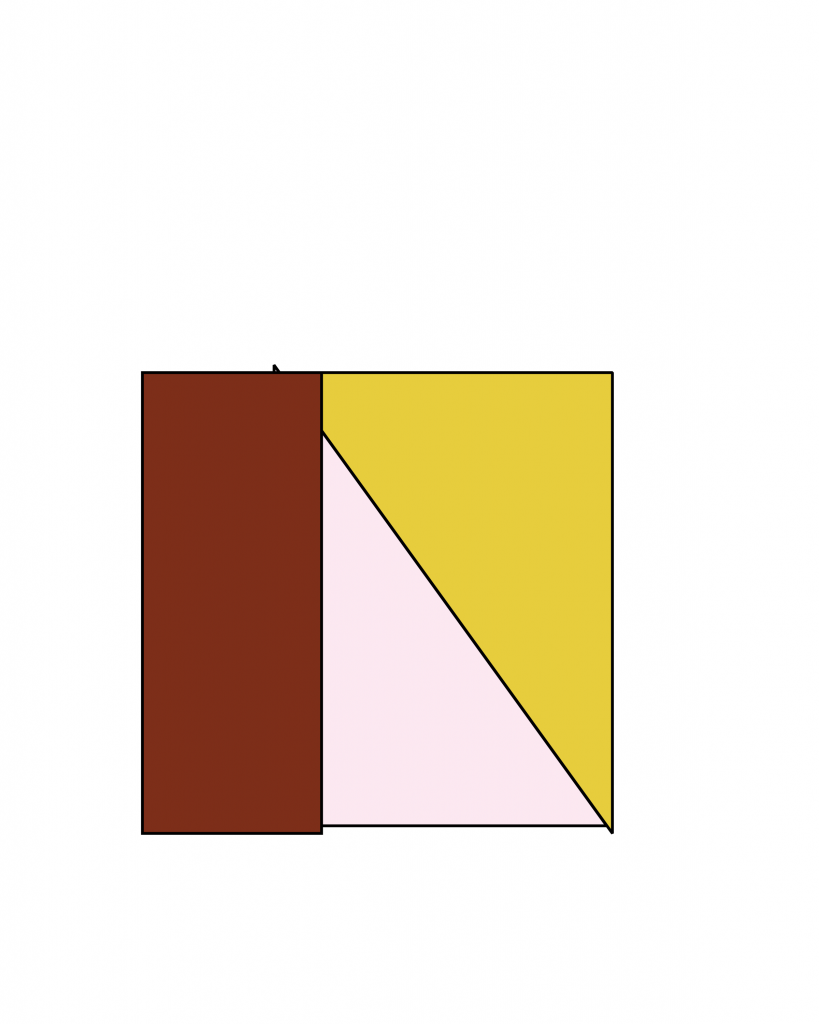 Step 2: Add the next rectangle, which overlaps the edge of the triangles.
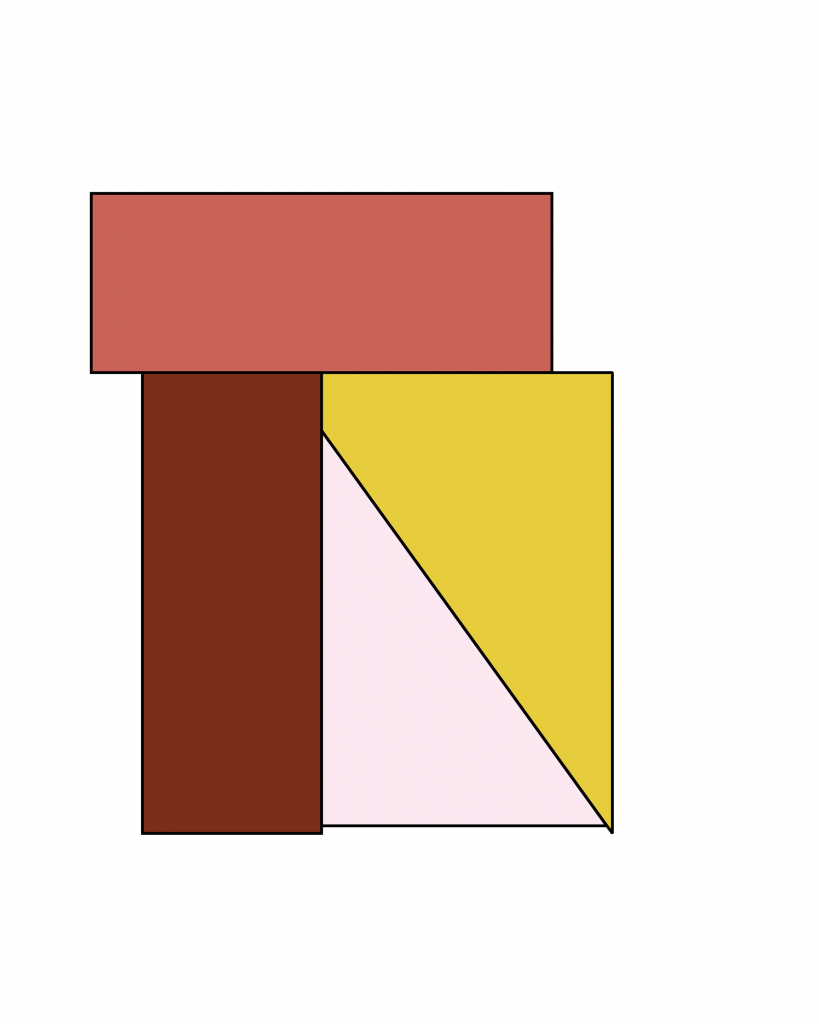 Step 3: Add the horizontal rectangle on top.
 Step 4: Then add the horizontal rectangle (notice how it overlaps the triangle unit).
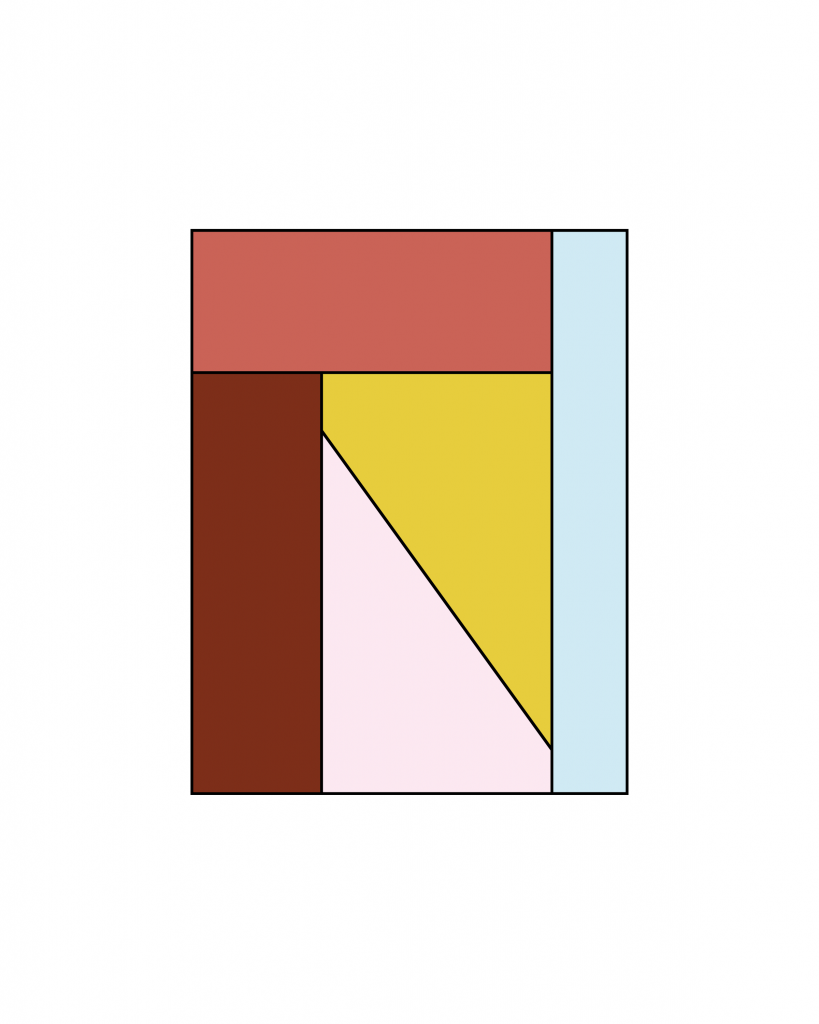 Final Trimmed Block
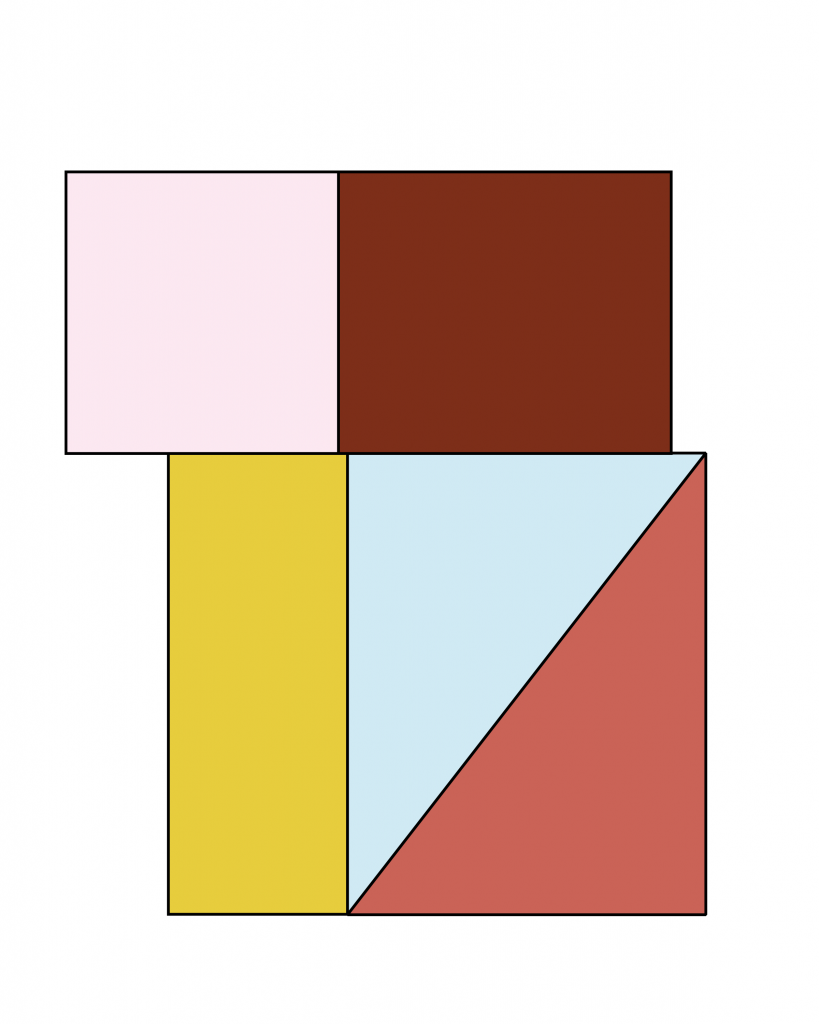
Block Arrangement 3
 Block Arrangement #3
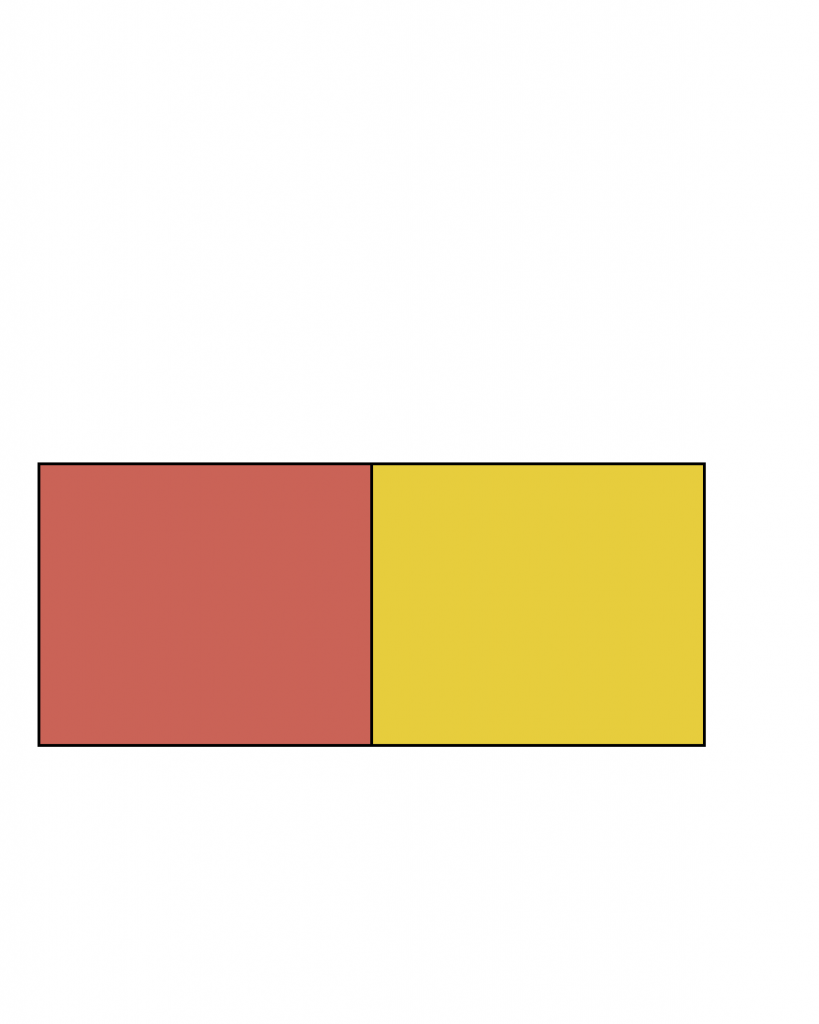 Step 1: Sew the two small rectangles (the smallest unit and “bottom-most layer under the triangles).
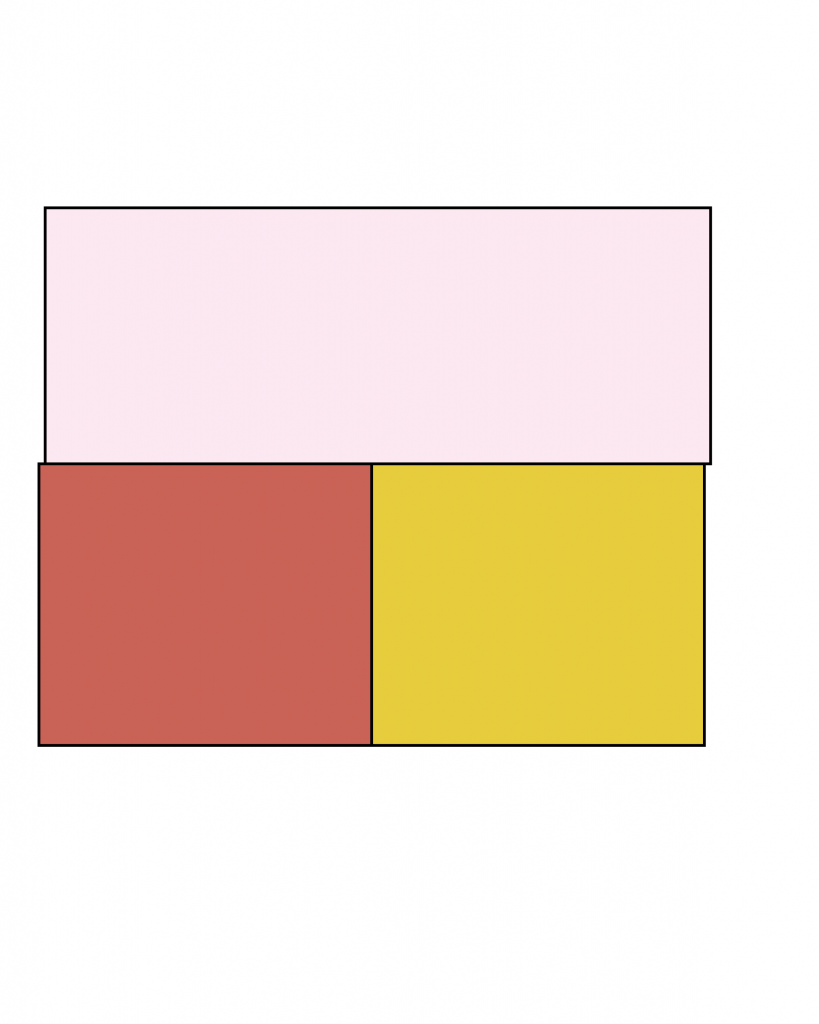 Step 2: Add the larger rectangle (the next “layer” under the triangles).
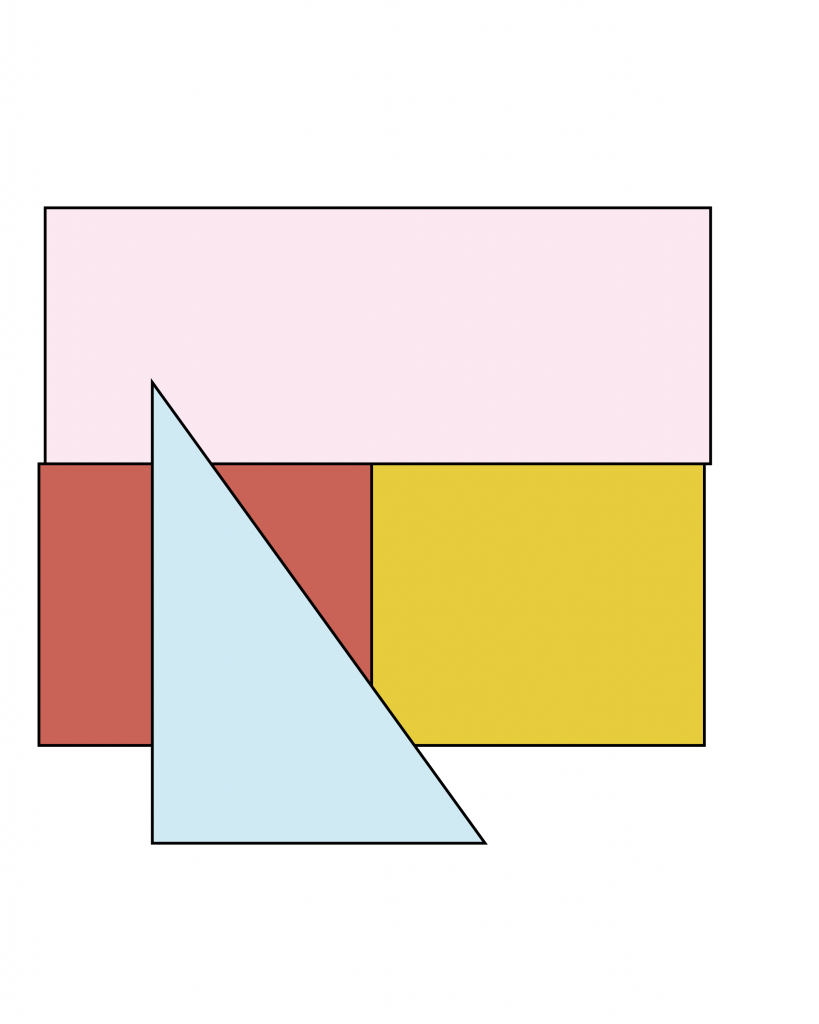 Step 3: Add the next layer, in this case a triangle that cuts across the rectangles
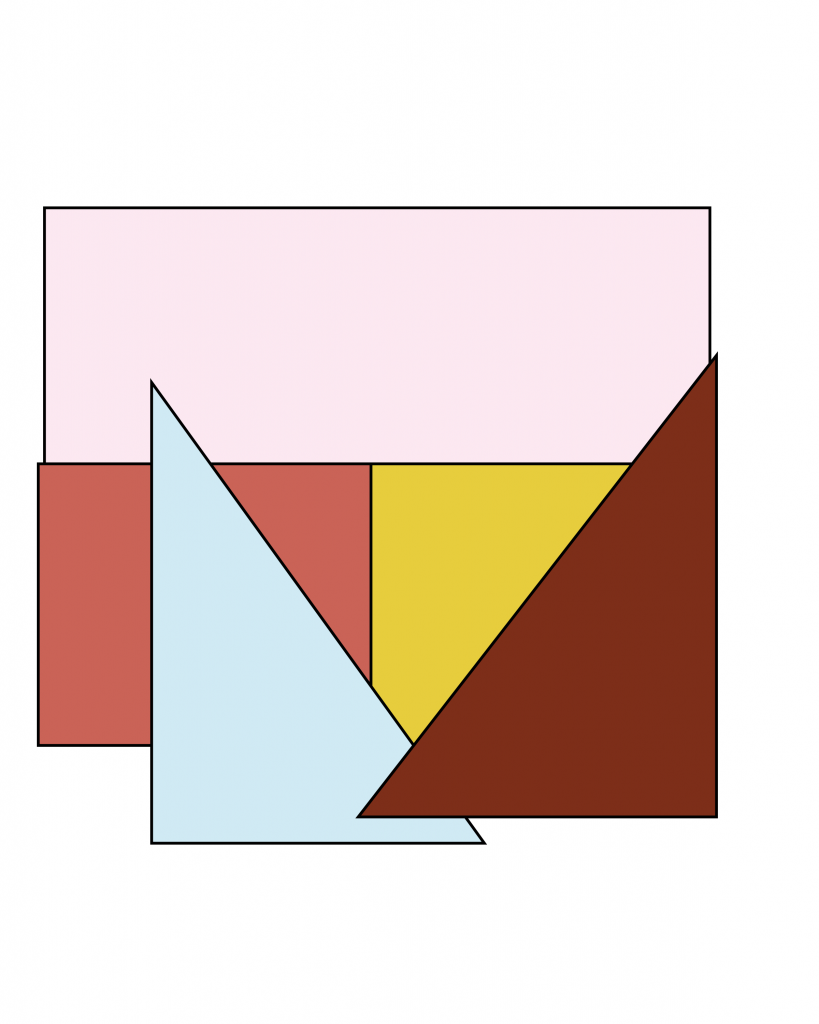 Step 4: Add in the final layer on top of the block
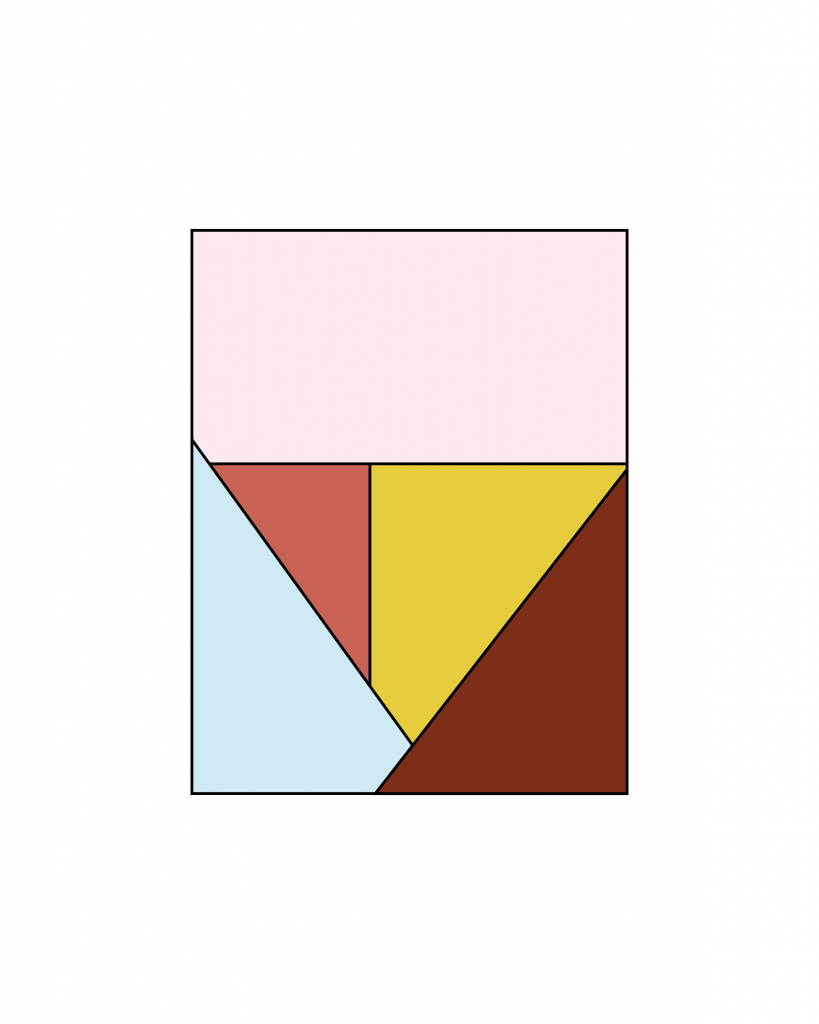 Final Trimmed Block
TRIM THE BLOCKS
Once you’ve sewn all the blocks, place a sheet of printer paper (US Letter size 8½ x 11 inches) on the first block. Use double sided tape to secure the paper to the block, then trim the block down, using the edges of the paper as a guide. You can randomly place the paper guide on the block and trim, or you can highlight an element of the block you love (like a cool seam intersection). It’s entirely up to you! Set aside.
Repeat with the other blocks.
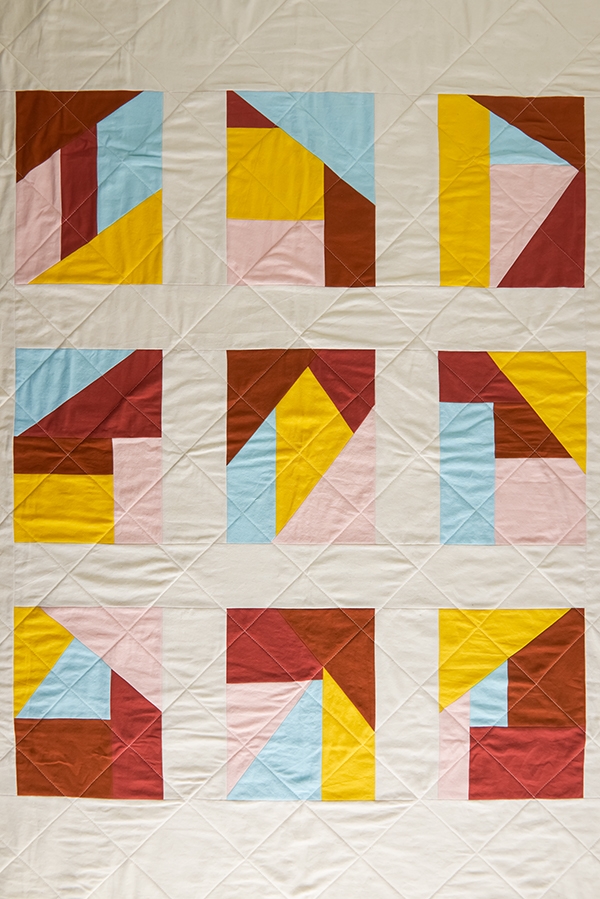
LAY OUT THE QUILT TOP
On a clean, flat floor (or large table), arrange the blocks vertically in a three-by-three grid. (The one block that doesn’t make it into your grid will make a cool wall hanging or a pillow. You’ll even have enough scraps from the Background Fabric to make a small border!)
Start with a random layout, and take a picture on your phone. Continue to play with other layouts and take pictures of the ones you like, then scroll through your photos to find your favorite composition!
ASSEMBLE THE QUILT TOP
Now that you’ve got your block layout, assemble the three rows in this order: Block, 4 x 11-inch Background piece, block, 4 x 11¼-inch Background piece, block. Press all seams open.
Join the three rows in this order: Top row, 4 x 33-inch Background piece, middle row, 4 x 33-inch Background piece, bottom row. Press all seams open. The Background pieces will be slightly longer than the rows, just trim them as you go. This is the Quilt Center.
Sew a long side of each of the two 11¼ x 52-inch Background pieces to the long side of the Quilt Center. Trim the Background Fabric down to size as necessary and press all seams open.
Sew the raw long side of each of the two 11¼ x 64-inch Background pieces to the bottom and top of the Quilt Center. Press the seams open.
The Quilt Top is finished!
MARK FOR QUILTING
Press the Quilt Top and then, with the right side facing up, lay it down on a clean, hard surface (most likely a floor).
Using masking tape, tape the fabric down to the floor around all four sides, pulling it taut as you tape. First tack down the centers of the opposite sides and then tape along each side, from the center out.
Using a long ruler, line up the 45-degree guide on your quilting ruler along one of the border’s horizontal seams. Use your preferred fabric-marking tool to mark a line.
Next, mark a line 4½ inches parallel to the first line. Mark the next line 4½ inches parallel to the last. Continue marking the Quilt Top in this manner, drawing parallel lines until there is no more quilt to mark.
Next, draw a line perpendicular to any previously drawn line. Draw lines parallel to this line in the same manner as described, creating a 4½-inch grid.
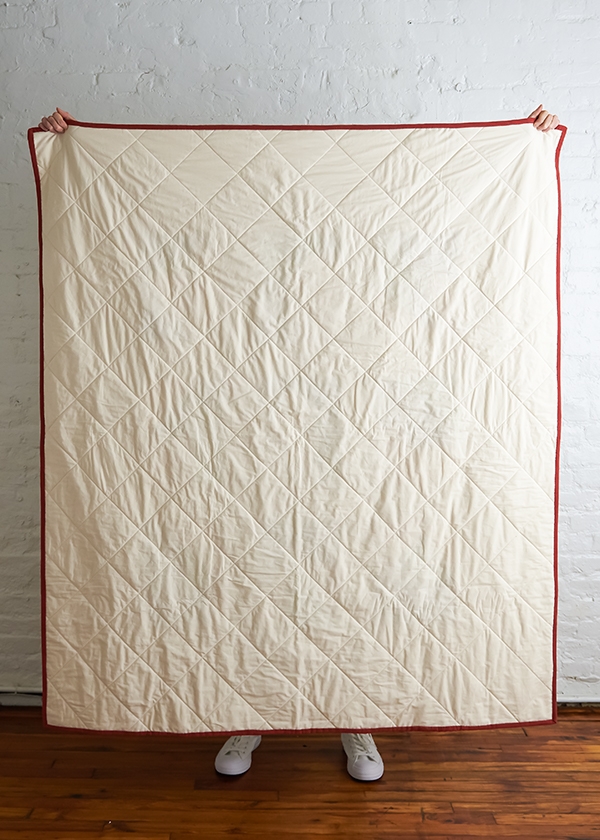
BASTE
Make a quilt sandwich and pin-baste the Backing, batting and Quilt Top together. For instructions on how to do all this, please check out our Pin Basting Tutorial!
QUILT
Now it’s time to quilt all the pieces together along the marked lines, first sewing all the lines slanting in one direction and then the lines slanting in the other direction.
Using your machine’s walking foot, start with a line that runs through the center of the Quilt (or close to it). Sew along this line from one edge of the fabric to the other (you do not need to backstitch at the beginning and end).
To sew the next line, rotate the Quilt 180 degrees and sew along the line running next to the line you just stitched.
Sew all of the parallel lines on one side of the center line and then sew all of the lines on the other side of the center line in the same manner: when you have finished sewing one line, rotate the Quilt and sew along the line next to it.
Next, quilt all of the diagonal lines slanting in the other direction in the same way: Start sewing with the center line and alternate directions as you sew along all the parallel lines running to the right and then to the left of this center line.
Once you’ve finished quilting, trim the batting and Backing to align with the Quilt Top.
BIND
Use the Binding Strips you cut from the Binding Fabric to bind the Quilt with double fold binding. For instructions on how to do this, please check out our Making Double Fold Binding and Sewing on Double Fold Binding tutorials. Use the Hand Quilting Thread for the hand-sewing steps.


I don’t understand how to deal with triangles that cut across. How do you manage to position them the right way (especially when working on the wrong side of the work) ?
Thank you
Hi Isabelle,
Thanks for reaching out! We give cutting templates under the PATTERN section to show exactly how to cut out each of the pieces!
I hope this helps, happy crafting!
Gianna
I’m working on this quilt . I’m pretty experienced piecing quilts , however , I would appreciate a more detailed tutorial. Thank you
Hi Lori,
Thanks for reaching out! At this time we don’t have the resources to make a tutorial for this pattern, but thank you for expressing your interest! I will be sure to pass this along to the rest of the team.
Warmly,
Gianna
Hello: I think this is a fabulous design. Allows for a lot of improvisation. Like little abstract paintings, all. As a new quilter, shall I attempt to adhere to 1/4” seam allowances, as possible? (for horizontal and certical joins). And shall I assume that in all cases I am piecing and seaming with right sides together, and then pressing open, even when there is a lot of overlap with placement of those overlapping diagonal shapes? I think the aim is to then trim down the selvages to 1/4” or so? Thanks for your help!
Hi Paula,
Thanks for reaching out and for your kind words! Yes that is correct, all seam allowances are 1/4 inch so you will want to stick to that to insure that all the pieces will line up correctly! And that is also correct, you will want to seam with the right sides together and then press the pieces open!
I hope this clears things up!
Warmly,
Gianna
Hi Gianna: thanks for your reply. With no quilting experience myself, I will just need to try out a color block. I anticipate that the laying in and stitching of those long angled edges of the triangles against the square areas will mean in some cases I will be trimming off on that angle a good deal of the bottom-most layers to make a 1/4” seam allowance on both sides of that seam. Do you prefer ironing open the seam? Or pressing both selvages to one side? Thanks again. Best, Paula
Hi Paula,
Thanks for reaching out again! I personally like to iron open the seam first and then press both selvages to one side for the cleanest seam!
Warmly,
Gianna
Thanks for your reply. I think your technique will make a nice crisp edge. I understand from reading other sources that leaving an open pressed seam might lead to a pulling apart of the stitches, especially if the machine quilting stitches end up in the seam. Many thanks again for your help. Best, Paula
Nice intro to improv. Thank you
How beginner friendly is this quilt?
Hi Holly,
Thanks for reaching out! I would say this pattern is an advanced beginner/intermediate pattern! If you are looking for a true beginner pattern I suggest checking out our new Learn To Sew A Patchwork Quilt In Spectrum Cotton!
Happy crafting!
Gianna
Hi! You have to at the 1/4” seam allowances to the pattern measurements ?
Kind regards mirre
Hi Mirre,
Thank you for your question! Yes, all seam allowances included in this pattern are 1/4″. We list this information under the “Notes” section for reference!
I hope this helps, and happy quilting!
All the best,
Margaret