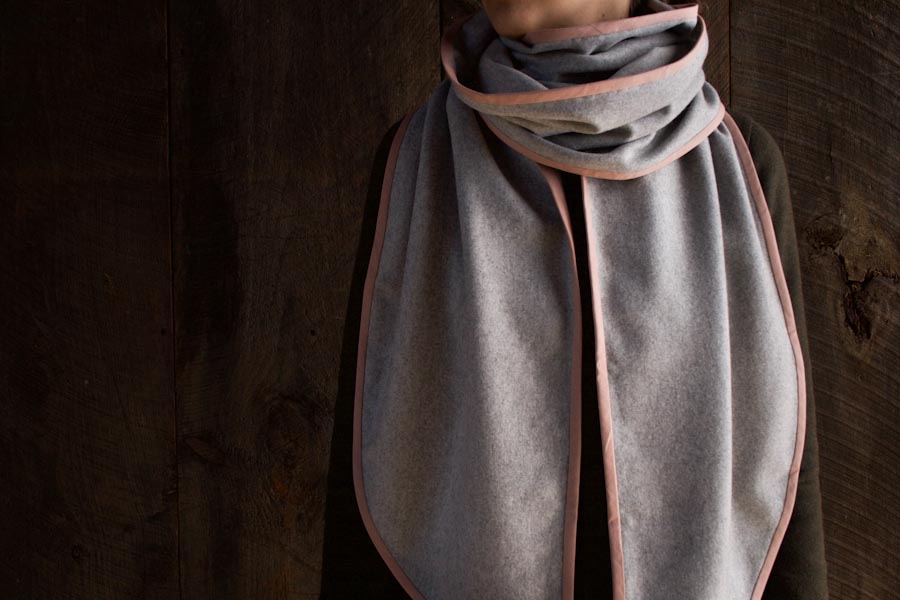

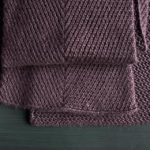
Bound Edge Wool Scarf
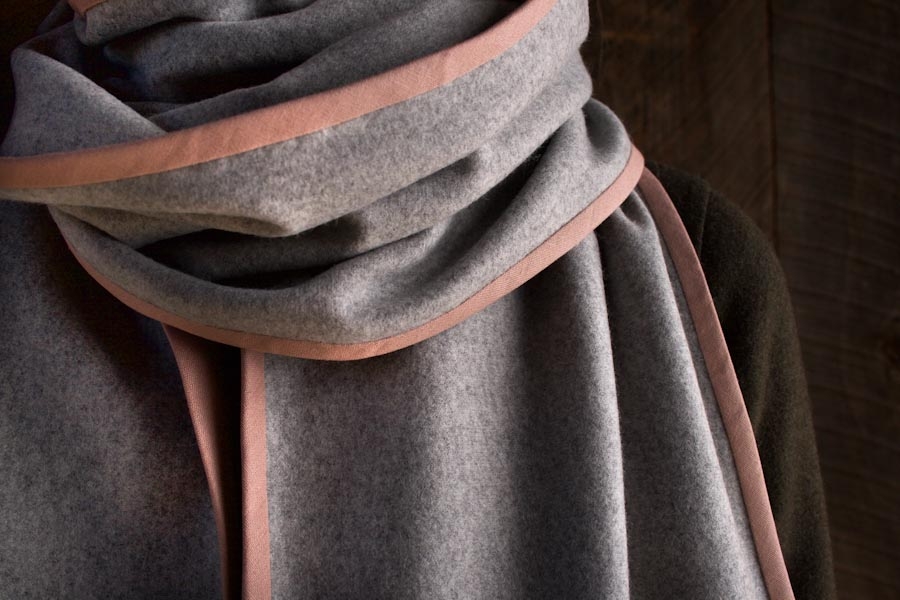
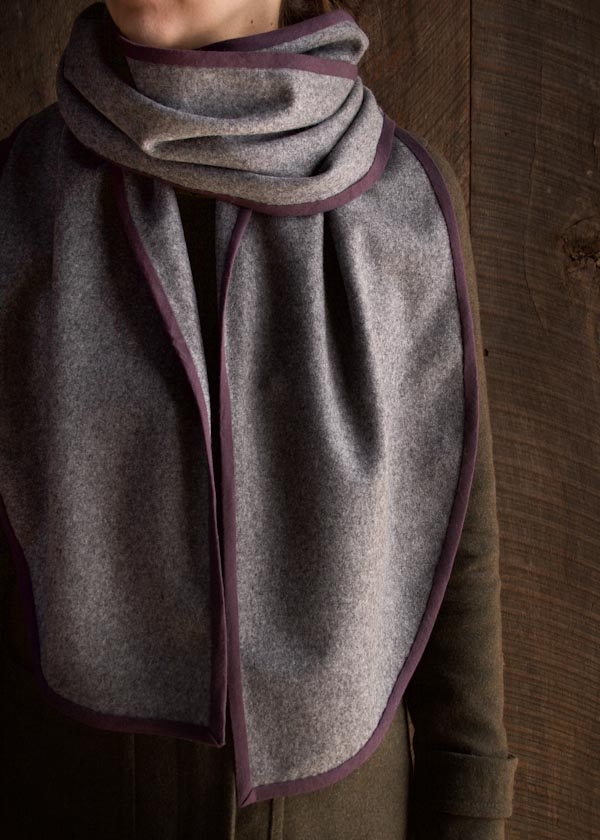
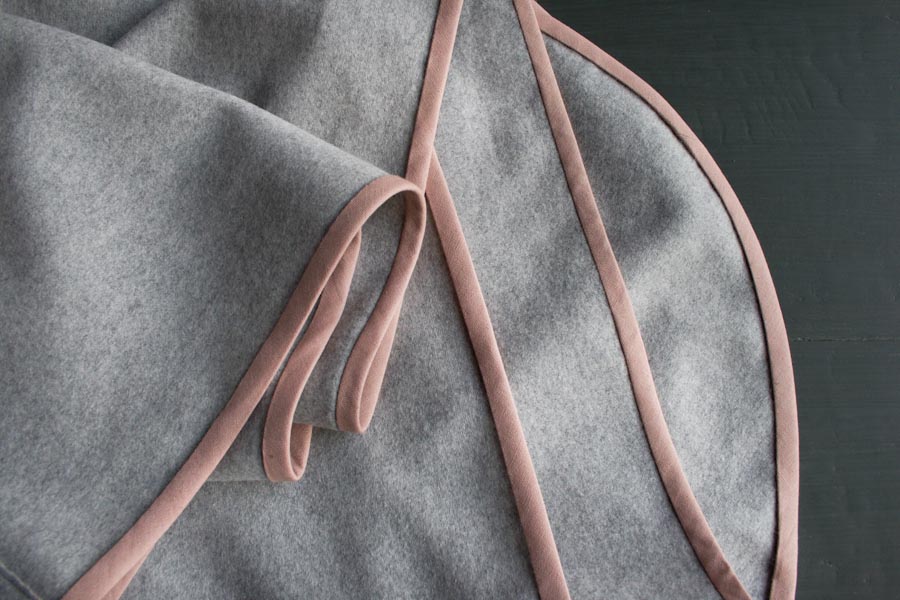
I am always trying to find ways to wrap myself in more and more swathes of Lanecardate’s amazing Lana Cotta Canberra. Although I’m tempted sometimes just to pull it right off the bolt, this Bound Edge Wool Scarf is nearly as easy as that, only even more beautiful!

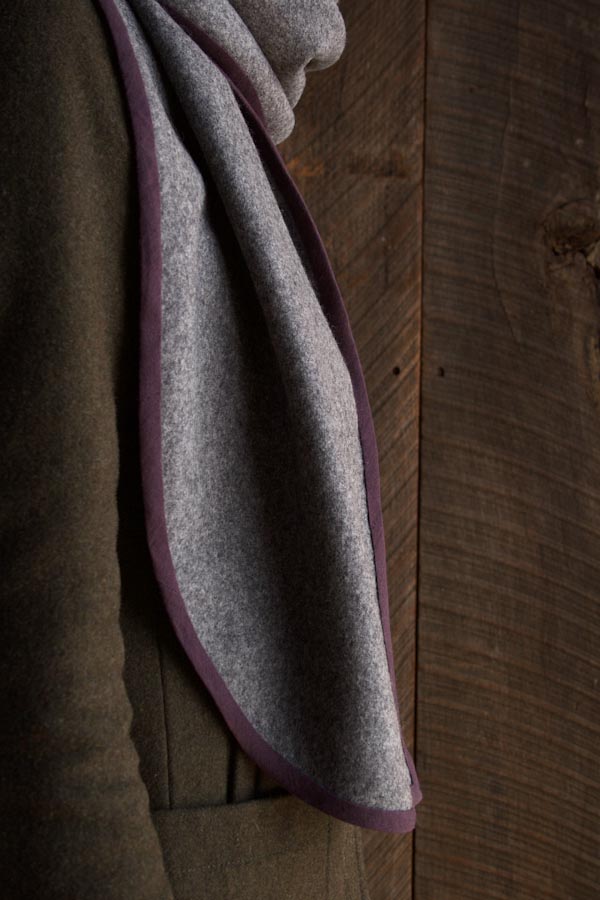
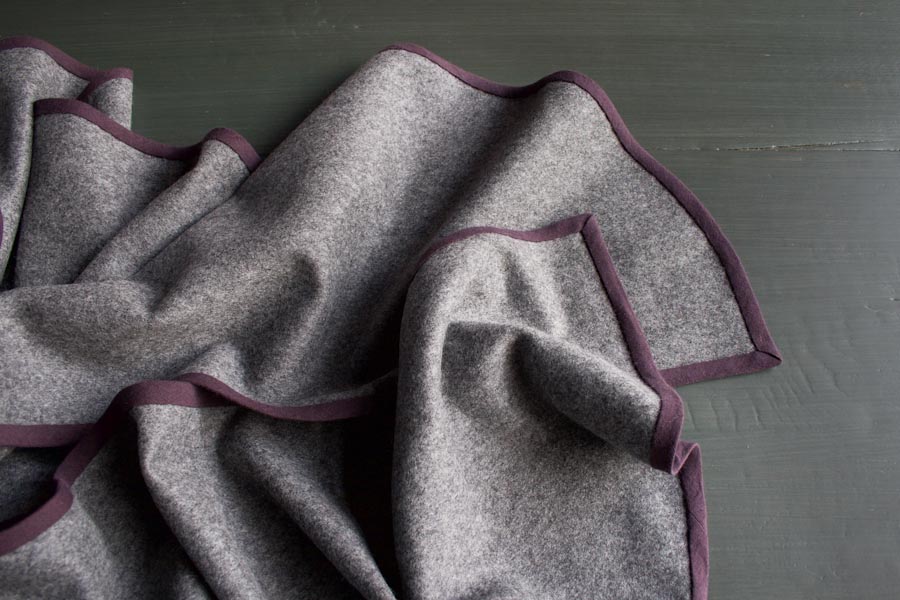
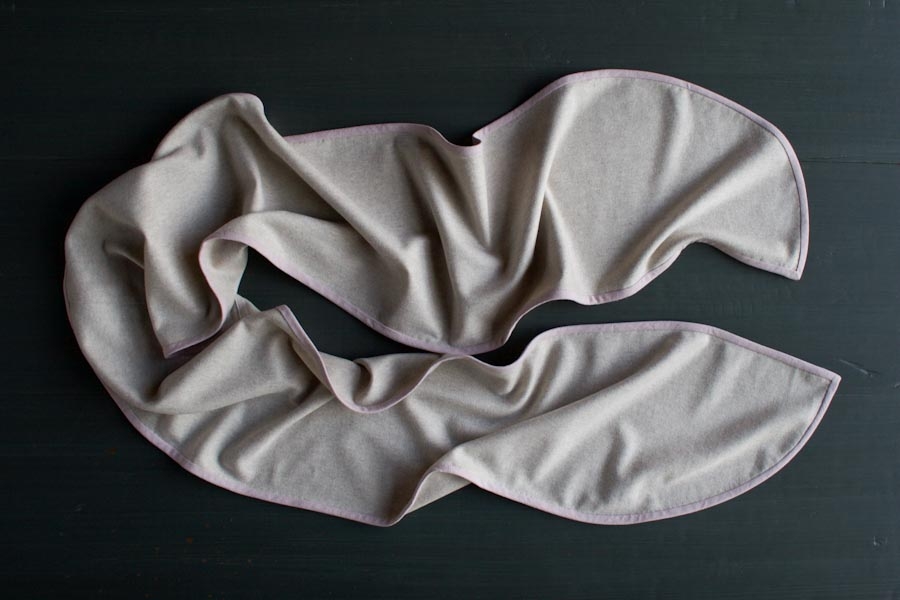
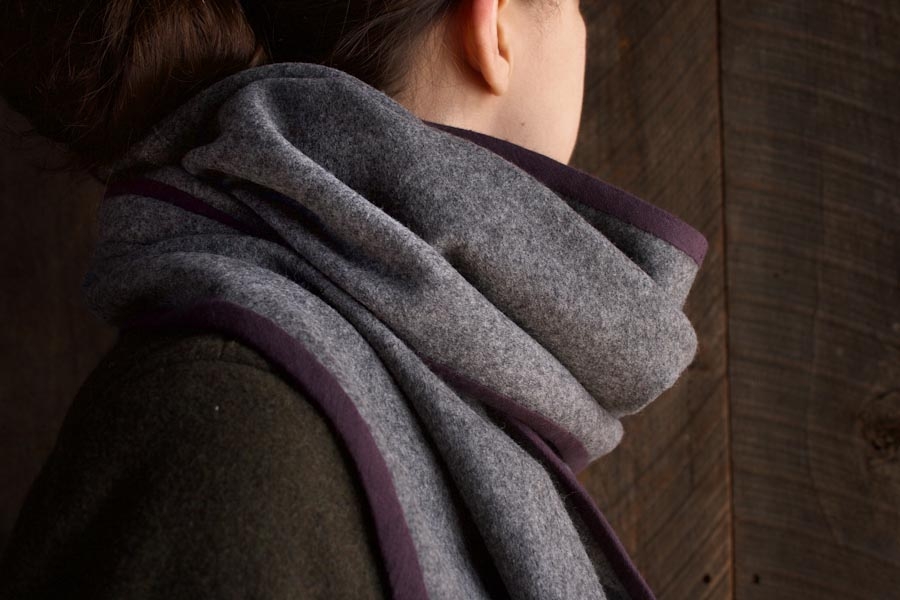
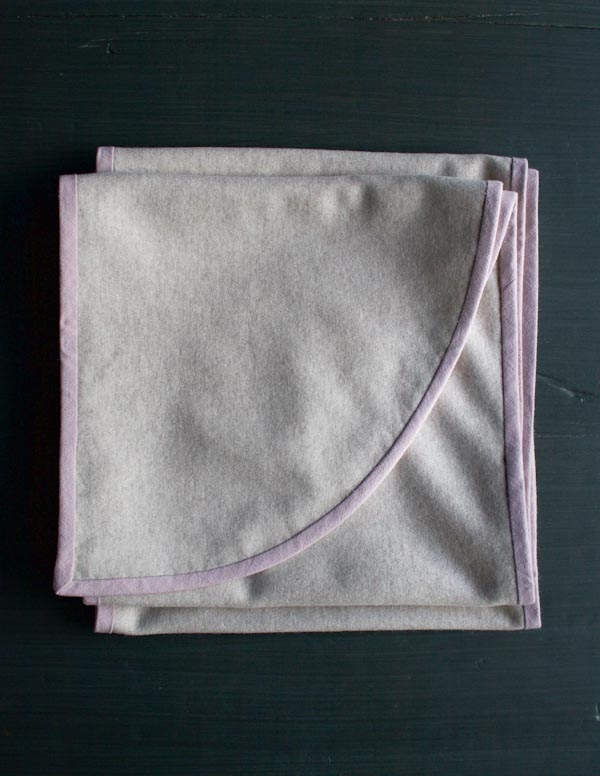
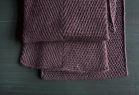
I made this lovely Scarf using two long cuts of Lana Cotta Canberra, pieced together at the center and trimmed to a graceful curve at each end. And the Bound Edge finish takes it another level, right past off-the-bolt into out-of-this-world! -Corinne

Materials
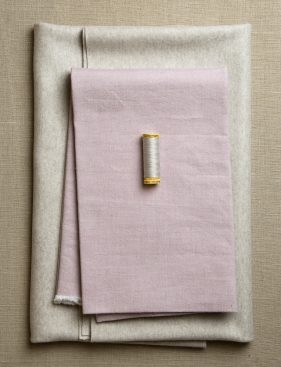
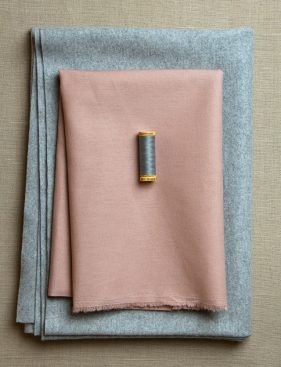
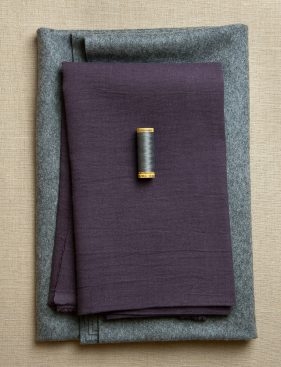
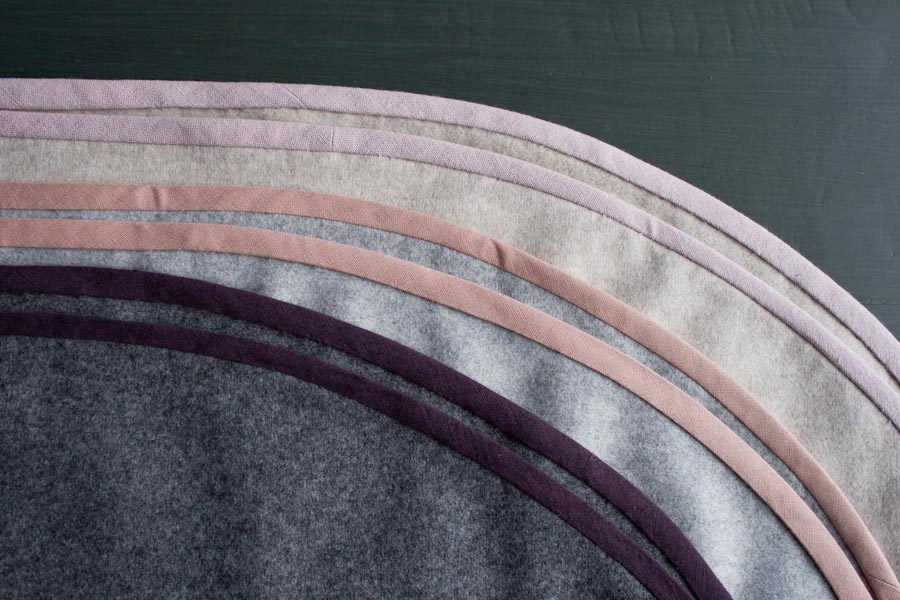
- Main Fabric: 3/4 yard of Lanecardate’s Lana Cotta Canberra or similar knit fabric (56 inches wide), shown above from left to right in Oatmeal, Light Grey, and Medium Grey (PLEASE NOTE: This fabric is unfortunately no longer available.)
- Binding Fabric: 3/4 yard of medium-weight fabric. We used, shown above from left to right, Kiyohara’s Upholstery Weight Solids in Pink (43 inches wide), Robert Kaufman’s Essex in Rose (43 inches wide), and Kokka’s Lightweight Linen Canvas in Eggplant (43 inches wide).
- A 110-yard spool of Gutermann’s Cotton Sewing Thread to coordinate with the Main Fabric. We used, shown above from left to right, colors 9045, 9240, and 9280.
- A Bound Edge Wool Scarf template, printed and prepared
Recommended tools…
- Purl Soho’s Rotary Cutting Tool Kit, which includes…
- A rotary cutter
- A self-healing cutting mat
- A 6 1/2 x 24 1/2-inch non-slip straight ruler
- A 6 1/2 x 6 1/2-inch non-slip square ruler
- A 25mm Bias Tape Maker
Size
Finished dimensions: 12 x 106 inches
Notes
- The right side of the Lana Cotta Canberra wool is the side with the small “V” pattern (as opposed to the side with the ridges).
- The recommended care for Lanecardate’s Lana Cotta Canberra is dry clean only.
Pattern
Cut
From the Main Fabric
Note: If you’re new to rotary cutting, please check out our Rotary Cutting Tutorial before you start.
Using the rotary cutter with the clear quilting ruler on a self-healing cutting mat, cut two 12-inch strips from selvage to selvage. You will have two pieces that measure approximately 12 x 56 inches each.
NOTE: I used my pieces at full length from selvage to selvage to make an extra long scarf. If you know that you would like your scarf shorter, you can trim the pieces down now. Here’s how . . .
First, determine the final length you would like your scarf to be. Divide this number by 2 and then add 1 to that number. For example, if you would like your finished scarf to measure 90 inches, you would trim your pieces down to 46 inches because 90/2 = 45 + 1 = 46.
Whatever length your strips, now lay one flat with its right side facing up.
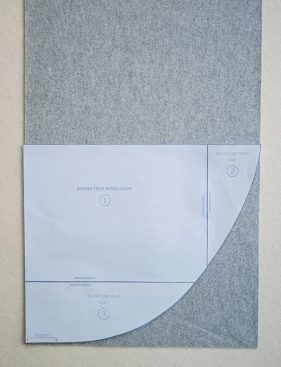
Place the prepared template with its right side facing up on the fabric strip, lining up the template’s bottom edge with a short edge of the fabric strip.
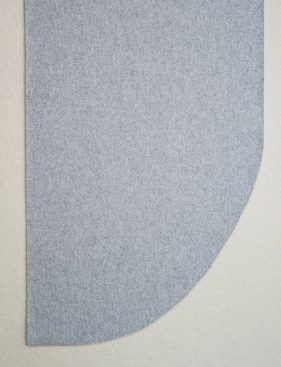
Cut the fabric along the curve of the template.
Now lay the other fabric strip out flat with its wrong side facing up. Place the template and cut the fabric, as described above.
When the two fabric strips lie flat with their right sides facing up, they should be mirror images of each other.
From the Binding Fabric
Cut a series of 1 7/8-inch wide strips on the bias. When assembled, the strips should measure at least 12 inches longer than the full circumference of your Scarf. For our scarves, we cut strips that together measured approximately 240 inches.
Prepare the Binding
NOTE: If you’re new to making bias tape, please check out our Making Single Fold Bias Tape Tutorial before you start.
Piece the bias strips so that they create one long piece, then use the 25mm Bias Tape Maker to create one long piece of single fold binding.
Piece the Scarf
Lay one Main Fabric piece flat with its right side facing up.

Use a clear quilting ruler to measure a line parallel to and ½ inch from the short, straight edge. Place a series of pins to mark the line.

With its right side facing up, place the short, straight edge of the other Main Fabric piece so that it lines up with the marked line of the first piece.
Pin the two pieces together, and remove the pins you used to mark the line.

Sew along the pinned line 1/8 inch in from the cut edge of fabric. Flip the scarf over and sew a second line 1/8 inch from the cut edge of the fabric on the other side. The two stitch lines should run ¼ inch from each other.
Finish

Use the prepared single fold binding to bind the edges of the scarf.
For detailed instructions, check out our Sewing on Single Fold Binding Tutorial, keeping the following tips in mind …
- Be sure not to stretch the binding as you work around the curve.
- You may find it helpful to trim the seam allowance after sewing the first seam and before folding the binding around the raw edge.
Your scarf is done and ready to wear!


What a beautiful scarf! Time to find some nice wool fabric to give this a shot!
I just downloaded your free pattern for the Bound Edge Wool Scarf. It says use “the prepared template” to cut the rounded edge, but I don’t see a prepared template. Can you please tell me if it’s available or if I make one myself?
Thanks so much.
Cheers,
Alyson
Hi Alyson –
The link to the pattern template is available in the materials list. This pattern prints on three standard letter-sized sheets. To prepare the template, cut the shapes out and tape together as described on the pattern pieces. This is your prepared template!
I hope this helps! Please let me know if you have any other questions as you work on the project.
-Corinne
Is there a template for the curved part of the scarf?
I found it! Sorry!
Love this thanks for pattern
I love the elegant scarf. thank you for the pattern. However I wonder why you use grey printing which is so hard to read? Black would be so much easier for these old eyes. Thanks, Linda
Hello, Linda!
Thank you so much for writing in! Sorry for the very delayed response!
Thank you for your kind words, we do appreciate them! You are not the first to comment upon the visibility of the grey colored text, I’ll be sure to pass your comment onto our web design team. Again, thank you for reaching out to us!
Best wishes,
Kumeko
Thank you for this pattern, I am allergic to wool so I’m going to make it out of polar fleece. It’s so clever and looks so simple.
This looks like a beautiful scarf and one that can be worn to dress up or dress down an outfit. Can’t wait to get started on it.
Well, I now know how to handle the Ivory wool I incorrectly cut a scarf from several years ago! (I saved it thinking something would come to me.) Thanks for the great idea.
Would love your (Purl Soho staffers) subjective opinion: would this scarf work for a guy? I was thinking maybe lose the rounded edges and cut it a little narrower to make it more masculine. Maybe in a gray wool/brown edging, or navy wool/gray edging. Would love to hear what you think. Thanks!
Hi, Jennifer!
Thank you so much for writing in! This would totally work for a guy! I agree with you, I would forego the rounded edges but I think leaving the width as is would be okay. Also, I really like the idea of this in a navy wool with gray edges. Be sure to send us pictures, we’d love to see your modifications!
Please let us know if you have further questions and again, thank you for writing in!
Best,
Kumeko
I notice that you no longer carry the wool featured in this pattern. Can you suggest another fabric that would work well for this pattern? I made this scarf out of the Lana Cotta Canberra two years ago and it was beautiful. Thank you!
Hi Lynette,
Thank you for reaching out! The most similar fabric we carry is Dorr Mill Wool Yardage, but I would recommend washing it to felt it before cutting out the scarf, as we did for our Ombre Edge Throw. While it is warm and comfortable to wear, especially after felting, the Dorr Mill wool is not as buttery soft as Lana Cotta, so if you have a sensitive neck, you might want to consider either Michael Miller Organic Fleece or Robert Kaufman Mammoth Flannel or Tahoe Flannel as non-wool alternatives.
I hope that helps!
Julianna
Can you please tell me why the edging needs to be cut on the bias? I am tempted to cut straight (not on the bias) since it would be so much easier to measure and cut… please let me know! Thanks
Hi Camille,
Great question! Cutting the edging on the bias allows it to curve and stretch slightly around the curved edges of this scarf without getting distorted or puckering. Although it’s more of a hassle to cut bias strips, the results will be well worth the extra effort!
I hope that helps!
Julianna