
Color Dipped Scarves
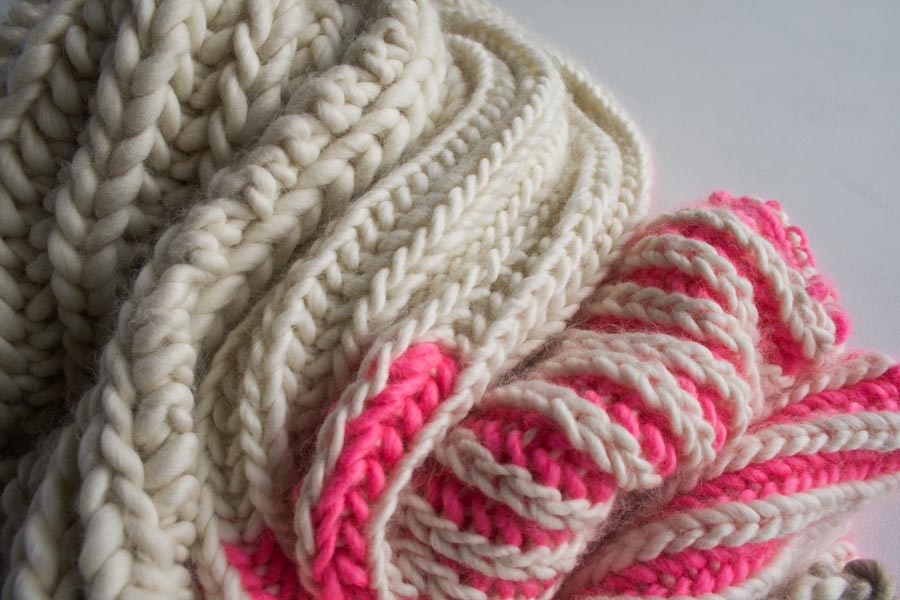
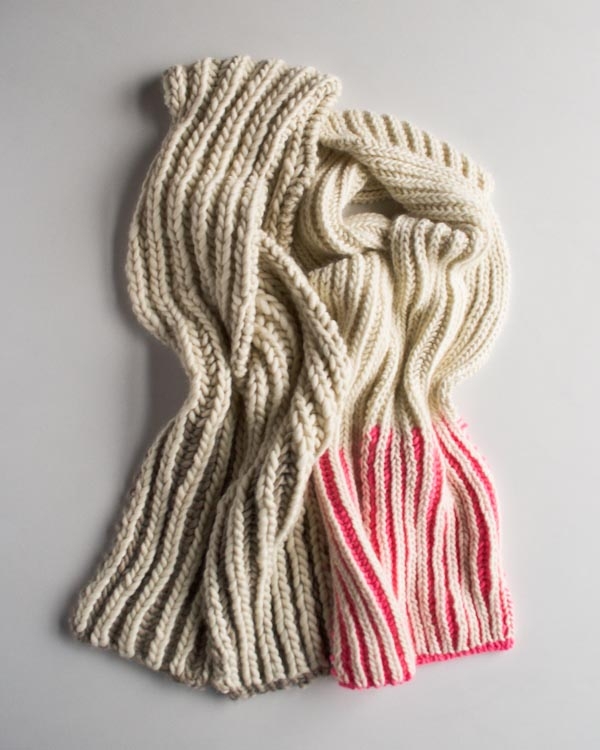
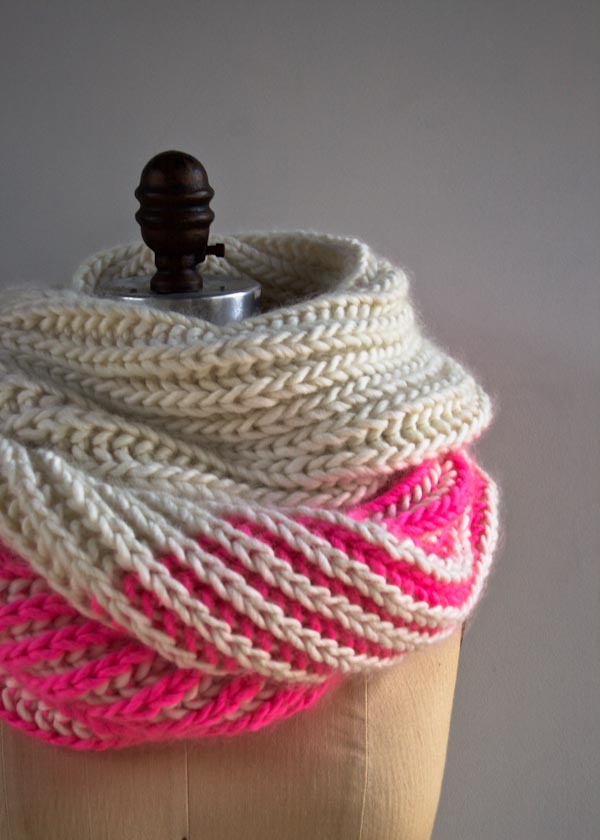
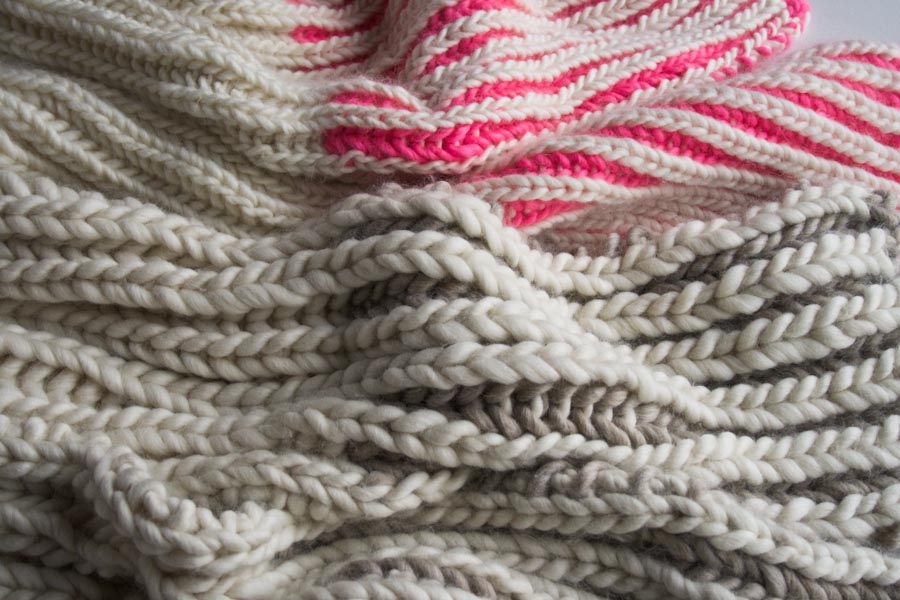
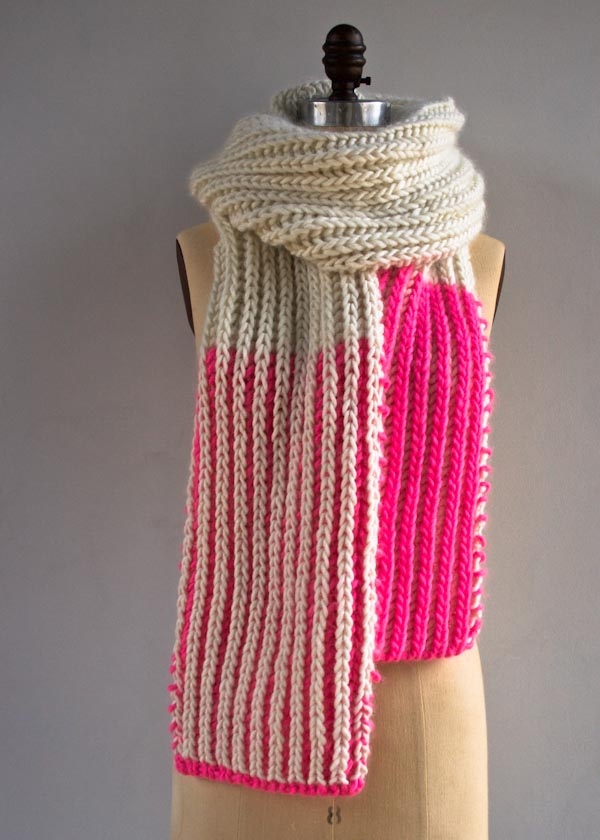
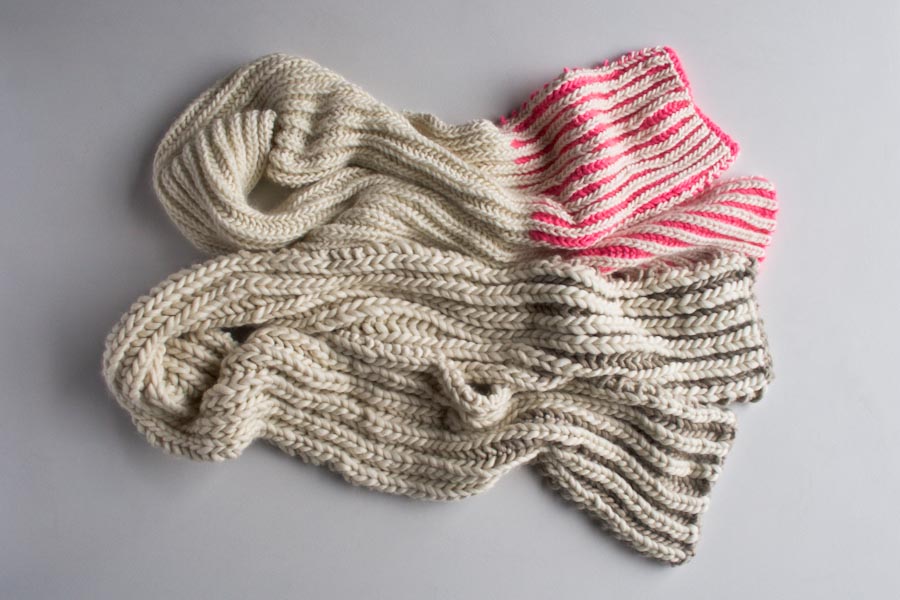
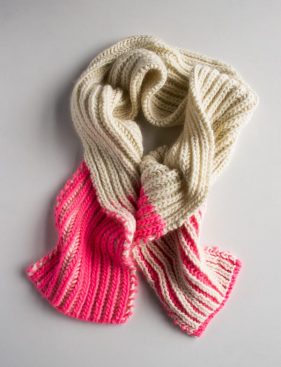
By swapping our thinnest yarn for our two thickest yarns, we transformed the subtlety of our Color Dipped Hats into something explosive for our Color Dipped Scarves! There is wildness and adventure in these jumbo Fisherman’s Ribs, rising up at the peaks and crashing together in the valleys.

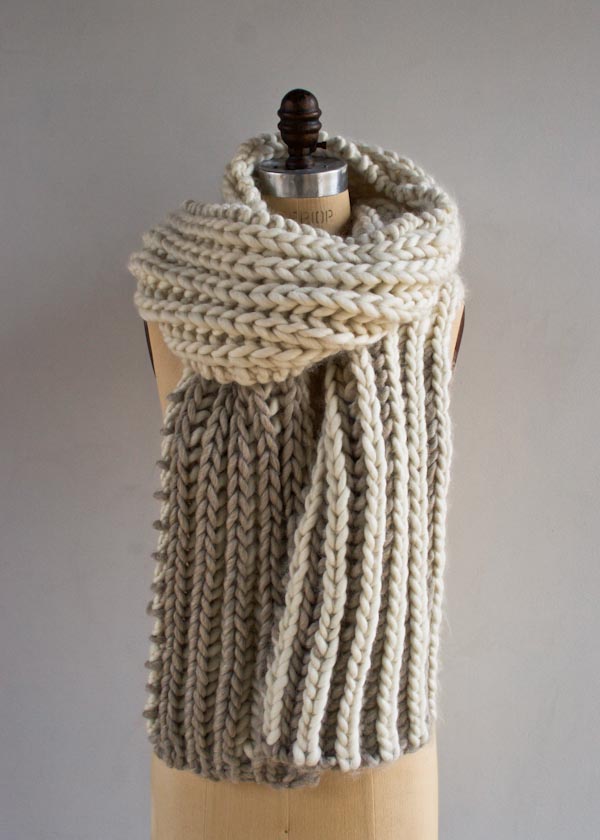
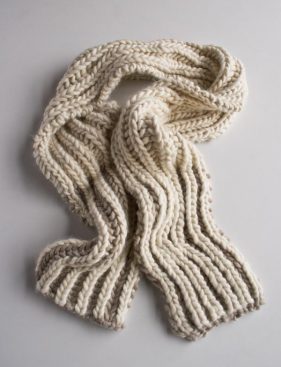
In our Super Soft Merino version, the corrugated stripes burst with Super Pink glow, and in our Gentle Giant version, soft Winter Bark brown interlocks with Heirloom White in a snowy forest of subtle color. Both bring their own drama… and warmth!

With winter around the corner, grab some big yarn, some big needles, and make some big fun with your own Color Dipped Scarf! –Laura

Designed by Purl Soho designer, Laura Ferguson.
Share your progress and connect with the community by tagging your pics with #PurlSoho, #PurlSohoBusyHands, #PurlSohoColorDippedScarf, #PurlSohoSuperSoftMerino, and #PurlSohoGentleGiant. We can’t wait to see what you make!
Materials
For the pink and white scarf we used…
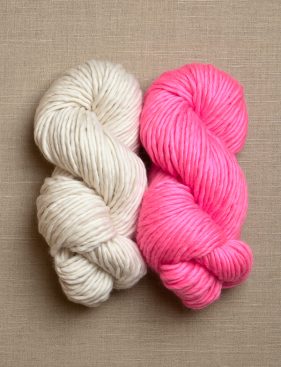
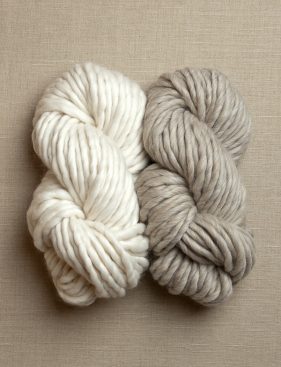
- Main Color (MC): 4 skeins of Purl Soho’s Super Soft Merino, 100% merino wool. Each skein is 87 yards/ 100 grams; approximately 348 yards required. We used Heirloom White.
- Contrast Color (CC): 1 skein of Super Soft Merino; approximately 87 yards required. We used Super Pink.
- US 13 (9 mm) circular needles, any length
For the brown and white scarf we used…
- Main Color (MC): 4 skeins of Purl Soho’s Gentle Giant, 100% merino wool. Each skein is 48 yards/ 125 grams; approximately 192 yards required. This is the color Heirloom White.
- Contrast Color (CC): 1 skein of Gentle Giant; approximately 48 yards required. This is the color Winter Bark.
- US 17 (12 mm) circular needles, any length
Gauge
In Super Soft Merino:
9 stitches = 4 inches in stitch pattern
In Gentle Giant:
5 ½ stitches = 4 inches in stitch pattern
Sizes
Pink and white scarf made in Super Soft Merino:
9 ½ inches wide x 82 inches long
Brown and white scarf made in Gentle Giant:
8 inches wide x 82 inches long
Notes
Slip Stitches
Slip all slipped stitches purlwise, unless otherwise indicated.
Working into the stitch below
k1b [knit one below]: Insert the tip of the right needle into the stitch below the next stitch from front to back, knit normally (wrapping the yarn around the needle and pulling it back through the stitch below) and let the stitch above fall from the left needle.
p1b [purl one below]: Insert the tip of the right needle into the stitch below the next stitch from back to front, purl normally (wrapping the yarn around the needle and pulling it back through the stitch below) and let the stitch above fall from the left needle.
For more information about these techniques, be sure to visit our Working into the Stitch Below Tutorial!
Turn or Slide
Each row in this pattern ends with the instructions to either “turn” or “slide” the work.
- “Turn work” means to do what you would normally do when knitting rows with a circular needle. That is to say, put the needle in your left hand into your right and the needle in your right hand into your left, and flip the work around so the other side is facing you.
- “Slide work” means to keep the same side of the work facing you and to push all the stitches to the right end of the circular needle. Without turning the work, start the new row as you normally would.
You will know that you’re doing this right if the yarn you need to complete the next row is magically there waiting for you!
Pattern
For Super Soft Merino: With CC, cast on 23 stitches.
For Gentle Giant: With CC, cast on 13 stitches.
I used a Long Tail Tubular Cast On, because it’s nice and stretchy, but a basic Long Tail Cast On would also be beautiful (and less complicated)! Either way, be sure to work the Foundation Row(s) with the CC before starting with Row 1.
IF YOU DID A LONG TAIL TUBULAR CAST ON…
Foundation Row 1 (wrong side): *Slip 1 with yarn in front, knit 1 through the back loop, repeat from * to last stitch, slip 1 with yarn in front.
Foundation Row 2 (right side): *Knit 1, slip 1 with yarn in front, repeat from * to last stitch, k1.
IF YOU DID A LONG TAIL CAST ON OR SIMILAR…
Foundation Row (right side): *K1, p1, repeat from * to last stitch, k1.
Continue with Two Colors
Join MC…
Row 1 (wrong side): With MC, k1, *knit 1 below (k1b, see Notes), p1, repeat from * to last two stitches, k1b, k1, slide work.
Row 2 (wrong side): With CC, slip 1 with yarn in front (wyif), *k1, purl 1 below (p1b, see Notes), repeat from * to last two stitches, k1, slip 1 wyif, turn work.
Row 3 (right side): With MC, *k1, p1b, repeat from * to last stitch, k1, slide work.
Row 4 (right side): With CC, slip 1 wyif, *p1, k1b, repeat from * to last two stitches, p1, slip 1 wyif, turn work.
Repeat Rows 1-4 until piece measures approximately 15 inches from cast-on edge, ending with Row 4.
Cut CC.
Continue with One Color
NOTE: For this section, turn the work between every row.
With MC…
Row 1 (wrong side): Slip 1 knitwise, *k1b, p1, repeat from * to last two stitches, k1b, k1.
Row 2 (right side): Slip 1 knitwise, *p1, k1b, repeat from * to last two stitches, p1, k1.
Repeat Rows 1 and 2 until piece measures 67 inches from cast-on edge, ending with Row 2.
Again, Continue with Two Colors
NOTES: For this section, either turn or slide the work between rows, according to the instructions. Also, the first time you work
Row 2, join CC.
Row 1 (wrong side): With MC, k1, *k1b, p1, repeat from * to last two stitches, k1b, k1, slide work.
Row 2 (wrong side): With CC, slip 1 wyif, *k1, p1b, repeat from * to last two stitches, k1, slip 1 wyif, turn work.
Row 3 (right side): With MC, *k1, *p1b, repeat from * to last stitch, k1, slide work.
Row 4 (right side): With CC, slip 1 wyif, *p1, k1b, repeat from * to last two stitches, p1, slip 1 wyif, turn work.
Repeat Rows 1-4 until piece measures approximately 81 inches from cast-on edge, ending with Row 4.
Cut MC.
Finish
Bind off
IF YOU DID A LONG TAIL TUBULAR CAST ON…
Bind off using the CC and a Long Tail Tubular Bind Off. Start with two set-up rows…
Set-Up Row 1 (wrong side): *Slip 1 wyif, k1, repeat from * to last stitch, slip 1 wyif.
Set-Up Row 2 (right side): *K1, slip 1 wyif, repeat from * to last stitch, k1.
IF YOU DID A LONG TAIL CAST ON OR SIMILAR…
With CC, bind off in 1 x 1 rib pattern.
Weave + Block
Weave in the ends and block as desired!


I have some lovely Purl Soho merino script I bought last spring in stone and green. It has been waiting for the right project. Can you suggest a needle size and the number of stitches to cast on!
Thanks!
Hi Ruth.
Thanks for writing in!
I would make a couple swatches to figure out the needle size. I’m guessing a US 9 or 10 would be nice with the Merino Script for this project, but since we all wield our needles slightly differently, I recommend making a swatch to be sure. Plus, once you have your swatches, you can measure your gauge and then a good cast on number! This is just a guess, but lets’s say you’re getting approximately 12 stitches per 4 inches (or 3 stitches per inch) in fisherman’s rib and you want a scarf at least the same width as the pink version shown here, 9 1/2 inches. You’d take the 9 1/2 inches and multiply it by 3 stitches per inch = 28 1/2… Cast On 29 stitches!
I do hope this helps! Please do not hesitate to write us back.
Enjoy your Merino Script scarf.
Laura
Can’t wait to make it!! Great X-mas gift to myself!
Can I use straight needles? Thank you
Hi Armanda.
That’s a great question, I’m glad you asked!
Due to the single-row striping technique used in this pattern, you need either long double pointed needles or a circular needle. If you’d like to read more about the technique, you can check out the section titled Notes and look under “Turn or Slide”.
Let us know if you have any questions!
Thanks.
Laura
where can I find notes in your site?
Hi Armanda.
Each pattern with special instructions has a section called NOTES. If you are at the top of a pattern, scroll down past the introductory story and then past the section titled MATERIALS and GAUGE and SIZES and then you’ll find a NOTES section, just above the PATTERN.
Let us know if you have any questions!
Thanks.
Laura
please explain slip stitch “knitwise” & “purlwise”, I do not understand the difference if you are just “slipping” the stitch from, one needle to the other. Thanks
Hi Cindy.
Gladly!
To slip a stitch purlwise it means to slip it as if to purl, inserting your right needle into the stitch from the back to the front.
To slip a stitch knitwise it means to slip it as it to knit, inserting your right needle into the stitch from front to back.
Hope this helps!
Please let me know if you have any questions.
Laura
Hi! I was wondering if this could be made into an infinity scarf. If you could, how would you do that? Thanks! I love this pattern!
Hello Lydia!
Thanks so much for writing in! If you want a true infinity scarf that is knit in the round with this two color effect, I would recommend trying our Brioche cowl found here: https://www.purlsoho.com/create/2011/10/16/ginas-brioche-hat-and-cowl/
If you like this chunkier effect, I would recommend knitting the item as if you were making a scarf and then seaming or grafting the stitches together at the end so that you wouldn’t have to alter the pattern for circular knitting. Let us know what you think and how it goes so that we may further assist you if you have any other concerns!
Thanks! -Alyson
I just posted on the bind off site. Thought I’d put my two cents on this one. As I said on the bind off site, I’m always wanting to learn new cast ons and bind offs. And one never knows when they might be able to use them. I’m sure the bind off works better when paired with its cast on partner. Anyway, I’m excited to try both of them. Thanks for sharing.
Hi! This is a fun pattern, thank you. Question – when I started to repeat the first “continue with two colors” pattern and started row 1 again, I found I had to start the k1 holding both the MC and CC, then drop the working CC and continue the row with the MC only. Is that right? When I tried to do the first k1 with the MC only, somehow it started to unravel when I did the next stitch – k1b. I hope this makes sense.
Hi Anna.
I’m glad you wrote in. You shouldn’t have to hold the two strands together for that first stitch to keep the fabric from unraveling. I’m afraid I don’t know what this might be from. The last stitch/first stitch of the row can feel a bit untidy until you work the next row with that same color, but it shouldn’t unravel.
Would you mind writing us back, letting us know what you think it may be. I’d love to help you figure this out!
Thanks again for writing in.
Laura
I love this pattern but want to do it with just one colour. I tried manipulating the pattern so I’m turning the work after each row with no luck. Is this something you can provide?
Hi Rose.
You’re in luck! We have a solid color scarf in this same Fishermans Rib stitch: https://www.purlsoho.com/create/2015/08/20/seafaring-scarf/
You can either follow the instructions for the Seafaring Scarf (link above) or you can follow the instructions for this pattern, skipping straight from the cast on to Row 1 under the section titled CONTINUE WITH ONE COLOR.
Please let us know if you have any questions!
Thanks for writing in.
Laura
Thanks so much, Laura! I’ve since found the Fisheman’s Rib Scarf and Cowl Pattern and am knitting that with a US 15 and thicker yarn! The Seafaring Scarf will be on my list to knit soon!
Rose
I have done the first 4 rows in the first ‘continue with two colors’ section twice now and my result is that the colors alternate on the knit stitches instead of being the same color which is what the pictures show. Is there possibly an error in this pattern?
Hi Roxanne.
I believe the pattern is correct. May I ask how many stitches you cast on? Also, are you turning your work at the end of Rows 2 and 4 and sliding the work at the end of Rows 1 and 3? Both of these things can have a large effect on the outcome of the fabric.
We’d love to help figure this out with you.
Thanks for writing to us. We hope to hear from you soon.
Laura
I am having the same issues with colors alternating in the knit rows. I cast on 17 stitches with 2 colors and I can not get all the gray stitches in a vertical row. Also the sl 1 yarn in front on row 4 is a mess. Please help
Hi Janice,
Thanks for writing in! Two color fisherman’s rib can take some getting used to. It will also take about 2 repeats of the 4 rows to really begin to see the pattern. If you have knit 2 repeats and your columns are not lining up, it may mean that you inadvertently mixed up the order of the rows. I myself have done this when stepping away and have started on a row 1 instead of a row 3. This will cause the columns not to line up properly. The edges can also be a little less than perfect. I think that you can probably see that our edges are a touch nubbly in the two color section. This really just takes a bit of practice to pull the yarns just taught enough on the edge to look a bit tidier. I encourage you to continue on! I myself, knit a number of swatches with scrap yarn until I got comfortable with the repeat and the edges. After a few tries, I figured out just how to work the pattern best for me.
I hope that this helps and happy knitting!
Cassy
hi there– i just want to start off by saying your patterns are amazing! i would like to make this in worsted weight yarn, though. what is the cast-on multiple??? thank you for all the cool patterns!
Hi Carmine.
Thanks so much! And you’re very welcome. Glad to hear you like them!
This pattern can be worked over an odd number (greater than 3) of stitches.
Thanks for writing in. Enjoy your scarf.
Laura
Hi there,
Thank you for the beautiful pattern!! This was my first attempt at a long tail tubular cast on so I tried it for my swatch, and I believe there is a small error in the foundation row instructions. I think for foundation row 1 the first stitch should be slipped and the second stitch knit through the back loop. Given that there are an odd number of stitches, and the right side row is k1 p1… ending in a k1, when I turn the work, the backside of the first stitch is a purl stitch and should be slipped rather than knit. This makes more sense since the next stitch is twisted and therefore knitting it through the backloop un-twists it. When I tried it with this correction it looked exactly like the tutorial picture.
“Foundation Row 1 (wrong side): *Slip 1 with yarn in front, knit 1 through the back loop, repeat from * to last stitch, slip 1 with yarn in front.”
Thanks!
Kelly!
You are absolutely correct! Thank you so much for taking the time to write to us. I do apologize for any frustration that may have caused you. Thank you again. The pattern has been updated.
All the Best,
Laura
I love this pattern….I want to make a baby blanket with it..but can a border be added to this pattern? Or will it mess it up? Thanks!
Hi Nan.
I think this would love wonderful with a border. Were you thinking of adding an attached i-cord afterwards? Or maybe just picking up and binding off? I love the look of that edge as well. You can do that just along the vertical edges and leave the bottom and top edge alone. Kristy did that with her Falling Bobbles Blanket and it turned out beautifully. My only tip would be that this stitch tends to be long and lean so you may have to pick up every 3 of 4 stitches along the edge rather than every 2 of 3. Maybe test it out on a swatch first.
Let us know how it goes!
Thanks for writing in,
Laura
Hello, I’m currently knitting this scarf and it’s beautiful! However my selvage don’t look as tidy and neat as I would like them too. I constantly have to rearrange the yarn and the knit column on each end of the wrong side look a little wobbly. Any tips you could give me? Should I knit the first stitch tighter or looser? As always, thanks for your help and all your amazing projects.
Hello, Melian!
Thank you for writing in! Sorry for the terribly delayed response! Our ends are not super tidy, if you look closely in the pictures you’ll see that they are very bumpy, but we kind of like that rustic look! If the rustic look isn’t for you try knitting that first stitch tighter. You could also slip the first stitch for a neater edge.
Again, thank you for writing in and for your kind words!
Best,
Kumeko
I would love to see a gentle giant yarn pattern for some matching “big thick beautiful warm” mittens. What a great gift that would be – scarf and matching mittens! Time to start them now for 2016 holidays for my 3 girls!
Hi Connie,
Thanks for the lovely comment! We’ll keep your request in mind.
Happy knitting!
Cassy
Hello,
I have not been able to figure out how to do the slip one with yarn in front (wyif) at the beginning and end of the row. I looked at tutorials and understand how it is done when it is demonstrated on a stitch within a row but have not found a tutorial that shows how to do it at the beginning or end of a row…I have started over many times hoping to figure it out..HELP please!
Hello Margaret,
Thank you so much for your question. I can understand this looks and feels a bit different without the other stitches around it. At the beginning of the row you will slip one stitch purlwise and then bring the needle back between the two needles (in front of that slipped stitch) to knit the next stitch. At the end of the row you will bring your yarn to the front, slip the stitch and turn your knitting. I hope that helps! Please let me know if I can expand on anything.
All the best,
Allison
I had the same problem. I think I am following the instruction correctly now, but I’ve end up with two extremely messy and bulky edges… Please help!
Hello, Maggie!
Thank you for writing in! Sorry for delayed response! Perhaps your tension was a little loose when doing the slip stitches? I know that when I am trying a new stitch I tend to knit a little loose. I recommend pulling your working yarn just a bit tighter when doing the slip stitches. Please keep us updated.
Best,
Kumeko
Hi! Thank you so much for all your lovely patterns – I love the fluffiness of this stitch. I am hoping to make a color dipped hat and scarf for a gift, and would like to use the same yarn. Would you be able to estimate about how much of the line weight yarn I would need to be able to make a scarf using size 2 needles (to match the gauge of the hat)? Thank you in advance for your help and please please please keep up the wonderful work!
Hello, Lauren!
Thank you for writing in! Sorry for the delayed response! I recommend getting 3 skeins of the main color and 1 skein of the contrasting color.
Again, thank you for your question and your kind words. If you have further questions please let us know!
Best wishes,
Kumeko
I plan to do this scarf in one color using gentle giant yarn. Is it possible to use straight needles with this pattern?
Hi Katie,
You certainly can use straight needles! The finished width of the Gentle Giant version is 9 inches. So as long as your straight needles are longer than 9 inches, you should be all set. If you are feeling adventurous, you can try knitting straight on circular needles. To use circular needles for knitting flat you simply finish a row, turn the work so the other side is facing you and put the needle that was in your right hand into your left hand and the needle that was in your left hand into your right hand, ready to go on the next row!
Happy knitting!
Cassy
I love the color work in this scarf! Is there anyway to do it on straight needles??
Hi Kay,
Thanks for writing in! You can certainly knit this scarf on straight needles. No adjustments are necessary to accommodate straight needles. We use circular needles to allow for longer lengths of knitting. Just be sure not to let any stitches slip off of your needles!
Happy knitting!
Cassy
I’m pretty new to knitting and can’t get fisherman’s down, but I’ve just mastered brioche and am ready to work on two-color. Can I apply the principles here to two-color brioche? If I follow the pattern instructions for two-color brioche, will I have the right number of stitches to keep going in the main color? Then when I’m ready to add the contrast color again, do I just do another foundation row?
Thanks!
PS, I’m knitting a blanket in your amazing super soft merino and it’s beyond!!
Hi Yael,
Thanks for the nice comment! This pattern can certainly be translated into a brioche stitch! You’ll follow directions for two color brioche, then switch to plain brioche and switch back to two color brioche at the end. It’s as simple as that!
Best,
Adam
Hi – I was wondering if there was a basic pattern for this if I’m only using one color? Are you still working into the stitch below where it states in the pattern, or is that just for the colorwork?
thanks!
Hi Angela,
Thanks for writing in! This pattern can definately be done using only one color. We also do have a Fisherman’s Rib scarf that is made using one color. It is the Seafaring Scarf! If you would like to make this scarf using one color, I would suggest using the cast on number listed above and following the directions for beginning the Seafaring Scarf.
I hope that this helps and happy knitting!
Cassy
Is it possible to do a short tutorial on how to fix a knit mistake on the color dipped scarves? I have ripped out several times back to the beginning because I cannot figure out how to fix it. Thanks.
priscilla
Hi Priscilla,
This is a great idea! We will keep it in mind for the future. To fix a fisherman’s rib mistake you need to understand how to do brioche knitting. If you look at this link, you’ll notice that after to YOS you are left with a regular stitch and a slipped stitch with a yarn over laying diagonally on top. When you rip out fisherman’s rib you will have a regular stitch and a stitch next to a long float of yarn. Pick up the stitches again by slipping the normal stitch on to the needle and then the “slip stitch” with its long float laying over the top of the stitch like in brioche. You’ll end up knitting the slip stitch and yarn over together to get back on track for fisherman’s rib. Best of luck!
-Adam
Cam you explain a bit better how to slide stitches? I’m not understanding.
Hi Gina,
Thanks for writing in! In this pattern, you will sometimes need to slide all of the stitches. To do so, once you have finished a row, do not turn the work as you would normally. You will keep the side just completed facing you and slide all of the stitches from the left side of the circular needle to the right side and then begin knitting again. In essence, you will be working the same side twice on the rows that call for you to slide the work instead of alternating sides.
I hope that this clears things up!
Cassy
Could you show or tell how to fix a dropped stitch in this 2 color scarf. I have ripped back several times to the beginning because I cannot figure out how to fix my mistake.
Thank you ,
Priscilla
Hi Priscilla,
Thank you for writing in. Sorry this is happening! We don’t have a fix it video about this stitch at the moment, but there are some great fix it tutorials for fisherman’s rib on YouTube. Take a look there and let us know how it goes!
-Adam
I am relatively new to knitting and have been attempting this pattern for two weeks now. Since there isn’t a video showing someone knitting the pattern, can you refer me to a video that demonstrates the slip 1 wyif at the end of a row before turning? Am I wrapping that strand of yarn around the end to create the loop? The scarf is lovely, and the pattern is simple enough for a beginning knitter, but I am missing something with the ends.
Thanks!
Hello Denise,
Thank you for reaching out! Unfortunately we do not have a video tutorial for slip 1 with yarn in front. For this technique you will not be warping your yarn, but simply placing your yarn in the front while you slip your stitch purlwise from one stitch to the next. If you continue to have issues please feel free to e-mail (store@purlsoho.com) us pictures of your scarf and we can continue to trouble shoot. Please let me know if you have any further questions.
Warmly,
Marilla
Hi there,
This is a gorgeous pattern – thank you!
Would it be possible to make it in Cotton Pure? If so, do you know how much yarn would be needed and what size needles?
Hi Deb,
Thanks for the kind words, we’re glad you like it! Cotton Pure works beautifully in brioche, as you can see in our Two-Color Cotton Cowl. I would recommend trying a swatch on US 6 needles, which should give you around 16 stitches to 4 inches. To match the size of the Color Dipped Scarf, you would then need to cast on 39 stitches. We only used two skeins of Cotton Pure for our Two-Color Cotton Cowl, but as it is quite a bit shorter than the Color Dipped Scarf, I would recommend getting two or three skeins of your main color and one of your contrast color.
Good luck and happy knitting!
Julianna
Does slip 1 stitch wyif mean the same thing as to slip one purlwise?
Hello Kim,
Thank you for reaching out! Slip one wyif(with yarn in front) just means that when you slip your stitch you want your working yarn to be in the front of your work rather than the back. When your pattern tells you to slip your yarn purlwise it to which way you are inserting your needle into the stitch you are slipping, so you could slip your stitch purlwise with your yarn in front or your yarn in back.
I hope this clears things up for you and let us know if you have any further questions!
Happy knitting,
Marilla
Can this be done with any amount of odd stitches, for example 25,27,29, 31 etc?
Hello Gaby,
Thank you for this great question-yes! This pattern can be worked over an odd number (greater than 3) of stitches.
Happy knitting!
-Marilla
After years of on and off knitting, I’m finally nearing completion of a blanket adapted from this pattern. My blanket is rainbow striped, so there are a lot of ends to weave in (amidst portions of contrasting colors, too). Can you recommend the most effective methods for weaving in ends in a fisherman’s rib? Thank you in advance!
Hi Sarah,
Thanks for reaching out! Your blanket sounds lovely – please do send us a picture when you are done! Although we don’t have a tutorial specifically for weaving in ends in fisherman’s rib, I would suggest using a variation of the duplicate stitch method we show in our Weaving In Ends tutorial. It will be a little trickier in the more complex stitch, but by following one strand of yarn with your end, it will be both invisible and quite secure.
Best,
Julianna
How does this pattern change if I want to knit in one color only using the Super Soft Merino using US 13 circular needles?
Thanks!
Hello Melissa,
Thanks for reaching out! This would be an easy change, you will just follow the instructions for the middle section all the way through.
I hope this helps and happy knitting!
-Marilla
Hi there,
I LOVE this pattern but I’m having trouble with the edging. When you have both both colors on one side, and you start knitting with one color, should you bring the working yarn up the back (behind the other color) or should you bring the working yarn up and over the other one? Not sure if the question makes sense but I’m wondering what will make the neatest edge. Thank you!
Hi Catherine,
Great question! Whenever you are knitting stripes and carrying your yarns up the side of your work, it doesn’t matter whether you take the old yarn over the new yarn or vice versa, as long as you are consistent – all you have to do is pick whichever one feels better to you, and stick with it!
Happy knitting!
Julianna