


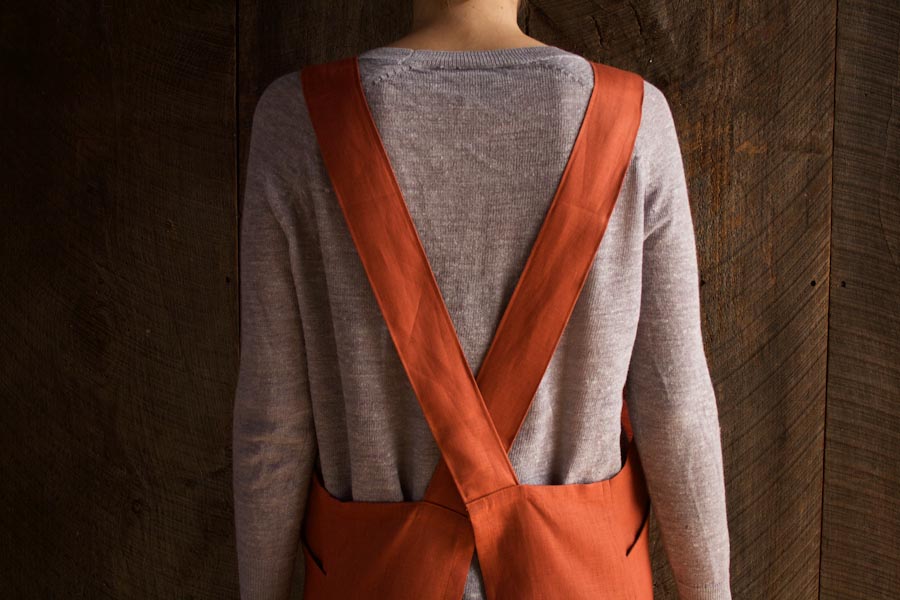
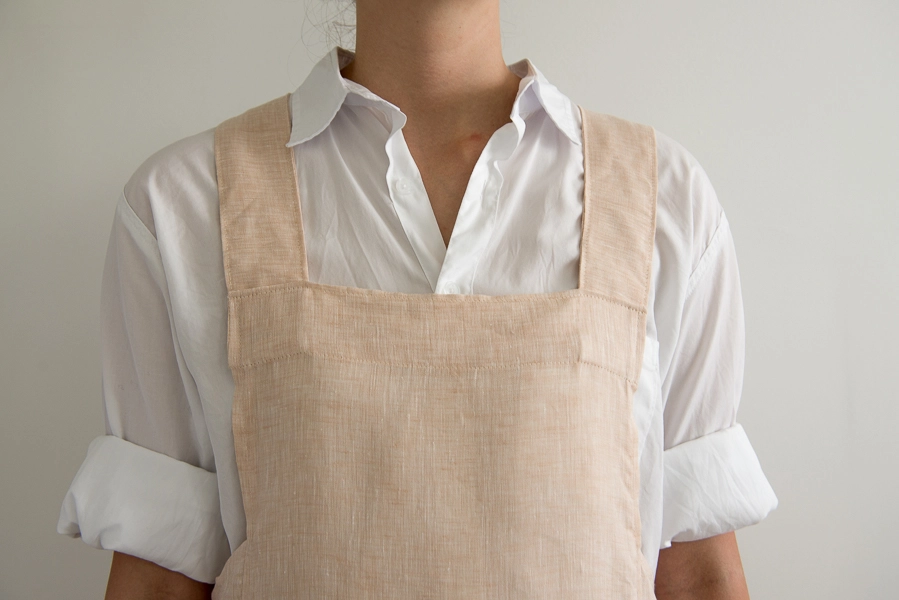
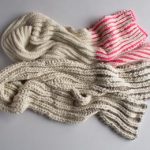
Cross Back Apron
This year, my husband’s Irish parents are coming to town for their first Thanksgiving ever (can you believe they’ve never tasted pumpkin pie?!). As the resident American in the family, I am nervous about everything from overcooked turkey to undercooked stuffing, so I’ve decided to focus on the one detail I know I can get right: the cooking attire!

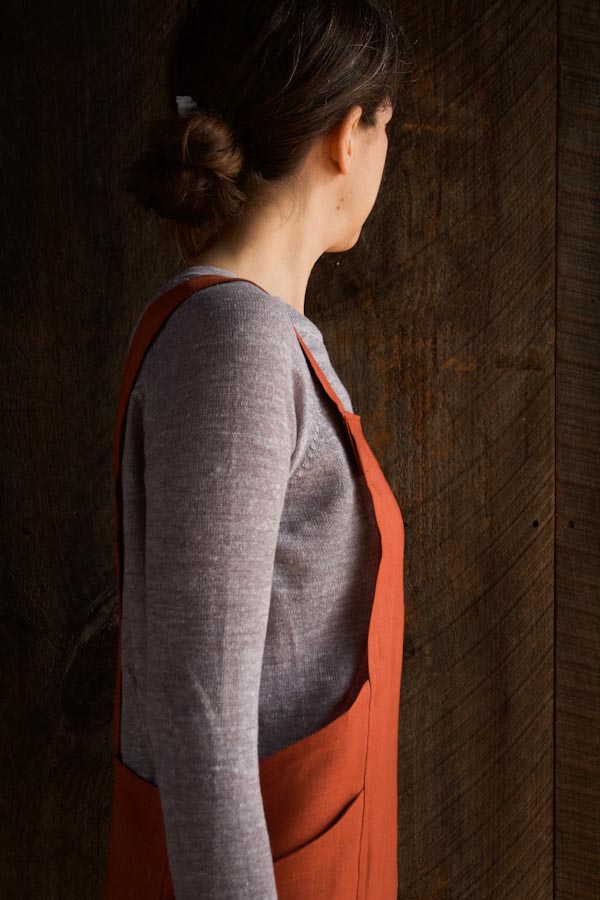
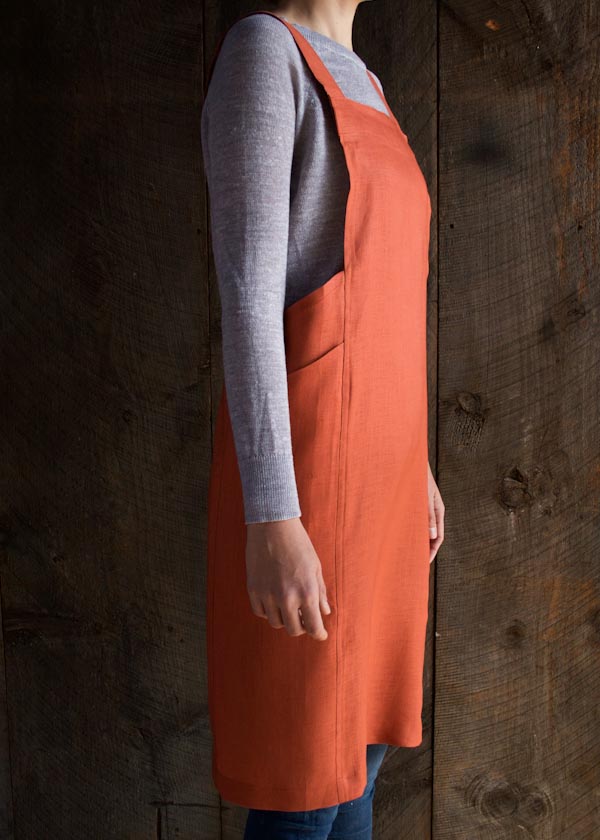
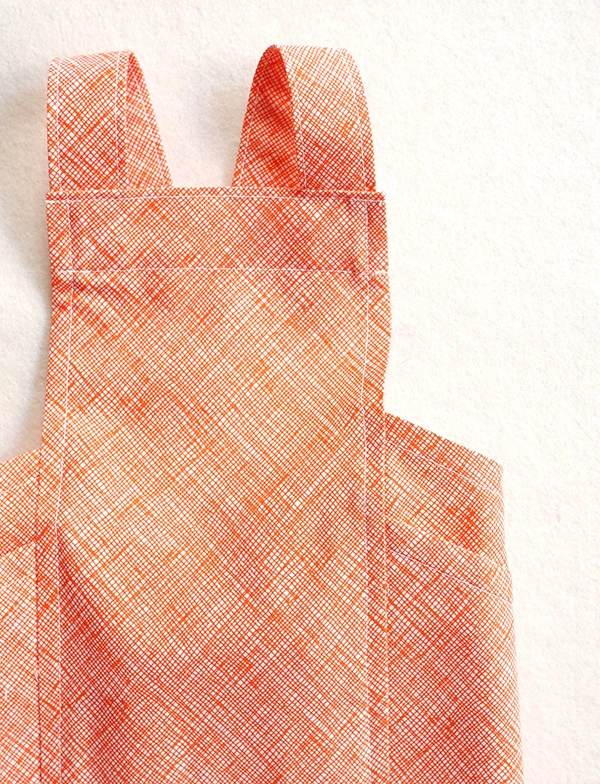
This lovely Cross Back Apron is so elegant that it feels almost like a new dress, but functional cover-up it is! I designed it to be loose and easy, so that when I bend over to baste the bird or reach up to grab the pie pan, I know I’ll feel comfortable. It also has durable French seams, generous side pockets, and full coverage (no gravy splatters on the holiday duds!).

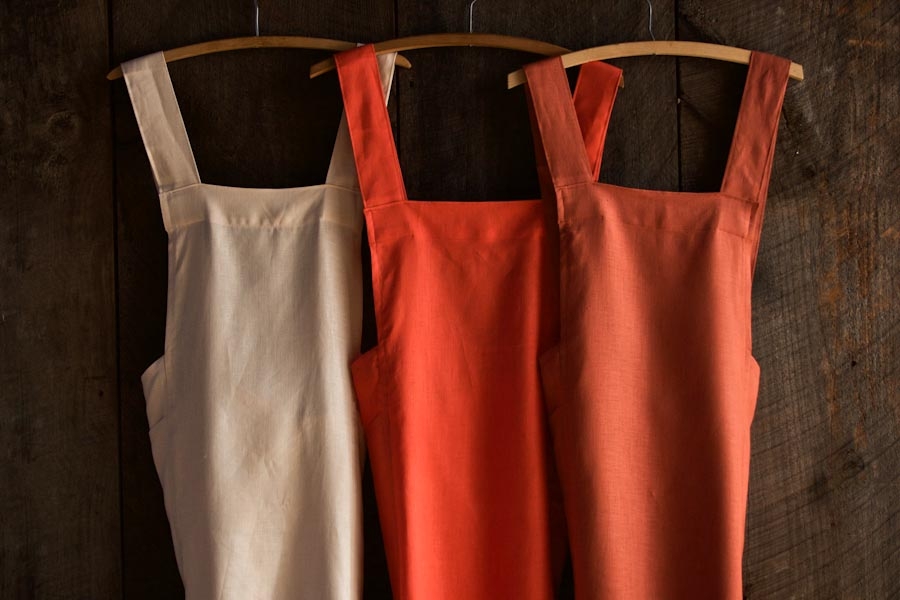
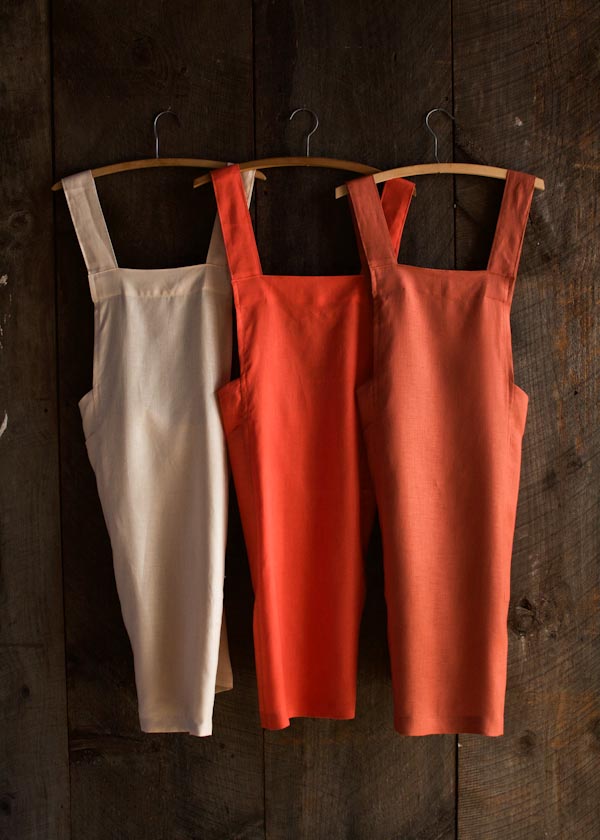
Sewn up in three pretty colors of Purl Soho’s Handkerchief Linen, our Cross Back Apron is sturdy, practical, and very beautiful. If nothing else, I know I’ll be dressed for a very successful mess! -Corinne

Update: New Fabric
July 16, 2016
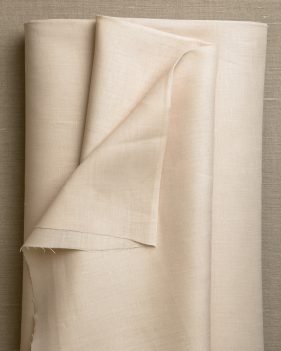
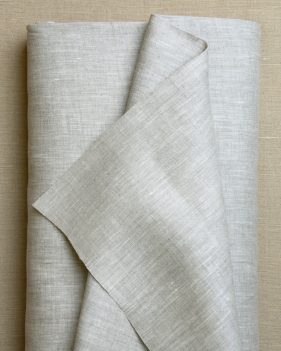
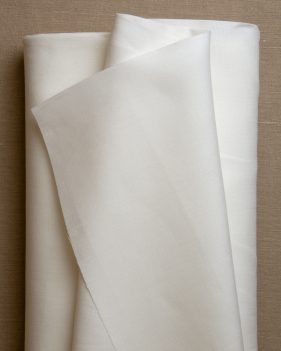
We sewed a new version of this classic apron in our very own Watercolor Linen! To see the full list of materials please check out our Cross Back Apron in Watercolor Linen story here.
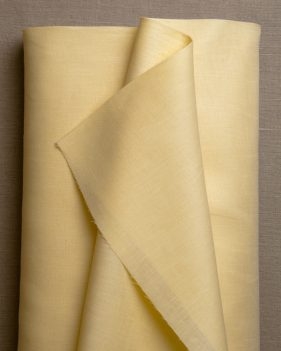
Update: Now in Spectrum Cotton
May 2021
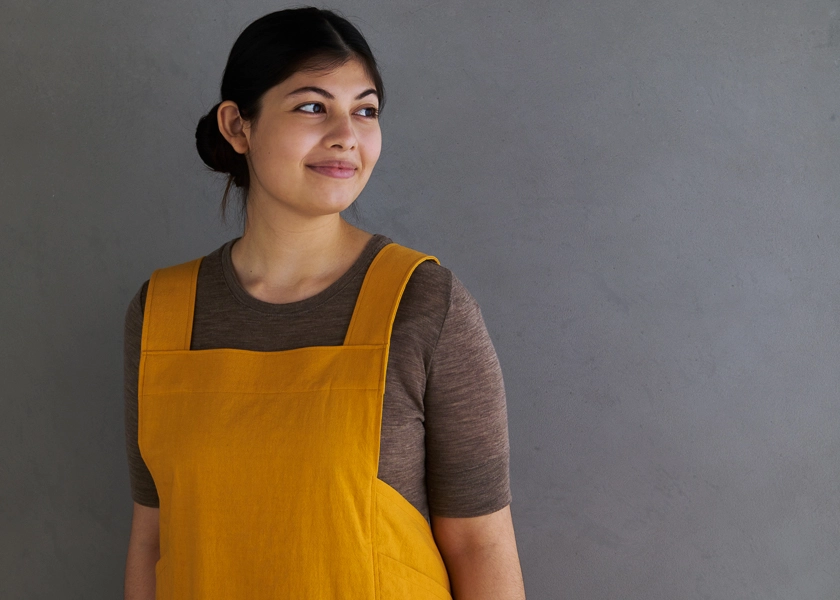
Soft and simple, our Spectrum Cotton makes the perfect apron. To see the full list of materials please check out our Cross Back Apron in Spectrum Cotton story here.
Materials
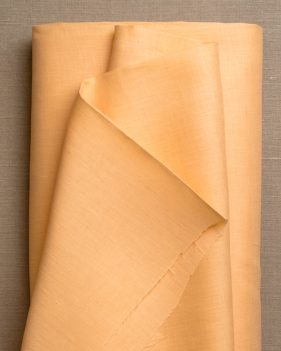
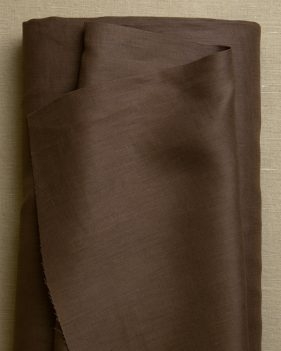
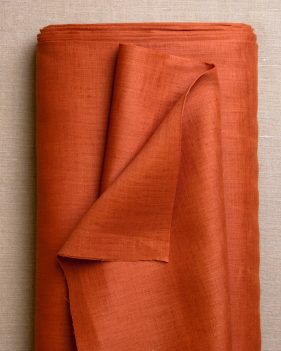
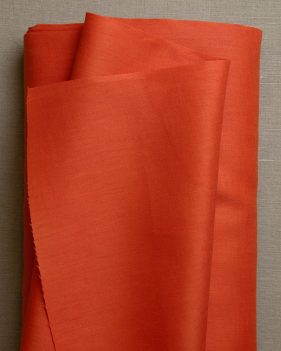
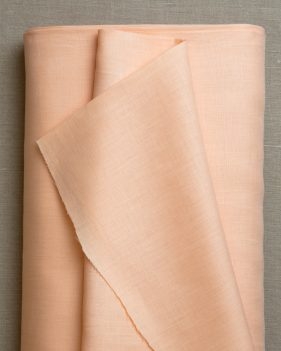
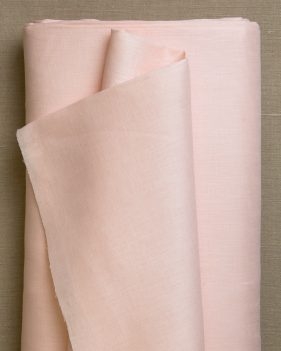
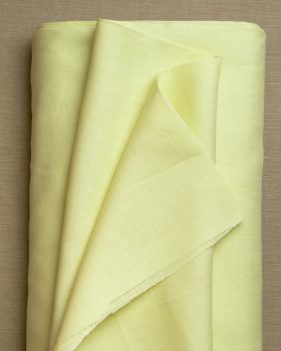
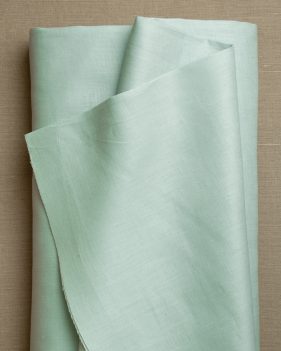
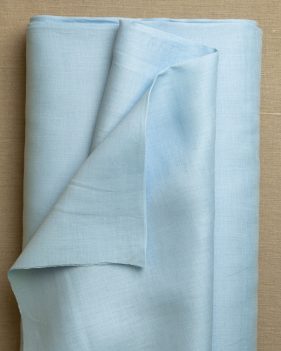
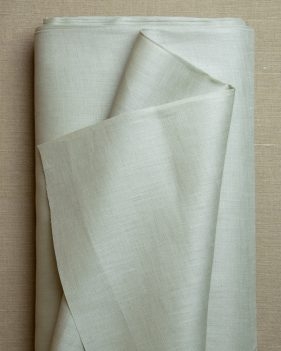
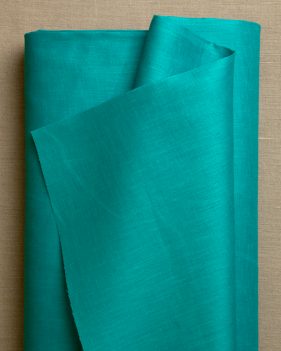
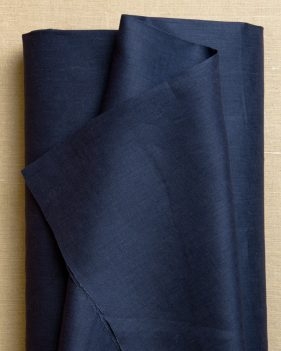
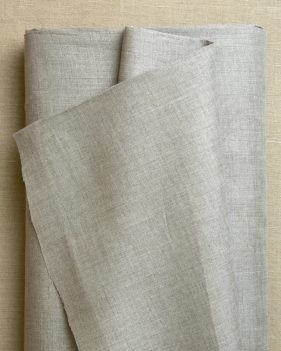
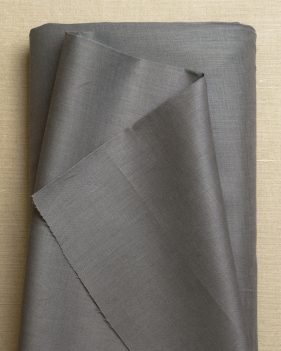
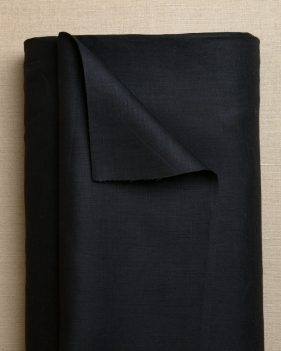
- 1 ¾ yards of Purl Soho’s Handkerchief Linen, 56-60 inches wide. We used the colors Redwood, Persimmon, and Desert.
- A 110-yard spool of Gutermann’s Cotton Sewing Thread to coordinate with the fabric. We used 4850 for Redwood, 4860 for Persimmon, and 1140 for Desert.
Or…
- 2¼ yards of Purl Soho’s Spectrum Cotton, 100% cotton, 45 inches wide. We used Yellow Ochre.
- A 110-yard spool of Gutermann’s Cotton Sewing Thread to coordinate with the fabric. We used color 1685.
Size
One size fits many.
Notes
Prewash, dry, and iron the fabric before starting.
For the sake of clarity our instructional photos use a fabric with a clear right and wrong side. When you are working with a fabric without a clear right or wrong side, choose either side as the right side for the first seam and follow this precedent for all subsequent steps.
Pattern
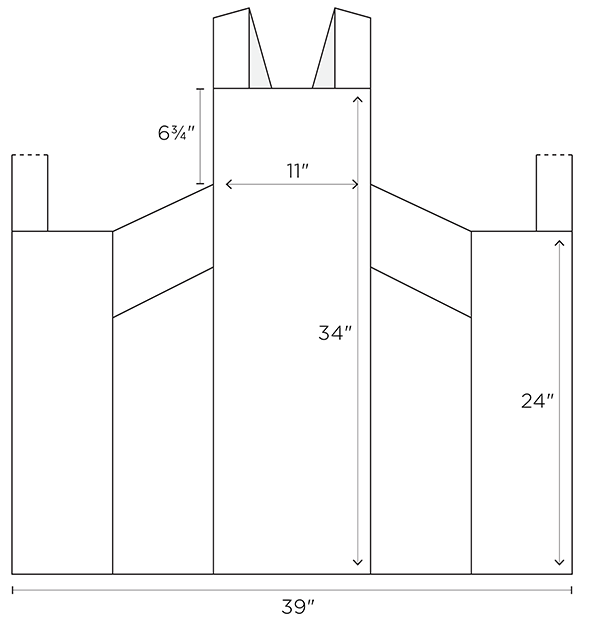
Cut
Use the cutting layout and measurements below to cut a total of 11 pattern pieces from the fabric.
Cutting Layout: 45 Inch Wide Fabric
Cutting Layout: 56-60 Inch Wide Fabric
Measurements

Prepare the Straps

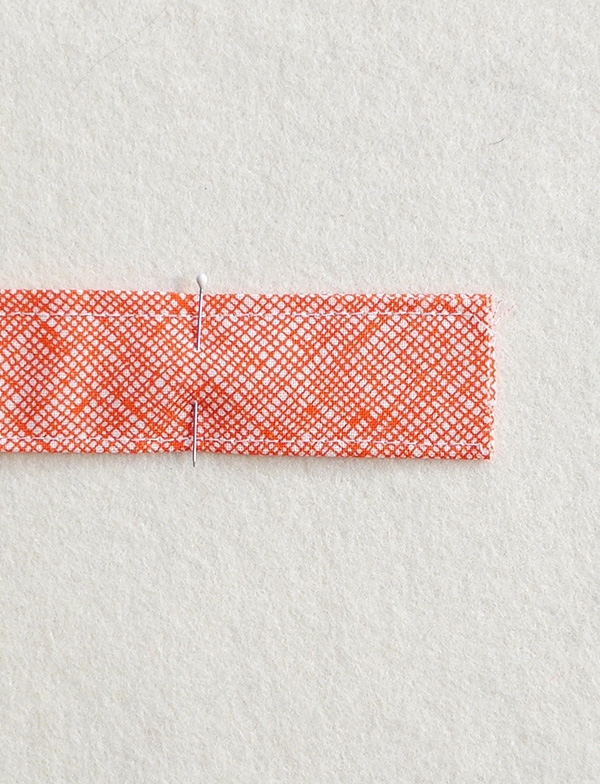
Fold one Strap in half lengthwise and press to create a crease. Open up the fold. Now, fold the two long, raw edges to meet the center crease and press. Fold the Strap in half lengthwise so that the raw edges are encased in the fold and press.
Sew along both long edges of the Strap with an edgestitch.
Repeat with the other Strap piece.
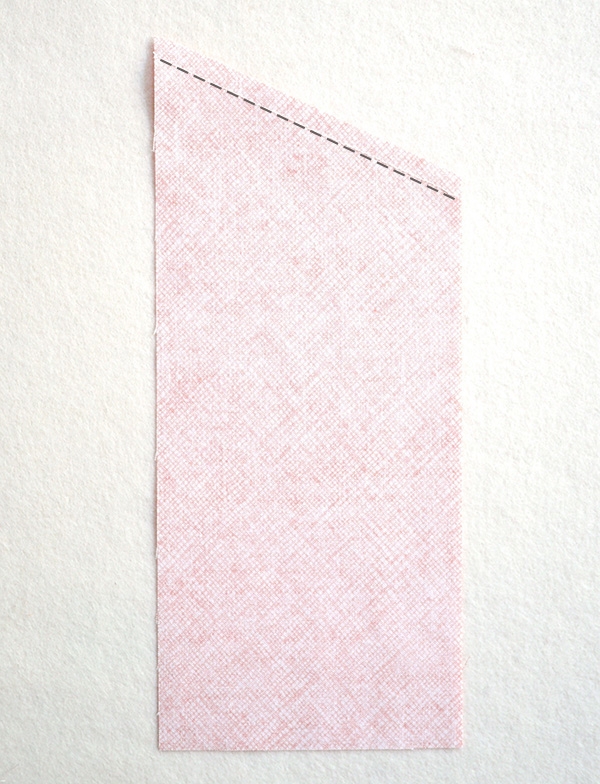
Prepare the Back

Fold one long edge of one Back piece ½ inch toward the wrong side twice, press and pin. Sew along the folded edge with an edgestitch.
Repeat with the other Back piece.

With the wrong side facing up and the long hemmed edge running along the right side, fold the top edge of the Back piece ½ inch toward the wrong side twice, press, and pin.
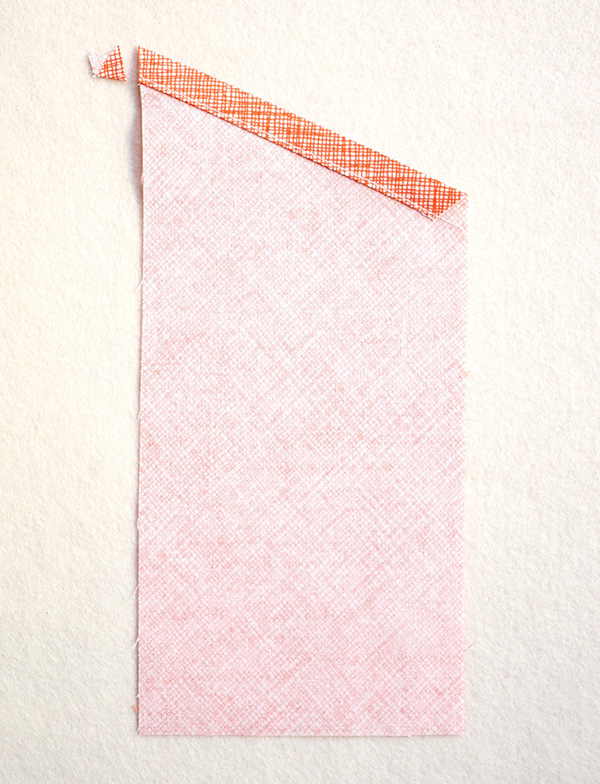
Tuck one short, raw edge of one Strap piece into the top hem of the Back, so that the long edge of the Strap runs along the long hemmed edge of the Back. Pin in place.
Sew along the top hem of the Back with an edgestitch, backstitching at the beginning and end of the seam.
Fold the Strap up at the seam and press. Sew the Strap to the top edge of the Back piece’s top hem. Backstitch at the beginning and end of the seam.

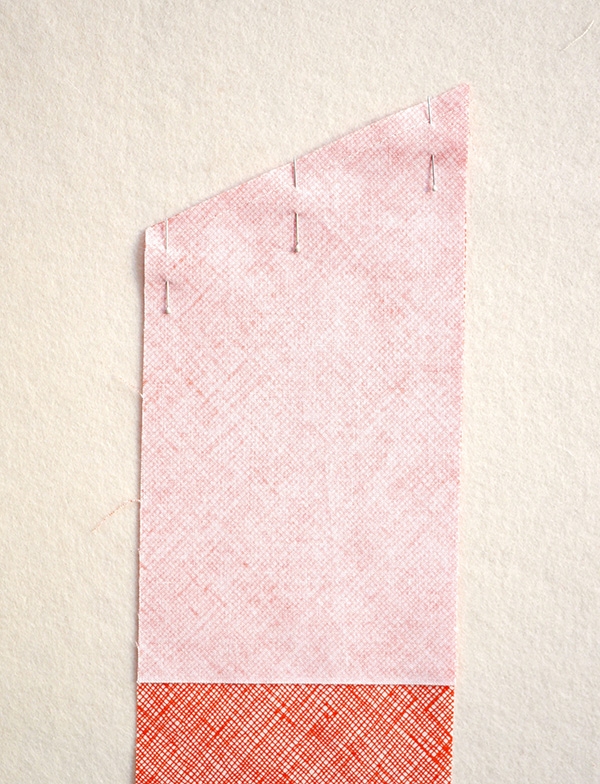
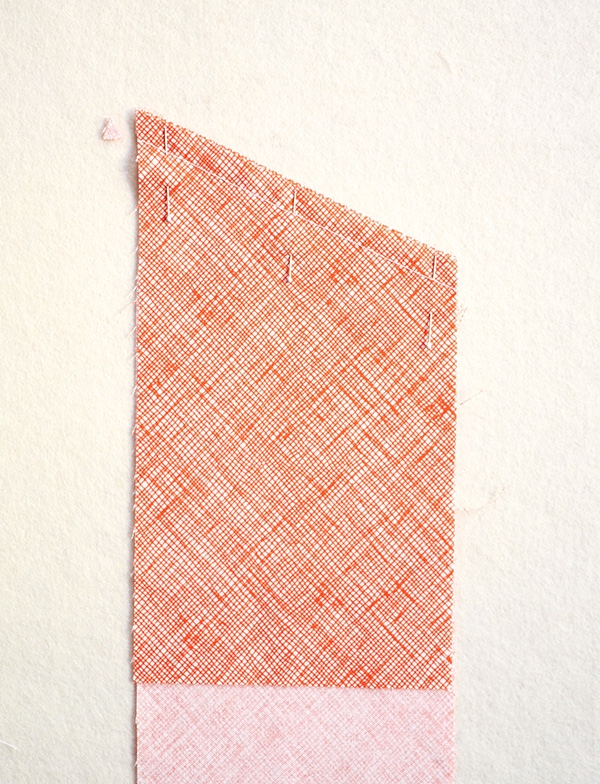
Repeat with the other Back piece and Strap, with one exception: When you start, the long hem of the Back piece should run along the left side. When you are finished, the two pieces should be mirror images of each other.
Prepare the Side Pockets
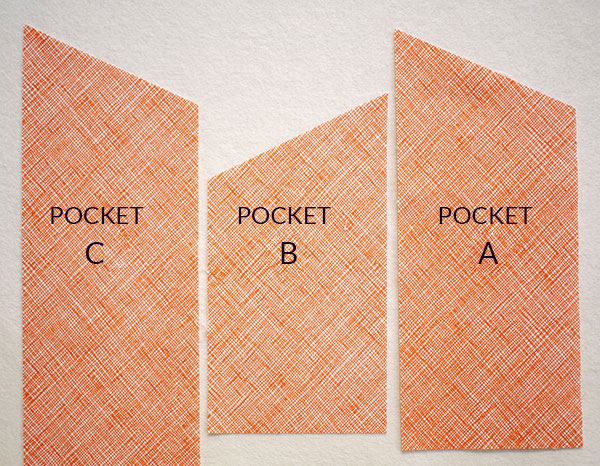
For each Side Pocket, you will need 3 Pocket Pieces: one each of Pocket A, Pocket B, and Pocket C.
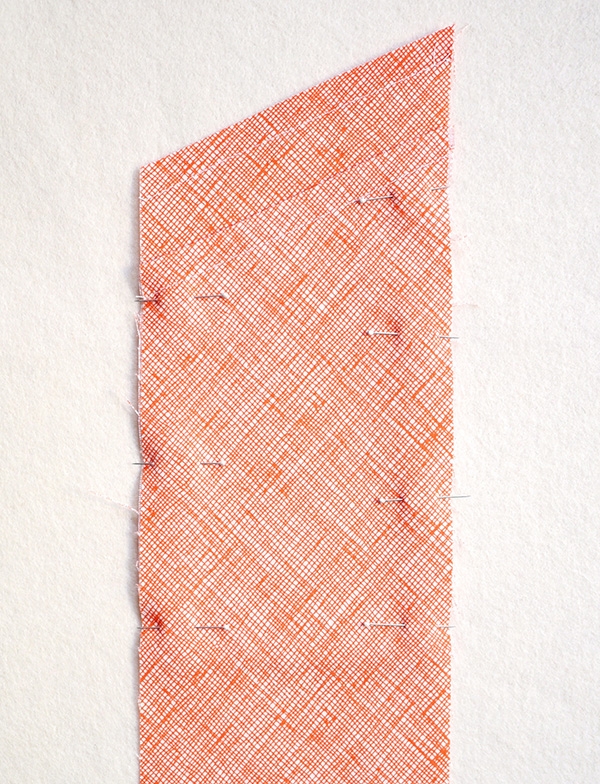
Right Side Pocket
The image above shows the shape of the Right Side Pocket pieces with their right sides facing up. The slope of Pocket B runs opposite the slopes of Pockets A and C.
Sew a line of stay stitching ½ inch from the top sloped edge of Pocket A. This will help prevent the bias-cut edge from stretching out in subsequent seams.
Fold the top edge of Pocket A ½ inch toward the wrong side twice, press and pin. Sew along the bottom folded edge with an edgestitch. Clip off any overhanging fabric so that the side edge runs straight.
Set Pocket A aside.
With right sides together, stack Pockets B and C on top of each other, lining up their top sloped edges. Pin in place. Sew along the pinned edge with a ¼-inch seam allowance.
Fold along the seam line so that the wrong sides of the two Pocket pieces are now facing each other, press, and pin. Sew along the top folded edge with a ½-inch seam allowance.
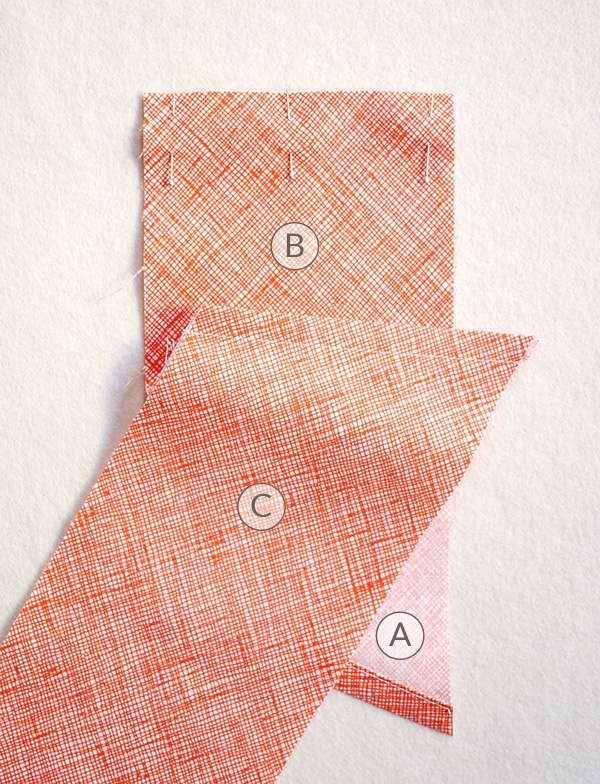
Now, with wrong sides facing, stack Pocket B on top of Pocket A so that their bottom raw edges are aligned. Pin in place. Sew along the pinned edge with a ¼-inch seam allowance.
Fold along the seam line so that the right sides of Pockets A and B are facing each other and press. Pin Pockets A and B together along the folded edge. Sew along the pinned edge with a ½-inch seam allowance.
This is now the Side Pocket.
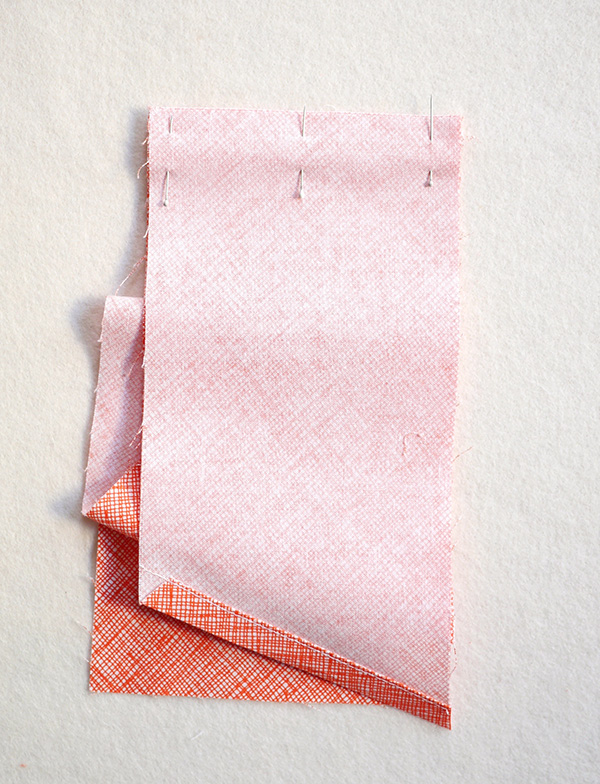
Lay the Side Pocket out flat with the right side facing up. Orient the Side Pocket so that A is at the top and C is at the bottom, then fold along the seam between pieces A and B so that B lies flat on A (right sides together). Next, fold C down so that its sloped edge runs parallel with the sloped edge of A. All the raw side edges should be aligned.
Pin along all layers of the side edges, and sew along the pinned edges with an 1/8-inch seam allowance.
Left Side Pocket
The image above shows the shape of the Left Side Pocket pieces with their right sides facing up. The slope of Pocket B runs opposite the slopes of Pockets A and C.
Repeat all the steps of the Right Side Pocket, using the Left Side Pocket pieces.
Attach the Side Pockets to the Back

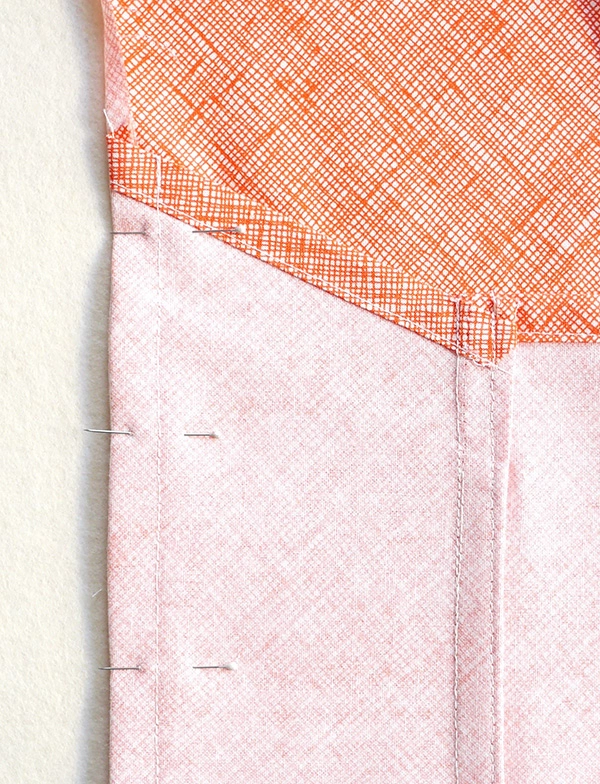
With their wrong sides together, stack one Side Pocket on top of one Back. Align the shorter side edge of the Side Pocket with the long raw edge of the Back piece.
Also align the bottom edges of the two pieces. When you do, you will notice that the Back is slightly taller than the Side Pocket. The top edge of the Side Pocket piece should hit the top edge of the Back about ¾ inch in from the raw edges (see above).
Pin the two pieces together along the aligned side edge. Start the French seam by sewing along the pinned edge with a ¼-inch seam allowance.
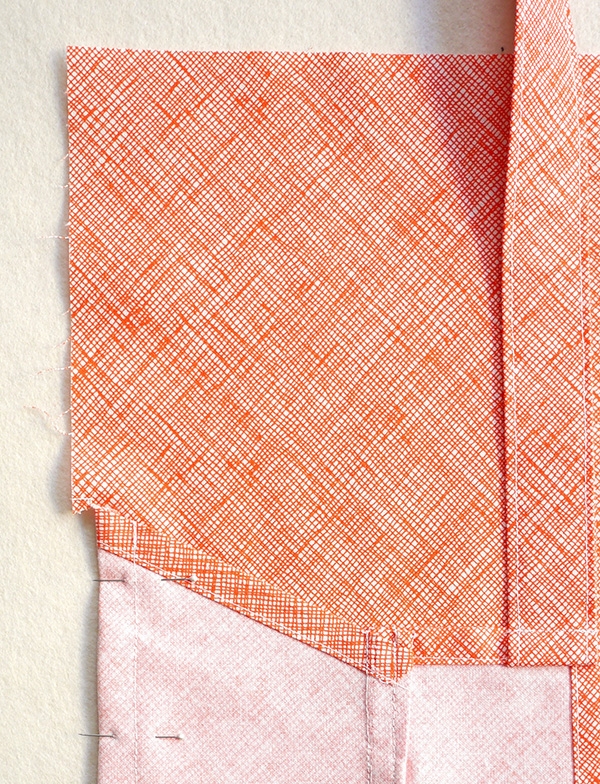
Fold along the seam line so that the right sides of the Side Pocket and Back are now facing. Press and pin. Sew along the pinned edge with a ½-inch seam allowance, backstitching at the beginning and end of the seam.
Press the seam toward the Back and finish the French seam by sewing it down ¼ inch from the seamline. Backstitch at the beginning and end of the seam.
This is now the Side.
Repeat with the other Side Pocket and Back. The two Side pieces should be mirror images of each other.
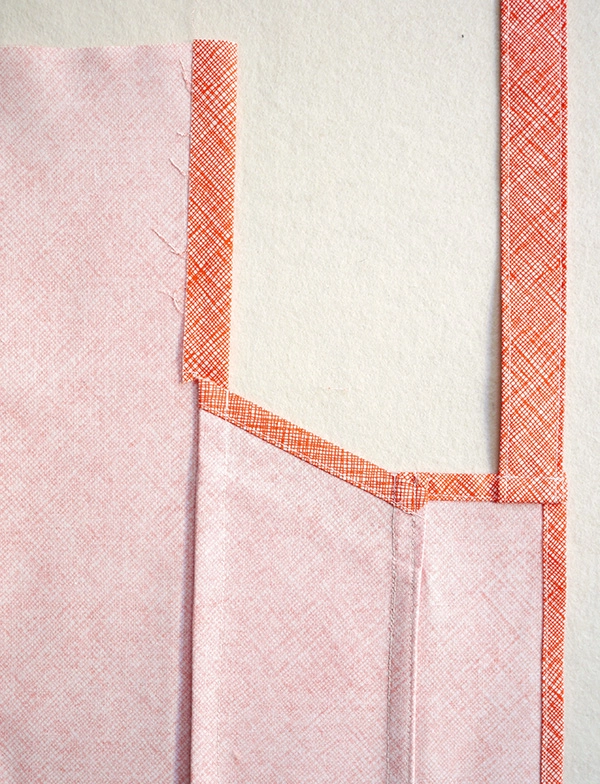
Attach the Sides to the Body
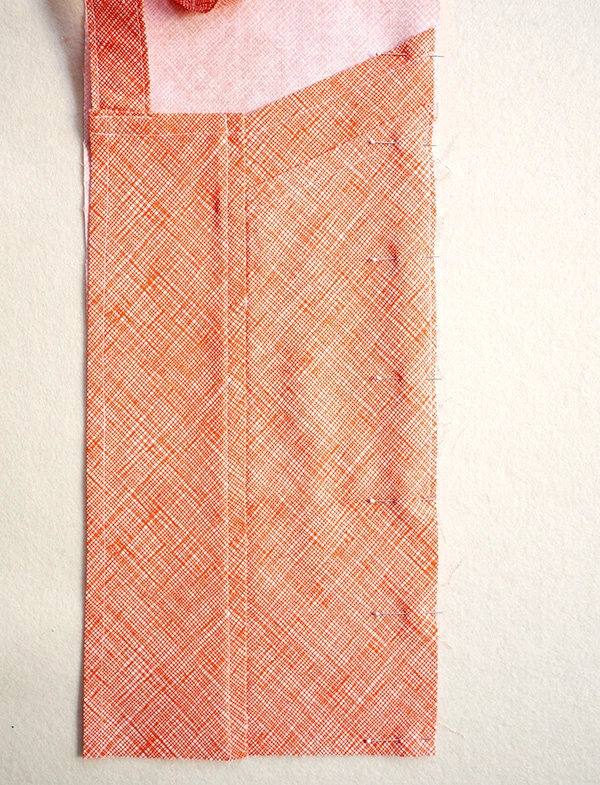
With their wrong sides together, stack one Side piece on top of the Body, so that the raw side edge of the Side aligns with one long edge of the Body. Also align the bottom edges of the two pieces. Pin in place along the long side edge.
Make another French seam, starting by sewing along the pinned edge with a ¼-inch seam allowance.
Fold along the seam line so that the right sides are now facing. Press and pin along the fold. Sew along the fold with a ½-inch seam allowance, backstitching at the beginning and end of the seam.
Make a small, ¼-inch clip into the seam allowance, following the slope of the Side piece so that the unsewn side edge of the Body can lie flat.
Press the seam allowance toward the Body. When you reach the unsewn side edge of the Body, press that raw edge toward the wrong side, following the seam line.
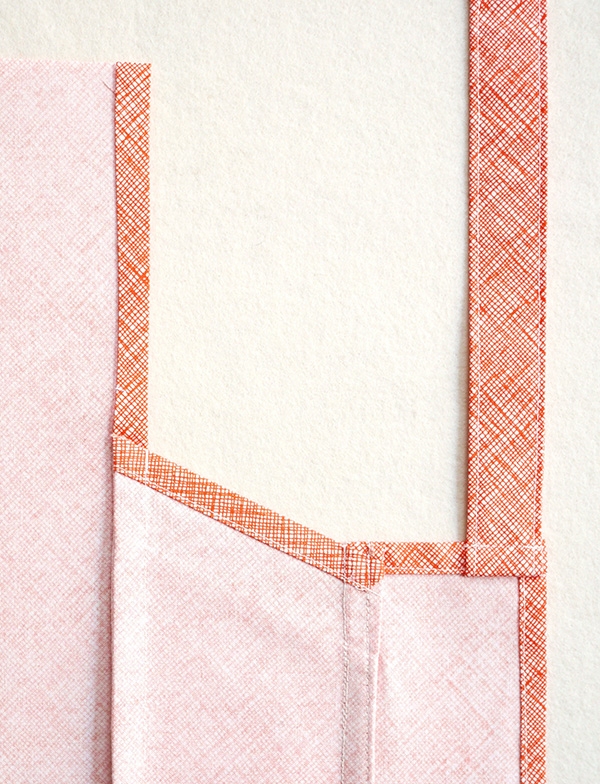
Tuck the raw edge of this seam allowance ¼ inch under the fold, following the line of the seam allowance below. Press.

Repeat with the other Side piece on the other side of the Body.
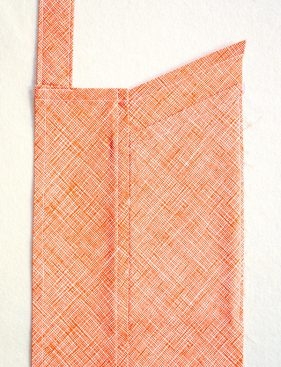
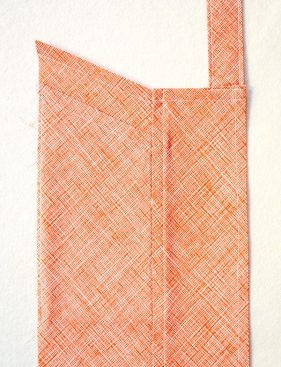
Fold the Top Hem

Fold the top edge of the Body ½ inch toward the wrong side and press. Now fold the top edge 2 inches toward the wrong side and press.
Open up the side ½-inch folds of the Body. Next, open the 2-inch fold along the top edge and refold it toward the right side along its crease. Keep the ¼-inch folds along the side edges and the ½-inch fold along the top in place.
Pin the last fold you made in place along the side edges.
Sew the fold down along the side edges with a ½-inch seam allowance (you can use the hem creases as a guide). Backstitch at the beginning and end of the seam.
Fold the top hem back toward the wrong side and press. Poke the corners out neatly.
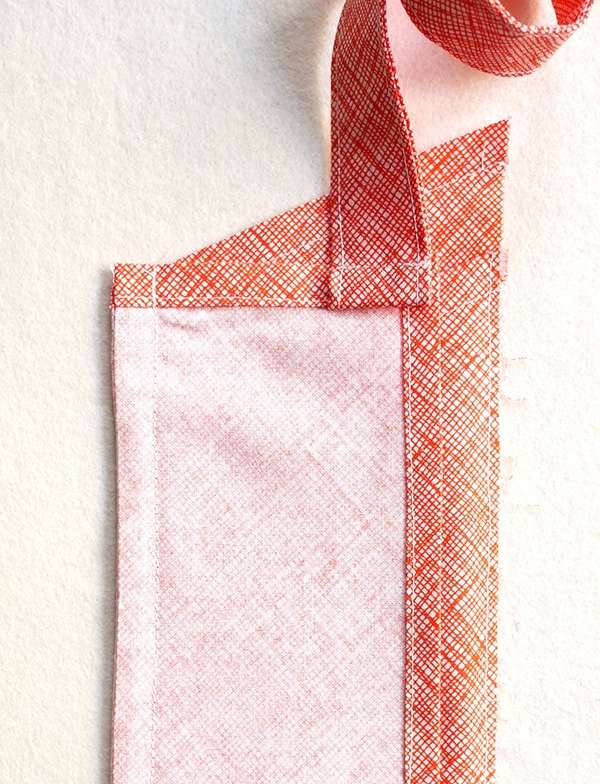
Attach the Straps
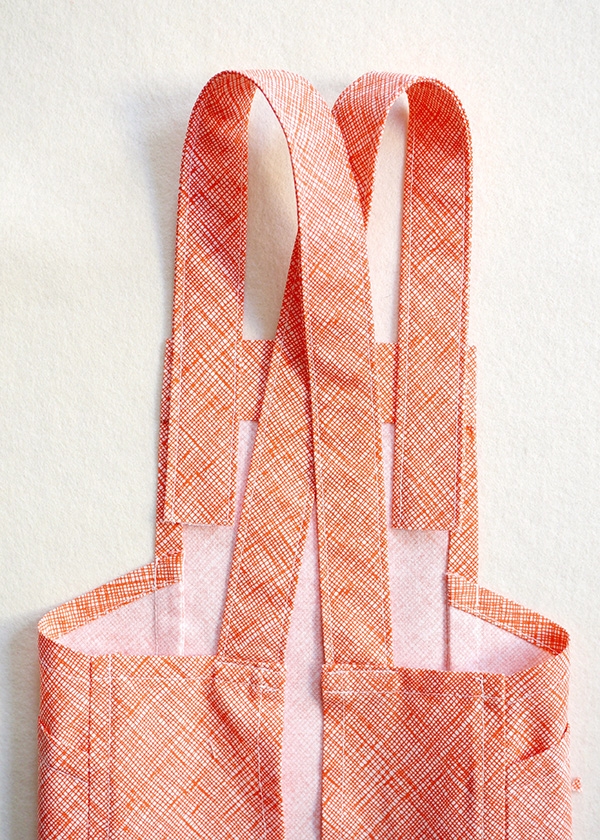
Bring the unsewn ends of the Straps to the front of the Apron. The Straps should cross in the back, but be careful that they do not get twisted.
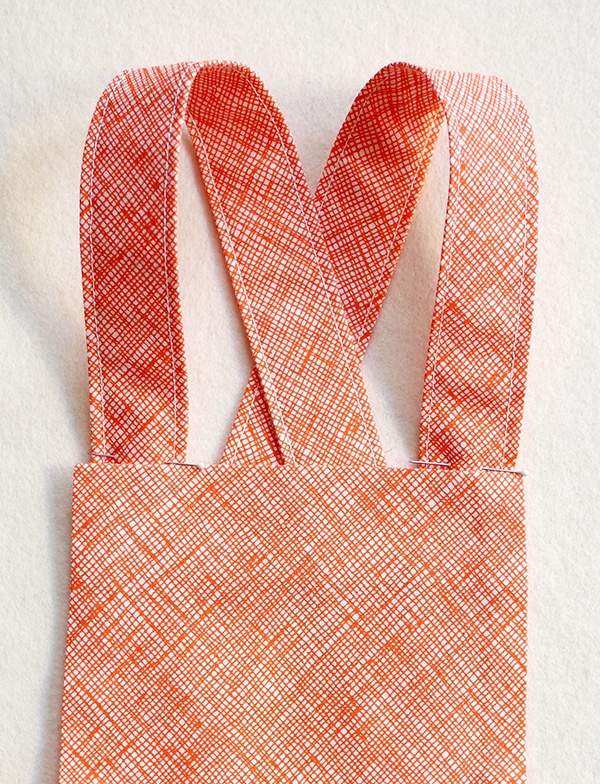
For the most accurate fit, try the Apron on and play with the length of the Straps. Once you like the fit, place a pin through the Straps, right where they hit the top edge of the Apron. The pin only marks the Strap; it does not attach the Strap to the Apron.
Trim the raw edge of the marked Strap 2 ½ inches from the pin.
Cut the other Strap so that it is equal in length to the first.
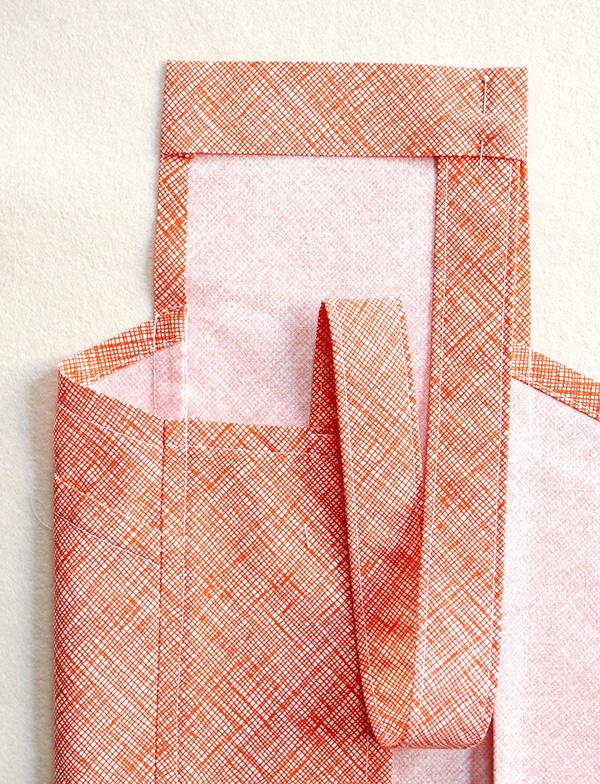
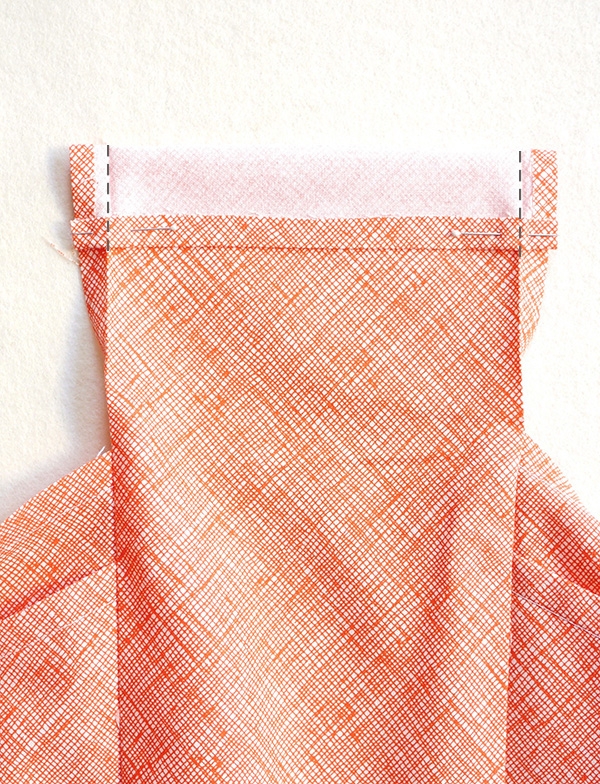
Tuck the raw edge of one Strap ½ inch into the top hem of the Apron. If you are pulling the Strap from the left side of the Apron, tuck it into the right corner of the hem (as shown here), or vice versa. Make sure that the Strap is not twisted. Pin in place.
Repeat with the other Strap.
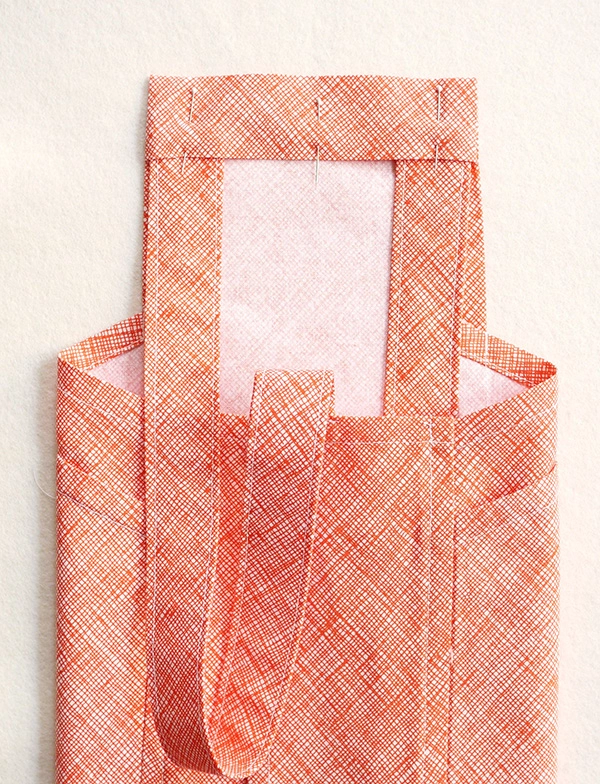
Pin along the folds of the top hem. Sew along the pinned edge, backstitching at the beginning and end of the seam.

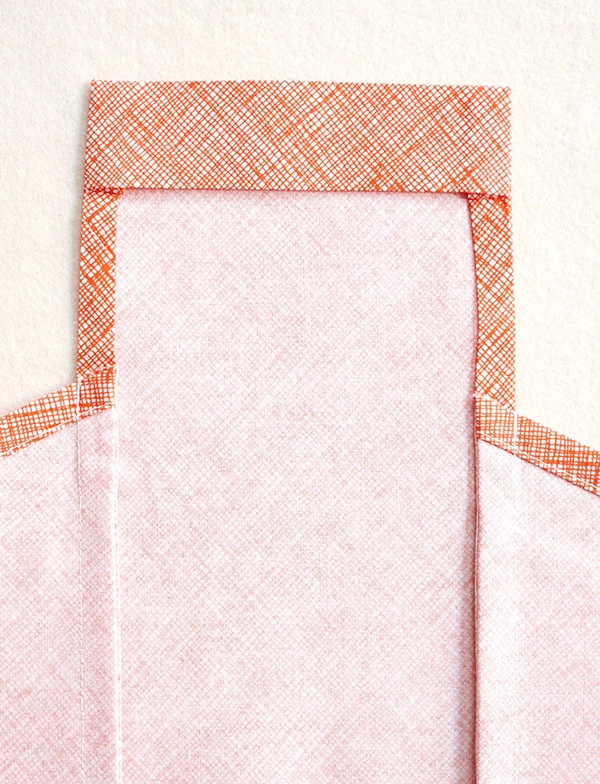
Fold the Straps up along the seam line and press. Pin in place.
Sew along the entire top edge of the Apron with an edgestitch. Backstitch at the beginning and end of the seam.
Finish the French seam you started by sewing along the side edges of the Body so that the seam runs ¼ inch in from the edge. Backstitch at the beginning and end of the seams.
Hem
Fold the bottom edge of the Apron ¼ inch toward the wrong side and press. Now fold the bottom edge 1 inch toward the wrong side, press and pin. Sew the hem down with an edgestitch, Backstitch at the beginning and end of the seam.


Excellent pattern, and always a delight to see properly finished seams which is something most commercial patterns neglect.
I used leftover denim and printed canvas for a two-tone finish, durable enough for woodworking. Some of the french seams were a bit rough on even my old vintage monster at this thickness, but with the suggested linen they would have been a breeze.
Thank you for your comment, Nicole! We are so glad you enjoyed this pattern, and can’t wait to see what you sew next!
All the best,
Margaret
Thank you SO MUCH for this pattern! I used some leftover muslin, and used a cotton print for the pockets, for contrast (also because I ran out of muslin ;D )
You are very welcome, Elizabeth! Your apron sounds beautiful and we hope you enjoy it for many years to come!
All the best,
Margaret
Alright! Everyone is getting an apron for Christmas!
There is NO free pattern??
Hi Emma,
Thanks for reaching out. You can find the free pattern for this apron on the page above! However, you’re correct that there is no template for the pattern pieces. That’s because they are too large to easily fit in PDF format, and the shapes are also quite easy to cut from measurements only, so tracing isn’t necessary! You can find the dimensions of each piece in the CUTTING LAYOUT section.
I hope this helps clear things up!
All the best,
Lili
My apron turned out beautifully! I used a yellow/white floral linen. Thank you for the easy to follow tutorial and helpful pictures!
It would be better if you make a video because I would understand much better,
Hi Suzana,
Thanks for writing in. I’m afraid that we do not currently have the time and resources to create a video tutorial of this entire pattern. We’re so sorry about that!
We do have a number of sewing tutorials already, which you can find on this page. These might be useful for you, as there are certainly some that are applicable to this pattern! Additionally, we are always happy to answer any questions you have, so if you run into a trouble spot, please don’t hesitate to reach out.
All the best,
Lili
Perfection! Purl Soho patterns are just incredible. Simple. Beautiful. Thoughtful. Such attention to detail with finished seams. Your patterns make me look like an expert! I pinned this years ago and finally made one for myself with some poly/cotton as a light-weight house-cleaning apron. Loved it so much I have made two more as Christmas gifts. I think I may need to make one in every fabric I can find! Thank you for sharing this tutorial for free. It was a joy to sew this apron!
Hello! I’m writing to you from Spain. I love this apron so much. I was wondering whether the dimensions of the CUTTING LAYOUT section include seam allowance and how much of it.
Thank you and congrats on your page!
Hi Cecilia,
Thanks for reaching out. The seam allowance is indeed included in the dimensions of the CUTTING LAYOUT, and the pattern specifies how much there is during each step (it sometimes differs)! Hope this helps!
All the best,
Lili
Made a couple of these for my mom for Christmas, one Christmas themed & one green & green gingham. They were a big hit. Thanks for the pattern, it’s so nice.
Good Morning,
Do you have instructions to enlarge the pattern and order adequate fabric for larger sizes?
Thank you,
Hi Karmann,
Apologies for the delayed response! I think that the simplest option for upsizing the apron would be to cut a wider piece of fabric for the body section, keeping the sides and pocket sections as in the original pattern. I would keep the straps at the original width, regardless of any other changes. You might want to plan on having 2 yards, instead of the original 1 3/4 yards as the pattern calls for, but I think that this would be a simple way to make it larger.
All the best,
Zha Zha
I’m about to sew this for our adult daughter who is 5′ 1″ tall. To accommodate her height, would you suggest adjusting with shoulder strap length or hem length or both. She lives 7 hrs away so i can probably adjust the fit when i get there but i’d love to have it as complete as possible beforehand. Any suggestions? Thank you!
Hi Kathe,
Apologies for the delayed response! I would recommend adjusting the shoulder strap length over the hem length to make sure it sits higher on her chest and provides enough coverage. I hope you’re able to see this before she arrives, but I’m sure she’ll love it either way!
All the best,
Zha Zha
Thank you for this pattern with full instructions. I really like how it is constructed with closed seams. My finished product looks so professional. I used some denim I had on hand and didnt have quite enough so I used a different fabric for the inside of the pocket and you would never know.
Than you again.
Great pattern, although I did cut 20″ off the straps before I attached them. Loved the finish on the inside using French seams. My neighbour gave me some old ripped sheets of very high quality fabric. I made her an apron from one as a thank you.
A few people will be getting aprons next Christmas!
Can I buy this pattern
Hi Cathy,
This is a free pattern! You can find all the instructions and other necessary information available on this page.
All the best,
Lili
I would love to see pictures of how to put pockets together. I must not be doing something correctly.
Hi Catherine,
Thanks for reaching out. We do include pictures of how to put the pockets together in the pattern instructions! You’ll just need to scroll down the page a bit to find them.
All the best,
Lili
This is a great pattern, but why fail to mention the French seams in the actual instructions? The description at the top mentions “durable French seams”, but the steps below merely give a description of how to sew a French seam without actually explicitly stating that they are French seams. This was quite confusing to me until I put two and two together. Other than that, I am looking forward to wearing and gifting this apron many times over!
Hi Carrie,
Thanks for reaching out about this! We completely agree with you that this is confusing, so we’re going to add a mention of French seams into the instructions themselves. Thanks again for bringing this to our attention!
All the best,
Lili
A friend made an apron with this pattern and I’m excited to get started on one of my own!
I’d like to do a slight contrast at the pockets so the higher inside piece is a different colour (with straps to match)
Which piece, A B or C, is the higher pocket that peekaboo shows ? I hope that makes sense 😉
Hi Nixy,
That’s a great idea for this pattern! Pocket A is the higher pocket, so you’d want that one to be a different color. Hope this helps!
All the best,
Lili
Sorry for the delay- thank you so much! All prepped, and putting it together today!
Just stitched the hem and have it all ironed so my apron is crisp and — if I do say so myself — beautiful! First time doing French seams and oh, what a finish it gives! I had read all the comments before starting (ALL the comments!) so I was ready when the pockets came ’round. No issues whatsoever; just follow the very clear directions and voila! it works! This will be a sort of hostess gift for my cousin in northern Canada, with whom I’ll be spending a week. She uses a full apron so I’m eager to present her with this bright, beautiful, new one, full (full!) of love! Thank you ever so much for your generosity in making this pattern available to us. I am so grateful.
This pattern looks beautiful! Do you have any suggestions for modifying the sizing for someone who is 5’2″ tall and very thin? Thank you!
Hi AB,
Thanks for writing in! I would recommend making the back, body, and pocket pieces both narrower and shorter. You may also want to make the strap pieces shorter as well!
All the best,
Lili
Thank you! This is an awesome pattern! Instructions are clear and easy to follow- even for someone who doesn’t do tons of sewing. I love how this turned out. Made this as a gift for my sister’s bridal shower.
Hi Suzanne,
Thank you so much for letting us know about your success… We’re so happy to hear that it was smooth sailing! What a beautiful gift and congratulations to your sister!
Best,
Whitney
I liked the pattern. Was just the style I was looking for. It wouldn’t be for beginners as the French seams are tricky. But the instructions were fairly clear and I really liked how nicely finished those seams made it. But…I cut off over 20 inches on each strap, which meant wasting quite a bit of fabric. I am 5’3” and so also cut off over 4 inches from the bottom. Would liked to have known I could get by with less fabric. But thanks for the pattern.
Hi there,
This pattern, and all of your fabrics, are so lovely, thank you! I have two questions regarding this pattern:
1. How might I modify it to make one for an 8-10 year old?
2. How might I make this reversible?
Thank you so much!
Melissa
Hi Melissa,
Thank you for writing in! While we’d love to be able to help you with this, I’m afraid these kinds of modifications would be outside the scope of support we can offer at this time. Not to worry though because we have some ideas for you!
As an alternative, we recommend trying a pattern that has instructions for smaller sizes built in like this one! You can also make a matching version for yourself by following our Adjustable Apron pattern instead.
I hope at least one of those options works for you, but please let us know if you have any other questions!
All the best,
Gavriella
I’ve just come back to sewing after a 30+ year hiatus, and I can’t believe what I’ve been missing! I am currently sewing my fourth apron using your ingenious cutting layout and impeccable tutorial, for gifts and home use! Thank you SO much for taking the time to share such a fun and functional design.
Hi Sarabeth!
We are so happy to hear this! We are also ecstatic that you have fallen back in love with the craft of sewing! Have a wonderful time and thank you for supporting Purl Soho!
Happy making,
Gavriella