Kid’s Ric Rac Apron

I love baking with my almost-2-year-old, but it can be quite a messy affair. An average session might involve her stealing fistfuls of chocolate chips, dumping sugar on the floor and rubbing dough into her hair. In order to protect her clothes from this toddler chaos, I was rigging up my adult-size apron and tying them on her like an elaborate toga. But after my contraption fell off for the hundredth time, it became clear to me that Lupe needed her very own little apron.
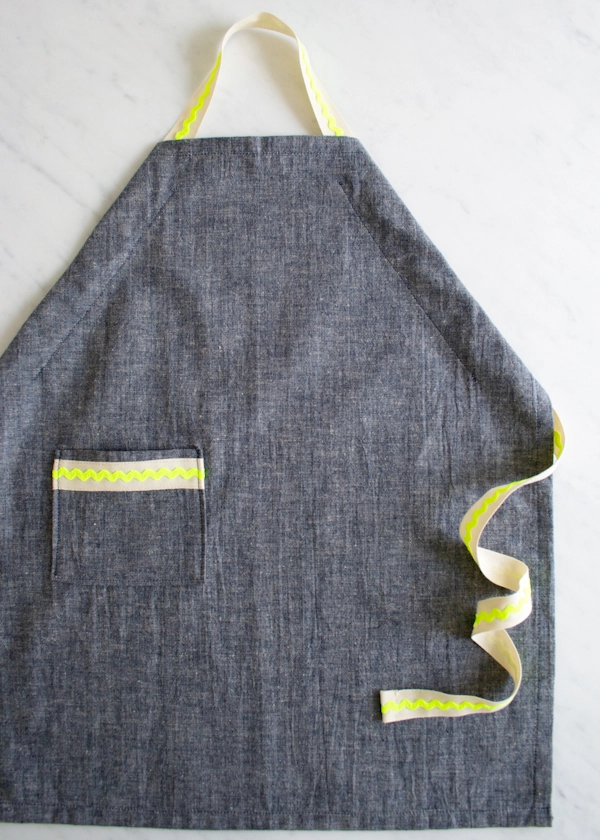
Aprons are my number one favorite things to sew. They are so quick and easy, clean and engineered, and as an avid home cook, I use them all the time. Sized for kids from 2-10 years, this apron is a smaller version of our Adjustable Unisex Apron and is just as versatile, useful and cute!

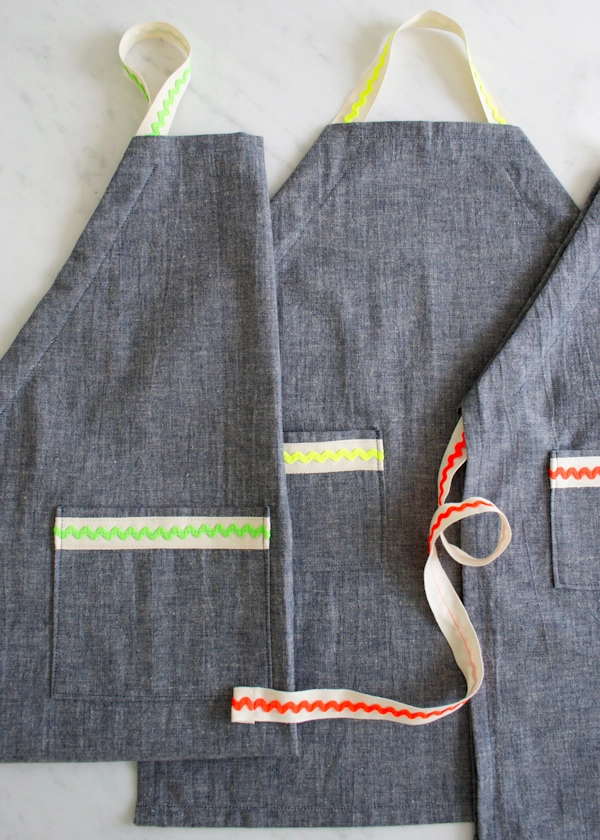
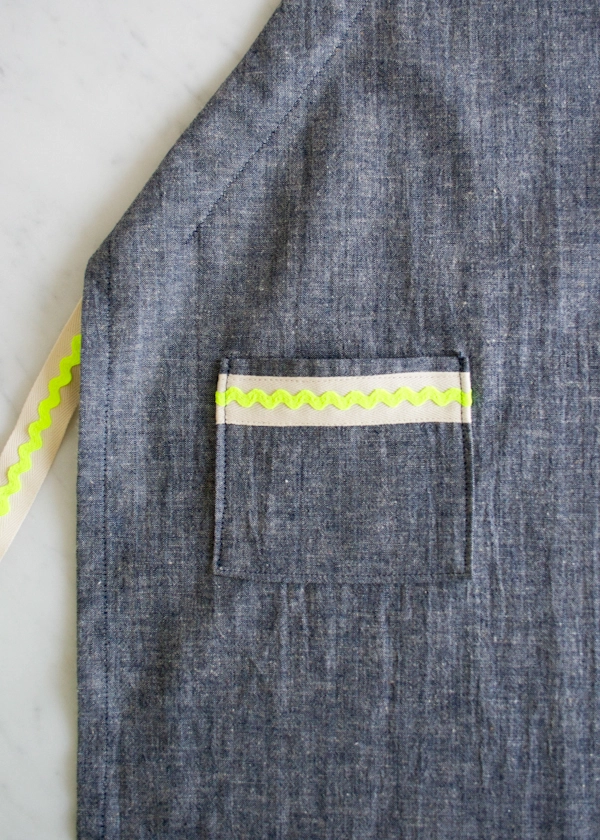
I used Kiyohara’s Linen Blend Solid fabric because of its sturdy feel and pretty yarn dyed color, and I paired it with a shock of neon ric rac to add some lively color and fun. After all, cooking with kids may not be the most practical thing to do, but if you can overlook the cookie dough handprints on the fridge, it should always be fun! –Molly

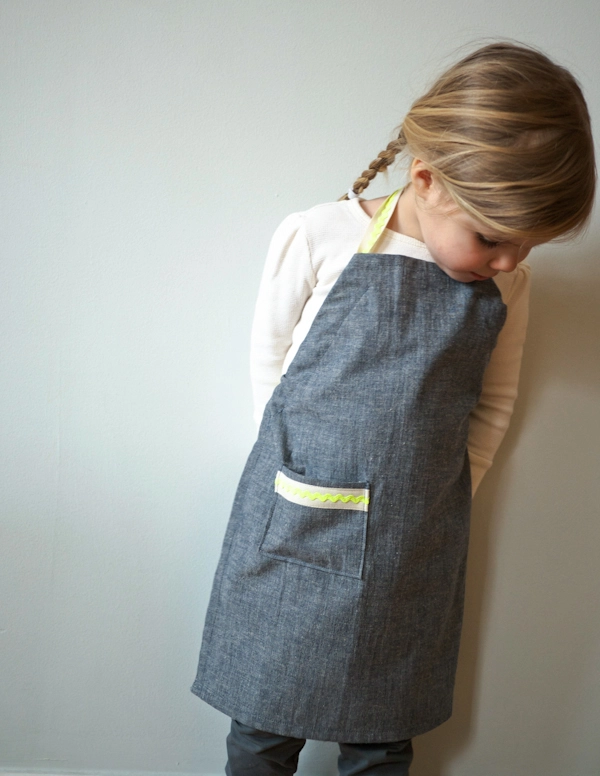
ps- Here is three year old Ruth modeling the Little Kid size!
Materials

- 3/4 yard of Kiyohara’s Linen Blend Solid in Navy
- 2 yards of small Ric Rac Neon in Orange, Yellow or Green
- 2 yards of 20mm Cotton Twill Tape in Ecru
- Mettler’s Neon Thread in Devil Red, Sour Apple or Limedrop to match the Ric Rac
- One small spool of Gutermann’s 100% Cotton Thread in 7400. This is the Blue Thread.
- One small spool of Gutermann’s 100% Cotton Thread in 1040. This is the Ecru Thread.
Note: Machine wash and dry the fabric (but not the trims) before you get started.
Sizes + Finished Dimensions
Little Kid (to fit children 2- 5 years): 19 inches tall by 16 inches wide at the widest point. Big Kid (to fit children 5-10 years): 23 inches tall by 18 inches wide at the widest point. Note: In the pattern the first measurements are for the Little Kid size and the measurements within the parentheses are for the Big Kid size.
Pattern
Cut
From the Twill Tape cut:
- One 60-inch (66-inch) length; this is the Tie Twill Tape.
- One 5-inch (6 ½-inch) length; this is the Pocket Twill Tape.
From the Ric Rac cut:
- One 60-inch (66-inch) length; this is the Tie Ric Rac.
- One 5-inch (6 ½-inch) length; this is the Pocket Ric Rac.
From the fabric cut:
- A 5-inch (6 ½-inch) square; this is the Pocket.
- A 21 X 18-inch (25 X 20-inch) rectangle; this is the Body.
Fold the Body piece in half lengthwise so that the two long sides meet one another. Orient the piece so that the fold is on the left and the shorter sides are at the top and bottom.

On the top edge make a mark 4 inches (4 ½ inches) to the right of fold. On the right hand edge make a mark 6 ½ inches (8 ½ inches) from the top. Cut a straight diagonal line running from the mark on the top edge to the mark on the right hand edge, cutting off a triangle shape at the right corner. Discard these triangle pieces (or save them for another purpose!)
Assemble the Pocket and the Tie
Press one of the long sides of the Pocket piece ½ inch twice towards the wrong side. Pin in place. Using the Blue Thread, edgestitch this fold down. This hemmed edge is now the top of the Pocket.
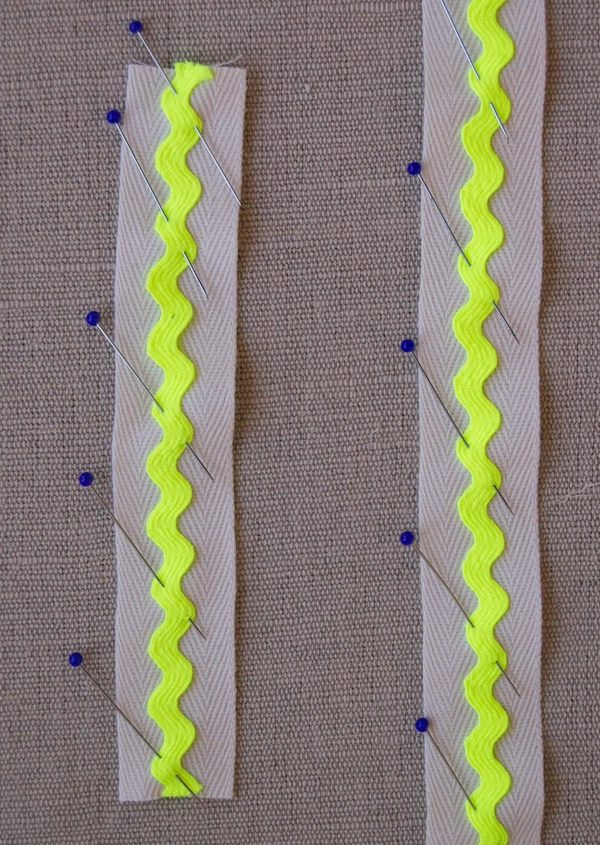
Pin the Tie Ric Rac down the center of the Tie Twill Tape, placing a pin at every third wave in the Ric Rac. Pin the Pocket Ric Rac to the Pocket Twill Tape in the same manner. Using the Neon Thread and working carefully, sew the Ric Rac in place straight down its center. These pieces are now the Tie and the Pocket Trim. Fold the raw ends of the Tie ½ inch twice towards the wrong side and pin the folds into place. Edgestitch this fold using the Ecru Thread.

With right sides facing up, pin the Pocket Trim across the top of the Pocket, ¼ inch below the top fold. Using the Ecru Thread, edgestitch the Pocket Trim in place along both its top and bottom edges. Using the Blue Thread, zigzag stitch around the three raw edges of the Pocket. Put the Pocket aside for now.
Sew
Note: All sewing in this section is done with the Blue Thread.

Unfold and press the crease out of the Body piece. Press and pin the 8-inch (9-inch) edge over 1/2 inch twice towards the wrong side. Edgestitch this fold down. Hem the two side edges in the same manner.
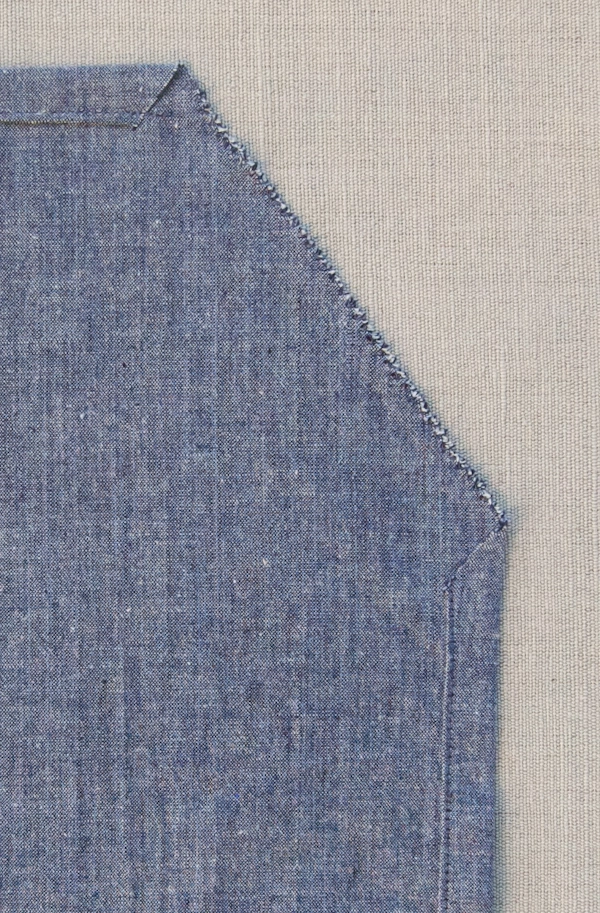
Zigzag stitch across both diagonal edges of the Body piece.

Fold and press both diagonal sides 1/4 inch towards the wrong side and then fold them over again 1 inch towards the wrong side. Pin these folds into place and edgestitch them down. The Body will now have two diagonal channels at either side. Fold and pin the bottom raw edge of the Body ½ inch twice towards the wrong side. Edgestitch this fold down.

Press the side and bottom raw edges of the Pocket ½-inch towards the wrong side.
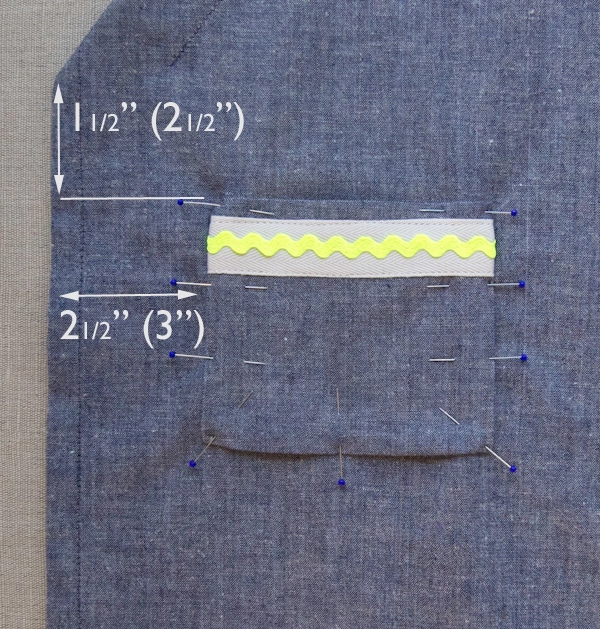
With right sides facing up, pin the sides and bottom of the pressed Pocket to the Body 2 ½ inches (3 inches) from the left side and 1 ½ inches (2 ½ inches) below the beginning of the left diagonal side. (Note: I put the Pocket onto the wearer’s right side. If you are making this for a lefty, you’ll want to pin the Pocket to the wearer’s left side, which will be the apron’s right side when it’s facing right side up.) Edgestitch the sides and bottom of the Pocket into place, leaving the top open.
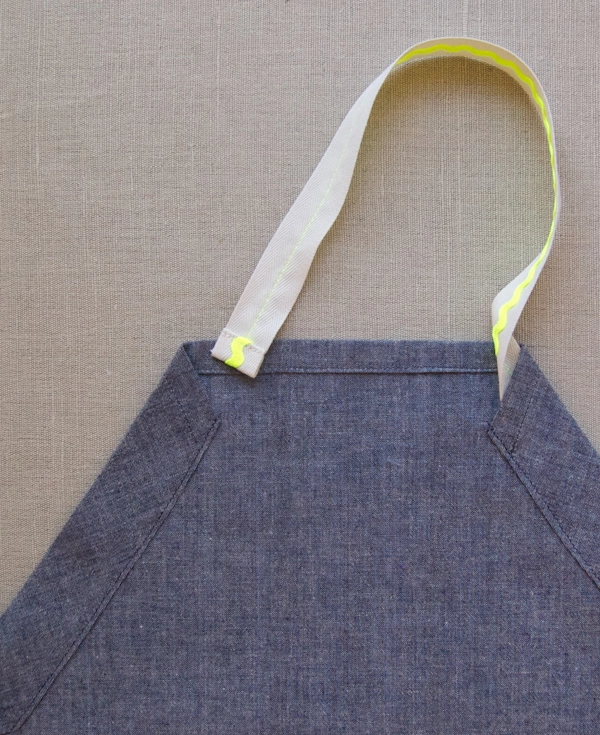
Turn the Body over so the wrong side is facing up. With the wrong side of the Tie facing up, thread one end of the Tie into the lower opening of the right side diagonal channel. Making sure not to twist it, pull the Tie through the channel out the top opening. Then thread the Tie into the top opening of the left hand channel and out the bottom, again making sure not to twist the Tie. Arrange the Tie so that it is even on each side and an adjustable neck loop is formed at the top.

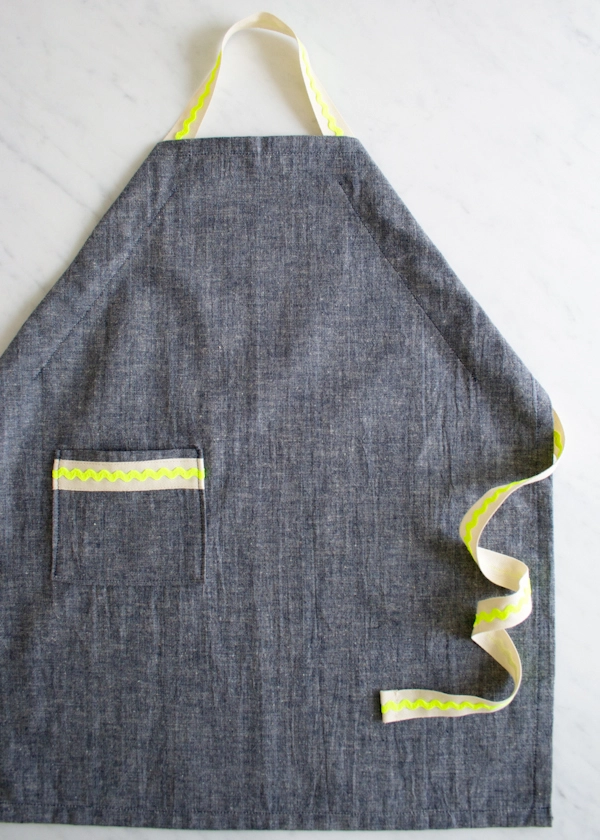
Press the apron and it’s all done!






This is another fantastic pattern. It really pops with the ric rac on the twill tape. Your designs and details make for great projects.
Any suggestions on sizing up to create matching mother/daughter aprons? I don't often sew but would love to make a few sets for gifts. These are so cute! Thanks!
Hi Angie-
Yes! This is actually based on an earlier project- the Adjustable Unisex Apron. As the name suggests it's made to fit both men and women. People on the shorter side will have to fold it up as pictured in the top photo of the pattern: https://www.purlsoho.com/create/the-purl-bee/2011/8/11/mollys-sketchbook-adjustable-unisex-apron.html To adjust this patten I would just follow the pattern and add ric rack to the tie and top of the pocket.
Or, if you'd like to make a smaller apron that is sized more for women you might want to use the body measurements from our recent Simple Linen Apron post and just sew it together in the same manner as this kid's apron. In that case I would get 1 yard of the body fabric and 3 yards each of the twill tape and ric rac. I would cut the pocket piece to 8-inches square and make the tie 100-inches long.
Please let us know if you have any more questions!
Molly
Love this. It's so cute. I hope Lupe has fun wearing it while she helps you make a batch of your famous cookies!
Love this! I've just bought materials to do this with a plum purple ric rac. But I'm wondering about shrinkage of the twill tape as I've bought one that is 100% cotton. Should I prewash it to avoid shrinkage and wrinkling of the poly ric rac once they're sewn together?
Hi Erin-
Yes, we recommend pre-washing any cotton fabric before you sew with it so pre-washing the twill tape would be a great idea!
Good luck with the project!
Molly
Lindo trabalho! Parabéns!
Just finished two of these for my 11 and 3 yr old granddaughters for Christmas. Super simple and was able to piece them together with fabric I had on hand. I’m sure they will love them! Thanks for sharing this pattern.
Thank you so much for the pattern. Lovely pattern and quick to make.
Such an easy pattern to follow! Thankyou so much
Lovely pattern, nice and easy to do. I’d like to just make one comment though. If making this apron for a very young child (toddler), you should be sure to make the tie long enough that you can knot it back through the neck loop (so on the back you have an ‘x’ shape).Otherwise there is a risk with a very small child that the back strings could be pulled or get caught on something, and this would have the effect of tightening the neck loop. Try it and you’ll see what I mean.
Hi, Sheila!
Thank you so much for writing in! And thank you for your suggestion!
Best wishes,
Kumeko
Love this pattern. Made some like this 30 years ago. Can’t tell you how many times I had to take them back from my co-workers. I made an adult version. Making it wider in the bust but shorter. That way I could get full coverage. (no boob popping out, like regular aprons). But not over covered to make a person to warm. Making this one for my grandsons. It will cover them better went they’re cleaning fish! Thanks again for the smaller sizes!
Really neat pattern
Hi love this pattern and made a few for my granddaughter, but your finished size is not what I get for the small I get finished size of 19” widest point and 16 for the length.
Your finished size for small is 19 x 16.
Can you help me figure this out please. Thank You Barbara
Hi Barbara,
Thanks for reaching out! I am sorry to hear that you are having difficulties! When you cut the fabric for the smallest size, you will cut a piece that is 21 X 18-inches. You then fold it in half so the two long sides meet and the measurements of it folded are 9 x 21 inches and make the cut for the top. This will make the very top 8 inches wide and the widest point 18 inches wide before you hem any pieces. For your description, it sounds as though you may have folded the fabric in the opposite direction leaving you with a shorter and wider apron.
I hope that this helps!
Cassy
Thank You Cassy
I actually thought the 21 was width and 18 was length that’s how I cut the fabric.
So it’s actually 21 long by 18 wide that was my mistake.
Thanks again
Barbara
Love this super simple pretty pattern! It came together so easily. I left off the ric rac and just made 3/4″ wide double fold binding in place of the twill tape, and it works wonderfully.
Just a note, I don’t think the tutorial mentions hemming the bottom. As an intermediate sewist, of course I knew I would have to, but a beginner may like an explicit direction to hem!
Oh! Just found it, never mind!
What is the size measurement of the “small ric rac”? I am trying to figure out another source being that you don’t carry the ric rac anymore. Thanks!
Hi Elli,
This is a very old pattern, so unfortunately we don’t have the details on all the materials we used anymore! But we’re almost certain that the ric rac was 5/16ths of an inch in width, and we used 2 yards.
All the best,
Lili