Box Pleat Top
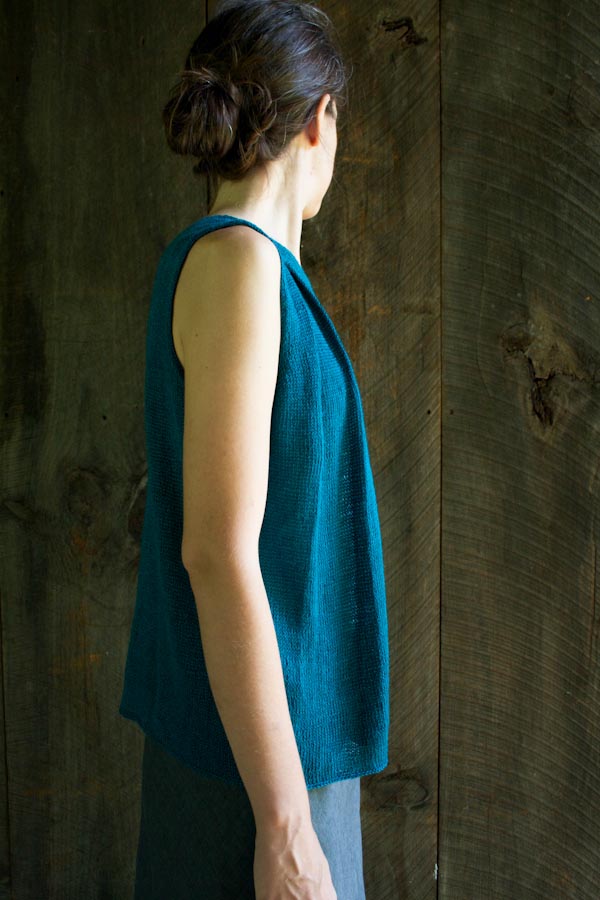
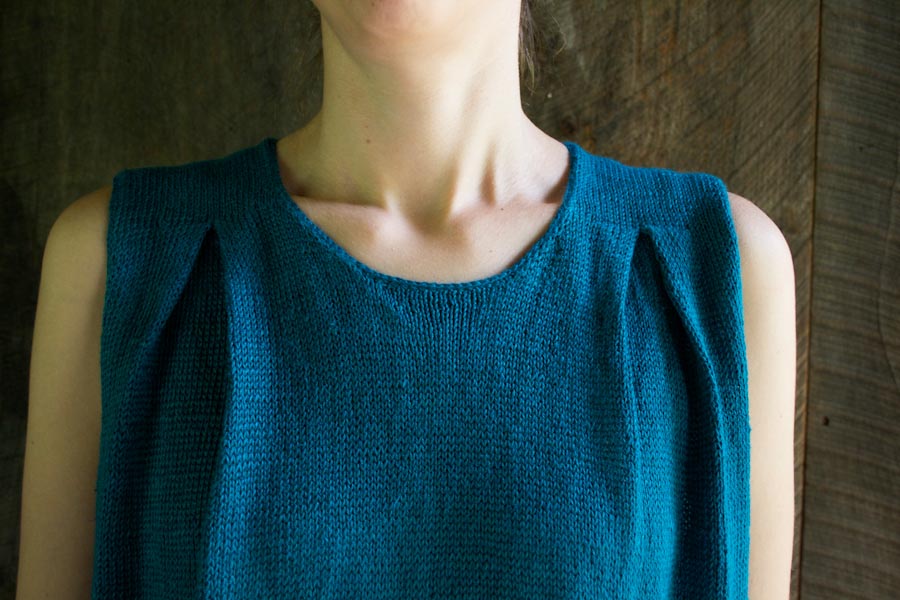
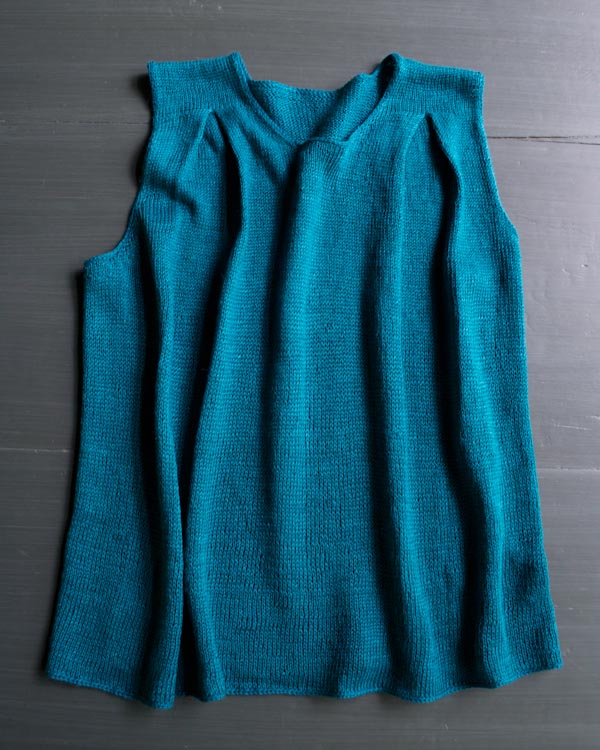
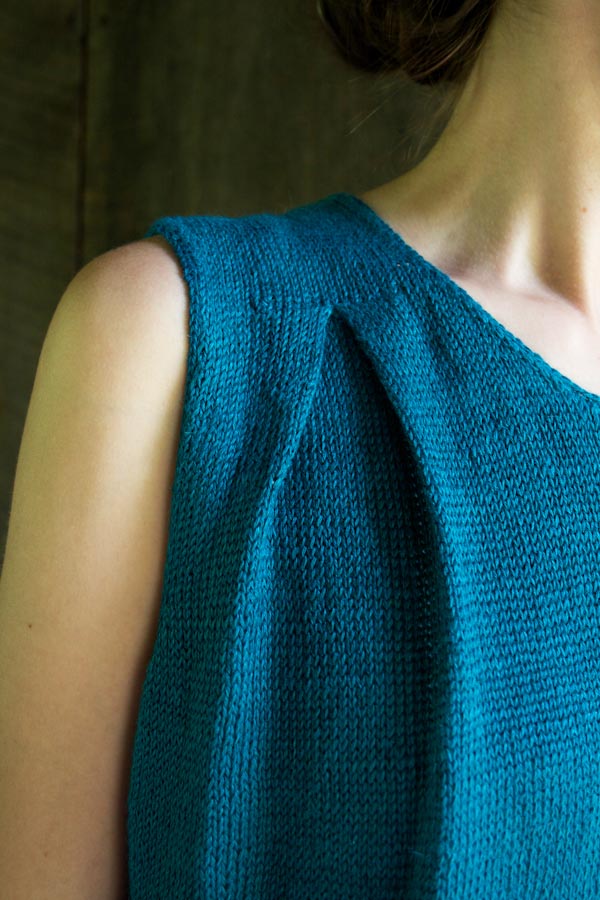
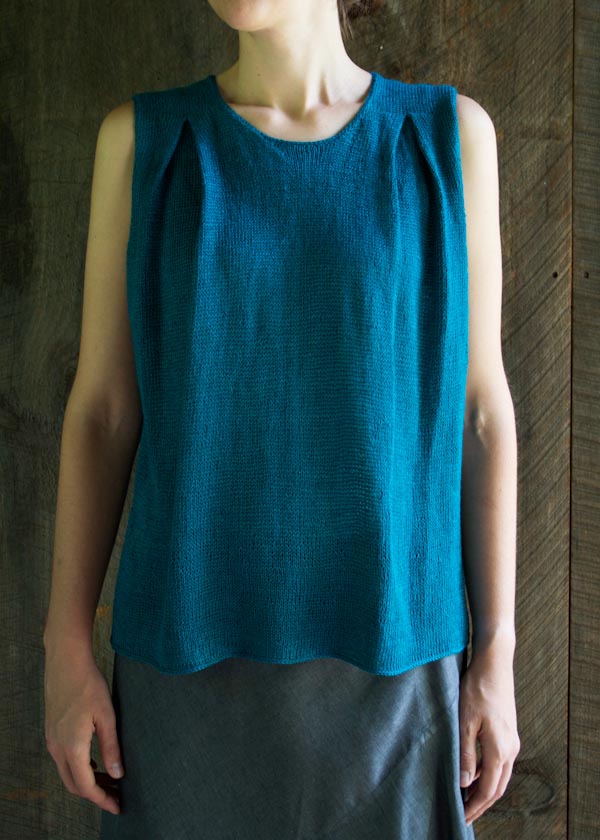
While I am a huge believer in approaching knitting on its own terms, designing my Box Pleat Top showed me that traditional sewing techniques can inform my knitting in ways that are both surprising and beautiful. Starting with box pleats!
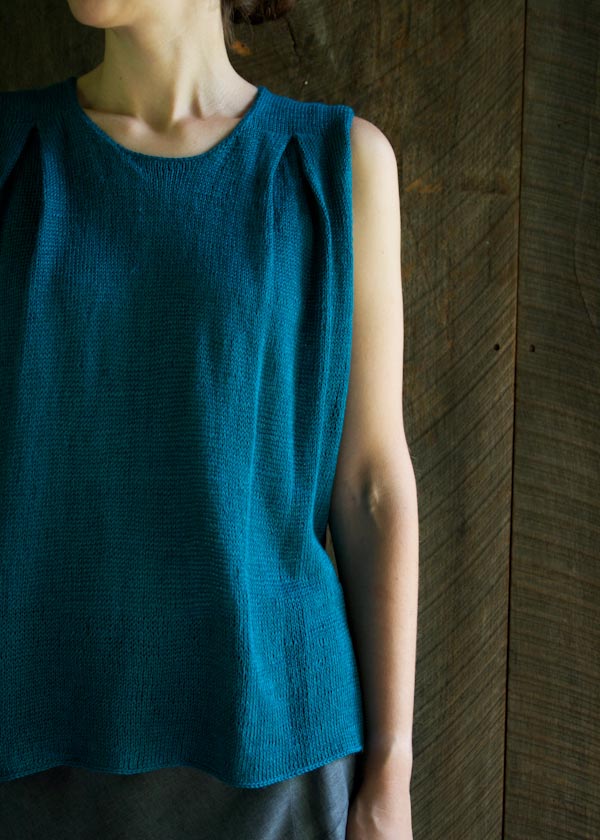
Like crossing a cable, securing the folds of a knitted box pleat is far easier to do than it may look. Tackle the slightly tricky maneuver of knitting together three stitches from three needles, and you’ve conquered this handy technique!
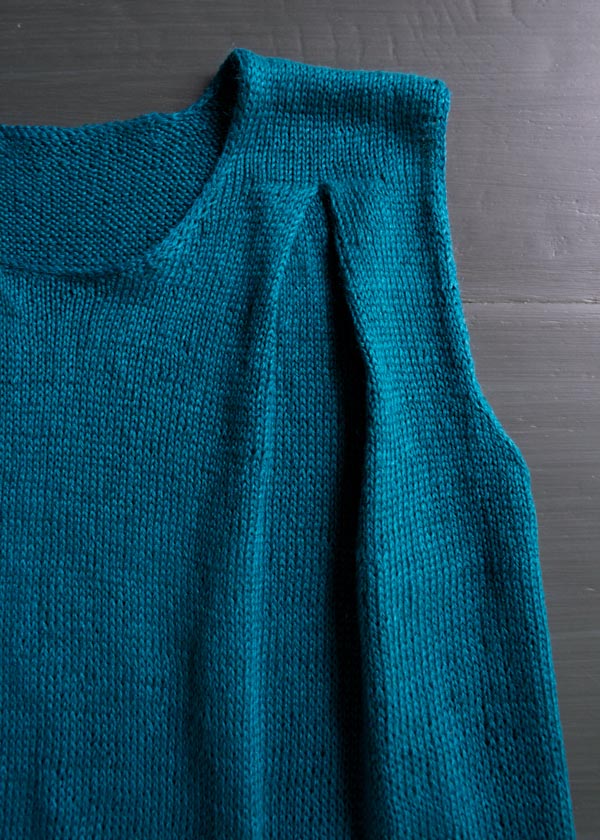
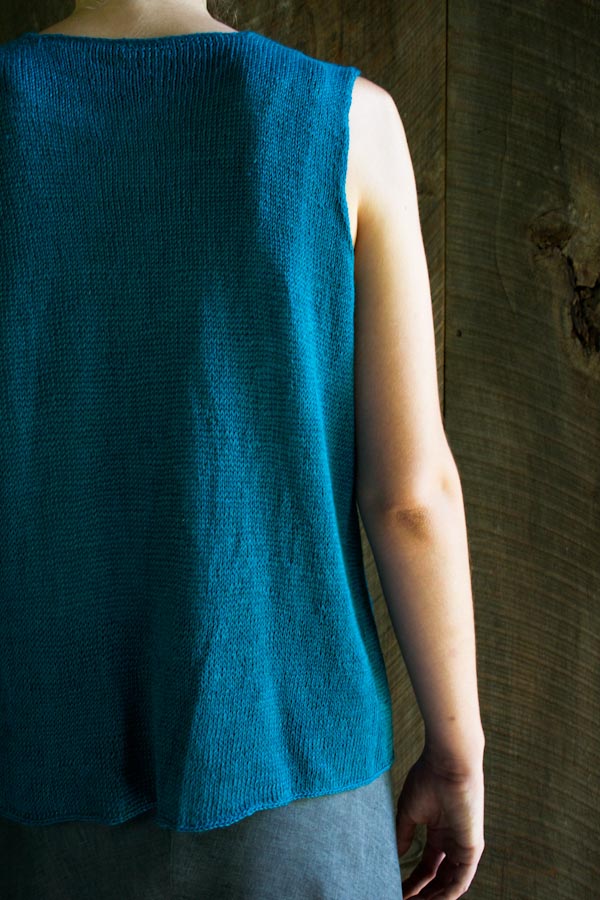
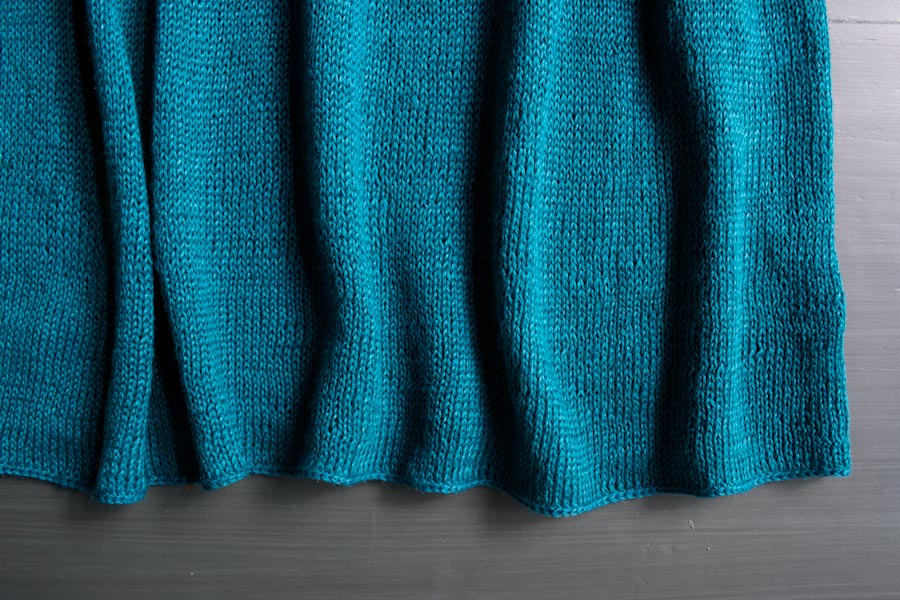
Karin Öberg’s Kalinka linen brings a dynamic drape and a subtle flow to these pleats. Attracted initially by the richness of the color Cyan (think Japanese beetle basking in the sun or the underbelly of a hummingbird), I was delighted by how smooth and supple the yarn became after I blocked it and by how effortlessly the folds took shape.
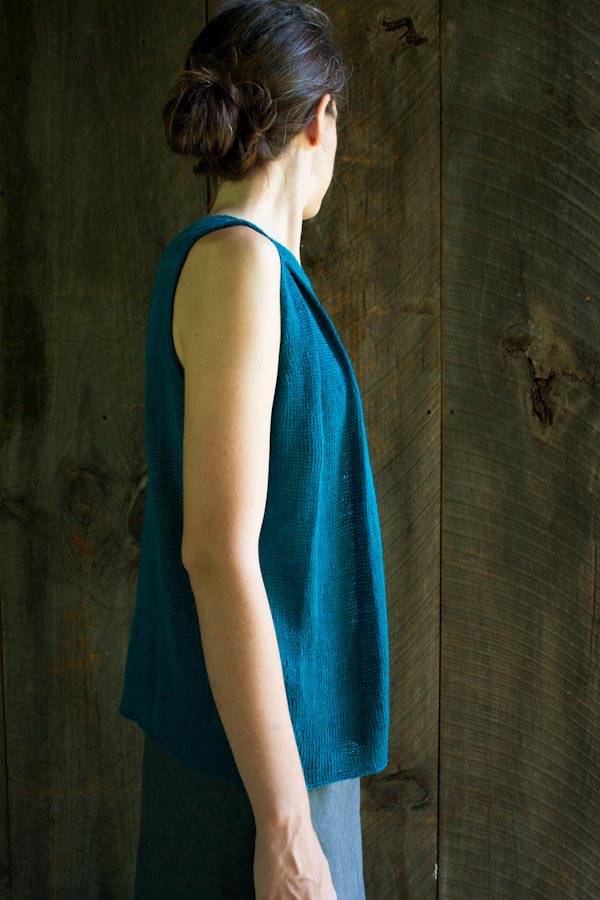
Creating this Top was a lesson in appreciating the moments when the worlds of knitting and sewing collide. I hope you’ll enjoy making it as much as I did! -Kristy
Designed by Purl Soho designer, Kristina McGowan. Click here to see even more of Kristina’s designs!
Share your progress and connect with the community by tagging your pics with #PurlSoho, #PurlSohoBusyHands, #PurlSohoBoxPleatTop, and #PurlSohoFieldLinen. We can’t wait to see what you make!
Materials
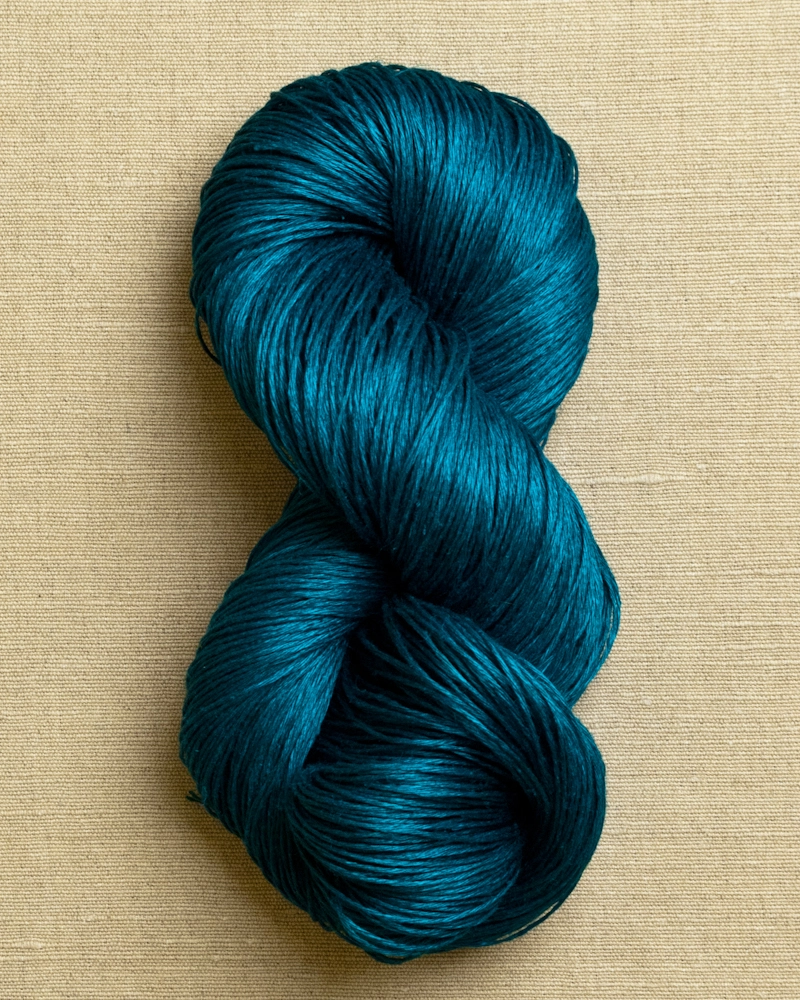
- 3 (3, 3, 4, 4, 4) skeins of Karin Öberg’s Kalinka, 100% linen. I used the color Cyan.
NOTE: Unfortunately, we no longer carry Karin Öberg’s Kalinka. We recommend, instead, 3 (3, 4, 4, 5, 5) skeins of Purl Soho’s Field Linen 100% linen. Each skein is 295 yards/100 grams; approximately 755 (845, 965, 1065, 1190, 1315) yards required.
- US 3 (3.25 mm), 24- or 32-inch circular needles
- A set of US 3 double pointed needles
- 4 stitch holders or scrap yarn
Gauge
28 stitches and 32 rows = 4 inches in stockinette stitch
Sizes
NOTE For help picking a size, please check out our Understanding Ease + Selecting Size Tutorial!
40 (44, 48, 52, 56, 60) inches
- Finished Chest Circumference: 40 (44, 48, 52, 56, 60) inches
- Length from Underarm to Bottom Edge: 13 (13, 13 ½, 13 ½, 14, 14 ¼) inches
- Length from Shoulder to Bottom Edge: 20 (20 ½, 21 ½, 22, 22 ¾, 23 ½) inches
EASE: This piece is designed with a 6- to 8-inch ease.
SAMPLE: We knit the Size 44.
Pattern
Body
Cast 280 (308, 336, 364, 392, 420) stitches onto the circular needle. We used a basic Long Tail Cast On.
Place a marker and join to work in the round, being careful to not twist the stitches.
Knit every round until piece measures 13 (13, 13 ½, 13 ½, 14, 14 ¼) inches from the cast-on edge, ending the last round 8 (10, 12, 13, 15, 16) stitches before the marker.
Separate the Front + Back
Bind off 14 (18, 22, 24, 28, 30) stitches (removing the marker), knit 97 (107, 117, 129, 139, 151) and put previous 98 (108, 118, 130, 140, 152) stitches onto stitch holders or a piece of scrap yarn (you will use them later to knit the Back), bind off next 14 (18, 22, 24, 28, 30) stitches, knit to end of round. [252 (272, 292, 316, 336, 360] total stitches; [154 (164, 174, 186, 196, 208)] live stitches for Front and 98 (108, 118, 130, 140, 152) on-hold stitches for Back.
Front
Note: You will work this section back and forth in rows over the 154 (164, 174, 186, 196, 208) Front stitches.
Row 1 (wrong side): Purl.
Row 2: K1, ssk, knit to last 3 stitches, k2tog, k1. [2 stitches decreased]
Repeat Rows 1 and 2 seven (nine, eleven, thirteen, fifteen, seventeen) more times. [138 (144, 150, 158, 164, 172) stitches]
Work in stockinette stitch until armhole measures 3 (3 ½, 3 ¾, 4, 4 ¼, 4 ¾) inches, ending with a wrong side row.
Next row (right side): Knit 63 (65, 68, 71, 73, 77) stitches for Left Front Shoulder and turn so the wrong side is facing you.
Leave the remaining 75 (79, 82, 87, 91, 95) stitches on hold on the needle.
Left Front Shoulder
NOTE: You will work this section over just the 63 (65, 68, 71, 73, 77) Left Front Shoulder stitches.
Row 1 (wrong side): Purl.
Row 2: Knit to last 3 stitches, k2tog, k1. [1 stitch decreased]
Repeat Rows 1 and 2 six (six, seven, eight, eight, eight) more times, then work Row 1 once again. [56 (58, 60, 62, 64, 68) stitches]
Note: You’re about to make a box pleat. See how it’s done with our Box Pleat video tutorial!
Box Pleat Row (right side): Knit 8 (9, 10, 11, 12, 15). Make sure the working yarn is at the back of the work and slip next 7 stitches purlwise onto a double pointed needle (Needle A), slip following 7 stitches purlwise onto a second double pointed needle (Needle B). Bring Needles A and B parallel to each other, creating a fold in the fabric that is wrong sides together. Now lay Needles A and B parallel to the front side of the left end of the circular needle, creating a fold in the fabric that is right sides together. All three needles are parallel and Needle A is closest to you.
*Insert the right end of the circular needle (or a third double pointed needle) through the first stitches of Needle A, Needle B, and the left needle. Knit all three of these stitches together and let them drop them off of their respective needles. Repeat from * until all 7 stitches have been joined (right-hand side of Box Pleat completed). Note: If you used a double pointed needle to knit the stitches together, slide the 7 joined stitches back onto to right needle.
Now, again, make sure the working yarn is at the back of the work and slip next 7 stitches purlwise onto Needle A, slip following 7 stitches purlwise onto Needle B. Bring Needles A and B parallel to each other, creating a fold in the fabric that is right sides together. Now lay Needles A and B parallel to the back side of the left end of the circular needle, creating a fold in the fabric that is wrong sides together. All three needles are parallel and the circular needle is closest to you.
**Insert the right end of the needle (or a third double pointed needle) through the first stitches of the left needle, Needle B, and Needle A. Knit all three of these stitches together and drop them off of their respective needles. Repeat from ** until all 7 stitches have been knit together (left-hand side of Box Pleat completed). Note: If you used a double pointed needle to knit the stitches together, slide the 7 joined stitches back onto to right needle.
Knit remaining 6 (7, 8, 9, 10, 11) stitches. [28 (30, 32, 34, 36, 40) stitches]
Next Row: Purl.
Next Row: Knit to last 3 stitches, k2tog, k1. [1 stitch decreased]
Repeat last 2 rows once more. [26 (28, 30, 32, 34, 38) stitches]
Work in stockinette stitch until armhole measures 7 (7 ½, 8, 8 ½, 8 ¾, 9 ¼) inches, ending with a wrong side row.
Place stitches on stitch holder.
Right Front Shoulder
Note: You will work this section over just the 75 (79, 82, 87, 91, 95) Right Front Shoulder stitches.
With the right side facing you, join yarn.
Row 1 (right side): Bind off 12 (14, 14, 16, 18, 18) stitches, knit to end of row. [63 (65, 68, 71, 73, 77) stitches]
Row 2: Purl.
Row 3: K1, ssk, knit to end. [1 stitch decreased]
Repeat Rows 2 and 3 six (six, seven, eight, eight, eight) more times, then work Row 2 once again. [56 (58, 60, 62, 64, 68) stitches]
Box Pleat Row: Work as for previous Box Pleat Row, but this time start the row with knit 6 (7, 8, 9, 10, 11), work the Box Pleat, and end the row with knit 8 (9, 10, 11, 12, 15) stitches. [28 (30, 32, 34, 36, 40) stitches]
Next Row: Purl.
Next Row: K1, ssk, knit to end. [1 stitch decreased]
Repeat last 2 rows once more. [26 (28, 30, 32, 34, 38) stitches]
Work in stockinette stitch until armhole measures 7 (7 ½, 8, 8 ½, 8 ¾, 9 ¼) inches, ending with a wrong side row.
Place stitches on stitch holder.
BACK
Return to the needle the 98 (108, 118, 130, 140, 152) Back stitches that have been on hold. With the wrong side facing you, join yarn.
Row 1 (wrong side): Purl
Row 2: K1, ssk, knit to last 3 stitches, k2tog, k1. [2 stitches decreased]
Repeat Rows 1 and 2 seven (nine, eleven, thirteen, fifteen, seventeen) more times. [82 (88, 94, 102, 108, 116) stitches]
Work in stockinette stitch until armhole measures 5 (5 ½, 6, 6 ½, 6 ¾, 7 ¼) inches, ending with a wrong side row.
Next Row (right side): Knit 26 (28, 30, 32, 34, 38) stitches for Right Shoulder and turn so the wrong side is facing you.
Leave the remaining 56 (60, 64, 70, 74, 78) stitches on hold on the needle.
Right Back Shoulder
Note: You will work this section over just the 26 (28, 30, 32, 34, 38) Right Back Shoulder stitches.
Work in stockinette stitch until armhole measures 7 (7 ½, 8, 8 ½, 8 ¾, 9 ¼) inches, ending with a wrong side row.
Place stitches on stitch holder.
Left Back Shoulder
Note: You will work this section over just the 56 (60, 64, 70, 74, 78) Left Back Shoulder stitches.
With the right side facing you, join yarn.
Row 1 (right side): Bind off 30 (32, 34, 38, 40, 40) stitches, knit to end of row. [26 (28, 30, 32, 34, 38) stitches]
Work in stockinette stitch until armhole measures 7 (7 ½, 8, 8 ½, 8 ¾, 9 ¼) inches, ending with a wrong side row. Place stitches on stitch holder.
Finish
Shoulder Seams
Graft each pair of shoulder stitches together using the Kitchener Stitch.
Armhole Edging
With the right side facing you and beginning at the center of one underarm, use double pointed needles to pick up 1 stitch from each stitch along horizontal edges and one stitch in each row along vertical edges, around the entire armhole. Loosely bind off all stitches as follows: *K2tog tbl (through the back loop), place stitch back on left needle, repeat from * to end. Cut yarn and pull it through the remaining stitch.
Repeat for other armhole.
Neck Edging
Work as for armhole, starting with the Back neck bound off stitches. Loosely bind off all stitches, as described in the Armhole Edging section.
Bottom Hem
With circular needle and the right side facing you, pick up 1 stitch in each stitch around cast-on edge and bind off all stitches as for Armhole and Neck Edging.
Weave in ends and block as desired.






wow! What a beautiful piece. Thanks for creating a wider size range in your latest pieces. This is definitely on my ” to knit” list.
Hi Thea,
I’m really glad that you like the top! It’s a fun one to knit, and I’m happy you’ll be giving it a try!
Thanks so much for writing in!
Kristy
It’s lovely and the color is stunning. I really like your ideas. It’s so clever to knit the shoulder like that. The shape is sooooo right.
Thanks a lot, Helena!! I went a little nuts over the color — it’s just so saturated and rich! I appreciate your kind words — thanks a lot for writing!
This top is stunning and one I will for sure put on my list of to do’s. I also enjoy your clear descriptions on the patterns and links to videos for the harder to understand stitches.
Thanks, Deborah!
Written instructions for knitted box pleats can seem a bit harder to understand than the technique really is — so I’m very glad if the video helps! I’m sending my best — thanks for writing in!
Kristy
this is pretty, thank you xx
https://justthatdiy.wordpress.com
Thanks, Erika!
This is a lovely top – and I think it would also be great as a sleeveless vest for the winterdays. Do you think it could work in Koigu? The linen is certainly more “swingy” but I would like a little more wool for the colder days. Or do you have another more “wintery” yarn recommendation?
thank you for this pattern!
Hi Petra! I think it would be great as a sleeveless vest in a more wintery yarn! Koigu is very nice and I also love our Mulberry Merino, which provides a beautiful drape and comes in incredible colors. My only two thoughts are that it’s probably best in defining the pleats that you go with as fine a yarn as you can, it helps I find to not make the folds as bulky. And the hem of the Kalinka linen stabilized itself very well after it was blocked and was very straight and smooth, but other yarn can tend to curl quite a bit in straight stockinette stitch, so you may find that you have to add a non-curling border at the bottom or turn a hem if needed, which wouldn’t be too hard at all. I wish you good luck and appreciate your writing in!
Are there any pictures of this in which one can get a view of the whole tunic from the front and from the side? The available pix only show a very partial (and not all that clear) view of each …. And the impression they leave is more that of a maternity top. Is it in fact like that?
Hi Rhoda!
Additional views of the Top can be found on the pattern’s page. If you go there, you should see an arrow above (to the right of the images along the top). And if you click on that arrow, additional views of the Top will become available, including one in its entirety, from the front, from the back, from the side, as well as laid flat on a surface off the body. I hope this helps! Although the Top was not designed specifically to be maternity, I do really love the idea that it could be used in that capacity! Thanks for writing in!
Kristy
I love this pattern and the choice of wool to knot it.I do have one problem though.Try as I might, I have never been able to perfect the skill of knotting on circular needles.Is there any way to adapt this pattern to knit in 2 pieces, front and back, and attach at the shoulders and side seams?
Hi Liz! It wouldn’t be hard at all to knit the Front and Back of the top separately instead of in the round on a circular needle. What size would you be making?
Love this top. It would be great with 3/4 or Long sleeves as well.
Sherri
Hi Sherri! That’s a neat idea, and the pattern is definitely simple enough to easily make such changes! I would be curious to hear how it turns out if you add sleeves! Thanks for writing in!
Thank you once again for your lovely designs.. Looking forward to making this, with the challenge of the Box Pleat.
This is so refined. I love creative knitting like this that doesn’t shout about itself, but hides it’s virtuosity behind simplicity. Beautiful.
Thanks so much for your kind comment, Robyn! I’m really glad that you like the piece!
Beautiful!
Thanks, Leanne and Miranda!!
That top is simply stunning. Hope to knit it some day and to get to your shop, too. Love being on your email list. Ahhh, so much knitting; so little time….
Hi Cathie! Thanks a lot! It would be great to have you visit the store, and I often feel the same way you do! That there are not enough knitting hours in the day! 🙂
Absolutely gorgeous… I love the simplicity and elegance of it. I’ve been looking for something similar to make for my 1 year old daughter for a wedding she’s in. Do you have any recommendations for books of children’s patterns that might have similar styling?
Hi Allie! That’s so nice that you’ll be making something for your 1 year old daughter! In thinking of patterns that might be similar or work well, there’s one that comes to mind from Debbie Bliss called the Pleat Neck Tunic (http://www.ravelry.com/patterns/library/pleat-neck-tunic/people) that might be a good one? I send good luck and appreciated your kind message!
As soon as I opened ur site, I said, ” wow this is for me”. I’ve only been knitting for 1 yr but have great support. Never did a sweater, mastering socks only. What do u think, can I master this. The color really makes it. Great choice. Noreen
Hi Noreen! If you’ve been able to master socks, I would definitely encourage you to give a sweater a try, especially one as easy as this! It’s wonderful that you have great support! Please feel free to write with any questions if you get stuck in any way — good luck!
I adore this pattern, and the tutorial video is brilliant. I was all set to place my order when, to my horror, I saw that you’d run out of the color “Congo”. I’ll keep checking back, and thanks again for the great pattern. Definitely a “keeper”.
Warmest regards,
Megan Olhasque
Hi Megan! Thank you so much! I just checked and we do have 9 hanks of Kongo in stock. If you try to place the order again and it doesn’t work for any reason, please feel free to call us directly (800) 597-7875) and we can help make sure that the order goes through! Also just to note, the Top was made in the “Kalinka,” 100% linen, and the yarn that comes in Kongo is just slightly different in that it is a linen and wool blend, “Kalinka 21” — with a slightly different suggested stitch gauge (the Kalinka has a suggested gauge of 7 to the inch and Kalinka 21, 6.5) both are equally lovely yarns, I just wanted to make sure to point out the difference. I send my best to you and thanks again for your kind message! Kristy
So beautiful, the fabric feels like a whisper against the body. Thanks for creating a very different garment.
Thanks, Morgana!
I’ve been knitting for three years and I’m finally confident enough to try making a garment. This fabulous, simple-but-elegant top is the perfect pattern for my beginner’s hands. The yarn looks absolutely stunning. Perfect choice. Excellent video tutorial for the box pleat. It has inspired me take a break from lace shawls and give this a try! Thanks so much for the pattern.
Hi Linda! That’s really wonderful to hear and how exciting that the project will be your first sweater! Thank you so much for writing and best of luck!
Kristy
wow….I love this! Do you think Cascade Ultra Pima Fine would work for it?
thanks!
Hi Jessica! The Ultra Pima Fine would be lovely! With the linen, I didn’t have any curling at the hem, and if you experience that with the Pima, you could easily add a non-curling border or hem. Good luck and thanks for writing!
Can you tell me the actual yardage used for this project. It is beautiful! and I have a good deal in my stash!
Hi Elena,
Sure thing! For sizes 32 (36, 40, 44, 48, 52), you’ll need approximately 755 (845, 965, 1065, 1190, 1315) yards.
Kristy
Hi,
I was wondering whether this top could also be knit in Quince sparrow?
Cécile
Hi Cecile! Quince Sparrow should work well! You may just have to experiment a bit with your needle size to make sure you’re getting the same gauge. The suggested gauge for the Sparrow is 6 sts to the inch on size 3 needles, and the gauge for the Top in the Kalinka was 7 stitches to the inch on size 3 needles. You may try going down to a size 2 if you’re not able to get 7 sts on 3s. Sending good luck, Kristy
Linen yarn are hard to knit?
I love this color & look.
Is this pattern hard to knit?
I have knit it open front one piece vest before & did turn out to be ok for very few experienced kniter( me).
When pattern state it as whoever inches easy, is this mean need to go up one size then my chest measurements?
My chest measures 38″.
Thank you.
Hi Gi!
We’re so glad that you like the top! The Kalinka linen yarn is not stiff or hard to knit as one might expect from 100% linen, and the resulting fabric is smooth and soft to the touch. The pattern itself is easy stockinette stitch until you create the pleats. And although this step might seem a bit tricky, we have a video (https://www.purlsoho.com/create/2015/08/28/knitting-a-box-pleat/) to show you step by step how to do it and are also here to answer any questions you may have! The top has about 6-8 inches of ease and so for a chest measurement of 38″, size 44 should fit well! Please let us know if you have any further questions and thanks for writing!
Kristy
Does anyone else have problems with the material? I already work with smaller needles than recommended, but it just doesn’t get tight enough. Any ideas on that?
Hi Anja,
Thanks for writing and very sorry for the delayed response. 100% Linen can sometimes feel a bit stiff at first and I can appreciate your instinct to want to knit more tightly with it. But in many ways, that is simply one of the unique properties of linen and how it handles. You might be surprised if you knit up a small swatch and block it (get it entirely wet and let it dry) how subtle and smooth the fabric becomes and how it can soften and smooth out your stitches, making very tight knitting unnecessary. I hope this helps and please know we’re always here to answer any further questions that you might have!
Best,
Kristy
This pattern is truly gorgeous, thinking of making it for my mother! She’s very petite though, about a 30″ chest, do you think it would be worth scaling the smallest size of the pattern down to maintain a proportionate fit? Thank you for your beautiful work!
Hi Lily,
Thanks for writing and for your kind comment! The pattern should not be too difficult to adjust, and best guide in resizing (since the pleats have quite a bit of volume) is to just make sure that the fit is as accurate as it can be at the shoulders and armhole depth. Scaling down to maintain proportions should not change the look of your final piece significantly, again, the pleats have quite a lot of volume and there is leeway to scale down! I hope that this helps and please let us know if you have any further questions! Good luck!
Kristy
Hi I have a large bust size 40HH so can you please suggest which size I should make to.
Hi Catherine,
The Top is designed with 6-8 inches of ease, and so size 40HH, (which by this chart would be a bust size of 52, http://www.wizardofbras.com/cupsizechart.aspx) your best best would be to make the Top in size 60. I hope this helps and please let us know if you have any further questions! Thanks for writing,
Kristy
Dear Kristy,
I have been knitting this top out of a bamboo yarn in a light icy blue and it’s coming out really nice. The instructions have been excellent including the video for the box pleat. I am stuck on the transition from the left shoulder to the right shoulder. Once I have achieved the measurement on the left, do I cut the yarn to join to start the right shoulder? If so, what is the best way to join the yarn at the neck?
Thanks for your help,
Lynn
Hi Lynn,
That sounds beautiful and we’re so glad that your sweater is turning out well! For the transition from Left to Right Shoulder, once you have achieved the measurement on the Left and have placed your stitches on a stitch holder, you can cut the yarn and then join it to work the Right Front Shoulder stitches. To join the yarn, you will just make sure that you’re leaving a long enough tail, about 4-6 inches or so that you will be able to weave in once you’re done, and will simply begin knitting the Right Front Shoulder. Don’t worry about any loose stitches you may have at the outset after you join. Once you’ve knit a few rows, you will be able to easily pull the ends slightly to tighten them. Please let us know if this helps clarify or if you have any further questions! Best of luck and thanks for writing in!
Kristy
HI Kristi,
Thanks for the help. I have finished both shoulders and am working on the back. I have only joined 2 balls of yarn together in the past, but not picking up on stitches that had been set aside. This is my first garment, so I’m learning. I’m a little nervous on the security of the joined yarn over time and wear.
Lynn
Hi Lynn,
That’s so exciting that this is your first garment! I do appreciate your concern about the security of your joins over time. I have found that making sure that your ends are securely woven in in these areas does go a long way to help protect the joins and you should not have any problems with them! Please let us know if you have any further questions along the way! Best of luck with your top!
Kristy
Hi Kristy,
This is a lovely and well written pattern!
I am almost finished. When we are completing the Armhole and Neck Edgings, are we picking up and binding off or picking up and knitting and binding off?
Thank you so much!
Claudia
Hi (again) Kristy,
It seems in the tutorials on this site it is always a pick up and knit. I will include the knit prior to binding off the section.
Asked and answered!
Thank you 🙂
Claudia
Would it be possible to do a tutorial on the edging technique? I actually finished the top a couple of months ago except for the edging because I did not understand how to do it. I wore the top once and it still looks good without it but would rather have a more finished look.
Thanks again.
Hi Lynn,
Sorry to hear that the edging for your Top has been giving you trouble! We have a helpful tutorial on how to pick up stitches (https://www.purlsoho.com/create/2016/05/09/picking-up-stitches/) that will provide a visual on how to do it! You’ll pick up stitches around each armhole and the neck opening and will then simply bind them off as follows: *Knit 2 stitches together through the back loop, place the stitch back on the left needle, and repeat from * to the end. Please let us know if this helps clarify! Best of luck and thanks for writing in!
Kristy
That helps immensely, thank you!
I love so many of your patterns and have knitted several successfully too!
I am in the process of knitting this sweater…but stuck. I completed all the rounds and I knitted decrease rows for the arm holes and I have 144 stitches on the needles ( back of sweater). The next directions are “work in stockinette until armhole measures 3(3.5 ….. )inches ending with wrong side. ” I am stuck on where to measure from. Do I measure the 3.5 inches from the bottom of the armhole? Or from where the decreases stop and the armholes start to go straight up? I’m not sure if I am explaining this well at all. Thanks for any help.
Mary
Hi Mary,
Thanks for the question! You’ll measure the armhole straight up from your first decrease to just below your needle. If you aren’t at 3.5″ yet, you’ll continue in stockinette stitch until you’ve reached this height. Hope this helps!
-Adam
Bottom hem: I suppose you mean “pick up 1 stitch in every stitch around the caston edge” and not just “1 stitch around the caston edge” as it says?
Hi Marianne,
Thank you for pointing this out! I have alerted the pattern editors and we will discuss whether to change this. Good eye!
-Adam
Hi Purl Soho! You always have such great patterns I love your site.
I would like to make the Box Pleat Top but sleeveless is not flattering at all for me, is there a way I could add sleeves to this pattern?
Hi Maria,
Thanks for writing in and for your very kind words! I think that the most straightforward way to add sleeves, without rewriting the whole top, would be to pick up stitches around the armhole and work short rows. The technique would be similar to what we did in our Knit T-shirt. You would need to rework the math as the yarn used for that pattern comes in at a different gauge and the armholes are a different size, but the principal holds. IT will require a bit of work but if you are adventurous, I think that the result could be lovely!
Best,
Cassy
Hi,
I was wondering about the yardage for this project, and I saw another comment ask about this as well. The answer to that comment said that size 32 needs about 755 yards. In the pattern, the smallest size I see is size 40. Will that be small enough for my 5′ height, and will 755 yards of yarn be enough? Thanks in advance.
Hi Iris,
Thanks for reaching out and I apologize for the confusion! The other comment you are referencing referred to the sizes as what chest measurement each size is intended to fit; however, we didn’t actually include this information in the finished pattern above and instead referred to the sizes as the finished bust measurements. For instance, the smallest size of the top has a finished bust measurement of 40 inches and is meant to fit with about 8 inches positive ease, so it would fit someone with a 32 inch chest measurement. The yardage amounts given are correct, so for sizes 40 (44, 48, 52, 56, 60), you will need 755 (845, 965, 1065, 1190, 1315) yards of yarn.
Rather than going by your height, I would recommend measuring around the largest part of your chest and choosing a size that is 6 to 8 inches larger than that measurement.
I hope that clears things up!
Julianna
Hi,
As your new Mineral Silk yarn recently came out, I’ve been wondering how I could modify this pattern to be able to knit it with Mineral Silk, which I know is a lace weight. Do you have any tips on how to do this?
Hello Iris,
Thank you for reaching out! This pattern would be lovely in our Mineral Silk. Unfortunately, you are correct that the gauges are not compatible. You could try and get gauge with mineral linen, if you don’t mind a more open knitted texture. You would likely have to go up to a US4 or US5 to get the required 28 stitches per 4″. Your other option would be to knit up a gauge swatch with a US3 or US2, depending on your desired texture, to see how many stitches per in you are working with. Once you have this information you can use it to determine if it would make sense to go up a size for the pattern.
Both ways are a bit risky and will likely require some trial and error.
I hope this is helpful and let us know how it goes!
Happy knitting!
-Marilla
Hello
I really like this top but I’m not avdr experienced knitter so have a few questions before I start knitting it:
1. Please could you explain the abbreviation “ssk” when decreasing?
2. When separating the front and back, I don’t understand what happens to the 28 stitches (14 on each side) which are bound off. Are they later picked up somewhere?
3. How are the sides of the of the front and back joined after completion?
I’d really like to knit the front and back separately without using circular needles so need to understand the answers to questions 2 and 3 above to work this out. I’m knitting the smallest size and would be grateful for any advice.
Thank you
Hi Deana,
Thanks for writing in! To answer your questions: 1, SSK translate to slip slip knit which is a very common single left-leaning decrease. You can find our tutorial for that here: Slip Slip Knit (ssk)!
2, Since this is a tank style top knit in the round, the 14 stitches that you bind off on either side will become the bottom of the arm hole. So you will not be coming back to that or picking them up again since binding off will complete those stitches.
3, This top in knit in the round and that is how the front and backs are joined and how you then separate for the front and back to create the arm holes. If you don’t want to work in the round then you would still need to bind off 28 stitches total, 7 on each side and then use a Mattress Stitch to seam the pieces together.
I hope this helps and let me know if you have any more questions!
Gianna
Loved the idea for this top but wanted to make sure I had enough yarn to do a longer style…so started with a provisional cast on edge in the place where the pattern specifies dividing for front and back, worked there too pieces first & am super excited for the straight knitting through my next two hanks of yarn! Thank you for such a beautiful idea.
Would this work OK with Buttercup Cotton?
Hi Jacqueline!
Thank you for your question! Yes, this top would work in Buttercup Cotton! As with any yarn substitution, especially for a garment, we always recommend knitting a gauge swatch first just to be sure your project will turn out as intended. If you would like to read more about how to knit and use a gauge swatch, we have a handy tutorial called All About Gauge!
I hope this helps, and happy knitting!
All the best,
Margaret
Many thanks for a lovely pattern and answering all the questions above. I was planning on using an alpaca DK yarn for this pattern and am about to try the gauge with US#2 (started at 4 and working down). I realize this is quite a ways off for normal DK but I don’t mind the tighter swatch. Do you have any suggestions if I want to move forward with the DK? Thanks!
Hi Jess,
Thanks for reaching out. Since this pattern was designed for a fingering weight yarn, it will be difficult to match the gauge with a DK weight! Instead, I’d recommend picking a different size to make that will work with your yarn’s natural gauge to come to the size you’re aiming for.
Here’s how to figure out which size to make: First, decide on which needles you want to use and make a gauge swatch. Once you know how many stitches you’re getting per inch, multiply that number by the chest circumference measurement for your original size. Then, compare the resulting number to the stitch counts around the body of each size (280 (308, 336, 364, 392, 420) stitches). The size that comes closest is the one you should make!
All the best,
Lili