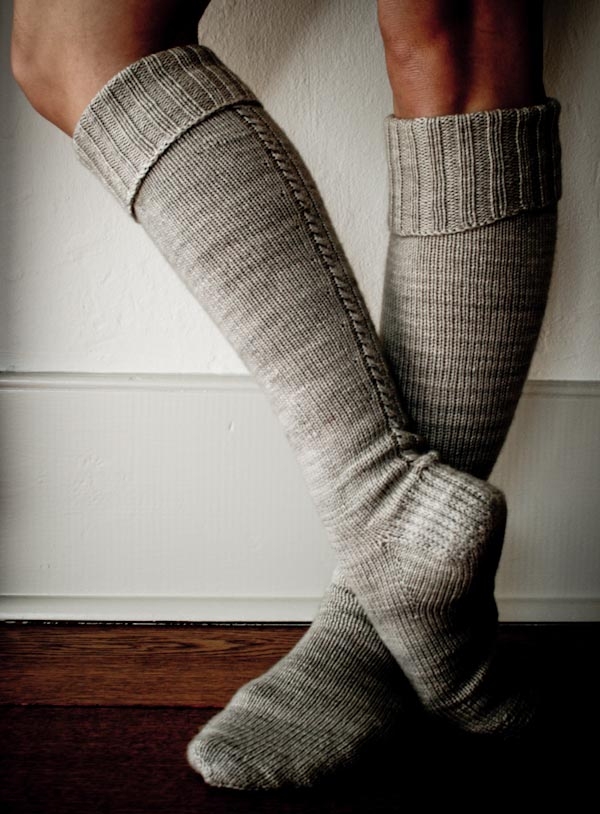
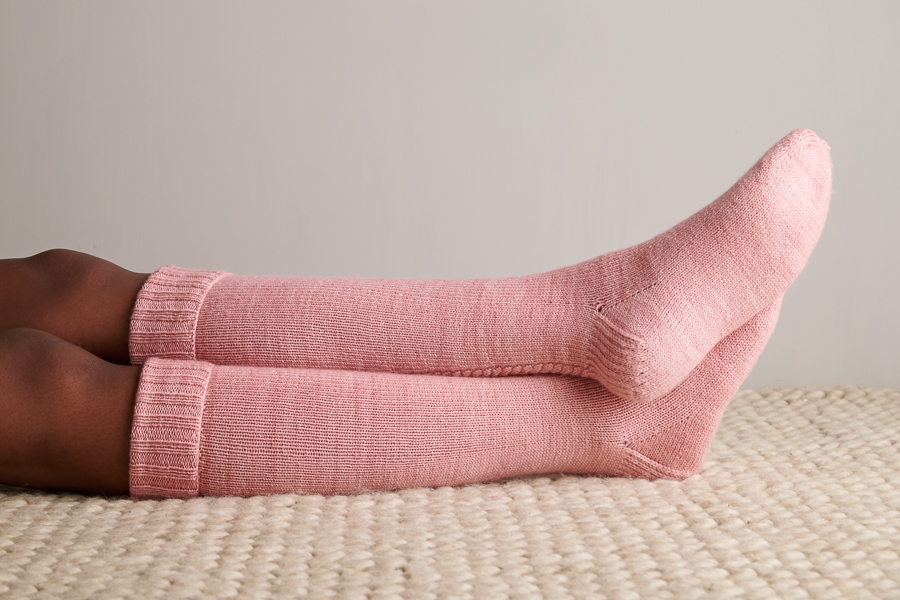
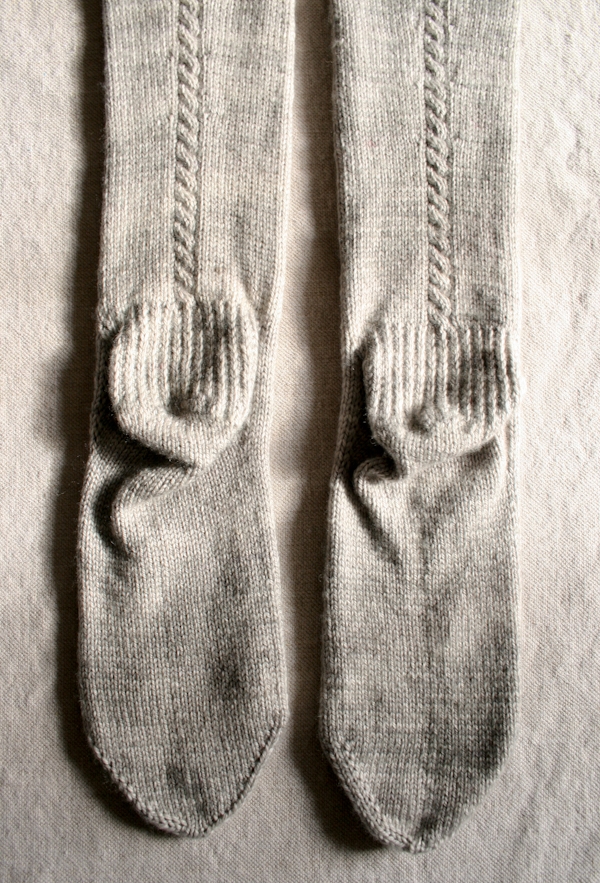
Little Cable Knee Highs
Whether you have legs like Rob Roy or Jerry Hall, whether you fancy yourself riding a horse in ancient Mongolia or hopping a subway in 21st century Manhattan, knees high socks are for everyone, everywhere, anytime!
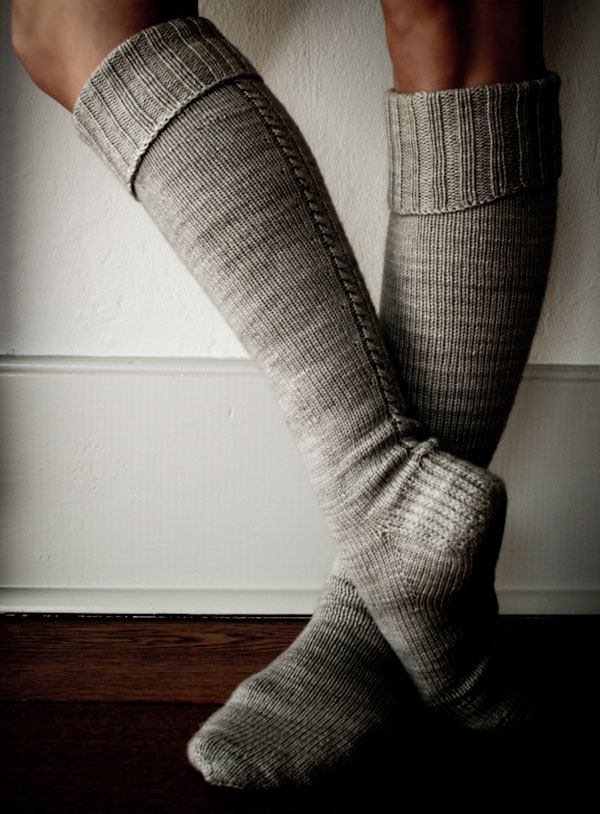
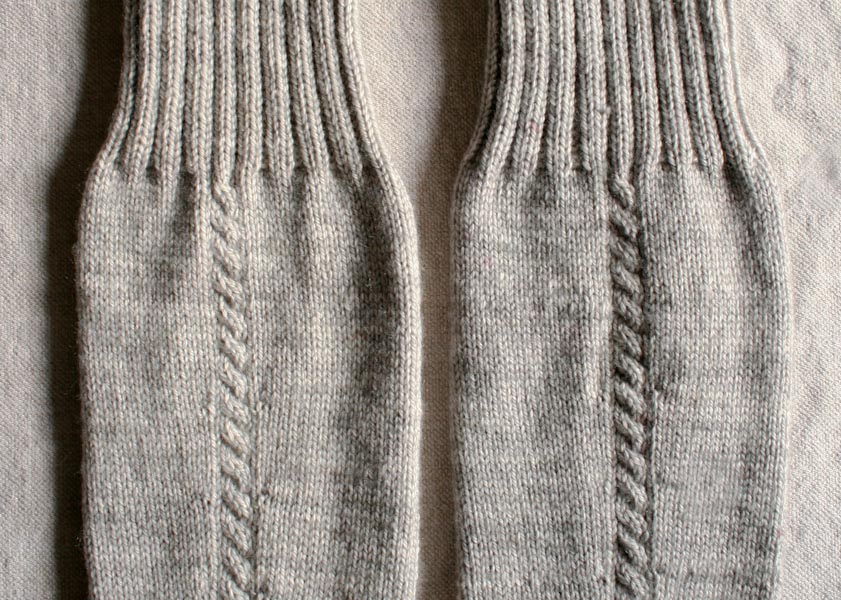
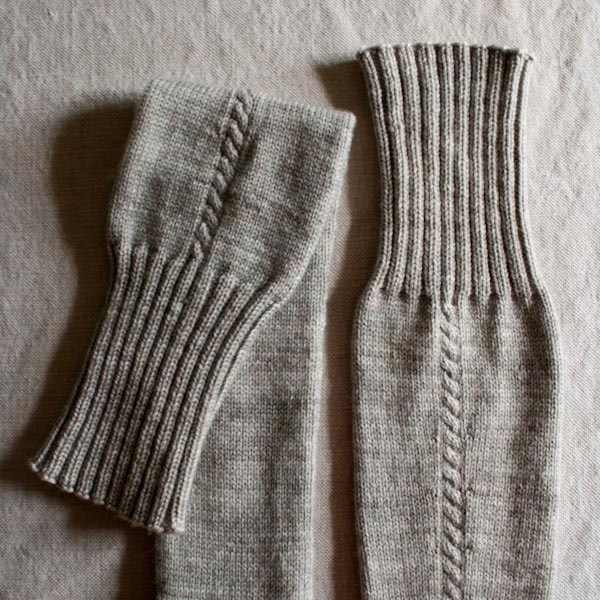
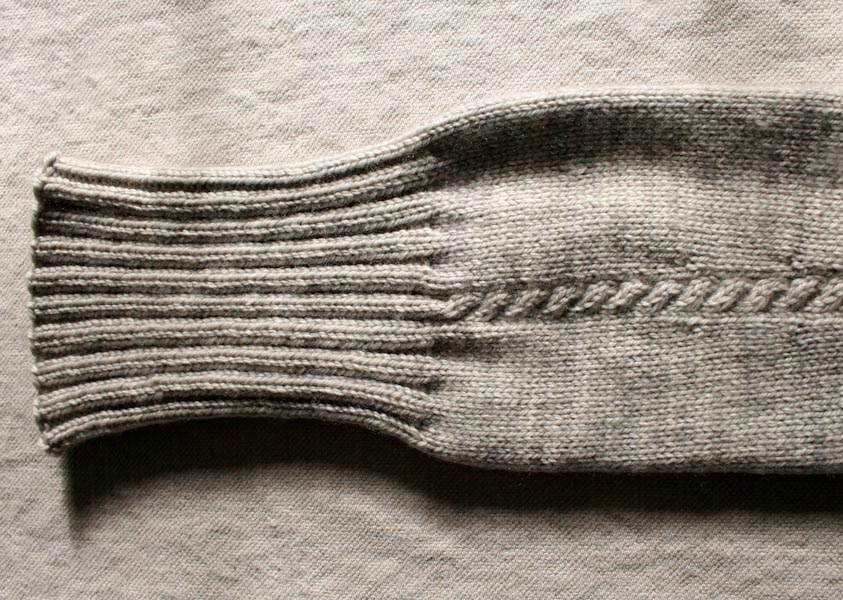
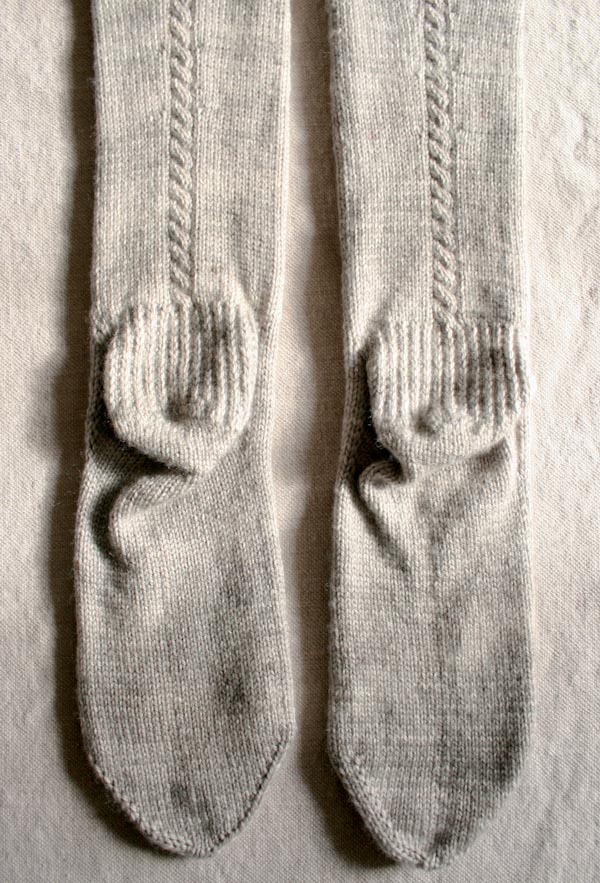
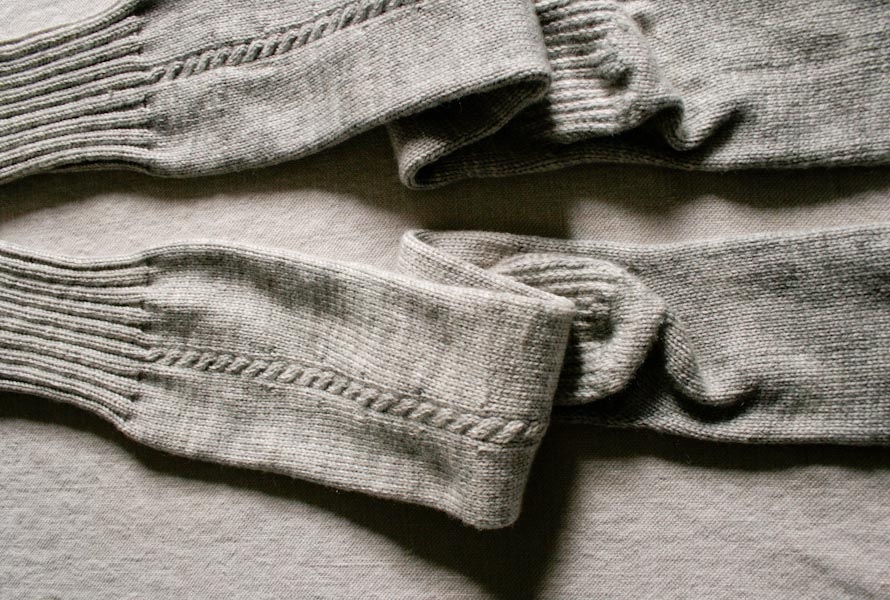
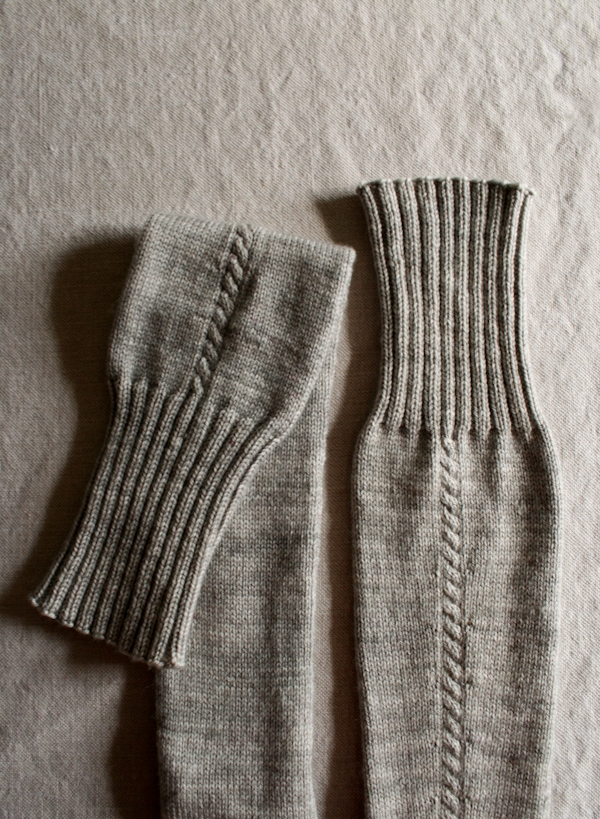
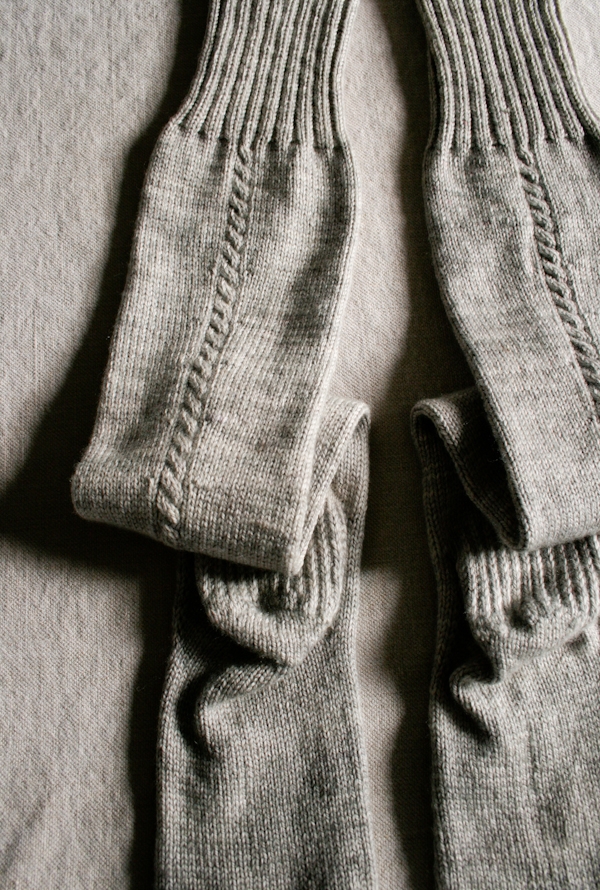
These Little Cable Knee Highs are designed to look like they could as easily have been plucked from a case at the Victoria and Albert Museum as from a shelf at Barney’s. They’re simple and practical, but with an attention to detail that’s both timeless and beautiful.
Serious sock knitters are also seriously particular about their sock yarn. That’s why I used Anzula’s Squishy, one of our favorites for everything from socks to baby blankets.
Squishy is the perfect blend of fibers for knitting up a superior pair of socks: merino for warmth and ruggedness, nylon for durability and cashmere for totally happy feet. Plus, I love how its hand dyed color is so gentle and spontaneous, like a wash of watercolor paint.

These Little Cable Knee Highs are just in time for holiday giving. Wouldn’t they be a spectacular gift to find under the tree? -Whitney
UPDATE: NOW IN POSY
JANUARY 2023
Now in Posy, this super soft blend of 75% superwash merino, 15% cashmere, and 10% nylon is machine wash- and dry-able and can withstand sliding in and out of boots all winter long! But for all its strength and durability, Posy sacrifices not a jot of beauty! It’s petal-soft and every color glows, each with the subtle variation we love in a hand-dyed yarn. Pick your favorite color and cast on… Your feet (and legs) will thank you!
Designed by Purl Soho designer, Whitney Van Nes.
Share your progress and connect with the community by tagging your pics with #PurlSoho, #PurlSohoBusyHands, and #PurlSohoLittleCableKneeHighs. We can’t wait to see what you make!
Materials
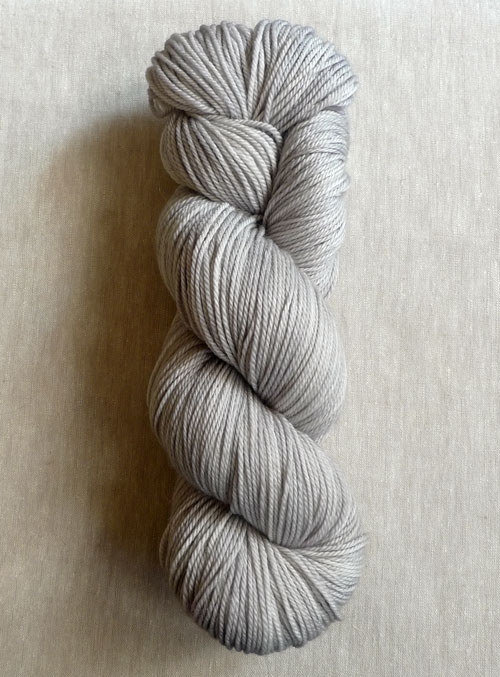
- 2 (2, 2) skeins of Anzula’s Squishy, 80% Superwash Merino, 10% Cashmere and 10% Nylon. Each skein is 385 yards/ 100 grams; approximately 770 yards required. This color is Seaside.
- A set of US 2 (3 mm) double pointed needles
- A cable stitch holder
- A small crochet hook and fingering weight scrap yarn (for Provisional Cast On)
Gauge
8¼ stitches = 1 inch in stockinette stitch
Sizes
Women’s Small (Medium, Large)
- Foot Circumference: 7¼ (8¼, 9¼) inches (unstretched)
- Calf Circumference (at widest): 9¼ (10¼, 11¼) inches (unstretched)
- Foot Length: Adjustable
- Height from Heel to Top of Cuff (unfolded): 21 inches (unblocked)
Sample: We knit a size Small.
Notes
How to Make the Cable
Make Cable: Slip 2 stitches purlwise to cable stitch holder and hold in the front of the work; knit next 2 stitches from double pointed needle; knit the 2 stitches from the holder.
Pattern
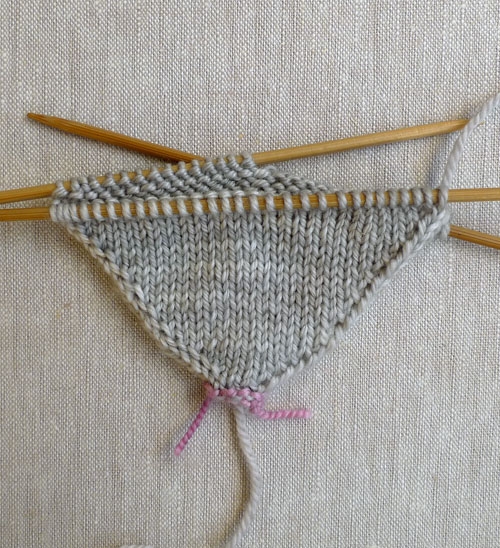
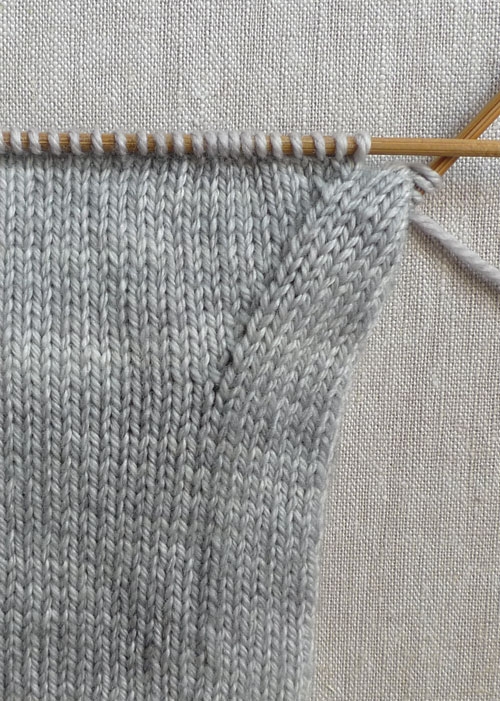
The Toe
Using a Provisional Cast On, cast 8 (8, 8) stitches onto one double pointed needle. Make sure to leave a 10-inch tail for finishing at the end.
Set-Up Row: K4 onto Needle 1, k2 onto Needle 2, k2 onto Needle 3.
Join for working in the round, being careful to not twist the stitches.
Increase Round: Needle 1: K1, Yarn Over (yo), knit to last stitch, yo, k1; Needle 2: K1, yo, knit to end of needle; Needle 3: Knit to last stitch, yo, k1. (4 stitches increased)
Repeat Increase Round 4 (8, 12) more times, knitting all yo’s through the back loop as you come to them. 28 (44, 60) stitches
Next Round: Knit every stitch, knitting yo’s through the back loop.
Increase Round: Needle 1: K1, yo, knit to last stitch, yo, k1; Needle 2: K1, yo, knit to end of needle; Needle 3: Knit to last stitch, yo, k1. (4 stitches increased)
Repeat last two rounds 7 (5, 3) more times, knitting yo’s through the back loop. 60 (68, 76) total stitches and 30-15-15 (34-17-17, 38-19-19) stitches on each needle
The Foot
Knit every round until piece measures 6 (6 3/4, 7 1/2) inches from cast on, or 2 1/2 (2 3/4, 3) inches less than desired legnth from toe to back of heel.
Here’s a guideline for final sock lengths:
US size 6 shoe (European 37) = 9 inches
US size 7 shoe (38) = 9 1/4 inches
US size 8 shoe (39) = 9 5/8 inches
US size 9 shoe (40) = 10 inches
The Gusset
Round 1: Needle 1: Knit; Needle 2: K1, yo, knit to end; Needle 3: Knit to last stitch, yo, k1. (2 stitches increased)
Round 2: Needle 1: Knit; Needles 2 and 3: Knit, working all yo’s through the back loop.
Repeat Rounds 1 and 2 eight more times. 78 (86, 94) total stitches and 30-24-24 (34-26-26, 38-28-28) stitches on each needle
Knit across Needle 1.
Turn the Heel
Notes:
The heel is worked back and forth in rows over just Needles 2 and 3.
You will shape the heel using short rows. If you need some extra help, we have a great Short Rows Tutorial right here!
Work all yo’s through the back loop as you come to them.
Row 1 (right side): Needle 2: Knit; Needle 3: K7 (9, 11), yo, k1, wrap and turn.
Row 2 (wrong side): P16 (20, 24), yo, p1, wrap and turn.
Row 3: K14 (18, 22), yo, k1, wrap and turn.
Row 4: P12 (16, 20), yo, p1, wrap and turn.
LARGE SIZE ONLY
Next Row: K18, yo, k1, wrap and turn.
Next Row: P16, yo, p1, wrap and turn.
MEDIUM AND LARGE SIZES ONLY
Next Row: K14, yo, k1, wrap and turn.
Next Row: P12, yo, p1, wrap and turn.
ALL SIZES
Next Row: K10, yo, k1, wrap and turn.
Next Row: P8, yo, p1, wrap and turn.
Next Row: K6, yo, k1, wrap and turn.
Next Row: P4, yo, p1, wrap and turn.
Knit to the end of Needle 3, working the wraps together with the wrapped stitches and knitting the yo’s through the back loop; knit across Needle 1; knit across Needle 2, working the wraps together with the wrapped stitches and knitting the yo’s through the back loop. 86 (96, 106) total stitches and 30-28-28 (34-31-31, 38-34-34) stitches on each needle
The Heel Flap
NOTE: The Heel Flap is worked over just the stitches on Needles 2 and 3. You’ll be working back and forth in rows.
Set-Up Row (right side): Needle 3: K14 (16, 18), Slip Slip Knit (ssk), turn. 85 (95, 105) stitches
Row 1 (wrong side): Working just the stitches on Needles 2 and 3, slip 1, p28 (32, 36), Purl 2 Together (p2tog), turn. 84 (94, 104) stitches
Row 2: *Slip 1, k1, repeat from * to 2 stitches before the gap, slip 1, ssk (the 2 stitches on either side of the gap), turn. (1 stitch decreased)
Row 3: Slip 1, purl to 1 stitch before the gap, p2tog (the 2 stitches on either side of the gap), turn. (1 stitch decreased)
Repeat Rows 2 and 3 eleven (12, 13) more times. 60 (68, 76) total stitches and 30-15-15 (34-17-17, 38-19-19) stitches on each needle.
Next Row: Needle 2: *Slip 1, k1, repeat from * to last stitch on needle, slip 1. Needle 3: *K1, slip 1, repeat from * to last stitch on needle, k1.

Join for again working in the round.
The Leg
Set-Up Round 1: Needle 1: Knit; Needle 2: Knit to last 3 stitches, p1, k2; Needle 3: K2, p1, slip these 3 stitches to Needle 2, knit to end. 30-18-12 (34-20-14, 38-22-16) stitches on each needle.
Set-Up Round 2: Needle 1: Knit; Needle 2: Knit to last 6 stitches, p1, k4, p1; Needle 3: Knit.
Cable Round 1: Needle 1: Knit; Needle 2: Knit to last 6 stitches, p1, make cable (see How to Make the Cable at beginning of pattern), p1; Needle 3: Knit.
Rounds 2-4: Needle 1: Knit; Needle 2: Knit to last 6 stitches, p1, k4, p1; Needle 3: Knit.
Repeat Rounds 1-4 eight more times.
+Increase Cable Round: Needle 1: Knit; Needle 2: Knit to last 7 stitches, m1r, k1, p1, make cable, p1; Needle 3: K1, m1l, knit to end. (2 stitches increased)
Repeat Rounds 2-4.
*Work a Cable Round.
Repeat Rounds 2-4.
Repeat from * 1 more time.
Repeat from + 7 more times. 76 (84, 92) total stitches and 30-26-20 (34-28-22, 38-30-24) stitches on each needle
**Work a Cable Round.
Repeat Rounds 2-4.
Repeat from ** 4 more times, ending last repeat with Round 3.
The Cuff
Round 1: *K2, p2, repeat from * to end of round.
Repeat Round 1 until cuff measures 5 inches.
Bind off loosely in rib pattern.
Finishing
Pick up the 8 cast on stitches, putting 4 stitches onto each of two needles.
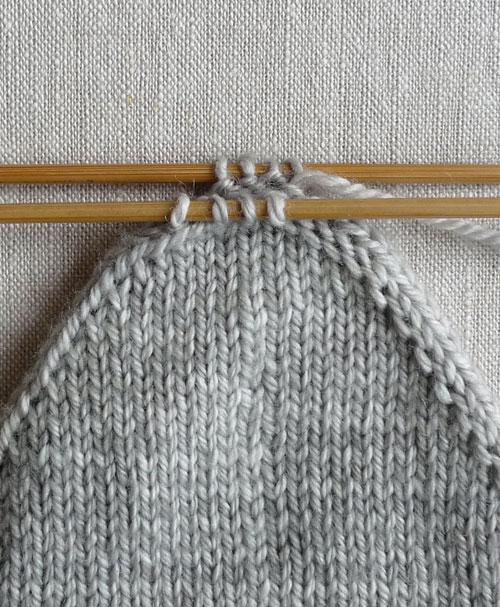
Use the cast on tail and the Kitchener Stitch to graft together the toe.
Weave in the ends and make a second sock. Block them both and you’re done!


Is it the case that having worked the gusset you are then picking up the stitches down the sides of it? I’m used to knitting socks top down and am trying to get my head around how this one works!
Thanks!
Hi Hattie,
Thanks for reaching out! Yes, as you are working you are working with the stitches on the sides to create the heel shape!
I hope this helps, happy knitting!
Gianna
Id like to knit this in a thigh-high variant, any tips for the increases that would be needed?
Hi Bishop,
Thanks for reaching out! It may take a bit of trial and error to get the right width when adjusting this pattern to be thigh-high, I would recommend repeating the increases in THE LEG section till you get the width/length you desire before going into THE CUFF section.
I hope this helps and please let us know how this turns out!
All the best,
Gianna
Hi,
It seems like you discontinued the yarn in the pattern. Do you have a suitable alternative? Thank you
Hi Barbora,
Thanks for reaching out! Yes we don’t cary that yarn anymore but in its place you could use our yarn Posy for this pattern! It should work out beautifully, I do recommend working a gauge swatch to insure that you are consistent with the pattern!
Warmly,
Gianna
How many total cables is that?
If I use the new midweight Posy with this pattern, how many 50-gram skeins are needed for the medium-size socks? Thank you!
You mentioned substituting Posy for this pattern: Is that the new midweight Posy? And if so, how many of the 50-gram skeins would be needed for one pair of these socks in size Medium?
Hi Ann,
Thanks for reaching out! Our new Posy is the exact same as the old Posy, the only thing that’s changed are the skein sizes, but it is the same fingering weight yarn! Unfortunately, since this is an older pattern I don’t have the exact yardage used for each size, however, we suggest using 2 skeins of Anzula Squishy for all of the sizes, each skein is 385 yards, so 770 yards for two skeins. Posy has 159 yards per skein fo I would suggest getting 5 skeins to be safe. If you don’t end up using all the yarn, you can return the skeins for store credit within 6 months as long as they are in original condition!
I hope this helps, happy knitting!
Gianna
Super cute pattern. I’ve never done a toe-up heel flap and gusset. If I want to use a contrasting yarn for the heel, at what point in the pattern should I be switching yarns? Is it possible to drop the MC and pick it up again later without breaking it?
Hi Nadia,
Thanks for reaching out. If you want to use a different color for the heel, I’d recommend switching yarn just for the HEEL FLAP section! Then, when you get to the LEG section, switch back to the main color. For carrying the MC yarn up, you could try “trapping” it under a stitch in each row as you work the heel flap, similarly to how you would trap floats when working in stranded colorwork. I’m not positive this will work, as I’ve never used the technique in this situation before, but I’d recommend giving it a try! Hope this helps.
All the best,
Lili
Thanks for replying!
At first, I tried using the CC just for the heel flap but I thought it looked a little funny so I ripped back and did the heel turn in CC as well. I switched colours at the beginning of needle 2 on the first row of the Heel Turn. I had to eliminate the last instruction of the heel turn to avoid knitting with the CC across the instep. Directly after the short rows, I carried straight on to the setup row for the heel flap on needle 3.
And my MC was waiting for me when the heel flap was done 🙂
I like to knit this sock but I’m confused about the sizing. The pattern says
Calf Circumference (at widest): 9¼ (10¼, 11¼) inches (unstretched)
I don’t have big legs at all and my Calf circumference at widest is 14″
Just don’t know which size to knit. Thank you.
Hi Judith,
Thanks for reaching out! I’d recommend knitting the Large size. I think that about 2.75″ of negative ease (from the 11 1/4-inch unstretched circumference) is the perfect amount so that the socks stay up on your calves but also aren’t uncomfortably tight. Hope this helps!
All the best,
Lili
What is meant by ‘the gap’ in the directions about the heel flap? I though tyou meant all the way to the 1st needle, but now I think I misunderstood…. if I’m wrong, any advice for taking it out and where to start again?
Hi Sarah,
Thanks for reaching out! When you turn your work after the p2tog or ssk, that motion forms a gap between that stitch and the next stitch. This should be very visible once you reach this point in the pattern!
If you need to go back in your work, I’d recommend unknitting each stitch until you get back to a point where everything’s correct. That’s a much more controlled way of undoing your work, since you don’t need to worry about dropped stitches!
I hope this helps, but please let me know if you have any other questions.
All the best,
Lili