Your basket is empty.
Continue Shopping

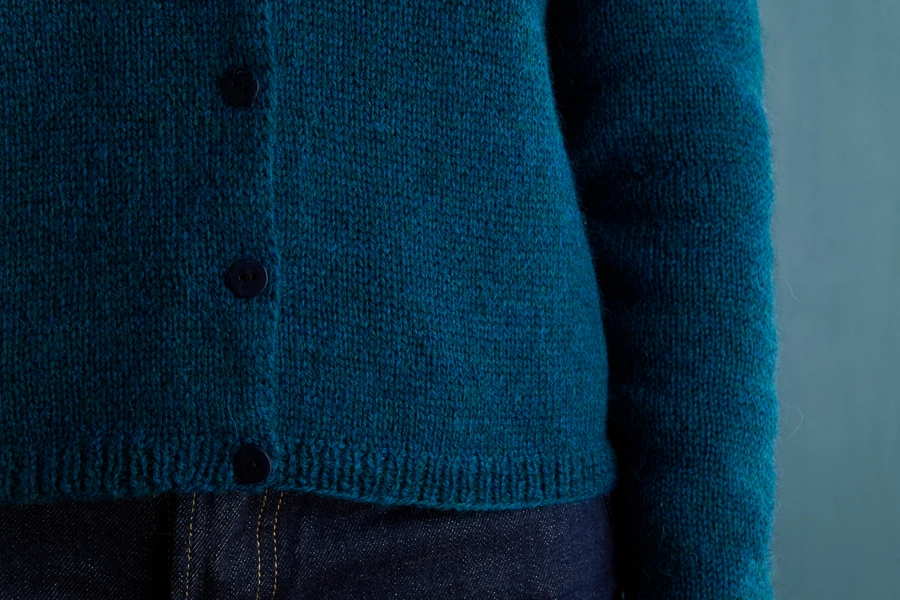
Classic Crewneck Cardigan in New Yarn
Our Classic Crewneck Cardigan pattern, beloved for its iconic wear-anywhere-with-anything versatility, is made new again in Good Wool! With 6 new colors of this beautiful Andean highland wool yarn to choose from, the possibilities for your perfect cardigan just keep growing.
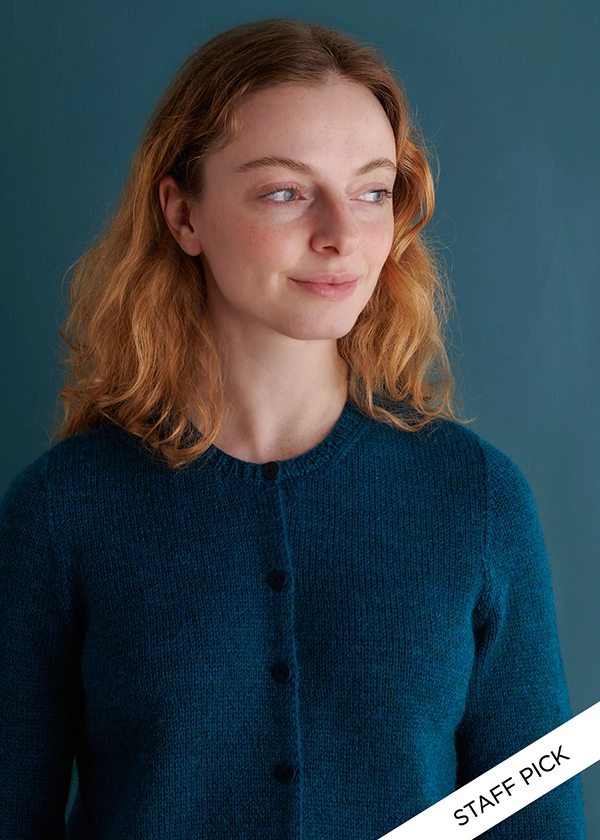
The timeless appeal of the Classic Crewneck Cardigan is all in the details! Clever construction gives you the polished fit of set-in sleeves without the fuss. Knit from the bottom up (first body, then sleeves, then both together), the sleeve caps, shoulders, and neckline are shaped with short rows, leaving you with surprisingly easy finishing for such a tailored look.
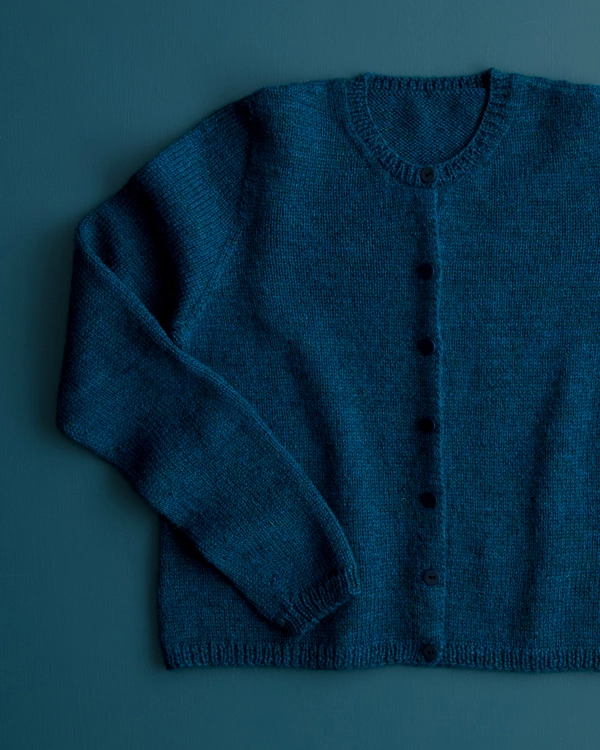
Your edges can be tidy ribbing or casual rolled hems, and a button placket that you knit as you go adds just the right touch of polish. We’ve also refreshed the fit, giving the cardigan a shorter overall length for a modern update!

You can knit your Classic Crewneck Cardigan in any of three sport-weight yarns, each a pure expression of a different fiber. Good Wool has a super natural vibe with a springy bounce that adds structure to the sweater’s lines; Season Alpaca drapes luxuriously with unparalleled softness and glowing color; and Cotton Pure knits into a smooth, breathable cardigan that’s easy to toss in the wash. Decide whether to cast on with Andean highland wool, super baby alpaca, or organically grown cotton… And then knit another cardi to see how your choice of fiber determines the feel and wear!
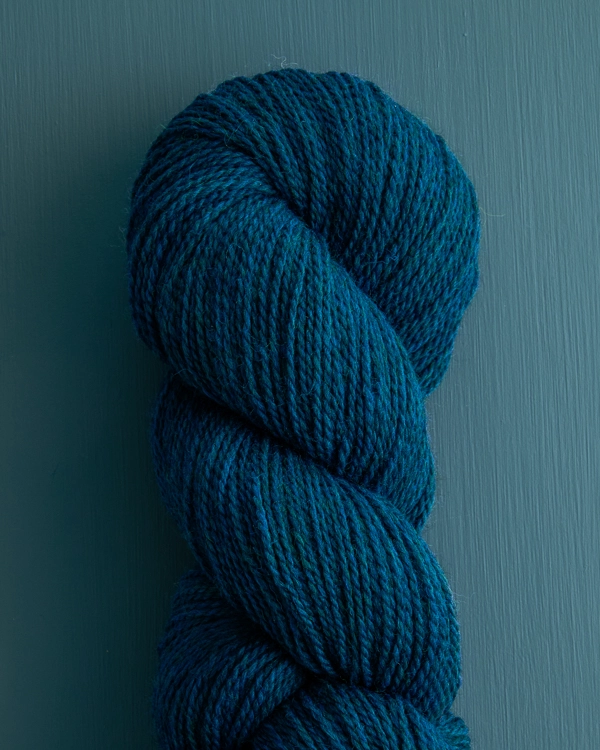
The star of the moment is Good Wool, our 100% Andean highland wool yarn that’s buoyant, lively, and full of sheepy charm. Its huge palette begins with the 5 natural colors grown by the sheep themselves, dyed to create a thrilling range of heathers. Explore 6 brand-new shades, including the deep, mysterious Dark Aquamarine we used for our Classic Crewneck Cardigan, a color that makes you want to dive in!
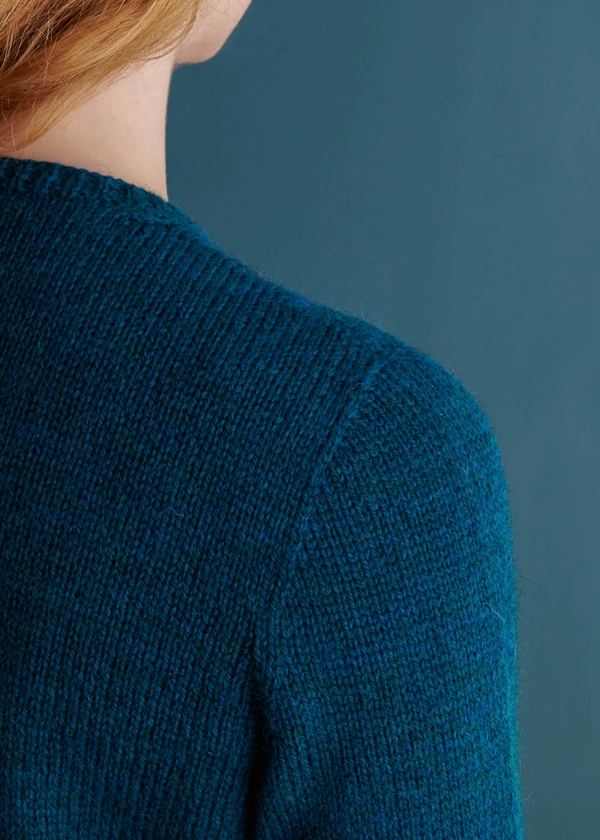

Pick the yarn that’s just right for right now; find the color that makes it unmistakably yours; and cast on your perfect Classic Crewneck Cardigan, tailored by your choices and made by your own hands!

Originally designed for Purl Soho by Adam Aronowitz.
Story written by Andrea Lotz for Purl Soho.
Materials

- 3 (3, 3, 4) (4, 4, 4, 4) (5, 5, 5, 5) skeins of Purl Soho’s Good Wool, 100% Andean highland wool yarn. Each skein of this sport-weight yarn is 383 yards/ 100 grams; approximately 1025 (1080, 1170, 1230) (1330, 1395, 1470, 1550) (1645, 1765, 1855, 1960) yards required. We used the color Dark Aquamarine, with ribbed edges.
OR
- 4 (5, 5, 5) (6, 6, 6, 7) (7, 7, 8, 8) skeins of Purl Soho’s Cotton Pure, 100% organically grown cotton. Each skein of this sport-weight yarn
is 279 yards/ 100 grams; approximately 1100 (1190, 1275, 1345) (1465, 1530, 1610, 1695) (1775, 1910, 2010, 2120) yards required. We used the color Warm Rock, with rolled edges.
OR
- 5 (5, 6, 6) (7, 7, 7, 7) (8, 8, 9, 9) skeins of Purl Soho’s Season Alpaca, 100% super baby alpaca. Each skein of this sport-weight yarn is 218 yards/ 100 grams; approximately 1025 (1080, 1170, 1230) (1330, 1395, 1470, 1550) (1645, 1765, 1855, 1960) yards required. We used the color True Turquoise, with ribbed edges.
You will also need…
- US 3 (3.25 mm), 32-inch circular knitting needles
- US 5 (3.75 mm), 32-inch circular needles
- US 5, 16-inch circular needles
- A set of US 3 double pointed needles
- A set of US 5 double pointed needles
- Stitch markers
- Stitch holders or scrap yarn
- 7 (7, 7, 7) (8, 8, 8, 8) (8, 8, 8, 8) ½-inch buttons. We used Purl Soho’s Medium Corozo Buttons in Dark Denim for the Good Wool version.
- A Classic Crewneck Cardigan Pattern PDF
NOTE: If you want to use Magic Loop, you won’t need the 16-inch circular or double pointed needles listed above… Just stick with the 32-inch ones!
GAUGE
24 stitches and 36 rows = 4 inches in stockinette stitch, using larger needles
SIZES
NOTE: For help picking a size, please check out our Understanding Ease + Selecting Your Size Tutorial!
36 (38, 40, 42) (44, 46, 48, 50) (54, 58, 62, 66)
To fit actual chest circumference 31–32 (32–34, 34–36, 36–38) (38–40, 40–42, 42–44, 44–46) (47–51, 52–55, 56–59, 60–63), with approximately 4–6 inches of ease
- Finished Chest Circumference (buttoned): 36 (38, 40, 42) (44, 46, 48, 50) (54, 58, 62, 66) inches
- Finished Length from Shoulder to Bottom Edge: 19 (19, 19½, 19½) (21, 21¼, 22, 22¼) (22, 22¼, 22½, 22½) inches
- Finished Length from Underarm to Bottom Edge: 11¼ (11, 11½, 11¼) (12, 12, 12½, 12½) (12, 12, 11½, 11¼) inches
- Finished Length from Underarm to Cuff: 17 (17, 17¼, 17¼) (17½, 17½, 17½, 17¾) (17¾, 18, 18, 18) inches
Sample: The sweaters shown here are size 38, worn with 6 inches of ease.
PATTERN

The Classic Crewneck Cardigan Pattern is available for purchase as a PDF download.
Share your progress and connect with the community by tagging your pics with #PurlSoho. We can’t wait to see what you make!


Learn About Good Wool, Season Alpaca, Cotton Pure + All Our Beautiful Yarns
Pick from three of our favorite sport-weight yarns for your Classic Crewneck Cardigan: Good Wool, our durable, sproingy, and warm 100% Andean highland wool yarn; Season Alpaca, our 100% super baby alpaca yarn, incredibly soft with beautiful drape; or Cotton Pure, 100% organically-grown cotton yarn with a supple feel and a lovely unmercerized matte finish. Each one comes in tons of beautiful colors, so you can make your perfect cardigan!
More Knitting Patterns
- Be sure to explore our collections of (mostly free!) Good Wool knitting patterns, Season Alpaca knitting patterns, and Cotton Pure knitting patterns!
More Sport-Weight Yarns
- Shop our entire collection of sport-weight yarns
- If you want to use a different yarn, be sure to take the time to get the correct gauge. Need help? Check our All About Gauge Tutorial and our Yarn Substitution article for lots of helpful information.
More Yarns With Similar Fibers
- Shop wool yarn
- Shop alpaca yarn
- Shop cotton yarn
- Shop machine-washable yarn
Looking for more inspiration? Explore all of our knitting patterns (including tons of free knitting patterns) and knitting tutorials, buy one of our many knitting kits and yarn bundles, and shop for beautiful yarn. We have over 55 gorgeous natural fiber yarns in 1,000s of magnificent colors, designed to bring integrity, beauty, and joy to your next knitting project and only available at Purl Soho!

Similar Posts You Might Enjoy:


Has the fit been ‘refreshed’ in any way other than the length? I own an earlier version. Thanks!
Hi Elizabeth!
Thanks for asking! This pattern refresh includes subtle grading and fit changes to make it more modern (including one button shorter) and includes an option for rolled edges.
Since you already have the older version, you can download the new version from your Purl Soho pattern library! If you have any trouble finding it, please reach out to [email protected] and we’re happy to send you a complimentary copy!
Happy Knitting!
Andrea
Thanks! I love my Cotton Pure version and wear it often.
What cast on would you recommend?
Hi Sarah,
Great question! You can use a basic long tail cast on for this pattern! Please let us know if there is anything else we can answer for you!
Happy knitting,
Gavriella
I just finished the first sleeve and by the time I finished all the increases the sleeve is longer than it is supposed to be. Not sure if I should frog it or make the second sleeve and see if it turns out longer as well.
Hi Sarah,
It sounds like your row gauge might be a bit larger than that of the pattern. Could you let me know if you were able to achieve gauge on your gauge swatch? This could help me better visualize the issue you are having. If you are happy with the current fit of your sleeves though, I’d recommend just knitting the sleeves to your preferred length. I hope this helps and I will keep an eye out for your reply!
All the best,
Gavriella
I finished the other sleeve and it was the same length and it’s going to be fine. It is weird because I am generally a very tight knitter. I really am loving this pattern. It is so fun to watch the cardigan take shape!
Aww! Thank you so much for the update. I am so happy it all worked out just fine. Happy knitting and we hope you enjoy your new cardigan!
I’ve just started knitting this cardigan. I need some advice/help with the pattern instructions. I’ve obviously done something wrong at the beginning of the body. The buttonhole edge doesn’t match up with the buttonhole at the ribbed edge.
Thanks for any help .
Norma
Hi Norma,
Thanks so much for reaching out! We’d love to take a closer look. If you could send a photo to [email protected], we’ll be able to see exactly what’s happening and give you the best guidance. We’re happy to help you get it sorted!
Warmly,
Megan
Hi Norma,
Thanks so much for reaching out via email with a photo! We’ve responded to you over email, but wanted to go ahead and answer here as well!
You’re right that the button placket shouldn’t line up with the top ribbing because the placket will be folded under and sewn down at the end. After you sew down your placket, your buttonholes will all be in a straight line beneath the buttonhole you made in the rib section.
We hope this helps! Let us know if you have any questions.
Kindly,
Allison
Hello! Can I ask what is the difficulty of this pattern? I knitted a baby cardigan last year and have done a few other simple projects, but just want to double check this one will be doable as it looks great!
Thanks
Hi Maya!
Thank you for your question! Since you’ve already knitted a baby cardigan (which truly uses many of the same skills as an adult cardigan) plus a few other projects, you should be in great shape for this one. It’s a comfortable step up, but absolutely doable if you take it one section at a time.
And of course, if anything feels unclear along the way, you’re always welcome to reach out to us at [email protected]. We’re happy to help!
Happy Knitting,
Megan
Hi! I am on the “shape yoke” section of this pattern and my stitch count for the right and left fronts are very off, while the back and sleeves are correct. My right front has 54 (should be 46) and my left has 38 (should be 40). I have no idea what happened or how to fix it. Any help is appreciated!
Hi Leslie!
Thank you for writing in! I can understand how this can be frustrating. It sounds like a few decreases may have been missed or worked in the wrong spots. If you can send us a photo of your work at [email protected], we’ll be happy to take a look and help you get everything back on track!
Warmly,
Megan
I am getting started on the body of the cardigan and confused by one instruction. In the section that starts with CREATE PLACKET EXTENSION, there is a line that says:
Row 2 (wrong side): [Slip 1 knitwise wyif] 3 times, purl to end of row.
Is this just slipping 3 stitches with the yarn held in front? I don’t quite see how that works. Do you just end up with a vertical rolled edge going down the front on that one side?
Hi Jane!
Thank you so much for your question! This is a really good one, and you’re reading the pattern correctly.
Yes, on Row 2 (wrong side) you are simply slipping the first 3 stitches knitwise with the yarn held in front, one stitch at a time, and then purling to the end of the row. You’re not working those stitches at all on that row, just moving them from the left needle to the right needle knitwise with the yarn in front.
Those slipped stitches are intentional and are what create the placket extension. Slipping them consistently forms a tidy, reinforced vertical edge along the front opening. It may look a bit rolled or like an I-cord while you’re knitting, but after a few repeats (and especially after blocking), it settles into a clean, stable edge that works well for buttons and buttonholes rather than a floppy stockinette edge.
So nothing is wrong, and you’re not missing a hidden step. Just slip those three stitches wyif, then purl on. You’re building structure there on purpose. I hope this clarifies things!
Warmly,
Megan
On the following (knit) row, are the slipped stitches (now twisted from being slipped knitwise) knitted through the back loop to untwist or through the front loop to preserve the twist?
Hi Constance,
Thanks so much for writing in. I’m so glad to see you’re working on the Classic Crewneck Cardigan… great work so far!
This is a really thoughtful question, and I’m happy to help. It looks like for Round 3 within CREATE PLACKET, you will be knitting through the front loop (rather than the back loop to untwist the stitches). Sometimes stitches are twisted to add structural integrity to a fabric. It looks like, in this case, it’s being used to add structure and durability to the placket, which tends to see a lot of wear as it closes for buttoning.
I hope this helps, and please feel free to reach out with any other questions you might have.
Happy knitting,
Hills
I am working on the Yoke. I have the correct number of stitches. Where is the seam for the sleeves supposed to be? Front, back, or on the bottom? I have one sleeve that lies on the bottom. The other one lies on the top?
Hi Leslie,
Thank you for your question! In this pattern, the sleeve “seam” (the point where the sleeve stitches are joined to the body at the underarm) is intended to sit at the bottom of the arm, right under the armpit.
If one sleeve is ending up on top while the other sits on the bottom, that means one sleeve may have been rotated when attaching it to the body. The easiest way for us to help you pinpoint exactly what’s going on is to see it. If you’re able, please send a photo of your yoke and sleeve join to [email protected]. A visual will let us confirm the orientation and give you clear guidance on how it can be adjusted.
Warmly,
Megan
This has been SUCH a fun project! I used every next step as a chance to double check my presumed techniques and learn new hacks with great effect and only one do over at the very beginning as I was trying a different cast on and tidier ribbing method.
I have two questions:
1. Now at the Shape Back Shoulders stage (top of p7 in the pattern), and here’s my question.
The last row I completed from the previous section was a wrong side purled row, ending with sm, p2tog, turn work. (When I turn the work, that means I’m now heading toward a knit, right side row.)
In the first of the Shape Back Shoulders instructions, I’m asked to place a removable marker at the center back. (Done.) Then it starts Short Row 1, on the wrong side. If I do that, since I just ended on the wrong side, so if I new try to head in a purl row again, it sends me quickly back to the left front of the sweater, in no way shaping anything on the shoulder back.
As remedy, I’m planning to just complete one more row of the previous Decrease sleeves + Shape Back Shoulders section, so that when I finish I’ve completed a knit row and when turned will head into the rightful short row 1 (wrong side) of the shaping the back shoulders. BUT I would welcome insight about what I may have missed between two purl wrong side rows.
2. One thing I did not do, but think I would do next time I make this, is pause to count stitches in sections each time they’re offered – which is so often that I skipped it:) By favor of the knitting gods, when I did stop to count in order to mark the center back stitches, the number of stitches I’m supposed to have on each sleeve at this point is off by approximately double – I have give er take a stitch twice as many on each sleeve as the pattern says I should. Sure it’s possible I missed a decrease somewhere (though my little decreasing lines are lovely and consistent); so I’m wondering if I’ve misread some part of the sleeve shaping instructions such that I’ve been half as slow at decreasing as I should have been. But in reviewing the pattern, see nothing ambiguous about the instructions. Thoughts? Prayers? My remedy for this is to ignore the counts and carry on – worst case scenario is a broader top of sleeve and so be it. If I get to that point of reconciling sleeve top and shoulder seam with any wackiness of extra top of sleeve fabric, I’m planning to last-minute decrease with a bunch of knit or purl 2 tog and pretend I meant to add that final little fan design. But I would like to know if I did something wrong for the next time I make this sweater. Thanks for the help!
Hi Dodie!
Thanks so much for your thoughtful question. I’m so happy to hear you’re enjoying the Classic Crewneck Cardigan so far. Great work, it really sounds like you’re building mastery!
Short row shaping can get a little tricky and I’m happy to help. Based on what you kindly provided for the most recently completed row, it looks like you may have ended the last section on Row 3: Slip 1 purlwise wyif, sm, purl to next marker, sm, p2tog turn work.
In the section before starting “Shape Back Shoulders” it says to “Repeat Short Rows 2 and 3 two times…” great! It continues with, “then repeat Short Row 2 one more time.” I think this may be the tricky part. If you repeat Short Row 2 once more, that will be a right side row. It’ll bring you to your wrong side and you’ll be ready to go on the “Shape Back Shoulders” section at “Short Row 1 (wrong side).”
Stopping to count your stitches is a great habit to build, I definitely encourage it! It can be so tempting to marathon knit, and the pause to count can sometimes be a welcome meditative break.
Thank you so much for providing such helpful information to “diagnose” where you were maybe running into a tricky part. Short rows can be a bit confusing, and you’re doing great!
I hope this helps, but please feel free to reach out with any other questions you may have!
Happy knitting!
Hills
I purchased this pattern last fall. There is a side note on page 3 to repeat the buttonhole until there are 7 buttonholes. I note on the photos that there are 6 buttonholes to the point that the sleeves are joined, and knitting to 7 buttonholes would make the body longer than the specifications. Can you help me understand what to do?
Thanks!
Hi Gail!
Thanks so much for writing in! Great work so far on your Classic Crewneck Cardigan! I can see why this might be tricky and I’m happy to clear up any confusion.
The note on the side indicates knitting either 6 or 7 buttonholes depending on the size you’re making, and then buttonholes continue past the armhole shaping, just like you indicated. It’s written like this: “Repeat Buttonhole Row 2 every 22nd row on right side until you have made a total of 6 (6, 6, 6) (7, 7, 7, 7) (7, 7, 7, 7) buttonholes.”
The sample size you see in the photo is a size 38, which would have required 6 buttonholes before the armholes. It’s possible that the size you’re making requires 7 before the armhole shaping, which wouldn’t be reflected in the image you see. But, please let me know if I misunderstood here.
I hope this helps! Please feel free to reach out with any other questions you might have!
Happy knitting!
Hills
I’m getting ready to divide front and back on the classic crew neck cardigan pattern. I am beginning with 264 stitches. Then I go to divide 3+70, 14, 126,14, and should have 65. But it doesn’t add up. What am I doing wrong?
Hi there Norma!
Thank you so much for writing in with your question! Great work so far on the your Classic Crewneck Cardigan! I totally understand your confusion and we’re here to help! I think I can see where the tricky part may be. I rewrote the directions for this row for your size below:
Division Row (wrong side): [Slip 1 knitwise wyif] 3 times, p70, place previous 14 stitches onto stitch holder or scrap
yarn for left Underarm; p 126, place previous 14 stitches onto stitch holder or scrap yarn for right Underarm; purl to end of row. 236 total stitches: 59 for Left Front, 112 for Back; 65 for Right Front.
Here’s the catch, when it says to place the previous 14 stitches on scrap yarn or a stitch holder, those 14 stitches are subtracted from the previous count (for example: 70-14) because they’re no longer a part of the round. Your math was so close! The 28 total stitches, which form each sleeve hole, are placed on hold and are subtracted from your previous total stitch count of 264… bringing your new stitch count of 236. This math looks more like… 3+ (70-14)+(126-14)+65=236.
I hope this helps, but please feel free to reach out with any questions or confusion you might still have!
Happy knitting!
Hills
I’m interested in making this cardigan in the Good Wool version in Dark Aquamarine. I really love the color as shown knit up here, but it looks pretty different (darker and richer) than the same color on the shade card for Good Wool. Do you have a sense of which the yarn resembles in real life? It looks like there are lots of great options in the Alpaca as well. TYSM.
Hi Nancy!
Thank you so much for writing in with your question! I’m so glad the Classic Crewneck Cardigan caught your eye!
The color card represents a more accurate picture of Dark Aquamarine. Thank you so much for bringing this to our attention and we’ll pass this along to our photography team to make that update!
I hope this helps, please feel free to reach out with any other questions you might have!
Happy knitting!
Hills
Loved this project so much and preparing to knit again, so updating my copy of the pdf with my many memos to self.
One adaptation I’d like to make this time, is that I want to reduce the sleeve length by 1″ (I see easily where to modify.)
I also want to lengthen the body by ideally 2″. Can you check my logic on repositioning the buttonholes?
The current pattern positions buttonholes every 22nd row. If I’m going to add 16 more rows total to increase the 2″ in length, can I just divide that across the 8 completed buttonholes to add 2 more rows to the cadence, so I’m putting in a buttonhole every 24th row instead?
Thanks so much!
Hi Dodie!
Thank you so much for writing in with your question! I’m so glad you loved the project so much that you’re thinking of knitting it again!
Unfortunately, that modification is a bit more involved than adding extra rows. I’m afraid I’m unable to list the steps for repositioning buttons for this pattern. We would love to see your finished project if you do take this path!
Happy knitting!
Hill
Thanks. It might be a good content topic for your archives as I’m not finding much online on the topic.
I’ve read up on how to adjust length which is easily applied to this pattern body and sleeves. Will experiment with buttonhole placement to see what I learn.
Hi Dodie,
Thank you so much for sharing your idea! I’ll be sure to pass this along to our team.
Happy knitting!
Hills
Hi all, my buttonhole modification worked just fine! New sweater all finished and love the longer 2” on the body.
Hi Dodie,
I’m so glad this worked for you! We would love to see your cardigan. You could email us a picture at [email protected] or upload a photo on our homepage!
Congratulations on your fantastic work!
Happy knitting,
Hills
I am getting ready to join the body and sleeves. I don’t understand about the under arm stitches for the body and the underarm stitches for the arm . How do i join them?
Hi Norma,
Thanks so much for reaching out. I’m so glad to see you’re making progress on your Classic Crewneck Cardigan!
These section of sleeve stitches will get seamed together at the end of your project (under the FINISH UNDERARMS) section:
I hope this helps, but please feel free to reach out with any other questions you might have!
Happy knitting,
Hills
I just completed dividing the front and back of my cardigan sweater. I’m supposed to have a total of 256 stitches, I have a total of 262. 64 for the left front, 122 for the back and 76 (this should be 70) for the right front.
My question is: What might be the best way of going about fixing this? Can I just work with the extra stitches or should I decrease (knit 2 together somewhere in the right front section ) over the next 3 rows?
Additional information: I’m knitting a size 46 and using size 4 and 6 needles to get the correct gauge.
Thank you!
Hi Susan,
Thanks so much for reaching out. I’m sorry to hear you’ve run into trouble, and I think there may be a great solution!
It sounds like you may have divided your stitches so that one side has the total of the extra stitches. I would suggest “tinking” back a row so that the extra 6 stitches can be redistributed evenly across each of the 3 sections (2 for the left front, 2 for the body, 2 for the right front). This way, you could easily (and evenly) add an extra k2tog at each of those points (as you so cleverly suggested!). I don’t see an upcoming k2tog, but it’s also sometimes an option to k3tog at the point at which you would k2tog to account for stitch count differences.
I hope this helps, and please feel free to reach back out with more questions or follow-up.
Happy knitting,
Hills