Soap Bubble Wrap
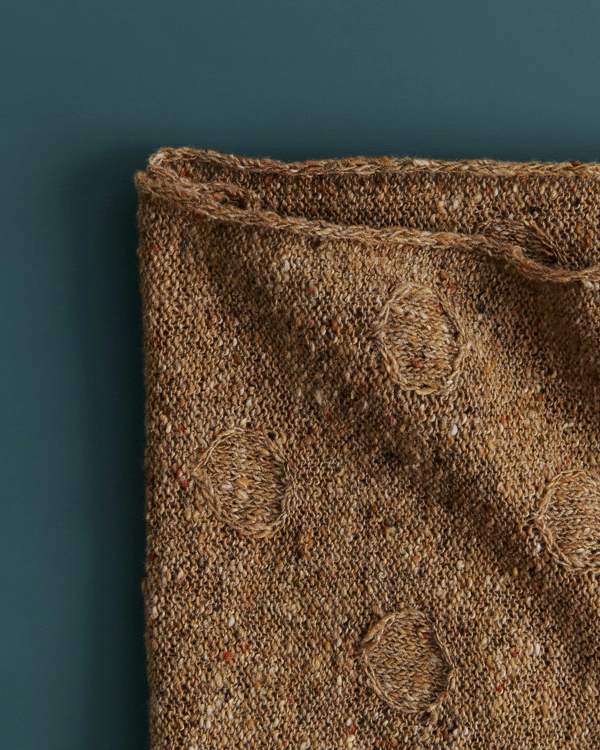
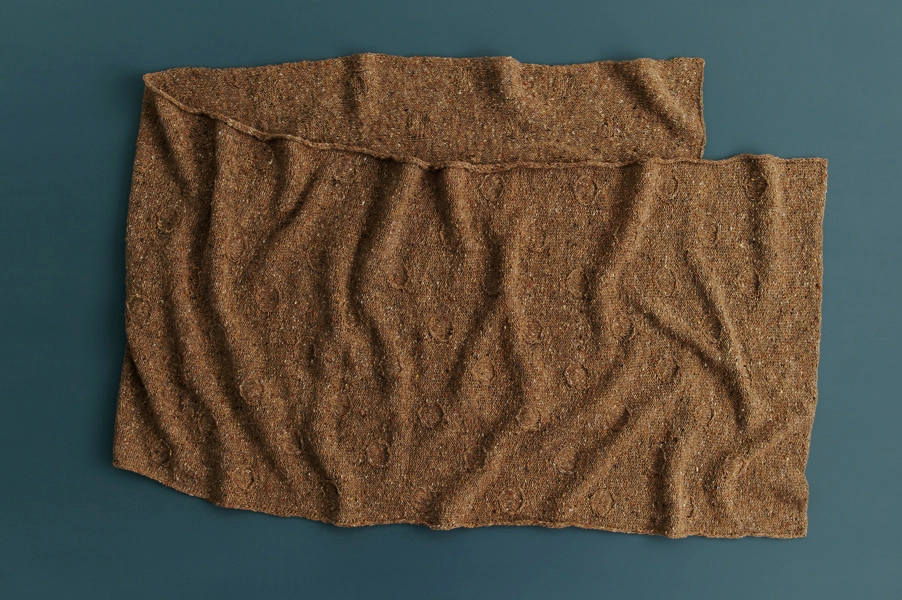
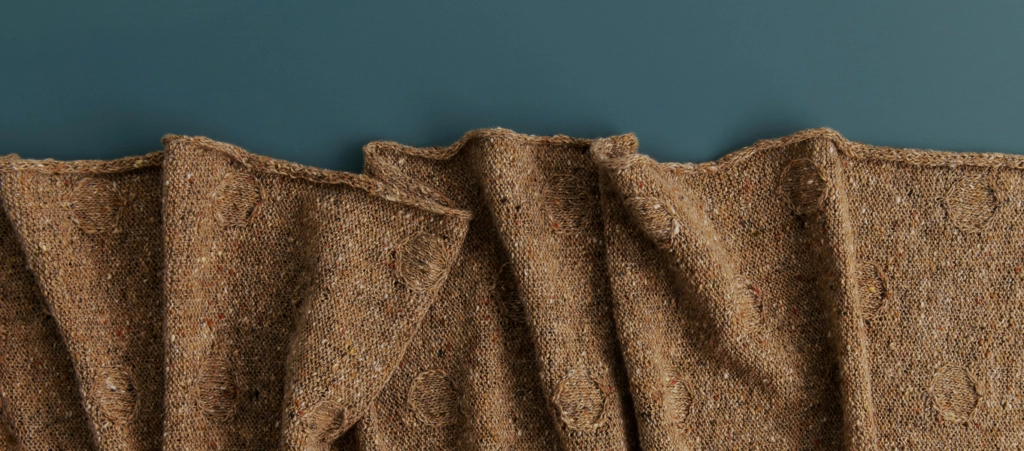
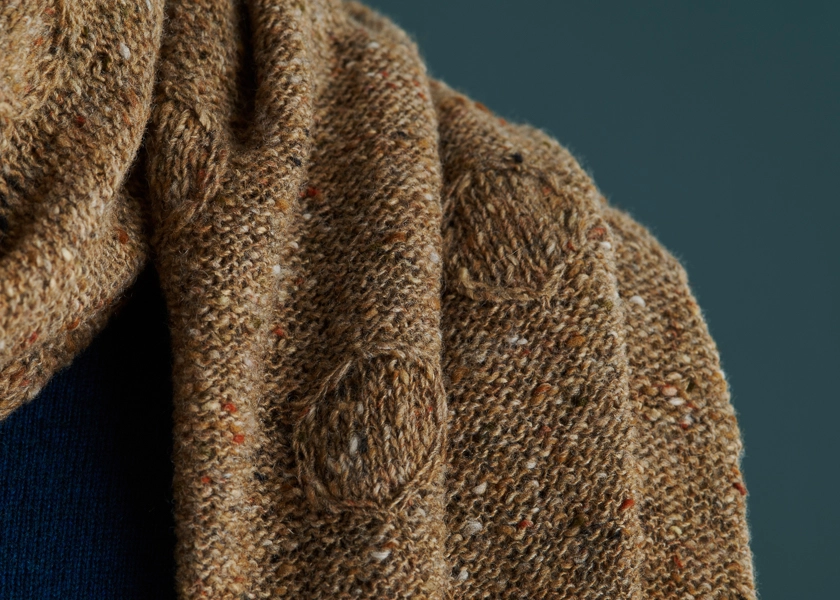
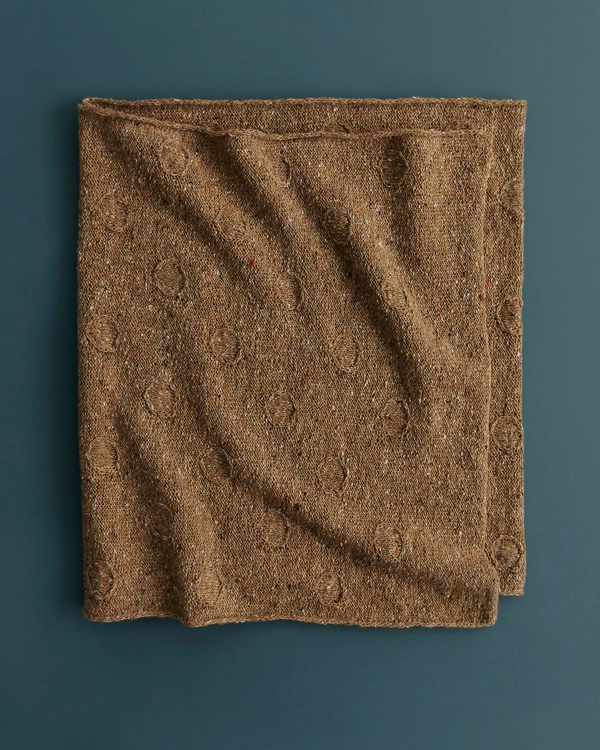
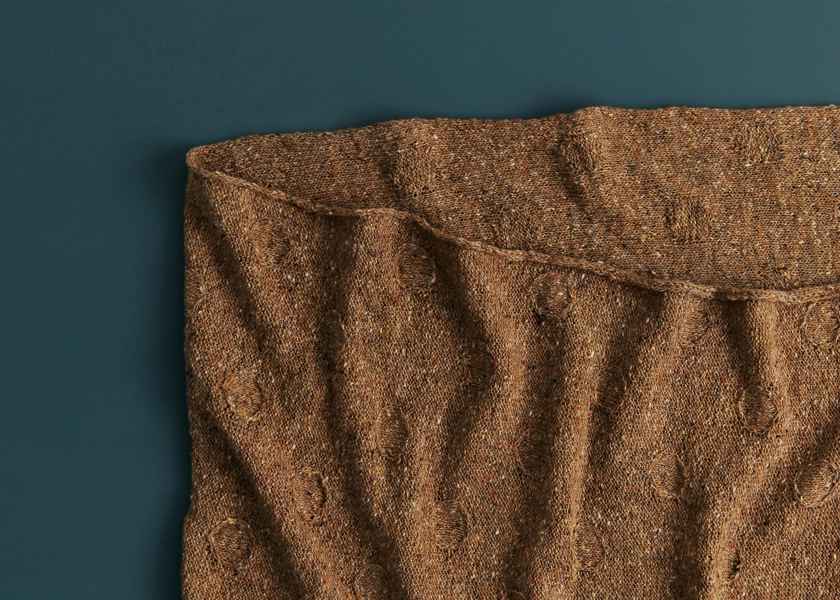
Our new Soap Bubble Wrap, designed by Mari Tobita, uses simple cables, plus the contrast between knits and purls, to create delicate “bubbles” floating across its surface.

The soap bubbles themselves are simply knits on one side and purls on the other, but their cable outlines are what make them stand out. If you’re new to cables, this is an excellent pattern for learning the ropes, with lots of easy knit-and-purl space between the special stitches.
Follow along with the text instructions or try reading the chart, an easy tool that gives you the whole picture as you knit. Just read along the rows and take it one square (which equals one stitch) at a time. Our Reading A Chart tutorial explains it all!
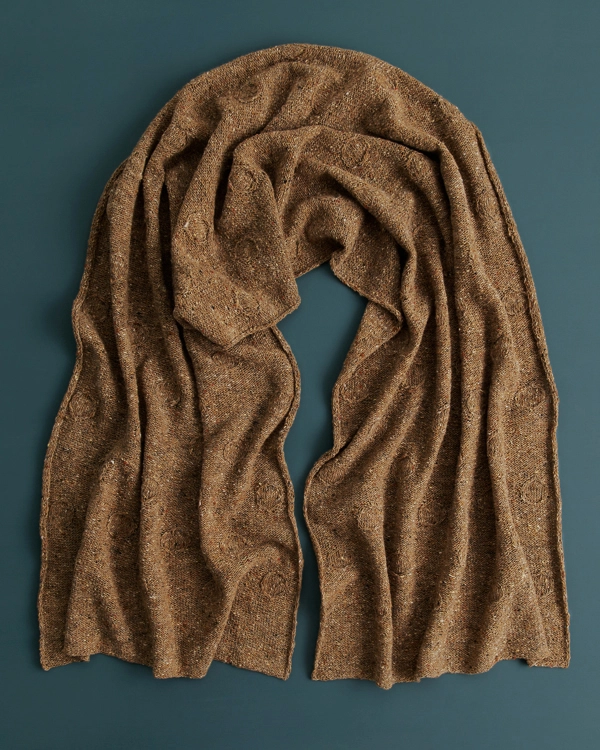
With a playful elegance that matches the spirit of this wrap, our laceweight Spindle holds the richness and beauty of tradition within its fibers.
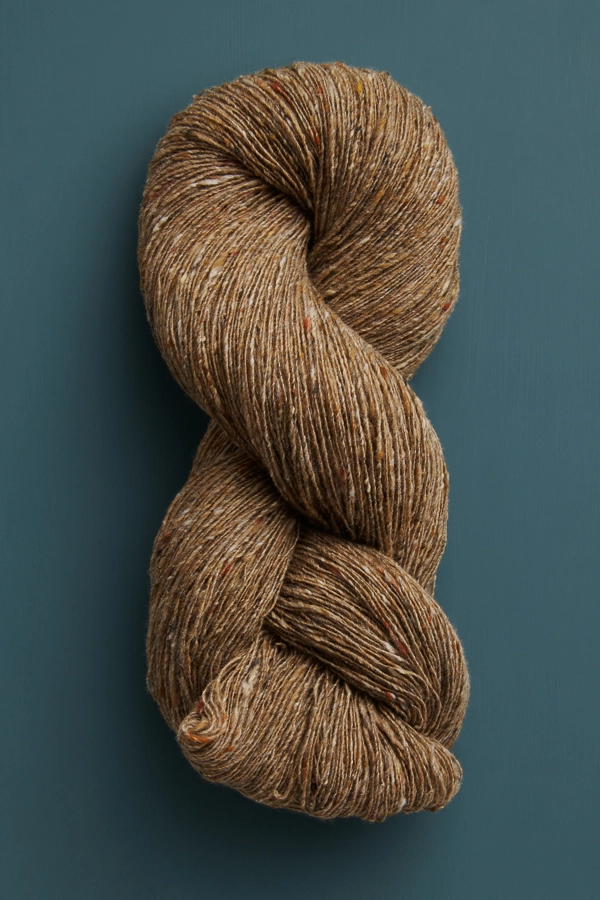
A gorgeous mix of 80% merino, 10% cashmere, and 10% mulberry silk, single-ply Spindle is reminiscent of the fine strands spun by hand for centuries in local cottages of County Donegal, Ireland, where it is made.

While Spindle knits into a fabric with a softer hand feel than traditional Irish wool, its colorful bits (or “burrs”) evoke the same history and joy. Spindle has seventeen gorgeous colors, so pick the one that pops for you and cast on for the charming Soap Bubble Wrap!
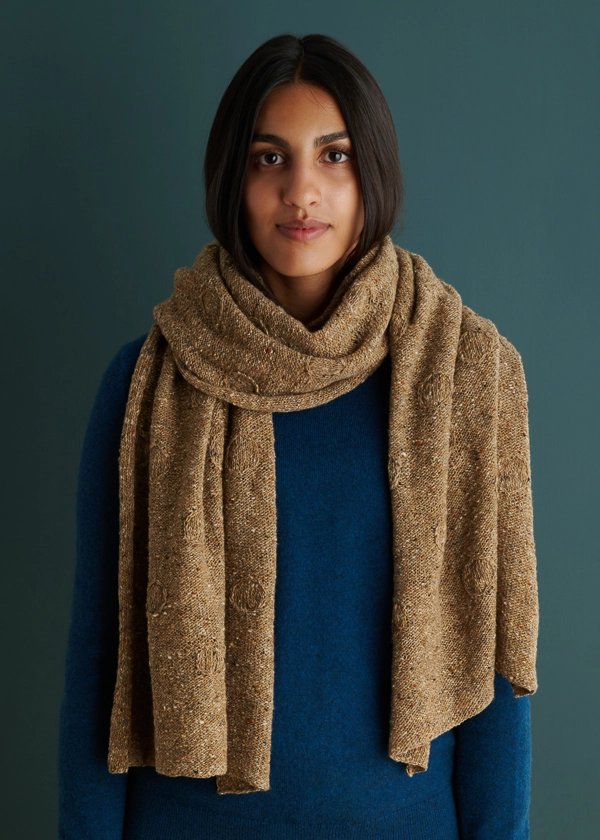
Designed for Purl Soho by Mari Tobita. Originally from Japan, Mari lives in New York City with her husband in an apartment full of books and yarn. She sees beauty all around her, from flowers in the garden, to the wall of a building, to the plates on a table… Inspiration is everywhere!
Share your progress and connect with the community by tagging your pics with #PurlSoho, #PurlSohoBusyHands, #PurlSohoSoapBubbleWrap, and #PurlSohoSpindle. We can’t wait to see what you make!
Materials
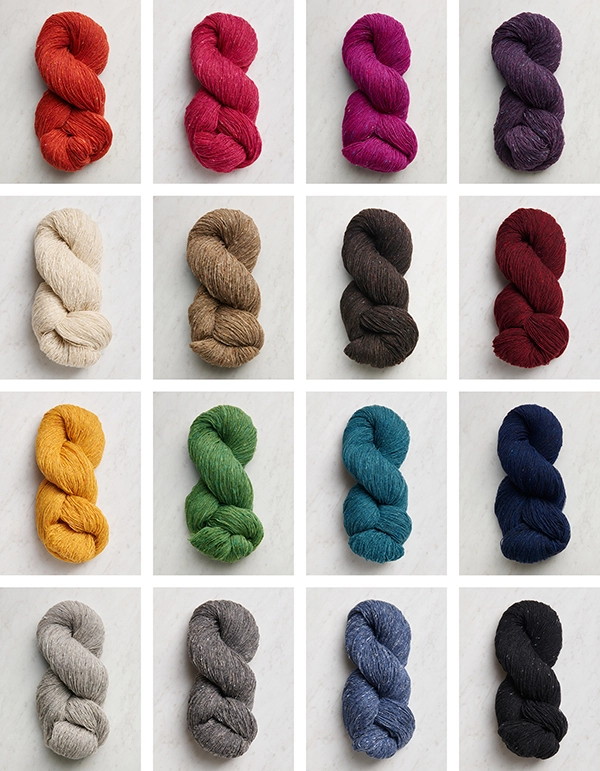
- 3 skeins of Purl Soho’s Spindle, 80% merino, 10% cashmere, and 10% mulberry silk. Each skein is 625 yards/ 100 grams; approximately 1530 total yards required. We used the color House Wren.
- US 4 (3.5 mm), 24-inch circular needles
- Stitch markers
- A cable stitch holder
GAUGE
26 stitches and 37½ rows = 4 inches in reverse stockinette stitch
SIZE
Finished Dimensions: 21 inches wide x 73½ inches long
NOTES
STITCH MULTIPLE
This pattern works over a multiple of 32 + 9 stitches and a minimum of 73 total stitches.
SLIP STITCHES
Slip all slipped stitches purlwise unless instructed otherwise.
SPECIAL INSTRUCTIONS
CDI (CENTRAL DOUBLE INCREASE)
Knit through back loop and do not let stitch off left needle, then knit through front loop of same stitch and allow stitch off left needle [2 stitches on right needle].
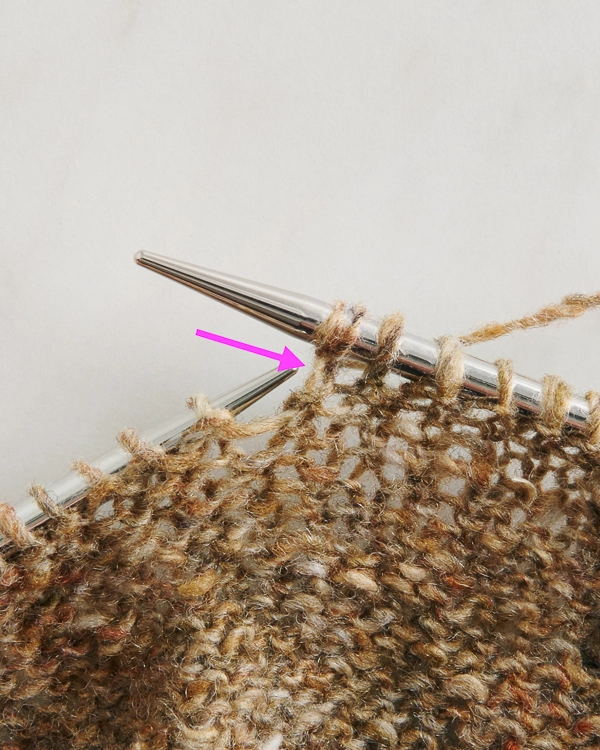
Next, locate vertical strand between two stitches you just created (shown above)…
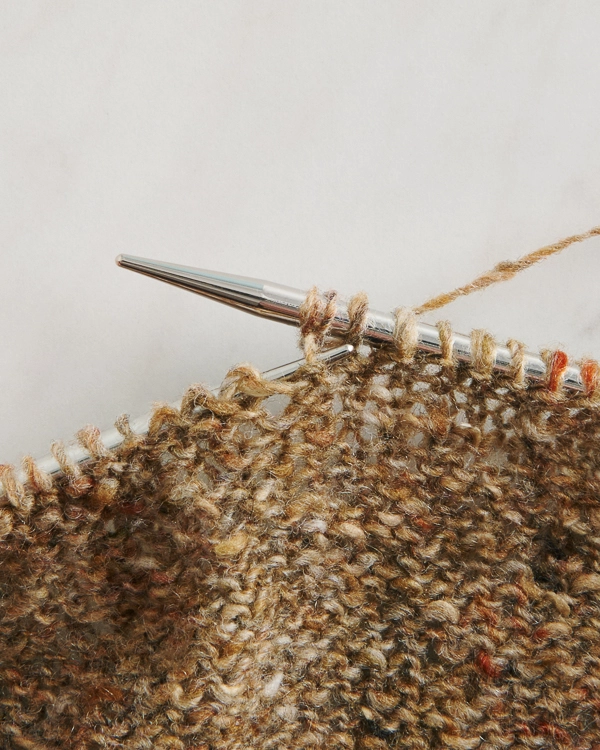
… and lift it onto left needle, inserting needle tip from left to right (shown above); knit this stitch through the back loop, and allow it off left needle. [2 stitches increased]
DD (DOUBLE DECREASE)
Purl 2 together (p2tog), slip resulting stitch to left needle, pass second stitch on left needle over slipped stitch, then slip remaining stitch back to right needle. [2 stitches decreased]
CABLES
1/2 LC (LEFT CROSS)
Slip 2 stitches onto cable stitch holder and hold in front of work, p1 from left needle, then p2 from cable stitch holder.
1/2 RC (RIGHT CROSS)
Slip 1 stitch onto cable stitch holder and hold in back of work, p2 from left needle, then p1 from cable stitch holder.
1/1 LPC (1/1 LEFT PURL CROSS)
Slip 1 stitch to cable stitch holder and hold in front of work, p1 from left needle, then k1 from cable stitch holder.
1/1 RPC (1/1 RIGHT PURL CROSS)
Slip 1 stitch to cable stitch holder and hold in back of work, k1 from left needle, then p1 from cable stitch holder.
1/2 LPC (LEFT PURL CROSS)
Slip 1 stitch onto cable stitch holder and hold in front of work, p2 from left needle, then k1 from cable stitch holder.
1/2 RPC (RIGHT PURL CROSS)
Slip 2 stitches onto cable stitch holder and hold in back of work, k1 from left needle, then p2 from cable stitch holder.
TWISTS
For help with these stitches, please visit our Right + Left Twist tutorial, although note that the tutorial shows them worked on the knit side only.
RT (RIGHT TWIST)
On right-side (purl) rows, knit into front of second stitch on left needle, leaving stitch on needle, then knit into front of first stitch on left needle and slip the two stitches from needle together.
On wrong-side (knit) rows, purl into front of second stitch on left needle, leaving stitch on needle, then purl into front of first stitch on left needle and slip the two stitches from needle together.
LT (LEFT TWIST)
On right-side (purl) rows, knit into back of second stitch on left needle, leaving stitch on needle, then knit into front of first stitch on left needle and slip the two stitches from needle together.
On wrong-side (knit) rows, slip 1 stitch purlwise, slip the next stitch knitwise, then slip the two stitches back to left needle in their new orientation; purl into back of second stitch on left needle, leaving stitch on needle, then purl into front of first stitch on left needle and slip the two stitches from needle together.
PATTERN
Using a basic Long Tail Cast On, cast on 137 stitches.
Row 1 (right side): K2, purl to last 2 stitches, k2.
Row 2 (wrong side): Slip 2 (see Notes) with yarn in front (wyif), knit to last 2 stitches, p2.
Row 3: Slip 2 with yarn in back (wyib), purl to last 2 stitches, k2.
Repeat Rows 2 and 3 until piece measures 4 inches from cast-on edge, ending with Row 2.
Work Soap Bubble Pattern either from Written Instructions or Chart, both below.
SOAP BUBBLE PATTERN: WRITTEN INSTRUCTIONS
Row 1 (right side): Slip 2 wyib, p6, place marker (pm), [p4, Central Double Increase (CDI, see Special Instructions), p4, pm, p23, pm] 3 times, p4, CDI, p4, pm, purl to last 2 stitches, k2. [145 total stitches]
Row 2 (wrong side): Slip 2 wyif, knit to next marker, sm, k2, 1/2 Left Cross (1/2 LC, see Special Instructions), p1, 1/2 Right Cross (1/2 RC, see Special Instructions), k2, [sm, knit to next marker, sm, k2, 1/2 LC, p1, 1/2 RC, k2] 3 times, sm, knit to last 2 stitches, p2.
Row 3: Slip 2 wyib, purl to next marker, sm, [p1, Right Twist (RT, see Special Instructions), k5, Left Twist (LT, see Special Instructions), p1, sm, purl to next marker, sm] 3 times, p1, RT, k5, LT, p1, sm, purl to last 2 stitches, k2.
Row 4: Slip 2 wyif, knit to next marker, sm, LT, p7, RT, [sm, knit to next marker, sm, LT, p7, RT] 3 times, sm, knit to last 2 stitches, p2.
Row 5: Slip 2 wyib, purl to next marker, sm, [knit to next marker, sm, purl to next marker, sm] 3 times, knit to next marker, sm, purl to last 2 stitches, k2.
Row 6: Slip 2 wyif, knit to next marker, sm, slip 1 wyif, p9, slip 1 wyif, [sm, knit to next marker, sm, slip 1 wyif, p9, slip 1 wyif] 3 times, sm, knit to last 2 stitches, p2.
Rows 7–10: Repeat Rows 5 and 6 two times.
Row 11: Slip 2 wyib, purl to next marker, sm, [1/1 Left Purl Cross (1/1 LPC, see Special Instructions), k7, 1/1 Right Purl Cross (1/1 RPC, see Special Instructions), sm, purl to next marker, sm] 3 times, 1/1 LPC, k7, 1/1 RPC, sm, purl to last 2 stitches, k2.
Row 12: Slip 2 wyif, knit to next marker, sm, k1, 1/1 RPC, p5, 1/1 LPC, k1, [sm, knit to next marker, sm, k1, 1/1 RPC, p5, 1/1 LPC, k1] 3 times, sm, knit to last 2 stitches, p2.
Row 13: Slip 2 wyib, purl to next marker, sm, [p2, 1/2 Left Purl Cross (see Special Instructions), k1, 1/2 Right Purl Cross (see Special Instructions), p2, sm, purl to next marker, sm] 3 times, p2, 1/2 LPC, k1, 1/2 RPC, p2, sm, purl to last 2 stitches, k2.
Row 14: Slip 2 wyif, knit to next marker, sm, k4, Double Decrease (DD, see Special Instructions), k4, [sm, knit to next marker, sm, k4, DD, k4] 3 times, sm, knit to last 2 stitches, p2. [137 stitches remain]
NOTE: On the next row, remove markers as you come to them.
Row 15: Slip 2 wyib, purl to last 2 stitches, k2.
Row 16: Slip 2 wyif, knit to last 2 stitches, p2.
Rows 17–24: Repeat Rows 15 and 16 four times.
Row 25: Slip 2 wyib, p22, pm, [p4, CDI, p4, pm, p23, pm] 3 times, p4, CDI, p4, pm, purl to last 2 stitches, k2. [8 stitches increased, 145 total stitches]
Row 26: Slip 2 wyif, knit to next marker, sm, k2, 1/2 LC, p1, 1/2 RC, k2, [sm, knit to next marker, sm, k2, 1/2 LC, p1, 1/2 RC, k2] 3 times, sm, knit to last 2 stitches, p2.
Row 27: Slip 2 wyib, purl to next marker, sm, [p1, RT, k5, LT, p1, sm, purl to next marker, sm] 3 times, p1, RT, k5, LT, p1, sm, purl to last 2 stitches, k2.
Row 28: Slip 2 wyif, knit to next marker, sm, LT, p7, RT, [sm, knit to next marker, sm, LT, p7, RT] 3 times, sm, knit to last 2 stitches, p2.
Row 29: Slip 2 wyib, purl to next marker, sm, [k11, sm, purl to next marker, sm] 3 times, knit to next marker, sm, purl to last 2 stitches, k2.
Row 30: Slip 2 wyif, knit to next marker, sm, slip 1 wyif, p9, slip 1 wyif, [sm, knit to next marker, sm, slip 1 wyif, p9, slip 1 wyif] 3 times, sm, knit to last 2 stitches, p2.
Rows 31–34: Repeat Rows 29 and 30 two times.
Row 35: Slip 2 wyib, purl to next marker, sm, [1/1 LPC, k7, 1/1 RPC, sm, purl to next marker, sm] 3 times, 1/1 LPC, k7, 1/1 RPC, sm, purl to last 2 stitches, k2.
Row 36: Slip 2 wyif, knit to next marker, sm, k1, 1/1 RPC, p5, 1/1 LPC, k1, [sm, knit to next marker, sm, k1, 1/1 RPC, p5, 1/1 LPC, k1] 3 times, sm, knit to last 2 stitches, p2.
Row 37: Slip 2 wyib, purl to next marker, sm, [p2, 1/2 LPC, k1, 1/2 RPC, p2, sm, purl to next marker, sm] 3 times, p2, 1/2 LPC, k1, 1/2 RPC, p2, sm, purl to last 2 stitches, k2.
Row 38: Slip 2 wyif, knit to next marker, sm, k4, DD, k4, [sm, knit to next marker, sm, k4, DD, k4] 3 times, sm, knit to last 2 stitches, p2. [137 stitches remain]
NOTE: On the next row, remove markers as you come to them.
Row 39: Slip 2 wyib, purl to last 2 stitches, k2.
Row 40: Slip 2 wyif, knit to last 2 stitches, p2.
Rows 41–48: Repeat Rows 39–40 four times.
Repeat Rows 1–48 twelve more times.
Go on to Edge section, below.
SOAP BUBBLE PATTERN: CHART
NOTE: New to reading charts? Learn everything you need to know with our Reading A Chart Tutorial!
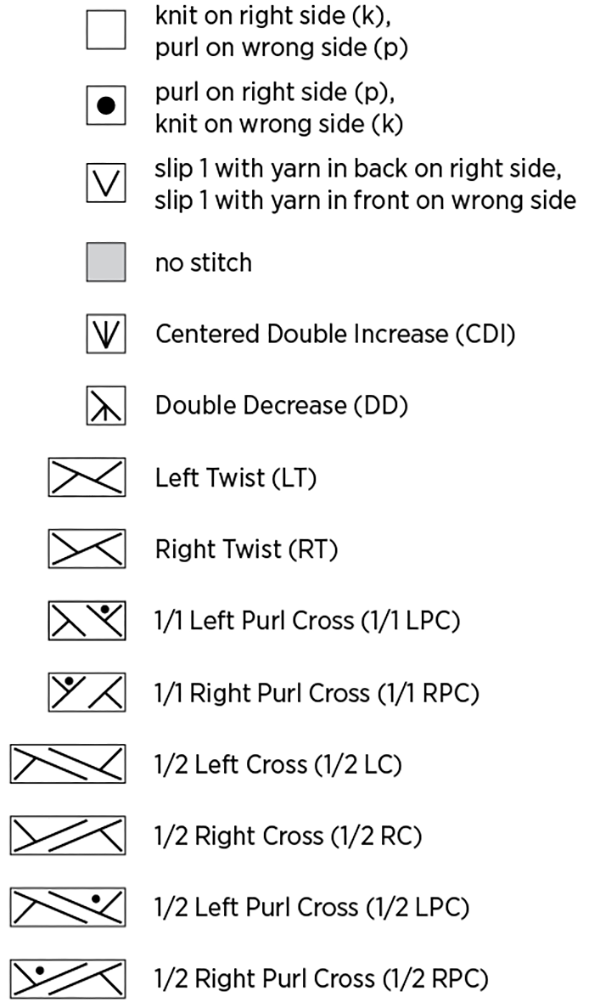
Starting in the bottom right corner of the Chart below, work right-side (odd number) rows from right to left and wrong-side (even number) rows from left to right.
Work Rows 1–48 thirteen times, then go on to Edge section, below.
KEY
CHART
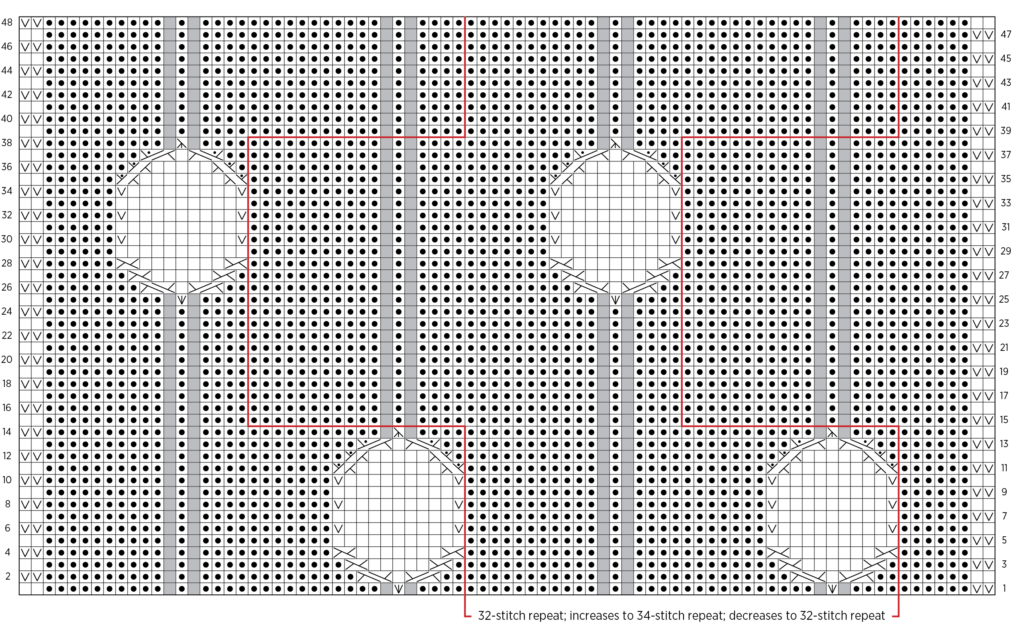
NOTE: Want to see it bigger? Download this chart (and key) as a PDF!
EDGE
Row 1 (right side): Slip 2 wyib, purl to last 2 stitches, k2.
Row 2 (wrong side): Slip 2 wyif, knit to last 2 stitches, p2.
Repeat Rows 1 and 2 for a total of 3 inches, ending with Row 1.
FINISHING
With wrong side facing you, bind off all stitches knitwise.
Weave in ends and gently wet block your finished piece.





I couldn’t find a tutorial for the CDI (CENTERED DOUBLE INCREASE) on your tutorials page. Could you put a like to it? The photos are hard to see, they are so small.
Hi Robin,
I just replied to you by email and sent along an unofficial photo tutorial we made of this stitch, using thicker yarn!
All the best,
Lili
this one is lovely!
it is really hard to make a knit circle that looks round.
mari succeeded wonderfully.
I’m going to try this with a contrasting color for the polka dot.
Is there a huge difference if I make this with fingering + bigger needles instead of laceweight yarn?
Hi Alexis,
You can absolutely use fingering weight yarn and bigger needles for this pattern! You’d just need to alter how many stitches you cast on so that the wrap comes out to the same dimensions. To figure out your cast-on number, you will want to first knit a gauge swatch in pattern. Once you know how many stitches you are getting per inch, you can multiply that number by the width and cast on the nearest multiple of 32 + 9 stitches (but at least 73 stitches total). Then you can follow the pattern as written!
All the best,
Lili
Hi There
Could you substitute this yarn with Cattail Silk?
Thanks
Hi Karen,
You can absolutely use Cattail Silk for this pattern! You may need to alter how many stitches you cast on so that the wrap comes out to the same dimensions though. To figure out your cast-on number, you will want to first knit a gauge swatch in pattern. Once you know how many stitches you are getting per inch, you can multiply that number by the width and cast on the nearest multiple of 32 + 9 stitches (but at least 73 stitches total). Then you can follow the pattern as written!
All the best,
Lili
This pattern is so intriguing. I am an unconfident intermediate knitter. I’ve enjoyed making many of your sock patterns (all of Ainur Berkimbayeva’s socks and Sole Salvo’s dog sweaters); albeit with quite a few mistakes. But I make the best of it and they all turn out presentable. This pattern looks really complex with many unfamiliar stitches. Do you think it would be too frustrating to attempt?) Thank you
Hi Avis,
I think that this pattern will be an exciting challenge for you! I would recommend making a swatch to try out the pattern before purchasing the yarn you want to use. That way, you can try out all the new stitches without any pressure to get them right on the first try! And as always, we’re here to help if you have any questions or run into a stopping point in the pattern!
All the best,
Lili
Dear purl soho,
The print page seems to be out of whack: nothing is scaling (print or pics). The problem has been ongoing for a week or two for all patterns you have posted in that time. I hate to have to print out 15 pages when 3 or 4 would do.. Thanks as always for your free patterns.
Hello,
Thanks for reaching out! We recommend using the “Print” function to print patterns, rather than printing them directly from the webpage. If you’re on your computer, you’ll find a “print” icon in the right column just below the “Save To Favorites” button. If you’re on a mobile version of the site, you will find the “print” icon below the pattern and above the comments.
Click on this button, and a window will pop up where you can delete whichever parts of the pattern you don’t want to print. When you hover over any image or a text block, it will be highlighted in yellow and a “trash” icon will appear. Just click on this icon to delete anything that’s not necessary to the pattern! For example, you may decide to shorten the pattern by omitting certain images or the list of materials. Then, just click on the “Print” button in the upper left-hand corner of the pop-up window!
All the best,
Lili
Could you substitute this yarn with Cattail Silk?
Thanks
Hi Karen,
It looks like I replied to your question yesterday! You should be able to find my answer above, but in case you’re having trouble tracking that down, I’ll copy and paste what I wrote here:
You can absolutely use Cattail Silk for this pattern! You may need to alter how many stitches you cast on so that the wrap comes out to the same dimensions though. To figure out your cast-on number, you will want to first knit a gauge swatch in pattern. Once you know how many stitches you are getting per inch, you can multiply that number by the width and cast on the nearest multiple of 32 + 9 stitches (but at least 73 stitches total). Then you can follow the pattern as written!
Hope this helps!
All the best,
Lili
I would like to knit this pattern into a baby blanket for my daughters baby. What yarn would you suggest and how many should I cast on for something like this? I considered doubling the casting of the wrap.
Hi Sheri,
Thanks for reaching out! For a baby blanket, I’d recommend using Santolina or Cotton Pure. We love both of these yarns for baby items because they’re extremely soft on the skin and machine washable! They’re also both pretty thin (though not as thin as Spindle), so they’ll display the delicate soap bubble pattern very well.
To figure out your cast-on number, you will want to first knit a gauge swatch in pattern (if this is daunting, we have a wonderful tutorial called All About Gauge). Once you know how many stitches you are getting per inch, you can multiply that number by the width that you would like and cast on the nearest 32 + 9 stitches. Then you can follow the pattern as written!
All the best,
Lili
I seem to be running into problems with this pattern. (1) the initial instructions after casting on say to repeat rows 2 and 3 until piece measures 4 inches from cast on edge, ending with row 3, which is a right side row. Then when you begin with row 1 in the bubble pattern, it says row 1 is the right side, when, in fact, it’s the wrong side, because you’ve just finished ending with row 3 which is the right side.
(2) I’m confused by the Center Double Increase instructions. It appears when following instructions that we’re adding three stitches, but when you do the math for how many stitches you should have on your needle after that first row, you are only increasing by two. For example, if you start out with 137 sts and you’re supposed to have 145 after Row 1, and you’ve done four total CDIs, that’s an increase of only 2 sts per CDI, and when I follow the instructions as written, I actually get three sts per CDI.
What am I doing wrong?
Hi Amy,
Thanks for reaching out! You’re absolutely correct that you shouldn’t be knitting two right side rows back-to-back. The instruction should actually tell you to end after a Row 2, not a Row 3. We’ll be fixing this in the pattern as soon as possible, and thanks again for bringing this to our attention!
In answer to your other question, the CDI is indeed a 2-stitch increase. You being with 1 stitch, work the CDI into that stitch, and end up with 3 stitches. That’s a difference of 2 stitches, since you began with 1 stitch!
I hope this helps clarify things!
All the best,
Lili