Crossbody Pocket Bag
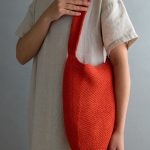
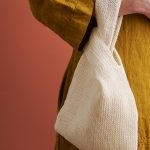
Because you can never have too many pockets, keep our Crossbody Pocket Bag handy for when your hands need more help!

You start this little sack by working linen stitch in a flat rectangle for the base, then you pick up and knit around its perimeter and join in the round to continue in linen stitch for the bag’s body.

And here’s where things get even more interesting. You will cast on for a nifty strap channel, work it separately, then knit it to the body as you go, forming a little sleeve through which you will later thread the strap. Follow this with a flap to close the top and the strap to make it wearable, and this little travel buddy is ready to go!

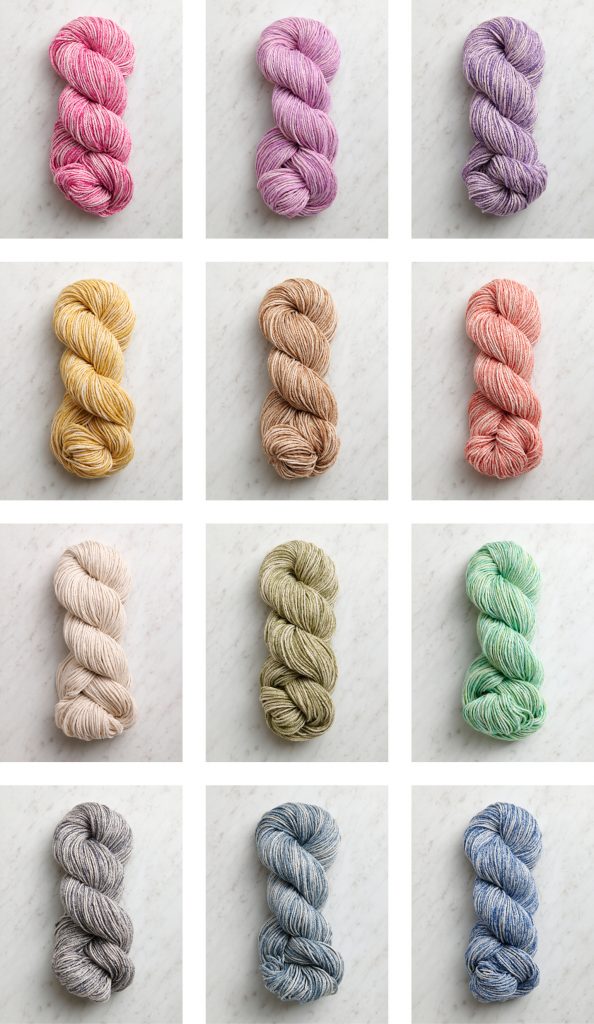
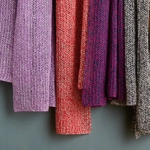
All this lovely linen stitch is made even better by the dappled hues of our Sunshower Cotton. With colors printed on a white base, Sunshower Cotton has a depth and variation that teams up with the texture of this fabric to make something truly wonderful!

Made in Italy of 100% organically grown cotton, Sunshower Cotton is super soft and supple. Its worsted weight makes the bag substantial enough to be useful, and its strong four-ply construction ensures it will last… Functional beauty at its best!


You can create this handsome helper with only two skeins of Sunshower Cotton… so pick up a pair and cast on!

Designed by Purl Soho designer, Hiromi Glover. Click here to see even more of Hiromi’s work!
Share your progress and connect with the community by tagging your pics with #PurlSoho, #PurlSohoBusyHands, #PurlSohoCrossbodyPocketBag, and #PurlSohoSunshowerCotton. We can’t wait to see what you make!
Materials

- 2 skeins of Purl Soho’s Sunshower Cotton, 100% organically grown cotton. Each skein is 159 yards/100 grams; approximately 265 total yards required. We used the colors Wood Thrush and Rain Storm.
- US 8 (5 mm), 24-inch circular needles
- US 8, 16-inch circular needles
- US 6 (4 mm), 16-inch or longer circular needles
- Stitch markers , including one unique
- A crochet hook and scrap yarn (for Provisional Cast On)
GAUGE
22 stitches and 40 rows = 4 inches in Linen Stitch, flat and in the round, on larger needles
SIZE
- Finished Circumference: 20 inches
- Finished Height: 5¾ inches
- Base of Bag: 3 inches wide x 7½ inches long
- Strap Width: 1¼ inches
- Strap Length: 44 inches
NOTES
CONSTRUCTION
You will make this bag by first knitting the Base flat, then picking up around the Base and knitting the Body of the bag in the round. You will knit the Strap Channel separately and then knit it together with the Body as you work. You will finish the Body by working the Flap back and forth in rows, then you will knit the Strap, insert it through the Strap Channel, and join the ends of the Strap using a 3-Needle Bind Off.
PROVISIONAL CAST ON
For assistance, including how to put live stitches back onto needles, please visit our Provisional Cast-On: A One-Step Method Tutorial.
SLIP STITCHES
Slip all slip stitches purlwise unless indicated otherwise in pattern.
STITCH PATTERNS
LINEN STITCH WORKED FLAT
Worked over a multiple of 2 stitches.
Row 1 (wrong side): Slip 1 knitwise with yarn in front (wyif), *p1, slip 1 (see above Note) with yarn in back (wyib), repeat from * to last stitch, k1.
Row 2 (right side): Slip 1 wyif, *k1, slip 1 wyif, repeat from * to last stitch, k1.
Repeat Rows 1 and 2 for pattern.
LINEN STITCH IN THE ROUND
Worked over a multiple of 2 plus 1 stitches.
Round 1: *K1, slip 1 (see above Note) with yarn in front (wyif), repeat from * to last stitch, k1.
Round 2: *Slip 1 wyif, k1, repeat from * to last stitch, slip 1 wyif.
Repeat Rounds 1 and 2 for pattern.
PATTERN
BASE
Using scrap yarn and a Provisional Cast-On (see Notes), cast 16 stitches onto larger 24-inch needles.
Join main yarn and knit one row even.
Work Rows 1 and 2 of Linen Stitch Worked Flat (see Notes) until piece measures 7½ inches from cast-on edge, ending with Row 2.
Do not cut yarn.
BEGIN BODY
PICK UP + KNIT
With right side still facing you and still with larger 24-inch needles, rotate piece 90 degrees clockwise and pick up and knit 39 stitches along selvage. [55 stitches]
Rotate piece 90 degrees clockwise, and carefully removing scrap yarn from Provisional Cast On (see Notes), start at left corner stitch and slip 16 cast-on stitches onto left needle, then knit 10 cast-on stitches, place marker, knit 6 cast-on stitches. [71 stitches]
Rotate piece 90 degrees clockwise and continuing with same needles, pick up and knit 38 stitches along remaining selvage. [109 stitches]
Place a unique marker and join for working in the round.
CONTINUE EVEN
Change to larger 16-inch circular needles.
Work Rounds 1 and 2 of Linen Stitch In The Round (see Notes) until piece measures 4 inches from picked-up edge, ending with Round 2.
Set aside.
WORK STRAP CHANNEL
Using a Provisional Cast-On, cast 50 stitches onto larger 24-inch needles.
Work Rows 1 and 2 of Linen Stitch Worked Flat until piece measures 1½ inches from cast-on edge, ending with Row 2.
Cut yarn.
Carefully removing scrap yarn from Provisional Cast On, slip stitches onto smaller 16-inch circular needles. [50 live cast-on stitches and 50 working stitches on separate needles]
Set aside.
ATTACH STRAP CHANNEL BOTTOM TO BODY
Returning to Body…
Set-Up Round (partial round): Remove unique marker, [k1, slip 1 wyif] 3 times, replace marker, work in established pattern to next marker, slip marker. [50 stitches remain before end of round]
Orient Strap Channel so wrong side is facing you and smaller circular needle (i.e. the cast-on edge) is in front of and parallel to left working needle.
With right working needle, *knit first Strap Channel stitch together with next Body stitch, repeat from * to end of round.
CONTINUE BODY
Beginning with Round 2, work Linen Stitch In The Round until piece measures approximately 1½ inches from attached Strap Channel bottom, ending with Round 2.
ATTACH STRAP CHANNEL TOP
Set-Up Round (partial round): *K1, slip 1 wyif, repeat from * to last stitch before next marker, k1.
Fold Strap Channel upwards so right side of Strap Channel is facing you and needles are parallel, with Strap Channel needle in front.
With right working needle, *knit first Strap Channel stitch together with next Body stitch, repeat from * to end of round.
Work Round 2 of Linen Stitch In The Round one time.
FLAP
Set-Up Round: K1, slip 1 wyif, bind off 55 stitches knitwise, knit to next marker, remove marker, *slip 1 wyif, k1, repeat from * to end of round, remove unique marker, slip 1 wyif, k1. Turn work. [54 stitches remain]
Beginning with Row 1, work Linen Stitch Worked Flat until Flap measures 4½ inches from Set-Up Round, ending with Row 1.
Bind off loosely knitwise.
Weave in all ends.
STRAP
Using a Provisional Cast-On, cast 8 stitches onto smaller needles.
Work Rows 1 and 2 of Linen Stitch Worked Flat until piece measures 44 inches (or preferred length) from cast-on edge, ending with Row 1.
Cut yarn, leaving a 2-foot tail for binding off.
NOTE: If desired, place Strap stitches onto scrap yarn and block Body and Strap separately before attaching pieces. Once blocked, return live Strap stitches to smaller needles.
Insert cast-on end of Strap through Strap Channel.
Carefully remove scrap yarn from Provisional Cast On and slip stitches onto right end of working needles.
Being careful not to twist the Strap, holding needles parallel so right sides of Strap are facing each other and working yarn is coming from back needle. Bind off remaining stitches using larger needles and a 3-Needle Bind Off.
FINISHING
Weave in remaining ends and orient Strap so seam is inside Strap Channel and wrong side of Strap lays against body when worn. Enjoy!


I’d like to knit this but it sounds complicated. How do you rotate a piece 90 degrees when using circular needles? I can’t imagine. It would be helpful to see a video tutorial for the entire construction of this lovely bag.
Hi Amy,
I’m afraid that we currently do not have the time and resources to create a video tutorial for this entire pattern. However, I’m happy to help clarify any questions you may have about the construction!
Regarding the “Rotate 90 degrees,” you’re actually doing so while still working flat, even though you’re using circular needles. You won’t begin working in the round until after you’ve picked up all the stitches at this point. Once you’ve finished the BASE section of the pattern, you will have a rectangle that will become the bottom of the bag. Then, in the PICK UP + KNIT section, you pick up stitches along each of the 4 edges of this rectangle (rotating 90 degrees before starting on the next edge). Once you’ve finished that step, you will have new picked-up stitches around all the edges of the rectangle, and you can begin working in the round.
I hope this helps clarify things, and please let me know if you have any other questions!
All the best,
Lili
Thank you for your reply and clarification!
Amy. Do not worry. It comes out just fine. What you are doing is picking up stitches along the edges of the base to form beginnings of sides.
What a lovely pattern! I’ve been looking for new gift projects! Unfortunately, with my arthritis, I find it difficult to knit with 100% cotton. Do you have any recommendations for a substitute–wool, perhaps? Thank you!
Hi Valerie,
Thanks for writing in! I completely understand, and I’d be happy to recommend a wool yarn for this pattern. Hedgerow would be the perfect alternative! This yarn is a very similar weight to Sunshower Cotton, so you’ll be able to meet the correct gauge (though you may need to size up or down your needles), and it even has a similar speckled pattern!
All the best,
Lili
Dear Purl,
Any ideas as to why the left end selvage of the right side of my base is so loose compared to the right end?
Row 1 (WS) begins withSlip 1 KNITWISE, ends with k1.
Row 2 (RS) begins with Slip1 wyif, ends with k1.
The right edge selvage is as tight as the linen stitch itself.
Please and thanks.
Hi KJ,
In linen stitch, the first slipped stitch on the right side has the tendency to be tight, which makes this edge tighter and shorter than the left edge. This is a natural thing that happens when knitting in linen stitch! I’d recommend consciously keeping the tension as loose as possible when on this side of your work. That will help even out both edges so that they have the same amount of looseness!
All the best,
Lili
Right. But I’m finding that what I should do is try to tighten the left selvage of RS because those loose knit stitch edges are going to leave gaps when trying to pick up stitches to start the body, yes? Suzanne Bryan has a good YouTube video on this but of course, she’s just doing stockinette. We’re steeped in linen stitch here, a stitching pattern with which I struggle enough. Maybe could I just KNIT first stitch of Row 1?
Sorry to be a bother…I’m really an amateur here.
Hi KJ,
The reason I suggested keeping the tighter side loose is actually because I’ve found that it’s much easier to consciously keep your tension loose than to try to consciously tighten it. You could try tightening the loose side though if that works for you! However, I also want to let you know that your picked-up stitches will probably be fine–there shouldn’t be too much of a gap no matter what, and it may actually be easier to pick them up from slightly looser stitches.
All the best,
Lili
Hi folks! I’m a little confused about something and I wanted to check before I get started. After the provisional cast-on for the base, am I correct that with the Linen stitch, I’ll be slipping some of the stitches of the provisional cast-on for the first row? I was trying to imagine how that would be when I get rid of the scrap yarn, so I figured I’d check, Thanks so much!!
Hi Peg,
Great question! Yes, you’ll be slipping stitches on the very first row you work after the provisional cast-on. It will not affect anything when you get rid of the scrap yarn, since all the original stitches you cast on provisionally will still be live, no matter if they were slipped or worked on the first row. Hope this helps!
All the best,
Lili
How do I pick up and knit the last 38 stitches on the same set of needles? After picking up about 5 stitches, the base is not wide enough to let me get my needle into more stitches.
Hi Lily,
Thanks for reaching out, although I’m sorry to hear that you’re having a difficult time picking up the stitches! I’m afraid that I’m not quite able to visualize what you’re describing, so would you be able to send a photo of your work to customerservice@purlsoho.com? That way, we’ll be able to see exactly what’s going on!
All the best,
Lili
I’m having difficulty slipping the first stitch on the wrong side knitwise with the yarn in front. Can you please give me specific direction on the position of the yarn in relation to the two ends of the circular needle? Or please refer me to a video of this technique.
Thank you.
Hi Cindy,
Thanks for reaching out! To slip the first stitch knitwise with yarn in front, just make sure that your working yarn is positioned in front of your needles/knit fabric. Meaning, it should be hanging between your needles/knit fabric and your own body. Then, insert your right needle into the first stitch as if you were going to knit it, but instead, just transfer it to your right needle without knitting it.
I hope this helps clarify things!
All the best,
Lili
Hi. I love this pattern but I’m stuck on the strap channel part of the pattern. Should I have two sets of needles — one at the top of the channel and one at the bottom? Couldn’t I just attach one end to the bod and then pick up the provisional cast on stitches with my needles? I’m a little confused. Thanks!
Hi Kate,
Yes, that’s exactly correct! You should have two sets of needles, one at either end of the strap channel. This is essentially doing the same thing that you mention. You’re attaching one end of the strap channel to the body, knitting the body further, and then attaching the other end. Hope this helps clarify things!
All the best,
Lili
I’d like to make the bag larger. The picture is deceiving in that respect. I’d like at least 24″ around. Can you tell me the number of stitches to work with for the larger size?
Hi Janice,
Thanks for reaching out, and I’d be happy to help you modify this bag to be larger! Would you like to add the additional 4 inches to the width, depth, or both? Currently, the width of the bag is approximately 7.5 inches and the depth is about 3 inches. Let me know, and then we can go from there!
All the best,
Lili
Can this be worked with dpns rather than circular needles?
Hi Jo,
Thanks for reaching out! You can absolutely try using DPNs for this, but they may be a bit fiddly to use for such a large circumference. If you have longer DPNs (8 inch, for example) those would help prevent any stitches from falling off though!
All the best,
Lili
I have just finished the base of the bag and the patterns says, after picking up the stitches to, “Change to larger 16 inch circular needles”. Yet we are on the larger size …5 mm and 24 inches which is the size used that is used to knit the base. Should this not read smaller needles?
Hi Joyce,
Thanks for writing in! Since you’re on the larger 24-inch needles, this instruction means to change to the larger 16-inch needles. The needles are still the 5mm needles, you just change to the shorter length at this point!
As a rule of thumb, “larger” and “smaller” are typically used to indicate needle size, whereas “shorter” and “longer” refer to the length of the cord.
All the best,
Lili
Hi
I’m working the flap section for the bag and it doesn’t look ribbed like the pictures of the bag. I’ve tried loosing my tension but it’s not working. Any ideas.
Hi Pam,
Thank you for writing in! The pattern on the front flat is actually knit in Linen Stitch and only looks slightly similar to ribbing due to the stitch and yarn combination. The most important thing to check here is if your gauge is the same as the one in the pattern. Since the stitch is worked vertically to the way it sits on the bag, this can also give the flap a vague look of ribbing that can be seen in the pictures. I hope this helps but please let me know if you have any other questions!
Happy knitting,
Gavriella