
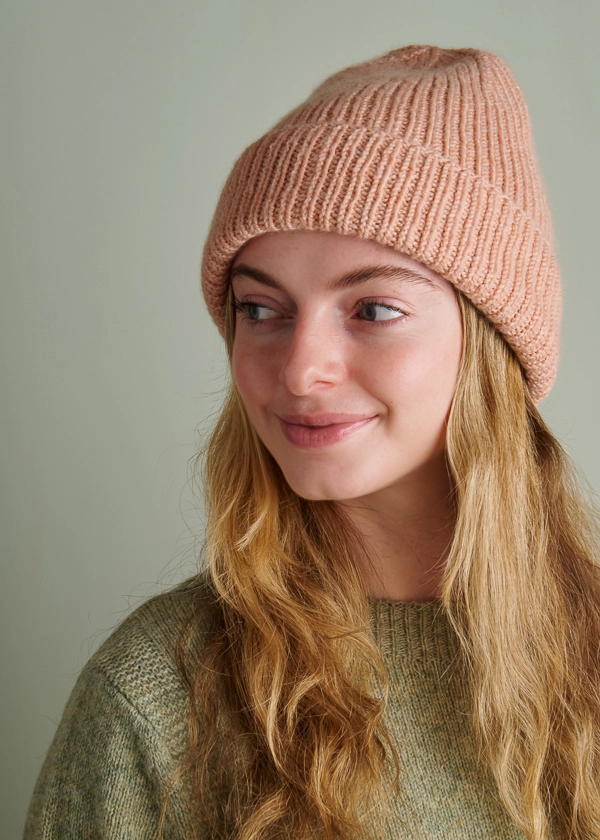

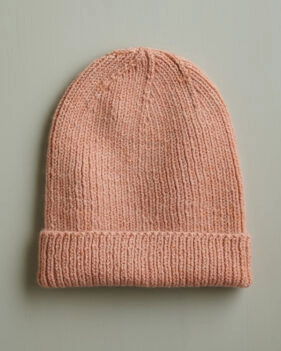
Classic Ribbed Hat In New Colors
Need a project you can take on the go? Classic Ribbed Hat. Want a no-look TV-friendly knit? Classic Ribbed Hat. Looking for the perfect gift that you can knit up in a wink? Classic Ribbed Hat. It may not be the answer to all our problems, but our Classic Ribbed Hat sure solves most of our knitting ones!

As straightforward as it gets, you cast on and knit in one-by-one rib from cuff to crown, adding in decreases to create that beautiful spiral detail.

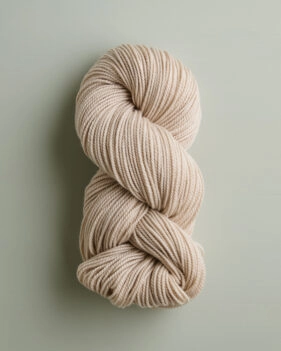
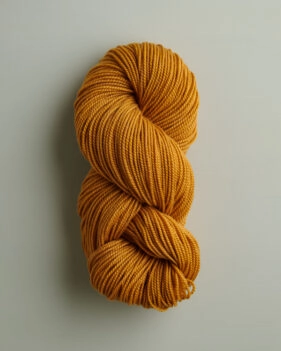
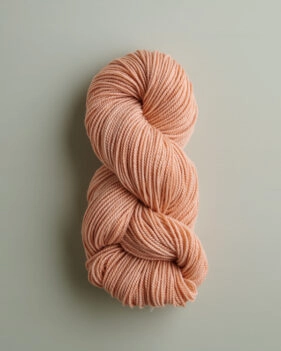
To make the simple stunning, all it takes is the right yarn. And our Cashmere Merino Bloom is just right.

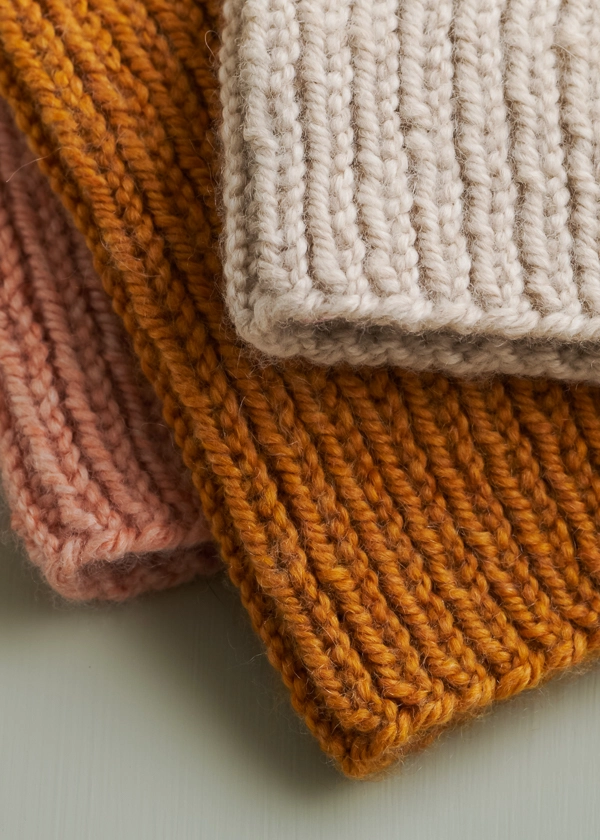
Seventy-five percent extra fine merino and 25% cashmere, this yarn is sumptuous and soft, with a gentle halo that illuminates the detail of your stitches. Since cashmere is even warmer than wool, it’s not just warm, it’s over-the-top cozy, too!

Cashmere Merino Bloom has two even plies, giving this ribbed fabric an even look and a beautiful hand.

Plus, its tidy twist and merino content make Cashmere Merino Bloom hard-wearing, as well… Good news, because this hat is going to be your favorite!

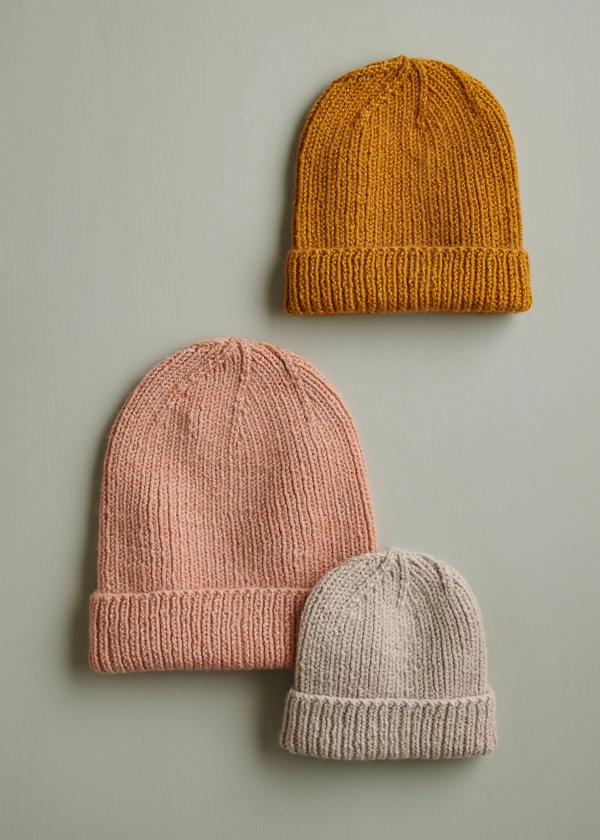
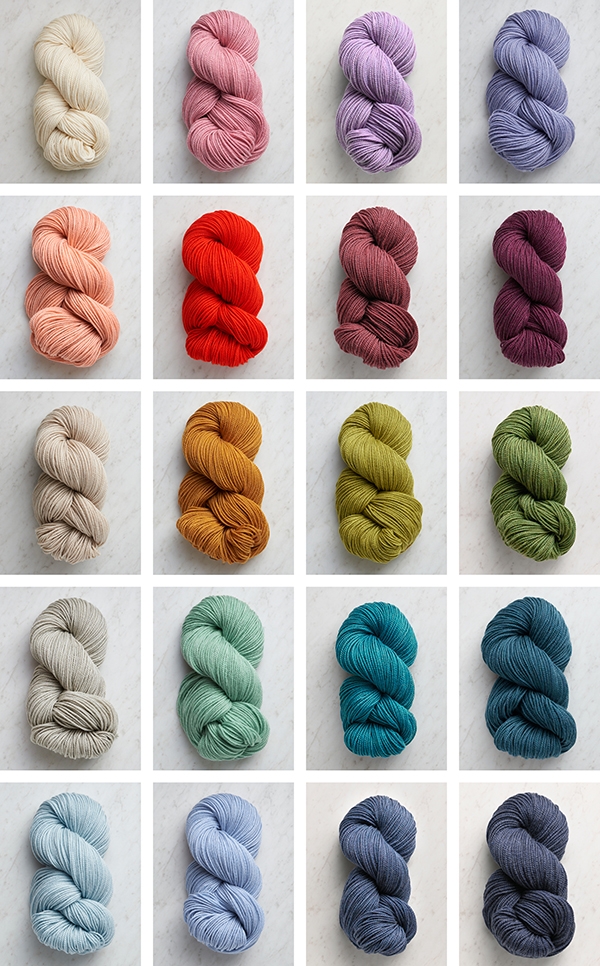
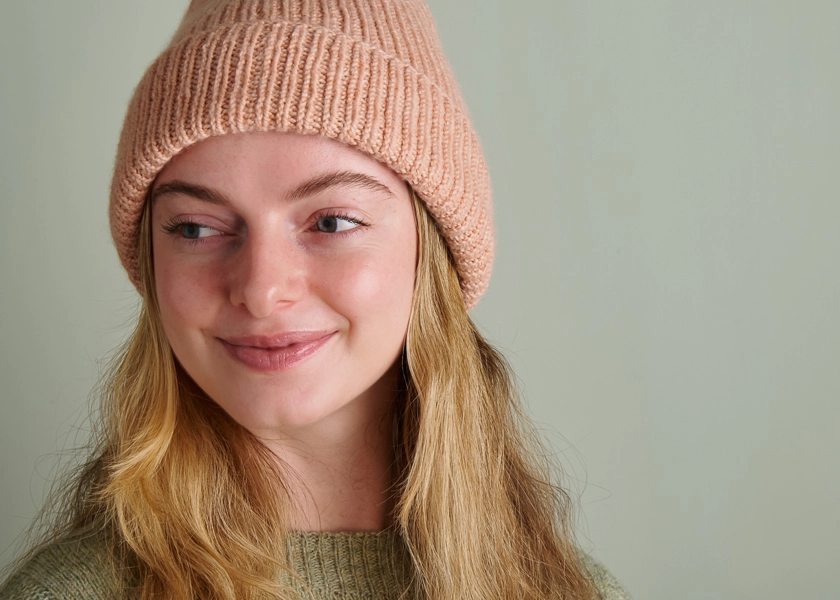
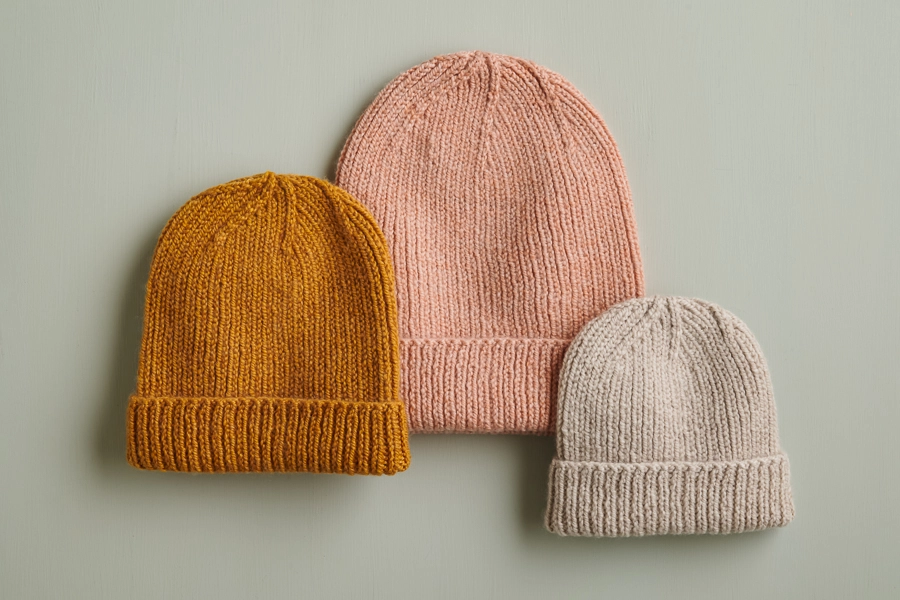
With over twenty colors, it’s hard to choose just one. But that’s okay because, with sizes from tiny baby to big grandpa, you’re going to want more than one of these … so pick a palette and cast on!

Originally designed by Purl Soho designer, Jake Canton. Click here to see even more of Jake’s designs!
Share your progress and connect with the community by tagging your pics with #PurlSoho, #PurlSohoBusyHands, #PurlSohoClassicRibbedHat, and #PurlSohoCashmereMerinoBloom. We can’t wait to see what you make!
Materials
- 1 (1, 1, 1, 2) skein(s) of Purl Soho’s Cashmere Merino Bloom, 75% extra fine merino and 25% cashmere. Each skein is 218 yards/ 100 grams; approximately 95 (140, 180, 200, 265) yards required
- US 3 (3.25 mm), 16-inch circular needles, for Adult sizes
- A set of US 3 double pointed needles, for all sizes
- Stitch markers, including one unique
We knit the following sizes in the following colors…
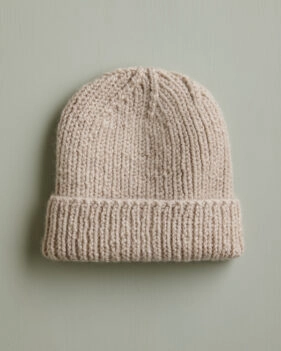
Baby: Wheat Flour
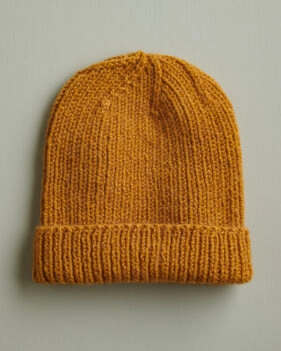
Kid: Warm Honey
Adult Medium: Conch Shell
GAUGE
32 stitches and 33 rounds = 4 inches in 1×1 rib, unstretched
SIZES
Baby (Kid, Adult Small, Adult Medium, Adult Large)
- Finished Circumference (unstretched): 10½ (12, 13½, 15, 16½) inches, comfortably stretching to approximately 13–16 (15–18, 17–20, 19–23, 21–25) inches
- Finished Height (uncuffed): 8 (9¼, 10½, 11½, 12½)
PATTERN
BEGIN
Cast 84 (96, 108, 120, 132) stitches onto double pointed or circular needles. We used a basic Long Tail Cast On.
Place unique marker and join for working in the round, being careful not to twist the stitches.
Round 1: *K1, p1, repeat from * to end of round.
Repeat Round 1 until piece measures 6¼ (7, 8¼, 9, 9½) inches from cast-on edge.
CROWN
NOTE: If using circular needles, change to double pointed needles when necessary.
Set-Up Round: Remove unique end-of-round marker, k1, replace marker for new end-of-round, *[p1, k1] 7 (8, 9, 10, 11) times, pm (place marker), repeat from * to end of round, omitting final stitch marker. [6 stitch markers placed, including unique end-of-round marker]
KID, ADULT SMALL, ADULT MEDIUM, AND ADULT LARGE SIZES ONLY
Round 1: [*P1, k1, repeat from * to 2 stitches before next marker, knit 2 together (k2tog)] 6 times. [6 stitches decreased]
Round 2: [*P1, k1, repeat from * to 1 stitch before next marker, k1] 6 times.
Round 3: [*P1, k1, repeat from * to 3 stitches before next marker, p1, k2tog] 6 times. [6 stitches decreased]
Round 4: *P1, k1, repeat from * to end of round.
Repeat Rounds 1–4 – (0, 1, 2, 3) more time(s). [84 stitches remain]
ALL SIZES
Round 1: [*P1, k1, repeat from * to 2 stitches before next marker, k2tog] 6 times. [6 stitches decreased]
Round 2: [*P1, k1, repeat from * to 3 stitches before next marker, p1, k2tog] 6 times. [6 stitches decreased]
Repeat Rounds 1 and 2 four more times. [24 stitches remain]
Next Round: *P1, k1, k2tog, repeat from * to end of round. [18 stitches remain]
Next Round: *P1, k2tog, repeat from * to end of round. [12 stitches remain]
Next Round: *K2tog, repeat from * to end of round. [6 stitches remain]
Cut yarn and thread tail onto a tapestry needle. Thread tail through remaining stitches. Pull taught and bring tail to inside of hat to weave in.
Weave in the ends and block as desired.


How many skeins for a baby hat and what length of #3 circular needles?
Hi Judy,
Thanks so much for your question! Just 1 skein of Cashmere Merino Bloom is needed for the baby size hat. And you would need US 3 (3.25 mm) double pointed needles for this size or, alternatively, US 3 (3.25 mm) circular needles that are long enough for magic loop if you’d prefer that technique more! Around a 40″ cable would be perfect for magic loop. I hope this helps!
All the best,
Cat
How do you suggest keeping the knit and the purl stitches even? Switching from one to the other often seems to result in a loose side of the knit stitch.
Hi Fran,
That’s a great question, and that’s actually a really common problem for many knitters to run into! If you knit using the English style (holding the working yarn in your right hand), you’ll get a bit of slack when switching between a knit and purl stitch. To minimize this slightly, you could try tugging a bit more on your working yarn as you work the purl stitches, but this won’t get rid of the extra space entirely. The best way to get around this effect is to try out continental knitting (holding the working yarn in your left hand). But that’s a big undertaking, so I totally understand if you’re hesitant to make that change! But it will tighten up the gap between your knit and purl stitches completely.
All the best,
Lili
Hi Fran,
I’m popping in here to add onto Lili’s response. It’s true that Continental knitters tend to have fewer tension issues switching between knits and purls, but English-style knitters can make these adjustments without learning a new style of knitting. Sometimes that loose side of the knit stitch you talk about is caused by knitting too tightly. I’d suggest knitting a bit more loosely, which may mean having to go down a needle size in order to still get the correct gauge. It may seem counter-intuitive that a loose stitch may be caused by tight knitting, but try easing up on your tension and let us know what you think!
Best,
Whitney
If I wanted to omit the folded brim, how much shorter should I knit it before working the crown? For example on the adult medium size?
Thanks
Hi Mary,
Thanks for reaching out! It looks like the cuff is folded up about 2 inches, so I’d say that you can knit the Adult Medium size to about 7 inches before beginning the crown. However, the very best way to determine where to begin the crown would be to try on the hat as you knit it! Once the cast-on edge just covers the bottom of your ears (or is however long you want it to be, for your preferred fit), then you can move to the CROWN section. Hope this helps!
All the best,
Lili
How long should the US 3 double pointed needles be? 6 “? 8”? Something else?
Thank you.
Hi Amy,
Thanks for reaching out. You can use either 6″ or 8″ DPNs! Some knitters have a preference for one length over the other, but either will work for this pattern. Hope this helps!
All the best,
Lili
Hi-
I have Purl Soho Plenty yarn and would like to know if you would be able to adjust the Classic Rib hat pattern to make the hat using PS Plenty? I made the Soft and Cushy hat using Plenty and have two other colors of Plenty that I would like to use in different patterns and this one looks good.
Hi Kari,
Thanks for reaching out. You can absolutely use Plenty for this hat, you would just need to adjust the cast-on number so that it comes to the correct size!
To figure out your cast-on number, you will want to first knit a gauge swatch in pattern with Plenty. Once you know how many stitches you are getting per inch, you can multiply that number by the finished circumference of the size you’re making and cast on the nearest multiple of 12. Then you can follow the pattern essentially as written!
The only par you’d need to change is the Set-Up Round for the CROWN. So here’s how to work Set-Up Round of CROWN with any multiple of 12 stitch count:
Set-Up Round: Remove unique end-of-round marker, k1, replace marker for new end-of-round, *[p1, k1] (cast-on / 12) times, pm (place marker), repeat from * to end of round, omitting final stitch marker which is end-of-round marker. [6 stitch markers placed, including unique end-of-round marker]
I hope this helps!
All the best,
Lili
I accidentally purchase a worsted weight yarn instead of DK for this pattern. Is it still recommended to follow the same pattern, or are there any modifications I should make?
Hi Anna,
Thanks for reaching out. You can absolutely use a worsted weight for this hat, you would just need to adjust the cast-on number so that it comes to the correct size!
To figure out your cast-on number, you will want to first knit a gauge swatch in pattern with Plenty. Once you know how many stitches you are getting per inch, you can multiply that number by the finished circumference of the size you’re making and cast on the nearest multiple of 12. Then you can follow the pattern essentially as written!
The only par you’d need to change is the Set-Up Round for the CROWN. So here’s how to work Set-Up Round of CROWN with any multiple of 12 stitch count:
Set-Up Round: Remove unique end-of-round marker, k1, replace marker for new end-of-round, *[p1, k1] (cast-on / 12) times, pm (place marker), repeat from * to end of round, omitting final stitch marker which is end-of-round marker. [6 stitch markers placed, including unique end-of-round marker]
I hope this helps!
All the best,
Lili
Hi, could I use Linen Quill or Linen Weight to knit this pattern? And if so, is there anything I should be aware of before I start besides being careful about my gauge?
Hi Jackie,
There are two routes you could go to use a fingering weight yarn like Linen Quill or Line Weight for this pattern. Because the hat is designed for a DK weight yarn, you could either use a fingering weight yarn at another gauge and adjust the stitch count, or you could hold it double at the same gauge.
If you opt for the first method, then here’s how to figure out your cast-on number: You will want to first knit a gauge swatch in pattern with the alternate yarn. Once you know how many stitches you are getting per inch, you can multiply that number by the finished circumference of the size you’re making and cast on the nearest multiple of 12. Then you can follow the pattern essentially as written!
The only part you’d need to change is the Set-Up Round for the CROWN. So here’s how to work Set-Up Round of CROWN with any multiple of 12 stitch count:
Set-Up Round: Remove unique end-of-round marker, k1, replace marker for new end-of-round, *[p1, k1] (cast-on / 12) times, pm (place marker), repeat from * to end of round, omitting final stitch marker which is end-of-round marker. [6 stitch markers placed, including unique end-of-round marker]
If you opt instead to hold two strands of a fingering weight yarn at once, then you can follow the pattern as written! Just be sure to knit up a gauge swatch, since you may need to size up or down your needles in order to get the correct gauge.
All the best,
Lili
I have knit the 9 inches (120 stitch size) to the set up round. I am confused. instructions say to (p1k1)10 times and place marker. repeat to end of round. Putting a marker every 10 times, I have 12 markers. What am I interpreting wrong?
Hi Beth,
Thanks for reaching out! You’ll actually be placing a stitch marker every 20 stitches, not every 10 stitches. That’s because you repeat a sequence of two stitches (p1, k1) 10 times before placing each marker. Because 2 x 10 = 20, the stitch marker will actually fall after every 20th stitch. Hope this helps clarify things!
All the best,
Lili
Hi, I’d like to make this hat using the Nigh DK instead. I’m thinking I wouldn’t have to make any adjustments since they are both light worsted/DK, but would you please confirm that? Also, I know you always say that you overestimate yardage on projects–do you think I could eke out a medium sized Classic Ribbed hat from one skein of Nigh?
Thanks!
Hi Melissa,
Thanks for writing in! Nigh would be perfect for this pattern. I’d just recommend knitting a gauge swatch before casting on your project, to make sure you get the correct gauge. You may need to size up or down your needles!
I do think it will be possible to complete the Adult Medium size with just one skein of Nigh! However, I would recommend purchasing 2 just in case you need a second one (this way, you’ll be sure to get the same dye lot). We accept returns of skeins in their original condition, so if you purchase 2 skeins, I’d recommend only winding each one until you’re certain you need to use it. That way, you can return the extra one for store credit (or a refund within 30 days of purchase) if you don’t end up using it!
All the best,
Lili
Hello! Is it possible to substitute the yarn for an cotton yarn?
Is that possible? I’m really allergic to wool.
Thank-you very much!
Sincerely, Annie
Hi Annie,
Thanks for reaching out, and you can absolutely use a cotton yarn for this project! I’d recommend using Serif, which is a DK weight yarn like Cashmere Merino Bloom, and it’s 100% cotton. As always though, we recommend knitting a gauge swatch before casting on your project, especially when you are substituting yarns. You may need to size up or down your needles in order to get the correct gauge!
I also wanted to mention one more thing! Most people who are sensitive to normal wool do not have the same reaction to fibers like merino wool and cashmere. Both merino and cashmere fibers are so fine that they bend to the touch, rather than sticking up and scratching. So if these are the symptoms that you have with wool, they may actually be perfectly fine with Cashmere Merino Bloom (and other merino or cashmere yarns)!
All the best,
Lili
Hello!
Thank-you soooo much for your wonderful reply!
I’ll probably use serif!!
The info on merino and cashmere is really interesting!
I really appreciate it!
Sincerely, Annie
I’d like to make this hat using Worsted Merino Twist but I’m not sure Purl SoHo is still carrying it? It was such a great wool yarn; I will miss it. Please advise. Thank you; your comments are always so helpful!!
Hi Gail,
Thanks for reaching out. I’m so sorry to say that we’ve discontinued Worsted Twist! While we loved this yarn, not everybody else felt the same way, so we’ve had to make the sad decision to stop producing it. We hope you can understand!
Apologies for the disappointing news, but please let us know if you have any other questions or concerns.
All the best,
Lili
Should I knit a baby size or a kid size for a 6mo? Thanks!
Hi Marian,
Thanks for reaching out. I’d recommend knitting the Kid size! That’ll give them room to grow into the hat and wear it for a much longer time!
All the best,
Lili
Hi!
Would I be able to use Good Wool yarn for this pattern? If so, are there any adjustments I should make?
Hi Ella,
Thanks for reaching out. You can absolutely use Good Wool for this hat, you would just need to adjust the cast-on number so that it comes to the correct size!
To figure out your cast-on number, you will want to first knit a gauge swatch in pattern with Plenty. Once you know how many stitches you are getting per inch, you can multiply that number by the finished circumference of the size you’re making and cast on the nearest multiple of 12. Then you can follow the pattern essentially as written!
The only part you’d need to change is the Set-Up Round for the CROWN. So here’s how to work Set-Up Round of CROWN with any multiple of 12 stitch count:
Set-Up Round: Remove unique end-of-round marker, k1, replace marker for new end-of-round, *[p1, k1] (cast-on / 12) times, pm (place marker), repeat from * to end of round, omitting final stitch marker which is end-of-round marker. [6 stitch markers placed, including unique end-of-round marker]
I hope this helps!
All the best,
Lili
Hi, I’m a bit confused about the size directions for the crown. I’m knitting an Adult Medium and there are decreasing directions for those rows, and then there are directions of All Sizes, which seem a bit different. Do I start with the Adult Medium directions and then switch to All Sizes directions at a certain row?
Thank you!
Hi Lisa,
Thanks for your question! Yes exactly, for the crown shaping, you will knit the set-up round, then knit the Adult Medium directions, and then finally move on to the “ALL SIZES” section. We’ve organized the pattern this way because anyone who is knitting the Baby Size hat can skip ahead to the “ALL SIZES” instructions. I hope this helps!
All the best,
Cat
(Just for reference, I’ve knitted since I was a preteen and am now in my 70s). This hat is gorgeous! It takes a little longer than a lot of hats because it’s on such small needles. But it’s well worth it! I have just one comment/suggestion. Look carefully at the sizes. An Adult Large will fit most women. This size calls for 2 skeins of the Cashmere Merino Bloom yarn ($43 each). I knitted exactly the last 3 short rounds (54 stitches) from the second skein. Had I known this, I would have probably eliminated the last round before the ALL SIZES instruction in the crown where you decrease on every row. This would have saved me 84 stitches and $43! So don’t wind your 2nd skein into a ball until you see if you need it!!
Hi Bobbi,
Thank you for writing in! That is such great advice for other knitters making this hat as well!
Happy knitting,
Gavriella