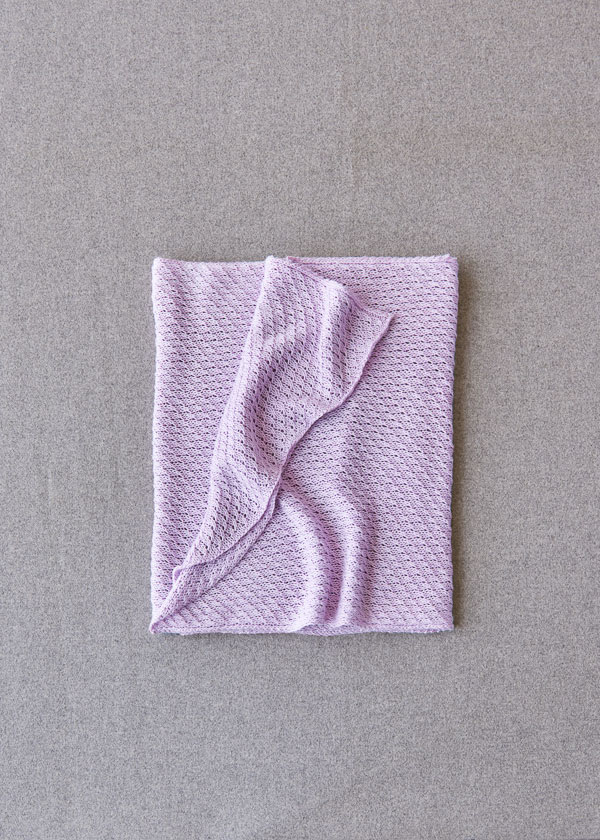


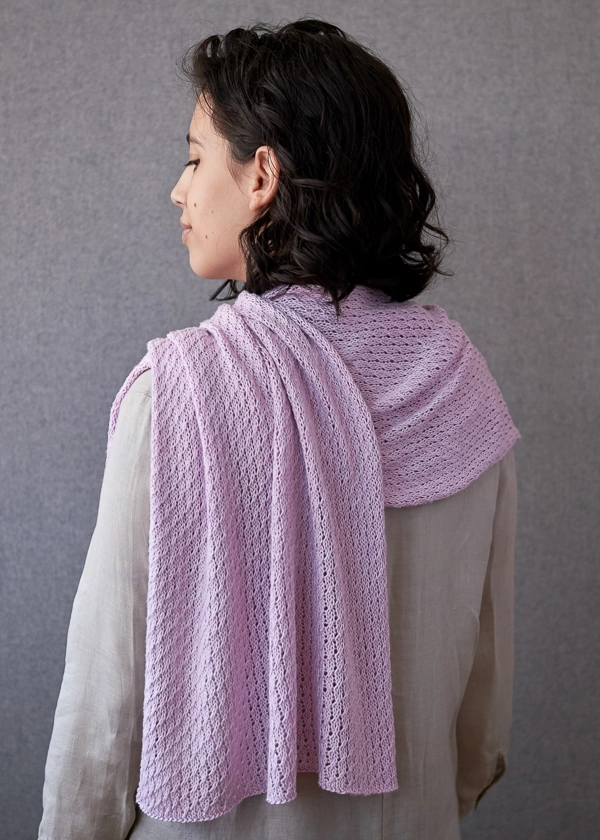
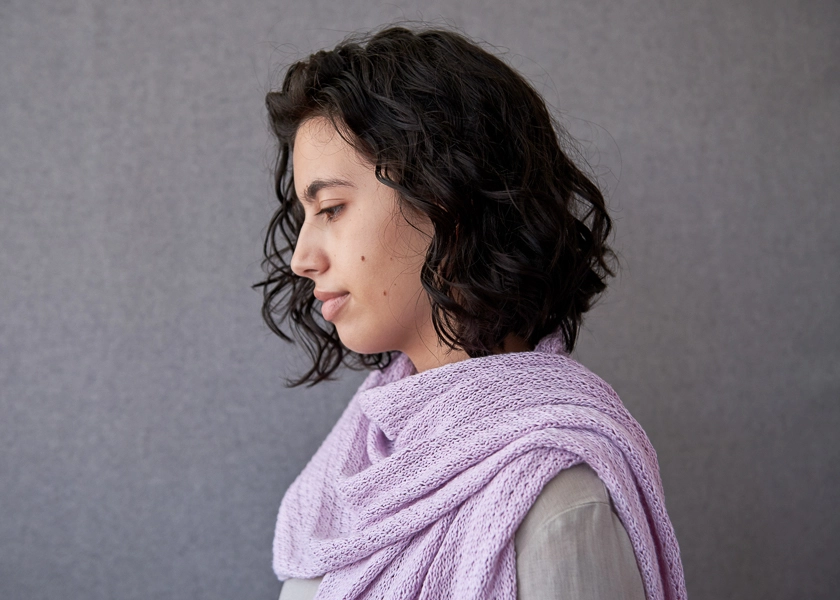
Floret Wrap
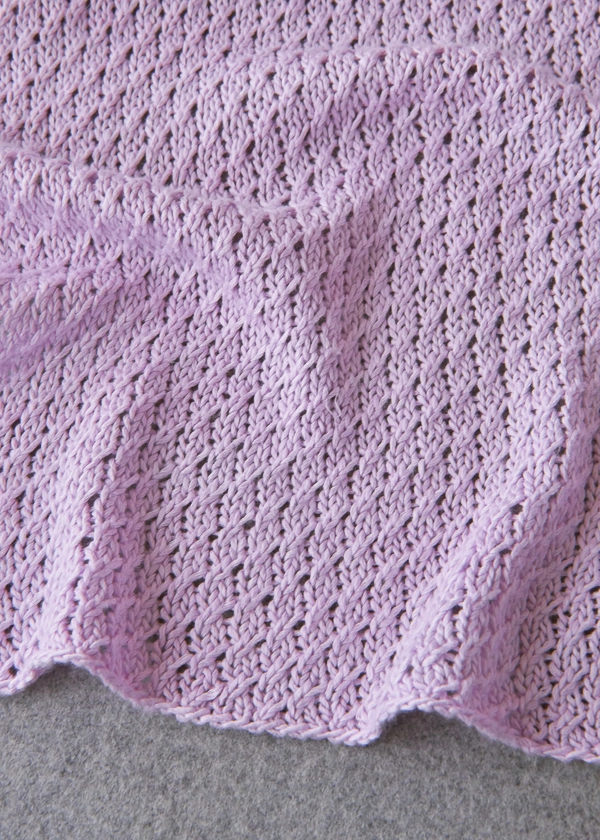
Most often stitch patterns suggest rather than depict, and to us, this one suggests a dense field of breezy blossoms. We can’t help but imagine the Brooklyn Botanic Garden’s much loved Bluebell Wood, whose explosion of blooms we all just missed. Perhaps our lovely Floret Wrap will help fill the void!
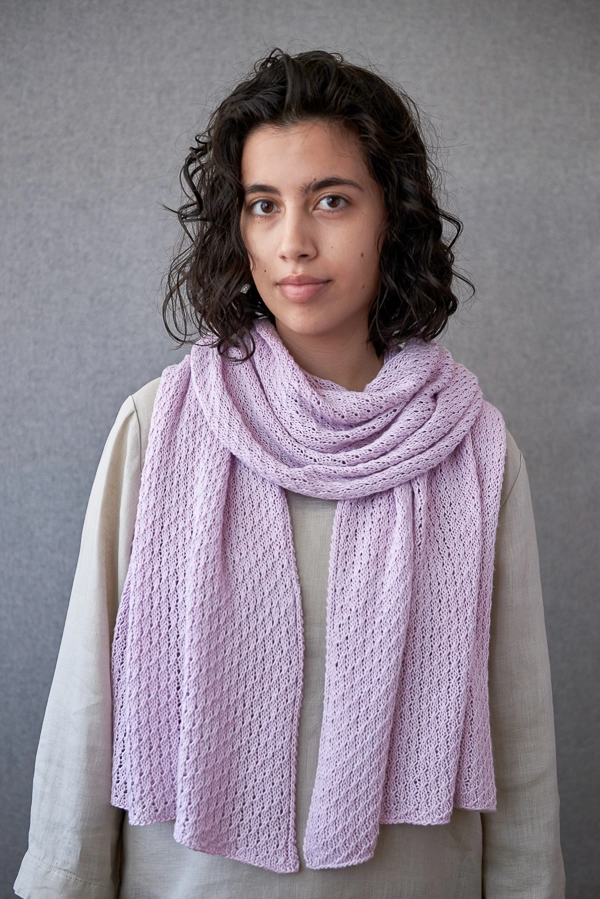
The trick for achieving all this charming texture is a simple right twist. Kind of like a one-stitch cable but without the fuss of putting stitches on hold, this technique creates a gentle diagonal sweep, like flowers bowing under the wind.
For our Floret Wrap we used Purl Soho’s Burnish. A rayon made from bamboo, it is soft, slightly shiny, and wonderfully drape-y, like silk but super durable and… a bonus for some, a must for others… 100% vegan!
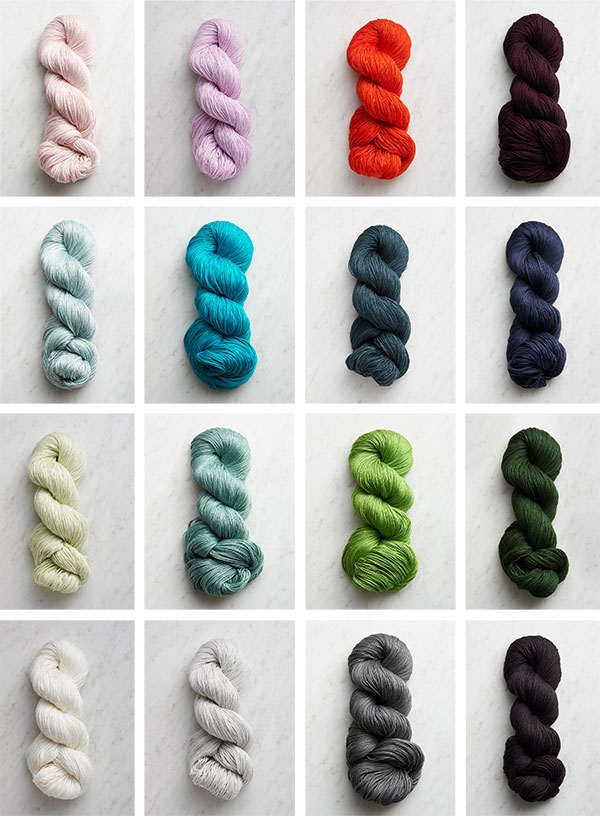
It’s easy to conjure spring blossoms when you choose a soft lavender, like this sweet Sweet Pea, but feel free to follow your own path: Midnight Blue for a rippling sea, River Rock for the bark of an ash tree, or how about Pale Celery for young tendrils crawling up the garden wall? Lovely!
Designed by Purl Soho designer, Jake Canton. Click here to see even more of Jake’s designs!
Share your progress + connect with the community by tagging your pics with #PurlSoho, #PurlSohoBusyHands, #PurlSohoFloretWrap, and #PurlSohoBurnish. We can’t wait to see what you make!
Materials
- 4 skeins of Purl Soho’s Burnish, 100% rayon from bamboo. Each skein is 339 yards / 100 grams; approximately 1,306 yards required. We used the color Sweet Pea. (NOTE: We no longer offer Burnish, but choose from one of our other fingering/sport weight yarns.)
- US 5 (3.75 mm) circular or straight needles
Gauge
24 stitches and 36 rows = 4 inches in stitch pattern
Size
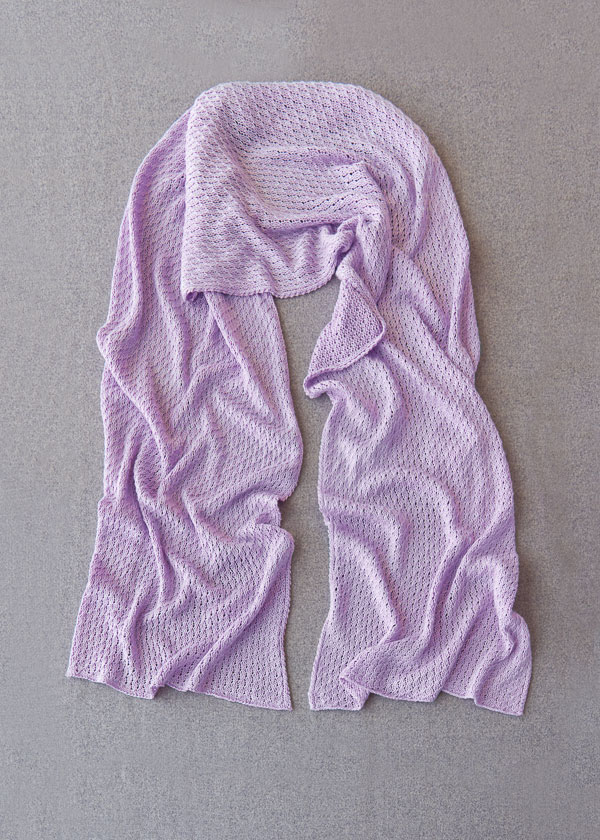
Finished Dimensions: 18 inches wide x 72 inches long
Notes
Stitch Multiple
This stitch pattern works over a multiple of 4 stitches of stitches.
RT (Right Twist)
Knit 2 stitches together, leaving both stitches on the left needle; knit into the first stitch again and let both stitches fall of the left needle. There are two new stitches on the right needle.
For a step-by-step video tutorial of how to work this stitch pattern, please visit our Mock Cable Rib Tutorial.
Pattern
Cast on 108 stitches. We used a basic Long Tail Cast On.
Row 1 (wrong side): K1, p1, k1, purl to last 3 stitches, k1, p1, k1.
Row 2 (right side): K2, p1, *RT (see Notes), k2, repeat from * to last 5 stitches, RT, p1, k2.
Row 3: Repeat Row 1.
Row 4: K2, p1, *k2, RT, repeat from * to last 5 stitches, k2, p1, k2.
Repeat Rows 1-4 until piece measures 72 inches from cast-on edge, ending with Row 3.
With the right side facing you, bind off knitwise.
Weave in the ends and wet block.


Do you think I can use Quill Linen with this pattern?
Hi Christine,
What a lovely idea! Linen Quill is just a bit thinner than Burnish, so I would recommend knitting a gauge swatch on a US 3 and US 4 to see which you prefer, and to measure your stitches per inch once you have decided which needle to use. You can then multiply your stitches per inch by 18 inches and round to the nearest multiple of four to determine how many stitches to cast on. Linen Quill has more yardage than Burnish, but you will need to use more yardage when knitting at a smaller gauge, so I would still recommend getting four skeins. You may not need the fourth one, but as long as it hasn’t been wound, you can return it for store credit!
I hope that helps, and happy knitting!
Julianna
What a lovely pattern and stitch for you to share. Thank you so much!
I totally love this pattern! But I don’t wear wraps. If I were to make a 10-inch wide winter scarf using worsted weight yarn and following this pattern, about how many stitches should I cast on?
Hi Amy,
Thanks for reaching out, and what a beautiful scarf idea! Since this stitch has a different gauge than stockinette and we haven’t tried it in worsted weight, I can’t say for sure, but it should be fairly straightforward to figure out from a swatch! I would recommend knitting a swatch in pattern on a US 8 or 9, or a needle that is one size larger than what is recommended on the yarn label. You can then multiply your stitches per inch by 10 inches and round to the nearest multiple of four. Since this stitch is mainly stockinette stitch you may find that your swatch curls up in a springier or wool-based yarn, but you can also see how your swatch turns out after blocking and decide if you want to add a border of garter or seed stitch to prevent this.
Happy knitting, and please do let us know how it turns out!
Julianna
Based on Amy’s question how would change the number of skeins required?
Hi Sue,
Unfortunately, it’s also really hard to estimate yardage when changing the yarn weight so drastically without knitting a swatch and weighing it! Based on similar sized scarves in Worsted Twist, you will probably need about 3 skeins, or 490 yards, but you might want to order an extra skein just to be on the safe side!
Best,
Julianna
Before I try this lovely-looking pattern, a question: is it possible to tink a right twist (RT) stitch? I had another pattern that used this stitch, and I hadn’t created a lifeline. I then discovered that there are no instructions anywhere I could find as to how to tink this stitch. I would be more willing to try this if I knew I could back up from a quickly-caught mistake, which is easier than ripping out rows.
Hi KJ,
Great question! If you have ever tinked a k2tog, the process will be quite similar – though it does look a little different! Viewing your work from the right side, at the base of the left-most stitch of the RT you should be able to see the original k2tog. To take out the stitch safely, you can insert your left hand needle into the center of this k2tog from front to back, making sure to grab both stitches. You can then take your right-hand needle out of the two RT stitches and unravel them, leaving the original two stitches on the left-hand needle!
I hope that clears things up!
Julianna
I think a baby blanket in this stitch would be lovely. Simple, with the same borders as the wrap. What dimensions do you suggest and how many skeins would it take? If Burnish is not appropriate for a baby blanket, what yarn do you have that is? I guess the gauge can be close but not identical since size for the finished blanket is flexible.
Thank you.
Dana
Hi Dana
Thanks for writing in! This stitch would look great in a baby blanket! If you used Burnish which you can machine wash on delicate, and lay flat to dry, 4 skeins would be close to a 36″ X 36″ blanket. Cast on of 210 stitches and follow the pattern for the wrap. Another great option would be Cotton Pure . This would require 5-6 skeins for around the same size blanket. I would recommend doing a gauge swatch to determine your correct needle size and stitches per inch, and multiply by the number of inches wide you want your blanket to be. This pattern is a multiple of 4 plus the 6 edge stitches. I hope this helps!
Happy knitting
Jessica
What a pretty pattern – and it looks so soothing! How is Burnish to work with – is it very slippery, and does it have a tendency to be “splitty” ? Thank you Purl Soho for another great design!
Hi Bonnie,
Thank you so much for the kind words! Some knitters do find Burnish to be a little slippery to work with, though not as slippery as silk, and it can tend to split. You might want to play around with your knitting needles while you are swatching to find the material and type that works best for you with this yarn! Bamboo needles usually have more grip so your stitches will feel more secure, though for some knitters they will have too much grip when working with a non-stretchy yarn like Burnish. How pointy your needles are can also make a big difference! I am usually a fan of extra sharp needles, like Addi Turbo Rockets, but sometimes find that sharp needles are more likely to go through the middle of splitty yarn. Switching to duller needles, like original Addi Turbos, makes sure my needles go into the stitch instead of the yarn!
I hope that helps, and happy knitting!
Julianna
I have some skeins of burnish that I bought for a different project but I just love this stitch. I think I’m going to use it to make rectangles to sew into a loose fitting T-shirt.
Hi. I am new to knitting and after reading a few patterns, I have noticed that most state to block the finished item before use. Does this mean that blocking would have to take place after each time the knitted item is washed? I haven’t been able to find this info on any website which I have been to. BTW your website is wonderful and I do enjoy reading the comments and your suggestions/answers. Thank you for all the inspiration that your website promotes.
Hi Sharon,
Great question! The answer is both yes and no, and depends very much on the nature of the project and the yarn used. The initial transformation that results from the first time something is blocked is usually quite dramatic and semi-permanent, so for plainer stitch patterns that naturally lie flat such as garter or seed stitch, as well as garments that have built-in structure, like sweaters, a full blocking is usually not necessary for future washes. After hand washing, most items just need to be re-shaped while wet and allowed to air dry, and will look just as good as new without pins or blocking wires! However, for some stitch patterns, you do have to take more care and may even need to repeat the full blocking process. Lace and cables both tend to collapse or pull in when they get wet, and stockinette-based stitches that are prone to curling up will reactivate when wet, especially in wool or wool blend yarns, so they require more aggressive stretching and pinning.
In general, you won’t really know if you need to re-block something until the next time you wash it! For this particular wrap, although the stitch pattern might be prone to curling up, Burnish responds very well to blocking and usually holds its shape without much work, so you will probably only have to fully block it once!
I hope that helps!
Julianna
The Floret Wrap pattern is lovely, and I was wondering beside Cotton Pure, Burnish, or perhaps Linen Quill, what other fall or winter type yarns from Purl Soho I could use for this pattern that would have a nice drape like Burnish?
Thank you, Carolyn
Hi Carolyn,
Thanks for writing in! I think Season Alpaca would be absolutely gorgeous in this stitch! Baby alpaca is not only wonderfully soft and drapey, but it’s also extra warm and cozy. It is a sport weight yarn, just like Burnish, but I would still recommend knitting and blocking a gauge swatch to see if you will need to adjust the cast on before you dive in!
Happy knitting!
Julianna
I am confused regarding the ending of row 2. It says repeat pattern to last five stitches. Isn’t RT,p1, k2 only four stitches. Please help me understand. Thank you!
Hi Jill,
Thanks for writing in! It sounds like you might not be reading the repeat correctly! At the beginning of this row, you will knit 1 and purl 1 once. The repeat then starts at the asterisk, which has you work a RT and k2, then repeat back to the asterisk only, so you will be repeating *RT, k2* until you get to the last five stitches of the row. At that point, you will stop repeating *RT, k2* and will instead work RT, p1, k2 once.
I hope that clears things up!
Julianna
In the patterns, it says for Row 2, k2, p1 at the beginning of the row. But in your reply to Jill above, you say to k1, p1 at the beginning of the row. I’m confused!
Hi Carol,
Thanks for reaching out! Yes you are correct, I believe that may have been a typo! You will be k2, p1 at the beginning of row 2!
Sorry for any confusion!
Warmly,
Gianna
Thanks, Gianna! 😁
Can this be knitted up in your line weight yarn, or is the yarn too fine for it? If so, what size needles would be best?
Hi Debbie,
Thanks for reaching out! We haven’t tried it ourselves yet, but you definitely can give Line Weight a go. Just note that it will likely be a bit different because of the size and fiber content, so it probably won’t drape the same way as the sample. If you’re excited to try something different though, I’d recommend knitting a gauge swatch on a US 2 and US 3 needles (since Line Weight is thinner than Burnish and closer to a fingering weight than a sport weight) to see which you prefer, and to measure your stitches per inch once you have decided which needle to use. You can then multiply your stitches per inch by 18 inches and round to the nearest multiple of four to determine how many stitches to cast on.
I hope that helps!
All the best,
Zha Zha
Hi,
I love this pattern! So pretty. Not a crazy amount of rows in the pattern and enough interest on the repeat. Lovely.
I wanted to make my mother a scarf for her birthday using this pattern. So a smaller version of the wrap, maybe closer to 10-12 inches wide.
I would certainly be grateful if you could tell me what the repeat is so I could make it less wide.
I will swatch first, but any advice you can give would be appreciated!
Thanks so much.
Tina
Hi Tina,
Thanks for reaching out, and what a thoughtful present! This wrap can be knit with any multiple of 4 stitches. I hope that helps you customize your scarf to the perfect size!
Best,
Julianna
Perfect, thank you!
Hey my shawl keeps curling. Is there a way to prevent that?
Hi Simran,
Thanks for reaching out! This is normal for a stockinette-based stitch like we used for this wrap, but it should block out nice and flat! You can always check before knitting any farther by placing your stitches on a piece of scrap yarn and blocking what you have done to see how it will turn out.
I hope that helps!
Julianna
What Length circular needle should I use for this project?
Hi Lisa,
Thanks for reaching out! I would recommend a 20″ or 32″ circular needles for this wrap!
All the best,
Gianna
This is so pretty! I am really taken with the colors and texture of Cattail Silk. Do you think it would work up well in this pattern?
Hi Heidi,
Thanks for reaching out! I think Cattail Silk would be a great option for this wrap! I do recommend working a gauge swatch prior to starting to insure that you are consistent with the pattern or if there are any slight adjustments needed!
I hope this helps!
Warmly,
Gianna
Dear Purl Soho
I cannot get your stitch instructions to match the look on the pictures. It does not look like mock cable rib. Is it the right pattern you link too?
Hi Annemette,
Thanks for reaching out! Yes, the written instructions and our Mock Cable Rib tutorial are both accurate to the photos we have provided! I recommend checking out the tutorial if you haven’t already and if you are still having problems with the stitch feel free to send our team some photos of your work at customerservice@purlsoho.com and we have trouble shoot further from there!
Warmly,
Gianna
I have three skeins of Burnish and am thinking of making a slightly smaller version of this lovely wrap. However, I’m having trouble recalculating the measurements and wondered if you could advise. Given that my gauge is pretty accurate, can you give me a rough idea how long the wrap likely to be if I cast on 96 stitches? Or would you suggest casting on fewer stitches? If it’s too small I will buy another skein but if I can get a reasonable sized wrap from three skeins that would be ideal given that the cost of freight to Australia is quite high. Thank you! Deb
Hi Deb,
Thanks for reaching out! For the wrap as is, we used approximately 1,306 yards which leaves only 50 yards leftover of the 4 skeins. To use 3 skeins I would give you 1,017 yards, so the pattern as written would come up a decent amount shorter. I think if you cast on 96 stitches (approximately 16″ wide) that would give you a bit more length on the end. You could even go down to 84 stitches (approximately 14″ wide) for even more insurance for a decent length!
I hope this helps and feel free to reach out with any more questions!
Warmly,
Gianna
Hello! I am trying out this pattern, but noticed that I am getting one side without a pattern and the other side has a pattern, though not quite like the pictures. I am sorry that it’s not a very clear explanation, but I was wondering if you had any idea of what was going on? Is this supposed to be reversible when finished? Thank you!
Hi Morgan,
Thanks for reaching out! There is a clear right and wrong side with this stitch pattern, it wont look the same on both side! However, if your “right side” is not looking the same as the pattern, feel free to send us a few photos of your work to our email customerservice@purlsoho.com and we can troubleshoot further from there what may be happening!
Warmly,
Gianna
Hello Gianna,
Thank you for your response! I figured out what I was doing differently and got it to work. Love the patterns, tutorials, and shop. Thank you!
Kind regards,
Morgan
Hi Morgan,
That’s great! Happy to hear it all worked out.
Take care, and happy knitting!
Kelsey
Oi, tradução p/português é ruim. Há anos tento reencontrar este ponto magnífico. Não recordo se é o mesmo visto há anos atrás. Será que consigo um vídeo do padrão? Grata.
Hello!
Thanks for reaching out. I’m afraid that we do not have a video for this entire stitch pattern though! However, it consists of knit stitches and purled stitches as well as a Right Twist, which we have a tutorial for here. After looking into this tutorial, hopefully the pattern as a whole will feel less daunting!
You could also consider signing up for 1-On-1 Project Help, where we’d be happy to demonstrate working this stitch (in English) over Zoom!
All the best,
Margaret
Good morning! I just found this pattern..love it!
Would this pattern work with DK yarn?
Thanks for your help!
Hi Gayl,
Thanks for reaching out. You can absolutely use a DK weight yarn for this pattern, you would just need to change the stitch count in order for it to come out with the correct dimensions!
To figure out your cast-on number, you will want to first knit a gauge swatch in pattern with the yarn you plan on using. Once you know how many stitches you are getting per inch, you can multiply that number by the width that you would like and cast on the nearest multiple of 4. Then you can follow the pattern as written!
All the best,
Lili
Thank you so much!
Love this pattern. Swatched it with Santolina and loved the feel. Do you think that would work nicely for a shawl I want to make for my son’s fiancée for wedding related events? I think I’d need three of four skeins.
Hi Catherine,
We are so happy to hear you will be knitting this pattern for such a special time! You should get a wonderful result with Santolina for this wrap. We always recommend making a gauge swatch with the yarn you intend to use with the pattern to be sure you have enough and are able to get the same size as the pattern. From my quick calculation, you will need a full 4 skeins for this pattern. I hope this helps but if you have any other questions, please let me know!
Happy knitting,
Gavriella
Thanks!