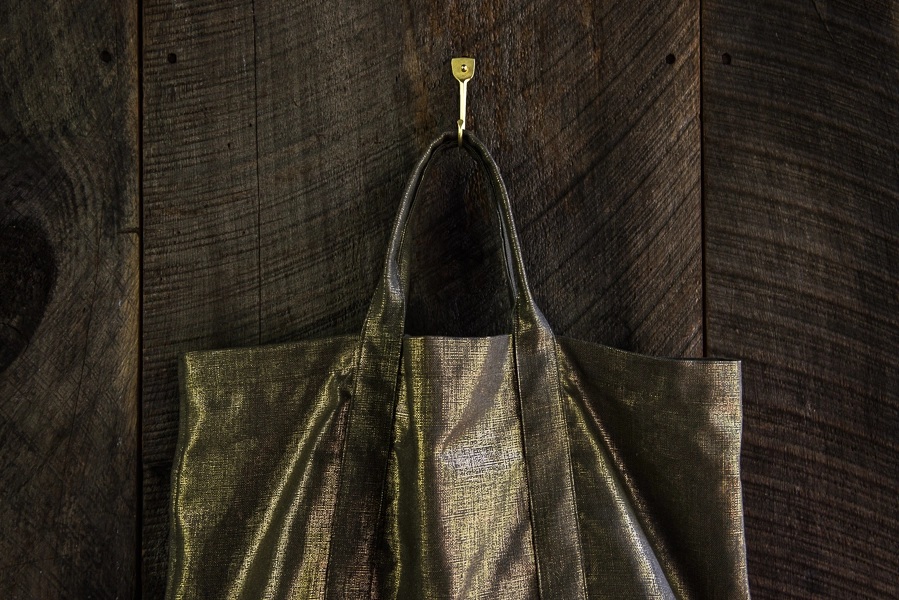
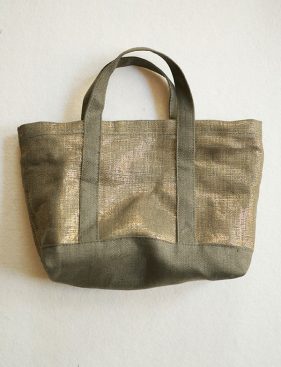
Hand Tote in Mineral Linen
I have to laugh at myself sometimes when I look at the number of bags hanging in my closet. Yet somehow, there always seems to be missing just the bag I need. The one that will fit all my stuff but that won’t cramp my style no matter where I’m going. Our Hand Tote in Mineral Linen answers that need!

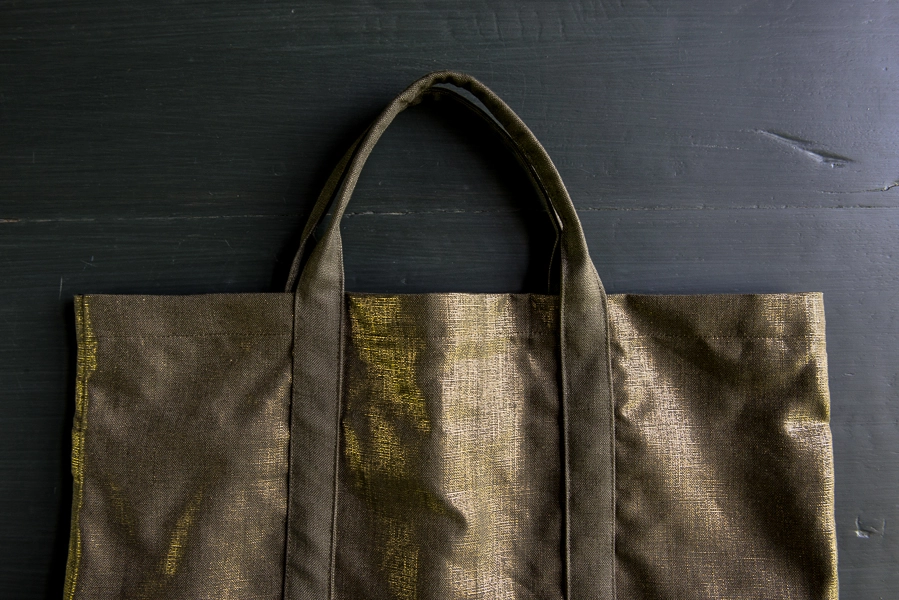
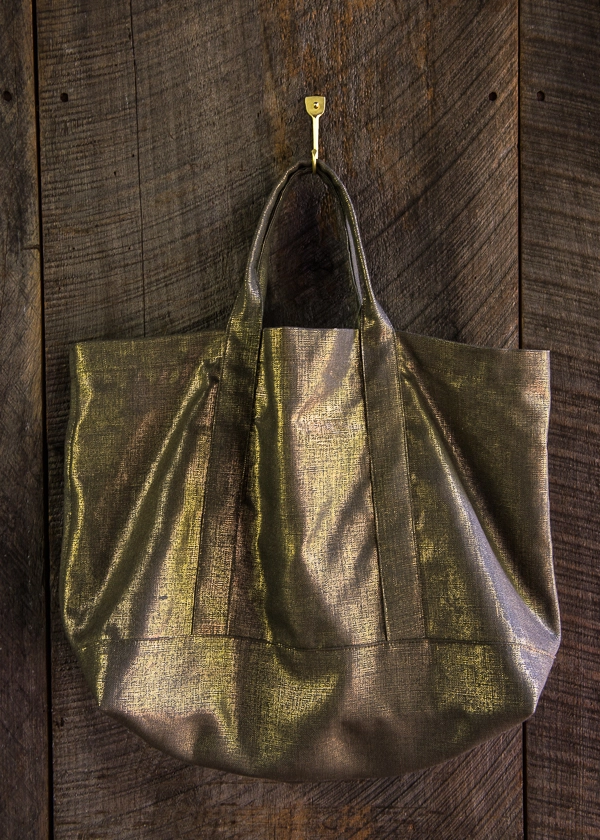
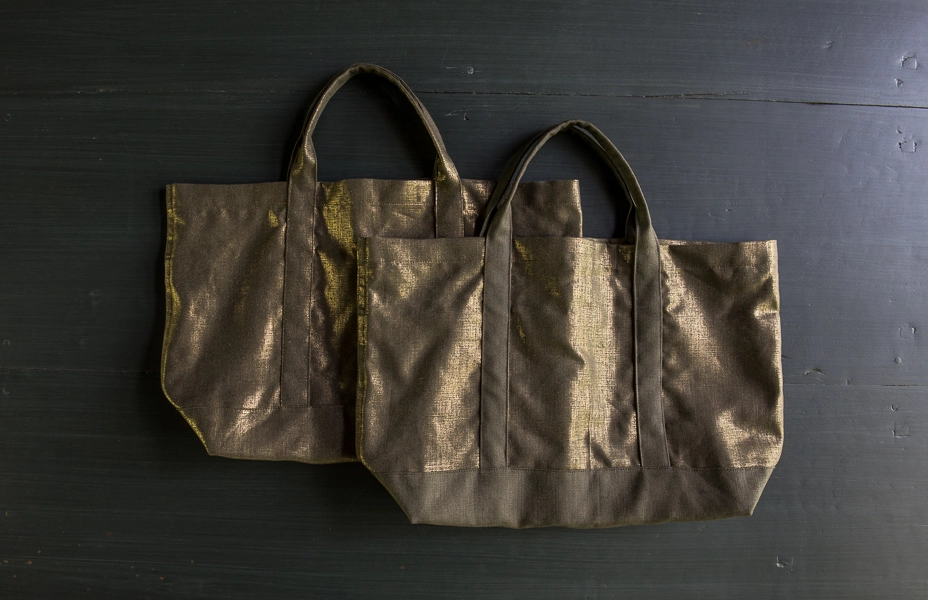
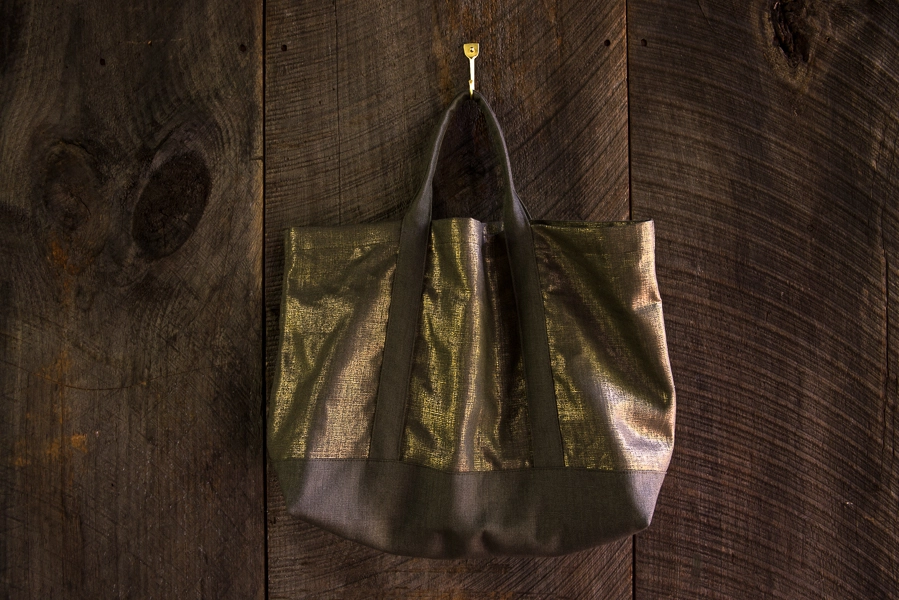
We made two versions of our Hand Tote, both in Purl Soho’s heavyweight Mineral Linen. One version shows only the fabric’s shiny metallic side, and the other plays with both the metallic and matte sides. For both versions, we lined the interior with pockets for pens, phones, glasses, and keys (all the things I usually lose!), while inside is roomy enough for everything else. Nice, short handles are just the right length to grab and go!

I’ve used this Hand Tote every day since I made it: to work, to the farmers’ market, out to dinner, and even to a picnic in the park. I might just be ready to toss out some of those other totes hanging around my closet… but probably not! -Corinne

Materials

- 1 yard of Purl Soho’s Mineral Linen, Heavyweight, 58 inches wide. We used the color Bronze. (NOTE: Mineral Linen, Heavyweight is no longer available.)
- 1 yard of Purl Soho’s Bias Tape By the Yard. We used the color Black.
- One 110-yard spool of Gutermann’s Cotton Sewing Thread in a color to coordinate with the fabric. We used color 2850.
Size
Finished Dimensions: 14 inches wide x 11 3/4 inches high x 4 1/4 inches deep
Notes
Do not prewash the fabric. The recommended care of the finished Tote is dry clean only.
Iron Mineral Linen either with the non-metallic side facing up or if you’re ironing on the metallic side, use a pressing cloth.
We show two versions of the Tote in this post: Version A uses the metallic side of the Mineral Linen as the right side throughout the pattern, and Version B uses the non-metallic side as the right side for the contrast Accent Panel and Handles. We show Version B in our instructional photos.
Pattern
Cut
- One 19 ½ x 31 ½- inch rectangle. This is the Body. The metallic side of the Body is the right side.
- One 19 ½ x 10- inch rectangle. This is the Accent Panel. For Version A, the metallic side of the Accent Panel is the right side. For Version B, the non-metallic side is the right side.
- One 19 ½ x 25- inch rectangle. This is the Inner Pocket. The metallic side of the Inner Pocket is the right side.
- Two 4 ½ x 33 ½- inch rectangles. These are the Handles. For Version A, the metallic side of the Handle is the right side. For Version B, the non-metallic side is the right side.
Use the cutting layout below to cut the 5 pattern pieces from the fabric.

Prepare the Rectangles

Body
Fold one short side of the Body ¼ inch toward the wrong side and press. Fold that same side 1 inch toward the wrong side, press, and pin. Sew the hem down with an edgestitch. Repeat on the other short side.
Inner Pocket
Repeat as for the Body piece.
Accent Panel
Fold one long side of the Accent Panel ¼ inch toward the wrong side and press, but do not sew. Repeat on the other long side.
Handles
Fold one Handle in half lengthwise, wrong sides together. Press to create a crease. Open up the fold.

Now fold the two long, raw edges to meet the center crease and press.
Fold the Handle in half lengthwise, along the original crease, so that the raw edges are encased in the fold and press.
Repeat with the other Handle.
Piece the Tote
Fold the Body in half so that its two hemmed edges meet. Press to create a crease and unfold.
Fold the Accent Panel in half so that its two folded edges meet. Press to create a crease and unfold.

With right sides facing up, stack the Accent Panel on top of the Body so that the creases of the two pieces align. Pin together and sew along the crease line.

Fold the Inner Pocket in half so that its two hemmed edges meet. Press to create a crease and unfold.
With wrong sides facing each other, stack the Inner Pocket on top of the Body so that the creases of the two pieces align (make sure that the Accent Panel also lies flat). Pin together and sew along the crease line.
Attach the Handles
Lay the Tote so that the right side of the Body is facing up and all layers lie flat.

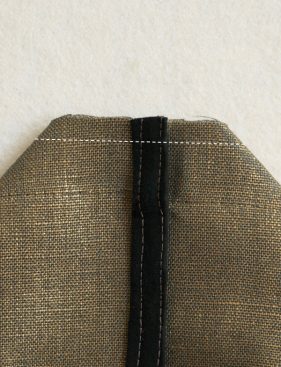
Align one Handle piece so that one short edge runs parallel to and 1 inch down from the folded edge of the Accent Panel and the outer long, folded edge runs parallel to and 6 ¼ inches in from the side edge of the Body. Pin in place.
When you get to the top edge, loop the Handle around and reverse direction, so that the Handle’s outer folded edge runs parallel to and 6 ¼ inches in from the other side of the Body piece and its short end overhangs the Accent Panel by 1 inch. Make sure not to twist the Handle. Pin in place.

Fold the Accent Panel back and edgestitch the Handle to the Body (and the Inner Pocket where the two pieces overlap). Sew along the entire length of both long, folded edges, from end to end.
Repeat with the other Handle on the other side of the Body.

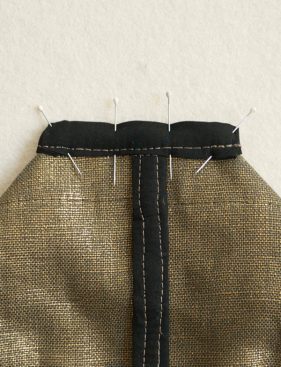
Lay the Accent Panel flat, so that it covers the short, raw edges of one of the Handles. Pin in place and sew down with an edgestitch, sewing through all layers of fabric.
Repeat on the other side of the Accent Panel.
Sew the Side Seams

With right sides together, fold the Tote in half so that the hemmed edges of the Body meet at the top and the raw, side edges are aligned. Pin the side edges together, pinning through all layers. Sew along the pinned edges with a ¼-inch seam allowance.
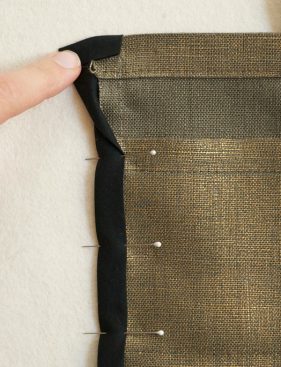
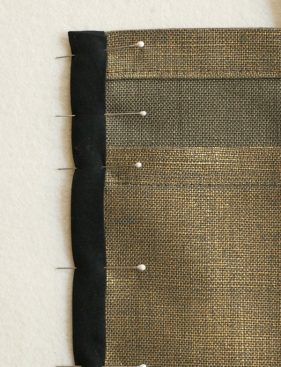
Starting at the top of the Tote and leaving a ½-inch overhang, fold a 12 1/2-inch length of bias tape around the raw edges of one of the Tote’s sides. Pin the tape in place, tucking its raw end under at the top (there is no need to tuck in the end at the bottom since you’ll be cutting it off in the next section).
Edgestitch the bias tape into place, making sure you catch both sides of the tape. If you miss a little, go back and sew it again (don’t worry, it’ll be your little secret deep inside your bag!).
Press the seam allowance to one side (remember to use a pressing cloth, if ironing on the metallic side of the fabric).
Pin and sew another 12 1/2-inch length of bias tape down the opposite side of the Tote in the same manner.
Sew the Corners

At one bottom corner, pull the two sides of the Tote away from each until the bottom seam and the side seam are lying directly on top of each other and the corner is at a 90-degree angle.
At the point where the corner is 3 ½ inches across, make a 3 ½-inch mark perpendicular to the side seam.

Cut along this line through all layers.
Repeat with the other corner.
Now turn the Tote so that the right side is facing out.

Sew the seam allowance of the side seam to one side, using the side seam as a guide for a straight seam.
Repeat on the other side.
Turn the Tote so that its wrong side is facing out and realign the cut edges of one corner.
Sew along the cut edge with a ¼-inch seam allowance.
Encase the raw edges of this seam with a 4 1/2-inch length of bias tape. Tuck under both raw ends of the bias tape for a neat finish. Pin and stitch into place with an edgestitch.
Repeat for the opposite corner.
Finish
Turn the Tote so that the right side is facing out.
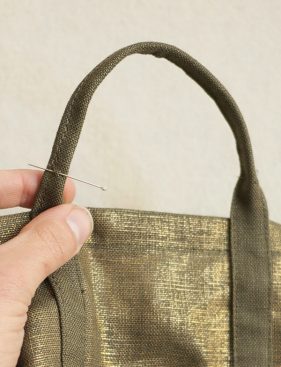
Place pins in one Handle of the Tote, marking 1 1/4 inches from the top edge on both sides of the Handle. Fold the Handle in half lengthwise toward the inside of the Tote and stitch the fold down with an edgestitch, starting and stopping at the two pin marks.
Repeat with the other Handle and you’re all done!


Great bag! Is it possible to add a lining to this bag? I’d like to make the pockets on the lining from the same cotton as the lining. Also can you show photos of the inside finished bag? Thank you!
Hello Virginia –
Adding a lining to the bag would be lovely. I recommend slipping it into the hem of the Body piece in the “Prepare the Rectangles” section of the pattern. You can then work the Body and lining as one piece for the rest of the pattern.
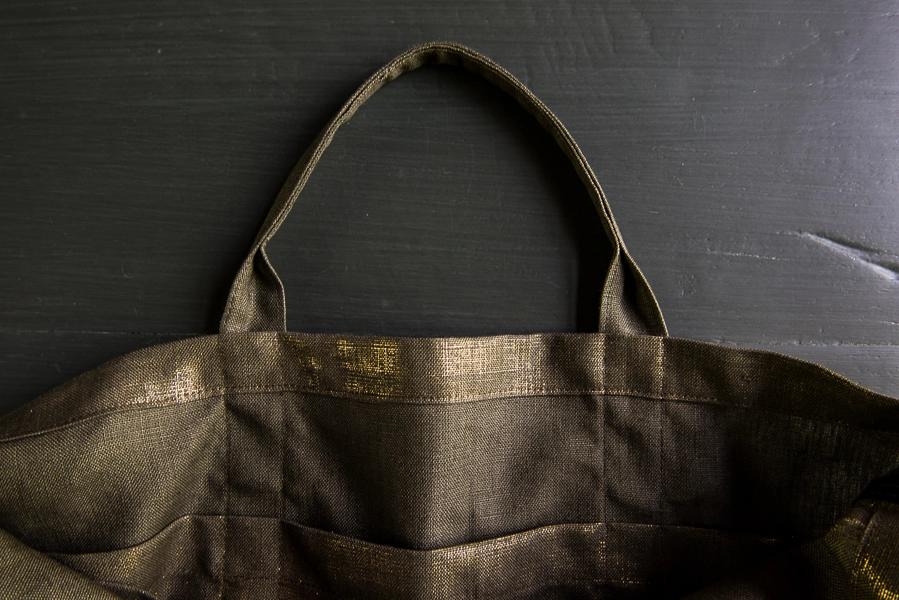
The only shot we have of the inside of the bag is the second picture down in the post. This shows the stitching from the handles and the top of the inner pocket.
I hope this helps!
-Corinne
This is such a beautiful bag, with clear easy instructions. Do you have any suggestions if I wanted ti add a zipper?
Hello Faith –
Thank you for writing in! Unfortunately I do not have any specific tips for adding a zipper to this pattern. However, you could certainly use this lovely fabric to make one of our favorite zippered bags, the Overnighter!
Sorry I can’t help more!
-Corinne
Greetings, thanks for the Great tutorial and showing off the beautiful linen fabric!
I did Have one question, I followed Your measurements for cutting pieces of tote, However my final bag measurements are way off from yours (a lot bigger) & my straps are really short.. any suggestions on where I may have misunderstood a step? Thanks!
Hello Lecretia –
I would love to help you troubleshoot your pattern! Can you send me the finished dimensions of your bag, and I can try to figure out where the discrepancy is!
Thanks!
-Corinne
Love this pattern/tutorial. I’ve only recently started to sew/embroider again and am enjoying attempting new projects.
I made the bag this weekend in a grey/cream cotton drill (remnant bargain) with great results. I prefer shoulder straps so made the handles slightly longer to allow for this (had enough fabric to allow this), lined it and also made my own bias binding from the lining fabric (not an unqualified success but next time will be, I’ve found a gadget I need to buy!), and used contrast thread to highlight the lining colour.
With all the layers it does get a bit bulky but my trusted Brother sailed through with flying colours.
I’m looking to make my Christmas presents this year and will definitely be making more of these as gifts. To keep cost/weight down though I may skip the interior pockets and just use some nice lining fabric for the interior to make it more of a shopper (we’re charged for supermarket carrier bags now in the UK) – will be keeping an eye out in the remnant bin.
Thank you for inspiring me!
Liz
The handles are too short too…What is the drop measurement supposed to be? I made them the size listed in the pattern but it doesn’t work to place them an inch below the accent panel… Please help!
Thank you!
Hi Pia,
I am sorry to hear that you are having difficulty with the tote. The handles are designed to be relatively short as the tote is intended to be held in the hand rather than over your shoulder. The drop from the top of the handle to the top of the bag is approximately 6 inches. If you would like longer handles, you can certainly do so by elongating the pieces that you cut for the handles. I would suggest measuring a bag that you like the drop on and measuring the length, being sure to include the amount that we have down the sides of each bag.
I hope that helps and happy sewing!
Cassy
Can I use the Mineral Linen in mid-weight? If so, would I need to use interfacing with a liner?
Thanks, Pat
Hi Pat,
Thanks for writing in! This tote would be lovely in the mid-weight Mineral Linens. You are correct in thinking that they will need a little more structure by using an interfacing to give them a little more body. You could also try adding a lining that has been interfaced. To do so, I recommend slipping it into the hem of the Body piece in the “Prepare the Rectangles” section of the pattern. You can then work the Body and lining as one piece for the rest of the pattern.
I hope that this helps!
Cassy
The only shot we have of the inside of the bag is the second picture down in the post. This shows the stitching from the handles and the top of the inner pocket.
I hope this helps!
Do u hv vedio’s regarding tote bags ?
Hi Gauri,
Thank you for the question. We unfortunately do not have a video regarding tote bags but we will keep your request in mind for the future! If you have a specific question, I’d be happy to assist!
-Adam
Hi there
I choosed a chambray fabric but heavy to do this bag. As I wanted to carry it by hand or on my shoulder both, I lengthened the handles just enough. As I also wanted to put notebook inside the pocket, I put 8” between the handle, then I have two larger pockets and four more narrow pocketS perfect for glasses or pencil pouch or small, folded umbrella.
I have loved to do it. The pattern was easy to follow, and can be alterate easely. I love my new bag. I am planning to do a bigger one for when I have more to carry.
Thanks guys
I love this tote and am looking forward to making it, The patterns Are
Easy and instructions look easy, I am looking at my fabric and I think
I can do this. Will keep you posted. Thank you…….
Hey Roberta!
Very exciting! Please do keep us posted!
Happy crafting
-Carly
Hi. Could you please tell me what thread # matches the Pewter fabric color so I can order it online? Thank you!
Hi,
We would use color 9240! Thanks!
https://www.purlsoho.com/tools/thread/cotton-sewing-thread-110-yards.html
Kindly,
Anna
Can this bag be made with the lighter weight mineral linen?
Hi Ginny,
Thanks for writing in! While you could use a lighter fabric, the resulting bag will not have the structure that you see here and be quite a bit more floppy! Making with a thinner material would require some interfacing to keep structure for the bag but as this bag is unlined, you may have to try a few ways to make it work.
I hope that this helps!
Cassy
Just made this bag and love it! However my side seam ended up at 14.25 inches, so had to recut the hiss tape to match. What did I miss?
Hi Peggy,
Great question! I actually don’t think you did anything wrong at all – it is correct that the side seam is initially about 14.5″ after hemming the top and folding it in half. Although the bias tape needs to be flush with the top edge of the bag, it does not need to reach all the way to the bottom since you will be trimming that corner off later when you square the bottom of the bag, so we used a slightly shorter piece. However, if you already re-cut your bias tape so it reaches all the way to the corner, it’s not a problem at all – you will just end up trimming off the extra with the corner. I have made this bag a few times and I just love it – I hope you do too!
Happy sewing!
Julianna
Loved the simplicity of making this bag. I only wish I lived in USA in order to buy this great fabric. For me, the only downside is that i prefer to have a bag over my shoulder. I know i can alter the size of the handles but hope it doesn’t change the look of the bag.
Titch (Australia)
I just recently discovered this lovely pattern but notice the fabric is no longer available. Do you have recommendations for other suitable fabric?
Hi Linda,
Thanks for reaching out. I’d recommend using a very sturdy fabric (mid- or heavy-weight) for this tote! That helps the bag keep its structure and not go floppy. Dry Oilskin is definitely an option for a sturdy fabric!
All the best,
Lili
Bonjour. J’aimerais faire ce sac mais je ne sais pas à quoi cela correspond en cm.
Merci
Hi Isabelle,
Thanks for reaching out. I’m afraid that we don’t have a version of this pattern written in centimeters, but you can still make the conversions! I’d recommend using an online inches-to-centimeter converter and inputting the measurements you want to convert. I use Google whenever I need to do this! Hope this helps!
All the best,
Lili