Little Peaks Quilt
As a quilt maker, I tend to think in squares. I’m constantly imagining the easiest way to deconstruct a given shape into rectangles, squares, and right triangles. But this singular thinking has led me to neglect a very worthy shape: the 60-degree triangle!
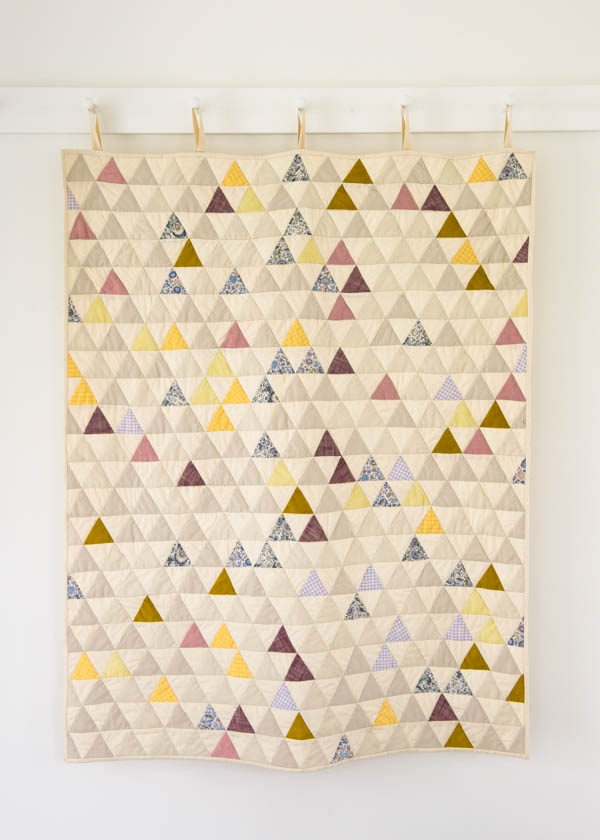
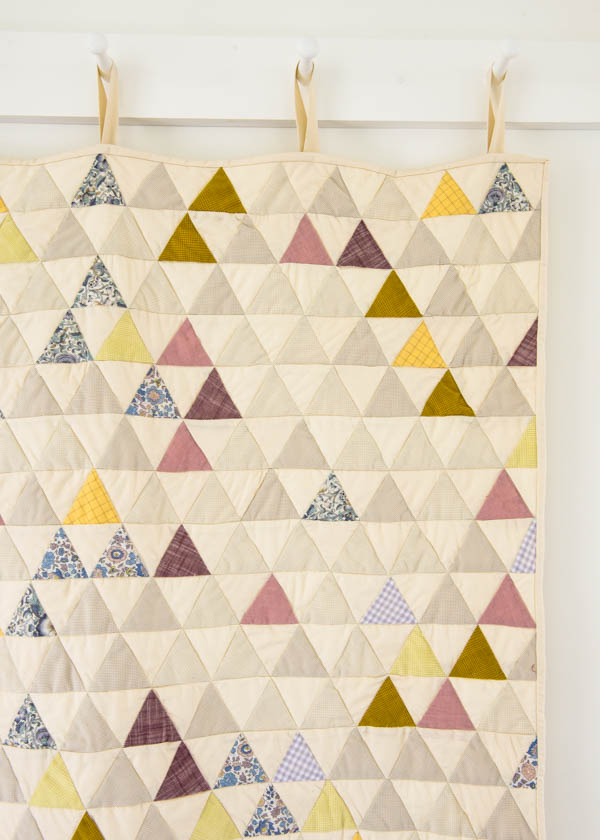
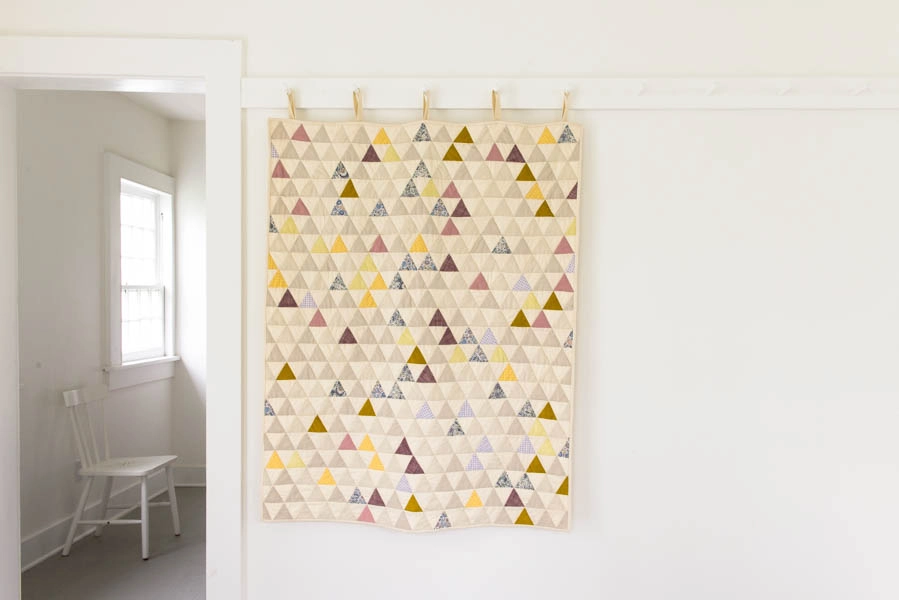
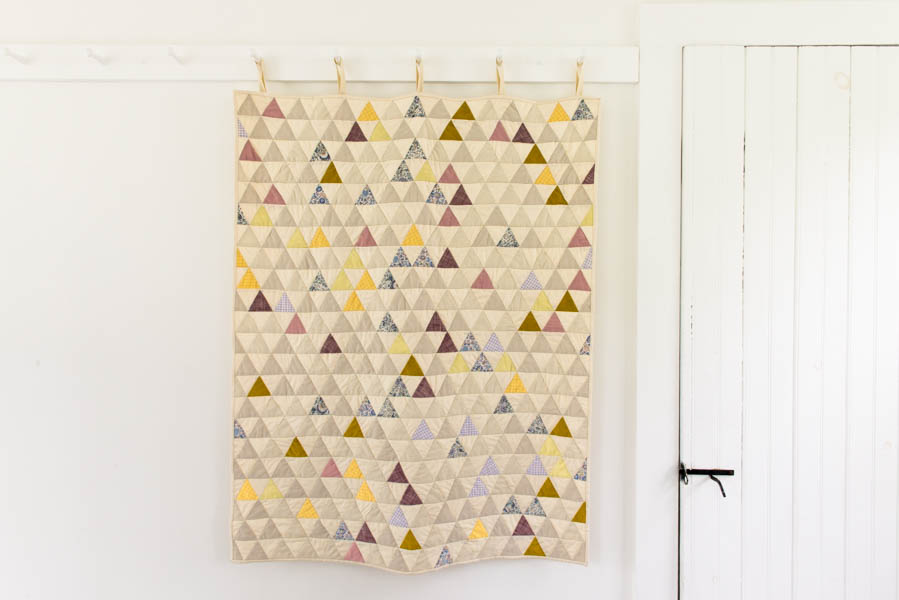
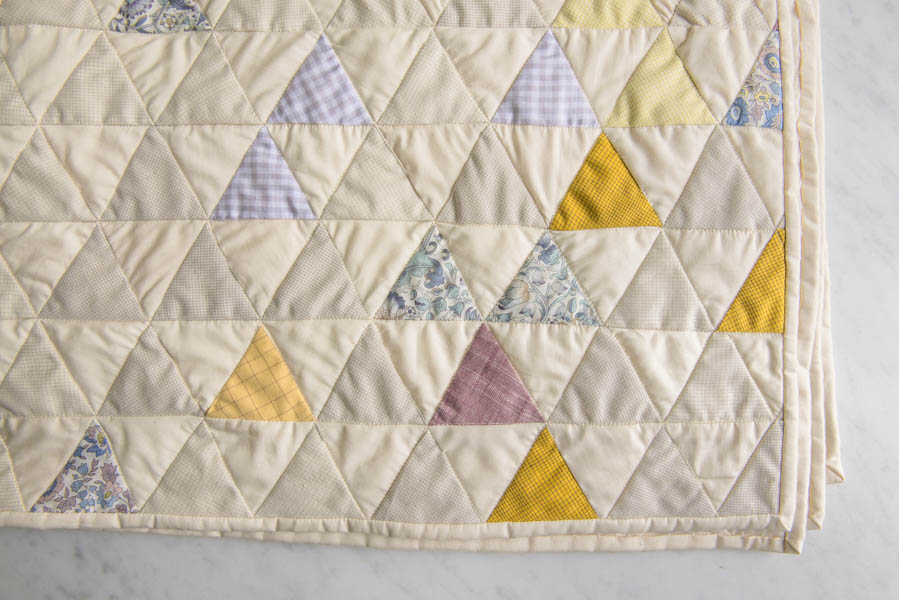
Just as easy to cut and sew as any right-angled shape, the 60-degree triangle has totally broadened my geometric horizons. Our finished Little Peaks Quilt consists of over six hundred of these little triangles. Their small scale and pretty palette create a truly lovely and unexpected quilt.
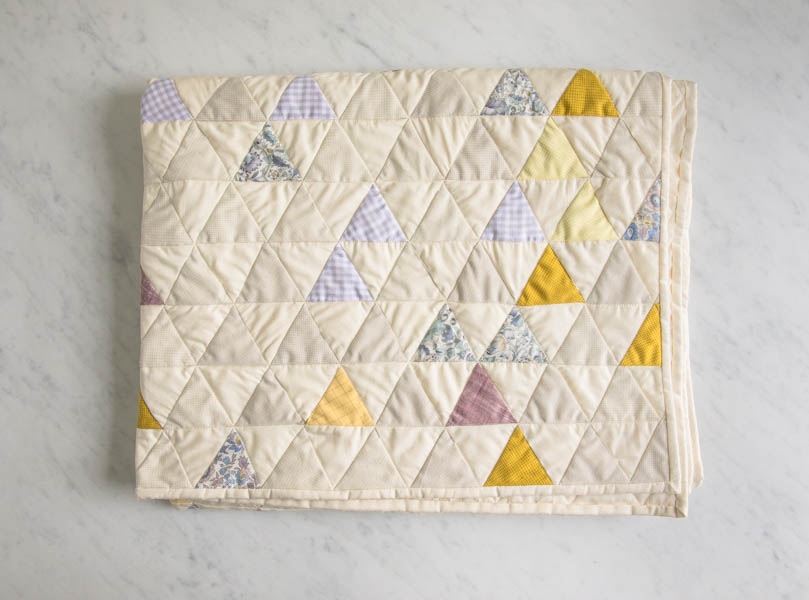
I know that working with so many pieces might sound daunting, but some basic organization, along with a fun random construction method, make these little peaks totally surmountable! -Molly
Materials
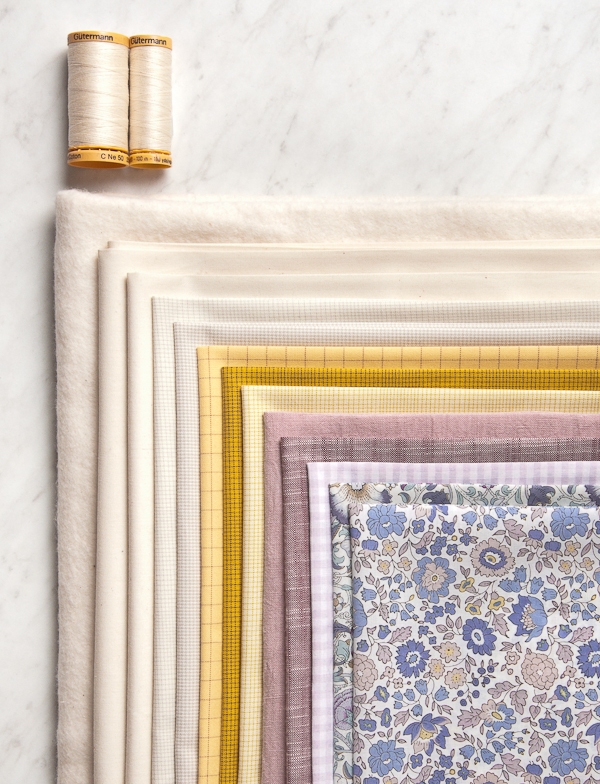
- Main Muslin (for Backing and Muslin Triangles): 3 yards of Moda’s 200-count Muslin, 45-inch, Natural
- Binding Fabric: ½ yard of Moda’s 200-count Muslin, 45-inch, Natural
- Fabric A: ½ yard of Robert Kaufman’s Studio Stash Yarn Dyes, Small Even Grid, Ivory
- Fabric B: ½ yard of Robert Kaufman’s Studio Stash Yarn Dyes, Small Grid, Natural
- Colored Fabrics: ¼ yard of each of the following…
- Robert Kaufman’s Studio Stash Yarn Dyes, Large Even Grid, Maize
- Robert Kaufman’s Studio Stash Yarn Dyes, Small Grid, Mustard
- Robert Kaufman’s Studio Stash Yarn Dyes, Small Grid, Straw
- Kokka’s Lightweight Linen Canvas, Tea Rose
- Robert Kaufman’s Manchester, Wine
- Kokka’s Small Gingham, Grey
- Liberty of London’s Tana Lawn Classics, Lodden, Lavender
- Liberty of London’s Tana Lawn Classics, Danjo, Denim
- Quilter’s Dream’s Cotton Batting, Crib size, Request loft
- Two spools of Gutermann’s Cotton Sewing Thread in color 1040 (a 110-yard spool and a 274-yard spool)
- Quilter’s Curved Safety Pins
- Purl Soho’s Rotary Cutting Tool Kit, which includes…
- A rotary cutter
- A self-healing cutting mat
- A 6 1/2 x 24 1/2-inch non-slip rectangular ruler
- A 12 1/2 x 12 1/2–inch non-slip square ruler
Size
Finished Dimensions: 38 inches wide X 48 inches long
Notes
Prewash and press all of the fabric but not the batting.
All seam allowances are 1/4 inch.
Pattern
Cut
Note: If you don’t have much experience with rotary cutting, please take a look at our Rotary Cutting Tutorial.
Backing and Binding
From the Main Muslin, cut…
- A 45 X 52-inch rectangle This is the Backing Piece. Put it aside for now.
From the Binding Fabric, cut…
- Five 2 ¼ inch strips from selvage to selvage. These are the Binding Strips. Put them aside for now.
Triangles
For the Quilt Top, you will need a total of seven hundred and four 60-degree equilateral triangles (you will cut a few more). Here are general instructions for cutting the triangles, followed by how many to cut from each fabric…
Fold the fabric in half so the selvages are aligned. Cut a 3-inch wide strip from selvage to fold.
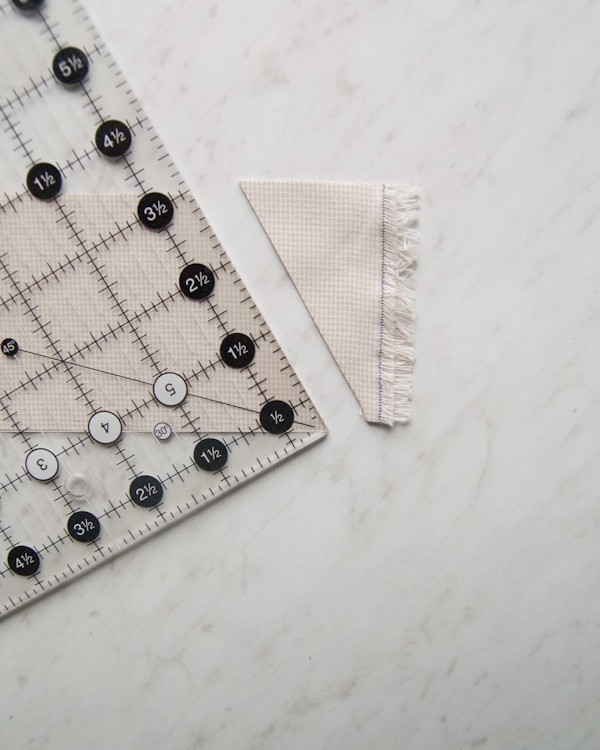
Orient the strip so that the selvages are at the right. Line up the rectangular ruler’s 60-degree marking along the bottom edge of the strip so that the top long side of the ruler is tilting to the left. (Note that the 60- degree marking says both 60° and 30° on it.)
Aligning the bottom right corner of the ruler with the bottom corner of the selvages, use the rotary cutter to cut along the top right edge of the ruler.
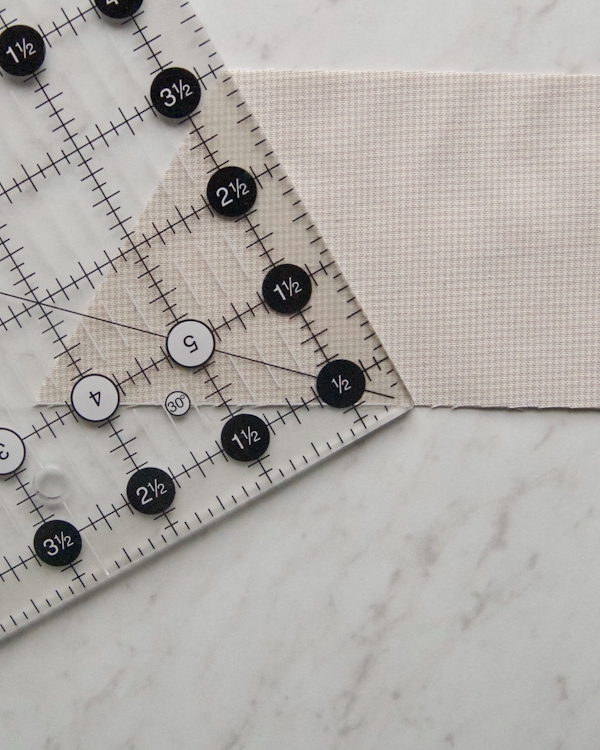
Flip the strip so the diagonal cut edge is now on the left and is slanting up to the right. Line up the 60-degree marking along the bottom long edge of the strip. Adjust the ruler so that the bottom right corner touches the bottom edge of the strip and the long right edge of the ruler hits the top left corner of the strip, as shown above. Cut along this right edge of the ruler.
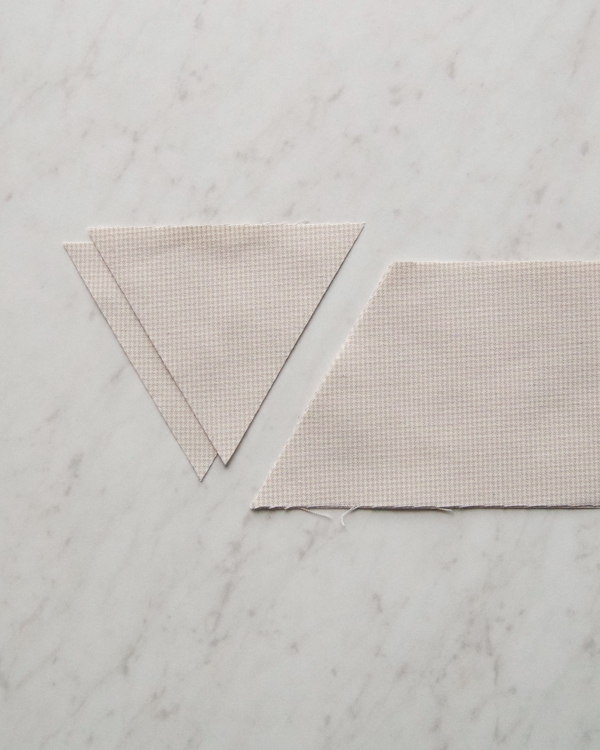
You now have your first two triangles. They have three equal sides, each a scant 3 ½ inches.

To cut the next two triangles, line up the 60-degree marking along the diagonal cut edge of the strip. Adjust the ruler so that its bottom right corner meets the bottom corner of the diagonal edge. Cut along the long right edge of the ruler.

You now have two more triangles.
Keep cutting the triangles in this manner! You should be able to cut 20-22 triangles per strip. And here’s how many to cut from each fabric…
From the Main Muslin, cut 352 triangles. Start with sixteen 3-inch strips (if you end up needing another one, you can cut it as needed). These are the Muslin Triangles. Keep them separate from the other triangles.
From the Fabric A, cut 118 triangles.
From Fabric B, cut 118 triangles.
From each of the eight Colored Fabrics, cut 16 triangles.
Shuffle all of the Fabric A, Fabric B, and Colored Triangles together. Collectively these are now the Foreground Triangles. You will have 364 of them.
Piece the Rows
Chain piecing is an essential part of this pattern. If you haven’t done it before, please check out our Chain Piecing Tutorial.

With right sides together, pin a Muslin Triangle to a Foreground Triangle along one edge. (It doesn’t matter which edge.)
Repeat this for every Muslin Triangle. (You will have some Foreground Triangles left over. Discard them or save them for a different purpose.) You will have 352 pinned pairs.
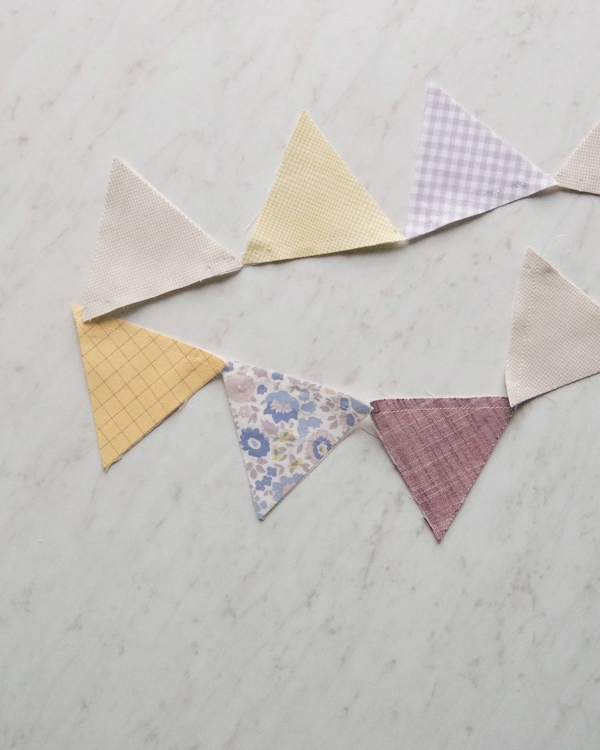
Chain piece all of these pinned pairs together. It doesn’t matter what order you put the pairs in.
Snip the pairs apart after chain piecing and then press each of them open, with the seam allowances pressed towards the Foreground Triangles.

Pick two pairs at random. Orient these two sewn pairs so that the Muslin Triangles are on the left, the Foreground Triangles are on the right, and the seams slant up to the right.
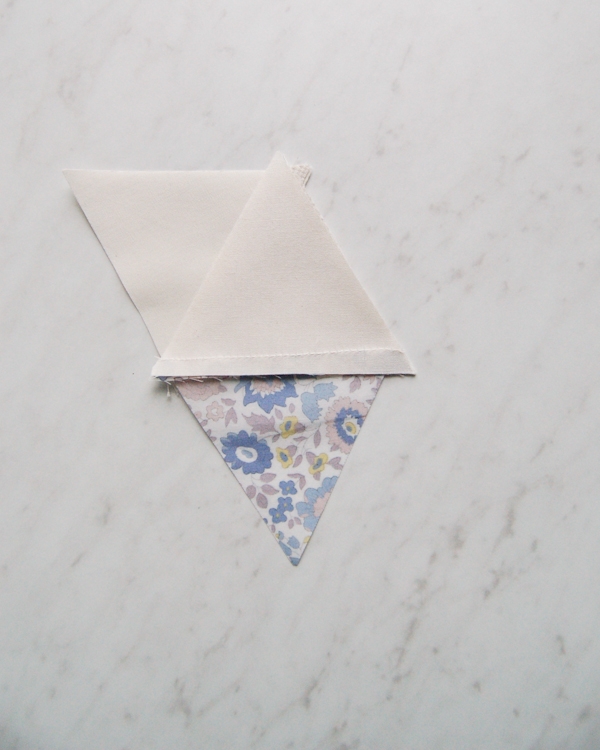
Now flip the right-hand pair over so that its Muslin Triangle is on top of the left-hand pair’s Foreground Triangle, right sides together with their right raw edges aligned. Align the bottom right raw corners of both Triangles. (You will notice that the Muslin Triangle’s edge seems longer than the Foreground Triangle’s edge. That’s okay!).
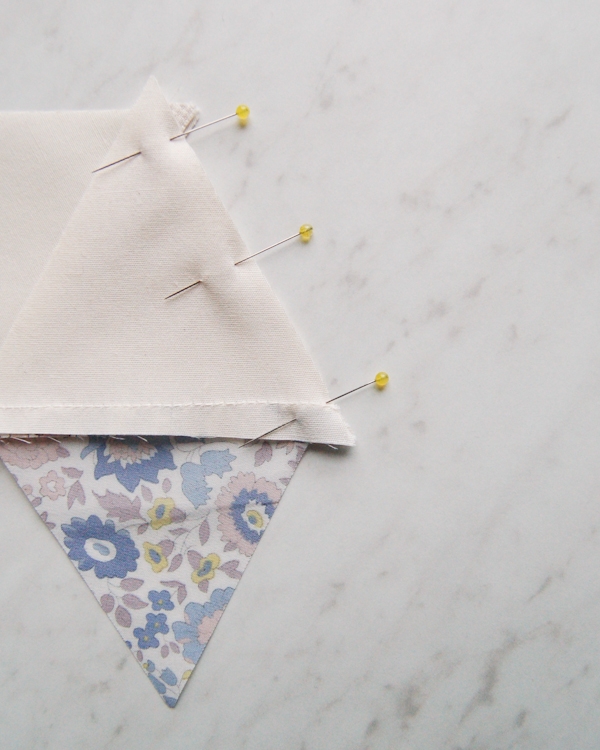
Pin this edge together. Repeat for all of the sewn pairs. You will have 176 of these pinned double pairs.

Chain piece all of these pinned double pairs together. Snip the pairs apart after chain piecing and then press each of them open, with the seam allowances pressed towards the Foreground Triangles.
You can see now how you’re starting to form a horizontal row, with the Muslin Triangles pointing downwards and the Foreground Triangles pointing upwards.
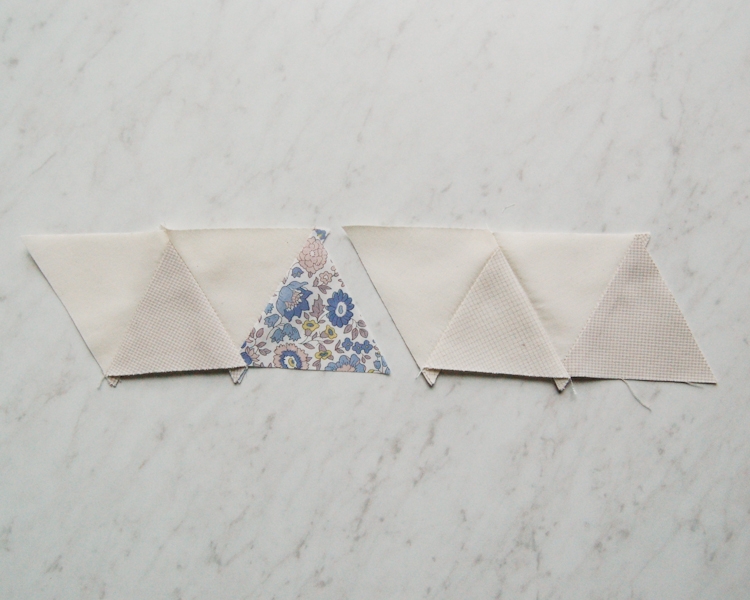
Now pin each of these groups of 4 together in the same way, picking two at random and…
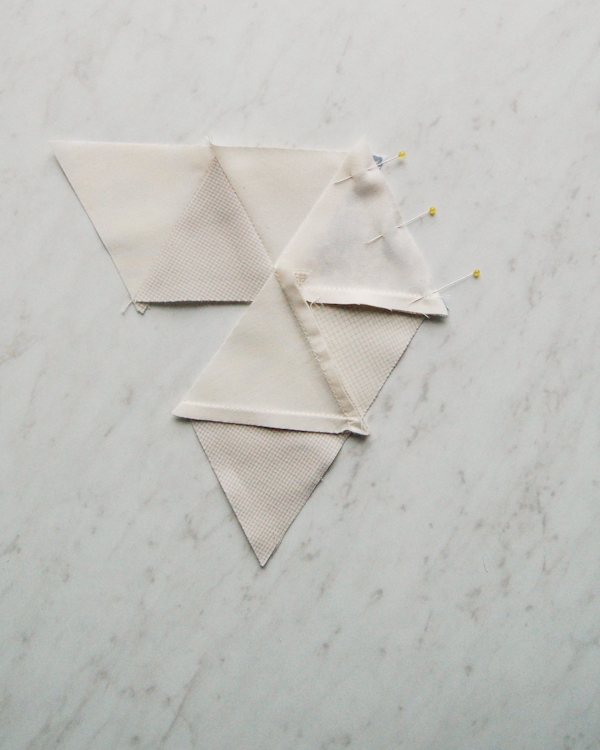
Lining up and pinning the raw left edge of the right-hand group’s leftmost Muslin Triangle with the raw right edge of the left-hand group’s rightmost Foreground Triangle.
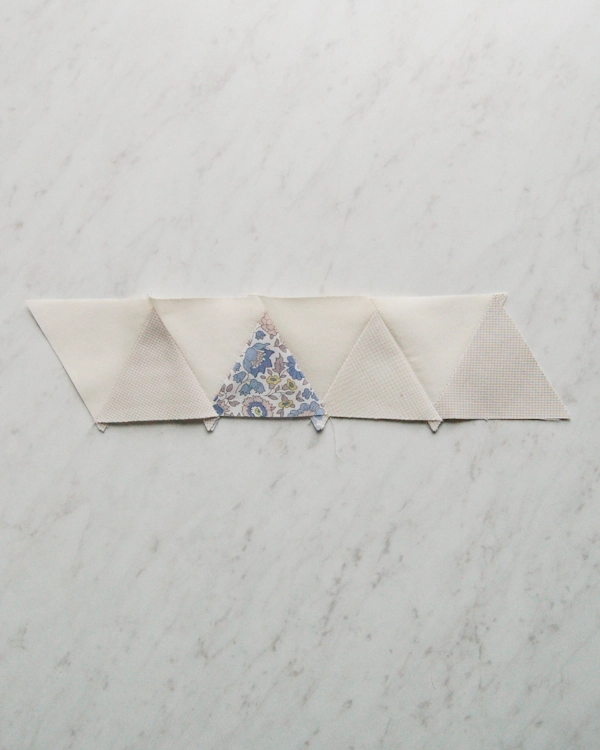
Chain piece these pinned groups together. You will now have 88 groups of 8 triangle each.
Repeat these steps to pin and chain piece the groups of 8 triangles into 44 groups of 16 triangles.
Then repeat again so that you have 22 groups of 32 triangles.
These are your 22 horizontal rows.
Piece the Rows Together
Pick two rows at random. Orient them right sides facing up, with one row above the other and the Muslin Triangles pointing downward. Line up the bottom edge of the top row’s leftmost Foreground Triangle with the top edge of the bottom row’s second-to-end Muslin Triangle.
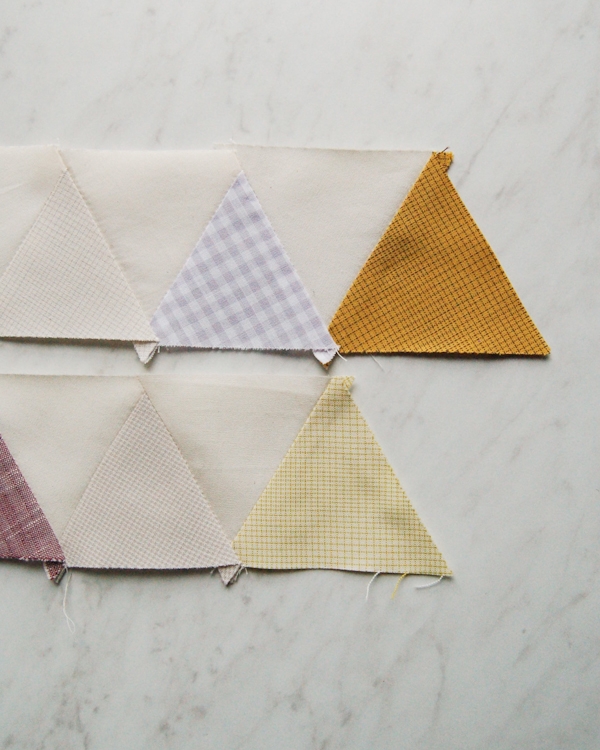
The top row’s rightmost triangle will stick out, as shown above.


Don’t be afraid to use lots of pins!
Repeat this process to pin the remaining 20 horizontal rows into pairs.
Sew the rows together along their pinned edges. As you sew, be very careful to not stitch over the triangles’ points.

Press the two rows open with the seam allowances pressed upwards towards the Foreground Triangles.

Pick two of these sewn groups at random and orient them right sides facing up, with one group above the other and the Muslin Triangles pointing downward. Align the bottom edge of the top group’s leftmost Foreground Triangle with the top edge of the bottom group’s leftmost Muslin Triangle.
Pin the two groups together, as before, making sure that the right sides are together and the points of the triangles meet up. Sew along the pinned edge.
Repeat until you have pieces all 22 horizontal rows together into one Quilt Top.
The Quilt Top is almost done, but the left and right sides are zigzagged, so you’ll need to trim them to make them straight.
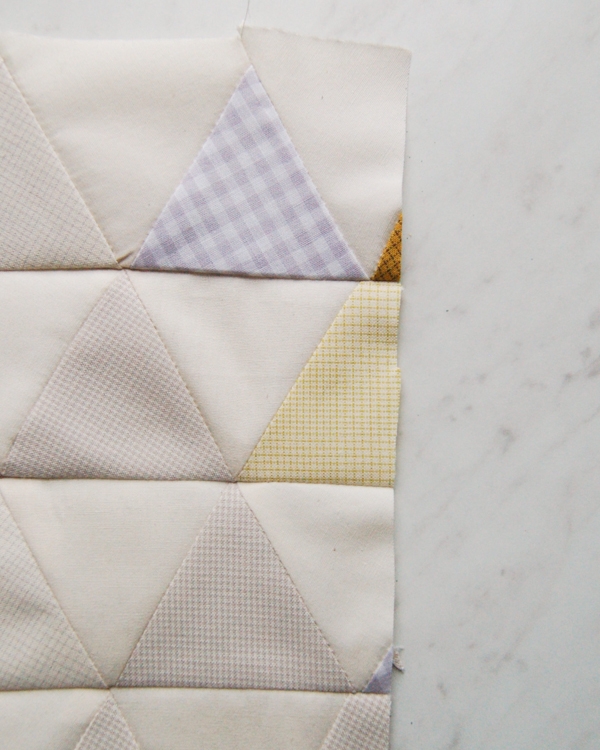
Along the right-hand edge of the Quilt Top, use the rectangular ruler to cut a straight edge ¼ inch from the bottom points of the Muslin Triangles.

Along the left-hand edge of the Quilt Top, use the rectangular ruler to cut a straight edge ¼ inch from the bottom points of the Foreground Triangles.
Baste
Baste the quilt to prepare it for quilting. If you’ve never done this, please check out our Pin Basting Tutorial. (When you make the quilt sandwich, trim down the batting after you lay it on top of the Backing and before you place the Quilt Top on it.)
Quilt
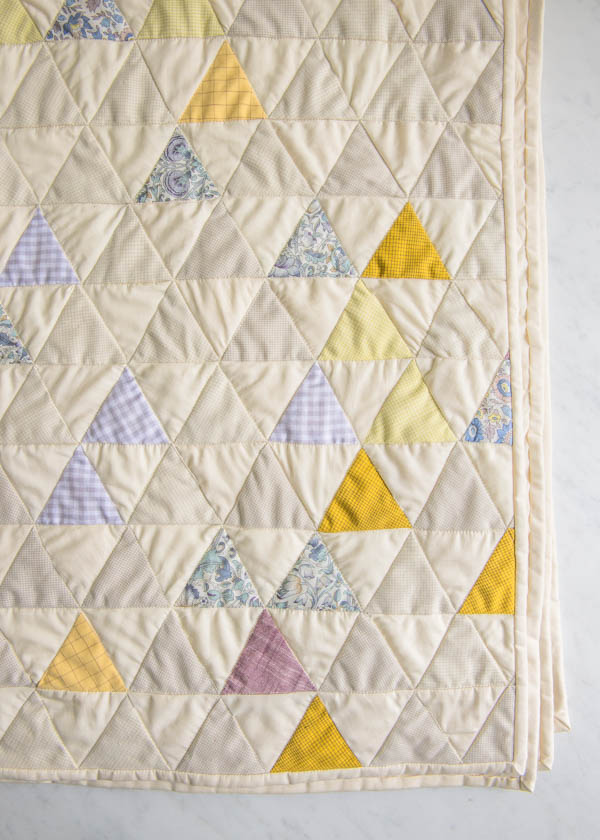
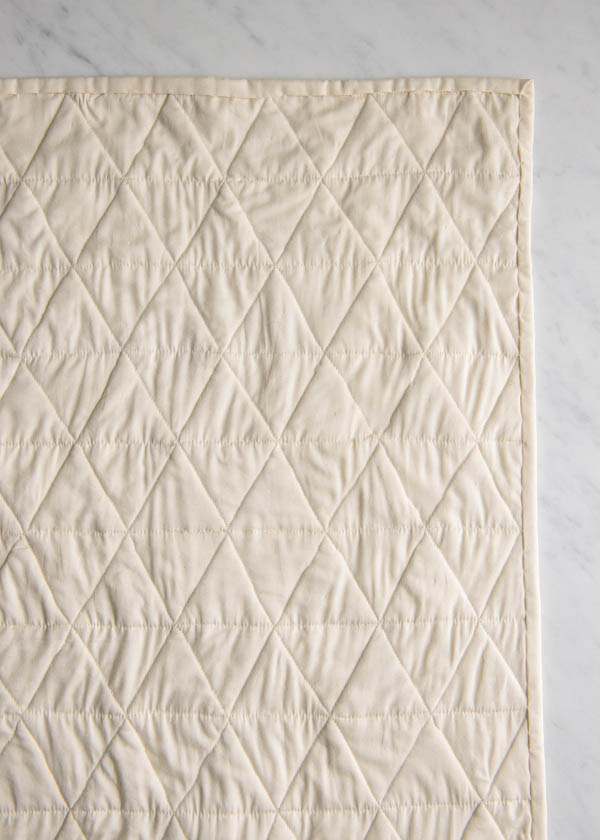
You can quilt in any pattern you like! We chose to “stitch in the ditch” for our quilt, sewing along every seam of the Quilt Top. To quilt by machine, use your machine’s walking foot and sew right next to the seams.
Once you’ve finished quilting, trim the batting and Backing to match up with the Quilt Top.
Bind
Use the Binding Strips to bind the quilt with double fold binding. For instructions on how to do this, please check out our Making Double Fold Binding and Sewing on Double Fold Binding Tutorials!







In the instructions you say to cut 3 inches from shelved get to fold but it looks like your ruler is measuring 3. 1/2 have I misread something or is there a trick to cutting this way?
Hi Trish-
The instructions are correct. You cut a 3-inch strip from selvage to selvage. This step is not pictured. The next photo (which I think is what you’re referring to) shows cutting the first 60-degree side of the triangle. You are not using the ruler to measure a length in this step, just cutting a 60-degree angle along the strip. As you note, this cut happens to be about 3 1/2-inches as shown on the ruler. But the original strip is 3-inches wide.
I do understand your confusion and I’m happy to answer any more questions you may have!
Thanks for getting in touch!
Molly
I’m thinking about making this quilt about 10-12 ” wider than the 38″. Do you have any tips in planning this expanded design? Would you recommend making it longer as well to keep the proportion the same?
Hi Kathy-
You get 1.26″ of width from each triangle so I would add 10 more triangles to each horizontal row. That means the horizontal rows should be 42 triangles each.
I would also add 12″ of length. Each horizontal strip will give you 2.18″ of height so I would add 5 more horizontal strips. That means you need 210 more triangles total (105 out of muslin and 105 in Colored Fabric.)
I hope this helps. Please let me know if you have any more questions!
Molly
Wow! This would make a great Sierpenski triangle pattern on a quilt. Brilliant!
Molly,
That is THE best tutorial I think I have ever seen, especially for triangles! It actually makes me want to make a quilt with 704 triangles, and when I do, I’ll be watching this for every step.
Thank you so much!
Love the pattern. Trying to increase to make it a twin size. Having a math dilemma. 65×88 is 1.75 times the size. How many rows will I need? How many triangles across?
I thought I would need 616 triangles of the muslin, 207 each of fabrics A and B, 28 of each of the other colors but it is not adding up.
Please any help is good.
Thank you.
Hi Kathy S-
Please see my previous response to “Kathy” above in this comments section and let us know if you have any more questions!
Best-
Molly
Hi there,
Thank you for the pattern! Can you make a suggestion to subsitute “Robert Kaufman’s Studio Stash Yarn Dyes, Large Even Grid, Maize”? That fabric does not seem to be in stock.
Also, can you confirm that this pattern calls for both “Kokka’s Lightweight Linen Canvas, Tea Rose” as well as “Robert Kaufman’s Manchester, Wine”? They are listed in the same bullet in the pattern.
Thank you!
Hi Kolina,
Thanks for writing in! To replace the Robert Kaufman’s Studio Stash Yarn Dyes, Large Even Grid, Maize I would suggest the Robert Kaufman’s Studio Stash Yarn Dyes, Small Grid, Earth as it provides you with a similar color value to the Maize.
Thank you also for calling our attention to the two fabrics appearing on one bullet. You do, indeed, need both and I have fixed the error on the page above.
Thanks again!
Cassy
I really love this pattern. I did find that 1/2 yard each of Fabrics A and B was not enough for 118 triangles of each after I’d prewashed it, so I cut two extra triangles of each of the eight colored fabrics and had enough. I also made a template of the triangle out of one of this ultra thin cutting board sheets and it made the cutting step a LOT faster.
Hi there-
Like a few others, I’m trying to expand the size of my quilt (I’m going for a queen sized quilt which may be more triangles than I can handle…). I’m confused by your previous comment that the width of the triangles is 1.26″ and that the height of the horizontal rows is 2.18″…Aren’t the finished dimensions of each triangle 3″?
Forgive me- I’m new to quilting and not a math superstar. What am I missing? Thanks!
Hi Jessica,
Thanks for writing in! I think that I see where the issue is! You will be cutting triangles that have sides that measure 3″ This does mean that the height will be roughly 2.6″ before stitching (I had to break out my Pythagorean therom and a calculator). After sewing these triangles together, the dimensions will change to those listed above.
I Hope that this helps!
Cassy
I hope that this helps